
Madmax
-
Posts
504 -
Joined
-
Last visited
-
Days Won
4
Content Type
Profiles
Forums
Events
Everything posted by Madmax
-
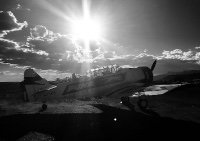
Thanks Nick and Rainer, I also couldn't wait to see what lay under the masks. I'm happy to report that Nick cuts great vinyl - no paint bleed under his masks. We'll see that in a moment, but first a little bit about the decals. I used the 2 Squadron badges from the AIMS Decals 'Korean War Mustangs' set, since they are the only ones I know about in 1:32 scale. This is how they look straight off the sheet - not bad, but could be improved a bit. Here is the real McCoy. Notice the number 2 is in black, and the feathers in the wing are actually pale blue. I took the finest brush I could, and painted the 2 black, and the feathers in blue. The writing in the scroll should read SURSUM PRORSUSQUE, But my hand just isn't steady enough... The carrier film is just one of those things I'll have to live with - decals on a metal finish are seldom perfect. The overall effect of the decals is convincing though, and a Korea Sabre wouldn't look the part without all the stencilling! Look at how neat Nick's reverse masked M looks. A large M goes on the underside, and here it was quite feasible to use the mask more conventionally. In case you're wondering, that is a very old 1:48th Hasegawa Sabre in the background. I couldn't help smiling at the original kits decals. Just goes to show how far the hobby has come since the 1970's! On the verge of assembling all the loose painted parts now. Till then, Cheers! Sean
- 131 replies
-
- 14
-

-
Nick, I particularly enjoy the way you have transformed the surface of the old kit. The panel lines are excellent and show the confident stroke of someone who has re-scribed more than a handful of models. Imagine how bored you will be building a modern Tamiya kit! Sean
-
Marcel, I agree with David (Dukie99) - this is a work of art! The subtlety of the grey tones offset by the crisp detail of the working bits is just brilliant. Bring on the Tomcat... Sean
-
Great subject choice John - and you're certainly no slouch out of the starting blocks! Enjoying the research too... Sean
-
Yes I know, it's been a while. I forgot to show you the detail inside Luigi's helmet last time. I hope to perch this on the windscreen frame, like one sees in so many Korea photo's. Nick's fantastic masks have put in another appearance. This is the tail number, reverse masked over the black painted background. In case you were wondering, I taped the whole mask to keep it together, and once in place, carefully peeled away the outsides to reveal only the numbers. It took more than one attempt! This is a very "mask heavy" way of painting, but I don't know how else to get around working with Alclad and Tamiya tape. I sprayed some more grey primer over the numbers in order to cover the black background (it would show up under the Alclad). The first layer I spray on is "White Aluminium", which I find to be surprisingly tough compared to the rest of the shiny paints in the range. It can be masked if allowed to dry for a day or so, and it works nearly as well as a gloss black base for the highly reflective paints. The next layer is "Airframe Aluminium". It has just the right amount of reflectivity under a coat of gloss varnish to still look like metal. I subsequently painted some panels with "Polished Aluminium", to show the contrast one sees on the real thing. Unfortunately the photographs of this were lost in a poorly handled hard-drive crash. My own fault. In the meantime, I gloss coated the entire model with Tamiya X-22 and levelling thinners at about a 50/50 mix ratio. Then it was time to get into the plethora of stencils that adorn the F-86. As nice as the CE decals are, there is a fairly big snag with the instructions - I can't tell where most of them are supposed to go! The instruction sheet is so pixellated, that it requires some serious work to decipher. I eventually resorted to cross-referencing with the decals that came with the Italeri (Kinetic) kit. I also scoured through my various reference photographs and made notes of what goes where... It is actually quite nice to do it this way. Now I know which system hides behind each and every panel that I re-scribed! See you next month, Sean
- 131 replies
-
- 19
-
-
Thanks Rainer, Alex and Craig - I can't wait to see the Alclad go on too! There is always something of a mystery that awaits with that paint - it's like painting with vapours that shine. Hi Jennings, I think it was easily misunderstood. The use of the term yellow bands, and then quoting the width in inches of the entire band (including the black borders), is bound to cause confusion. The stencils look fantastic, and I look forward to using them. Thanks Kev, Nick and I will tweak the mask slightly, and them I'm sure we can convince him to upload the files...
-
The masking war continues! I decided to get the roundels in place before painting any silver, since they require a lot of handling of the model to position properly. A white base-coat was laid down first. Then the blue outer ring is sprayed on. Note that this blue is technically BS 108 (Aircraft Blue), and often depicted too dark - more like US Insignia Blue. Looking at the photo, I think my version is a little too dark, but that's how it stays... Now for the fun part - the springbok! (Remember the rugby team?) This distinctive little antelope is often butchered by decal manufacturers, and I wondered how to go about getting this right in 1:32 scale. Then I saw that Nick cut a mask for his 1:72 scale Vampire , and the answer was staring me in the face! The trick is to get the proportions correct, and to that end I did a drawing of the 'bokkie' based on a couple of photographs from Korea. Here is the graceful ungulate, as near as dammit: Nick (Cheetah11), patient as ever, plotted the drawing into his Silhouette cutter, and here is the mask he cut for me. The beauty is that he sorts out all the measurements, and I have learned not to question the final fraction of a millimetre he says it must be. Thanks Nick! The first ones were sprayed 'as is' onto the lower wing roundels. I tweaked the mask a little bit for the upper 'bokkies' hind quarters. I'll refine the drawing when I finally get around to building the Mustang. Here is a comparison of the mask with the only decal option available in 1:32 scale (that I know of). Look at how precise Nick's measurements actually are! In the meantime, some tricky side issues are finally getting done. The canopy has to be glued to the frame, and it needed a lot of sanding and polishing to get the joint as seamless as possible. The internal frame had to be painted and detailed before this could be done. Luigi's helmet looked a bit bland, so I gave him a 2 Squadron badge (from an old 1:48th decal set). Next instalment: "Does this reverse order painting thing work for Alclad finishes?" Till then... Cheers! Sean
- 131 replies
-
- 19
-
-

-
Hi Nick, Matt, Ivan, Craig, Kev, Jaro, Mike and John - Thanks very much for all the kind words! I have enjoyed the research on your builds John, and this confirms why - an eye for detail! It is interesting that the stencilling went back on in this case (especially since the narrow bands were apparently applied at depot level in Japan, or at unit level). The Mustangs appear to lose many stencils once they got a coat of silver paint over the NMF. By the way, there are many more Korea Photo's available on the Barracuda Studios Ready Room Facebook site: https://www.facebook.com/groups/848474938507986/
-
Hey Nick, there are some people out there who are holding thumbs this build will cause a 1:32 Tamiya Sabre. Let's not jinx it... I took Luigi's head, and made it a bit smaller, hollowed it out as much as possible, and then added some detail. The mask is his as well, just reshaped and strapped up. The hose is redone using styrene and copper wire. There is a lot of painting to be done before any "metal" paint goes into the airbrush. It is much easier to mask and handle the model whilst it is only dressed in grey primer. First up, the wheel wells and airbrake bays. They got a bit of heavy-handed chipping , glossed up, and detail hand painted. Then it was time for the yellow bands so synonymous with Korea. I have tried decals on a 1:48th Sabre in the past, and they weren't great - so this time they will be sprayed on. This is where the measuring and positioning started... I have reliable measurements from a local publication: South African Colours and Markings - Vol 1 No 4 (Van Schalkwyk et al) This means that the yellow portion of the band should measure very close to 22mm on the model. Then I checked this with the excellent looking Cutting Edge Decals specifically made for Korea Sabres (CED32049). In their instructions they point out that there were two widths of bands during (and after) the Korean War: initially 28" wide, and later, 36" wide as applied at the factory. This would be generally F-86F-25's and later, so typically SAAF Sabres. The decals look very wide compared to the references I marked on the model, and then it dawned on me - there are two ways to interpret the width. Cutting Edge read 28", and 36" as the width of the yellow portion of the band. I believe this is incorrect. The narrow band had a yellow portion of about 20", and with the two 4" black borders = the 28" bands. The broader band on the SAAF aircraft did indeed have a 28" yellow core, with two 4" borders; making up a 36" band. Keep that in mind if you intend use the decal set, which I do for all the stencils. (Note that the fuselage bands labeled 26" can be used for the broad fuselage bands, and the wing bands trimmed to match) Here are my measurements based on a side-on photo; relative to known measurements of the roundels and numbers. I have drawn in the narrow band. And the photo of the narrow band that I based my interpretation on: So, masked off and a white base coat applied. I simultaneously masked the fin flash, that interestingly, was also worn by the American units of the 18th FBW - presumably as a gesture of unity - nice. Yellow 22mm bands sprayed, left to dry for a couple of days, then masked, and the black borders masked. This is how it looks after using up half of my masking tape rolls... The big black blocks are for reverse-masking of the tail number and squadron code. There was a lot of time spent waiting around for paint to dry, so I did the preliminary painting of the 1000lb bombs. A big thank you to "John1" who warned about the decals in this Brassin set (in his excellent build of the Italian Front P-47 "Little Bunny"). I used LOTS of water to make sure they didn't get stuck on impact! Now, where is that masking tape? Cheers, Sean
- 131 replies
-
- 17
-
-
-

RAF FG.1 XV571 WILD HARE Phantom Conversion
Madmax replied to Anthony in NZ's topic in Works in Progress
What a well considered, and worded, response from Derek. I'm all for rivets personally, and variation in paint finish. Stick to your guns Anthony, it is looking fantastic! -
Hi Craig, Very kind of you. Considering the years of entertainment you have provided us with your B-17, I figure it's the least I could do! Agreed Mike, what happens under the metal finishes sets the tone. At the risk of misquoting Baldrick, I have a cunning plan. Probably end up in a ball of masking tape and silver fingers like last time...
-
So, what will it take to make a decent kit of the F-86? The more I toy with the notion, the more I realise why there aren't many 1:32 models out there. The problem is, that as the "marque" evolved, there were many changes that would require new mouldings. It seems, assuming I haven't missed something obvious, that it is virtually only the forward fuselage, canopy, undercarriage and underwing stores that are universal. Here is a drawing of what it would take if one wanted to do the classic Sabres: F-86A-5, F-86E, F-86F-30 and F-86F-40. With minor modifications the Canadair Sabres could also be built from theses basics, but obviously not the exotic wide mouthed versions. Maybe when Sprue Brothers are done with the Phantoms... Still stuffing up circular scribing on round things. Thanks for the extra fuel tanks Nick. Finally got the rivets cleaned up. Not kidding about how many there are. The aircraft now looks like a Sabre, and is primed and ready for paint. Grey primer for a metal finish? Yes, I have a plan - if it works I'll tell you. If not, you will see gloss black in the next instalment. This is something not normally seen on a slatted-Sabre model: a leading edge without a great big step in it. Notice also how narrow the narrow-chord wing actually is. I would love to have a helmet resting on the canopy frame, and I am toying with using the head of the old Hasegawa pilot. His head is very big though, when compared to a Tamiya Spitfire pilot. Maybe his name is Luigi? Cheers, Sean
- 131 replies
-
- 21
-
-
Good heavens - that instrument panel!
-
Wow. A big thank you to one and all. I'm pleased that you are enjoying the build so far! I've got Nick slaving away at the silhouette cutter, and I'm still cleaning out clogged rivets - just under 20 000 to go. In the meantime, some light entertainment...
-
Thanks for the response guys, really appreciate it! The windscreen isn't a perfect fit given all the mods I did to the nose. The easiest solution is to glue it in place, checking that the windscreen slope matches the fairing on the fuselage. Then it is just that painful thing of sanding a transparency to shape. Finer and finer sandpaper grit, sanding sponge and eventually some micro-mesh cloth. It hardly needed any polish to finish the job! Now at last, the wings can be attached. Seems as if it took forever to get to this point. Just like these guys at the Oregon Military Museum, I realised that getting the wings onto the Sabre requires quite a bit of co-ordination. Many models of the Sabre that I have seen look like they have no dihedral, so I was quite careful to check that I got the 3 degrees built in. It took a bit of shimming, and here you can see the Tetris game that I played with bits of styrene to get the wings snug. The flaps and ailerons appear to made of a thinner aluminium than the main plane of the wing, and in photos they show a bit of "pillowing". Here is my attempt to get that surface feel. I just sand with folded sandpaper down selected rivet lines (that have been deepened with a sharp point), then smooth it out with a sanding sponge. Drop-tanks were a thing in Korea, and I imagine they were strewn all over the North Korean countryside by the end of the War. It appears that the most commonly used tank was the 120 gal combat tank, although many photographs also show the 120 gal "Misawa" tank (a modified F-80 tank) that was used as the others ran out. The Kit tanks have the pylon attached to one half, and I had to remove it in order to scribe the fuel cap and the plumbing cover that goes under the pylon in front. The fins are wrong for the Korea tanks, and need to be re-shaped into triangles. I also added weld seams by glueing stretched sprue into deeply scribed panel-lines. Finally for today, the undercarriage doors. This is like cleaning the inside of a fridge - nobody notices. Ejector pin marks sanded out, re-riveted and the folding nose wheel door hinged and detailed. Nearly time for paint... Sean
- 131 replies
-
- 16
-
-
I really should check out the RFI more regularly . Your Hawk is immaculate Malcolm - such a lovely, and challenging colour scheme. Well done!
-
Clever fix to the machine gun-mount Wolf. What I really enjoy however, is the oily hand prints on the inter-wheel fairing! Lovely build so far, Sean
-
Hi quang, you certainly chose to highlight one of South Africa's finest sons - a brilliant leader and a highly principled man. Thanks! Ja Nick, three more great men. You have an unfair edge in knowing more people than Charlize and the Bokke! Pat Pattle is one of my favourites, in no small part because of the tragedy and mystery of his legacy. For those who don't know about him, he is largely accepted as being the highest scoring RAF pilot of the Second World War, but there is a problem with that - the official records of 80 and 33 Squadron were destroyed in Greece so as not to fall into enemy hands. As a result, his final tally isn't a clear number like Johnnie Johnsons 38, and more often quoted as between 40 and 50, or even between 40 and 60. We will never know. He was shot down by a BF 110 over the bay of Eleusis, trying to defend an Irish squadron mate. Roald Dahl, the famous author, joined Pattle's Squadron just as things started to go wrong for the RAF in Greece. He wrote about Pat in Going Solo, and penned this haunting observation: "He was a very small man and very soft-spoken, and he possessed the deeply wrinkled doleful face of a cat who knew that all nine of its lives had already been used up." Thanks very much Kev.
-
Thanks Matt - I trust the figure painting is coming along well. Looking forward to seeing more of your Sopwith Camel. If I were to ask which South Africans have done well in an international way, you would probably be hard pressed to name anyone other than Nelson Mandela. Here are some others you may have heard of: No, not Tom Hardy - Charlize Theron! Yes, yes, she really is South African... (Which movie poster would you have used in my case?) And these guys: For our American readers, that is the 2019 Rugby World Cup winning team - The Springboks. Rugby is similar to American Football, but generally played without helmets (not clever, I agree). Most won't remember these however: They also wore a Springbok emblem, but were known as the "Flying Cheetahs". 2 Squadron (SAAF) volunteered to serve alongside the other American units shown in this row of operations buildings, and together they made up the 18th Fighter Bomber Wing in Korea. For nearly three years they fought side by side, sharing the trials and tribulations of war, first in Mustangs and eventually in Sabres. For a brief moment in time, these South Africans did well on the international stage. (The photograph of these buildings recently surfaced in a collection posted by Vladimir Yakubov on the Barracuda Studios Ready Room / Facebook site) https://www.facebook.com/groups/848474938507986/ Just in case you were wondering what the South Africans were doing in Korea. There is actually a lot more to the story, and maybe I'll tell it it alongside a Mustang build one day. Here is some much anticipated brass of my own: I must admit that I am a little out of my depth with this order-your-own-etch thing, and I got it slightly wrong. I knew I would have to trim each slat track's front attachment since the slat tapers toward the wingtip, but not that I had misread the "droop" angle. A little messy, but they will do the trick. This is one of the key features of the Sabre that I really wanted to capture in this build - detailed extended slats. Very satisfying! Even if the rest of the model is a flop, this would have been enough reward for me. Yeah, cheap date. Being part of the 18th FBW meant that these Sabres had to drop bombs. It was known as "mudmoving" in Korea, and also what we called it when I was with 2 Squadron, forty years later. Here a 1000 pounder is being prepared to hang on a SAAF F-86F. Given that ground attack was the SAAF's primary role, it was important to get some bombs onto the model. There are none in the Hasegawa kit that I have, and no indication of where they go. Firstly I had to work out where the pylon fits. According to this diagram, the pylon is 72.25 perpendicular inches from the fuselage centreline. So 72.25 x 2.54 is 183.5cm divide by 32 equals 5.73 cm and Bob's your uncle. You will notice some pencil lines just to check that it runs parallel to the droptank and wing join lines. The final pylon you see here is modified from the ones provided in the Kinetic kit. The 1000 pounder is from Eduard Brassin, and apart from undersized attachment lugs, is a fine piece of aftermarket resin/brass. I then prepared the fuselage for the wing join. This basically involved deepening the recess for the upper half, and cutting a slot for the lower mounting (which is a thick piece of styrene glued to the wing). Hopefully this will be strong enough. Before joining the wings however, some detail on the fuselage must still be taken care of. The canopy requires quite a bit of attention, and so far I have only attended to the main sliding hood. I was tempted to use the Aires rear deck, but it was clearly made for the Kinetic kit since the Hasegawa canopy runners didn't fit the rails. Have styrene, will scratch... Slowly but surely getting there. Till next month, Sean
- 131 replies
-
- 17
-
-
Well, there it is. A problem shared Now I can get to grips with establishing a sound method of attaching the wings to the fuselage. A problem entirely of my own making of course, since you may recall that the kit had a single piece lower wing. Part of the challenge, as with the wings, is the absence of structure to hold the airfoil shape in place. This has caused many difficulties with the wings in particular as they tend to squeeze and crack when being worked on. All part of the engineering challenge, and we do this for fun after all - don't we? I had to pause work on the wings at this point as I wait for the etched slat-tracks to arrive. A good time to address the main gear, which is very basic in these old kits. The Hasegawa legs (the lower ones) have nasty ejector pin marks, and the wheel axle in the centre of the leg. As per the Kinetic legs (above), the axle is offset in a trailing position on the leg. I would have preferred using the Kinetic legs, but the mounting pin is just not compatible, and not something I like to compromise when modifying a kit. Here is an improved leg, and some of the components (including the torque-links) that were made from stryene pieces. The Hasegawa wheels are ok, but the side facing the leg could be improved. The Kinetic hub looks much closer to the real thing, so I opted to use it instead. The Hasegawa brake drum is nicer to my eye, and is easily upgraded. Here the final product... Back to the slats shortly. Cheers, Sean
- 131 replies
-
- 19
-
-
What a lovely build Nick! You certainly have a well balanced approach to the older Hasegawa kits. Turning the raised panel lines into a modernised "quick build" (your words) is no mean feat. Well done
-
WingNut Wings Albatros D.V - Ltn Wolf, Jasta 5.
Madmax replied to Whitey's topic in Ready for Inspection
Beautifully done Whitey. It is a real treat to look at, and for some reason, makes me feel like drinking beer! -
Thanks Jens. I agree with you - the deeper leading edge of the 6-3 extension necessitated a different airfoil section. This had a notable impact on the handling of the aircraft (particularly the initial hard wing). Here is a good reference for Sabre fans: https://finescale.com/~/media/files/pdf/online-extras/sabre/sabretable.pdf In the table I found the answer I was looking for, at least for a Korea F-30. So, the SAAF's Sabres had a late A-5 wing with new inner hardpoints! The important thing for me is that it had the same slat tracks as the F-86A. This is what they look like... This means that the slat tracks I ordered are wrong. That was bugging me - a lot, so I ordered some new ones. Pricey hobby! It's not often one gets to see this leading edge without the slat attached. I was surprised at how sharp it is, certainly compared to the truncated representation in the kit. I risked sanding it to the same fine edge, but there just wasn't enough plastic to pull it off. I then resorted to shoving styrene into the compromised sections - not very tidy but it has saved the project from the bin for now... It looks a bit better after initial shaping. Enough of that. I was wondering about the incredible complexity of the various modification states of North American Aviation products in the 1950's, and the staff required just to do the admin! Maybe this is how it was? I messed with the photo - just having some fun.
- 131 replies
-
- 15
-
-
-

-
At first, I thought the slat issue was quite simple. Based on the majority of slat track photographs I have "mined" from the internet, I sent off this simplified design to to a local etching company. I was lulled into believing that all slats were created equal thanks to evidence like this... (there are eight "actuators" btw) and here is a part catalogue drawing to support what I thought was the standard part. In essence, the slat track is thicker above the slot than below. Then I started to see other evidence. Thicker below. Sure, this is a VERY early F-86, but it got me thinking. This photo in the Thompson book piqued my suspicion. An F-86 F crash reveals a slat track that is thicker below the slot, more like the early wing. The tracks are slightly bent from the impact, but the inspection panels on the leading edge confirm the orientation. So what is going on down here in the rabbit hole? Jennings Heilig created this guide to the basic differences between Sabre wings, and many of you with an interest in the subject would have seen it already. It is excellent for pointing out the basic differences, but he warned on the forum (that it was originally posted on), that the subject deserves a book. Agreed. Here are some more differences that I started to notice. The slots in the leading edge are different, and this one is like the Korea Sabres. And this one is not. The shape of the leading edge of the early Sabres also caught my eye - they are quite rounded, blunt if you like. And this one is sharper... This may be more difficult to prove in court, but I think I can see it... I'll get to the point in the next episode. Sean
- 131 replies
-
- 10
-
-
Yup, that's where I have been - probably still am. The Hasegawa wing isn't ideally suited for conversion to a narrow-chord slatted one, but it will have to do. I really don't like the way the slat tracks are represented in the kit, so this was one of my first considerations. Based on a multitude of photos of slat tracks, and the structure of the model wing - I came up with this idea (this is just a styrene prototype of what I would like done in etched brass). This requires a roller of sorts inside the leading edge, and here is my solution. With that in place, it was time to join the wing halves. You will notice that there is no structure inside the wing to maintain the airfoil apart from the leading and trailing edge joins. Because of this I opted to first join the wings, and then perform the next major surgery, which is to remove the 6-3 leading edge extension. The slat track openings on the kit wings run very far back, and I was concerned that due to the lack of structure the leading edges would not survive the surgery. At this point I added styrene fillers to the overstated slat recesses in the hopes of propping up an otherwise wobbly affair. Now to remove the 6-3 extension... Job done, but to my surprise, the kits upper and lower separation lines for the leading edge don't match up. I was hoping to sand the opened leading edge joins flat, and emulate the attachment of a non-extended leading edge as it was on the real Sabre. No such luck. Pity, but in order to retain the airfoil shape, I joined the leading edges as cut. Then came the job of scribing the detail on top of the wing. although I followed a lot of Hasegawa's detail on the fuselage, it would be wise to look carefully at the wings. Understandably, a kit from the 1970's was predicated on drawings from that era. Many of the panels on a wing are based on the line from which it is squared on. On a tapered swept wing it is hard to guess what the datum is, so detailed photographs (or the real thing) are a must! This one, is anyones guess... I'll leave you with that thought for now, and on the next instalment, explain what has happened in the rabbit hole so far. Cheers, Sean
- 131 replies
-
- 13
-