-
Posts
907 -
Joined
-
Last visited
-
Days Won
9
Content Type
Profiles
Forums
Events
Posts posted by ChuckD
-
-
While the knowledge is definitely present at all those sites, none of them come close to the quality of character here at LSP. There are some good folks there, but there is also an abundance of pedantry lurking just below the surface, just waiting for someone to post a tank with the wrong color shade, a decal out of place, or the wrong variant of tow cable attached. It gets really tiring to read, so I usually just end up back here even if there's a tank on the bench.
-
-
On 4/10/2024 at 11:33 AM, BiggTim said:
3x Trumpeter P-38s: one in progress as an L-5, one in progress as an H model, and one unstarted.
T
Now that's dedication to a very difficult cause.

I don't really have any duplicates. I tend not to build multiple copies of the same kit. Interesting to see how others see things here.
-
11 hours ago, Paul2660 said:
I am still surprised no one has come out with an after market correction for the nose issue. With 3D printing taking over the after market it should not be that hard just a big print job. The corrections for the A-26 Invaider are many and some quite extensive.
Paul
I think there's more to it than just the rounded bulkhead in front of the cockpit windows. The flub in the shape of the bulkhead threw off the geometry of the whole turtle deck area, windows, and all. The complexity of a correction set plus the relatively small number of buyers out there who would 1) want to build this beast at all and 2) care enough to correct the nose issue leads to a pretty small market in my opinion.
21 hours ago, CRAZY IVAN5 said:That's so true! I had to give up golf because of the ever increasing cost of everything associated with it[ not that I was any good anyway. Plastic scale modelling is still the cheapest bang for the buck hobby that I know of , just look at the model train prices for some real sticker shock! General aviation?? The cost is insane! Someone asked once what a particular aircraft ran on, [he was meaning fuel] but being the smart aleck [sheriff Buford T. Justice voice] I told him MONEY and lots of it!
At the end of 2023, my wife and I tallied up what we'd spent on our respective hobbies over the year and, while modeling was more expensive than hers (this, of course, conveniently ignores her pesky insistence on traveling a couple times a year), I still spent *far* less than I ever would on a collectible WWII rifle. Likewise, my hobby spending through all of 2023 would have only bought a few hours of rental time in a general aviation airplane. So, yeah. I'll stick with scale modeling.

- LSP_K2 and CRAZY IVAN5
-
 2
2
-
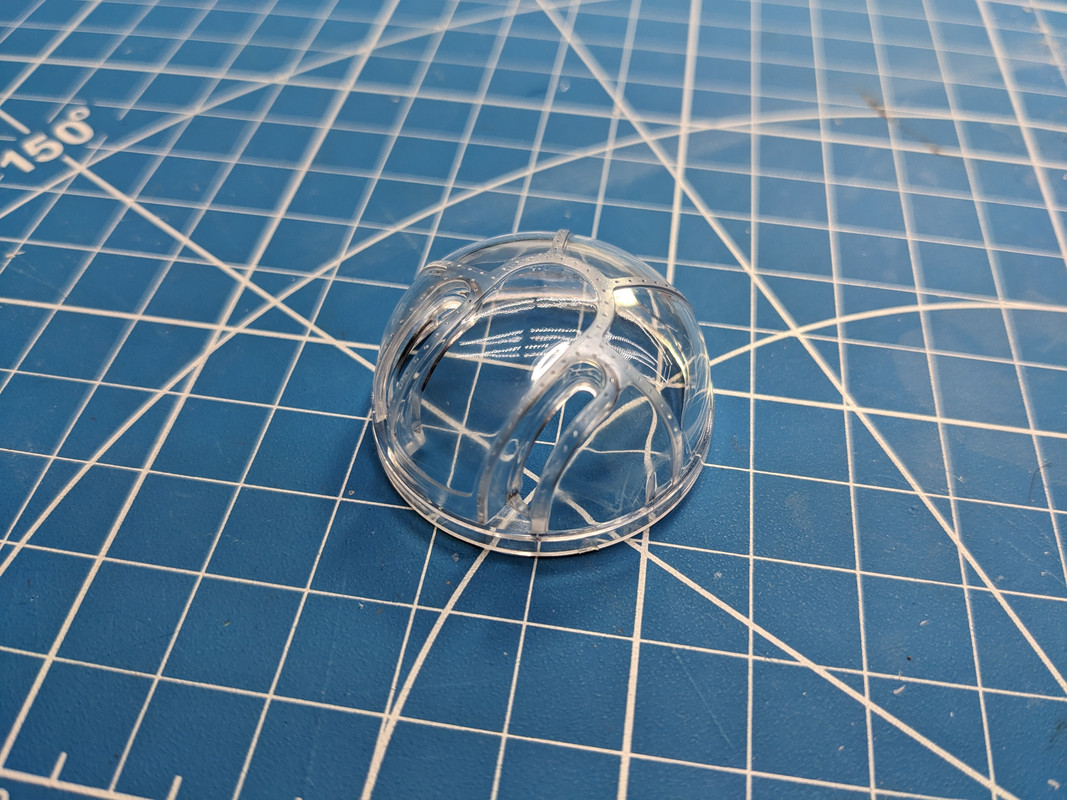
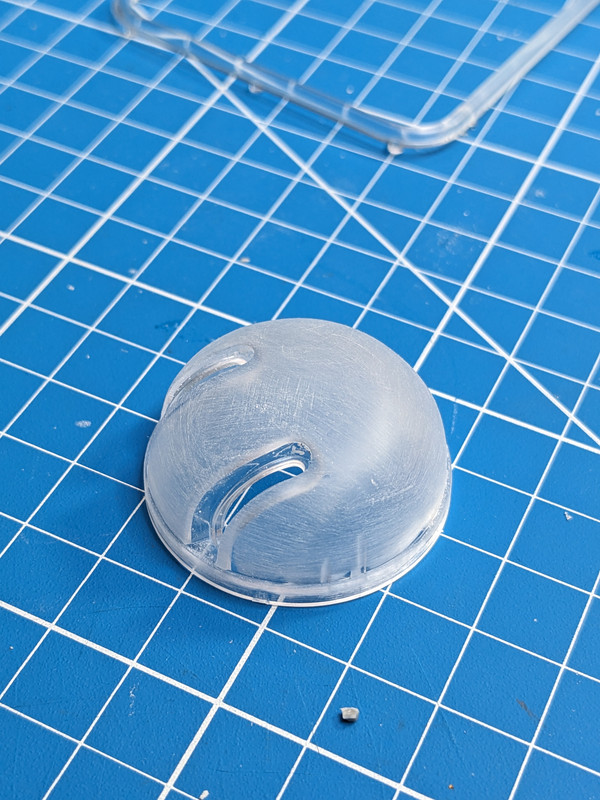
Slowly but surely making progress. I couldn't stand the framework in the upper turret, so I spent some time sanding and polishing it.
The start... Completely inaccurate as it should have no framing at all.
220 grit to knock it down.
This is about 800 or 1000...
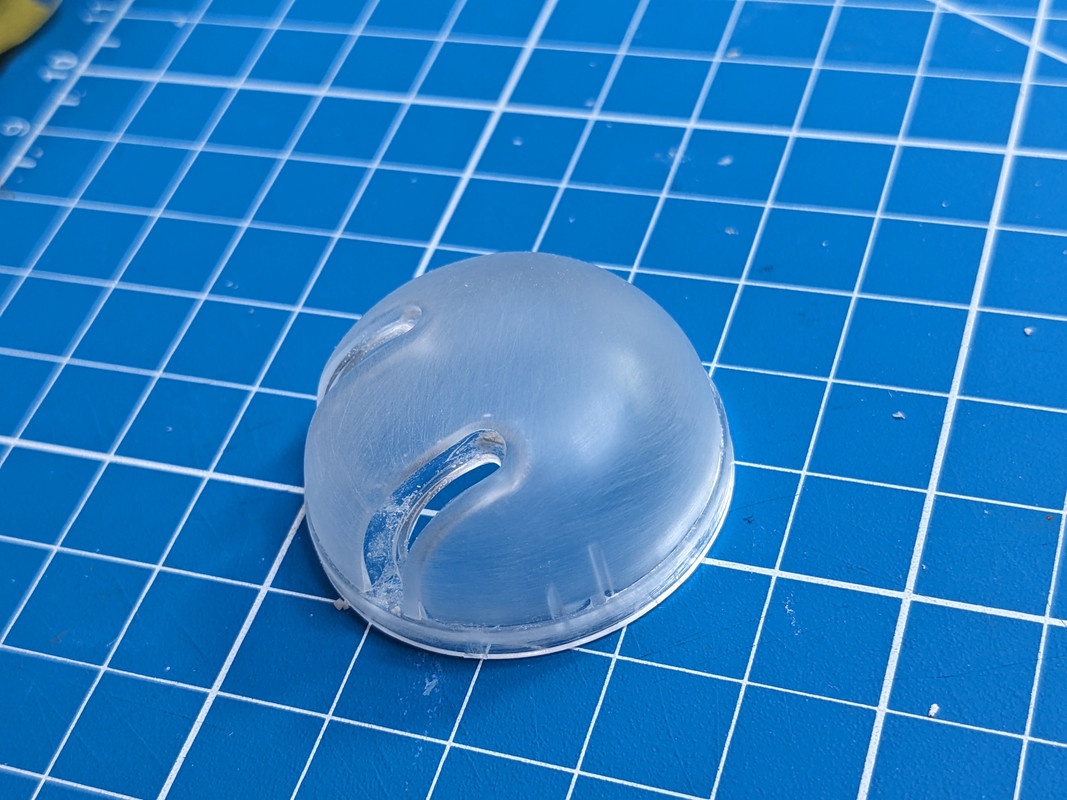
I finished at 4000 grit, then brushed on a coat of future floor polish. Much better.
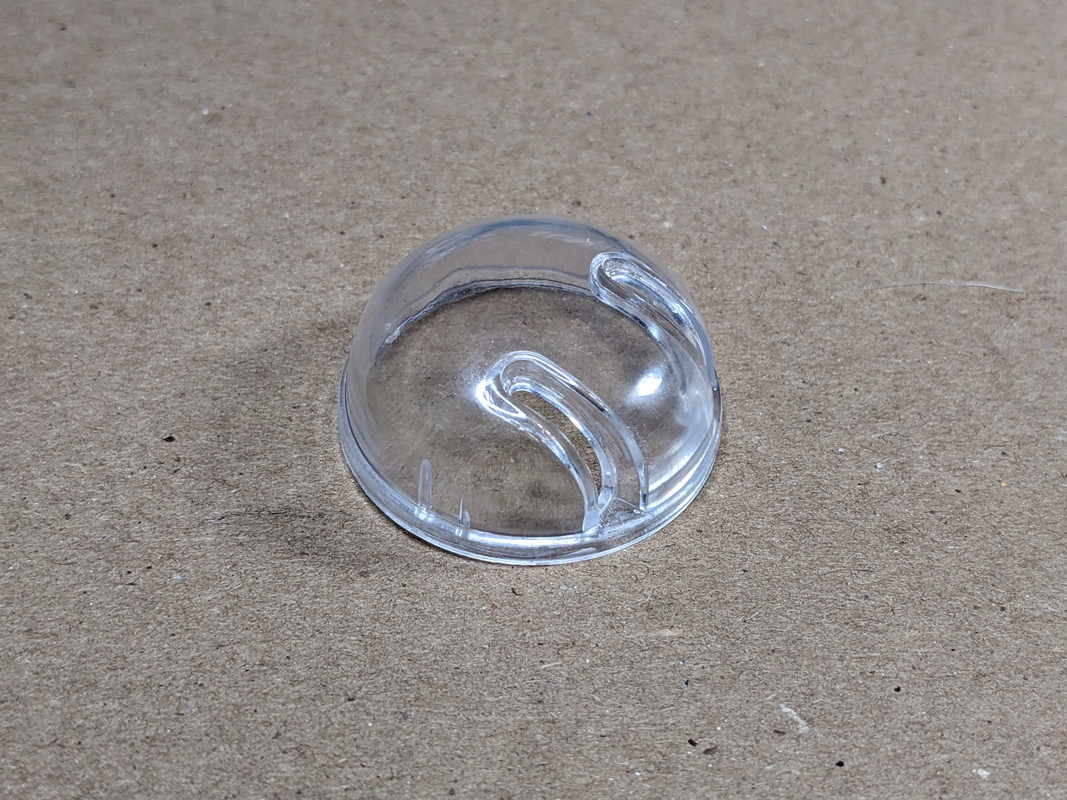
A quick and dirty dry fit shows it's looking good!

Not surprisingly, there is a lot of crap to paint on this beast.
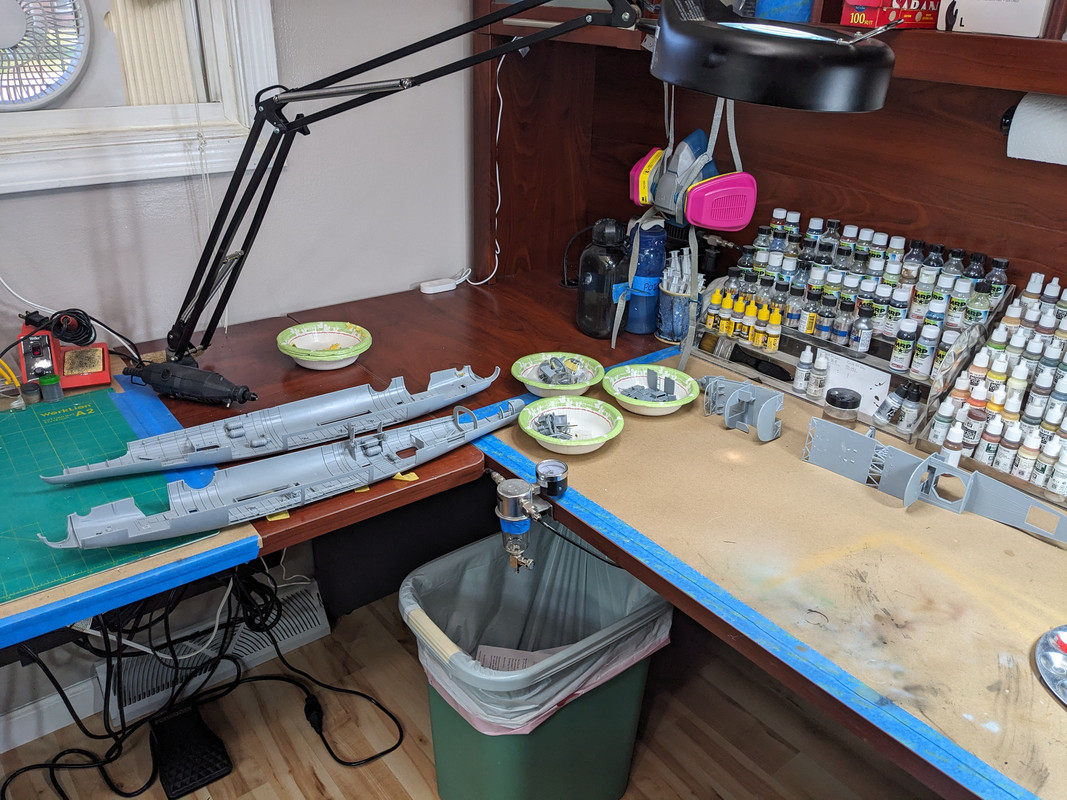
I spent today base coating the interior. Nothing too exciting, so I didn't take many pictures, but I'll post a few once I get it washed and dirtied up a bit. Next step is to build the Eduard cockpit bits. More pics soon!
-
3 hours ago, Quint said:
Prices on all kits and accessories are going through the roof it seems . I love this hobby but it's almost becoming a " rich mans " hobby . You definitely have to shop around these days .
It's all about perspective.
My first major hobby was general aviation. My second major hobby was collecting historical firearms.
Compared to those, modeling is dirt cheap.
- Archimedes, CRAZY IVAN5 and BiggTim
-
 3
3
-
I'd be curious to see if you all get the same prices if you checked them from a browser in incognito/in-private mode. Not saying the vendors listed above do this for sure, but a lot of online vendors' sites will manipulate prices based on your browsing history. Amazon and travel booking sites in particular are famous for using your browsing history to drive higher prices and profits.
- LSP_K2, CRAZY IVAN5 and chukw
-
 3
3
-
Having never dinked with VR, I kinda have to wonder how much the lack of true depth perception affects the ability to hold formation and things like that. Supposedly it's a game changer, but I've always been happy with trackir. With that you're still looking at a 2d screen.
-
Hello, all. We're back with another update.
I spent the better part of the day buried in the turretry of this big dumb beast. I finished the scratch building of the tail turret and I have to say I'm pretty pleased with how it all came together.
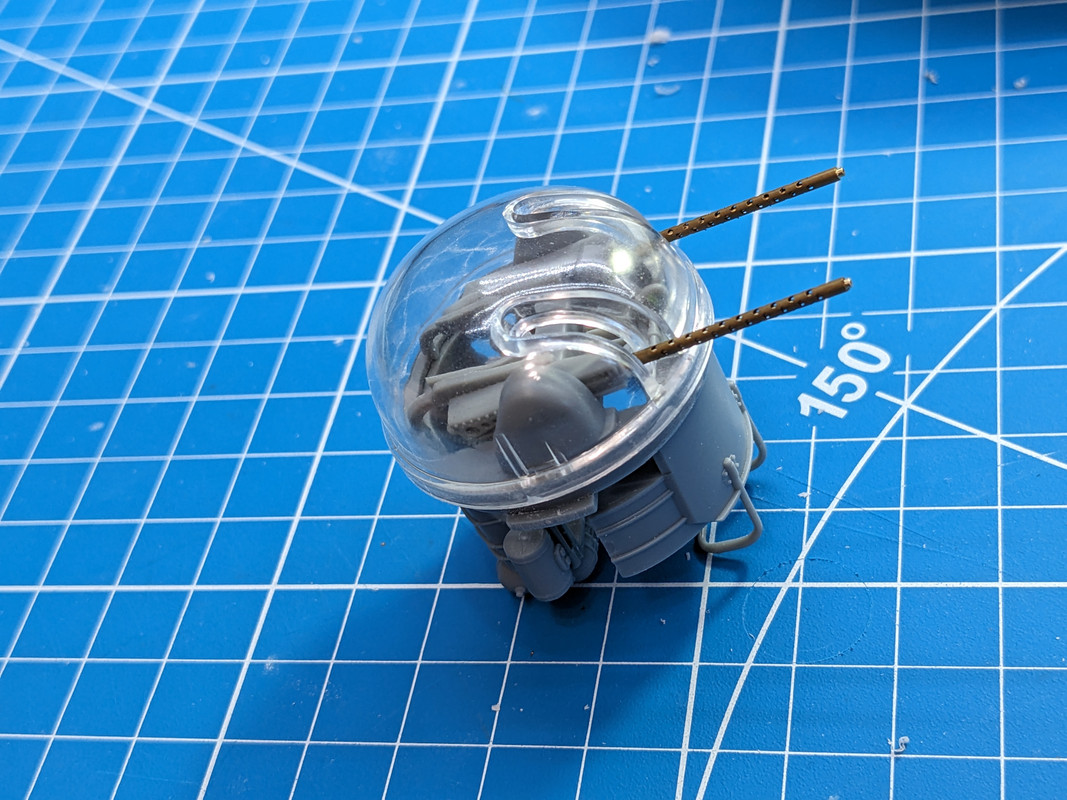
At this point, most stuff is just dry fit so I can break it all down and paint everything. This shows my favorite .50 barrels on the market - Master Models. They're turned brass and come in two parts with separate barrels and cooling jackets. No resin or other aftermarket parts come close, in my opinion.
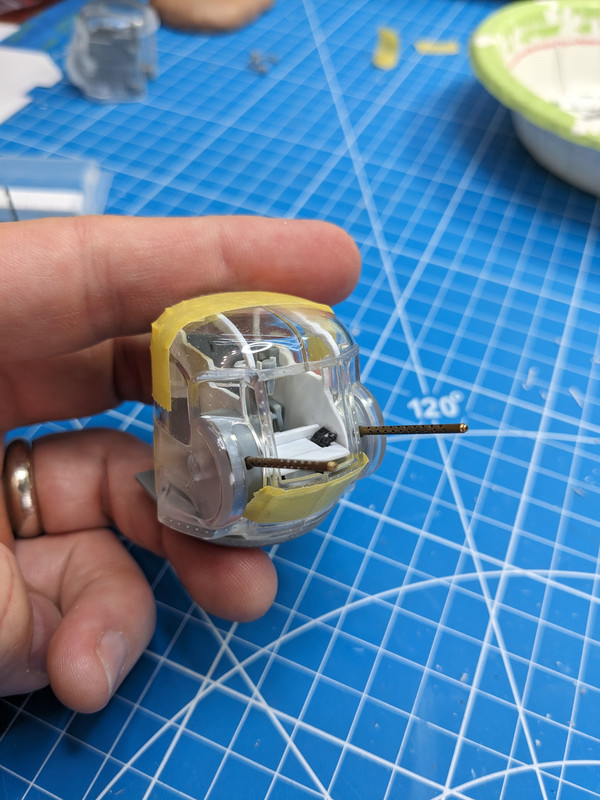
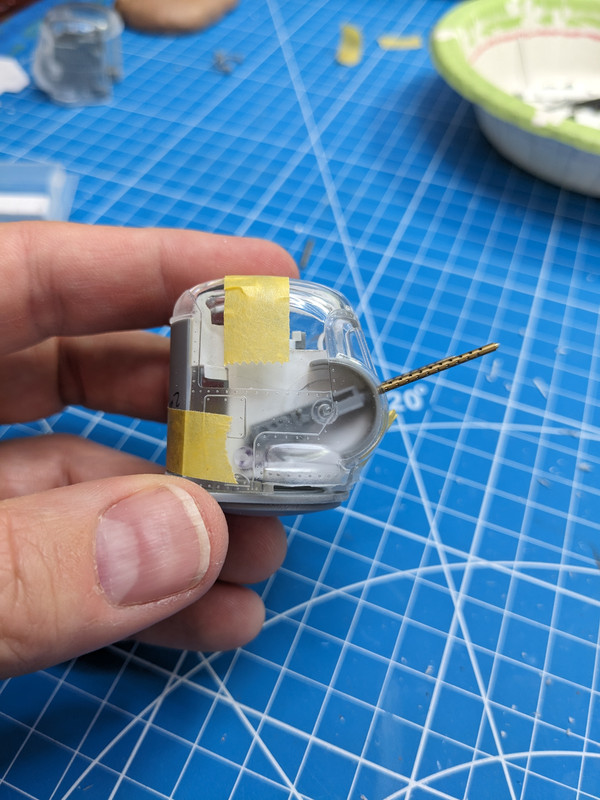
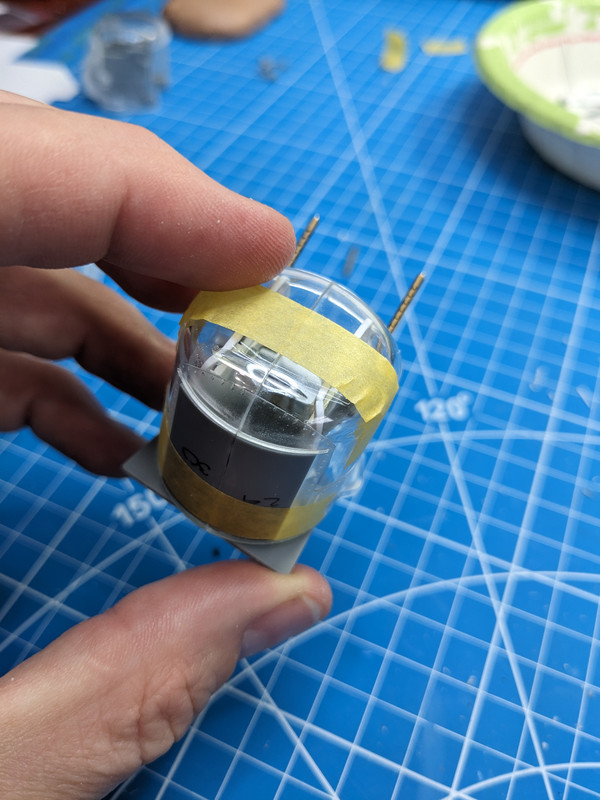
The rear doors took a little finagling to get sitting flush, but they are nice and snug now.
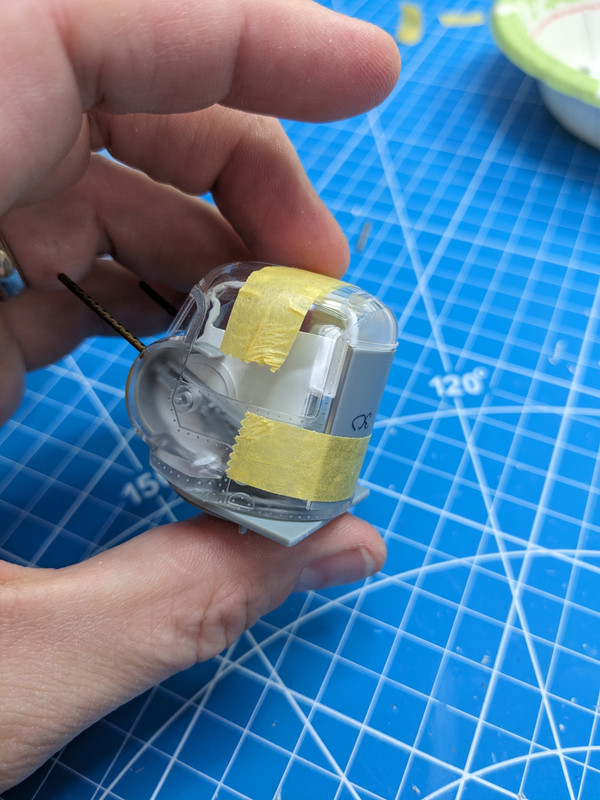
Here's the rough breakdown. It's not a perfect recreation of the turret interior, but in all I'm pretty happy with how it looks when bundled up into the turret shell. The arm for the gunsight can be snuggled nicely into place once the other half is put together.
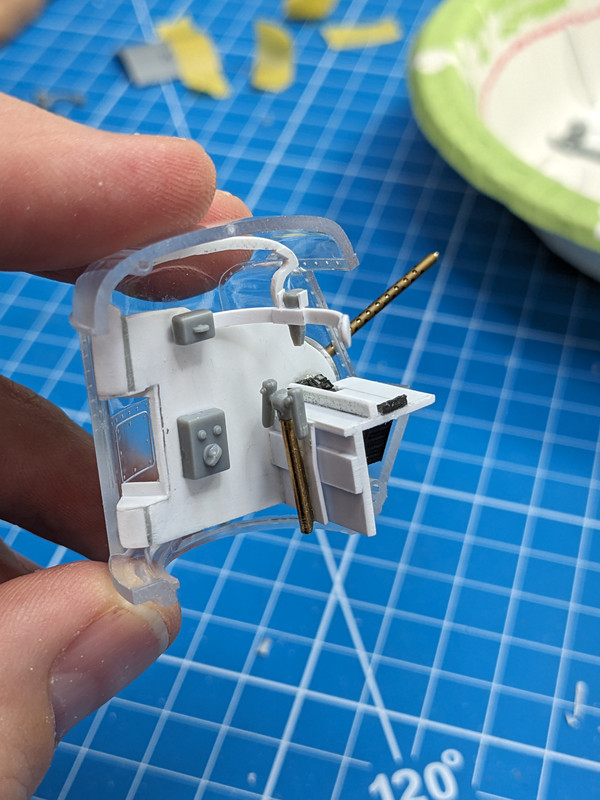
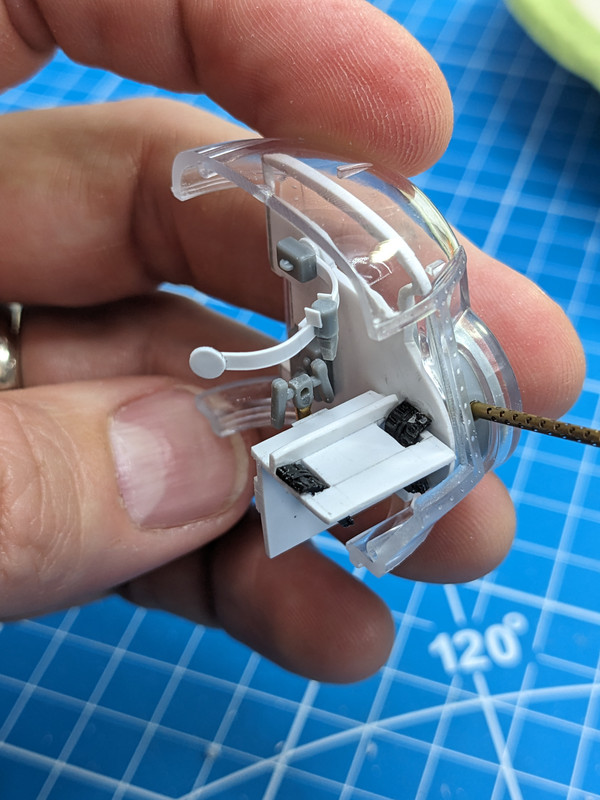
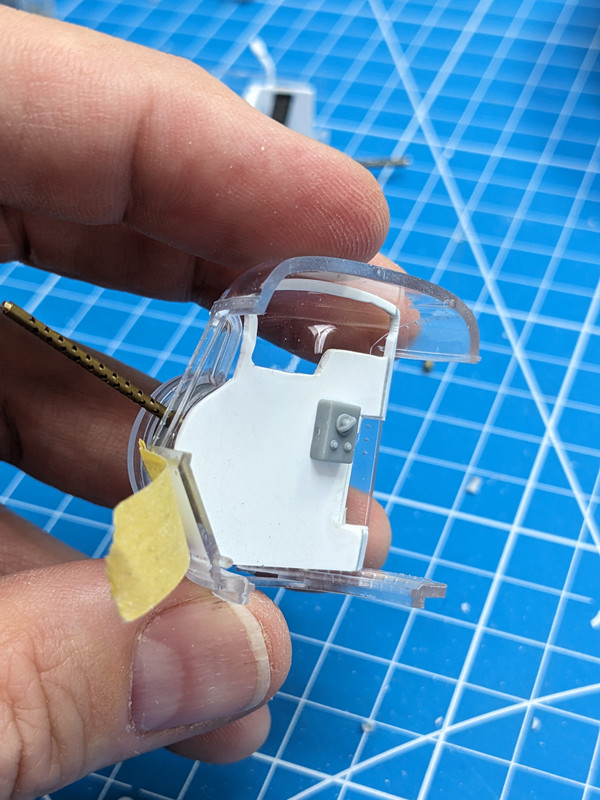
Here's the Cold War Studio solid turret. I had to scratch the rear doors, naturally. When dry fit, they're a little loose, but a small bit of superglue ought to tack it in place without much trouble.
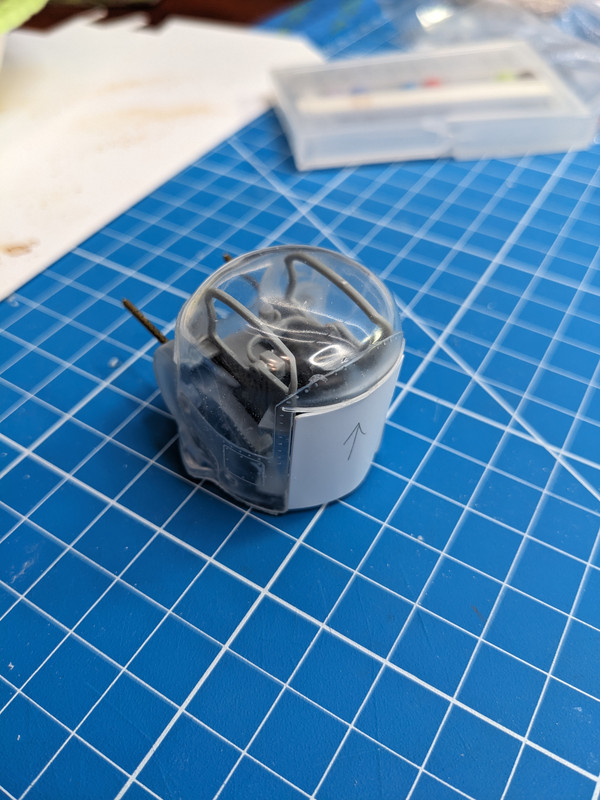
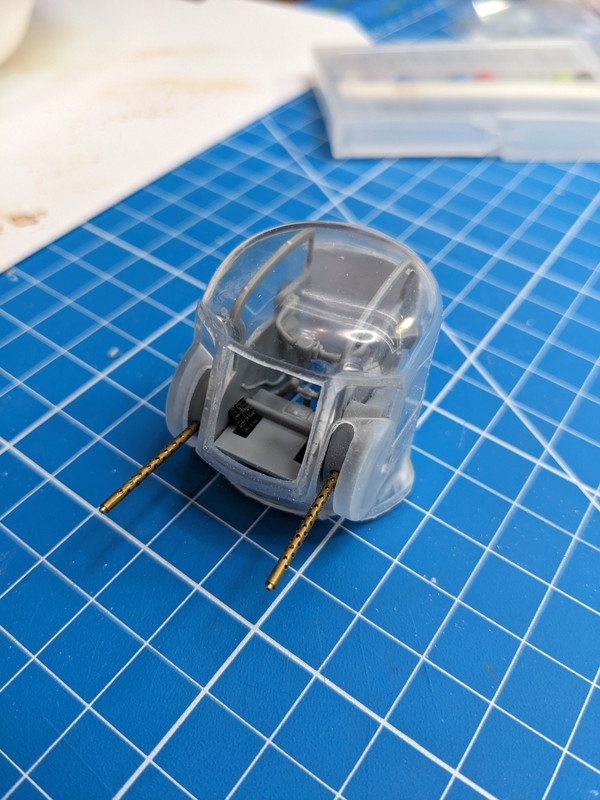
I also got the ball turret assembly around as well. It will no doubt be a delight to mask and paint, but at least the assembly was very straight forward.
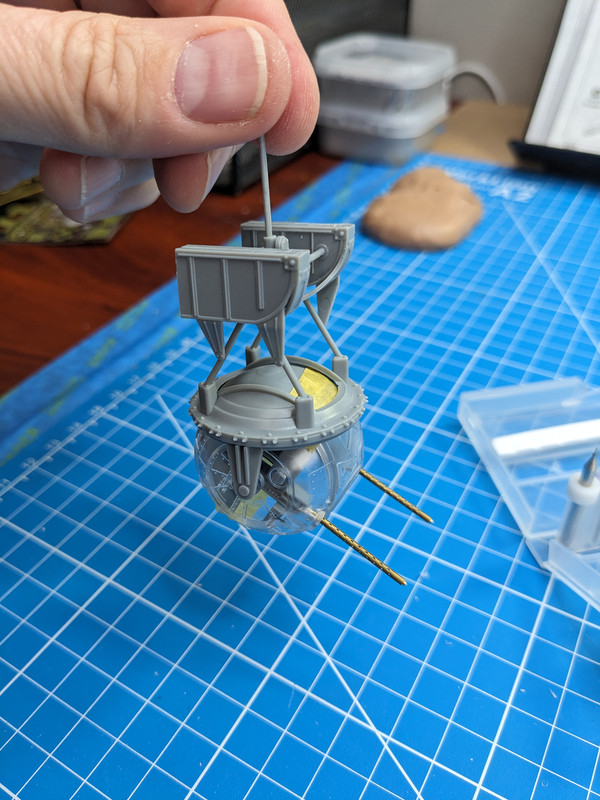
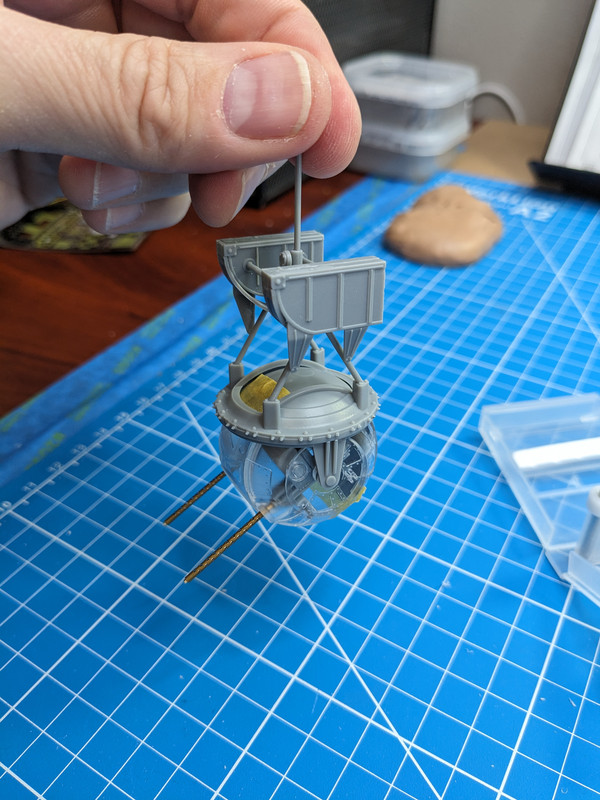
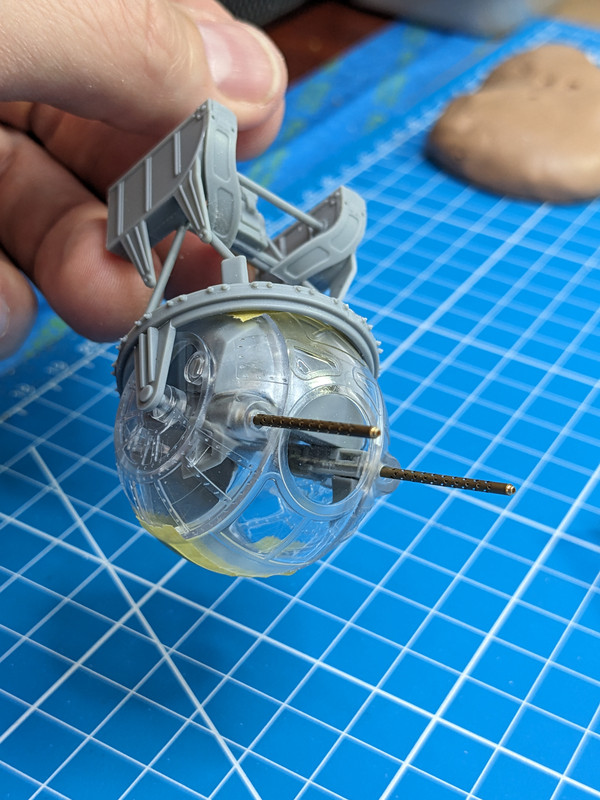
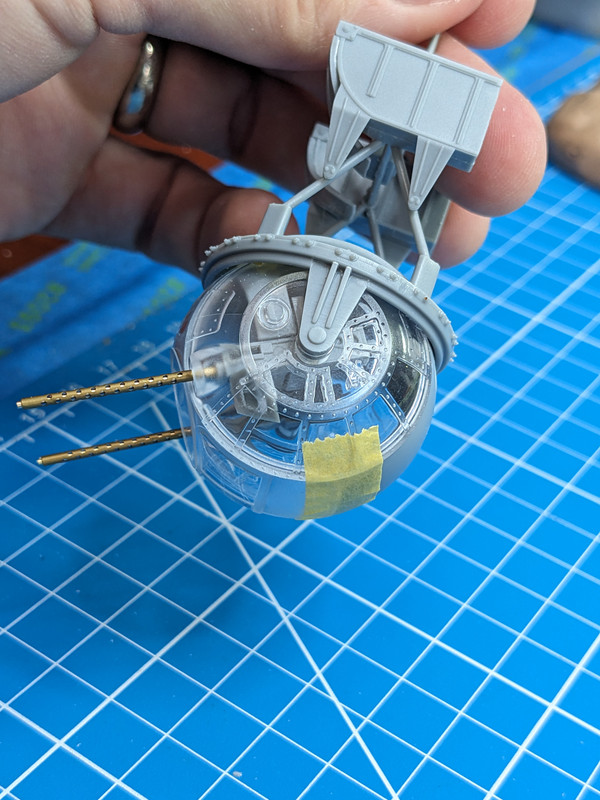
I know I said I didn't want to more lipstick on this pig, but I decided to break down and order another tail turret shell from CWS. Their page says it's out of stock and "pre-order." That's what their site said when I ordered the turrets that I have now, and they arrived within a few weeks. So, we'll see. Worst case, I can dispute things with paypal and get a refund.
All that said, now that I'm through with the major scratch building part of this project, I think the rest of it will start to pick up speed. I can tell you that I'm going to be burning a boatload of paint on the interior.

- Paulpk, blackbetty, BradG and 11 others
-
 14
14
-
-
Yep. I've put hundreds, if not thousands of hours in DCS since the first A-10C module came out ages ago. It's pretty great, but the drawbacks are already outlined above.
I can do most stuff in the F-18 and the US warbirds. My crowning achievement is to take a full load of fuel in the Hornet from the tanker in one hookup. In my opinion, A2A refueling is the hardest skill to master in the game.
- LSP_Matt and Michael931080
-
 2
2
-
-
-
-
-
Today's update:
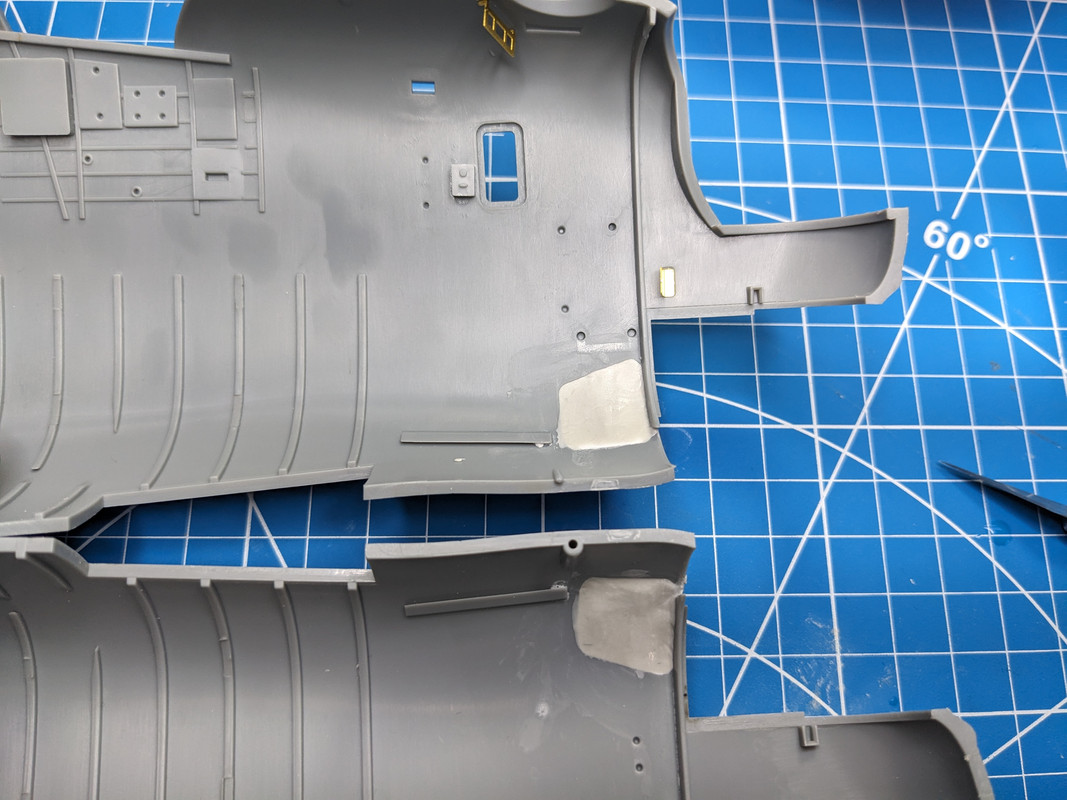
I decided to tackle a couple items today. First, I wanted to fill the holes in the nose as mentioned yesterday. I left plenty of extra material on the outside of the fuselage so I'd have plenty to sand and feather. The inside of the fuselage will not be visible, so I wasn't as worried about getting that as smooth.
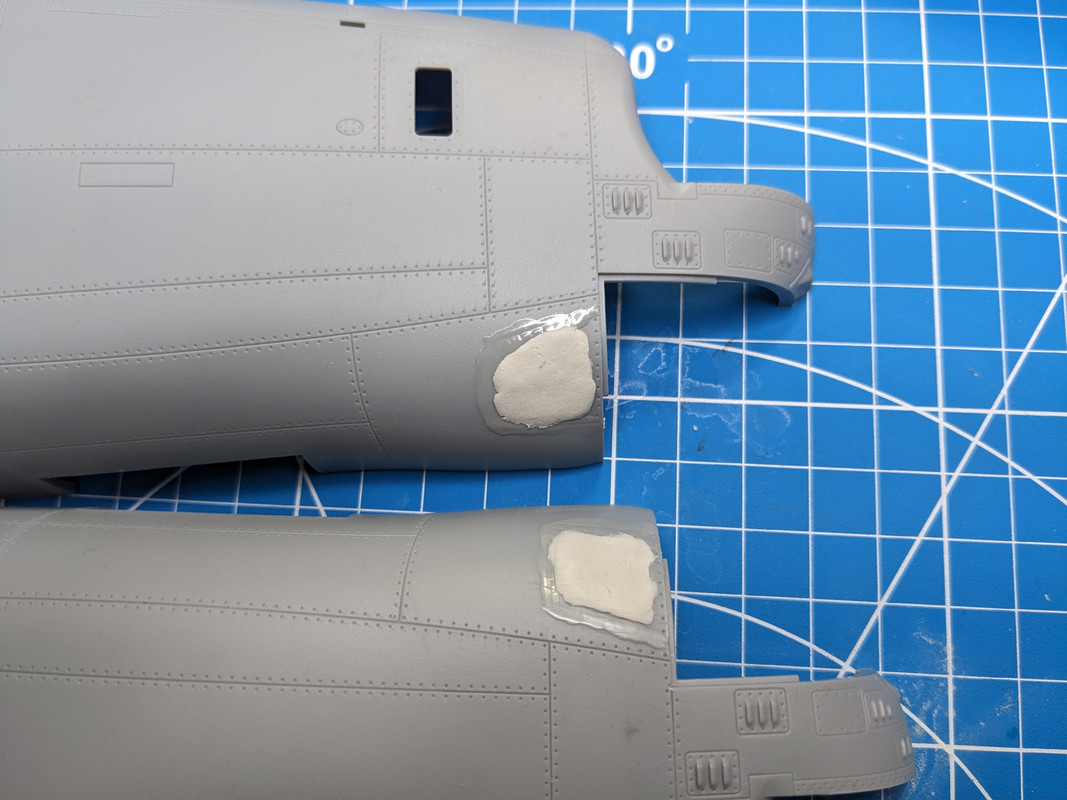
While I was/am waiting for that epoxy putty to cure, I decided to start looking into the turret question. As expected, the internal components for the A6C (of which this a/c has 2) are nothing like those in the Emerson front turret. So, with no other options, I'm going to have to do my best to scratch build the internals for one of them.
These are the parts in question.
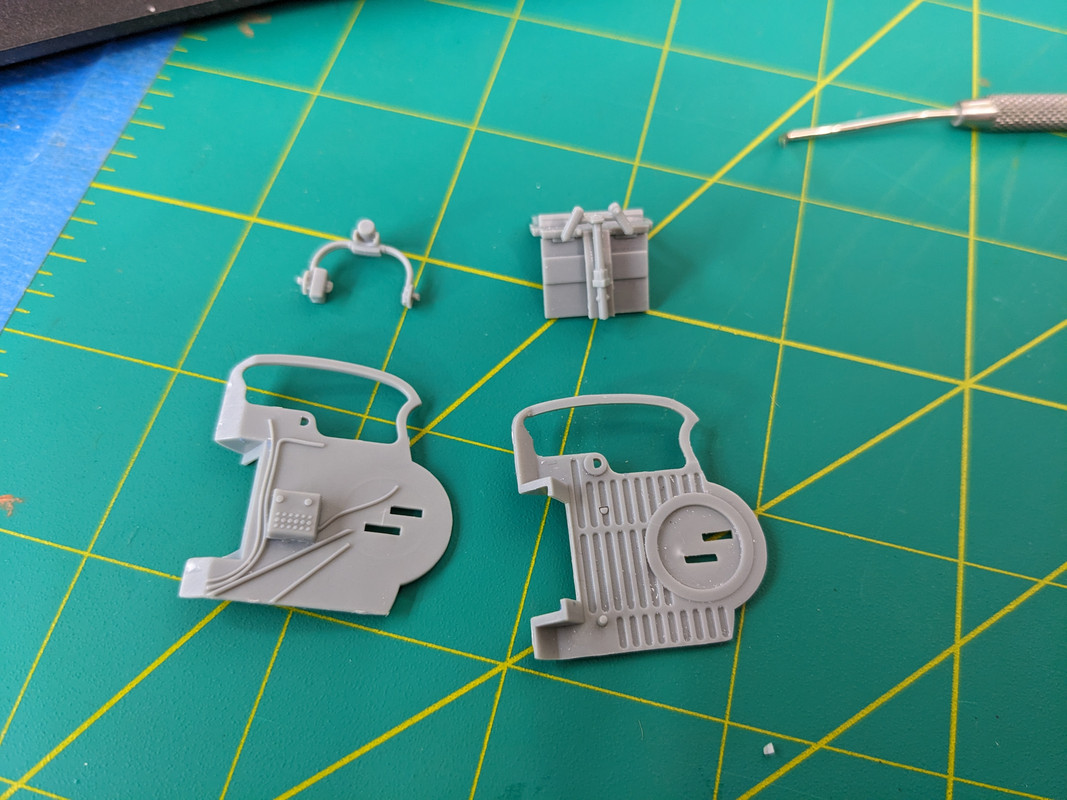
To be fair, I did check eBay for a parted out kit, but alas no Z-sprue is available. I don't have a 3d printer either, or I'd probably build these in there. I had started the build expecting it to be a pretty simple, straightforward thing. Surprisingly, it's already throwing up a challenge for my scratch building skills.
The good news is, I'm already making some pretty good progress.
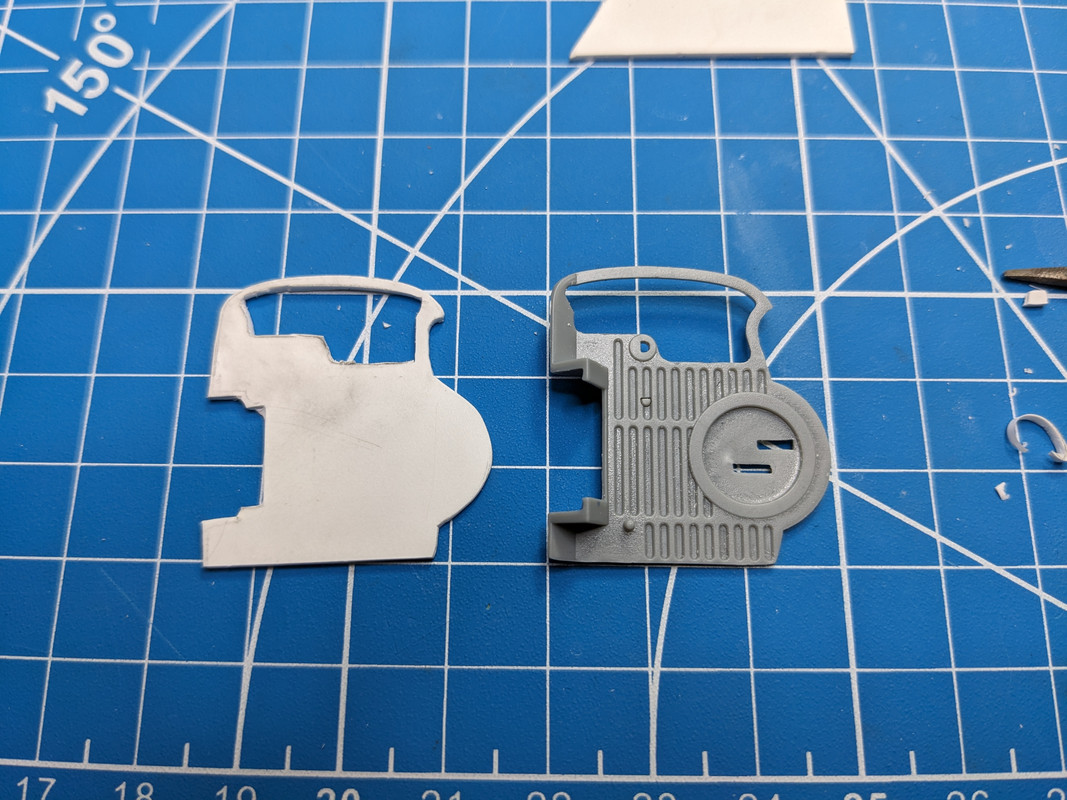
The main armor plating/framework roughed in.
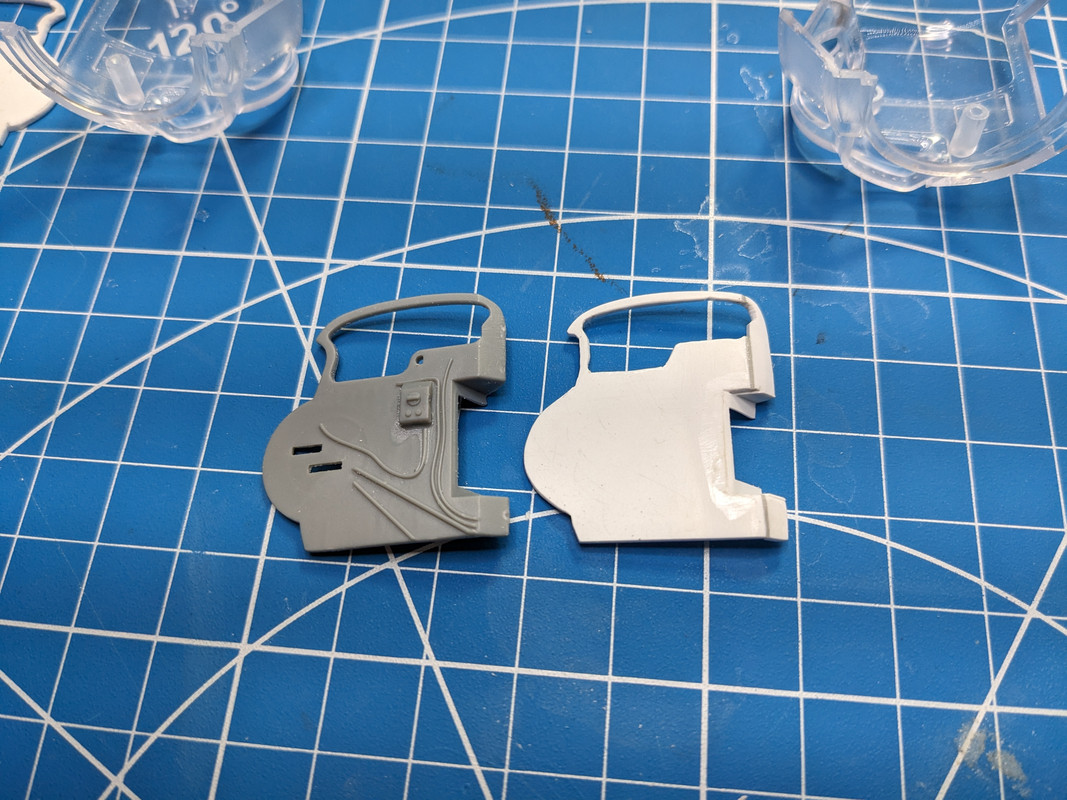
I recreated the bend by carefully cutting partway through the plastic sheet, then back-filling the new gap with stretched sprue.
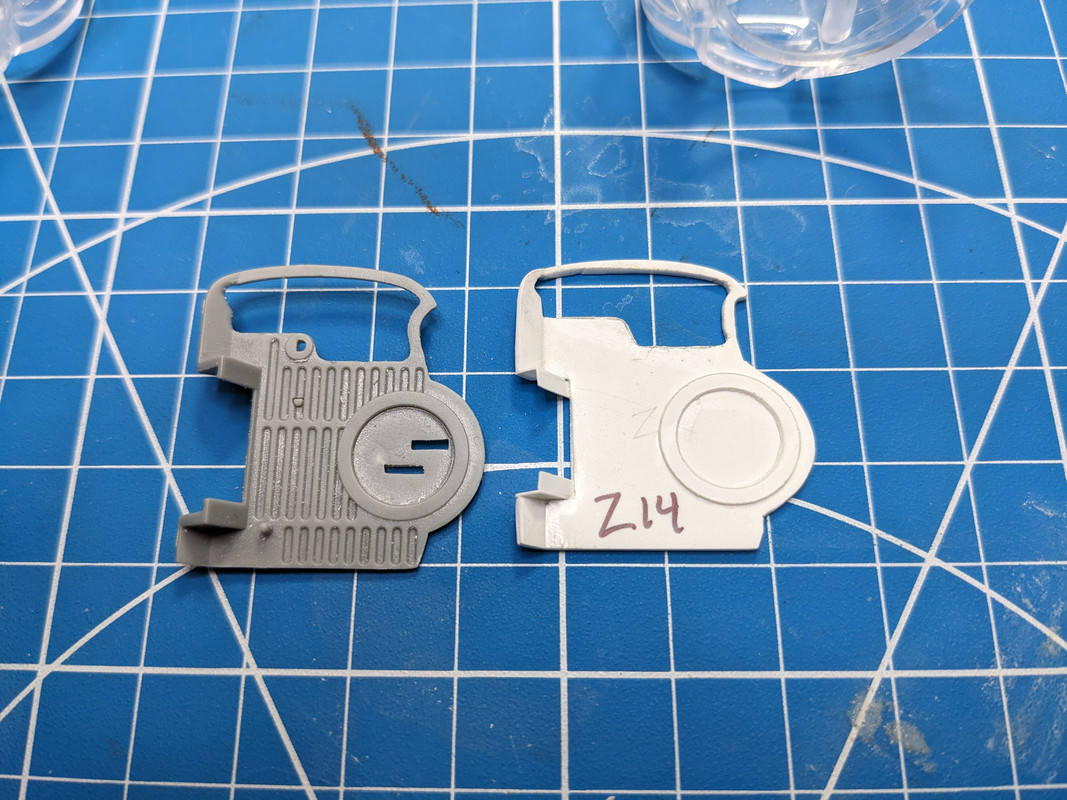
A compass helped cutout the ring.
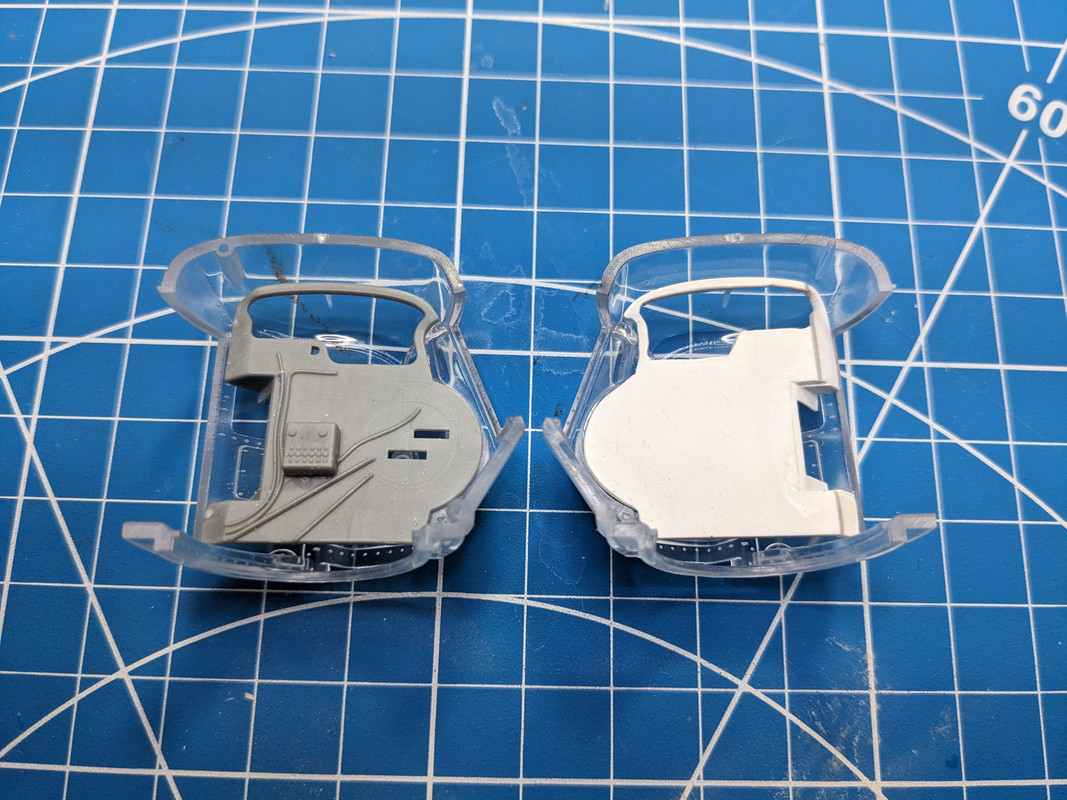
And here you can see the fit of the factory part vs the blank of the scratch part. I will use the scratch parts in the tail turret along with the kit-supplied split turret. The factory turret innards will go in the CWS single-piece turret. I've got the other side plate started, but it's very rough at this point. Still, it's off to a good start. I'll add details like the control boxes and wiring after I get the rest of the main structures together, but I'm pretty sure that once the turret is closed up and painted, nothing will really be visible of the interior.
-
Hello, all. For this group build, I decided to do something a little off the beaten path. I'd considered a couple different fighters in the stash that would be applicable, but ended up deciding on the B-24J that'd been sitting on my shelf of doom for years. I think I originally bought it as a COVID project and, to the SoD it went after something else happened to catch my attention.
I typically don't like to do any of the markings included with kits as they often tend to be overdone. And, with access to a mask cutter and decal printing paper, I usually like to try to do something unique. To that effect, I've spent the better part of the evening scouring Joe Baugher's USAF serial number lists and b24bestweb.com trying to determine which ship to build and have ultimately landed on Nan.
If you're at all familiar with the B-24, you know that it still holds the title of the most produced heavy bomber aircraft in history. As such, the modeler is left with a dizzying array of options and combinations as to what may or may not be appropriate for a particular build. Best I can tell - and I make no claims to be a B-24 expert - the kit really won't make any B-24 correctly. (This is, of course, ignoring the wing shape and other form issues.) My primary criteria in my search were the nose window and turret configurations, and nothing I could find quite matched the layout of this kit. Either a ship would have the right window layout with the wrong turret, or vice versa.
So, we're going to grit our teeth and do the best we can with what we've got.
Here's the subject ship. She's B-24J-55-CO s/n 42-99949, nicknamed Naughty Nan. On the right side of the nose, there's a Vargas pinup girl whose head has been chopped off in favor of ad hoc armor plating (See here). She was lost in a mid-air collision with another B-24 on September 21st, 1944 over Belgium. According to the Missing Air Crew Report, 5 of the 9 crew went down with the ship.

The most glaring issues between this a/c and the kit are the facts that the kit calls for an Emerson forward turret and also has side windows next to the bombardier's windows. The latter are easy enough to smooth over. The former, however, is a bit of a twist... but I think I have a halfway acceptable plan.
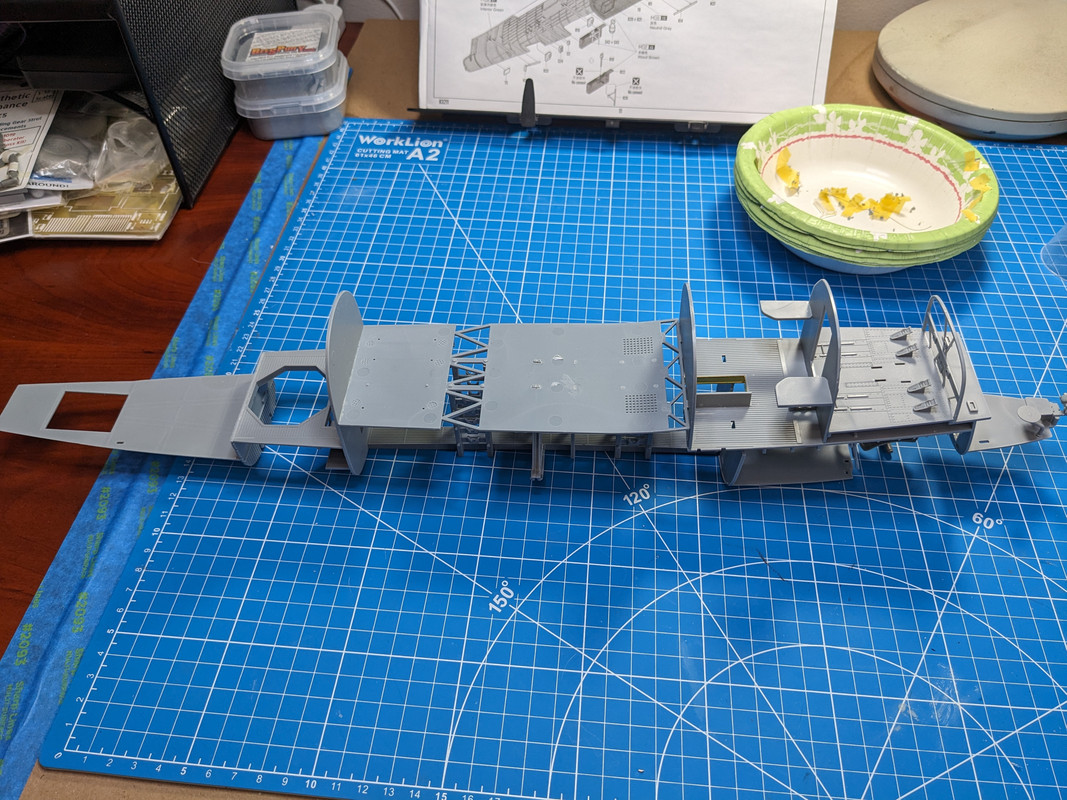
Here's what I'm working with so far.

Obviously, I haven't done a whole lot yet, but the build has been pain free. It's a huge, chunky kit, but it seems to be going together fairly well.
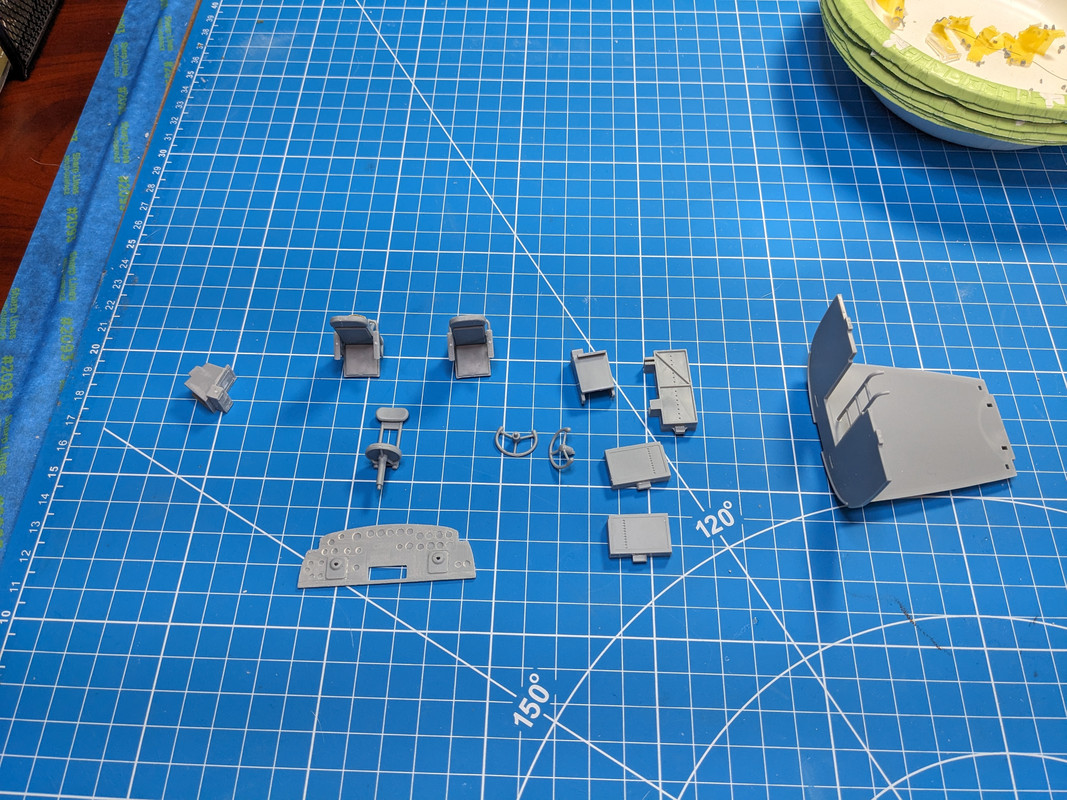
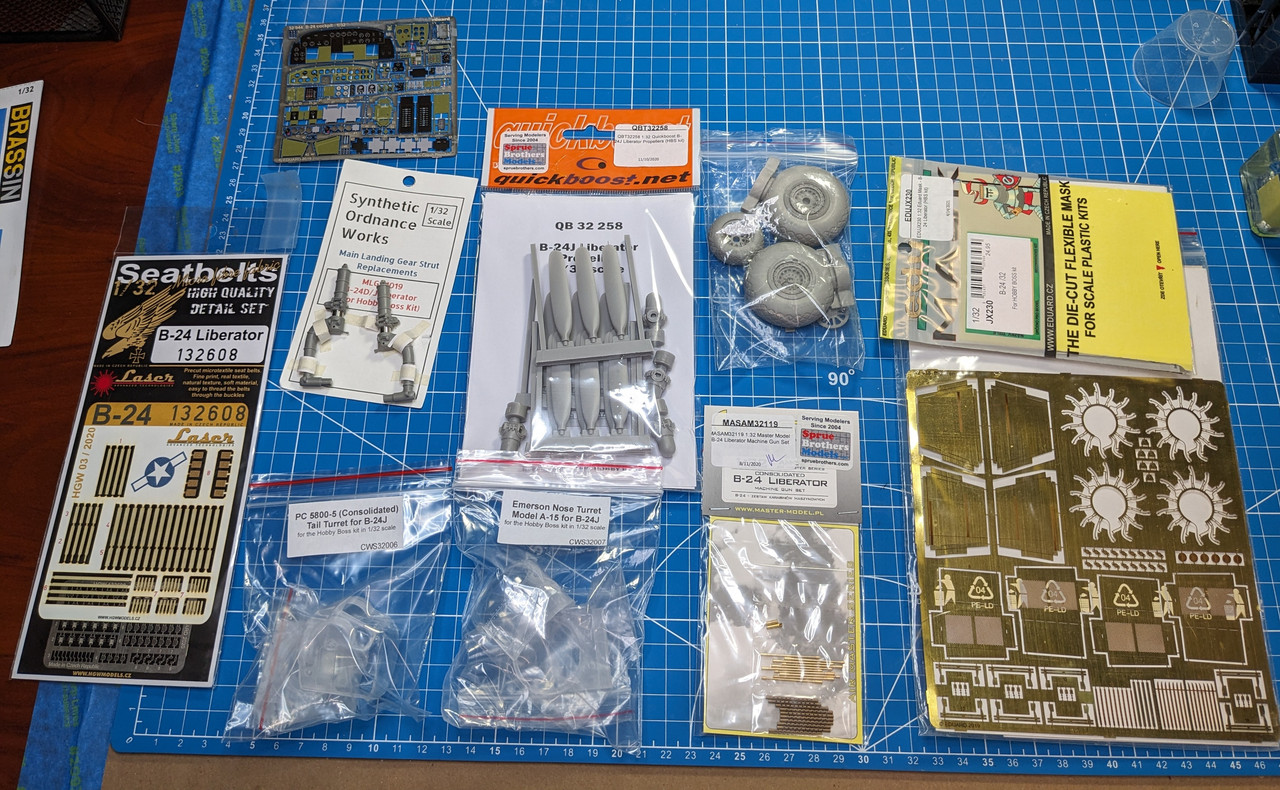
As you can see, I have oodles of aftermarket to lipstick up this pig, including both an Emerson nose turret and a A6C turret from Cold War Studios. Our subject ship has an A6C in the nose as well as the tail. Technically, I have two A6Cs if I include the split-down-the-middle tail turret from the kit. So, in an effort not to spend more money on more lipstick, I'm going to try to use the kit turret for the tail and the CWS A6C for the nose. Crossing my fingers here that everything works out because I'm not yet sure if the guts of the Emerson turret from the kit will fit the A6C turret. (See here for a lengthy discussion. Bonus points for my giddy naivete in the 3rd post)
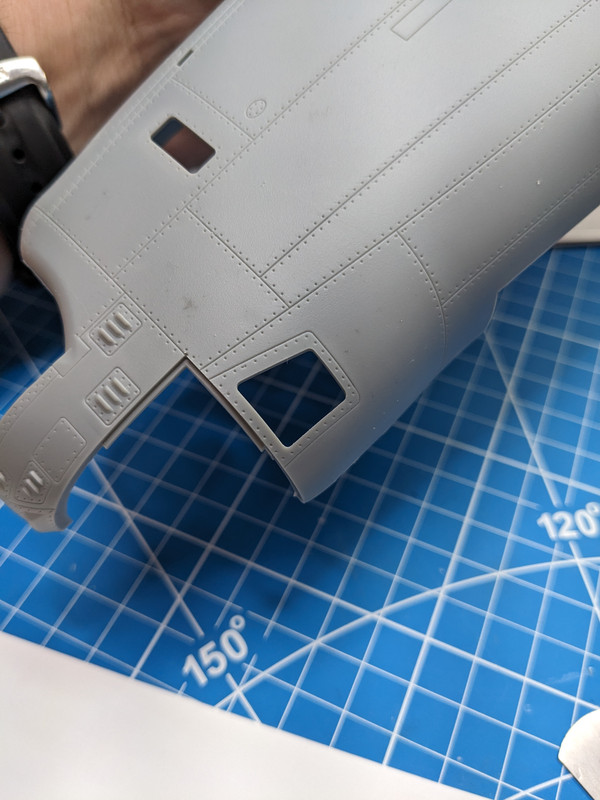
For Naughty Nan, the window aft of the bombardier's sighting glass will need to go.
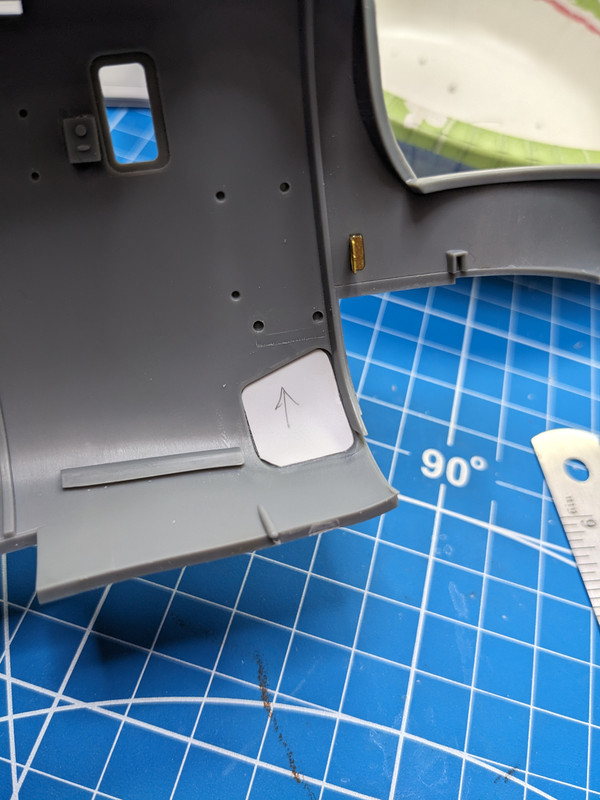
And so it shall be done. Plated off with a little plastic card.
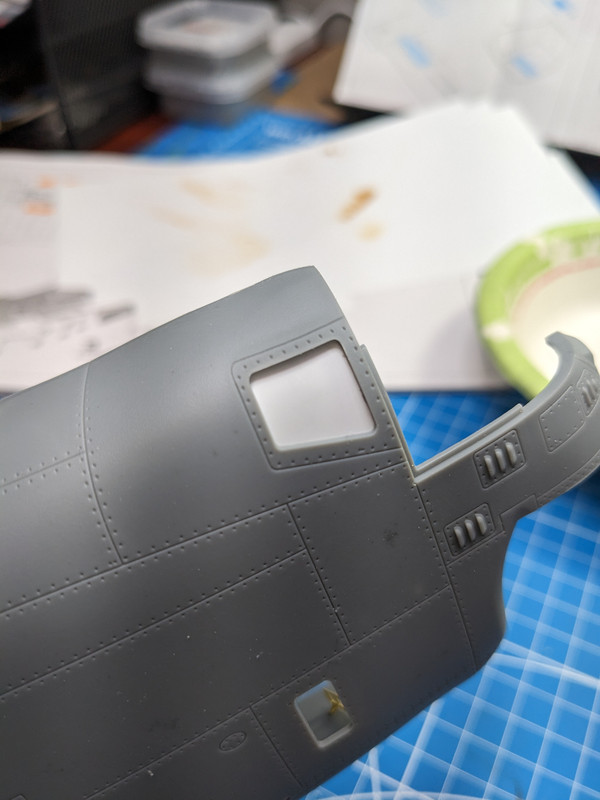
Rivets around the area are filled with liquid sprue. Once that's cured, I'll fill the recesses for the windows inside and out with epoxy putty and sand them smooth.
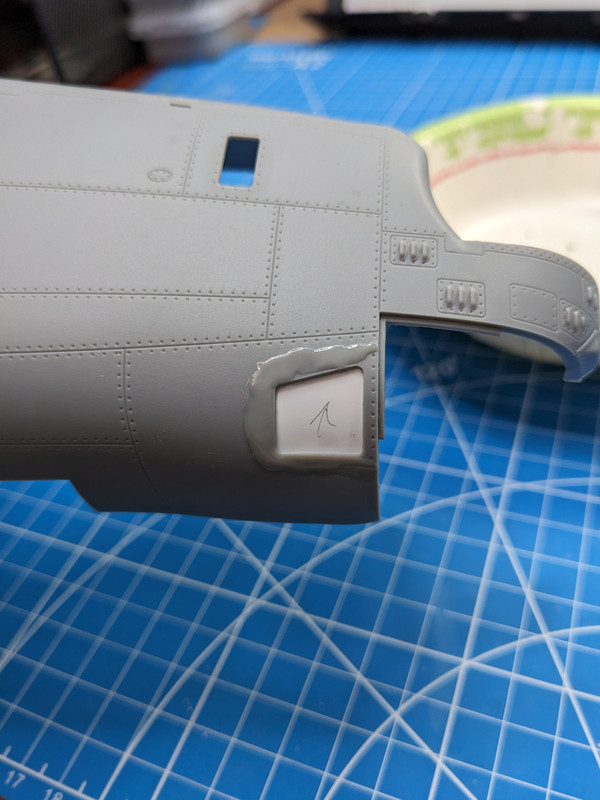
So, that's where we're at. Time to finally get this going. As I'm not doing any figures or ground work, I expect this build to go pretty quickly, so stay tuned!
-
Thank you.
11 hours ago, alain11 said:Hi
it's a very nice little " vignette" , very realistic , the battle damages are well done , you got it !!! ..
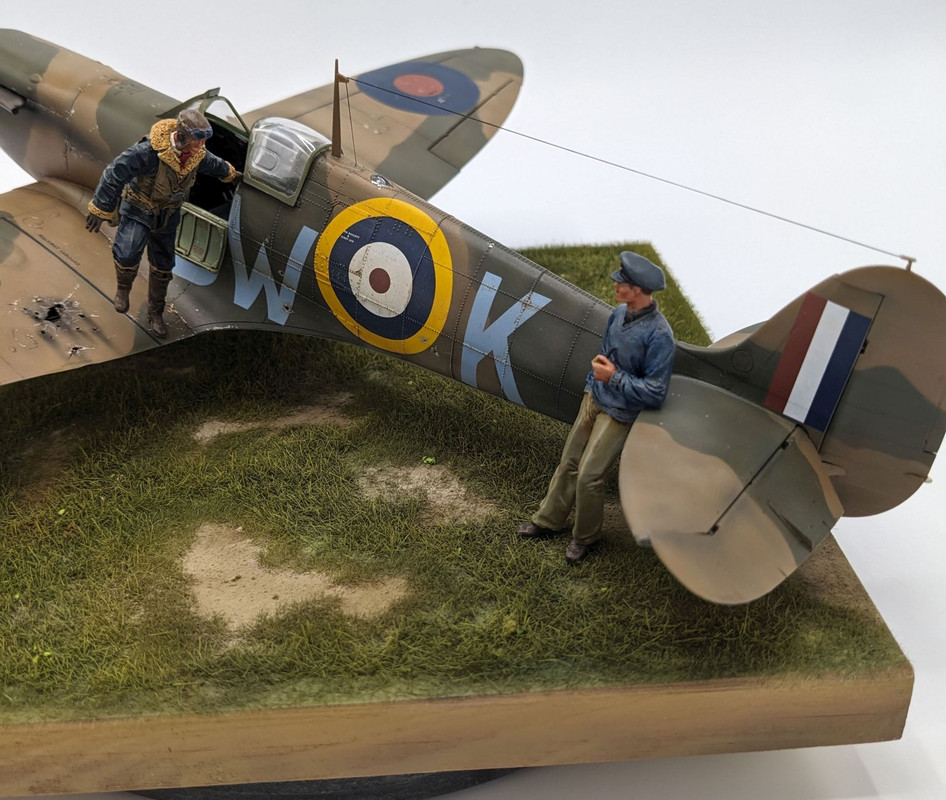
the guy on the tail plane looks a bit "relax" compare to the dramatic moment depicted ,I presume it's the typical " the Brit sense of coolness "(or composure)
Alain

Yep, that was the hope... To capture that classic British cool and calm in the face of difficult times. Same with the understatement of the thread title. I envisioned a friend greeting his returning brethren and downplaying the danger just to help bring some levity to the situation.
-
-
Hi, everyone. I guess it's time to get my membership card to the Kotare Klub as there seem to be about a million of these in the WIP forum right now.

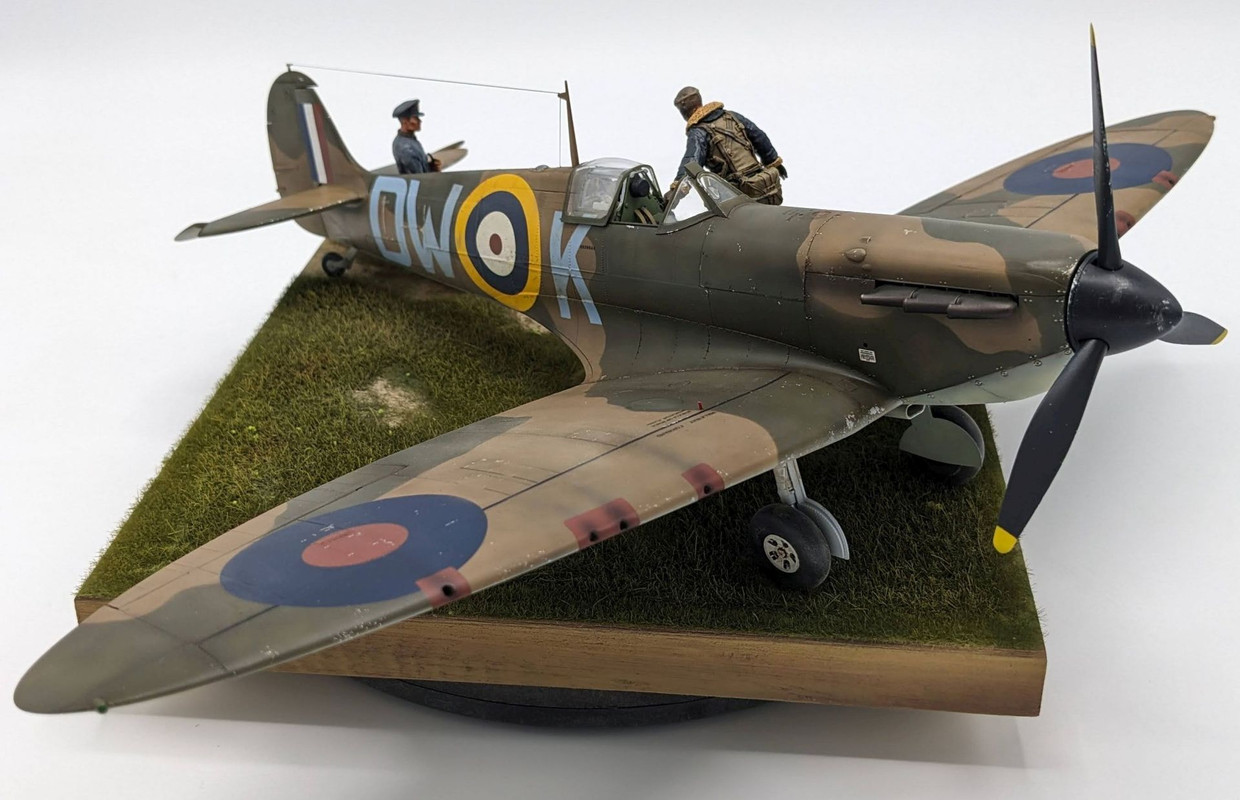
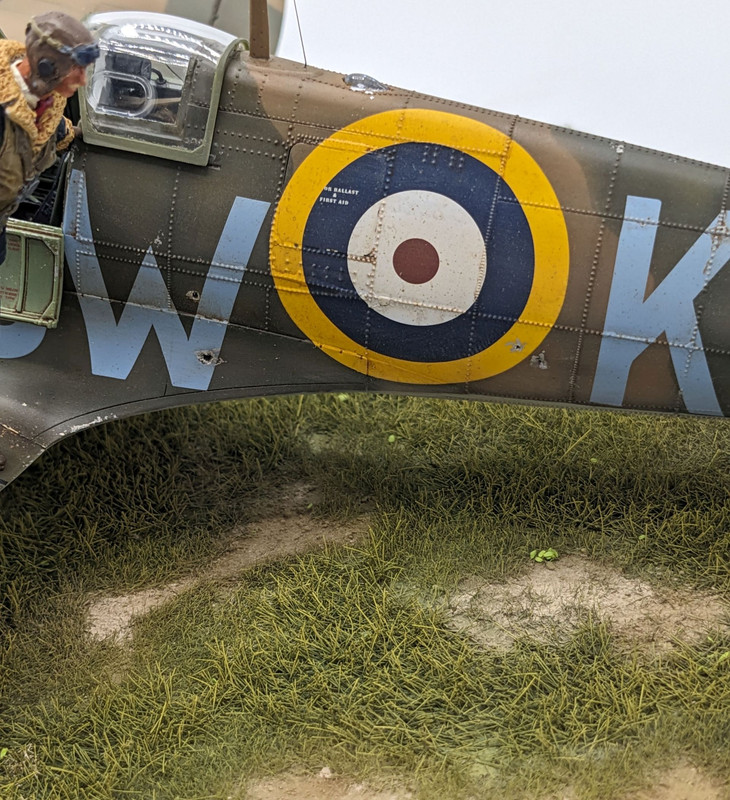
Since finishing my Corsair diorama, which took months, I wanted a quick, straight forward build as something of a palate cleanser. My son said he thought it'd be neat if I did a Spitfire, I had the Kotare Mk Ia (mid) kit in the stash, I've never build a British aircraft before, and so, fate was decided.
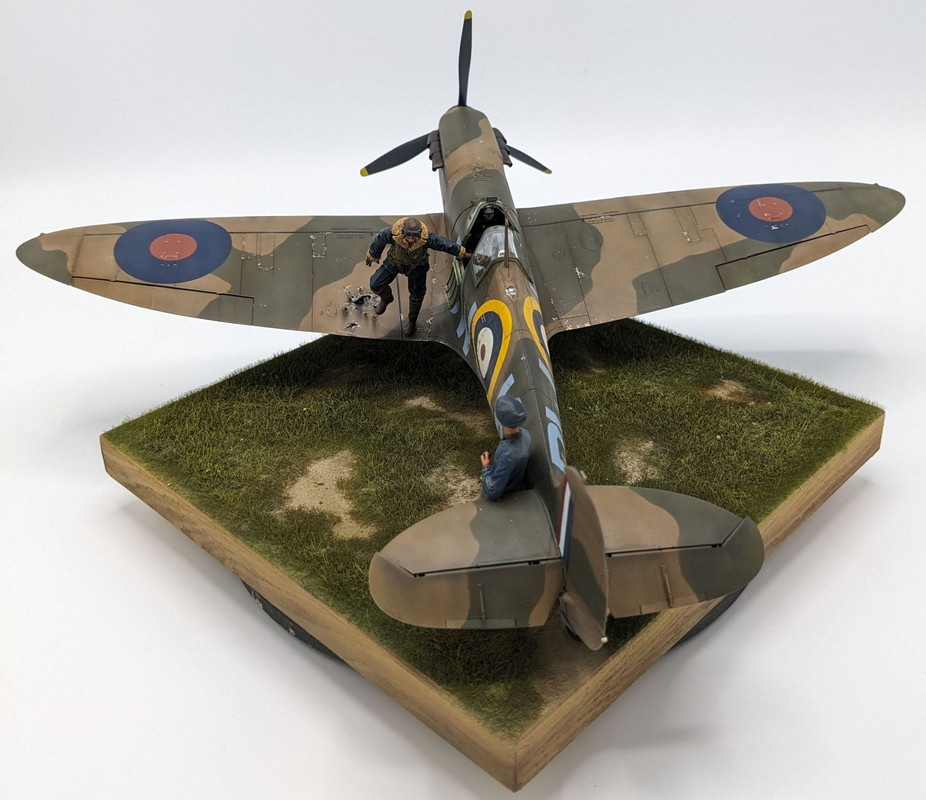
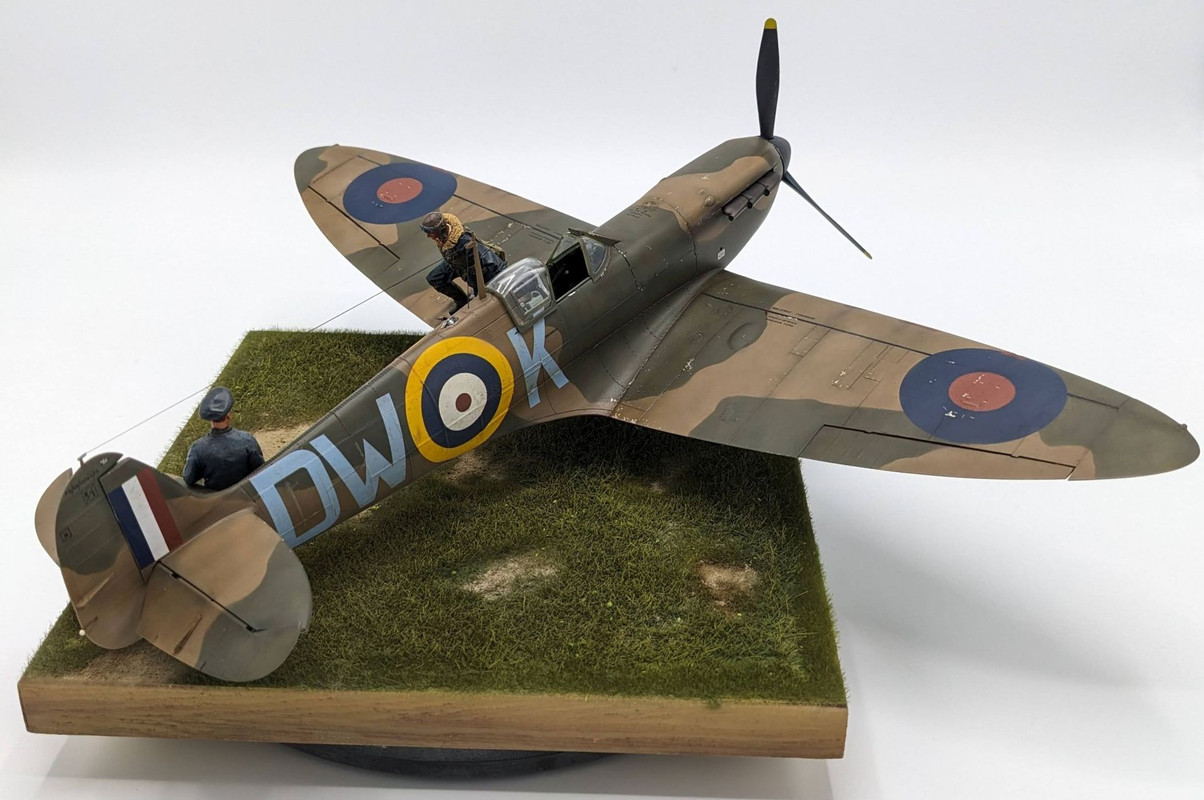
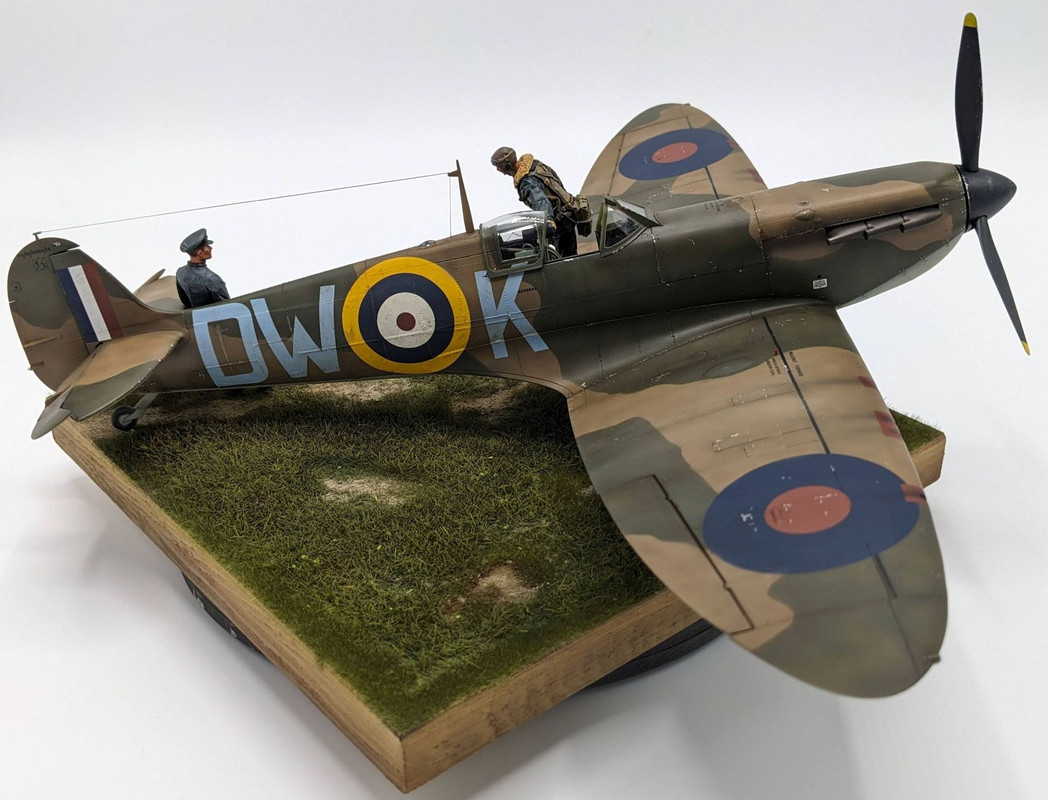
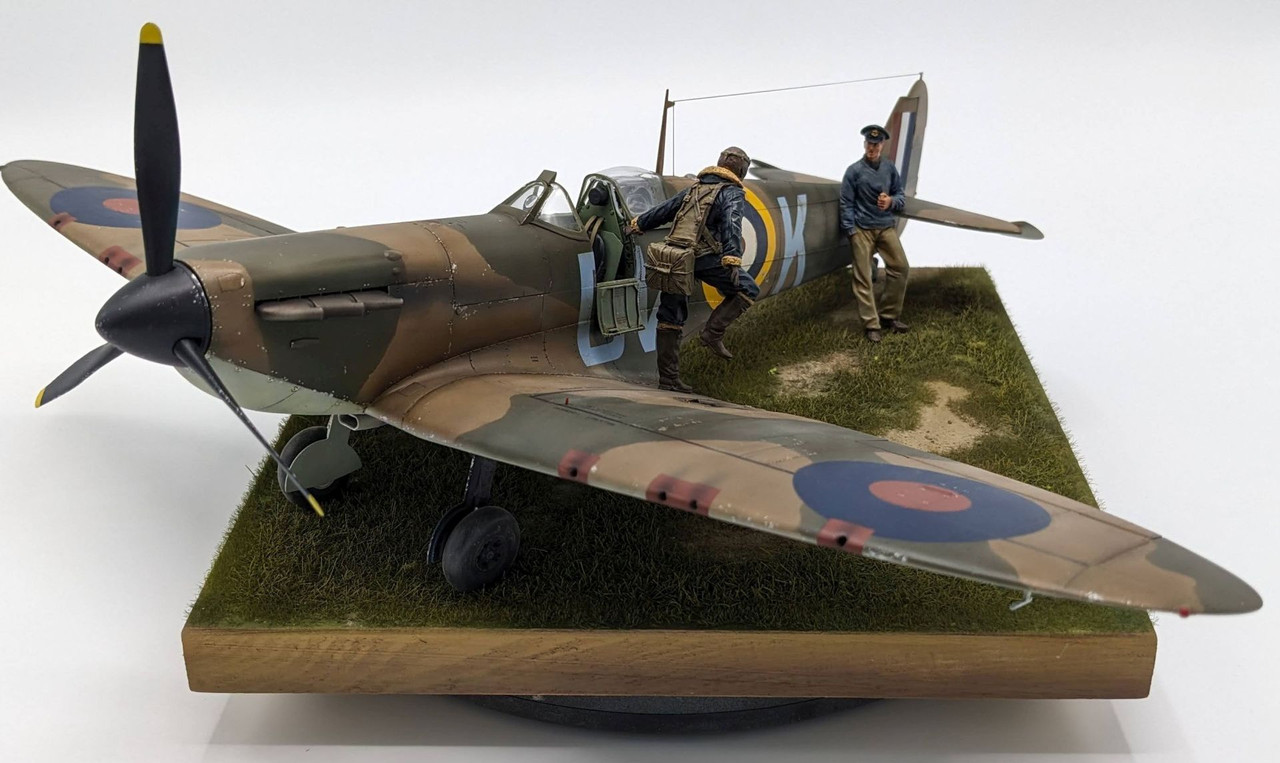
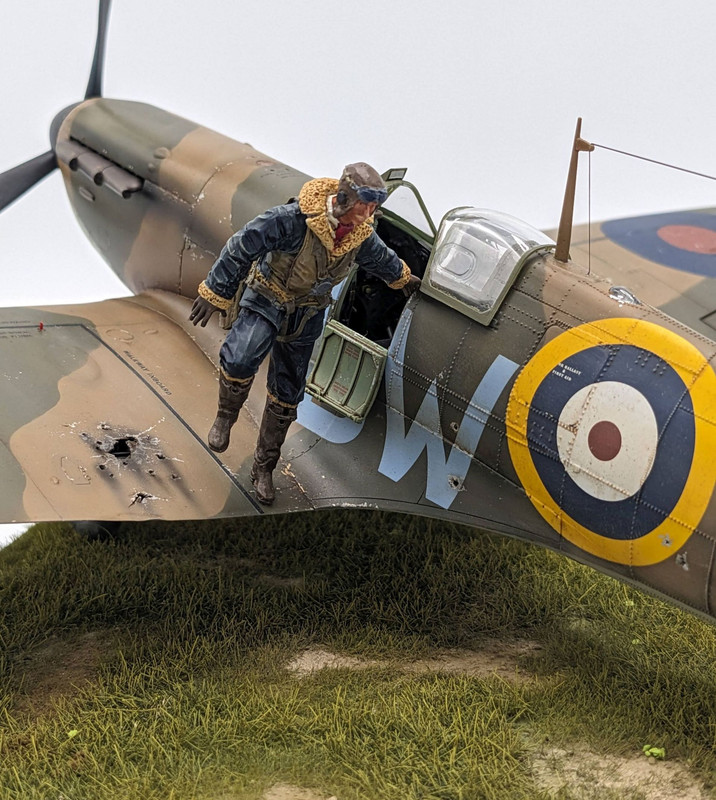
I departed from my usual MO of recreating an historical photograph and decided to just do a fictional, but feasible scene. I've wanted to depict battle damage on an aircraft since I was kid, but never really had the skills or practice till now. So, being that this kit has a low parts count and went together really nicely, I decided it would be a good platform to try my hand at damage. I thinned the interior plastic walls with a low rpm rotary tool, carefully punched and pried holes in the weakened area, then painted and streaked the area to look the part.
Aside from the rigging wire (EZ-line), figures (Black Dog Resin, out of the box), and the base (el cheapo panel board), the kit is presented out of the box. I even used the decals in lieu of my usual gig of cutting masks and painting. This experience reminded me that I'm way out of practice working with large decals, but after a few minor scares, they turned out okay.
This is a Spitfire Mk Ia of 610 Squadron sometime in the summer of 1940 before it was damaged beyond repair that August.
"Bit of a rough go today, eh, chap?"




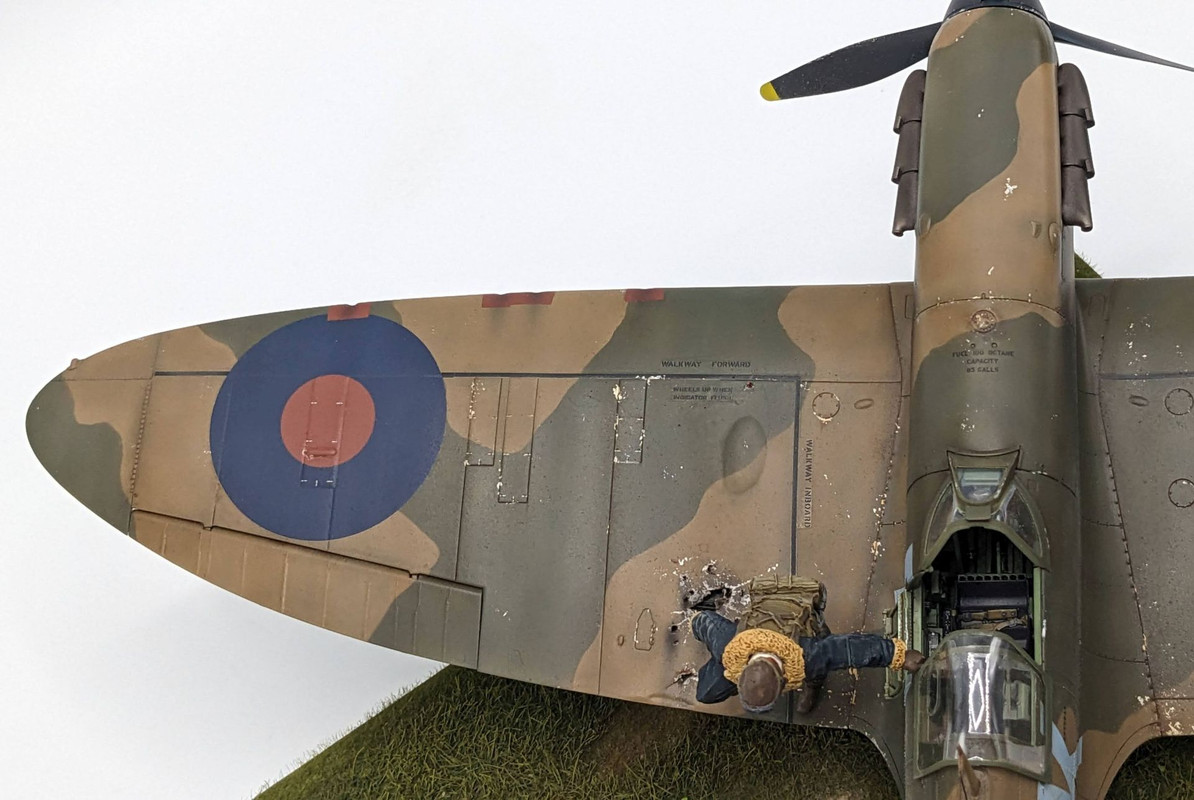
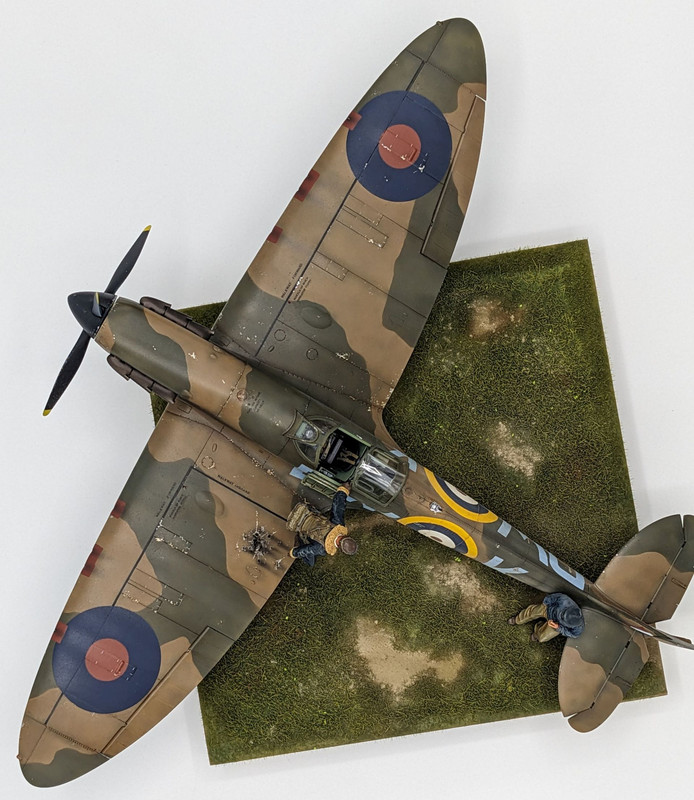
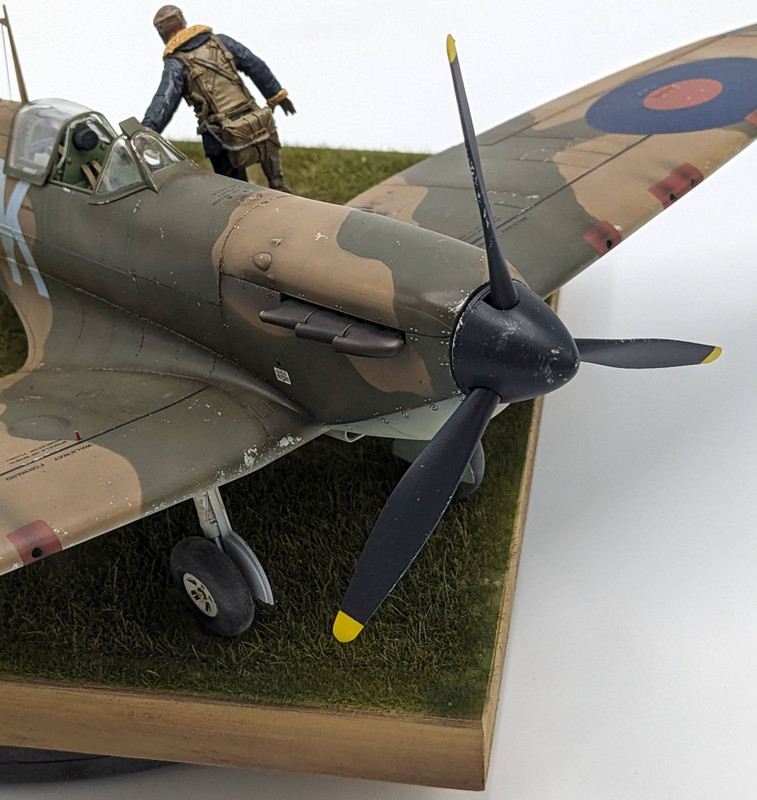
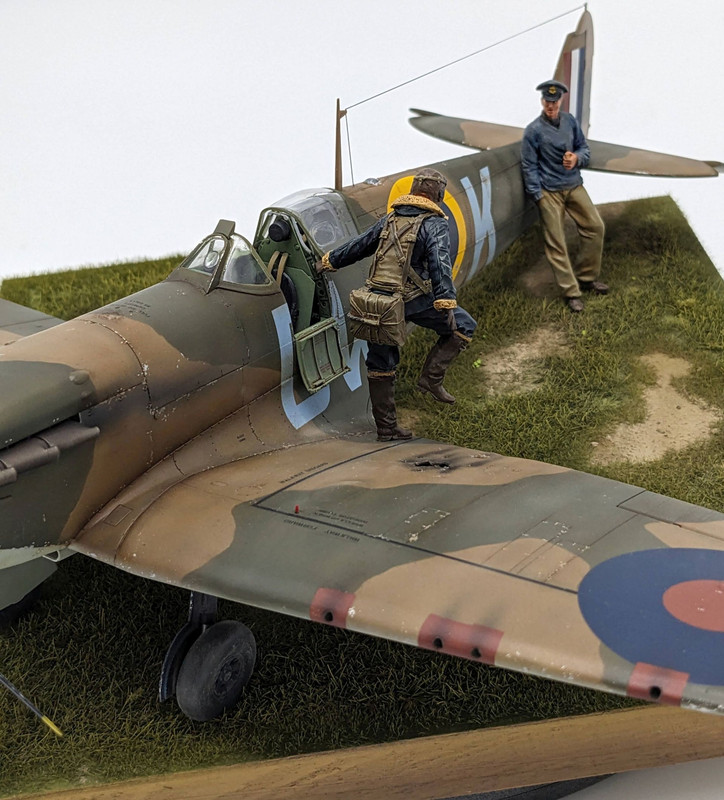


- geedubelyer, JeepsGunsTanks, Shoggz and 27 others
-
 29
29
-
 1
1
-
Great work! What a bizarre little airplane.
-
Mods, I'm not sure the best place to post this. So, no hard feelings if you move or delete it.
A friend just made me aware of an estate sale for the next couple days in Carthage, MO that has a ton of nice LSP kits. Tons of WNW, GWH P-40B, 2x Airfix Hellcats, Airfix Spitfire, HKM B-25, Kotare, Tamiya, etc. No idea of pricing, but if you're in the area, it's worth checking out.
https://www.estatesales.net/MO/Carthage/64836/3962628
I am not associated with that site, this sale, or anything related to it in any way. Caveat Emptor. Your mileage may vary. Offer not valid in Utah, etc, etc, etc.
-
Are you going to be going for an FAA airworthiness certificate?
- chaos07, themongoose, Troy Molitor and 5 others
-
 2
2
-
 6
6
-


New book on scratch building model aircraft, due to be released in 2024
in Construction & Scratch-building
Posted
I just got a shipping update for it showing shipping in July.