
mikeblack
-
Posts
79 -
Joined
-
Last visited
Content Type
Profiles
Forums
Events
Posts posted by mikeblack
-
-
Hi Peter - I've just caught up by reading your whole build thread. It's incredible! Looking forward to learning more, and being inspired to raise my standards as you progress onwards.
Mike
-
-
Mike,
I used the NASM subject as the baseline. My suggestion is to switch to Tamiya Paints and use their lacquer thinner.
All of the colours I used were custom mixed. I can tell you the colour codes when you're ready. I didn't have any issues at all spraying them except doing the actual Wellenmuster squiggles, which requires constant thinning of the paint until it's too watery to use.
Justin
Hi Justin
Many thanks for this. Yes, as the painting was the 'Achilles Heel' on my first attempt I've put a lot of thought into how i'm going to do it on the second attempt! Will definitely not be using Xtracrylix! Tamiya sounds really good and I would be interested in your colour codes in due course - thanks. However, in my research I've become a bit more laid back about the RLM 76 as, by that stage of the war, it was a case of 'beggars and choosers' as the German war machine ran out of raw materials. Shame that the three photos of '290126' are slightly over-exposed so don't show the upper camouflage that clearly. In addition two of the references I've used are slightly at variance with the photos themselves! Therefore, I too will use the NASM aircraft as a baseline.
Finally, as I was trying to complete the build for the end of October deadline I started to feel self-induced pressure which began to erode the enjoyment: I think you had the same experience coming up to the model competition? Going to take a page out of 'Mal's Way/Corsair' build in this section: do it slowly and enjoy it (and hopefully I'll make fewer mistakes with paint)! First going to sort out the model bench

Cheers
Mike
-
Woa, nice save, Hakan!!
Mike
-
Going along nicely, Alain ;-)
Mike
-
-
Just superb!
Mike
-
Coming along very nicely, Hakan ;-)
Mike
-
Ouch! Are there many parts or sub-assemblies of the original build you could salvage? That would save some repeated work at least.
Much sympathy; plus respect for your stoic attitude - if it happened to me my teddy would still flying after I'd thrown it out of the cot ...
Hi Mike - thanks for your post. Yes, as I was in the painting phase there were a number of sub-assemblies waiting (cowlings, propellers, landing gear) for attachment that I could use again. But who knows...I might be able to improve on them at the second attempt

Mike
-
Hey Mike!
Interesting subject =) I just finished my 290126, you can check out my build here: http://forum.largescaleplanes.com/index.php?showtopic=61165&page=1
I'd be more than willing to help you with my paint colors.
Justin
Hi Justin - I picked up your build thread quite early on in my research. Your Uhu is a beauty and richly deserved the awards and accolades it received! If I can get 50% of the way towards that I'll be pleased.
Thanks for your kind offer of help - I take it that you used the NASM's (Uhu) paint scheme as your reference? As you can see from my latest post I'm starting the whole project again so the painting will be some time off...
Will be in touch and thanks again

Mike
-
Gentlemen, many thanks for your kind and encouraging words following my 'Great Painting Disaster' - they are much appreciated

Last night I came home to find that a framed picture's string had snapped and (pure Murphy's Law!) being directly above the model fell onto it
 knocking it to the floor. With so much additional weight in the front it must have hit the ground with a thump. One wing has split open and the other is cracked but the cockpit section is largely undamaged. Sooooo.....
I have decided to start again and build the same kit in the same finish (WN 290126 in British markings) as Eric 'Winkle' Brown flew her in 1945.
I've often joked that I should build each kit twice so that I could learn from my mistakes
 and incorporate the advice and emulate the example on forums such as this one. That's my plan! However, I have a busy couple of months so I'm unlikely to restart this project until December. Will post updates in due course.
Thanks for visiting
Mike
-
Looking good! Love to see the next paint step!

HÃ¥kan
Ah, well, Hakan, I'm afraid you'll have to wait a bit longer as I had the original 'Great Painting Disaster'
 . This was almost certainly due to my inexperience though I have learnt a great deal! The Vallejo RLM 75 (Grey-violet) went on nicely and hardened up; however, when I came to apply the (Xtracrylix) RLM 76 (Light-blue) for the 'Wellenmuster' wave/squiggle pattern I hit a few snags:
1. With the paint well thinned it would not adhere to the surface, and
2. With the air pressure low it would not adhere anyway, and
3. If the paint was thickened it would not flow through the AB (even with a flow improver)

So, I thought I'd just brush-paint the RLM 76
 This was successful and looked very effective (initially) but when it dried it looked awful with ridges and runs. I was left with no option but to clean all of it off and start again. However, time is now against me so I'm going to be another member of this GB who is not going to complete it in time. Very sad but I'd rather get this right and that will take a bit longer - and I intend to airbrush the whole scheme
Having given this particular camouflage scheme a great deal of thought I now have the basis of a plan. What is interesting is that one of the best references for the 'Wellenmuster' appears to be the beautifully restored NASM Uhu. I've used their work as a basis for completing my Uhu (290126) because the three photos of this particular aircraft (two are of it in British markings) do not show the upper camouflage scheme very clearly. It seems to me that the 'Wellenmuster' on the upper main wings is a definite series of coils, circles and lattices (however, as the NASM's example was missing this scheme on the wings, theirs, by admission, is an extrapolation). On the fuselage and tailplanes the NASM was fortunate to have the remains of the scheme plus some undisturbed paint in the wing roots, and were able to recreate what is a very definite lattice work. So, interesting times ahead - but I will finish this build.
Finally, I will continue with updates but, in the meantime, all the best to you other builders: you are an inspiration

Thanks for visiting
Mike
-
Hello Torben
Many thanks for your comprehensive update, and while it will be a trifle disappointing not to make the deadline at least you are enjoying the build - which is the main thing!
Your cockpit build is beautiful and most inspiring. I can also appreciate your thoughts on the efficacy of PE: being a returnee to modelling I was initially enthralled by it but now I'm not so sure...the jury is still out! And as I'd like to develop more scratch building skills ahead of a series of vacuform kits then using PE won't do the trick. So joining this GB has given me a lot of food for thought.
Finally, I've been giving thought to the strength of the undercarriage legs on my Uhu: with so much weight in the nose I've inserted a brass rod in the nose gear for starters but now I'm pondering the mains.
Keep up the great work and I'll keep following your progress!!
Mike
-
I'm echoing Torben's words, Alain. Great modelling ;-)
Mike
-
Coming along nicely, Hakan!
Mike
-
-
Great work, Alain!
Mike
-
Good evening everyone! A progress report on my Uhu 'WN 290126' now that rest and play are over:
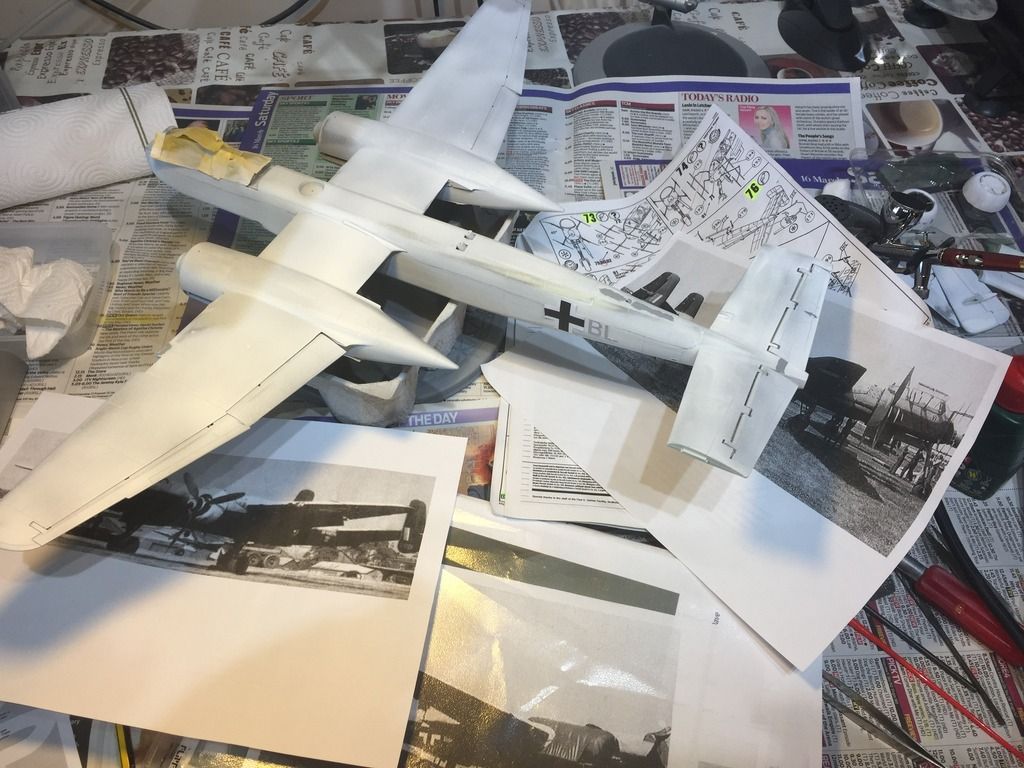
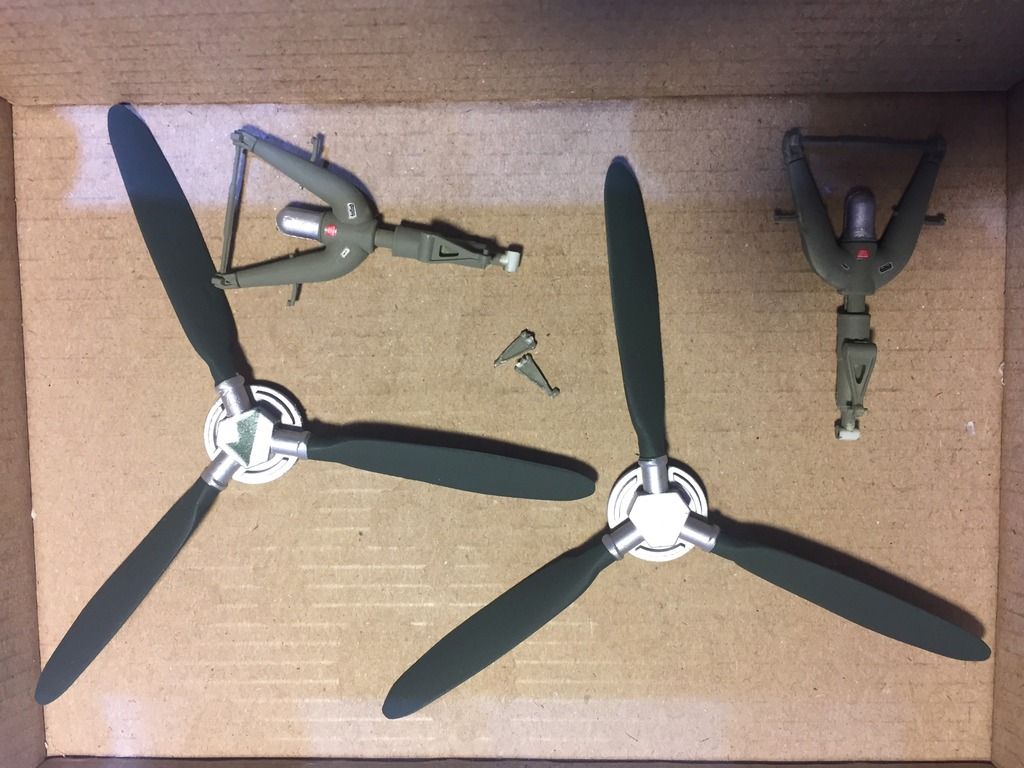
In the last few days I've reached the stage of painting the Uhu. Recently I've been working on various sub-assemblies such as the landing gear and propellers, though they will need weathering. I reduced the size of the nose oleo to something more reasonable and inserted a piece of brass rod to strengthen the assembly. I'd like to do the same for the main landing gear (showing off its decals with a nice bit of silvering!) but not quite sure of the feasibility

I did a prime with good old Tamiya Primer from the can and learnt a lesson: too little control (didn't decant) though it did the job! After sanding, repairing and rescribing I gave her a coat of Vallejo acrylic primer from the airbrush - much better.
Then came the interesting exercise of positioning the 'old' markings so that later on the overspray and subsequent British markings could be applied. First problem was finding a set of references which agree - despite the fact that this is one of the 'more photographed' Uhus!!
Of the two major references I was using, both disagreed about the placing of the side fuselage markings. In the end I eyeballed it from a grainy photo of the actual aircraft.
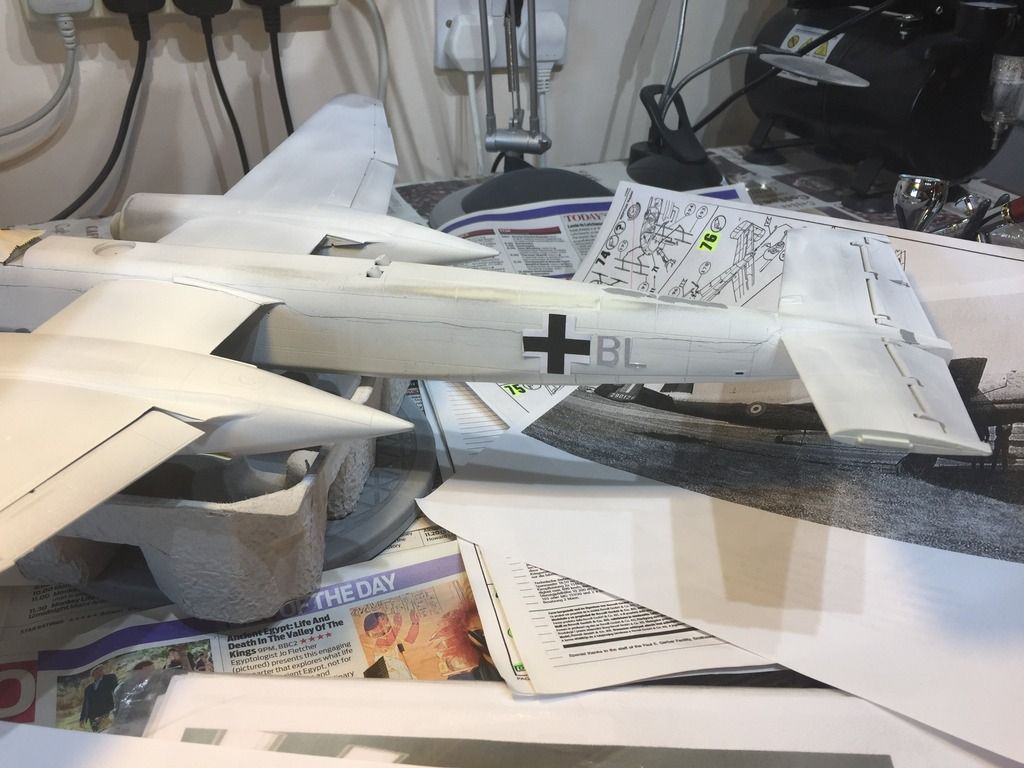
Then on with a couple of coats of RLM 75

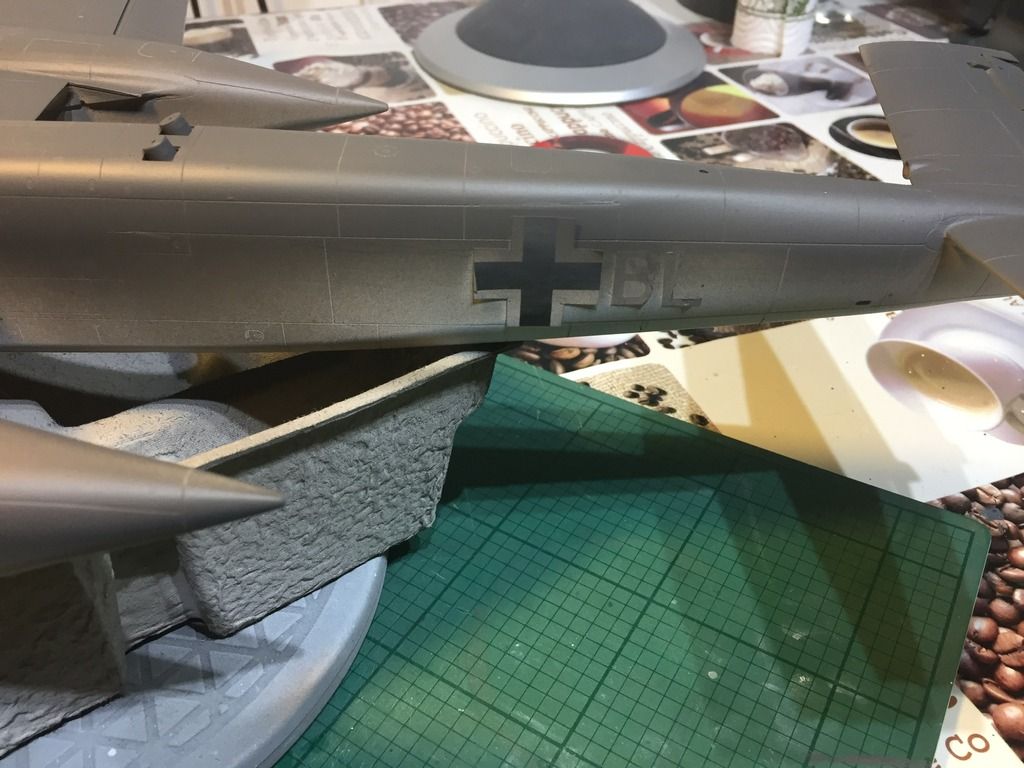
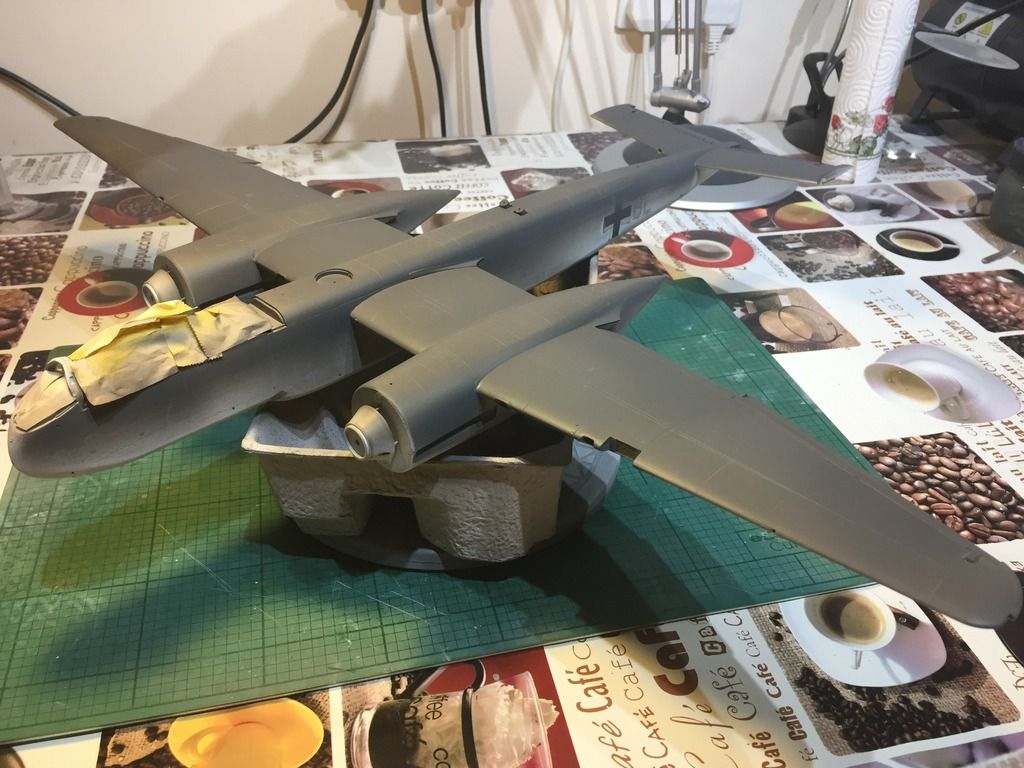
Some bits look a bit rough but I've planned them
 (trust me I'm a doctor!) as part of the weathering process (who said it was a ploy to cover up bad modelling?). Next stage is practising the RLM 76 squiggle over the RLM 75 before the real thing
Now a short intermission while work disrupts the modelling.....
Many thanks for visiting.
Mike
- MikeC, Alain Gadbois, dutik and 2 others
-
 5
5
-
-
A superb build, Justin - and rightly recognised by your awards. Many congratulations!
Mike
-
Truly inspirational modelling, Max!!
Mike
-
-
-
Coming along nicely, Hakan ;-)
Mike

ZM Heinkel He 219 Uhu:5/26/17: BACK WITH A VENGEANCE
in Works in Progress
Posted
Beautiful work, Peter - I'm following this one (as I did with your Mossie) with interest!!
Mike