
Mark M
-
Posts
1,089 -
Joined
-
Last visited
-
Days Won
1
Content Type
Profiles
Forums
Events
Posts posted by Mark M
-
-
progress at lastfirst up holes to fill

 then all of a sudden i was up to this point with no photos sorry guys
 then work on the engines, however most of it wont be seen so ive skipped super deatiling them

 and thats where i am at the moment
-
couldnt resist a mock up


- Stokey Pete, Whitey, LSP_Kevin and 4 others
-
 7
7
-
so otday has been rear console day, the kit part has the moulding for the rear elecrtical cables, but no cabels, so....
i raided the wires box and i dont have anything thin enough so..
i raided my wifes sowing box, and have used white cotton CA'ed in place and then painted and washes, ive tried to follow photos as much as i can, its not perfect but it looks alot better


-
so after a day of painting (and not finished yet, can you guess which seats im going to use


- geedubelyer, scvrobeson, JayBee and 10 others
-
13
-
-
so its time to work on the seats, i have 3 potential options
1 - kits seats OOB
2 - kits seats with the 3d printed kits world decals
3 - resin replacements

so i think ill give the kits world decals a try.... DONT!!!!!
first of all, they are not scaled for the italeri seats, they are far to wide and you cant cut them down without ripping them
2nd - IF you can peel them off the backing without ripping then will not stick in place, i had to stick them with varnish in the end, however this morning, they have come away and curled up
3 - they really dont look very good

so...
im donnw to 2 options, 1 try and peel all this off and start again with the etch harnesses from the kit or go with the resin option
-
where are you, ive your in the UK i can send you a flashing LED (depending on the size you need and an appropriate resistor)
simple electronics are easy
you need 2 cuircits
LED and resistor
and motor, possibly with a resistor,
both can be attached to a switic and battery, these days small disc batteries are perfect
resistor goes on the positive side of the LED same on the motor
let me know where you are and i can find you some shops with approptiate stuff
-
so managed to get the front done before i came to work tonight, sorry about the photos they were rushed as i came out the door, ill replace them at some point
the yellow is a bag of 60g of weight wrapped in tape, so it wont split


- scvrobeson, Victor K2, LSP_Kevin and 3 others
-
6
-
-
-
2 hours ago, Tomjw said:
Hi Mark.
The nosewheel bay is looking great. As far as I'm aware, the only white on Tornado gear was on the early prototypes. The vast majority of RAF Tornados have a very light aircraft grey bays and gear.
Looking forward to more updates.
Cheers,
Tom
Well the photos in the mdf book shows grey bays and white gear on both a gr4 and adv
Also my photos of tornados at cby show white legs so ill stick with it
-
so it was a long working week with not alot done, just a couple more shifts then a weeks leave
anyway, ive done some work on the gear bay, italeri give paint call outs gor grey bay and grey landing gear, this isnt correct, the bays are grey but the gear is white ( opoisite to hawks)


-
-
ive been speaking to a 'museum shop' over the past couple of weeks and revell prices into the shop have gone through the roof, revell aint going to be cheap in the uk anymore
all those people that criticised stashes, will have a rude awakening!! im brexit proof!!!!!
- Rick Griewski and monthebiff
-
1
-
 1
1
-
i could of sworn the early ecr had recessed missiles, sorry guys my bad
-
cool ill go for that then, cos you know ill end up breaking it!
-
no sorry i ment for wheels down can you leave out the leg until the end, or does it have to go in during the build, i always end up breaking things
-
cool, question as ive not quite got there yet, is it possible to build the nose bay without the landing gear or do you HAVE to install it
-
-
have you checked the nose gear bay fit with the pit, the tolerance in the revell kit is tight, im not 100% the aries resin wont foul the nose gear bay
-
Cheers guys
-
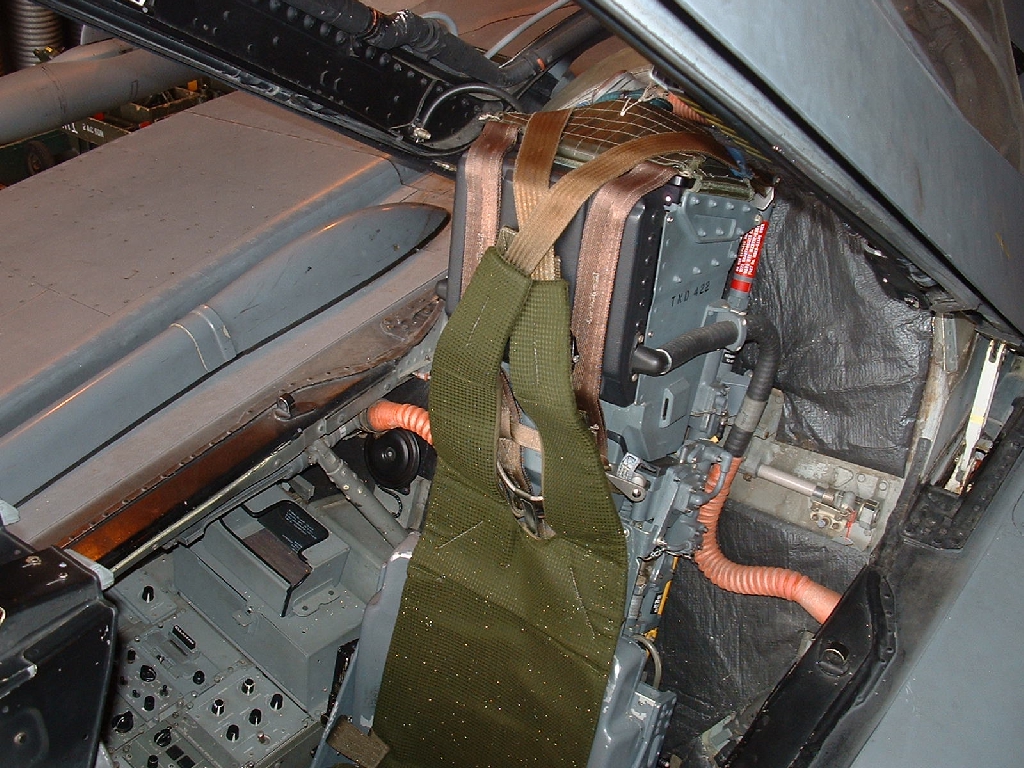
not much to say but some work done on the cockpit


- scvrobeson, LSP_Kevin, wunwinglow and 16 others
-
19
-
well ive finished this set of nights and this afternoon i made a start on the tub, according to my refs its admiralty grey, but as with everything tonka, fade, bdr and wear and tear changes everything, so ive made a mix of paint to base the tub on
and using ref pics made a start on the details, more painting, clear coats, washes and details to go

- Fanes, HerculesPA_2, MikeMaben and 12 others
-
15
-
The ecr has inserts for missiles on the belly rather than pylons, there will be German weapons such as the kormorant, the cockpit layout is different, I recon the ids will be the original German ids which was developed into the ecr so ifcyour thinking raf gr1 it should be possible but the ecr cockpit is very different, you prob would be better with the current boxing


41sqn Tornado - One Giant leap!
in Works in Progress
Posted
so today i thought id make a start on the wings, i was a bit unsure about flaps and slats, now in real life the flaps are only deployed to check intergaty and then are retracted before shut down or in maintainance. however it seemed a shame to waste all that detail so a bit of artistic licence
the wing build is really easy and they are designed to move, although i wont be moving them, you have to aligh the pins otherwise the wing mounts wont fit, so anyone building this, build as if they will move otherwise you will have problems
the eager eyes will notice ive added the actuators for the deployed slats, but i havent fitted them, and on the right wing ive left off the upper ?airbreak they will be added later in a slightly lighter paint, to simulate a BDR replacement
putting the wings in place is really awkward you need 7 hands and the smallest screwdriver in the world, i didnt have one!! even a screwdrive for repairing spectacles was too big, i ended up using a blade
the side are glues and its all weighted, ill let it dry overnight before i mate it to the front section