

EmperorKai
-
Posts
575 -
Joined
-
Last visited
-
Days Won
7
Content Type
Profiles
Forums
Events
Posts posted by EmperorKai
-
-
Emperor,
Really nice work there on your NAW. I hope you will publish finished photos of it.
Thought I might contribute a little bit to the discussion on the windscreen.
There are three reasons for the switch to a single piece windscreen.
1. Birdstrike vs. Small Arms.
While the existing windscreen is indeed 'bullet proof' (7.62mm API), that is -all- it is and only the main panel is so rated, not the quarter panels. It will not stop 12.7mm (Tank) 14.5mm (BTR) or 23mm (Zoos). To be honest, from that aspect, you'd be fortunate if the bathtub did. Given the period GSFG/WARPAC threat, by the time you close enough for small arms fire to pose a serious risk, especially at night, you had better be down to harsh language and rude gestures yourself. The reverse was true of bird strike. Generally you outrun anything you might hit as birds are only roused by overhead jet noise in the aftermath of their wakes. But CAS often requires tight orbits over a narrow area where risen flocks of birds could pose a real second-pass problem as you went in for five minutes to rough the enemy up and then backed of for 5-10 more before rinse-repeating. Under these conditions, where a solid windscreen will bow and deform in a rippling wave effect (after being struck by a bird), it will not break. A framed windscreen however usually shears on the unequal stress lines of the frame posts and this shear causes the quarter panels to shatter and shrapnel spray the whole cockpit. Razor sharp and heavy fragments of Polycarb are far worse than the bird itself in this.
2. Raster Presentation of FLIR.
While it was not generally assumed that the jet would get the WARHUD (holographic raster presentation) systems being developed for the F-15E and F-16C.40, you do need to have a wide field of view system so that there is minimal tunnel-speeding effect and some look into turn ability on which to present 1:1 scaled imagery. Where the windscreen frames interfere with this, they 'superimpose' an artificial lateral terminus that disagrees with the infinity projection of the image itself. So the windscreen post frames had to go, along with the double combiner stack and it's own heavy side frames.
3. Night Vision Effects.
While we were not using the existing Gen-2 goggles at the time within the fast jet community, it was discovered, later in the early 90s, that the main, armored, windscreen panel was so heavily leaded that it interfered with the performance of the Gen-3 M949s (ANVIS-9) which were then coming online. This is important because, while goggles greatly exacerbate the risks of low altitude ejections, they also provide significantly better look into turn and threat tracking. You can literally see a missile launch from dozens of miles away because it is a very intense, near-IR, source. Almost like a small sunrise. As a result most pilots prefer night vision on a stick over HUD FLIR.
With regard to the WX-50 pod. It was a strange looking beast with a nose/radome assembly almost half again as large as the rest of the pod with a noticeable step in diameter as a result. The scanner was fifteen inches across with perhaps another 6-8" on either side. The Flight Global from 6-12-76 has a couple of good renderings of the pod on a Skyhawk and in sectioned view. Possibly enough to let you scratch build. Note the conformal ECS vent system on the back which looks somewhat like the drogue receptacle on a KC-130 wing tank (I can't paste LINKS here so check out the Wikipedia listing for Google: 'Hose Drogue Pod'). I believe Attack Squadron resin models makes this pod as part of their KC-130W upgrade in 1/72nd. Useless for the Trumpeter but possible for the Hobbyboss.
Though the late 1979 Aviation Week article on the NAW A-10 shows the WX-50 radar in the forward section of the port landing gear sponson, I have some question over the utility of the unit in this location. Namely, in a starboard turn there is no look angle as the fuselage masks. The FLIR was never intended to be more than a basic terminal (gun) targeting aid with a FOV of approximately 20` to either side and a laser range finding ability only. But the radar needs to have a full look angle of at least 80`, both in searching for MTI ground targets to cue the FLIR onto and to assist with manual terrain following.
This means a suspended centerline pod. Which is not all that hard to do as the station easily spanwise and longitudinally clears the inboard wing hardpoints and is rarely used otherwise.
Just some thoughts, hope your hard effort turns out well.
GLAAR!
First- Awesome name!
Second- Awesome post! I appreciate the input and it has given me a bit to consider in regards to the single piece windscreen. It's been a while since I've had a chance to sit down at the bench much less get back to this one, so this is still sitting off to the side patiently waiting...
Hope things slow down enough to get back to some modeling soon

Thanks again and for looking in on my build!
Kai
-
OK, I'm definitely picking up a Kingfisher and I already have the 2 different Revell Ar196 kits...
Are there any other floatplanes available in 1/32 plastic right now? Actual kits I mean, not conversions.
In plastic, Wingnut Wings do a couple: Hansa-Brandenburg W.29 and Felixstowe, which is or was available as some super set dogfight double.
In resin and fibreglass quite a few, including the giant HpH Catalina.
I'm waiting for a 1/32 IM Seiran and Grumman Duck.
Tony
A few others in 1/32:
- Doyusha K5Y2 Willow (Type 93 Akatombo)
- Revell PA-18-150 Piper Super Cub Floatplane
- HPH Supermarine Walrus
Kai
-
-
Very cool!
Kai
-
In the middle of a build of a Fisher kit myself (F4D) and have the other kits as well. The instructions do require extra attention, and there are some tricky spots.
In regards to the instrument panel, I understand the skepticism, however they actually turn out pretty decent with the photocopied dials.

Kai
-
Thanks guys! Thanks for keeping me going.
As usual, I've been plugging away at it a little at a time and have some updated pics. Have more to show actually, but I'll start with these for now.

To backtrack just a bit, the intakes are tricky to mask along the interior edge, and are much easier if done BEFORE gluing them into place. Paul's instructions point this out and it is good advice.

A pic before the forward fuselage is joined to give an idea of the join lines.

A last look at the compressor face. Once the intakes are in place, only a small part of this will be visible.

Here, the intakes are dry-fitted in place and not quite lined up yet. It is also possible to see here where the underside of the upper clam shell was ground down with a Dremel to make the joining step go trouble free.

The intakes and fuselage finally in place with CA. The intakes went in first, and were aligned with the fuselage and wing. Then they were cleaned up and the seam lines filled. Then the fuselage went in last- everything went according to plan without any issues.

The join line on the spine had a considerable gap, which was filled with plastic and CA.

The joins between the forward fuselage, clamsell and inakes all come together here. All the previous prep work has paid off nicely and very little is left to do here.

Stepping back a bit to see how it all comes together.

Once the seams were all cleaned up, lost panel lines were re-scribed and missing panel lines were added. There is also a dimple that was added on the underside, seen here on the right side of the pic.

Lots of additional panel lines were added on the underside, mainly along the center sections. The aft fuselage section features prominent rivets, especially around the unpainted section, which were added.
Will have more shortly- thanks for looking!
Kai
- sandokan, Hubert Boillot and Zero77
-
 3
3
-
Thank you jmreed76 and EmperorKai for the positive comments. EmperorKai I dry fit those together and it looks like a very tight fit even though I did not put PE and the HUD glass in. Would like ideas on how to remedy that.
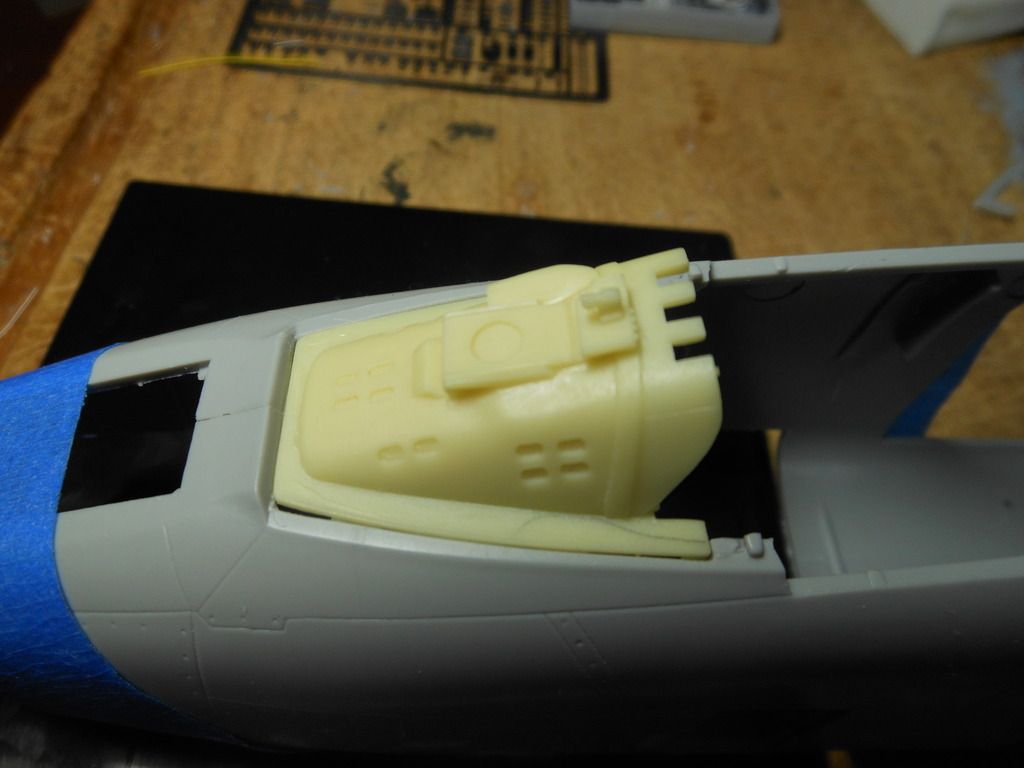

Hi WROBO-
I ended up mounting the coaming UNDER the kit dash area instead of even with (or on top). The instructions are confusing and at first I did it the same way you have it. After discovering it would be too tall, I had to fill in the areas I had cut with sheet plastic and then mounted the Verlinden piece as seen here in this pic. Note that my build (link to it is in my signature) is a 2 seat A-10B with the F-15 HUD.

I would estimate the height of the HUD assemblies are the same either way though.
Hope this helps!
Kai
-
Waroff-
I just had a chance to catch up on this thread. You have done a beautiful job! If it is not too late, I would love to have the opportunity to have and build this kit- can you please add me to your list?
Kai
-
Hey WROBO-
Following along with your build- looks great!
Just a friendly heads up- You might want to check the fit of your dash though with the windscreen in place. When you do your check, be sure to accommodate for the HUD glass as it will stick up higher. I used the same dash on mine and found that it sits pretty high and can interfere with the windscreen, especially if you use the Squadron replacement.
Looking forward to more!
Kai
-
Wow- Beautiful work Dave
Kai
-
-
hmm. "Paleface"?
Did find the following:
440621 SMITH, THOMAS O P-40N 43-22863 SHWANGLIU, CHINA440621 P-40N 43-22863 60FS 33FG 14 LAC 3 Smith, Thomas O CHI Shwangliulanding accident 321 Jun 44 43-22863 Curtiss P-40N-20-CU Warhawk Smith, Thomas O 60FS 33FG 14AF Damaged landing, Shwangliu, ChinaAlso found this while searching- in regards to "Lulu Belle", thought it was interesting. Looks like a blue border to me, but hard to tell

-
Ordered my Curtiss F7C-1 today. Looks fantastic
Peter
Me too! Can't wait.
Kai
-
I believe the early , up to b-25H-5 had them on the left only , then they had them both sides
The breach block is their The Block is in the open position. The Block drops down. The square silver area on the left side of the Breach is the channel that the block travels up and down. The Brass item is the back of the spent round. Not sure what the aluminum handle screw driver looking thing is? It's wedged between the round back and breach block forward top edge.
Hope it is some help http://www.scaleplasticandrail.com/kaboom/images/stories/hkmodels/b25hprev/Screen-Shot-2014-02-02-at-21.35.jpg
Cheers
Outstanding guys- I didn't know about the asynchronous gun pack installation. And the added info regarding the 75mm gun makes sense. Perhaps the silver handle serves in part to satisfy demilitarization requirements? Regardless, it doesn't look like it originally belongs there.
Kai
-
Looks great Andrew!
Kai
-
Nice video Maru!
Okay- here's a few stills from the crappy iPhone video. I think there's a couple of shots of the interior in here that might be useful.

Sitting in the right jump seat and looking back, the spindle for the turret and the lower portion of the forward bomb bay bulkhead.

Looking down, below the turret spindle, is the hatch. The gunner's feet rest on top the hatch, and the gunner's seat folds against the side.

Looking up into the turret. The sight is in the middle. The turret position is best for smaller folk as the framing does not leave much room as it is meant really for just the head and shoulders. The arms go under the frame.

Not to put too fine a point on it, the turret is much smaller that one would think. This is the view if the iPhone is placed on top the head. Normally the view is lower, and the barrels themselves are obscured. The M2 50 cal machine guns are basically ear muffs. Seriously.
I spent quite a bit of time in the turret. I tried to envision what it must have been like to be scanning the skies for bogeys with such limited view, much of which is distorted by the perspex. To see left or right, the back of the head has to be nearly pressed against the back of the turret to see around the guns. Cold air cold blows through cracks and joints, and even then the sulfur smell of spent gun powder must have been overwhelming.

Downtown Denver.

Forward view from the jump seat. I don't think the hula girl was standard issue, but check your references.
That's the last of it. Hope this helps. It was fun going through these pics again.
Kai
-
Oh, I forgot to mention. Not sure if you noticed, but on the currently flying Barbie III, it has the gun packs on the right side only, but none on the left. I've never seen where it was flown in this arrangement during the war.
Glad you like- this is one of my other hobbies- flying on restored aircraft.
Kai
-
I used a DSLR for photos, and my iPhone for video. I wasn't getting along with the camera equipment that day, and ultimately wanted to really soak in the experience, so unfortunately I didn't get much in the way of photos from the jump seat.

From the gunner's seat, looking forward and above the cannon, the flight deck is eye level. Yes, that is someone's foot on the left.

Standing up and looking up from the gunner's seat. The jump seats were added for rides, but makes for cramped quarters for everyone involved. If one were to turn to the left in this photo, the turret stem and mount would take up most of the space.
I have a few more of the interior in general

After landing, I did a walk around and then went back in to the back half of the plane. Here, just aft of the bomb bay, looking forward towards the cockpit. This space was packed with equipment during wartime.

Same spot looking aft towards the rear gunners position. I think it was shortly after this pic that they had to drag me off the plane kicking and screaming.
Kai
-
Nothing but respect to DACO for considering a project like this- never been done before and sounds like it will be a pretty comprehensive kit as it is envisioned right now.
But "This kit will contain more than 450 parts..." and "the tooling price is much, much higher than anticipated" go hand-in-hand. Complete engines and what looks like fairly extensive interior detailing drive the cost up, and unnecessarily so when many (probably most) builders won't use them.
I agree with the points made already- $35 to $55 is probably the sweet spot for a kit of this aircraft. It might fetch more in Europe, but in the same way an F-11 Tiger or F-101 Voodoo doesn't command much demand abroad, I don't think a Magister will have as much appeal in the US market. There are other subjects that might, such as a Buccaneer, Jaguar, Rafale, Etendard, etc that would have wider appeal...
Bottom line- I'd like to see DACO be successful- to do this kit, make money and look to doing others. But IMHO, I don't see anything north of $75 for this particular subject matter selling too well.
Kai
- geedubelyer, Zero77, rafju and 1 other
-
4
-
From my last flight on Barbie III. For takeoff, I sat down the in the gunners seat. Dark, cramped and LOUD (there's loud, very loud and then R-2600 loud). Only thing between the gunner and those 2 radials is aluminum skin. I can only imagine what it must have been like with four 50 cal gun packs blasting away just on the exterior of that fuselage.
I spent most of the flight up in the turret, and for landing, I was in the jump seat behind the pilot.


I believe the breach block has been removed, so this is not a complete setup.
Kai
-
-
Nice! I like the recipe for your wash too- Looks awesome

Kai
-
Beautiful job!
John,
The conversion set is available on ebay: http://www.ebay.com/itm/1-35-GSh-30K-fixed-twin-barrel-gun-for-the-helicopter-Mi-24P-/121734699651?hash=item1c57f41a83
This is a very nice resin set with good details, the instructions are spartan but with good reference it is not a problem. The fitting of the new chin to the Trumpeter fuse is by no means perfect (but maybe it was just my limited skills) but nothing that filler and sanding cannot fix. I actually replaced the barrels of the GSh-30k with barrels from RB Model L2A1 Rarden Barrel cut to size and mated to the resin flame hiders from the conversion set. The barrels of the conversion set are simple copper rods and I thought the RB models looked better.
I had the Hind in my stash for a while and always hoped to convert it to a P because the twin 30mm look so badass. So when I saw that Ruporator was doing a conversion set this spring (he also does the gunship conversion for the Mi-17), I knew I had to do it. I used the Verlinden Lock-on and also Yefim Gordon Mi-24 book as reference, both are useful.
Now I hope the next GB is a helo GB so I can try my hand at a Mi-17 Gunship.
I got a chuckle out of this- I have pretty much the same stuff ready to go for this project, except for the Ruporator conversion, which I didn't know about, but will save some time (nice tip- thanks!). I might also mention that Profimodeler also has wheels, rotor hub and other detail bits for the Mi-17/24.
Well done Dukie!
Kai
-


A-10B Desert Storm: 2/28 Taking a break
in Double Trouble!
Posted
Hey there Maru-
It's still sitting next to the work bench along with the Skyray. Have been quite busy with work and life in general, so haven't had much of a chance to build for quite awhile. One of the projects I've been picking at is a general re-organization of the man-cave, but once that is squared away, there should be plenty of motivation to get back to some bench time.
Thanks for checking in on this
Kai