
Uilleann
-
Posts
571 -
Joined
-
Last visited
-
Days Won
2
Content Type
Profiles
Forums
Events
Everything posted by Uilleann
-

1/32 Trumpeter F-117A Nighthawk - in 45 Days!?!?
Uilleann replied to DoogsATX's topic in Works in Progress
Oh I know that point in a build intimately! Hehehe (How many years now has my own '117 build stalled?!) But love the progress you're making! On this jet in particular, the devil really is in the details...because there are so few of them on the fuselage. Taking the time to really sort out the cockpit & gear wells pays off in spades with this jet I think. Great work so far! Would love to see your work on the cockpit and bulkhead if you have any progress photos. Also, when the time comes, if you're opting to use the PE RCS screens in front of the engine intakes instead of the solid plastic versions, the intakes themselves were painted white - not black. Well, a "dirty white" is what I've seen and been told in confirmation. Mike at Sierra Hotel also has some very nice engine face updates for the GE F404. -
Peter. Please begin labeling all of your posts "NSFW". The swearing every time I see them is getting me in to heaps of trouble over here!
-
1/32 Trumpeter F-117A Nighthawk - in 45 Days!?!?
Uilleann replied to DoogsATX's topic in Works in Progress
Really beginning to look the part now! It's funny how difficult those little screens can be to get looking "correct". But from what I can see, you nailed it. Good show! B~ P.S. When the time comes, don't forget the rear bulkhead behind the bang seat is also gray. -
1/32 Trumpeter F-117A Nighthawk - in 45 Days!?!?
Uilleann replied to DoogsATX's topic in Works in Progress
Excellent work Matt! I've recently asked about the little red thingymabob myself on the Nighthawk FB group...but no replies so far. I'm assuming is't something to do with calibration/indexing of the FLIR? But none is present on the DLIR, so who knows. At one point, I had the Eduard interior (cockpit) set myself, but ended up using the Aires update instead. If I can find it, would you like me to send it your way? I'm happy to look regardless. I'm about 73.6749% certain I've got it floating around in my stack of goodies on the desk. If I might suggest a slight tweak to the FLIR and DLIR mesh (which looks cracking by the way!) I believe the mesh did have a metallic sheen to it as opposed to being flat black. I might suggest a subtle buffed sheen such as Testor's metalizers or very dark alclad finish. I've been trying to find an appropriate sized mesh screen myself, and it's not as easy as one would thing for this part. Well done! Your front panel is coming along nicely as well. I used a theater gel to get the screens looking more prototypical...but if you're going to use the kit panel, you can go all out and light those suckers up! I tried it a few years back and was surprised how well it turned out (in 1/48 even): Now I know this is a relatively quick build...so that isn't likely the way to go. But it was fun, and not terribly difficult, should you wish to do something similar in future. I just got a new desk put up down in the basement specifically for this build, so I'm hoping to make some forward progress myself in the near future. You're definitely keeping me motivated. Cheers Matt! -
1/32 Trumpeter F-117A Nighthawk - in 45 Days!?!?
Uilleann replied to DoogsATX's topic in Works in Progress
I worked out a fix here for the oversized cockpit and the properly sized QB seat conundrum that seemed to work fairly well, and low cost too. One point to remember, is that the rear bulkhead and cockpit should be overall painted a medium gray with a slight bluish cast. The main IP, and switch/button clusters on the sidewalls were black, but the gray was seen between and around them. Such as this. Great work on the black jet so far! Love seeing any builds of this one...especially in a proper 1/32 size! -
1/32 Trumpeter F-117A Nighthawk - in 45 Days!?!?
Uilleann replied to DoogsATX's topic in Works in Progress
I've got hundreds of reference images Matt, if you'd like me to send them on, collected over literally decades of research on this aircraft. A number of them aren't readily available on the web. As for the door bumpers, I would think they could be grafted back on easily enough with some small styrene bits. Research on this airframe has been something of a personal mission of mine for ages now. I'm happy to send what I have on to anyone interested - just shot me a PM here and I can get them sent. I'm hopeful others may be able to benefit from my searching and own mistakes in my build as well. The removal of the weird "ram tape / patches" on the upper surfaces is correct of course. But I would suggest checking each one against multiple references to verify if it a feature should be removed entirely, minimized in appearance, or left as is. Cheers! Brian~ -
1/32 Trumpeter F-117A Nighthawk - in 45 Days!?!?
Uilleann replied to DoogsATX's topic in Works in Progress
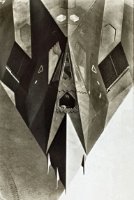
The raised diamonds on the bomb bay doors are accurately represented. They were present on the actual jets as bumpers when the doors opened quickly in flight, and served as a sort of bumper against the doors hitting each other with the A/C in flight. They are visible in many images of the underside, such as this example: Hope that might be helpful! -
F-117A Nighthawk (channelling my inner scratch builder)
Uilleann replied to Uilleann's topic in Works in Progress
Hey Tom! You absolutely should dust off! If I can get my PE set sorted out, I'll throw one in the mail to you straight away. Just to help keep your own Nighthawk fire buring as well. ☺ Let me get it all banged out first of course, and make sure the bloody thing even fits first though. Hehehe -
Peter. Seriously. You're HIRED! I don't even care what you make...but I want you to do this all over my entire house! No reason. Except it's PURE AWESOME!!!
-
1/32 Trumpeter F-117A Nighthawk - in 45 Days!?!?
Uilleann replied to DoogsATX's topic in Works in Progress
Excellent Matt! I've been hammering away at the same kit for a while now, and have just begun the process once again of dusting off the bits that had bogged me down, and trying to push forward. Lots of mistakes, and trial and error, but it's a very fun build all in all. A bit of a blank canvas to detail as much or little as one might wish. If it's of any help, I've got my own build log/saga you're welcome to poke around in and see if there's any info useful to help speed your own completion. http://forum.largescaleplanes.com/index.php?showtopic=45784 Looking forward to following your own build here myself, and learning as much as I can. Cheers! Brian~ -
F-117A Nighthawk (channelling my inner scratch builder)
Uilleann replied to Uilleann's topic in Works in Progress
Well well...the old thread is still here. Look at that. I think it's a fair bet to say that 2016 on the whole was a particularly brutal year for many of us. The loss of so many incredibly talented artists and performers, and of course, our pup Mosey a year ago this month. Unfortunately, about a month after, my beautiful bride also lost her little brother to suicide. Needless to say, we're all forever changed. To say it's been hard to find the desire, and the happiness, in even simple things (like modeling again) would be massively understating our past year. But I have slowly felt some of that inner push to get back to the bench. In addition, the model store - the *only* model store anywhere near my house, that was a great place to find paints, tools, and random plastic and metal parts, went out of business and closed their doors forever. But - through it all, trying to keep calm and carry on. In addition to the above, my web hosting carrier was sold or some such nonsense over the past year, and all of my images got locked away in a new 'secure' file structure. Which required me to copy everything into a new directory, and then start the joyous task of going through one by one, and updating links to all the images in this now 4 year old thread. It was a treat I can tell you! I think I got everything sorted out, but if any of you good souls notice broken image pointers or links, and would be so kind as to let me know, I'll happily fix them asap. One of the last things I was working on here and there, was an attempt to sort out some custom PE parts for this kit. The gear door uplocks were one item in particular I was very interested in trying to get right (as they're fairly visible). And the more I looked at it, the exhaust vanes in the famous 'platypus' system used on the F-117A look quite different from the Trumpeter interpretation. So I added that to the PE workload. Still have a bit of tweaking to get final shapes and dimensions correct I'm afraid, but I am at least, closer than when I started. The current iteration looks something like this: Exhaust vanes, uplocks, and a few bits for the gear wells in general. I'm honestly not sure if I will ever get them to a satisfactory spot or not, but I'm determined to give it a go at least once. Again, a MASSIVE shout out to Peter over at airscale. The man has been nothing but absurdly giving of his time, skill, and boundless knowledge. He's quite a treasure, both in modeling badassery, but even more so in just amazing human being-ness... Here's to progress, no matter how small, or indeed how slow. -
Oooohhhhhkaaaaaayyyyyyyyyyyyy...... So clearly every team with a Spit under restoration across the planet will now be using Peter and his little kit here as the defacto standard by which ALL Spits are measured, built, and PROPERLY finished off. Case closed!
-
Quite a haul Peter! A very happy new year to you and yours!!
-
Peter, you better fly that thing right over here state side when she's do everything so we can get a good and proper look in person!
-
Hey Peter - does the shine in the metal reflect enough for you to see my utter envy of you and all you stand for? Good.
-
Very well done indeed!!
-
Flipping. Cripes.
-
I think the greater question really is - does it even matter at this point?!?!
-
..on the outside skin I used some tiny 1mm screws Uilleann sent me to get the fixings right - four can be seen here... ..and here are mine.. My babies!! :wub: Tell me if Peter has treated you well over in cold, damp Scotland?! Has he fed you every night like he promised? Does he take you out for *proper* walkies? None of that treadmill rubbish! Hehehehehe Seriously Peter - I DO in fact have words for your build. But they literally are all swears - and probably not things I should say in front of the Missus. WOW WOW WOW!!! Bri~
-
What the..... I just...... Can't even find the...... Every time I type something - it just comes out swear words Peter! This is simply, absolutely, and unabashedly INSANE! I can't even imagine the chuckles you must have had in your head whilst I tried to work out my "detailed" bits for the F-117A photo etch you were helping me with. This is just beyond NUTS!!! Please NEVER EVER STOP!!
-
Seriously Peter...don't be a looser like me. Updates man! We need em!!
-
I've had an almost complete home remodel crop up since my last postings. Still very interested to get it finished, however. I've been looking at designing additional PE to help correct some of the missing details in the wheel bays, and also to replace the oversized exhaust vanes with properly thinned and detailed versions. As far as the RCS screens over the engines, I'd hoped to be able to convince Mike Valdez (Viper Enforcer) for a bit of inside knowledge and design skill there. But I haven't heard from him in ages - hoping all is OK with himself, and that he's just busy enjoying life! If I can ever get that mess sorted out, I've got great and lofty plans for the final finish of the jet myself. Though time will tell if I have the cajones to actually pull any of it off. At least now, I have yet another amazinf F-117A build finished to taunt me back to the modeling desk once again. Soon I hope! Cheers Brian~
-
Shan - you did it! Looks GREAT! I'm still hoping to finish mine. Some day.....in the future... Great work all around, and love the stories too. Makes it so much cooler!
-
1:32 Lockheed EC-121K Constellation/Warning Star
Uilleann replied to Iain's topic in Works in Progress
Dont know if this was posted to your thread here earlier - or if youd seen this before... But saw this tonight myself, and immediately thought of you Iain!- 686 replies
-
- 2
-

-
- ec-121k
- tigger models
- (and 4 more)
-
Cripes man! I'm quite sure I look just like an ugly carp staring at my screen here. Mouth all agape, gasping for air/words/belief!