

Rick K
-
Posts
1,257 -
Joined
-
Last visited
-
Days Won
10
Content Type
Profiles
Forums
Events
Posts posted by Rick K
-
-
On 4/6/2024 at 9:22 AM, Shawn M said:
outstanding
Thanks Shawn
On 4/6/2024 at 10:04 AM, Archimedes said:That looks tremendous!
Kind regards,
Paul
Thanks Paul
On 4/6/2024 at 6:55 PM, monthebiff said:Absolutely phenomenol finish Rick, I really like the difference in finish of all the different parts. It looks like a real one!!!
Regards Andy
Cheers Andy
On 4/6/2024 at 8:04 PM, LSP_Kevin said:Fantastic, Rick!
Kev
Cheers Kev
-
On 4/7/2024 at 1:50 AM, Greif8 said:
Superb work Rick! I really like how you displayed the finished result as well. Special kudos for the excellent painting work on the pad, it looks like real leather.
Ernest
Danke Ernest.
-
Thank you all for your kind words. Really means much to me. I feel somewhat discouraged as I do not get the time to mine LSP check in and comment on all the beautiful builds There are so many outstanding modelers on this site. It's a privilege to be part of this group.
Cheers - Rick
- Martinnfb, Granger Davis and Christa
-
 3
3
-
On 4/8/2024 at 9:59 AM, Shoggz said:
That's really nice Rick. These FAA Corsairs are about the only planes where I prefer the non-US colours - and you've really done it justice!
Thanks Richard!
On 4/8/2024 at 1:16 PM, LSP_Ray said:Gorgeous!

Thanks Ray!
On 4/8/2024 at 4:47 PM, LSP_Kevin said:That looks great, Rick! That colour scheme really looks good on the Corsair.
Kev
Cheers Kev!
-
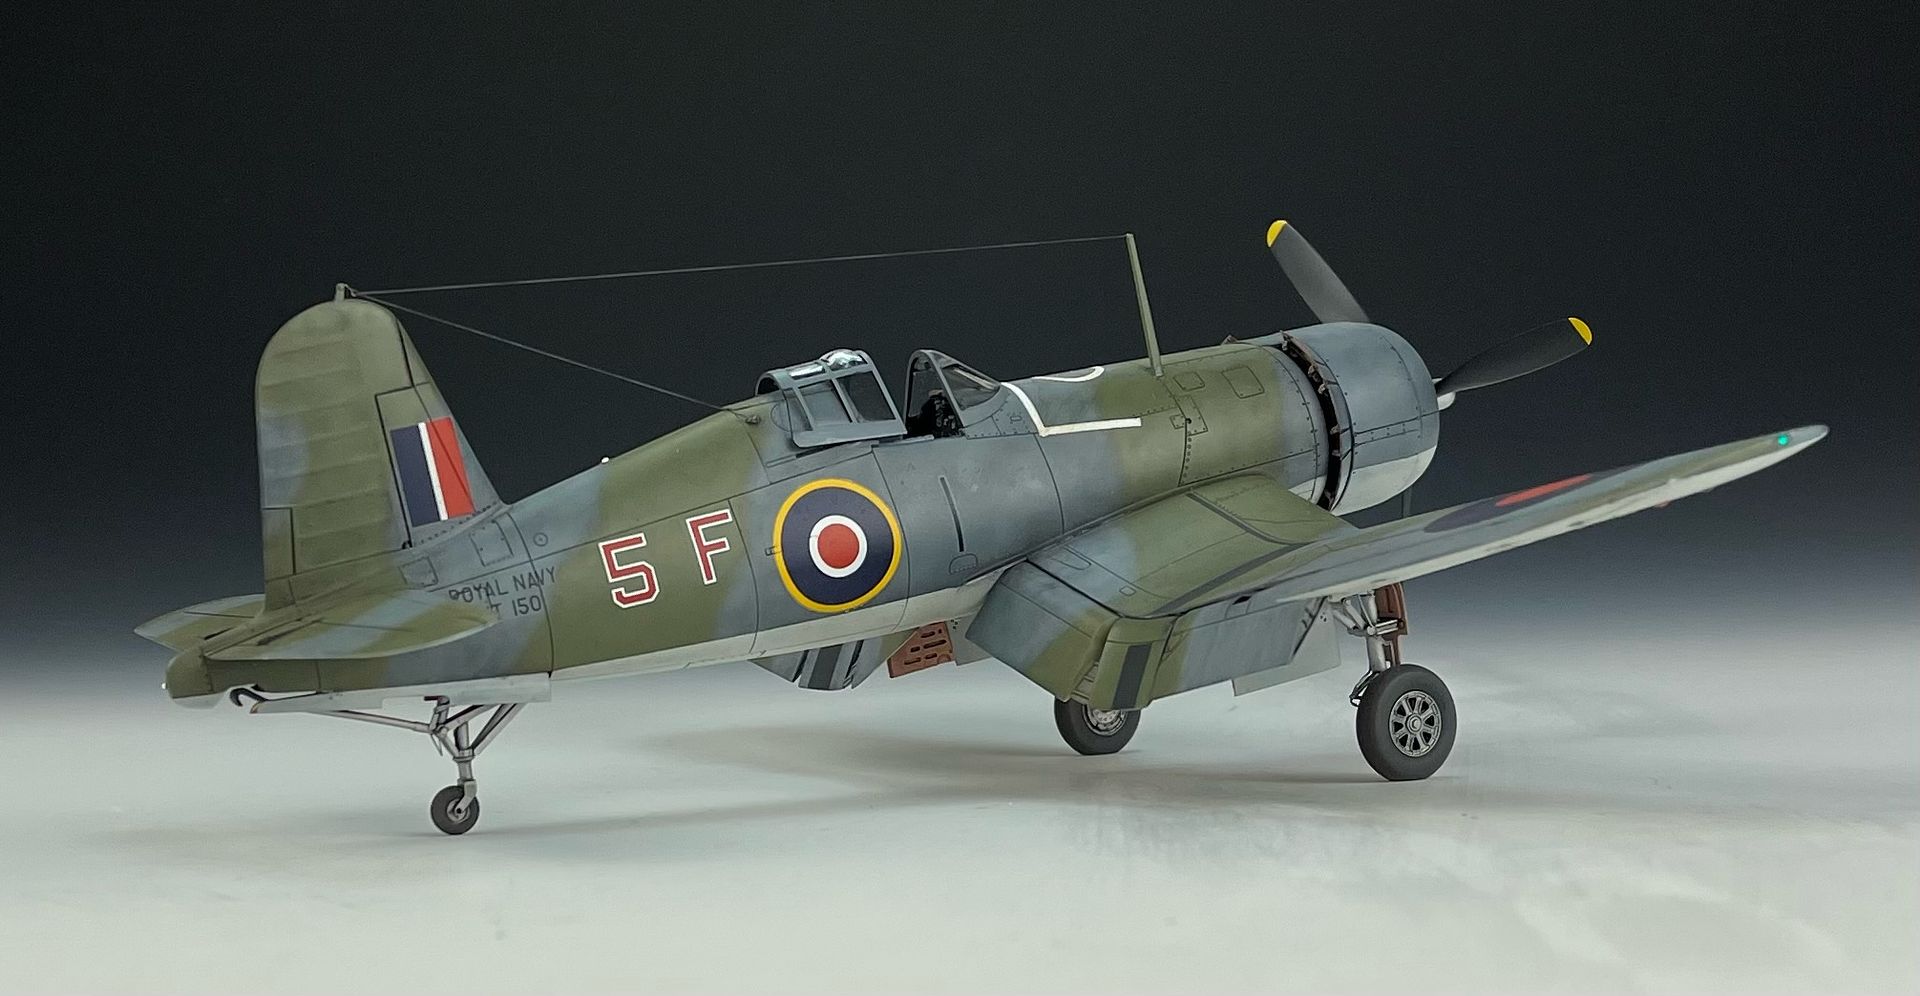
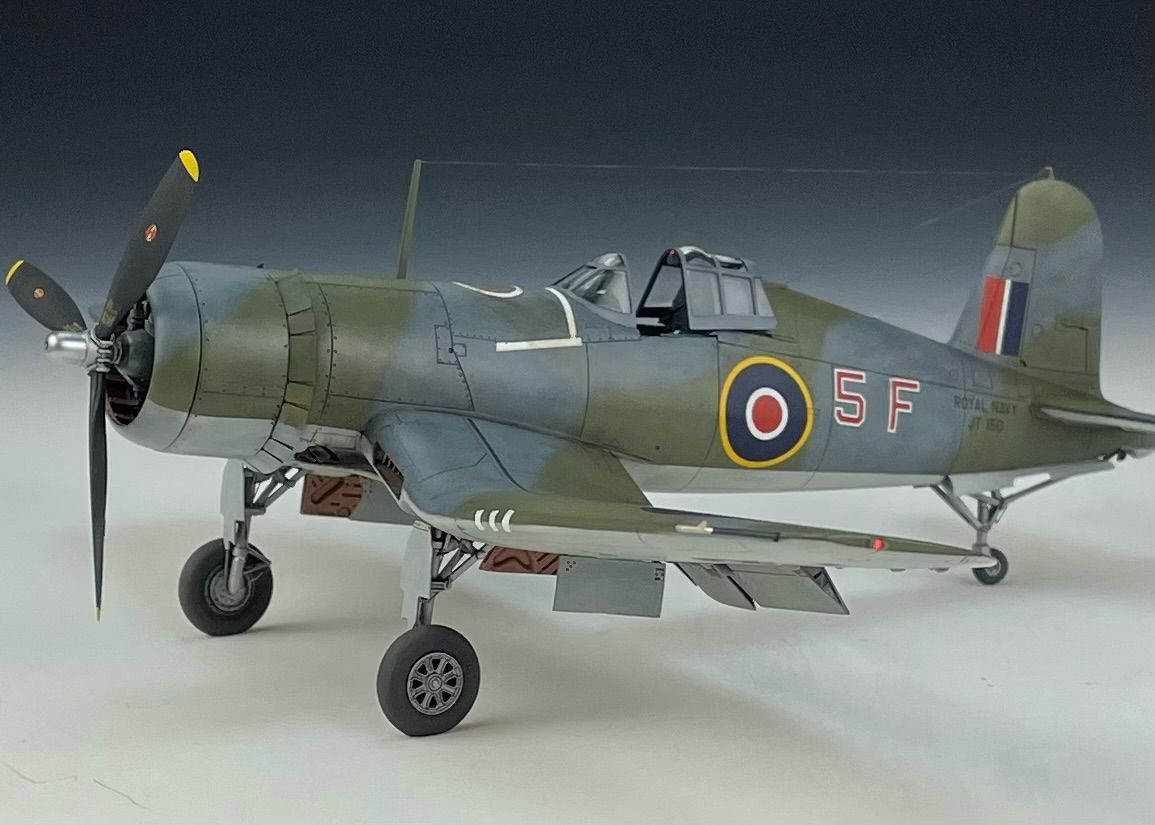
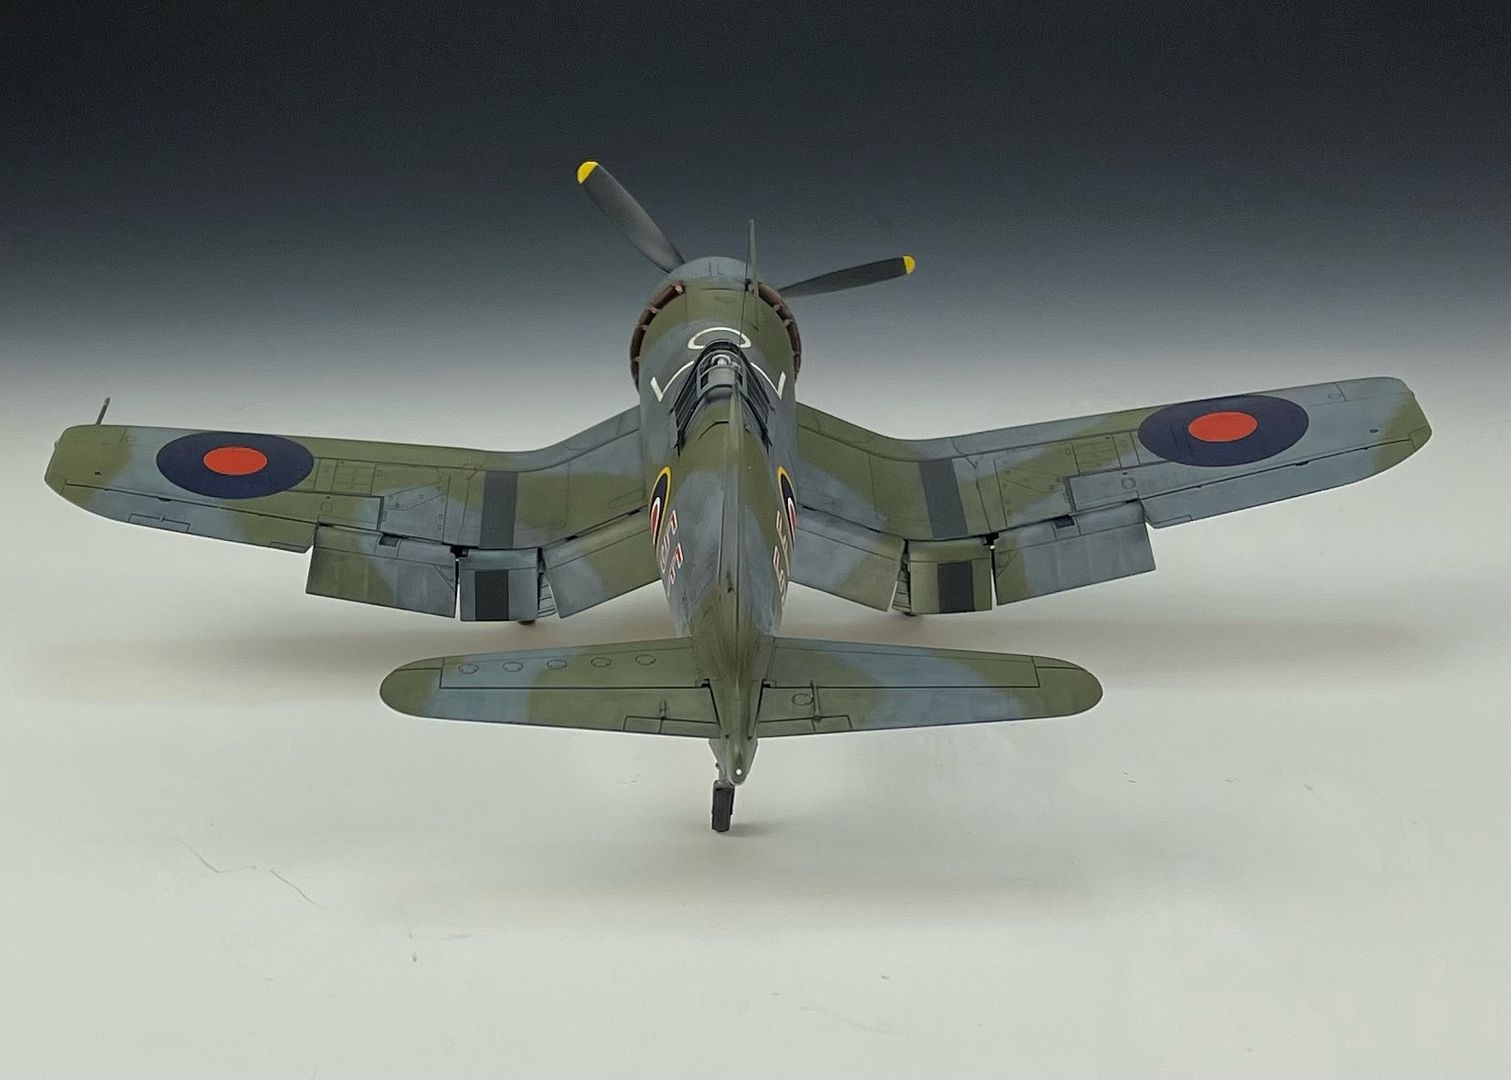
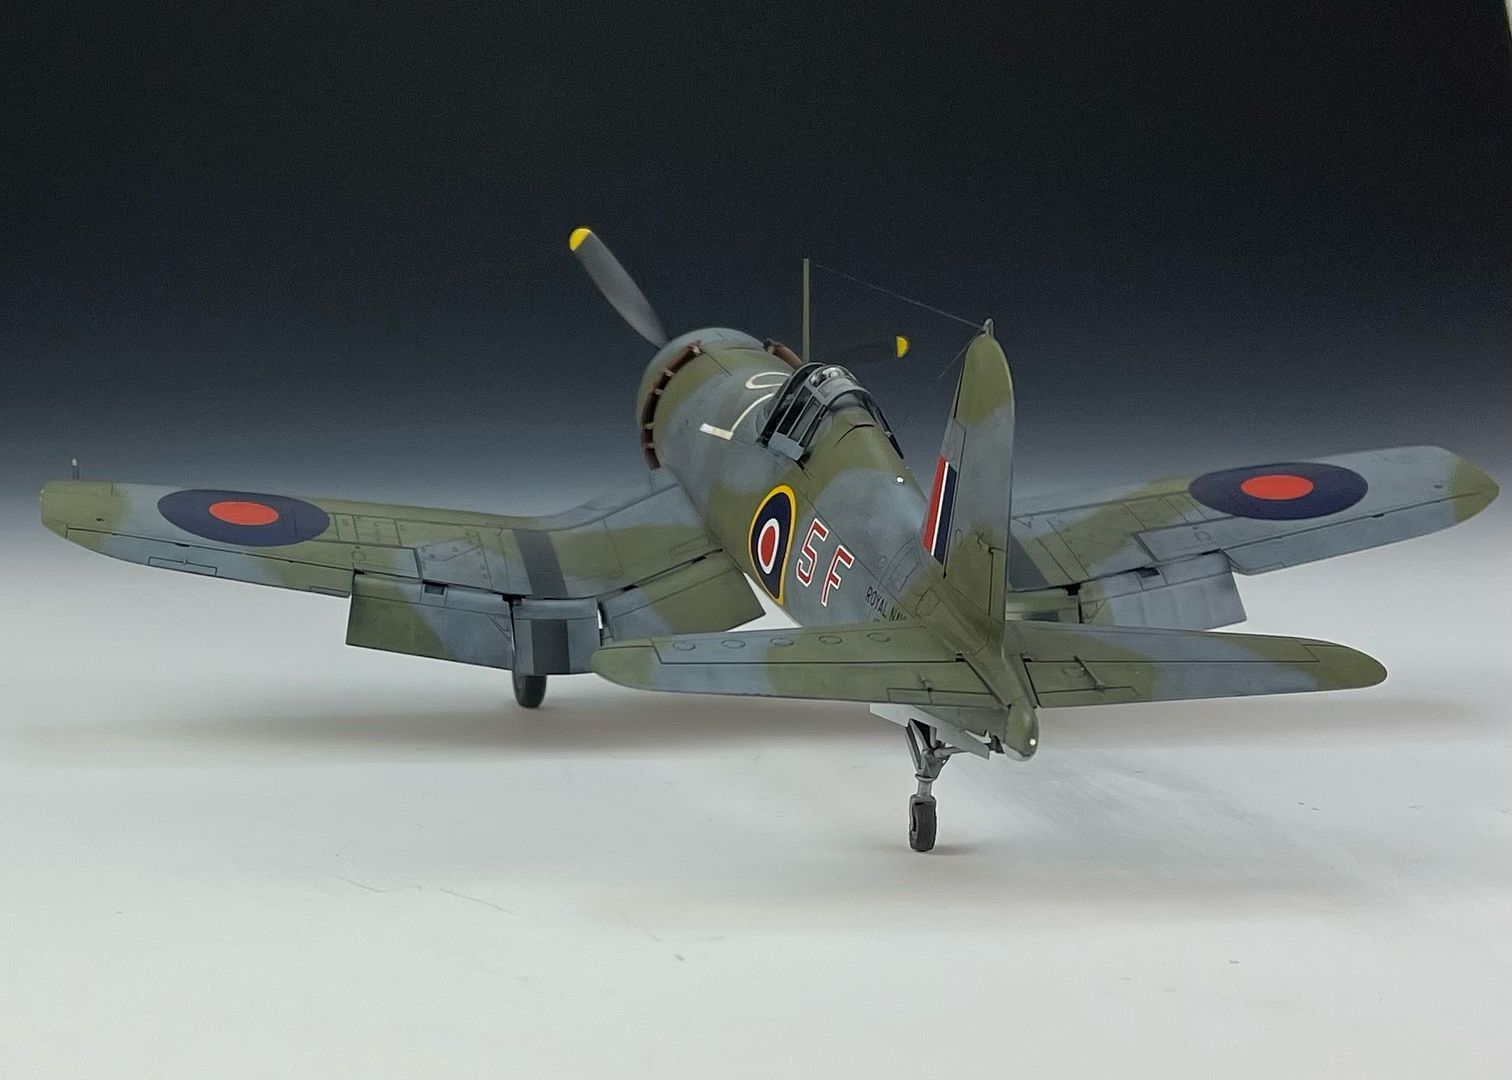
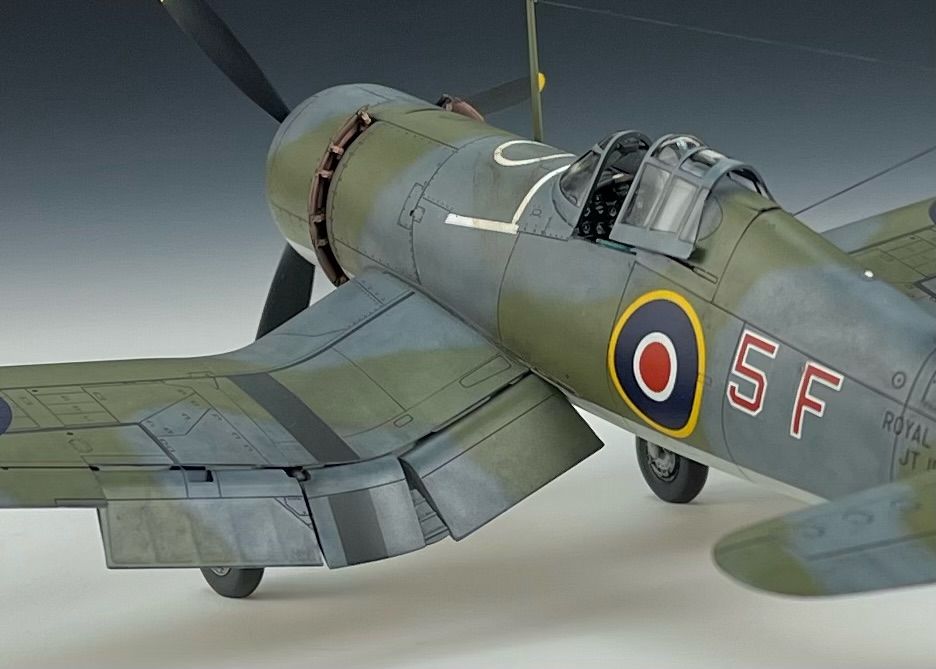
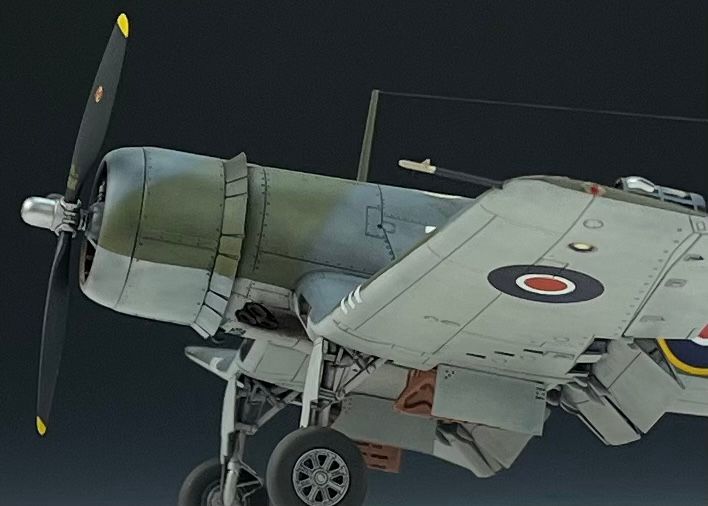
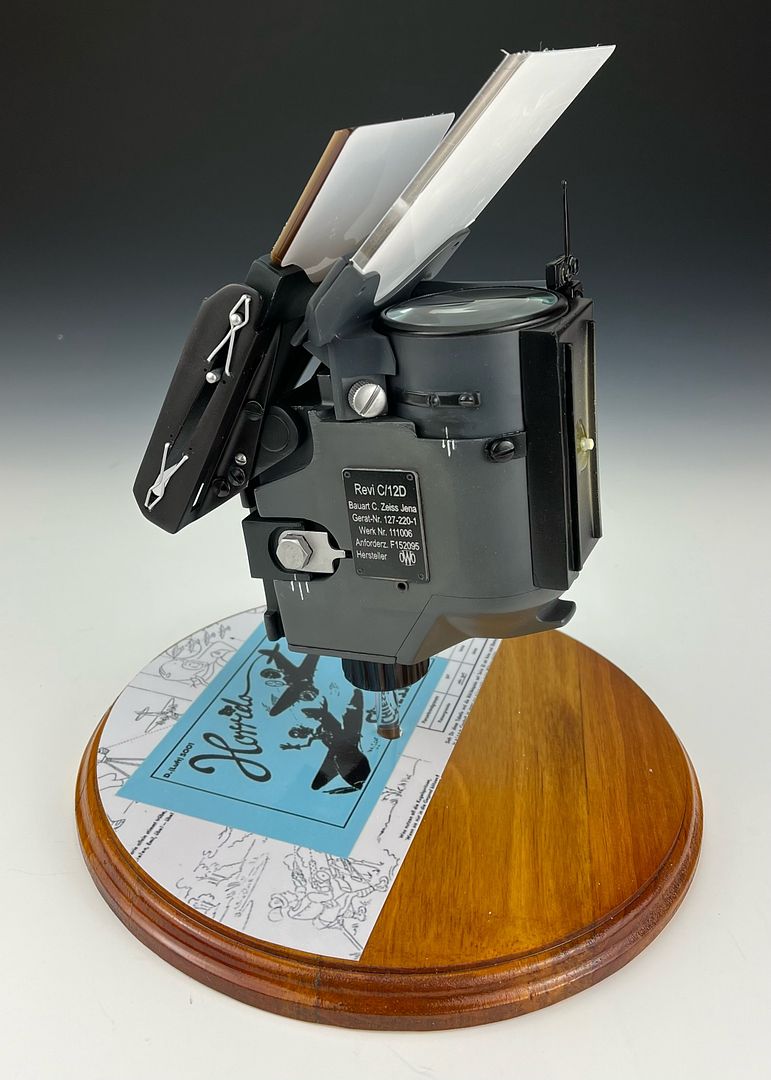
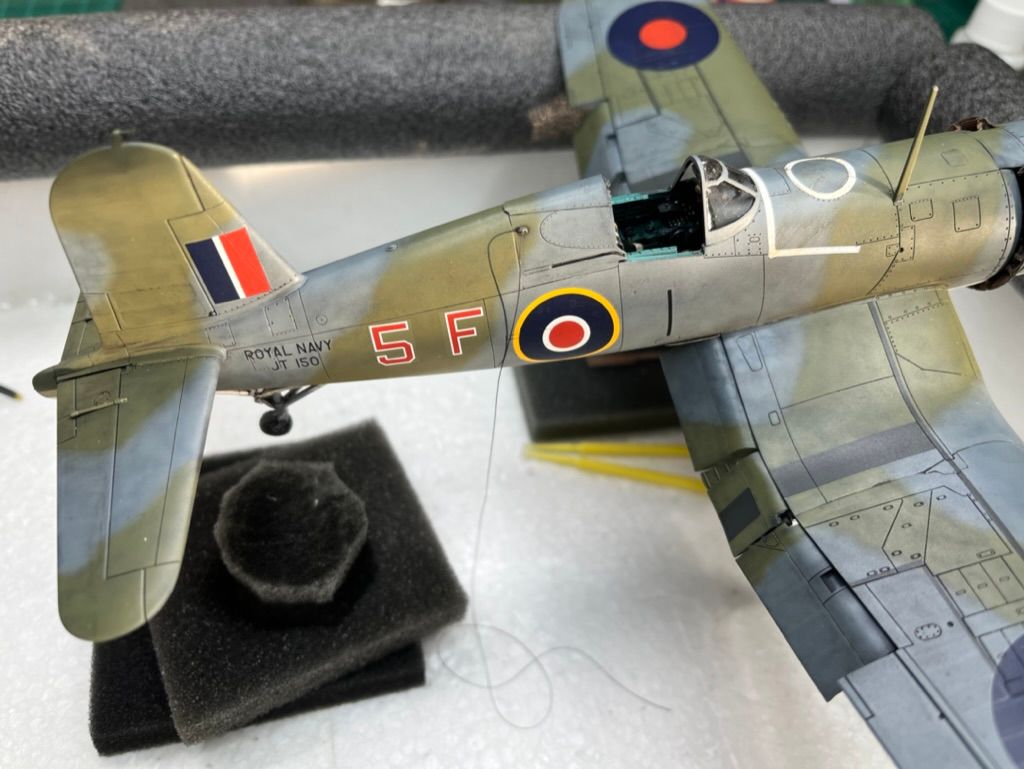
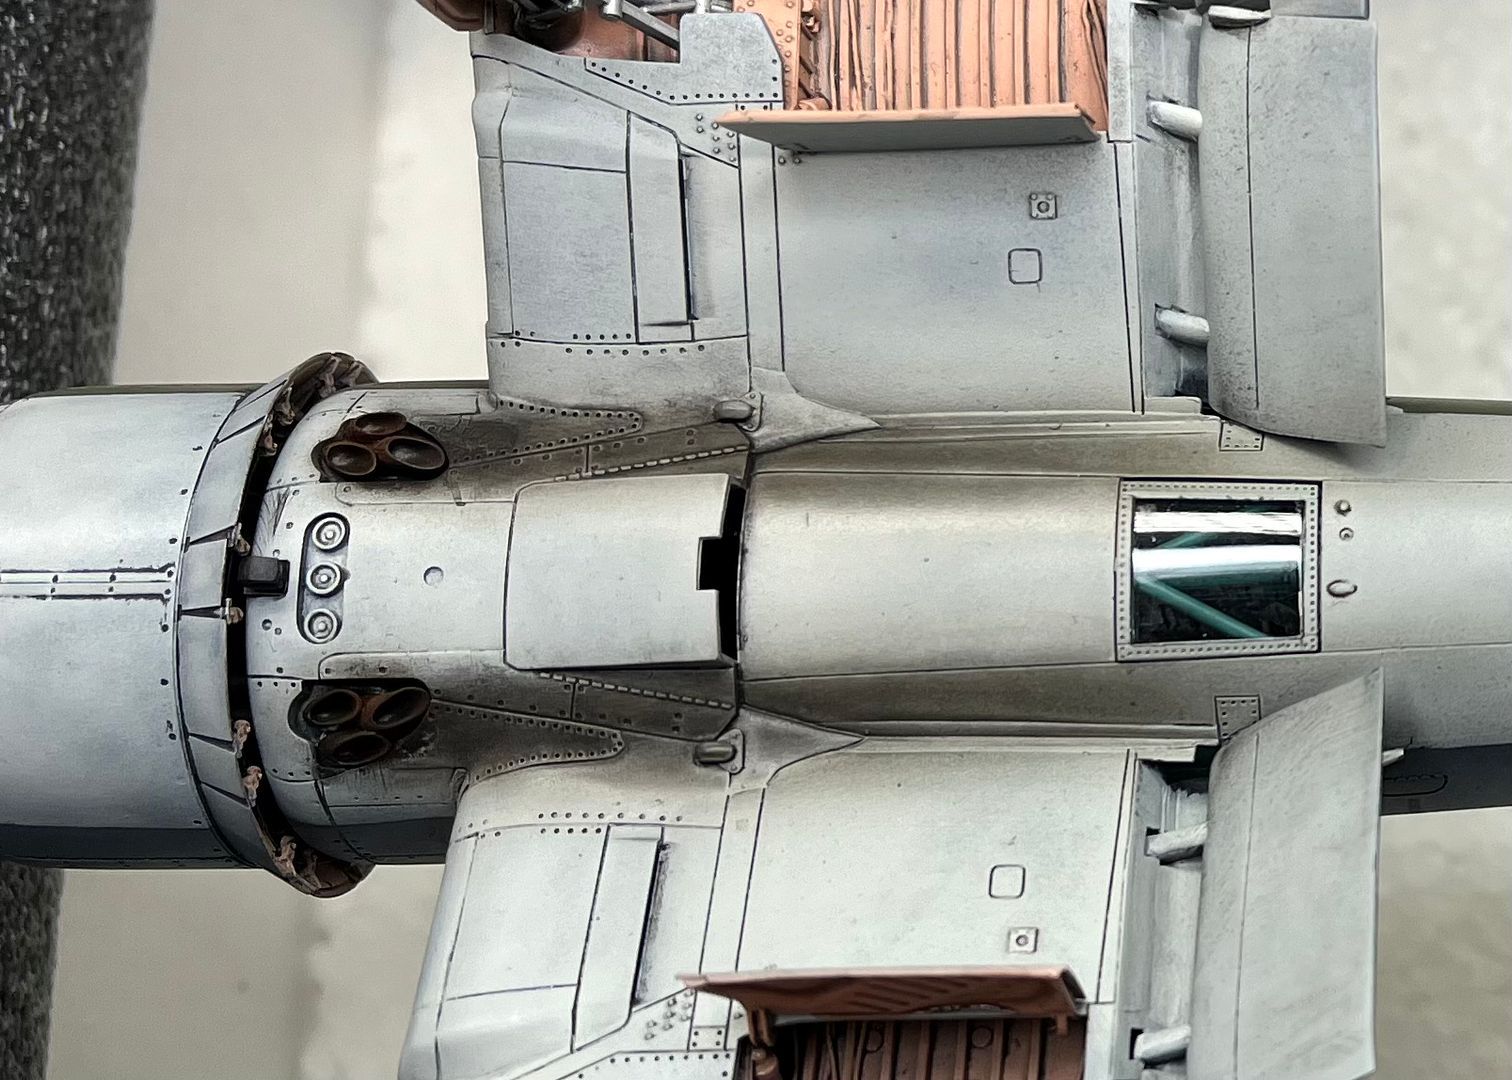
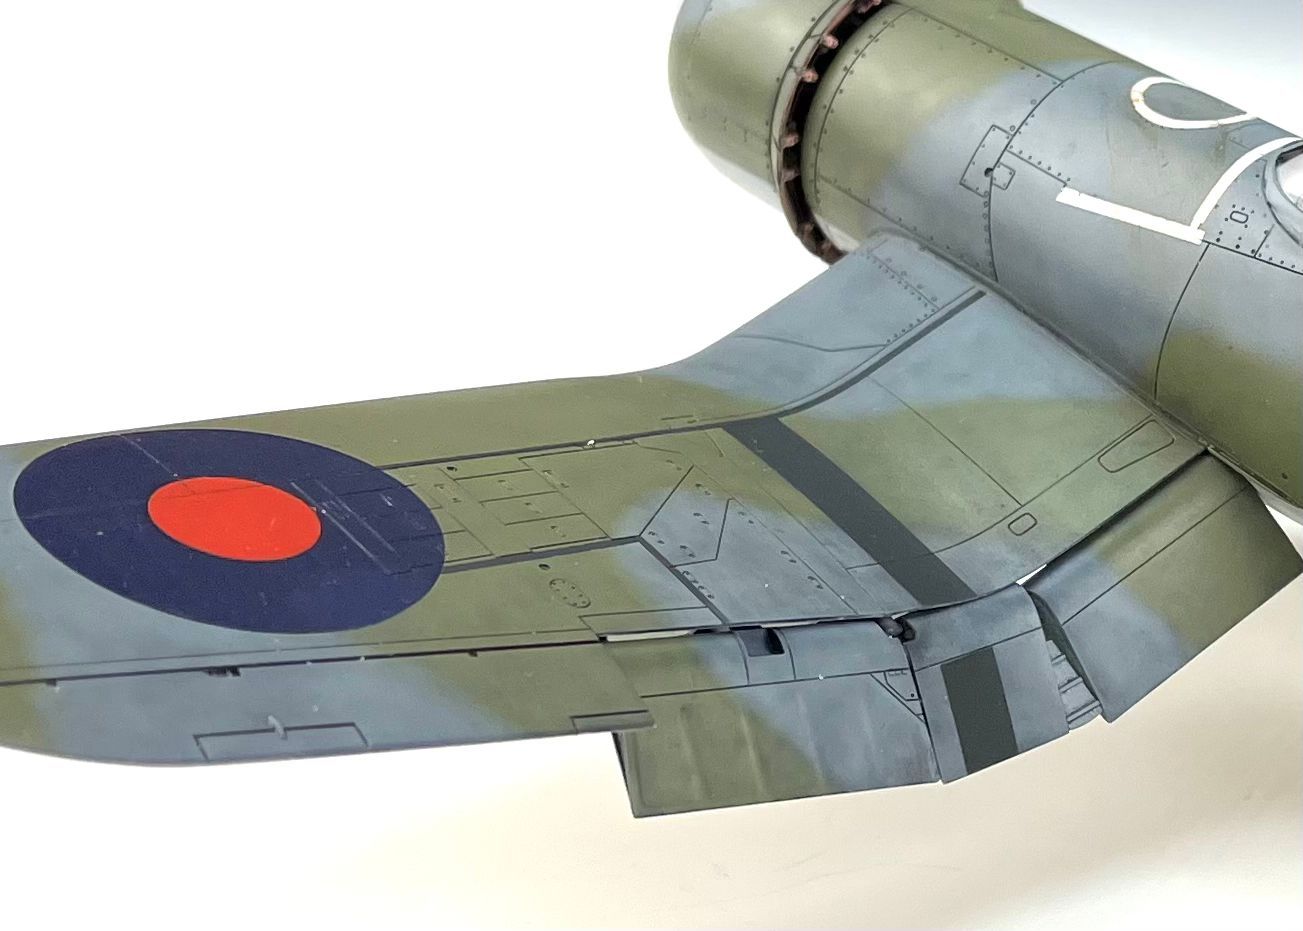
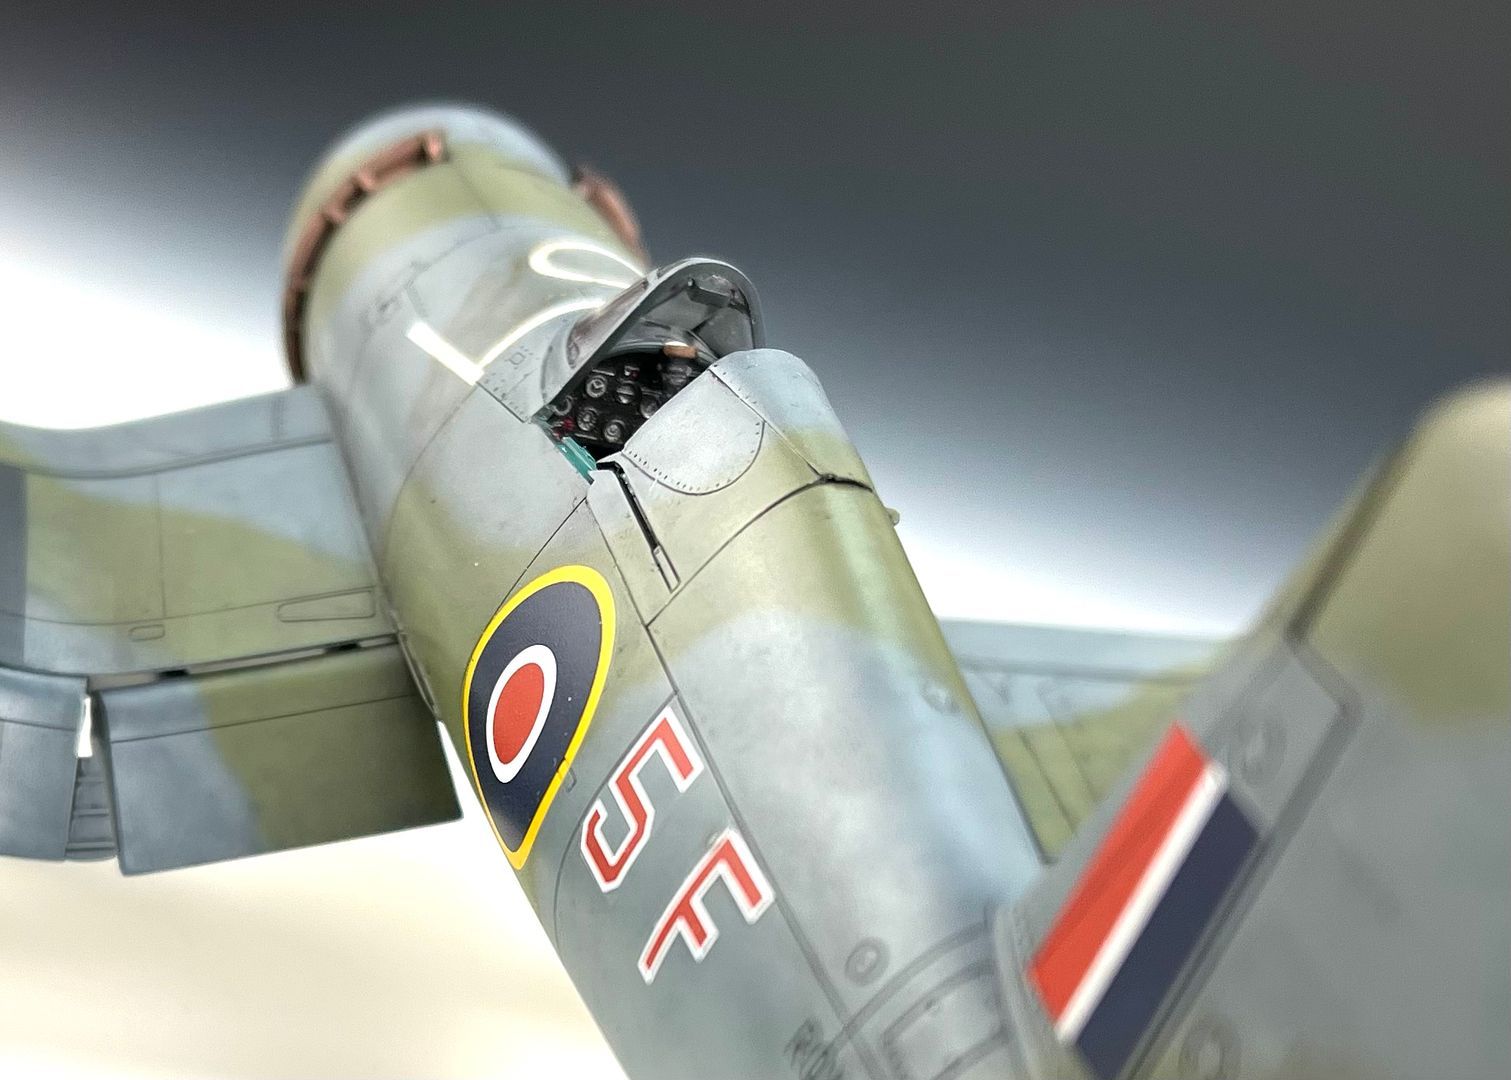
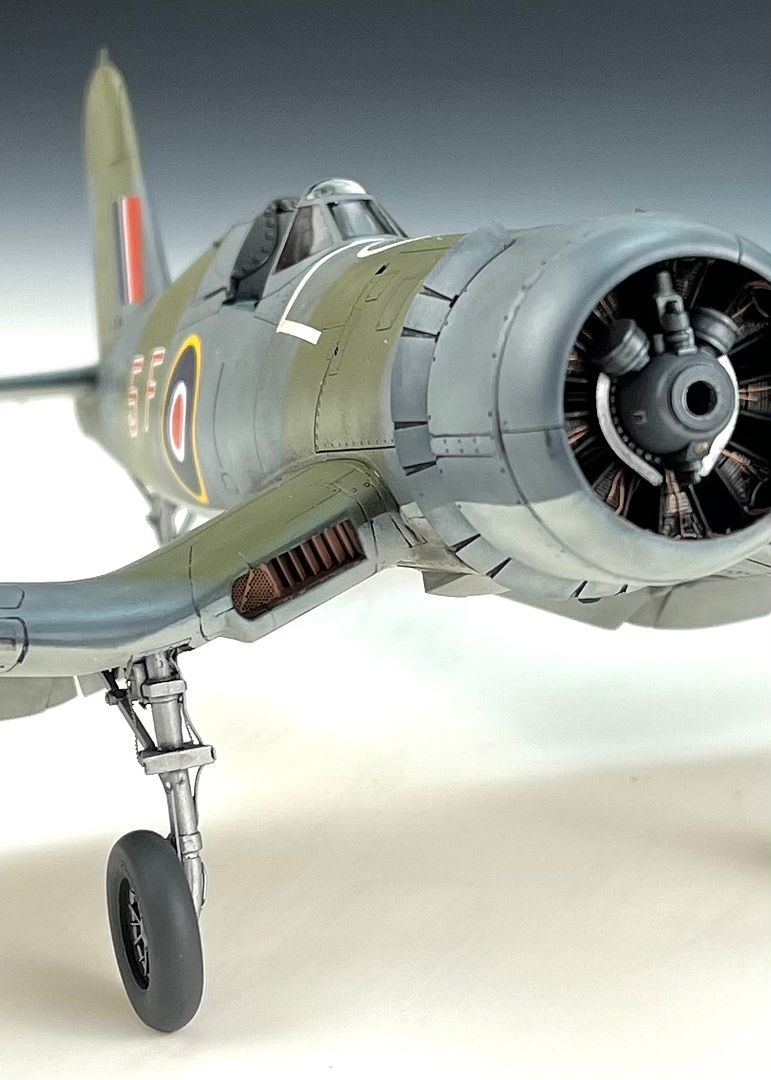
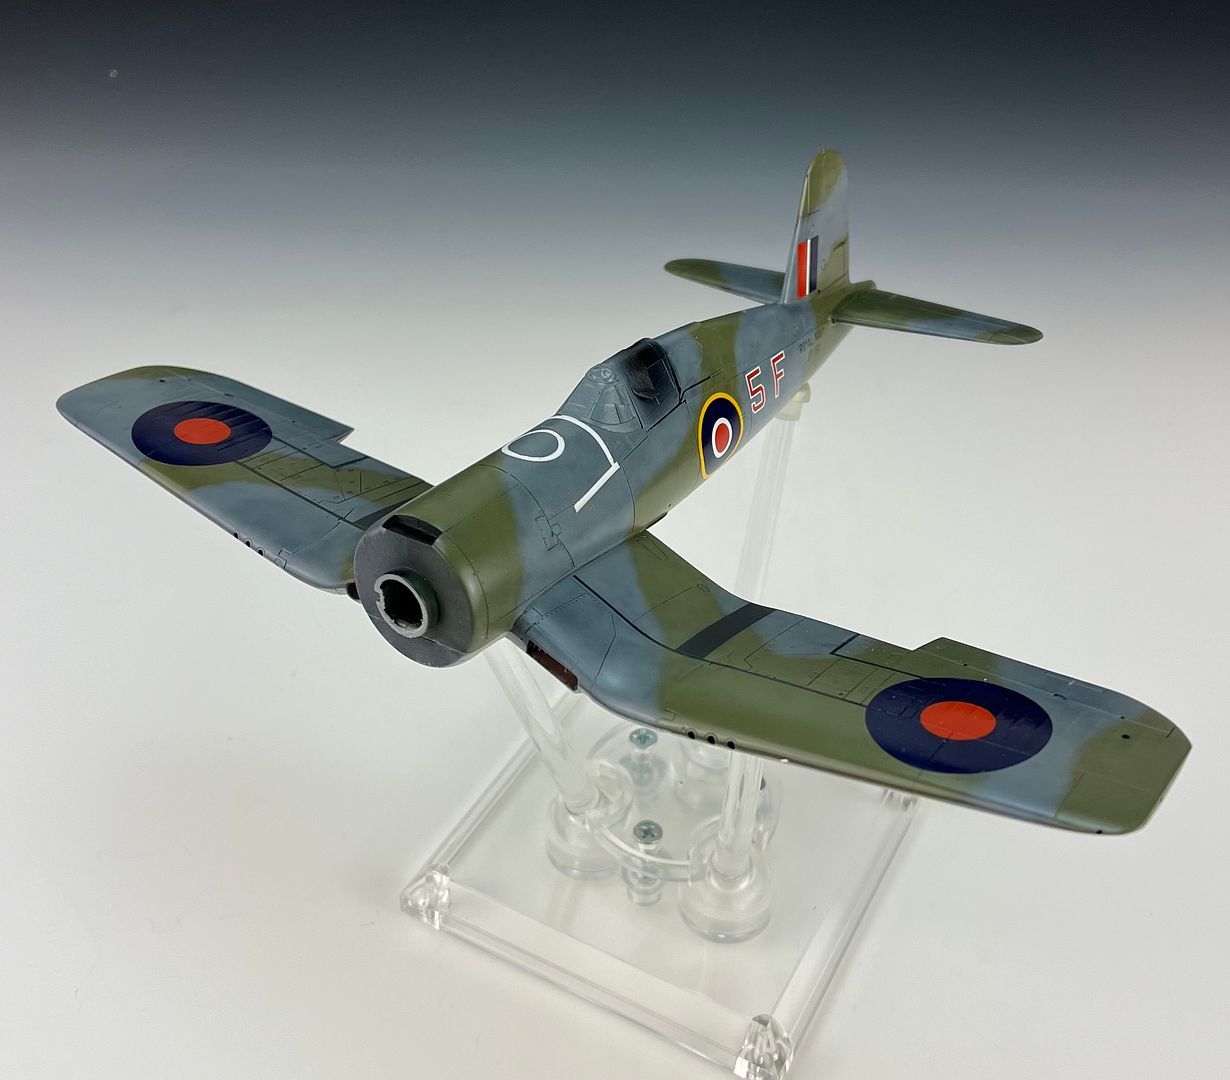
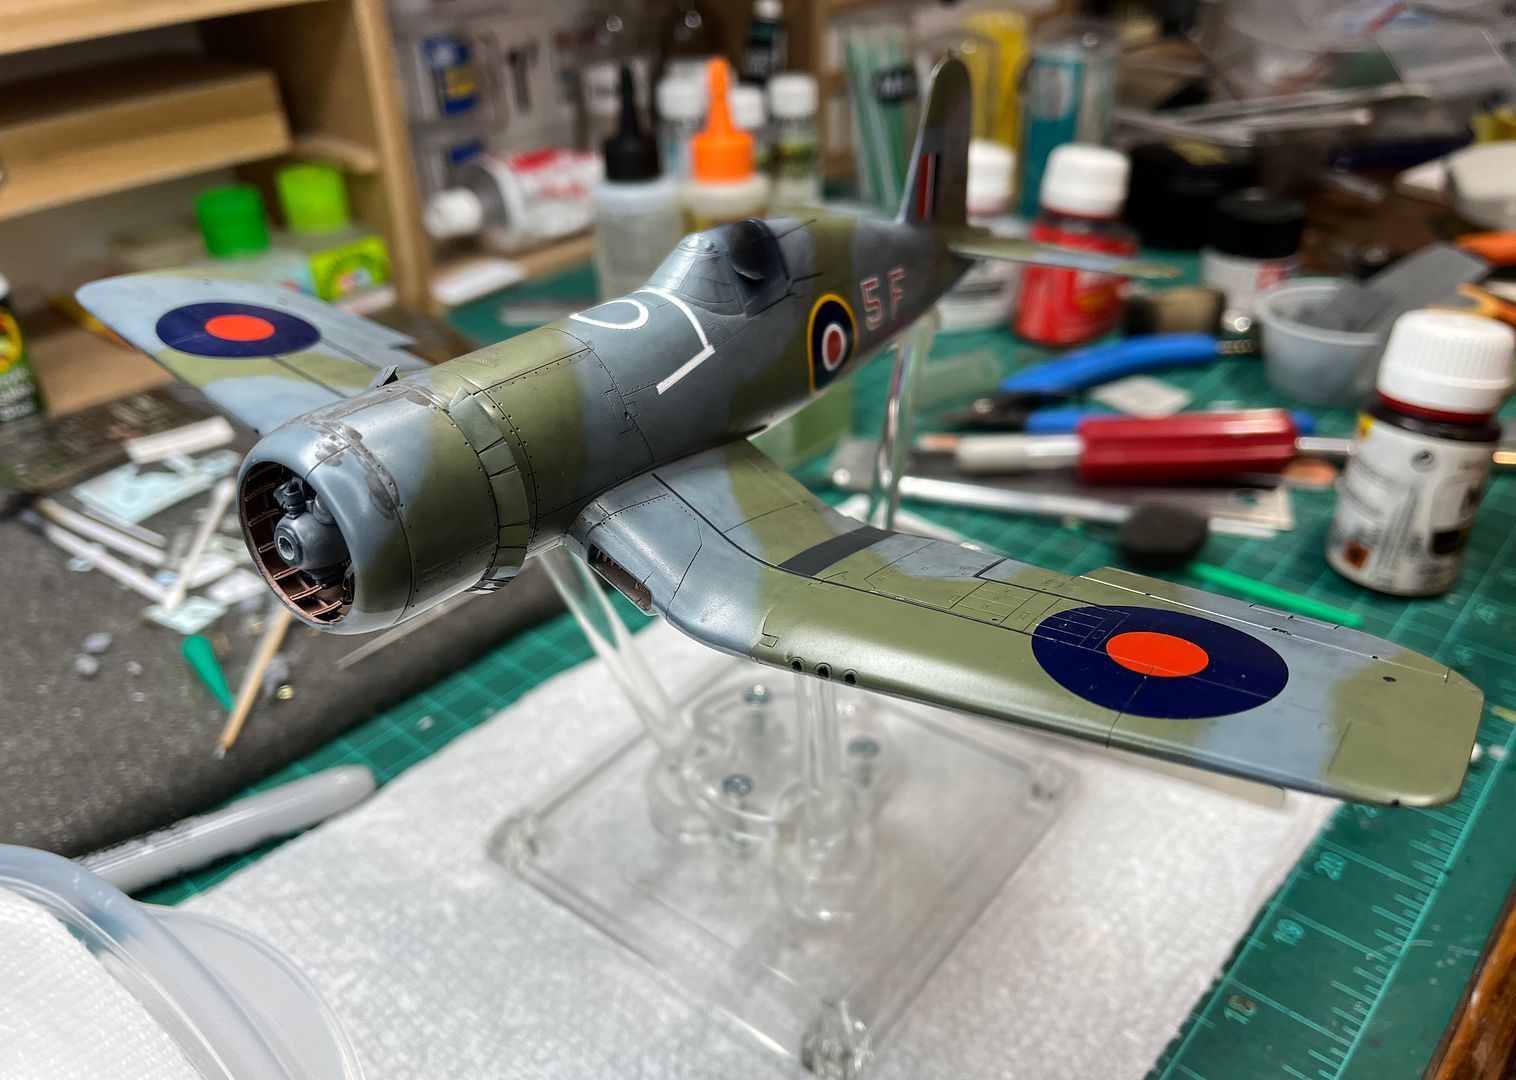
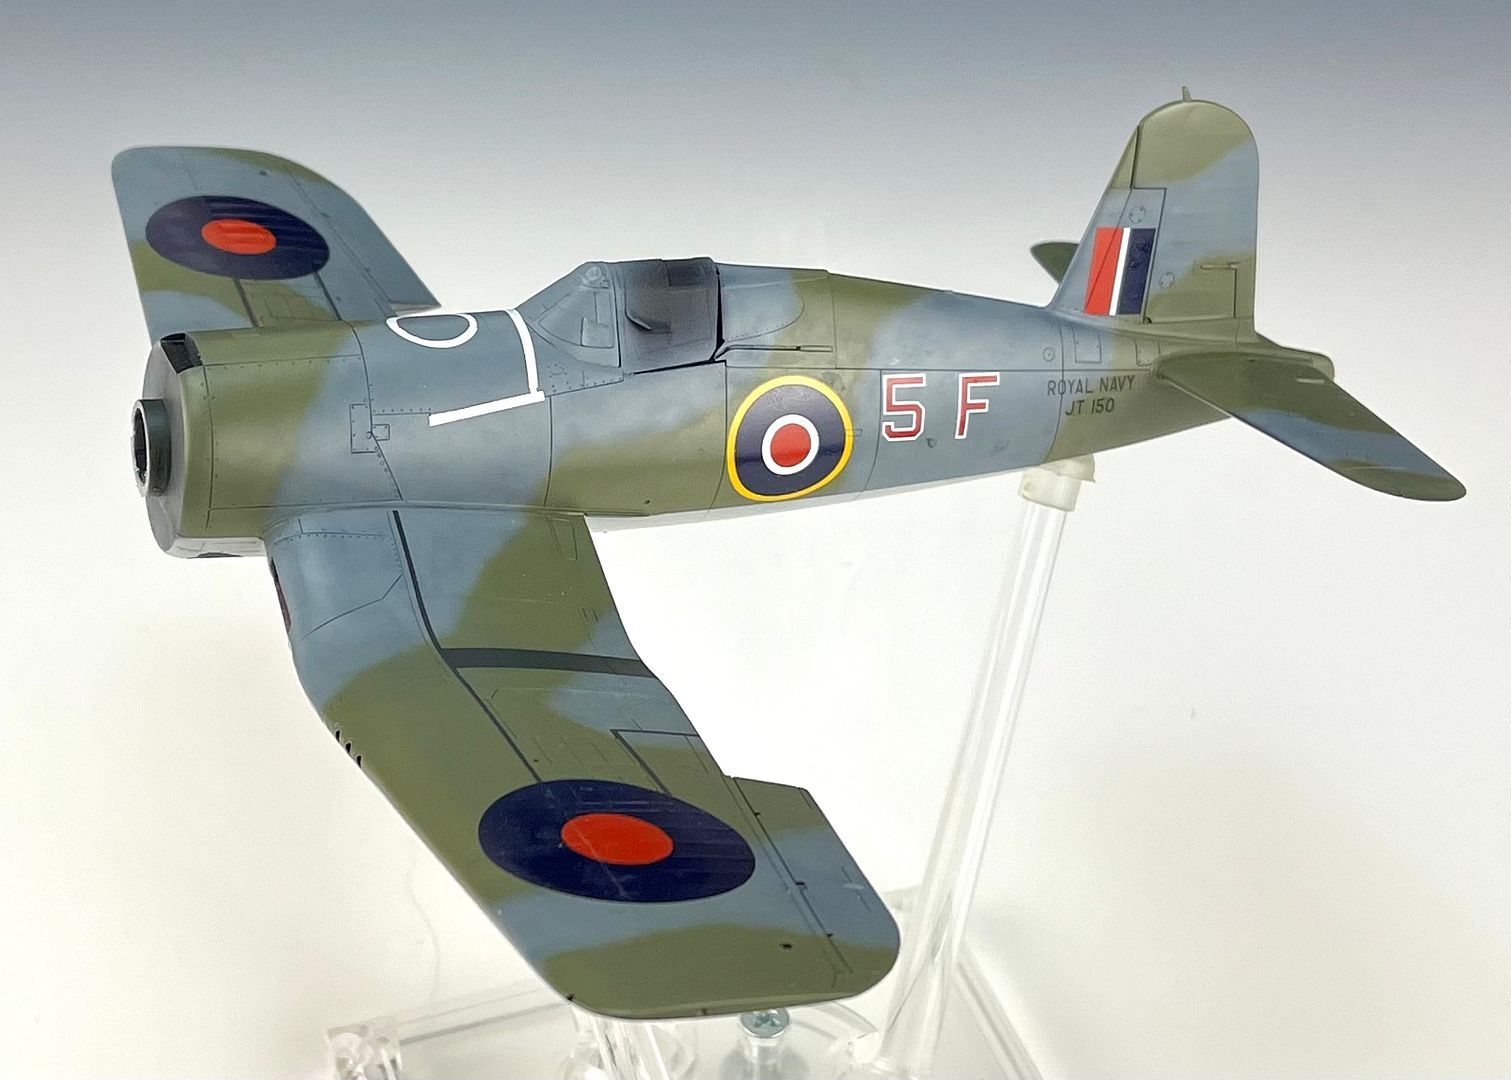
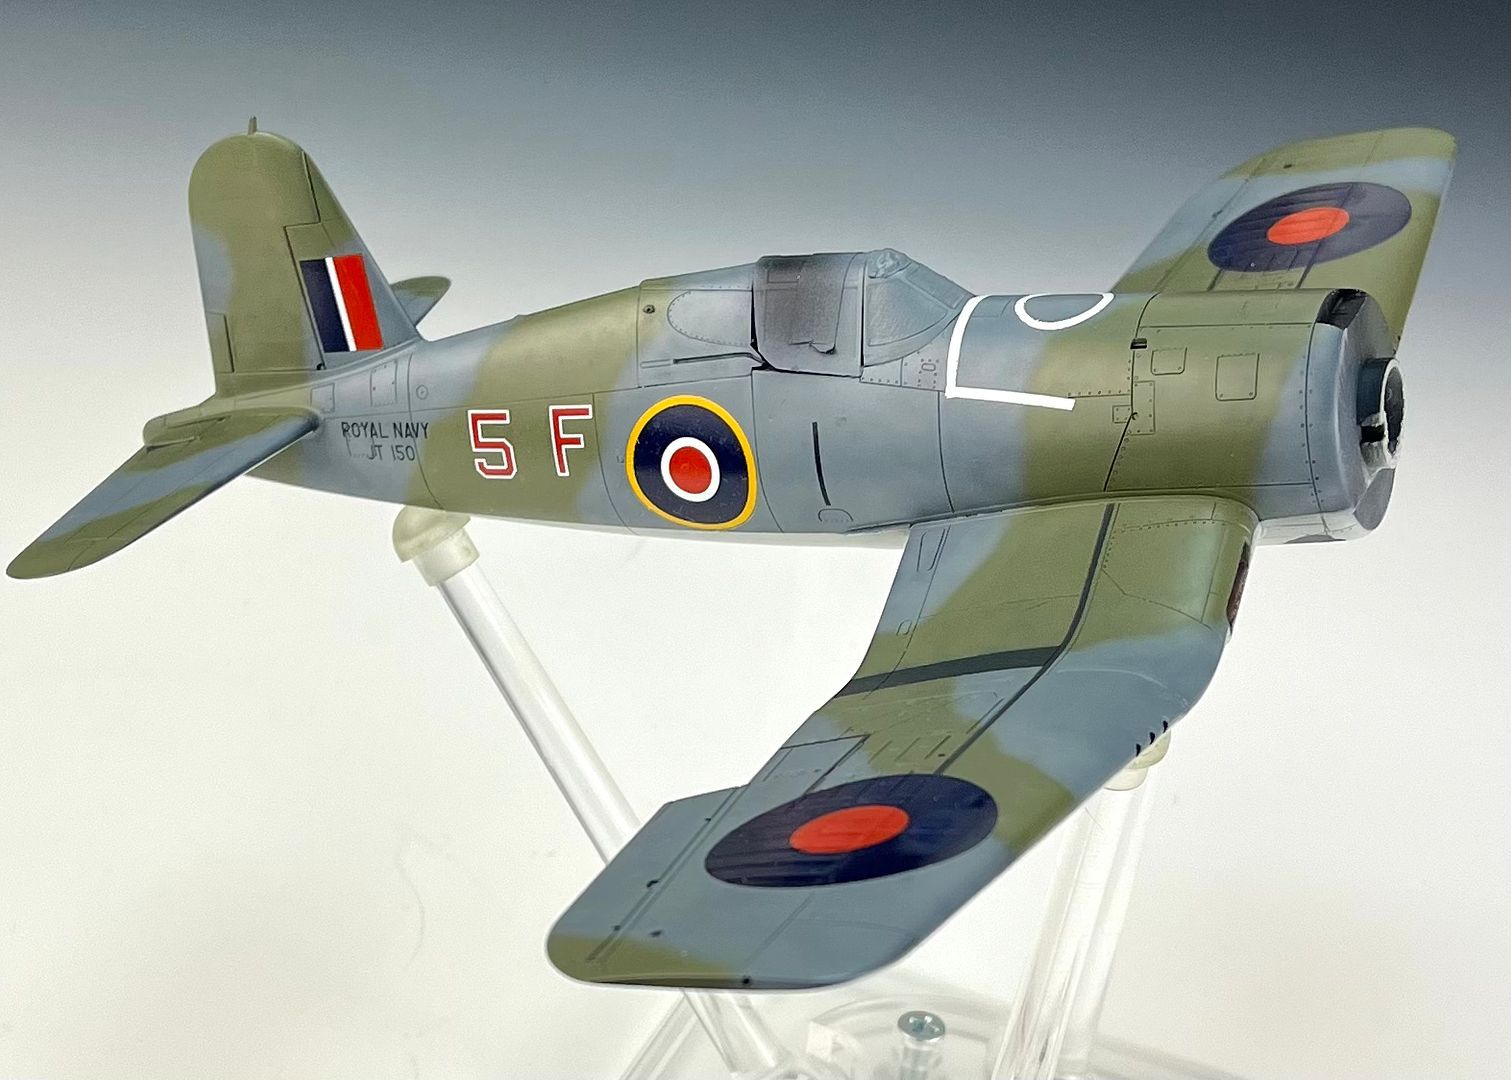
Finished. A really fun build. Enjoyed doing this conversion of clipped wing FAA Corsair Mk.I
FAA Corsair Mk.I
This aircraft represents Corsair Mk.I Fleet Air Arm 1835 Sqn JT150. Transit Camp Downhill at US Naval Air Station Quonset Point, RI 1943. Pilots would train on Corsairs at Quonset Point then return with plane to UK.
Tamiya 1:48 F4U1/2 Birdcage Corsair
EagleCal EC152 Birdcage Corsairs, Barracuda BR48114 Wheels, Eduard PE, Ultracast Prop, Vector "Turtleback", Vector Cowling detail, HGW belts, X-Small Ultra Wire, INFINI 70 Denier 70 Lycra Thread, AirScale Decals, MRP 132 Interior Bronze Green, MRP130 Salmon Pink Primer, MRP 98 Lt Gull Grey, MRP 99 Navy White, MRP 77 NATO Black, MRP 365 Ocean Grey, MRP 138 Olive Drab, MRP 127 Super Clear Matt, Alclad 117 Dull Aluminum, Alclad 107 Chrome, Motlow Liquid Chrome, MiG Black Smoke powder, MiG Standard Rust powder, MiG Industrial City Dirt powder, MRP 130 Salmon Pink Primer.

- Shoggz, denders, scvrobeson and 7 others
-
10
-
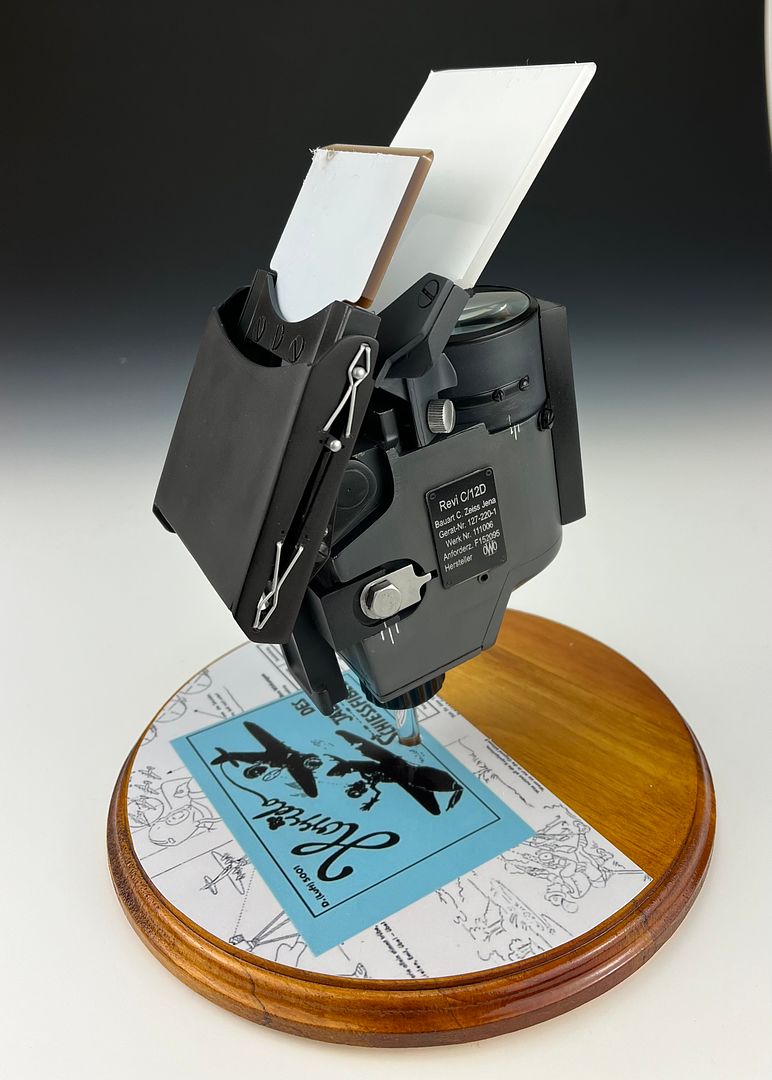
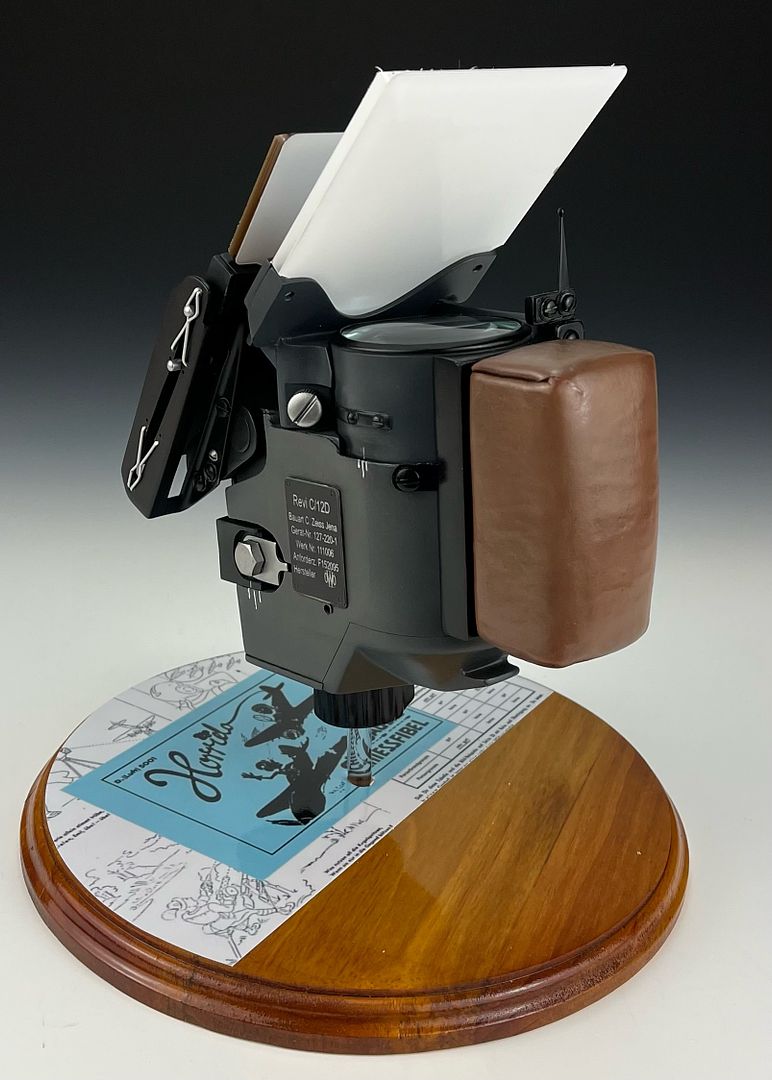
Tail Boom Production's Revi C12/D gunsight is a full resin cast of an actual Revi 12. 32 parts with 5 parts being other substrate, glass, wire and lens.
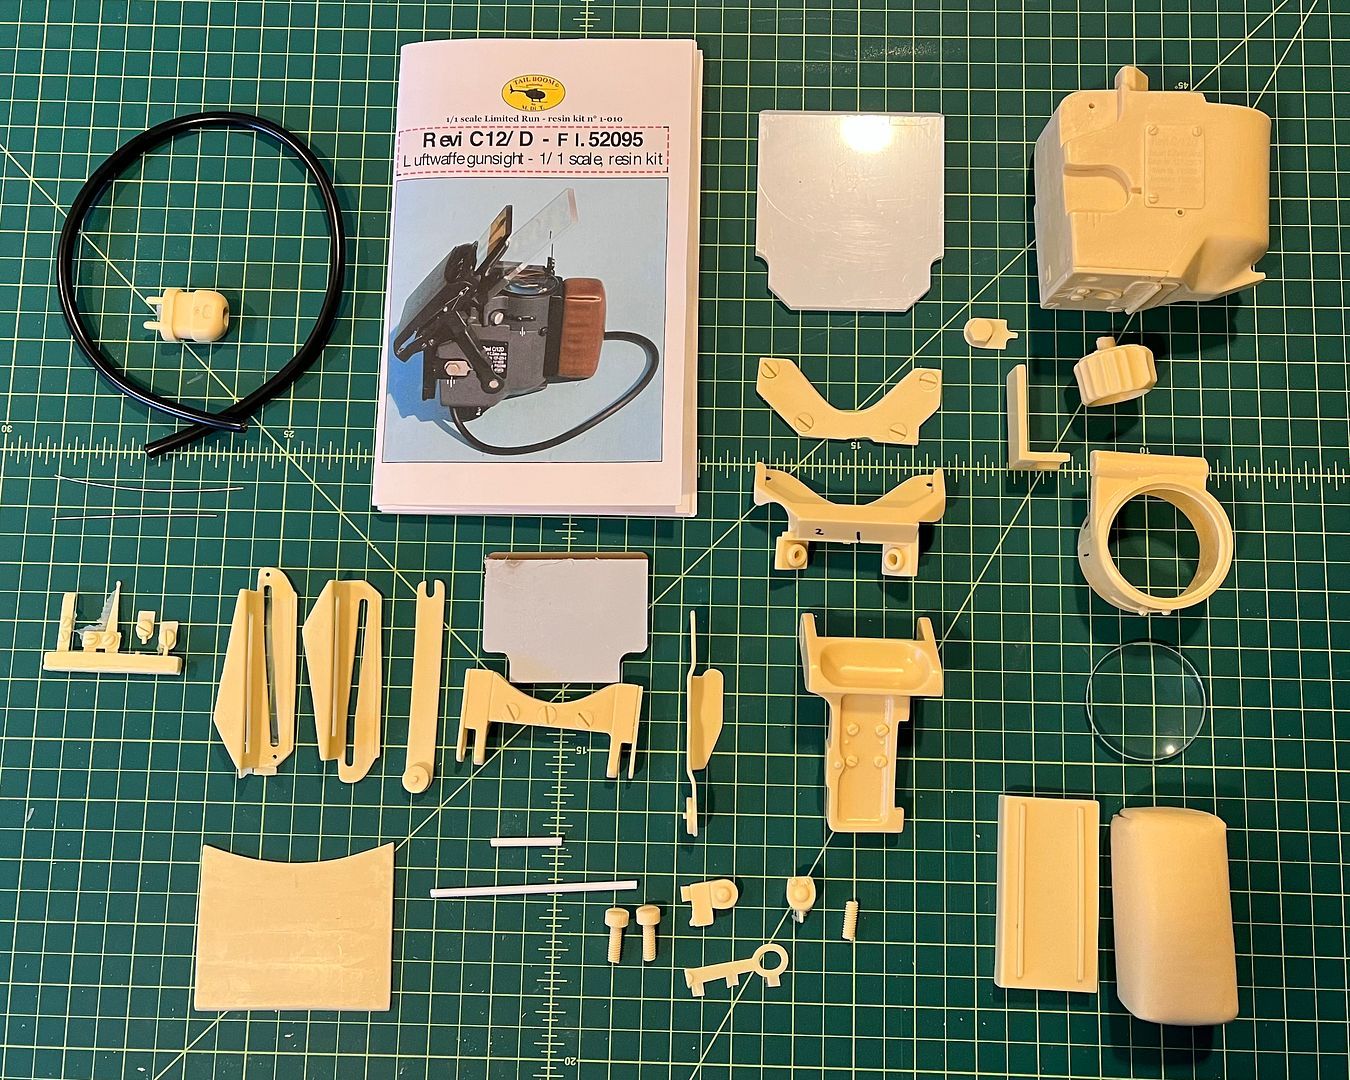
One of my most challenging builds being all resin. Test fit, test fit to the point of redundancy is needed. Lots of drilling, shaping, mount pins/tabs and scratch work.
This kit is long out of production. This has been in my stash for almost 8 years.
Tail Boom also made Revi16 and Barr Stroud Mk.II gunsights as well as control sticks for Luftwaffe, RAF and Italian aircraft all 1:1 scale. These too are long out of production.
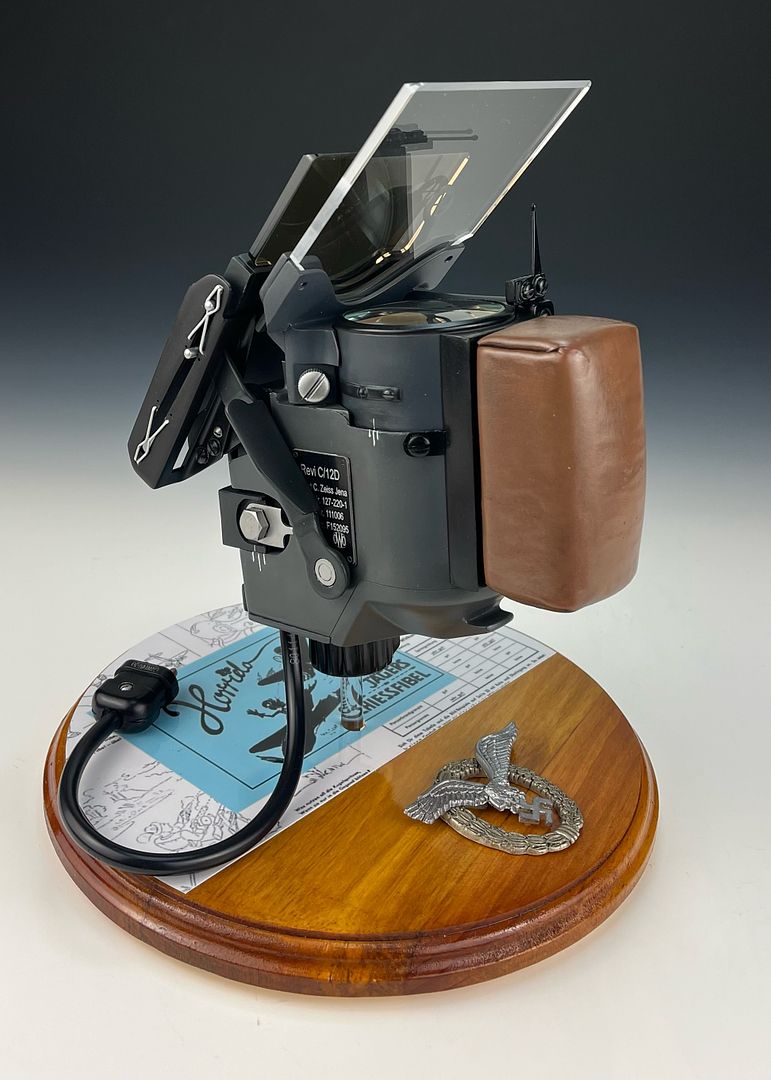
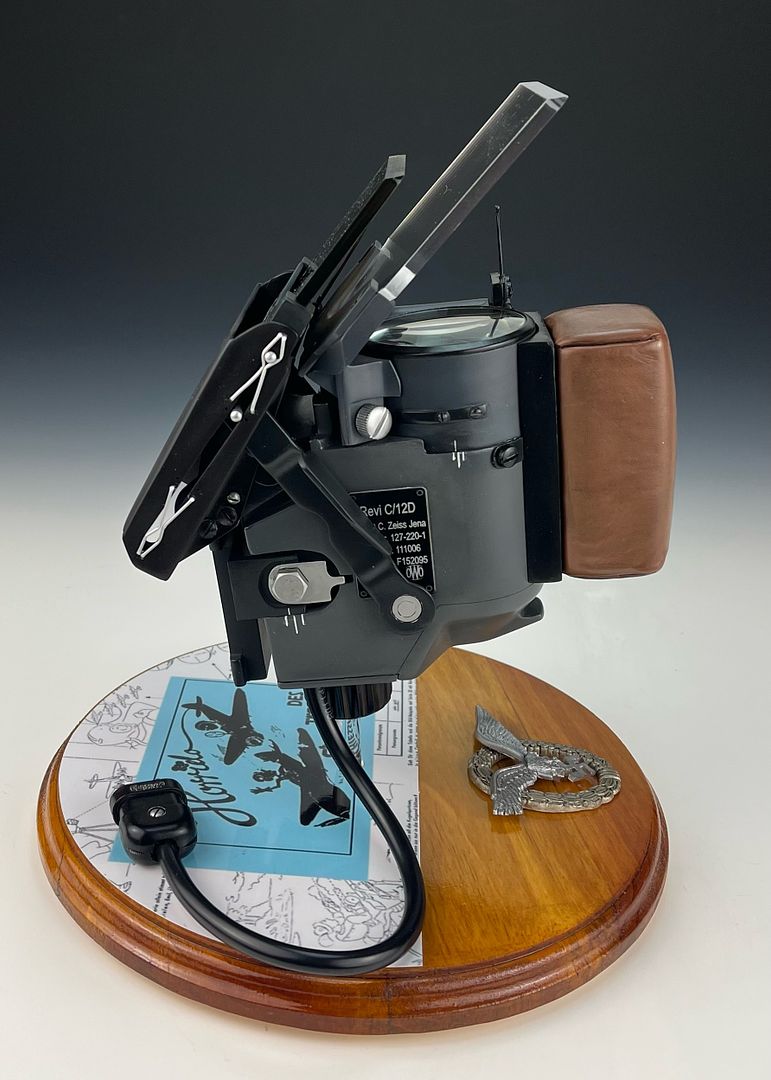


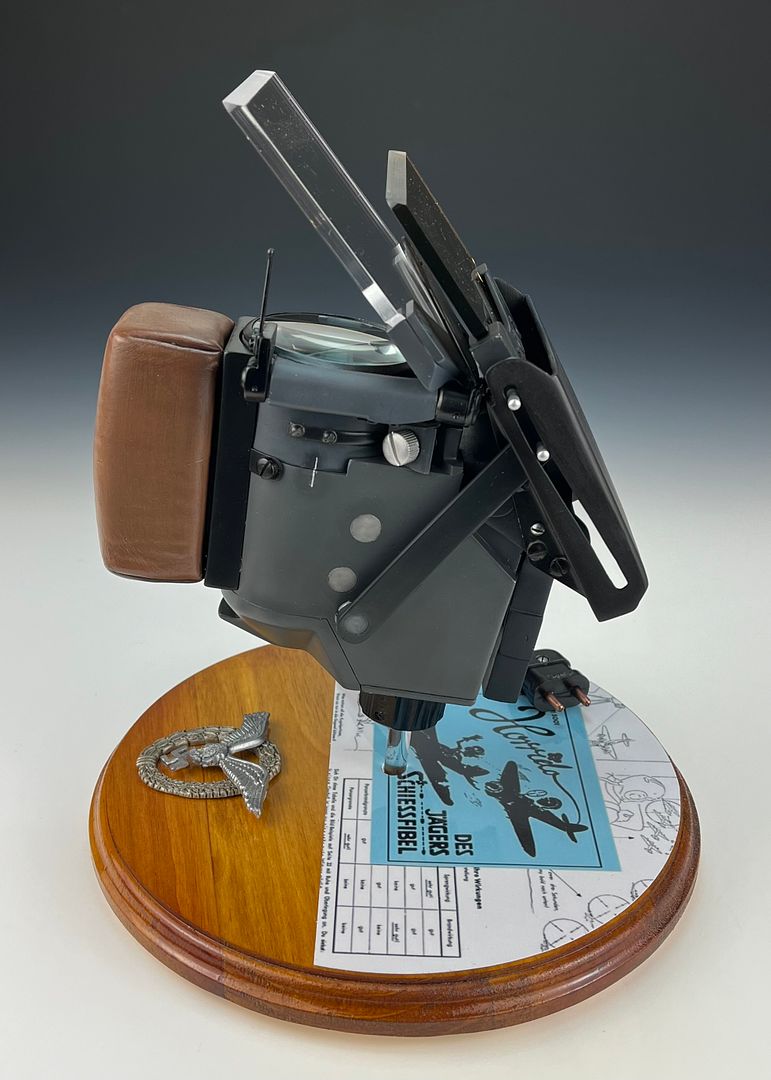
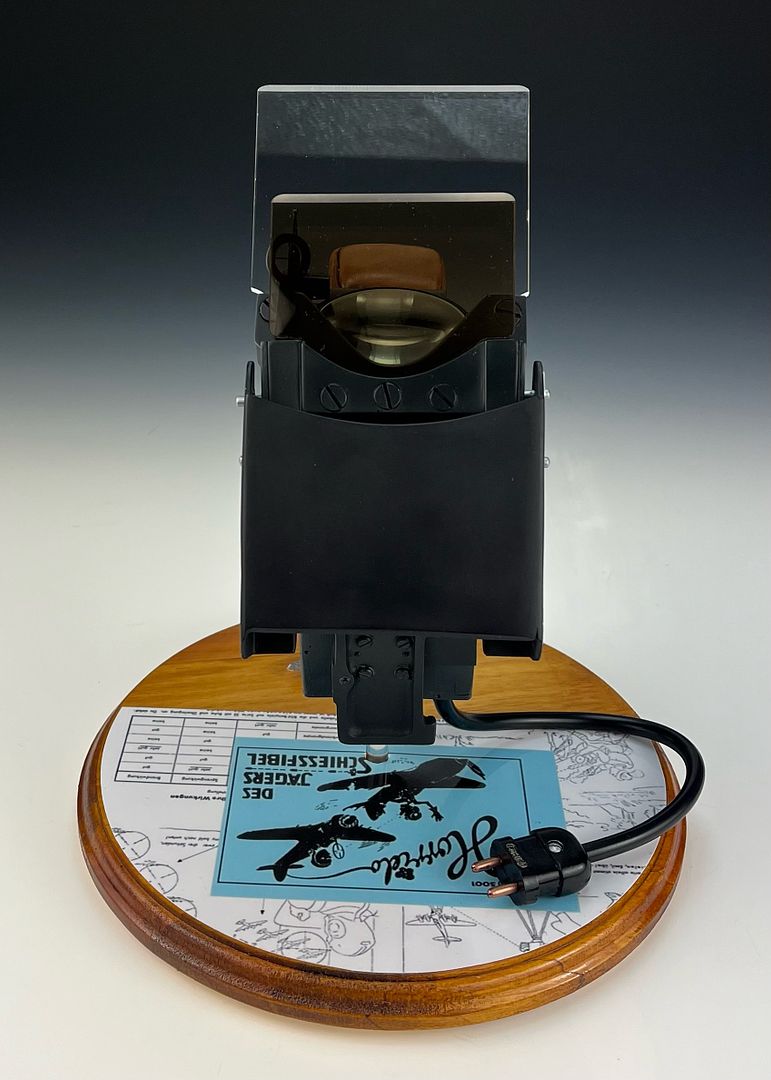
Des Jägers Schiessfibel translates to The Hunters Shooting Guide.
-
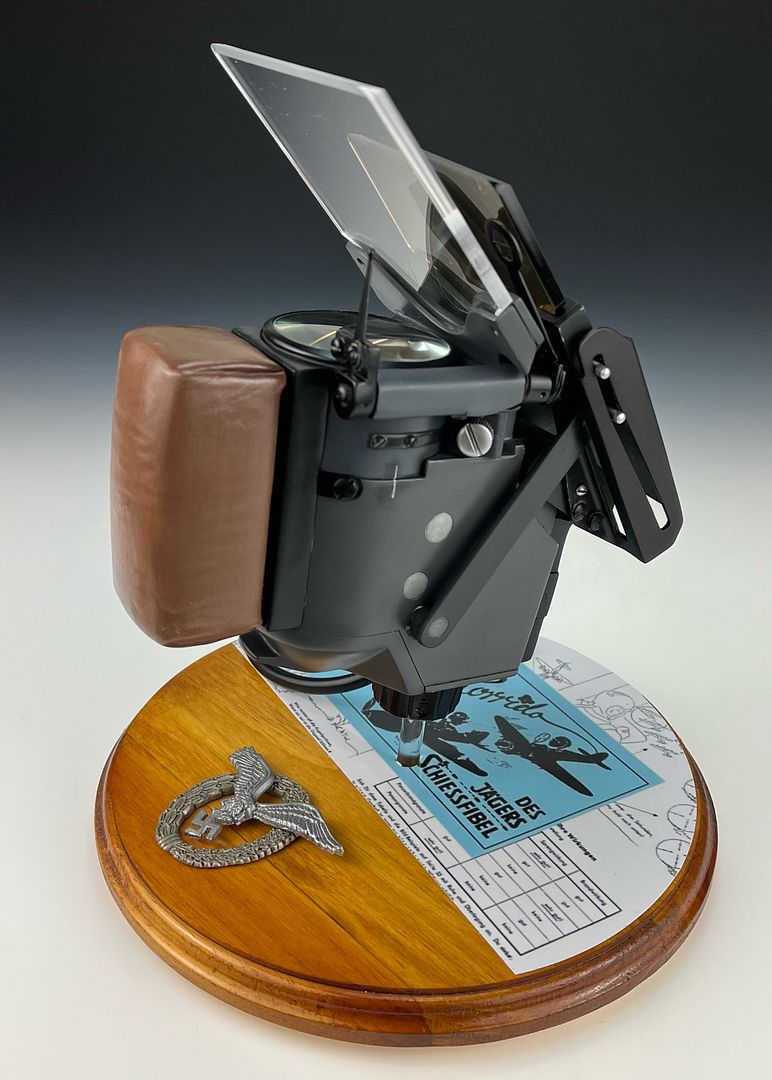
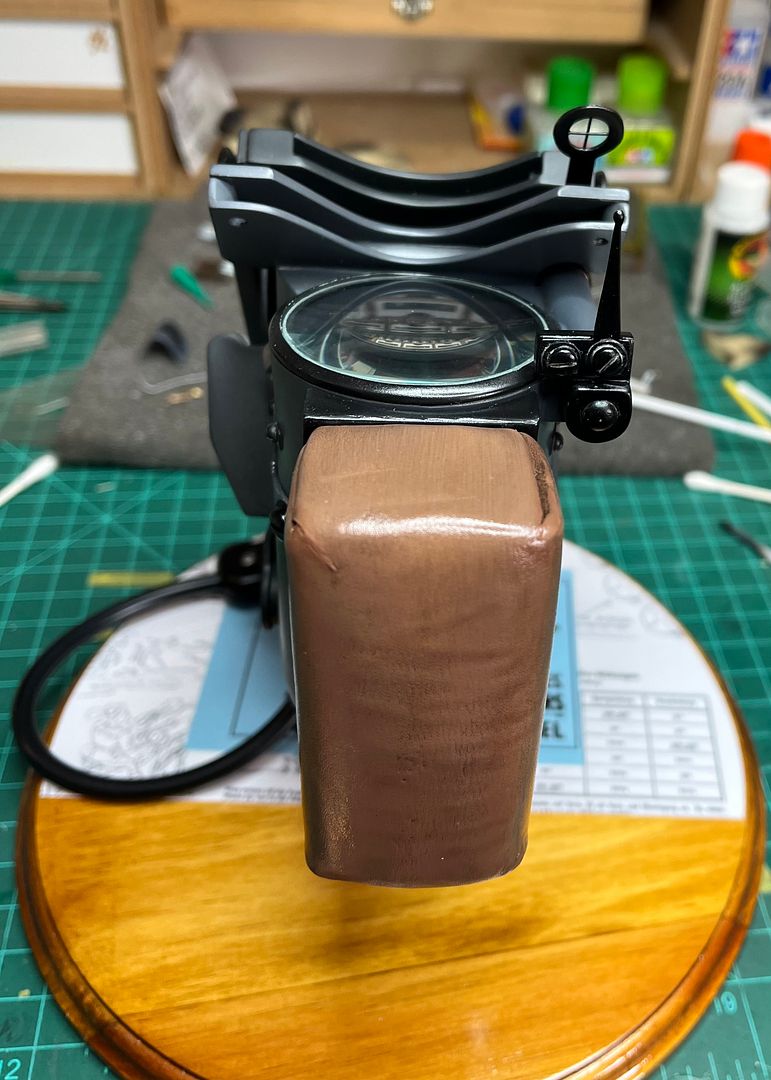
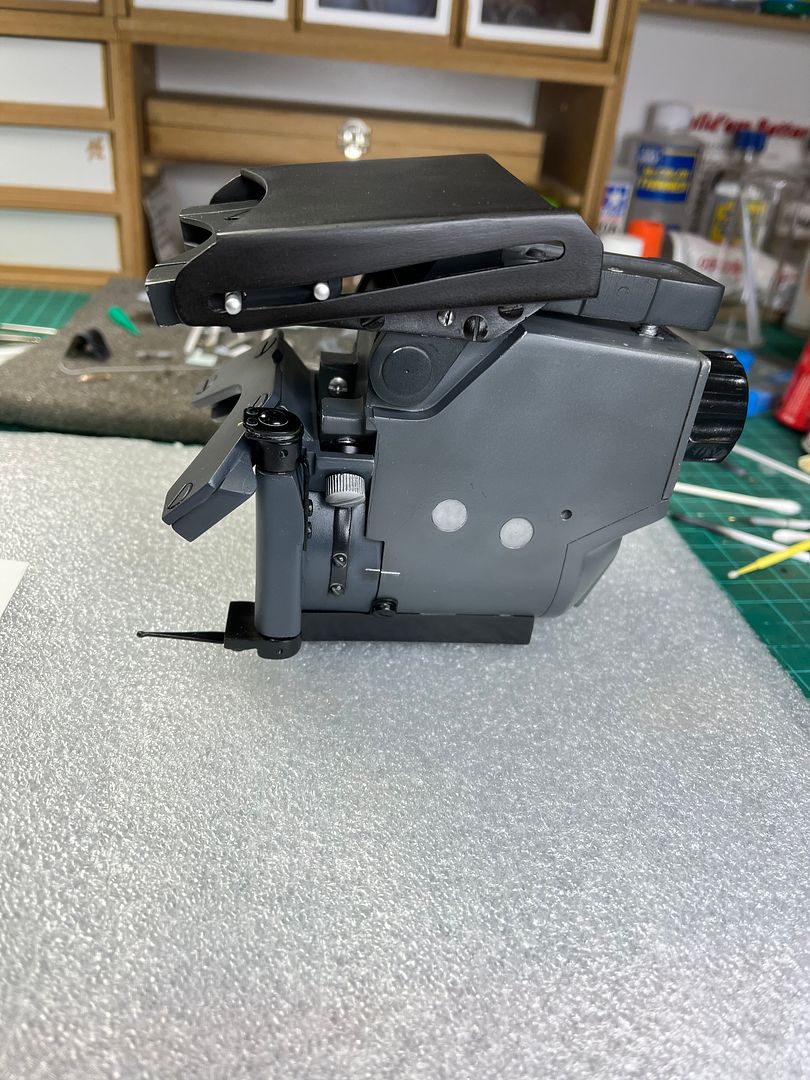
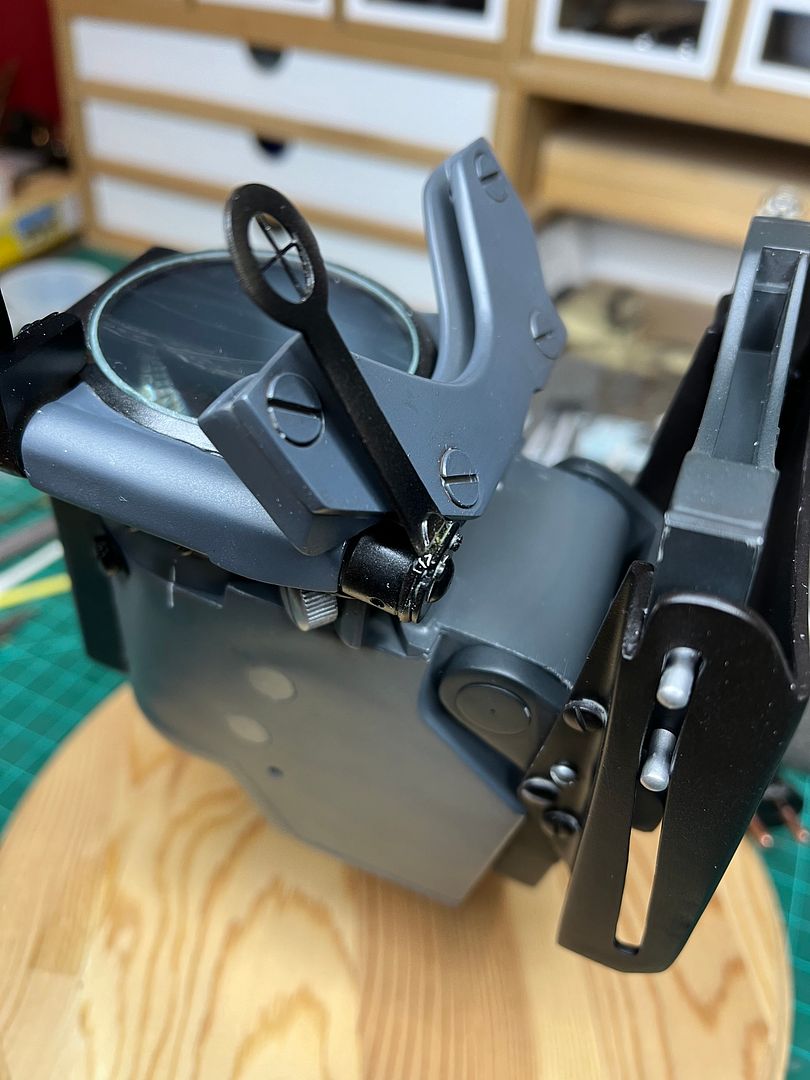
Crash pad assembly mounted.
Final test fit of sunglass and reflector glass. The protective vinyl is coming off.
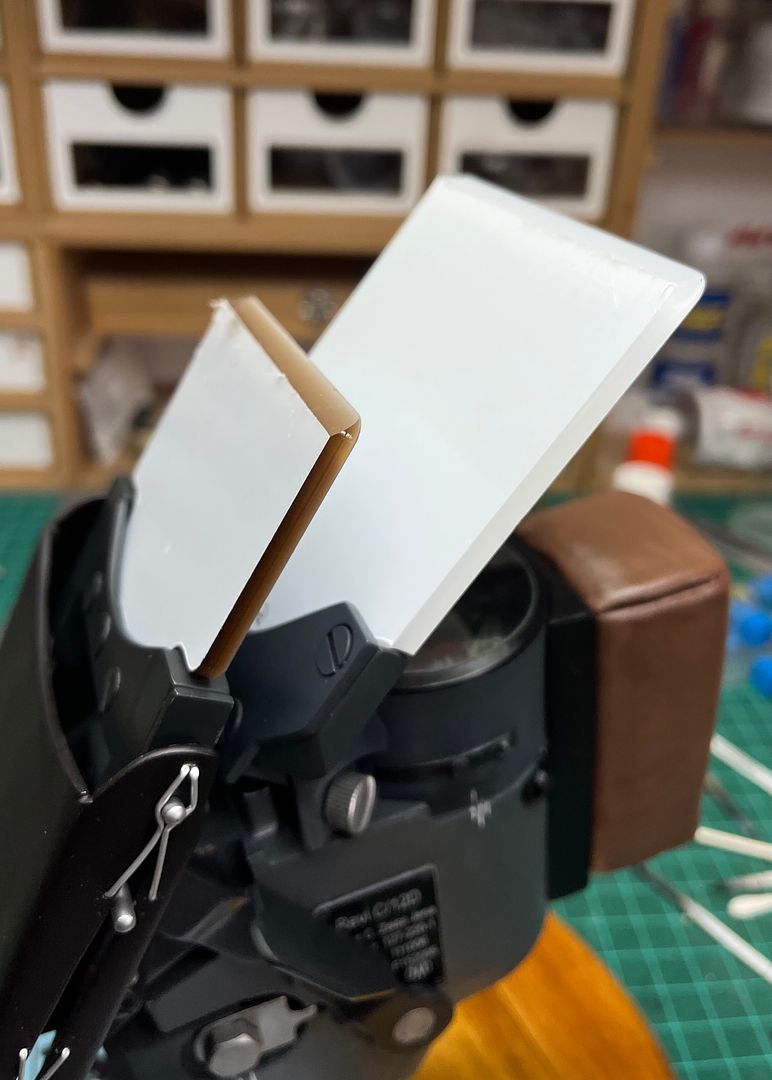
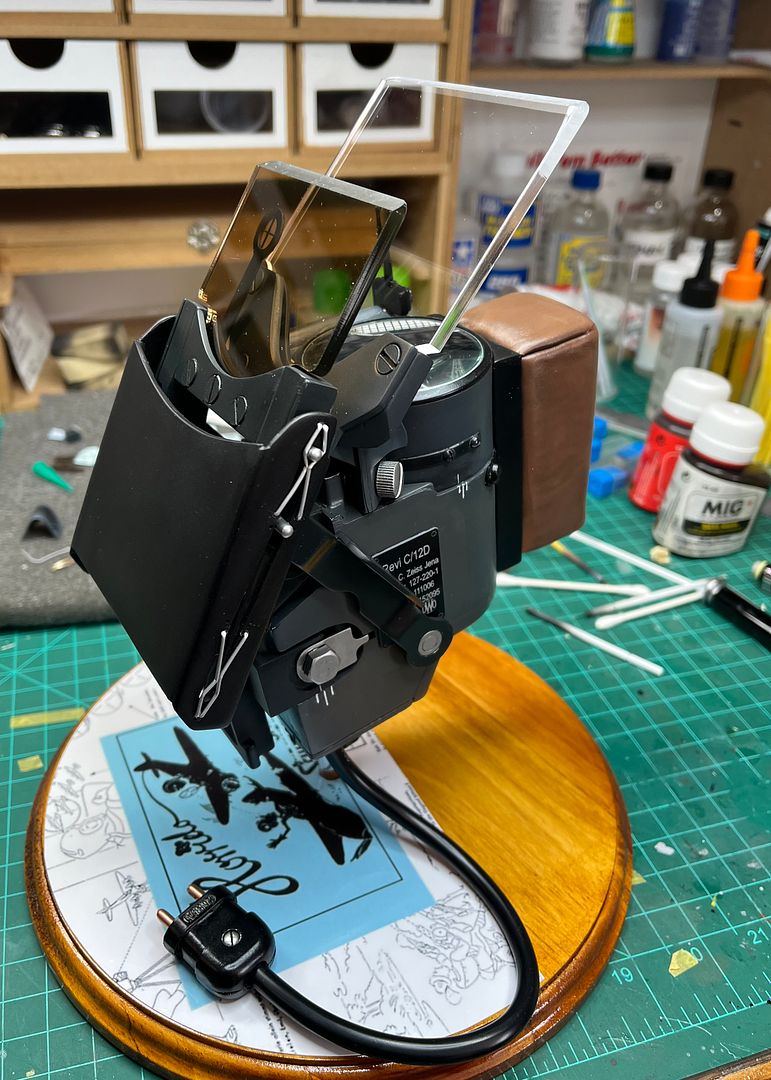
Sunglass and reflector glass installed. The dust is going to be my enemy with this. Will be covered however, I've decided not to glue the glass so I may have access to cleaning.
Photoshoot done. See RFI link for all pics.
-
On 4/4/2024 at 6:31 PM, LSP_Kevin said:
That looks fantastic, Rick!
Kev
Thanks Kev. The end is near.....
19 hours ago, scvrobeson said:Awesome build Rick. What a cool little project to put together. Looking forward to what's next
Matt
Thanks Matt. Truly been an interesting effort.
What's next? Major deep clean the bench.
- LSP_Kevin and scvrobeson
-
2
-
On 4/4/2024 at 10:58 AM, Alain Gadbois said:
Looks like the real thing!
Excellent work!
Alain
Thanks Alain, almost done.
On 4/4/2024 at 2:22 PM, Landrotten Highlander said:very realistic indood
Thanks!
-
Test fit on the base.
Crash pad painted with various shades of brown with highlights accomplished with "pre-shade", oils and dark panel line wash followed by an overall varnish Tamiya X22 Clear. Crash Pad is dry fitted.
-
-
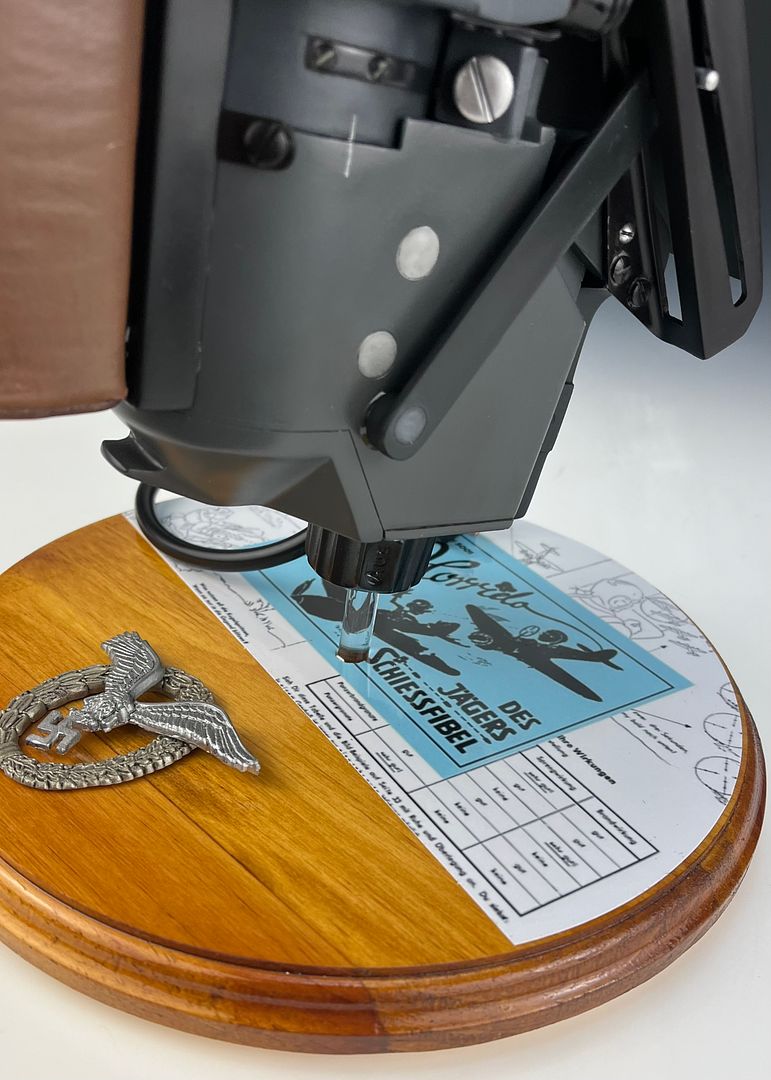
Base for my Revi is a 12" diameter wood base. I gave it some stain and varnish. Drilled a 5/16" hole for acrylic rod.
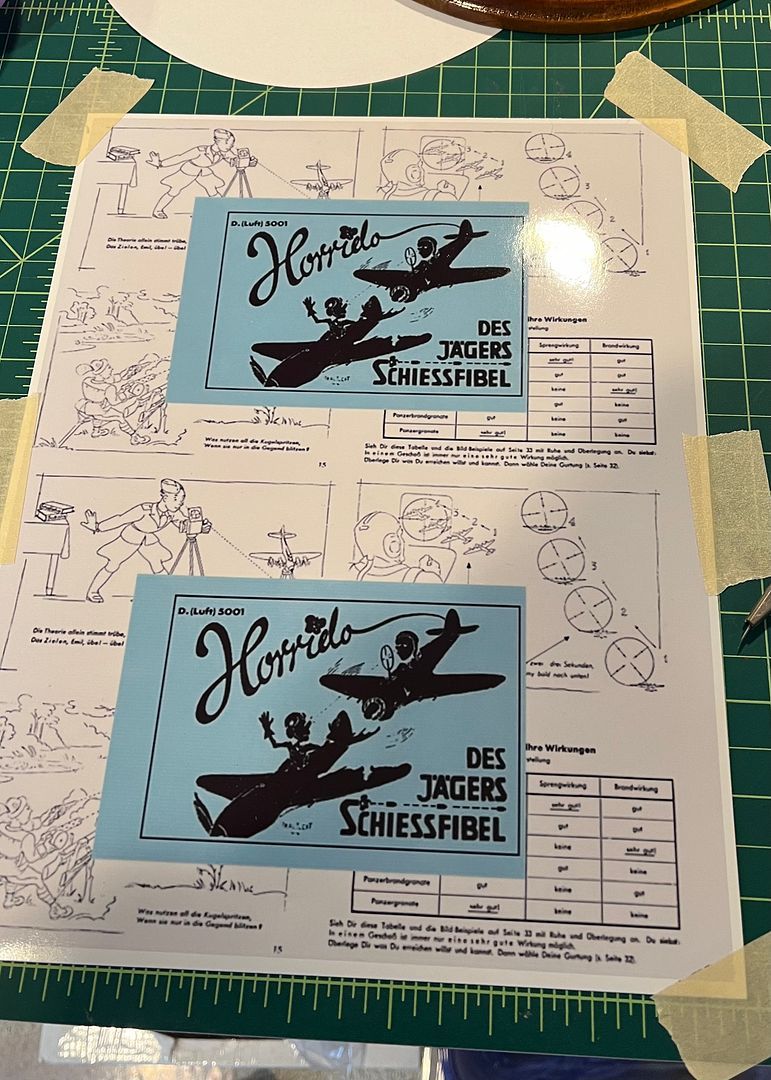
I found a copy of an Luftwaffe gunsight training manual cover. I know you'll ask...Des Jägers Schiessfibel translates to The Hunters Shooting Guide. Perfect.
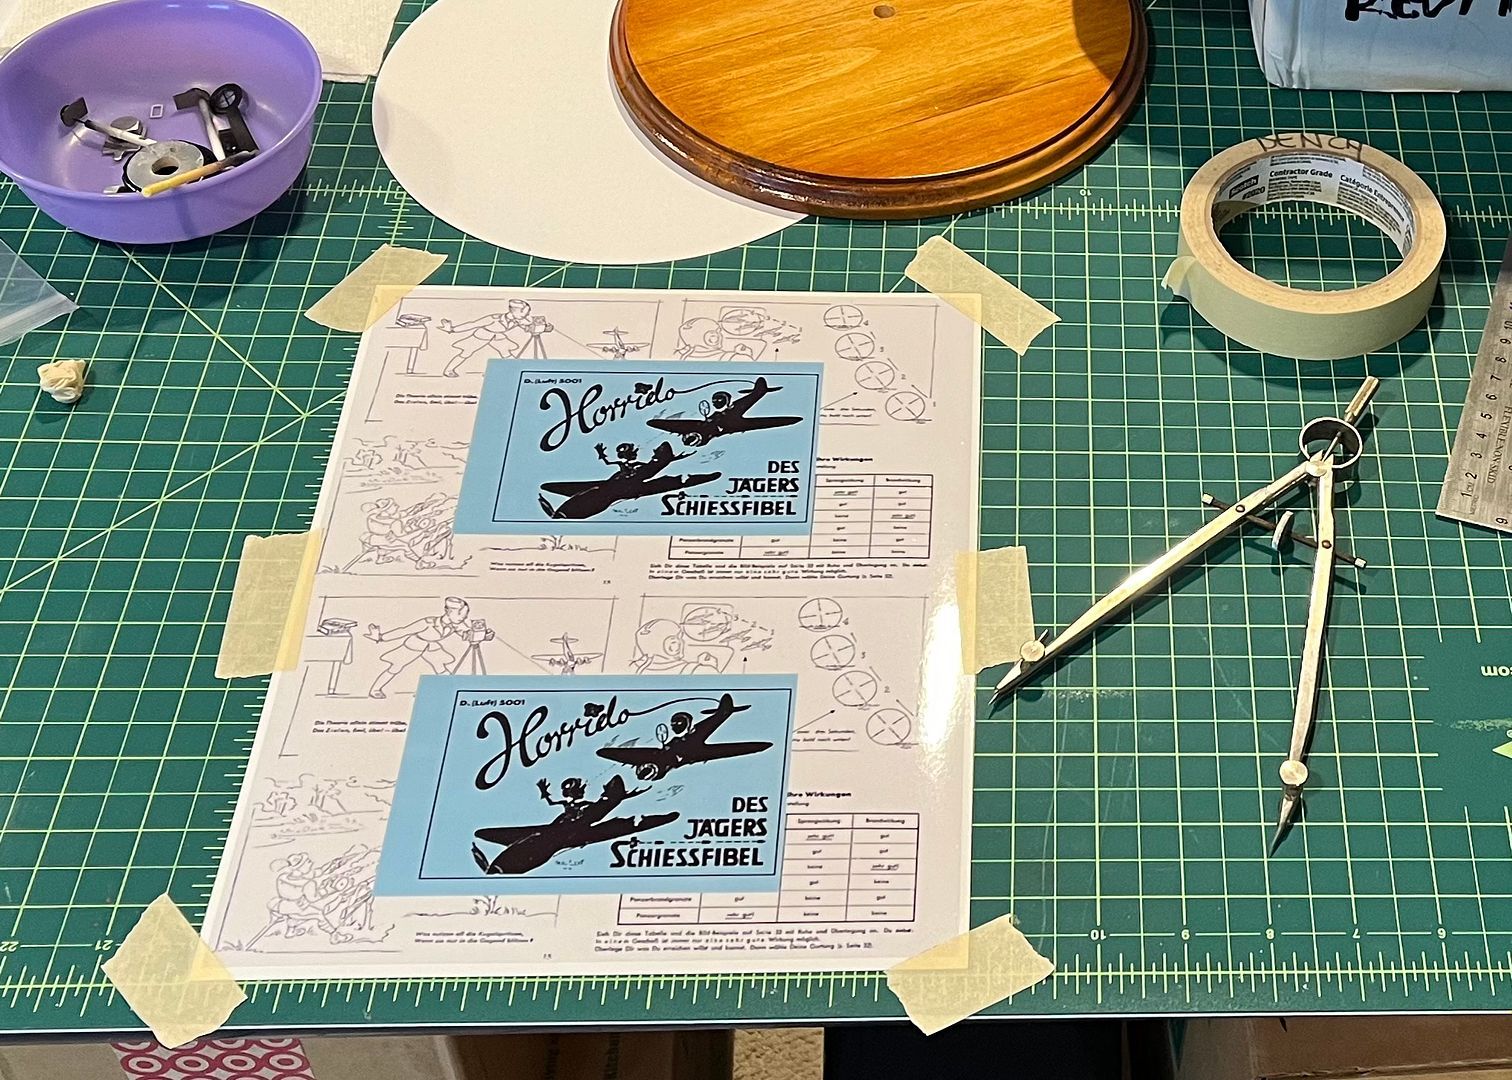
Taped to cutting table I used a compass with cutting tool to cut out the art.
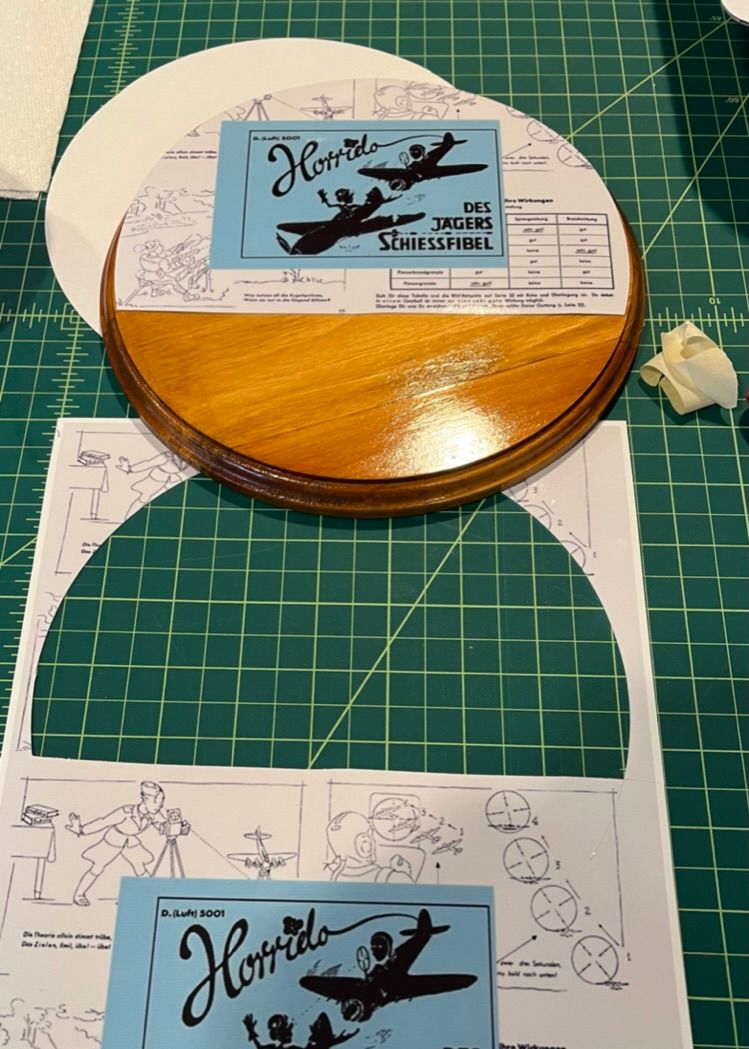
Good fit.
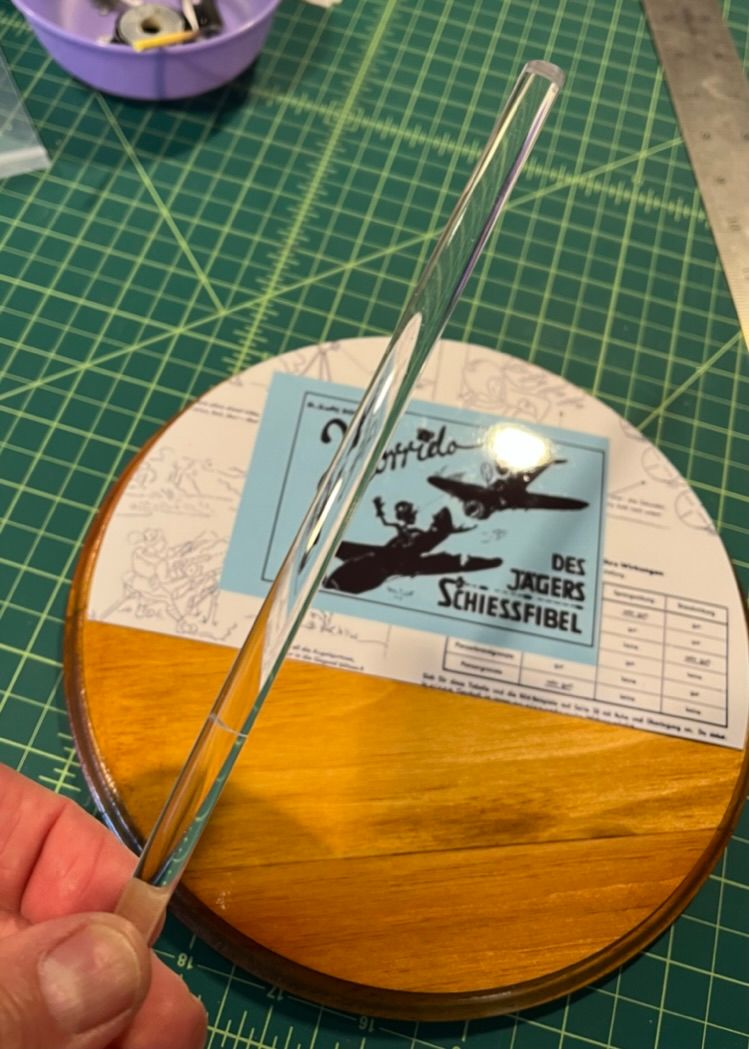
Acrylic rod to mount the Revi.
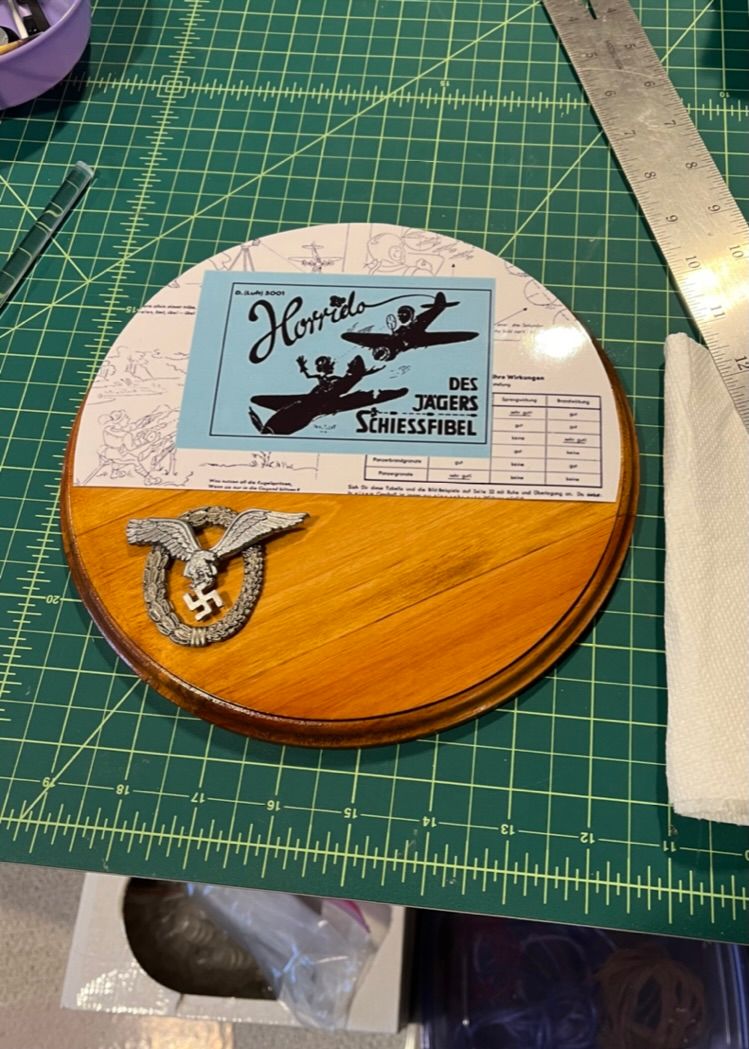
Luftwaffe badge from Bling For Bases will add additional interest to the base.
-
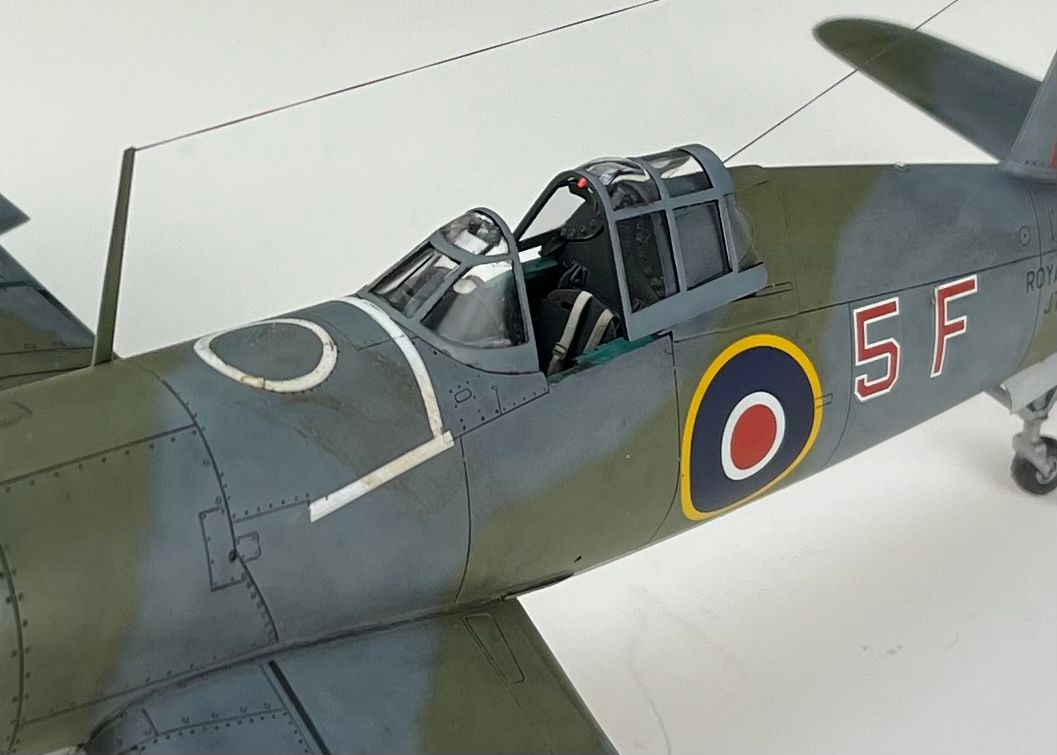
INFINI 70 Denier 70 Lycra Thread for aerial line. Secured at point behind cockpit will thread through turnbuckle/loop I fashoned at the rudder with X-Small Ultra Wire then connect on aerial mast forward cockpit. Thread will be one of the last things I do.
Meanwhile, I need to touch up some areas and mask/paint glazing.
- Shoggz, Martinnfb, scvrobeson and 5 others
-
8
-
On 3/21/2024 at 1:39 AM, RadBaron said:
Excellent work!
More so, that it's in the smaller scale

Thanks Rad!
-
On 3/27/2024 at 6:45 AM, LSP_Kevin said:
OK, I did my best to capture the issue in a photo:

They're like that all the way along both wings. They reacted badly to Microsol, and these wrinkles are still there more than a day later, and even after trying other decal setting solutions. The uppers aren't in great shape either, and haven't even had any Microsol yet.
I'll strip them off and mask and paint them (the lower ones are out of position anyway). Quite bummed about this, as it was all going quite well until this point. But then, it isn't really one of my builds until something like this happens...
Kev
Dang Kev. Sorry to see this. Everything is going well until the decals. I just hate when you get to the decal stage the the decals behave poorly. Been there too many times. You got this for a successful fix.
-
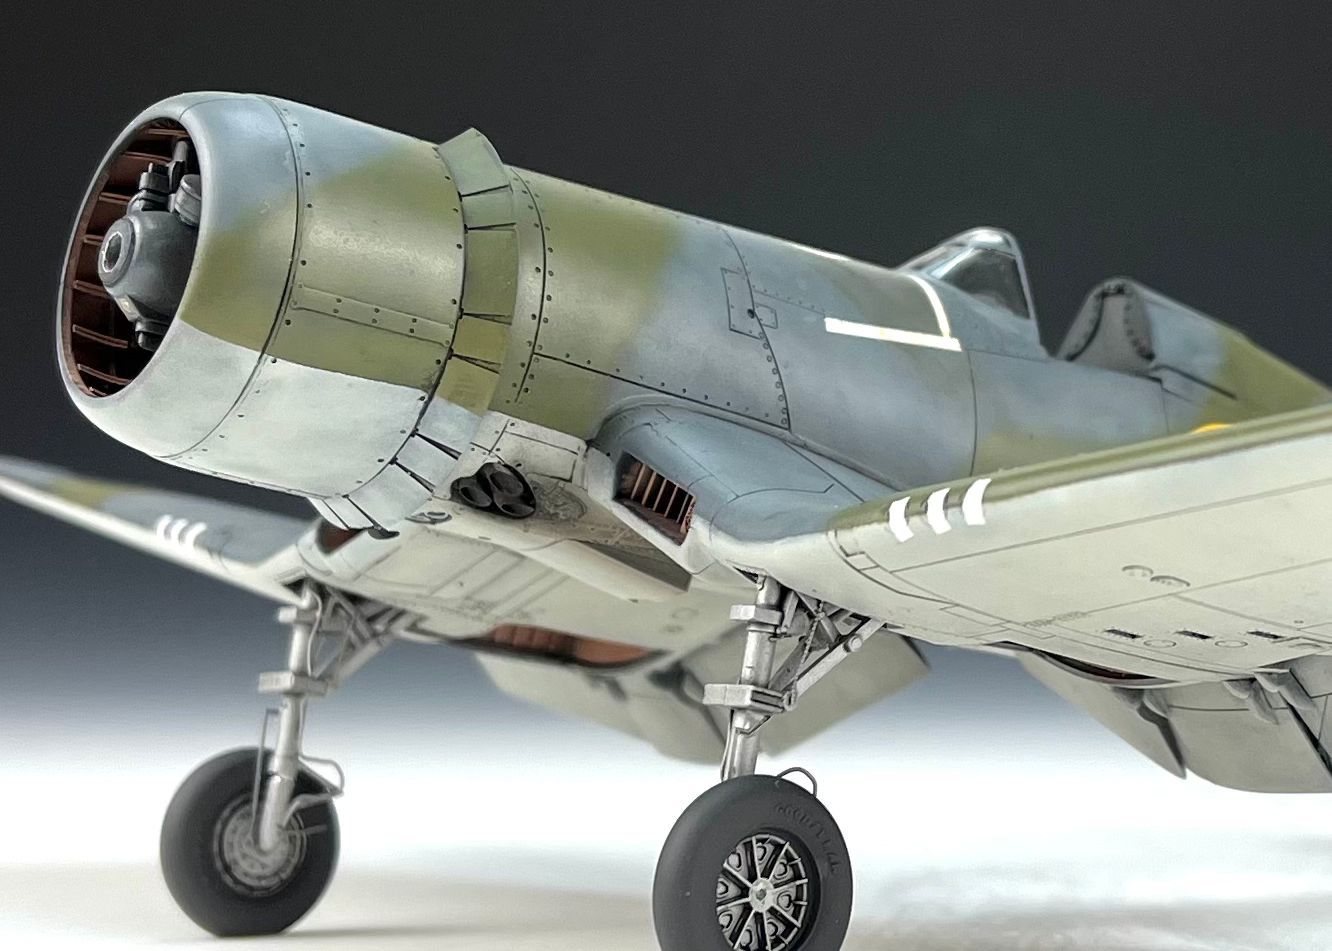
MiG Black Smoke powder enhances the exhaust stain. MiG Standard Rust powder highlight the exhaust tips.
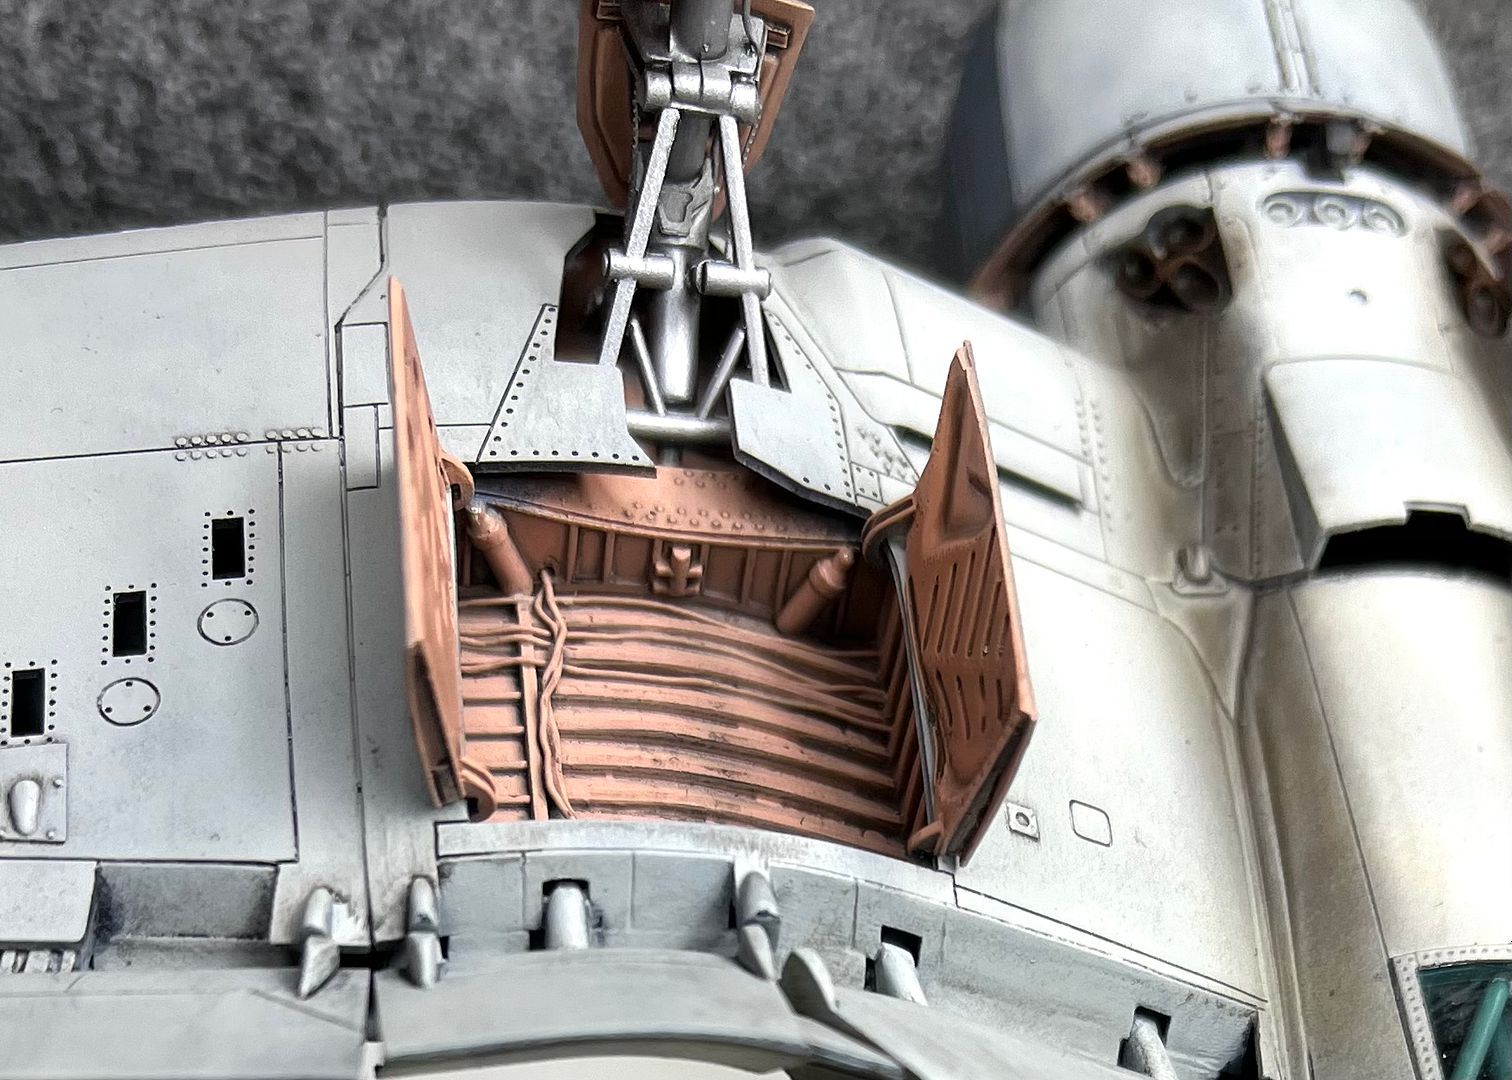
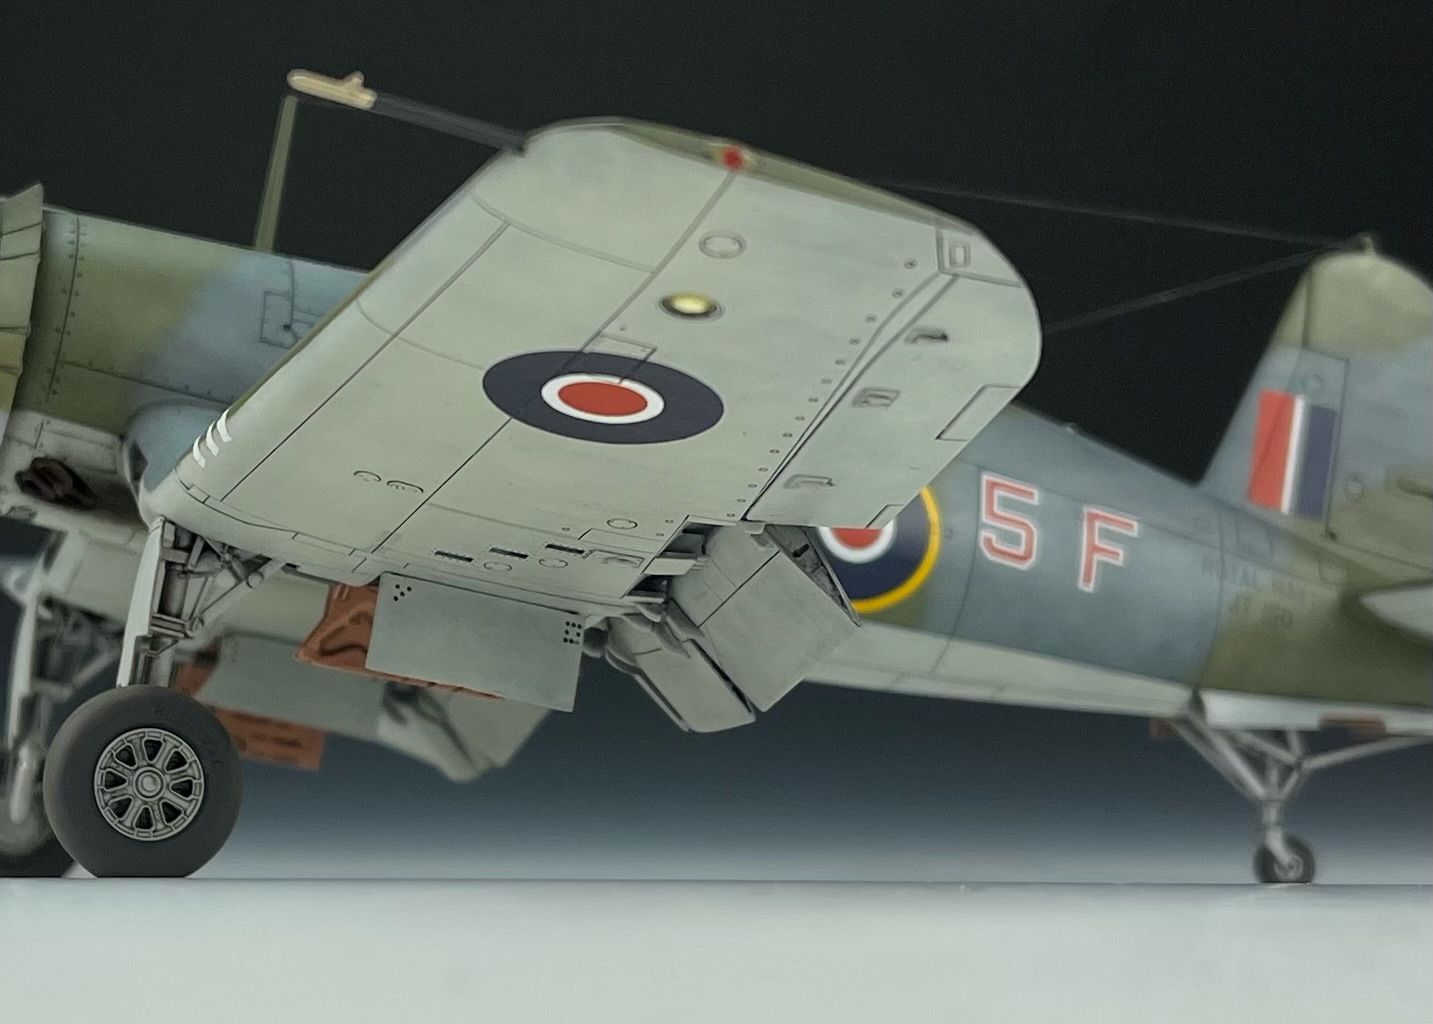
Landing gear doors and dive break added. Lead wire used for the plumbing.
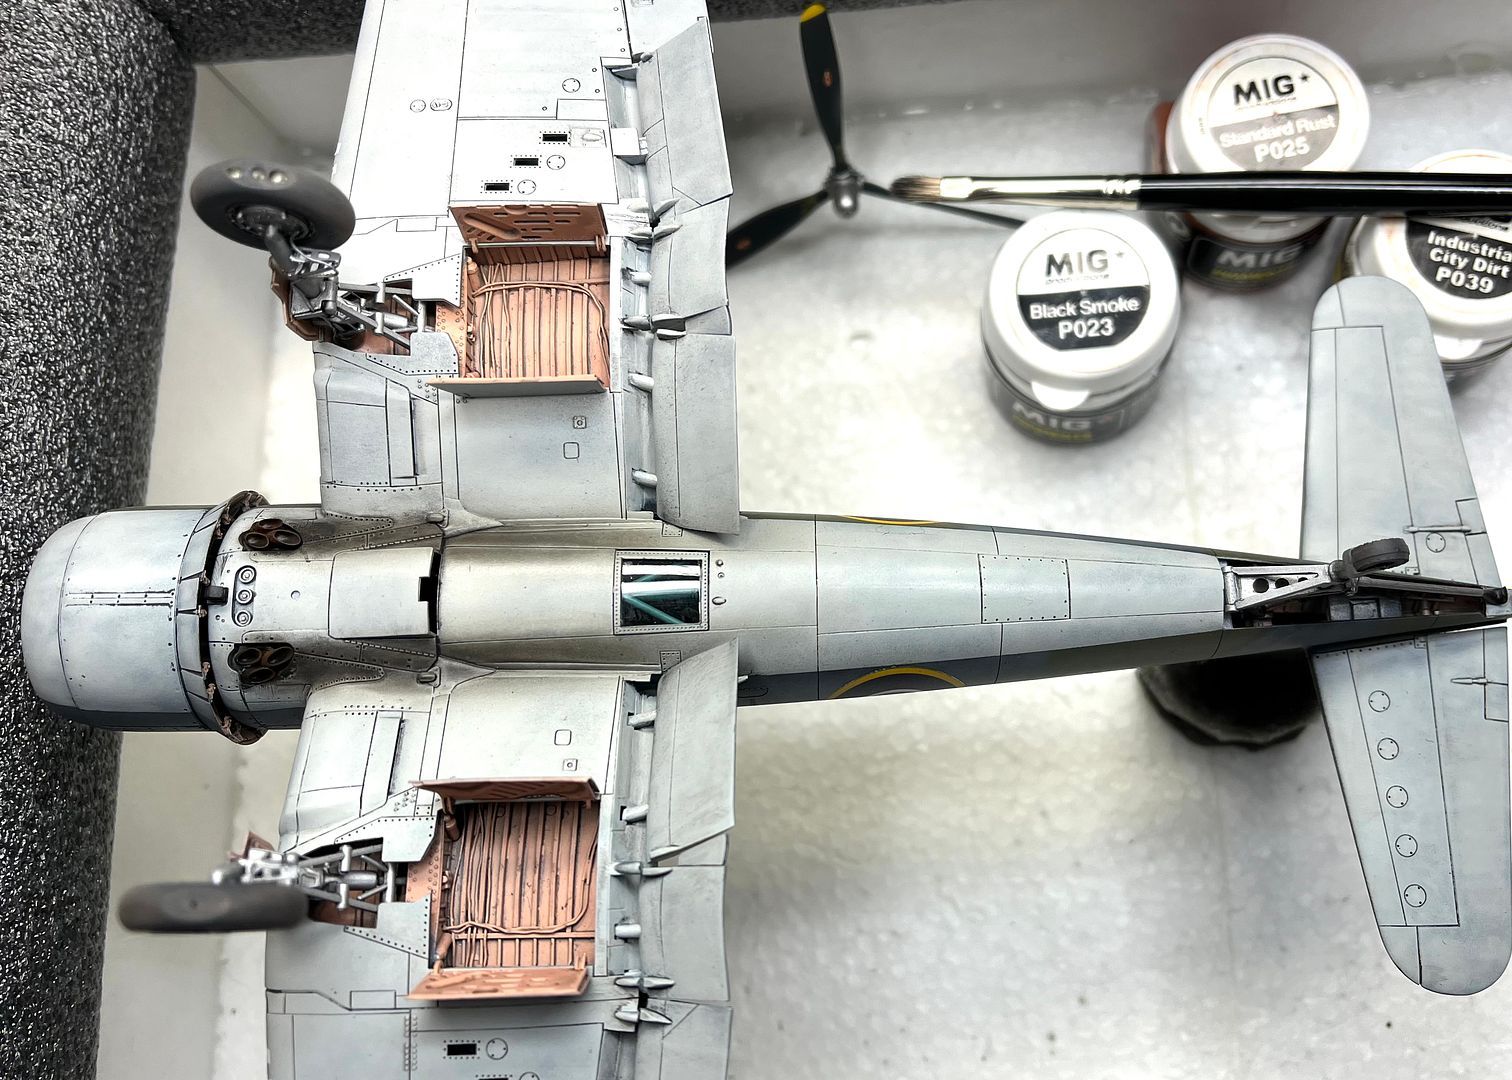
Tail wheel secured. That Salmon Pink Primer MRP130 looks pretty cool. MiG Industrial City Dirt to be applied to the main wheels.
- monthebiff, GMK, chaos07 and 8 others
-
11
-
On 3/10/2024 at 11:27 AM, Martinnfb said:
Beautiful work Rick , clean and crisp.
Cheers Martin. Much appreciated.
On 3/10/2024 at 5:21 PM, LSP_Kevin said:That looks fantastic, Rick!
Kev
Cheers Kev. Thank you.
On 3/10/2024 at 8:12 PM, LSP_Ray said:Great job!!
Many thanks Ray.
On 3/11/2024 at 6:38 PM, monthebiff said:Absolutely stunning work Rick, coming together very nicely!
Regards. Andy
Cheers Andy, appreciated.
-
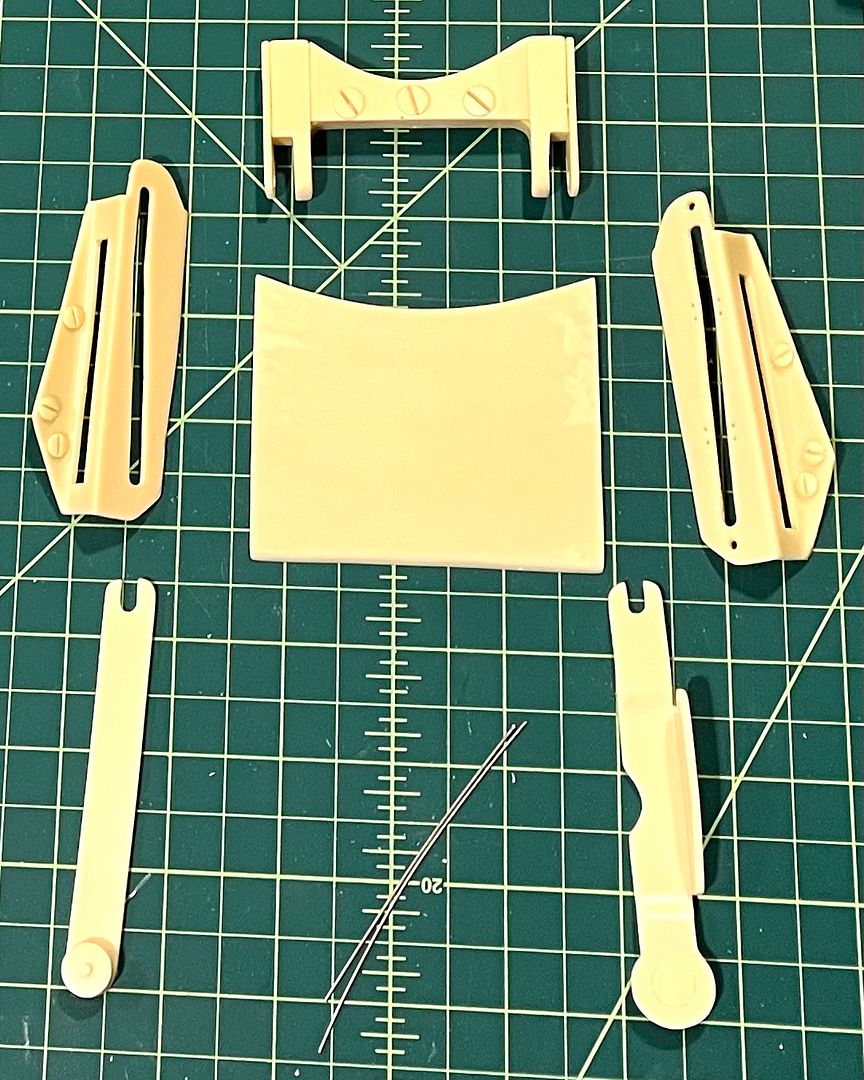
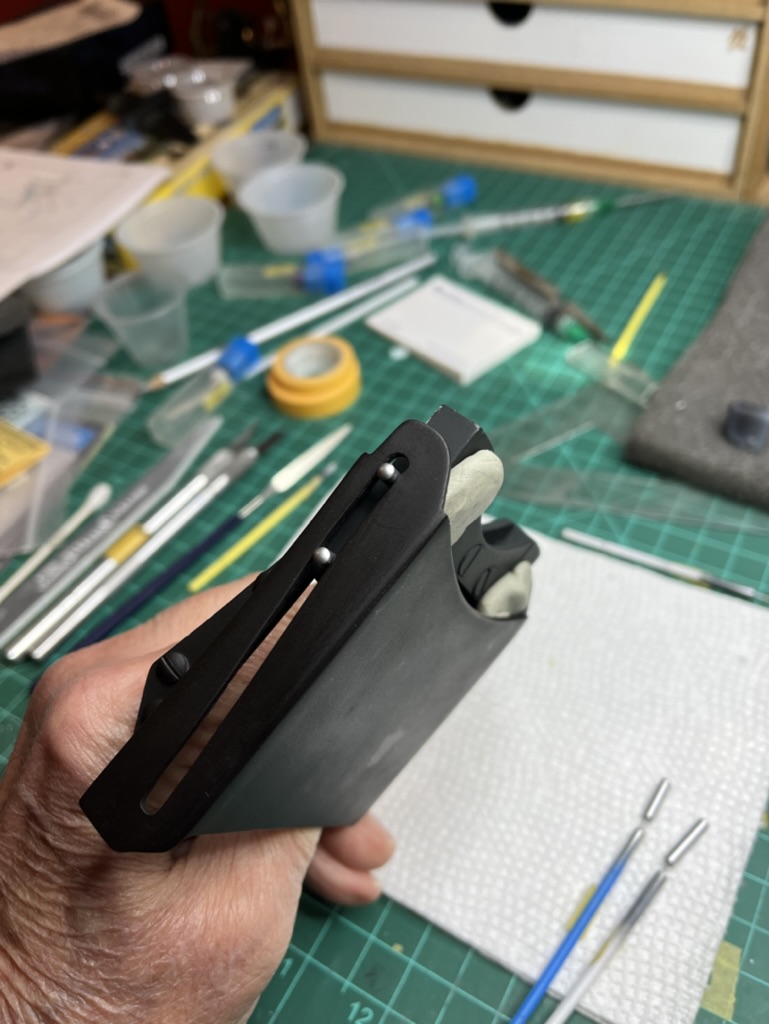
The Sunglass Cover, Support Arms and Support assembly is going to be tricky. These parts have zero mount pins/tabs/joints.
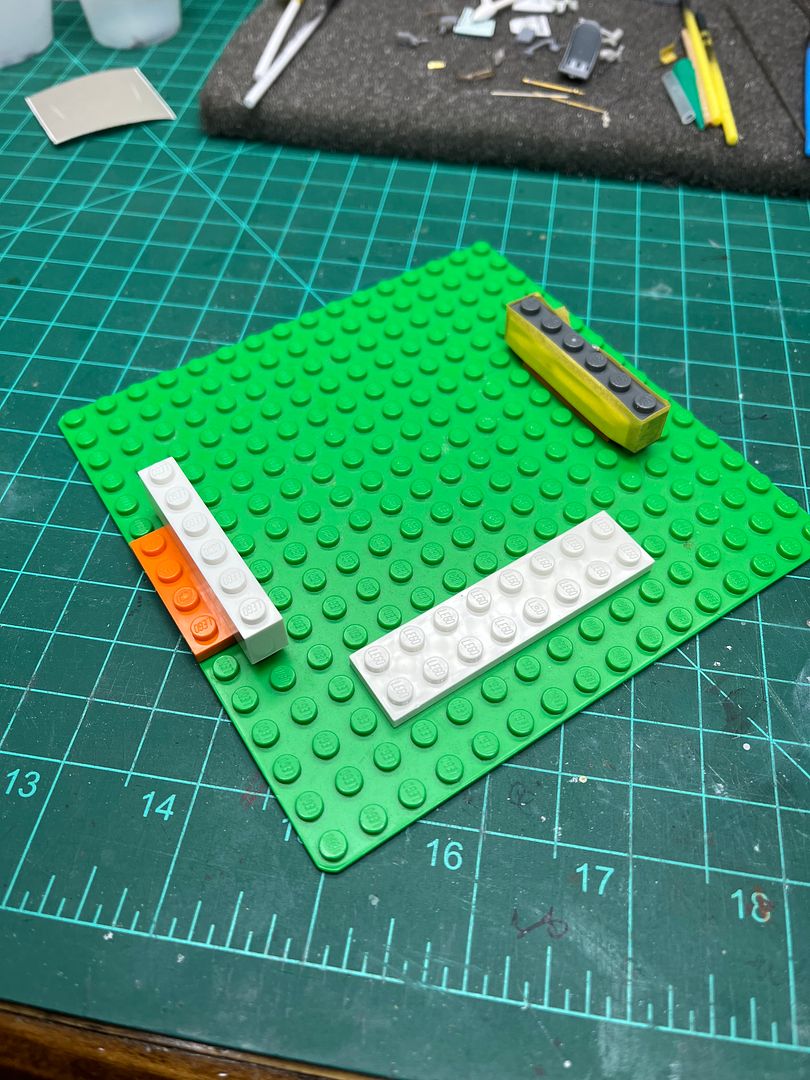
Make a jig using Legos.
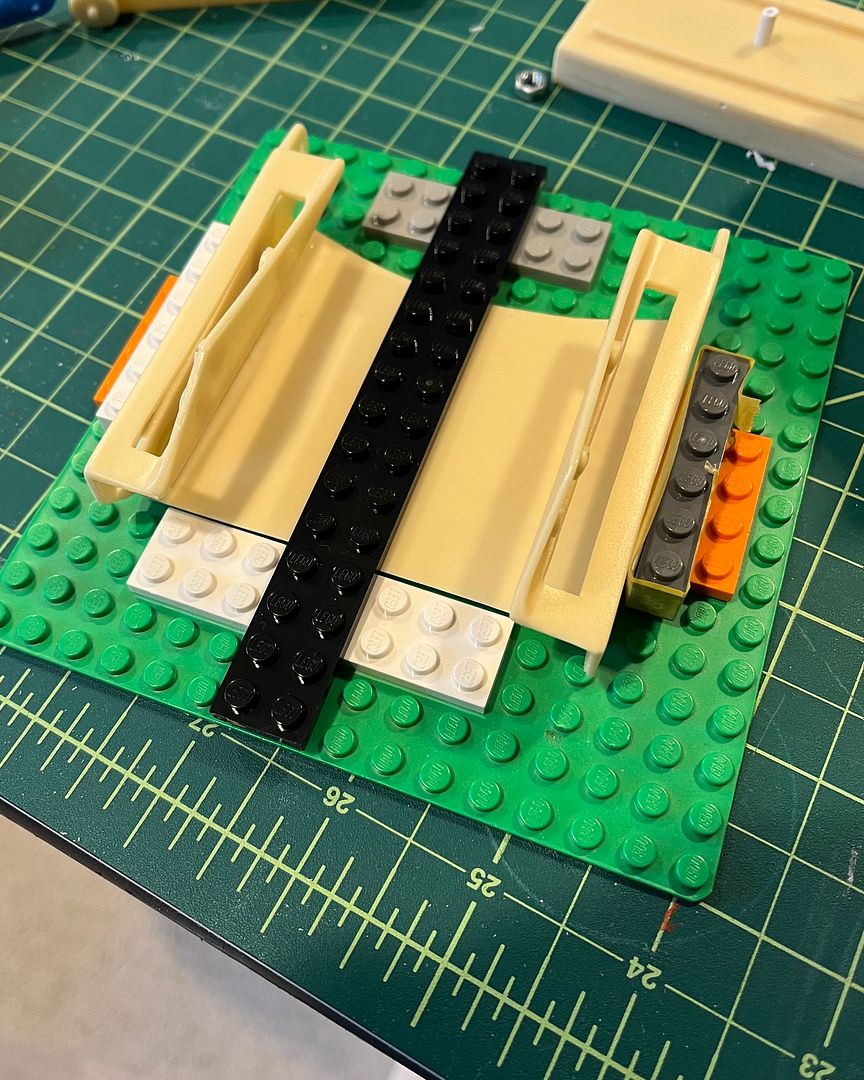
Secure Cover and Support Arms. Ready for glue.
 \
\
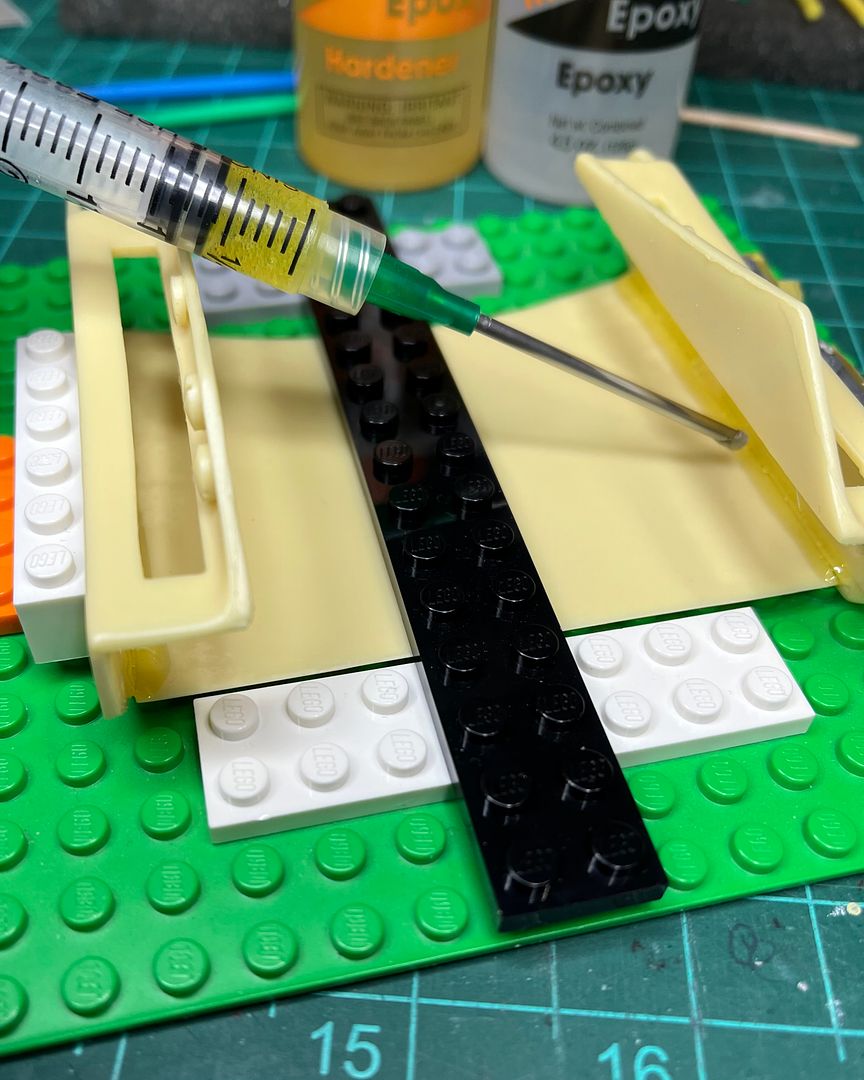
Using 2 part 15 minute epoxy I use a syringe with 14 gauge 1.5" industrial tip and draw a bead along entire inside of the join on both sides of the Support Arms and Cover. The long cure time allows minor adjustments before the glue sets.
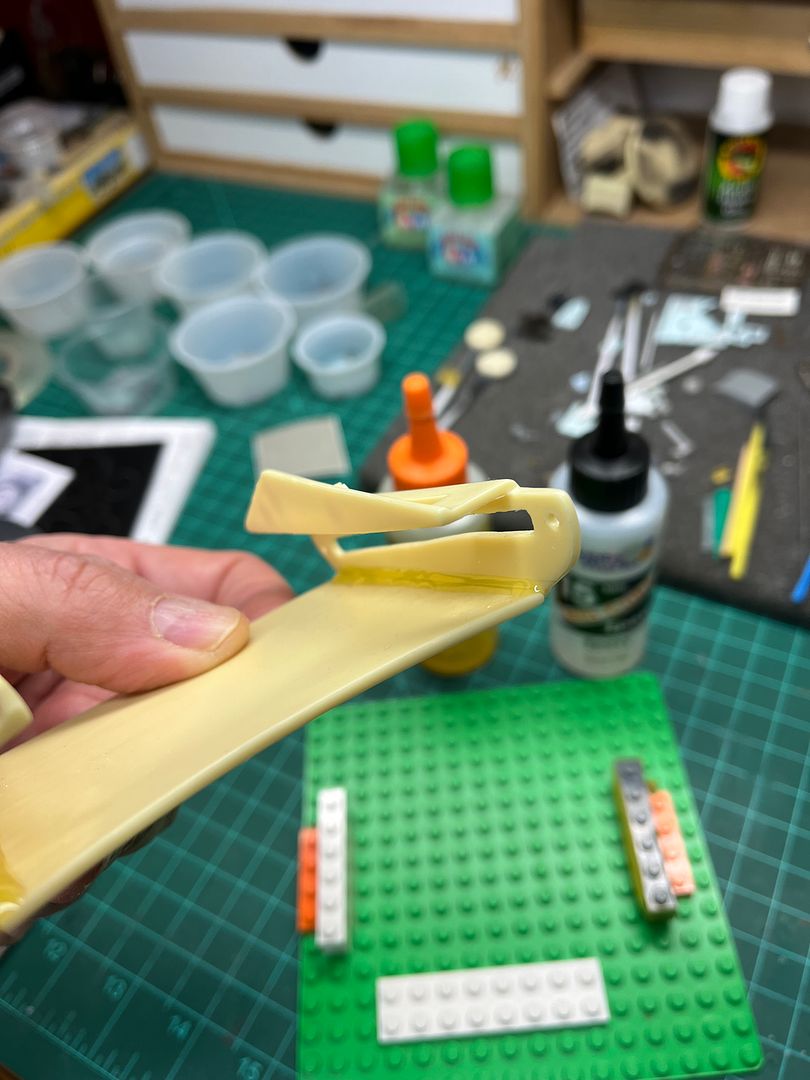
A nice solid join.

All parts washed and ready to glue, prime & paint.
After primer applied the outside seams of the Sunglass Cover are wonky. I break out the 3M Glazing and mix with Mr Leveling Thinner to a creamy paste and spread with a piece of plastic card.
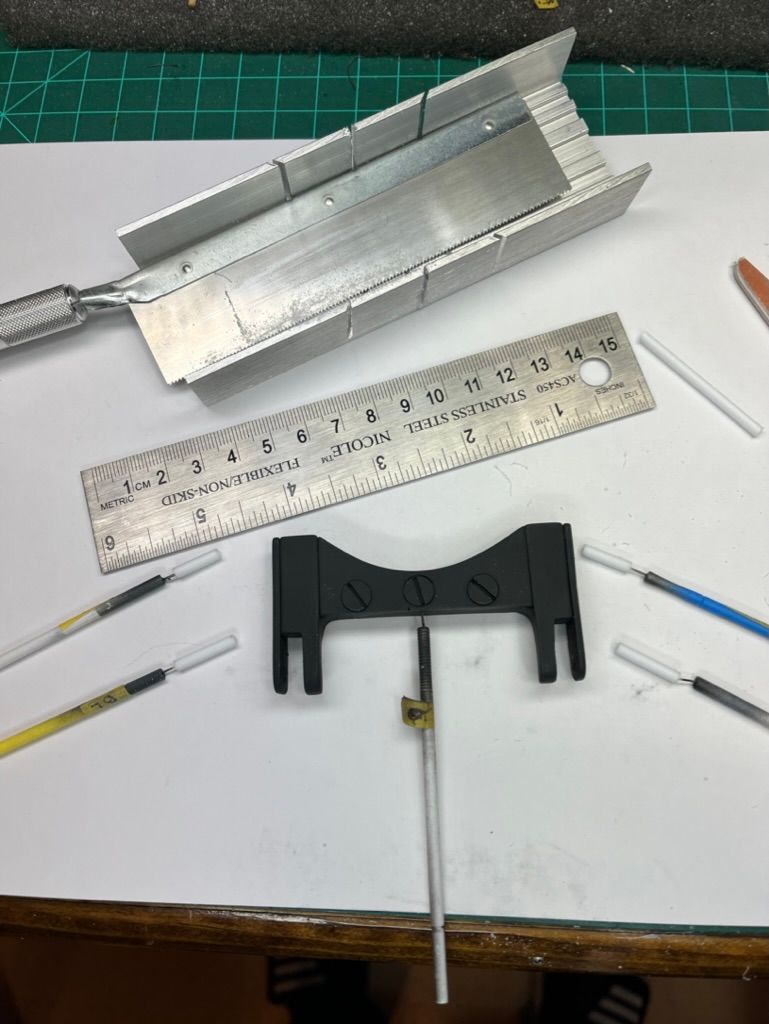
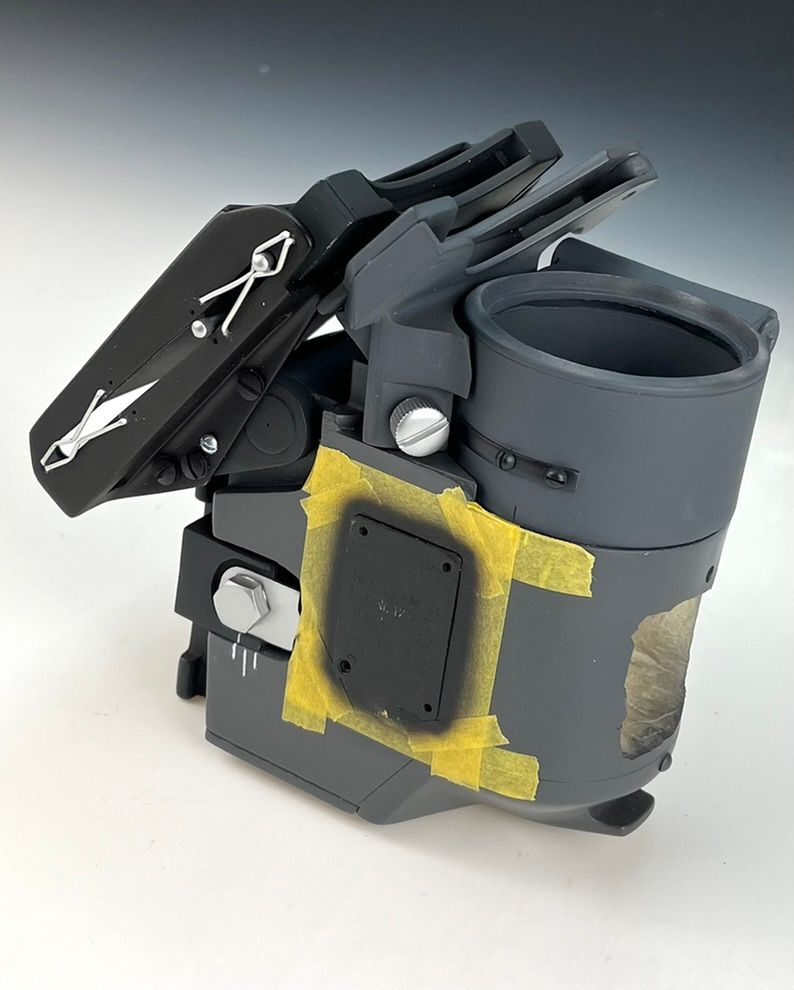
The Sunglass Support is painted Tamiya German Grey. Four mount pins are created with 1/8" plastic rod. A minimum of 4mm extend for each rod when assembles with the Sunglass holder. This is an exercise of careful and precise measuring.
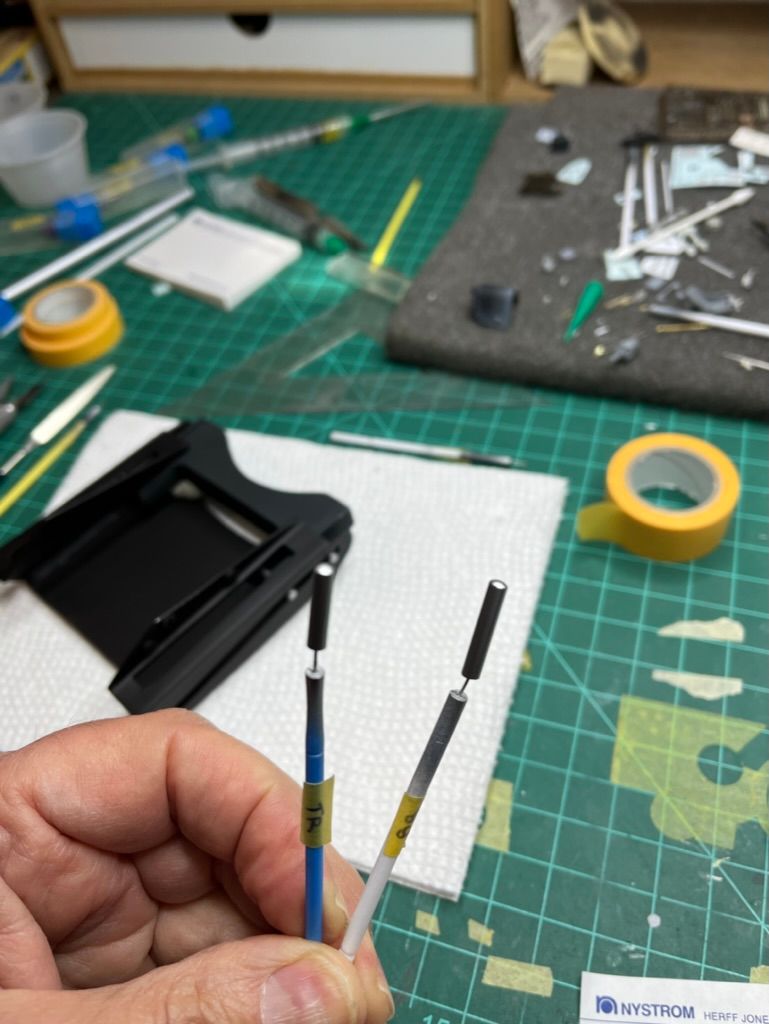
A dab of epoxy is applied to outside end of each pin to achieve a rounded effect. After full cure the pins are painted Alclad 102 Duraluminum.
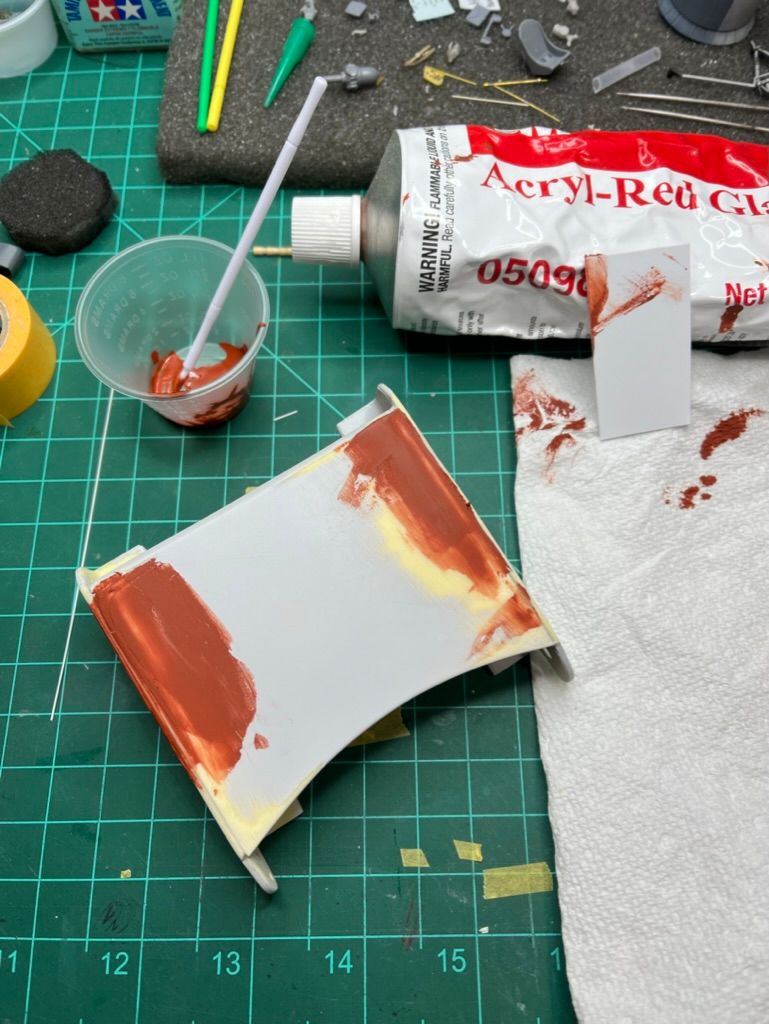
The Sunglass Holder is painted a mix of 1 part Gunze 3 Red and 9 parts Gunze 2 Black. 3:9
Using putty to secure the Sunglass Support I carefully apply 15 minute epoxy to corresponding hole on the Sunglass Support with micro tip applicator then insert the pins.
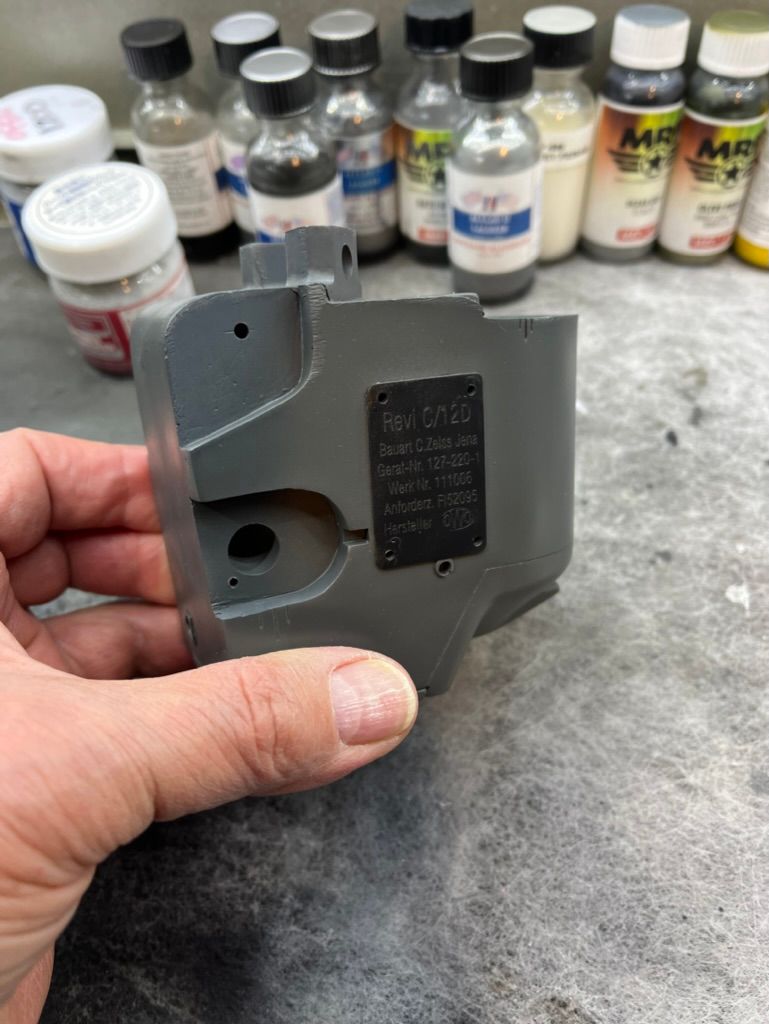
The body is painted Gunze 116 RLM 66. The data plate is Gunze 2 Black. I drilled out the corresponding mounts screws and will add real screws after I whitewash the letters on the data plate.
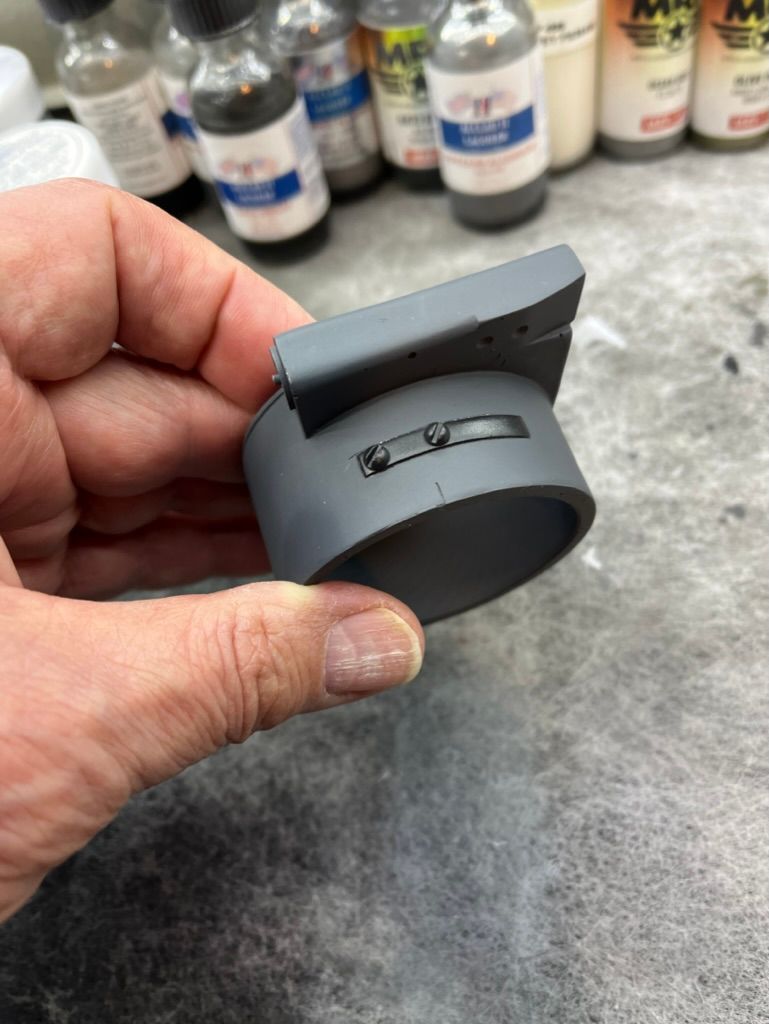
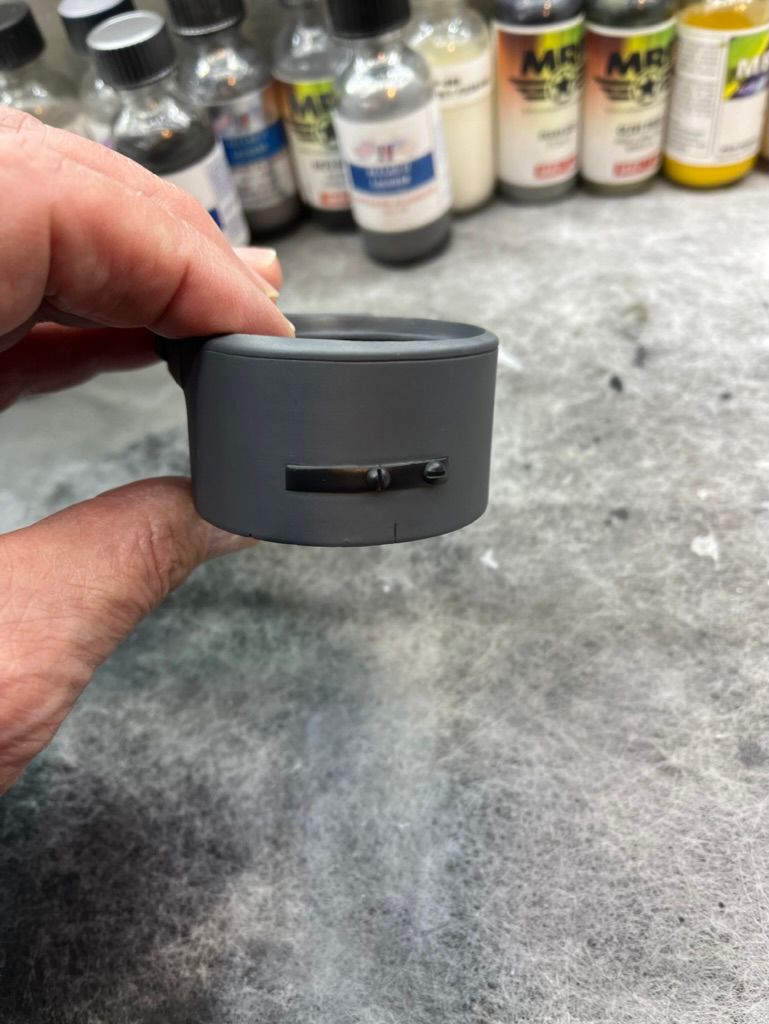
The reflector lens mount is painted Gunze 116 RLM grey then details picked out with Gunze 2 Black. The top ring will also get some Gunze 2 Black love.
The whitewash application on the data plate failed and has been repainted black. This process is to bring out the engraved letters. So far it ain't working for me. The alignment ticks whitewash showed up quite nicely.
This is a test fit and I'm really stoked on the look. This is far from complete. You can see I hollowed out the body with a 1/4" drill to reduce weight. I reduced body weight by over 3 ounces. The Crash Pad will cover the hole.
The Sunglass Cover assembly is secured to the Sunglass Fixing Plate with one sheet metal screw on each side. This will allow final positioning before I glue all components to a "static" position.
-
On 2/2/2024 at 6:14 PM, monthebiff said:
Yes Jay, think they were 1/4 scale and were included in their Royal edition boxings. I had a 110 panel and it was pretty cool.
Regards. Andy
Eduard makes 1/4 Scale IP for Me109 and Me110. I have both purchased over 10 years ago. Tell me about the Royal Edition boxings?
-
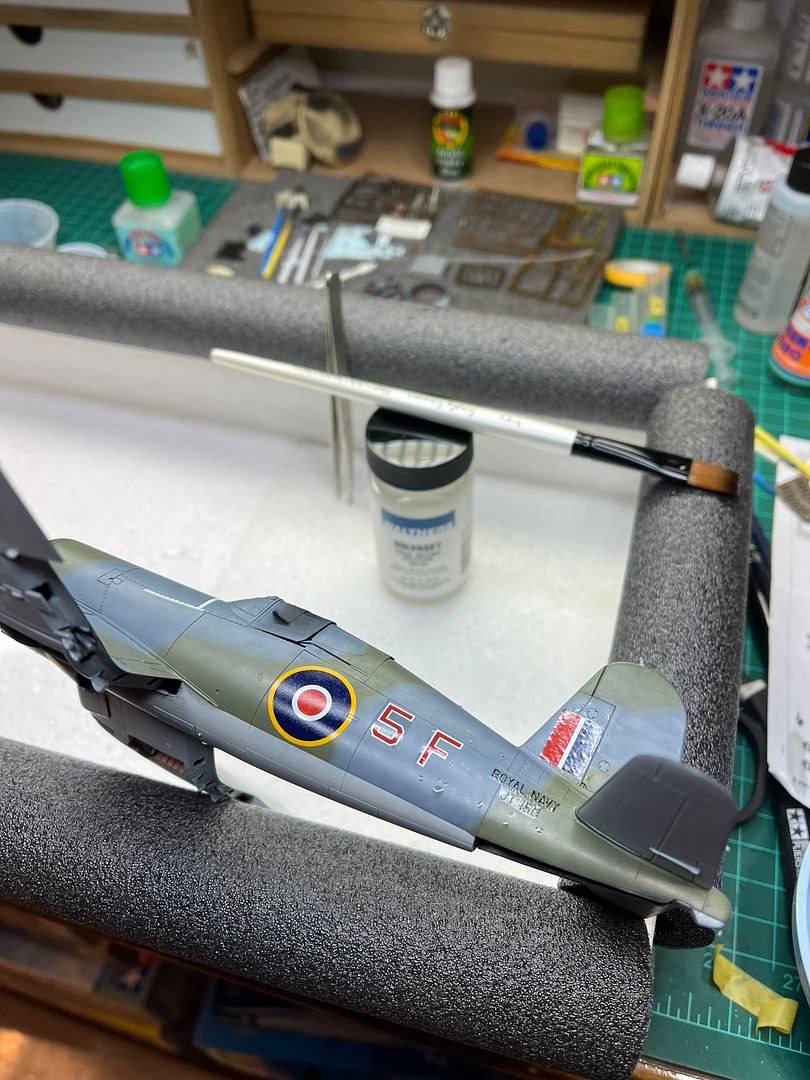
Matt finish using MRP127 Super Clear Matt. First time using MRP clears and I'm very happy with the results. Wind screen masks removed.
Pardon the dust.
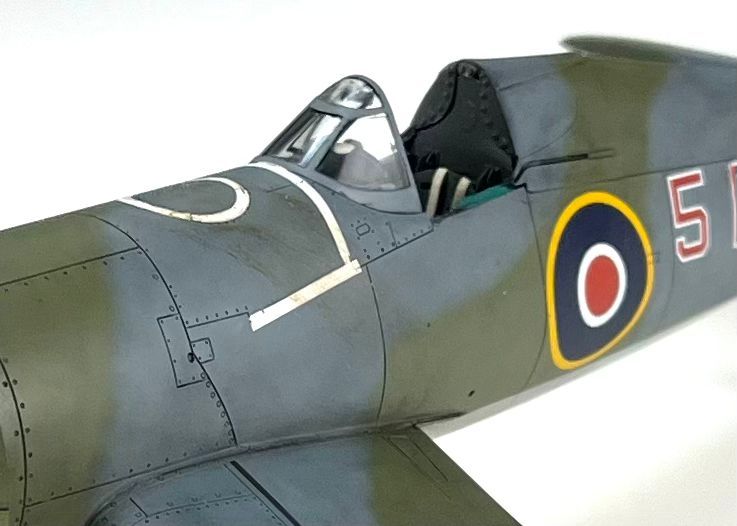
And the fuel leakage begins.

Landing gear legs installed. Will add wheel hubs and adjust the brake lines later.
Gun ports covered with thick white decal strips. Yup, they were a pain to apply.
Again, pardon the dust.
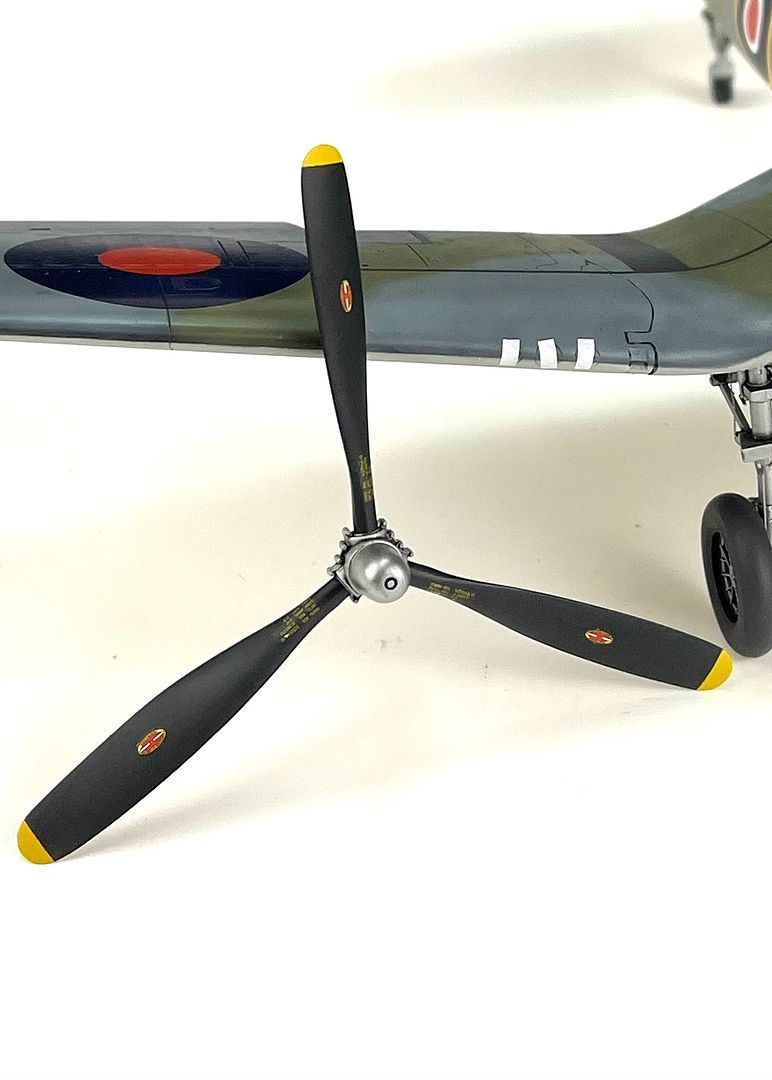
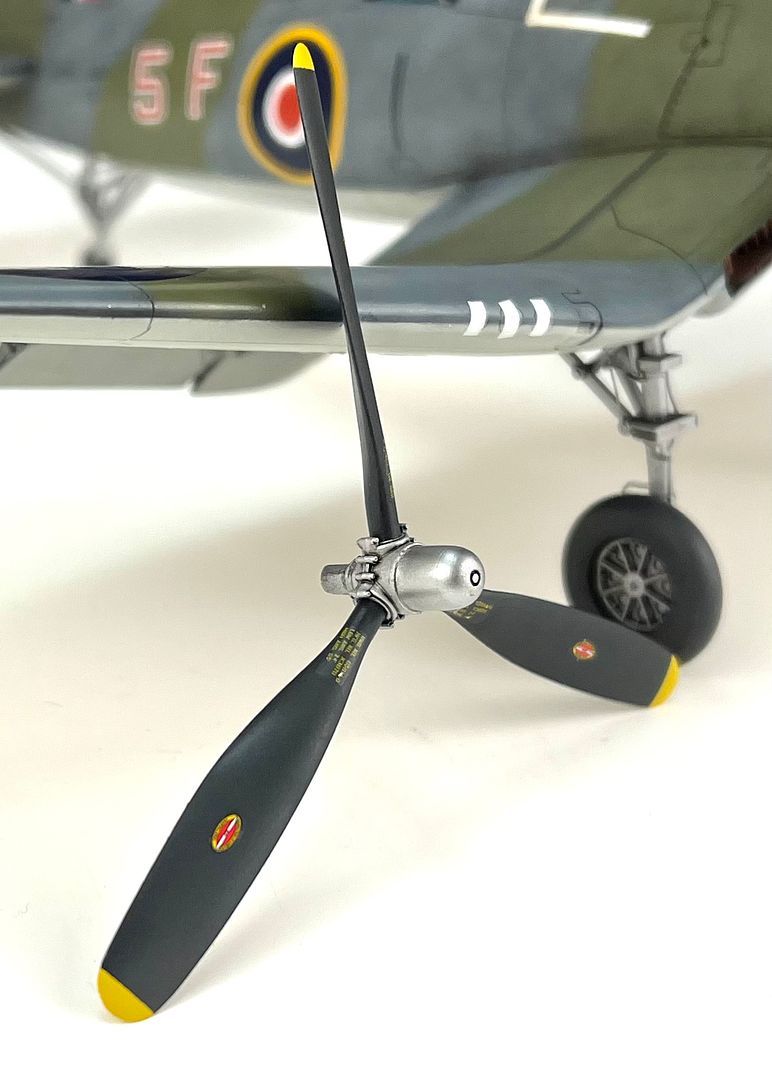
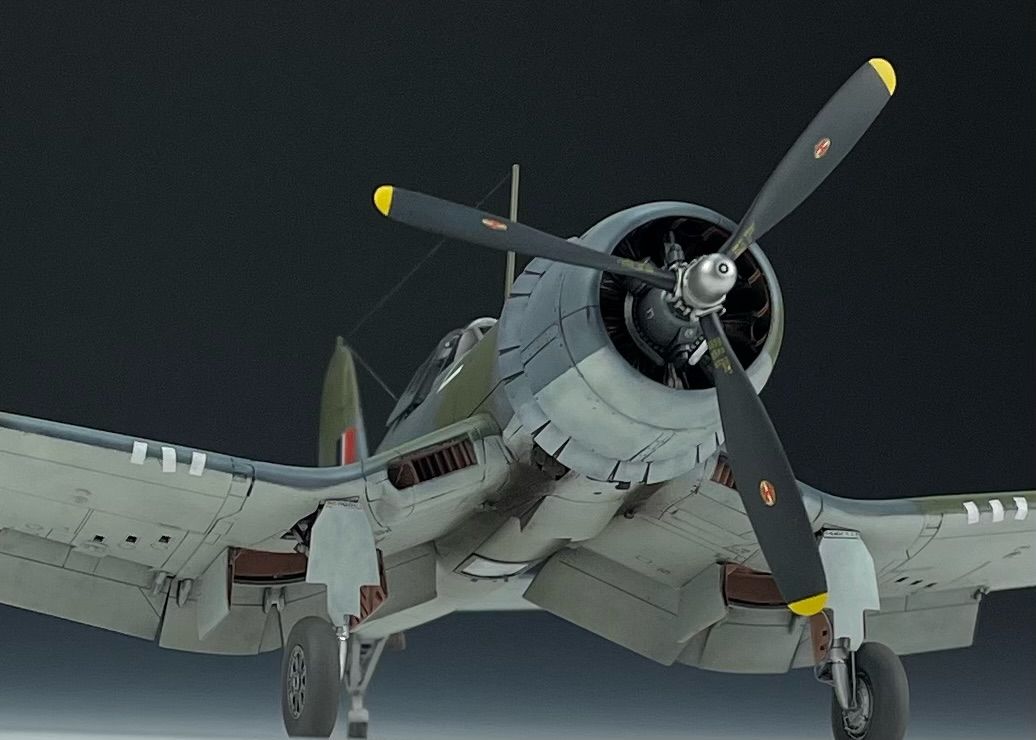
Stencil decals applied to the prop blades and given a matt varnish. The boss stayed shiny.
On deck will be more weathering and finishing touches with wheels, landing gear doors, radio aerials.
-
Using PropMaster I glue and align my UltraCast F4u hub with kit blades. UltraCast blades are HS Paddle Blades and incorrect for F4U-1's.
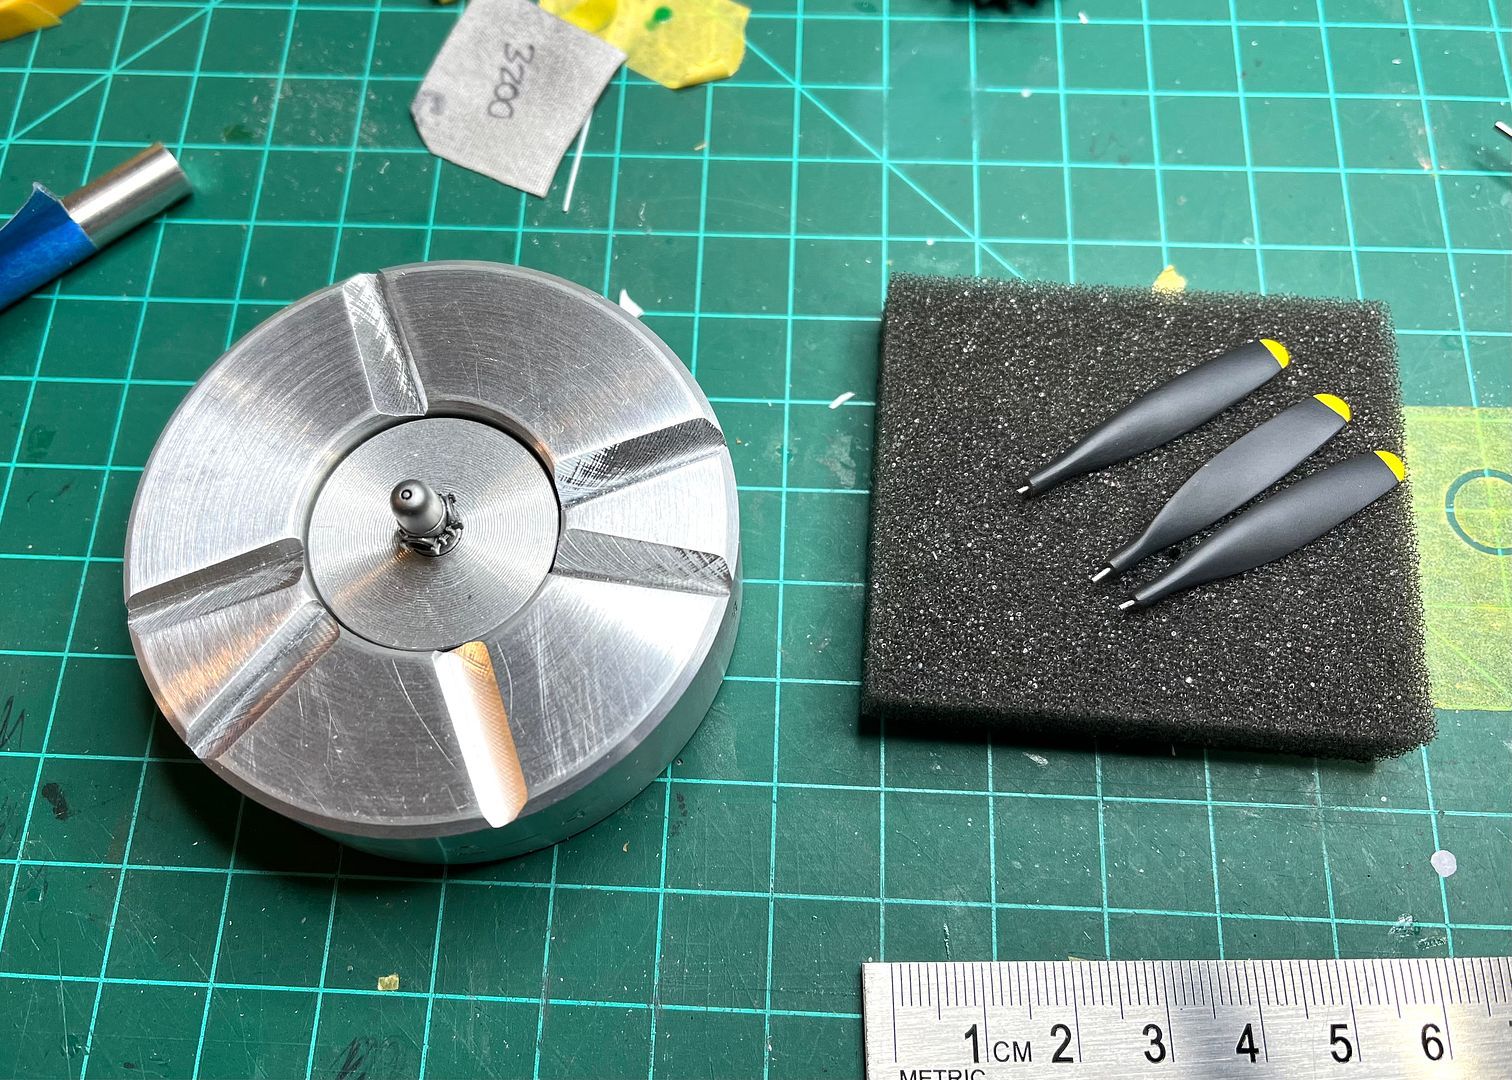 I drilled .5mm holes in the prop hub and prop blades then inserted locator pins for the prop blades
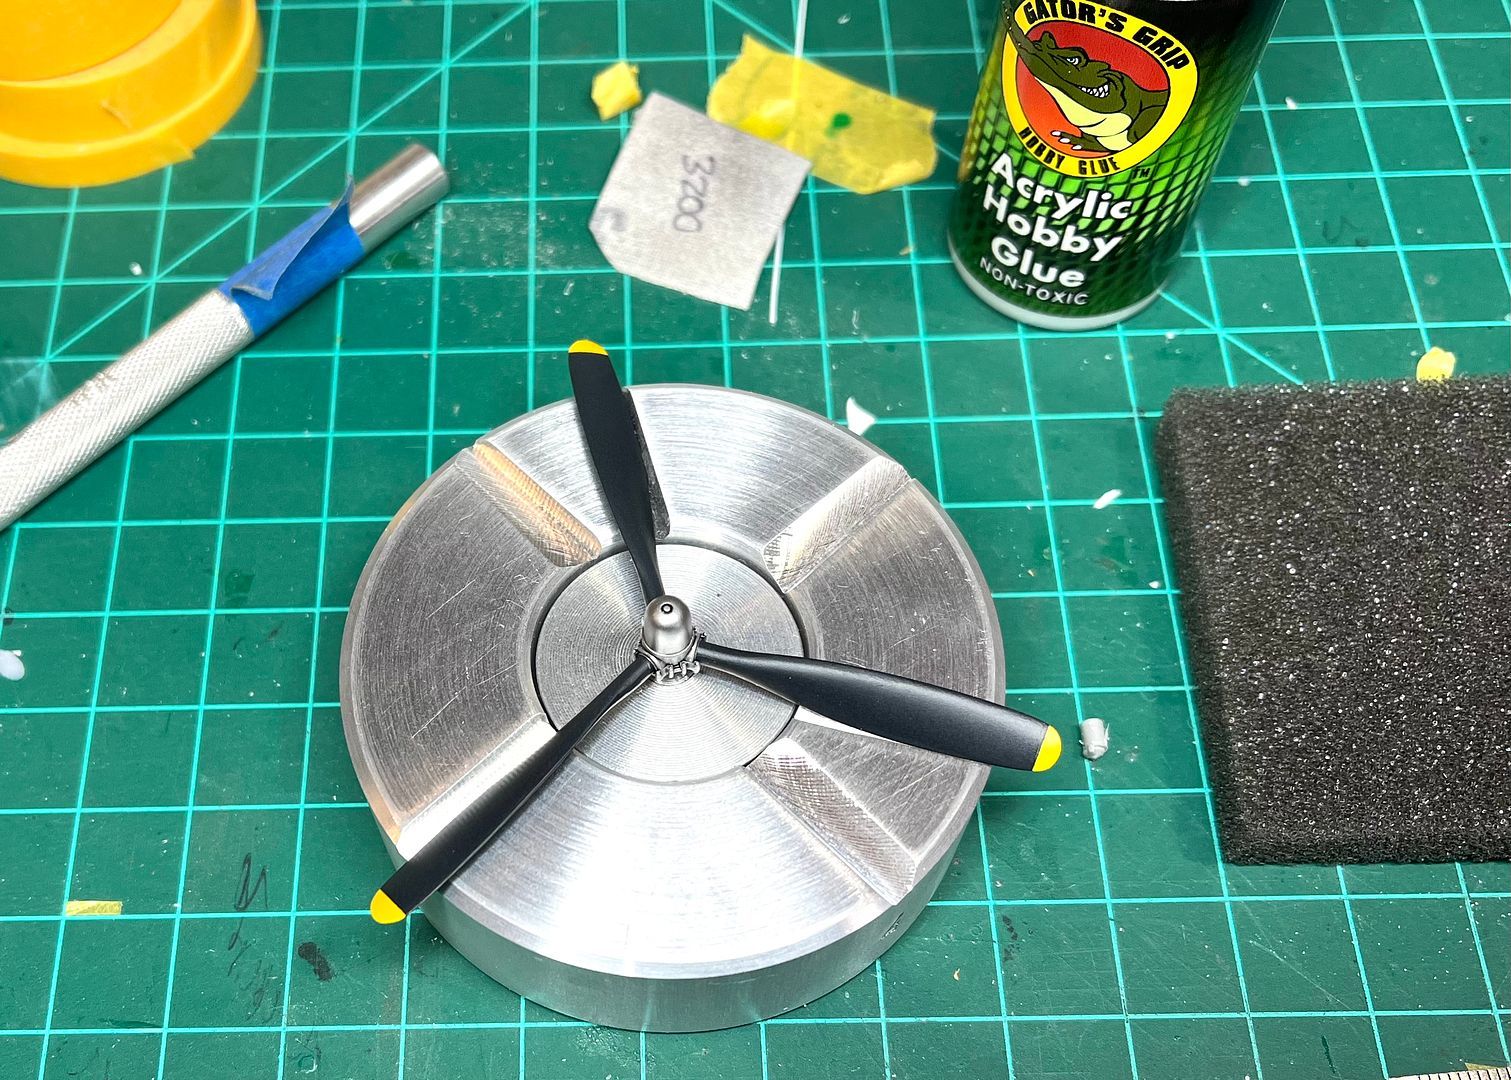 Using acrylic glue the props are inserted and desired pitch achieved. PropMaster is a valuable tool. I have one for 1:32 scale too.
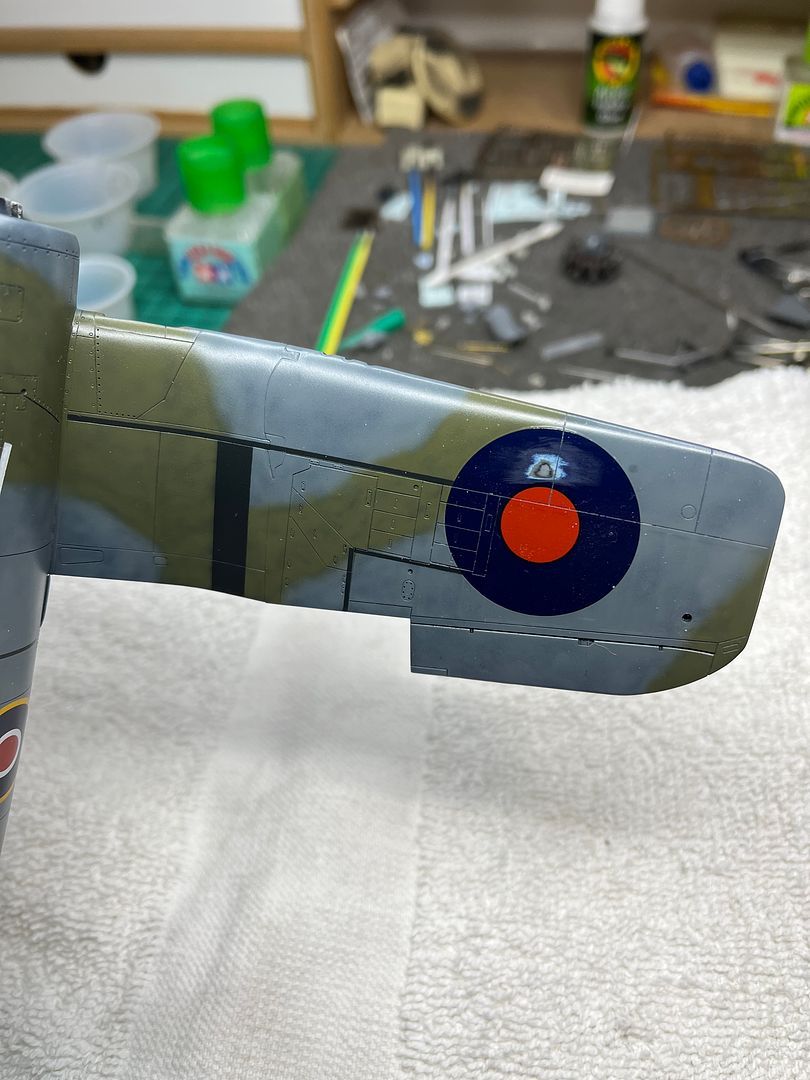
All fun n games till you drop a tool leaving a nice gash on wing through decal. A little progressive sanding and paint with MRP183 Oxford Blue is a match.
Panel line wash using MiG Dark Wash.
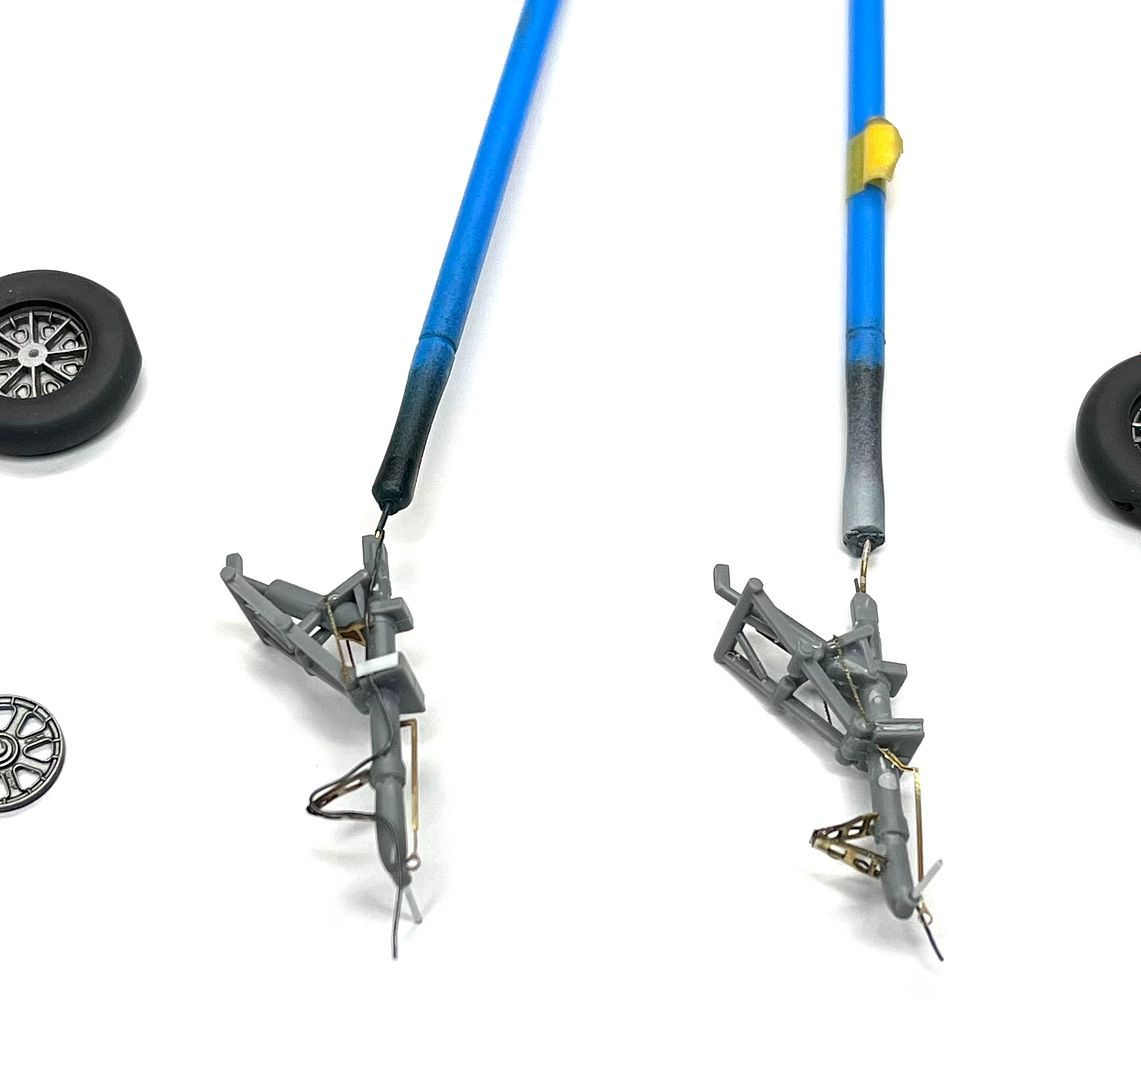
Main gear gets ejection pin removal then some PE and lead wire love. Each leg get 5 PE pieces and lead wire. I drill and inserted locator pins to accept Barracuda Studios wheel set as I cut down the axles just a tad too much.
- scvrobeson, chukw, Shoggz and 3 others
-
6
-
-
22 hours ago, LSP_Ray said:
Beautiful!
Thanks Ray
19 hours ago, LSP_Kevin said:Great stuff, Rick.
Kev
Cheers Kev.
-
More decals....
Decal softener applied. The wrinkling of the decals says the solution is working. Walk away and come back later.
Setting solution cured. No silvering, hooray!
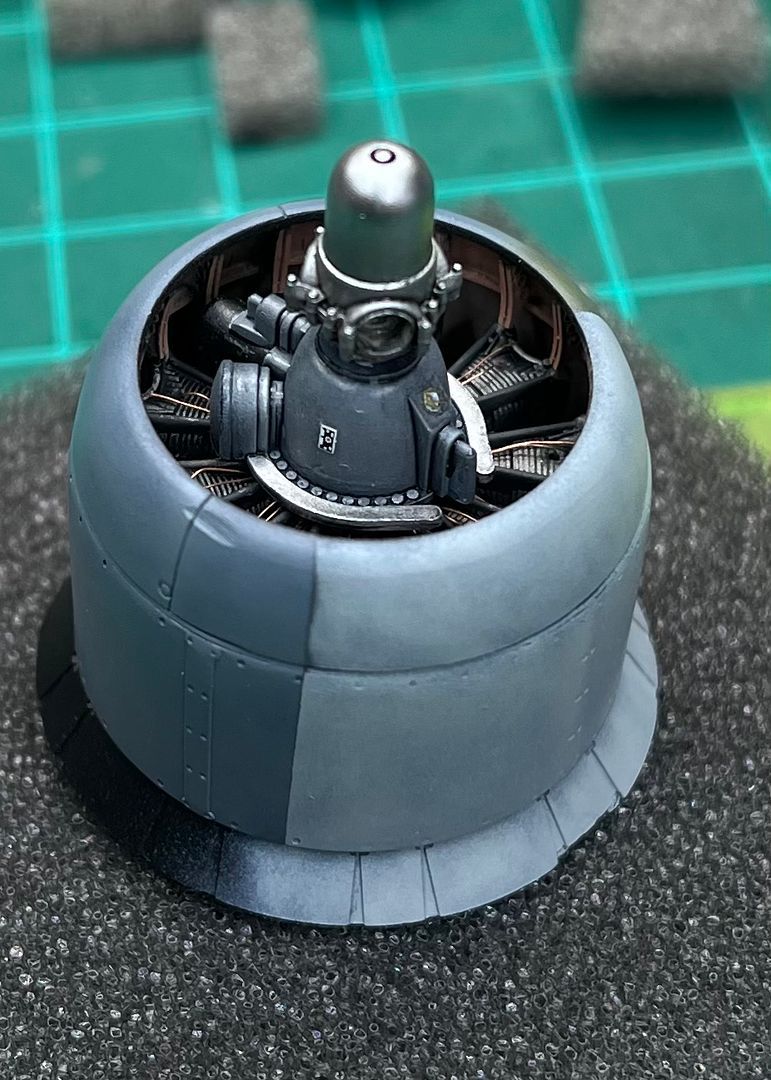
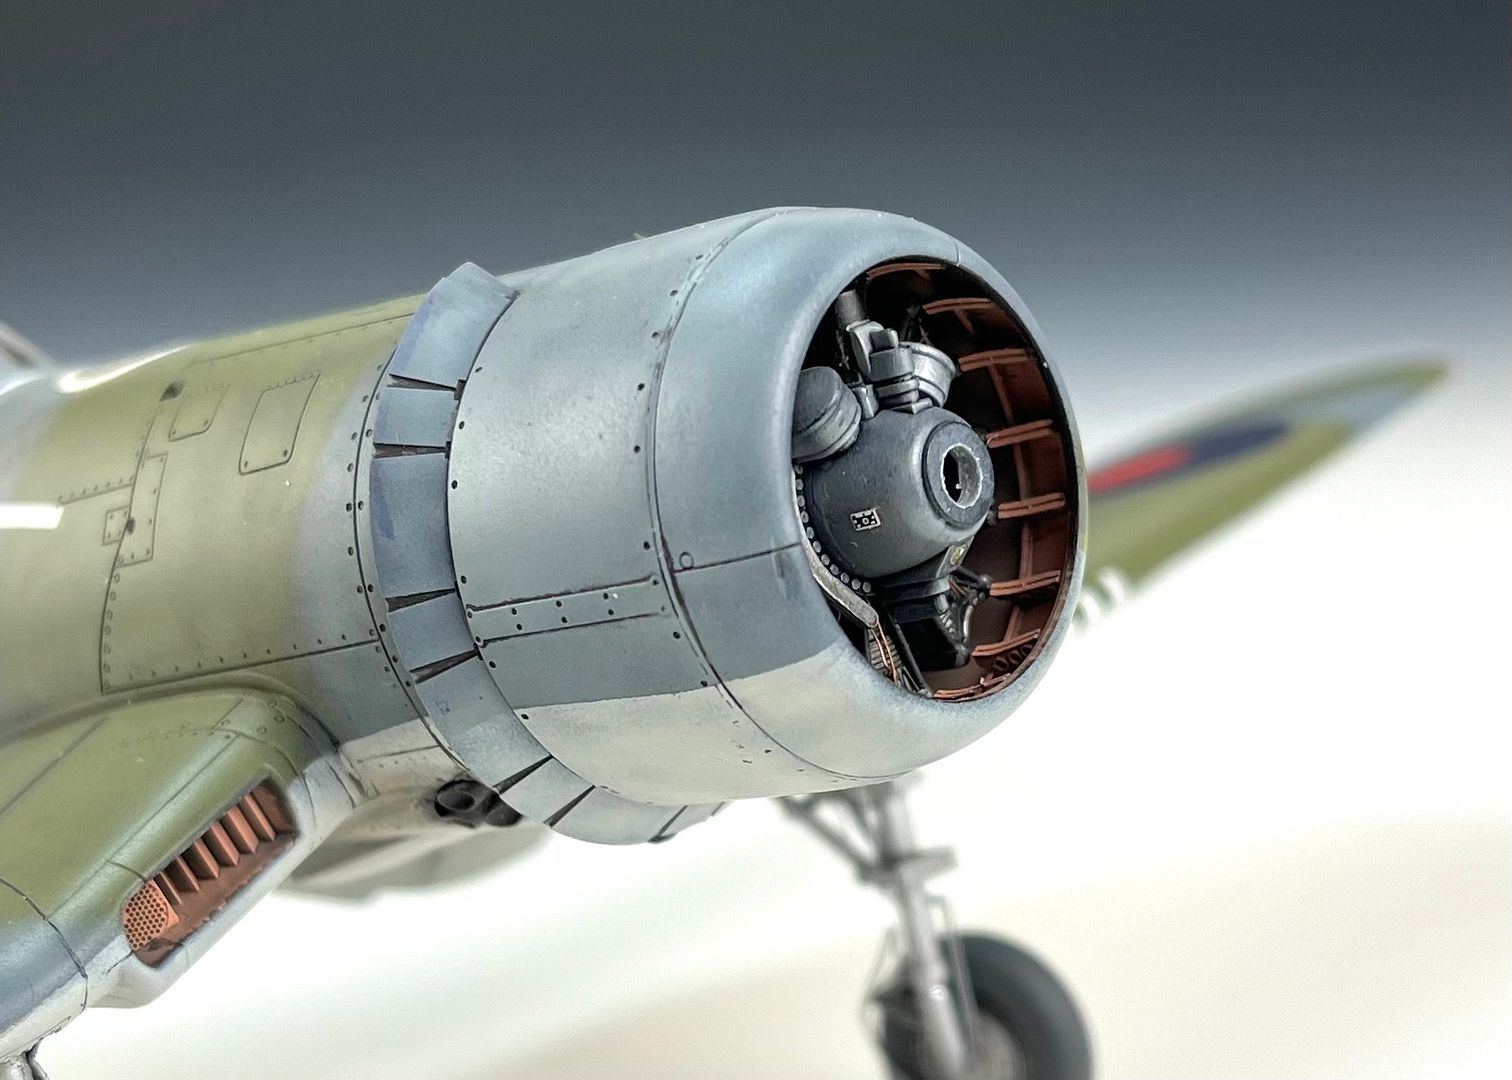
Engine dry pitted
- Out2gtcha, patricksparks, Fanes and 10 others
-
13
1:1 Revi-12C/D Gunsight
in Works in Progress
Posted
Thank you all for your kind words. Really means much to me. I feel somewhat discouraged as I do not get the time to mine LSP check in and comment on all the beautiful builds There are so many outstanding modelers on this site. It's a privilege to be part of this group.
Cheers - Rick