BJG
-
Posts
140 -
Joined
-
Last visited
Recent Profile Visitors
840 profile views

-
 mywifehatesmodels reacted to a post in a topic:
First armor Academy 1/35 Tiger 1- Finished
mywifehatesmodels reacted to a post in a topic:
First armor Academy 1/35 Tiger 1- Finished
-
Bill Cross reacted to a post in a topic:
First armor Academy 1/35 Tiger 1- Finished
-
Calling this one done guys. Chipped, washed and dusted, all good fun and learned a bit along the way. Final pictures and am waiting for the postman to come. Cheers,
- 18 replies
-
- 2
-
-
- 1/35 scale
- German tank
- (and 2 more)
-
Bill Cross reacted to a post in a topic:
First armor Academy 1/35 Tiger 1- Finished
-
Out2gtcha reacted to a post in a topic:
First armor Academy 1/35 Tiger 1- Finished
-
Out2gtcha reacted to a post in a topic:
First armor Academy 1/35 Tiger 1- Finished
-
Almost there. To finish off will be a bit more dry brushing and a clear coat of matt. Cheers, Brad
- 18 replies
-
- 2
-
-
- 1/35 scale
- German tank
- (and 2 more)
-
Bill Cross reacted to a post in a topic:
First armor Academy 1/35 Tiger 1- Finished
-
Outstanding. Love it.
-
BJG reacted to a post in a topic:
1/16 panzer 38t COMPLETED, New Pictures.
-
Guys you are too kind. Thanks. I really am enjoying this even though it is taking longer than expected and I am biting into family time. That is what the double ended candle is for right? Any way, exhausts are almost done, (still have to do those tricky little mushroom things that sit on top of the main section of exhaust) painted with a couple of different brown colours and dry brushed with a brown metallic. Still need soot to finish off. Deck tooling is done and will be covered in mud and dust to hide them haha. Now, a question. The box you see sitting on the front section with the tools was that camouflaged as I have it or was it a regularly replaced item that should be a wood finish. I have no idea what it is for and am wondering what you would do. Oh dear, just noticed rather ugly join line on the head of the sledge hammer. That can stay there.
- 18 replies
-
- 1
-
-
- 1/35 scale
- German tank
- (and 2 more)
-
andromeda673 reacted to a post in a topic:
First armor Academy 1/35 Tiger 1- Finished
-
andromeda673 reacted to a post in a topic:
First armor Academy 1/35 Tiger 1- Finished
-
andromeda673 reacted to a post in a topic:
First armor Academy 1/35 Tiger 1- Finished
-
mywifehatesmodels reacted to a post in a topic:
First armor Academy 1/35 Tiger 1- Finished
-
Cheers guys, I have defiantly rekindled some modelling mojo by doing this kit. Some times not giving too much of a damn can be good and fun as right here. Well I got home from a stint from work and got the total of seven decals on the tank as per the instructions. Got to love that!! They seemed to go down well with a bit of decal sol and set even though the carrier film seemed thick. They will do any way. Then it was time to do some dry brushing and chipping and the like and exposing some of the good old German steel in places. Being my first tank and not being really up to speed with a few of my techniques I wanted to keep it low key, not going too far and messing it up. I can always go back and do more. I did an initial wash in the engine grill area and it looks ok so far. Also today I painted the wire ropes and tools for the upper deck but failed to take a picture of them so i'll post pictures next time if you can wait haha. Next is to seal again, a couple of washes and then onto the mud and dust. Cheers for looking in, Brad
- 18 replies
-
- 2
-
-
- 1/35 scale
- German tank
- (and 2 more)
-
So I had an hour spare today so got to doing the camouflage on the Tiger. I wished to use the green and red brown scheme so went with a tank that operated in Russia in 1943. No political motivation here just modelling. I applied the green first as I had read that the coverage of the red brown was very good and would cover the green well to define the two lines with a nice tight edge. Well, still a rank beginner with my Aztec 470 I needed all the help I could get so went with it. Using 15psi and a couple of drops of Tamiya lacquer thinner (yes I was told to try it by some bloke in a hobby shop) I gingerly went about applying my very first tank camo scheme. I can honestly say I did not have any Opps moments or think this is Sh1+ and I want out. Green first then red brown and then some more green to even things out a bit. Here it is so far with tracks not fixed and on it's new but bare base that I will be displaying the model on once complete. Next is decals and tools etc to be added. Hope you like it. Cheers, Brad
- 18 replies
-
- 5
-
-
- 1/35 scale
- German tank
- (and 2 more)
-
Yeah and I would like to see dust and dirt and exhaust behind it like in the picture above please mate.
-
Thank you for the encouragement gents. Please don't hesitate to chime in with corrections, tips and advice. So I got the wheels and drives on the Tiger, then after watching a couple of Utube vids had a crack at painting the tracks which in the kit are a rubber band type with a single join. Firstly I lightly airbrushed them with Tamiya Nato Brown all over. This is to (try to) represent parts of the track that are not worn or driven on and so rust a little. Active tanks did not have too rusty tracks I've been told. Next was to drybrush with a metallic colour I mixed with German Grey and Aluminium to get what I wanted. (purely speculative here haha) A wash and mud and dust will finish them off. Pictures are of how it stands tonight. Track is not fixed on and the keen eye will see a bit of tissue paper holding the track down at the front so it 'sags' under it's own weight. Wow, it is still fun. Cheers, Brad.
- 18 replies
-
- 3
-
-
- 1/35 scale
- German tank
- (and 2 more)
-
BJG reacted to a post in a topic:
Tamiya 1/35 Challenger 1 Mk3
-
BJG reacted to a post in a topic:
Dragon 1/35 M4A3 Sherman
-
More, more more!!!!!!
-
Wow mate. Awesome work.
-
Having a break from wing things for a little bit. I have been wanting to build some type of 1/35 tank for years and after seeing some great examples at a recent model expo I was hooked. I purchased and have been building my first ever armor vehicle being a cheapish but pretty good quality Academy Tiger 1 tank. Being my first I just want to have fun and even got my daughter helping me. No great expectations or modelling skills here just fun. Just knowing how beat up these things were is comforting to know I will be able to cover up any mistakes. I still want to end up with something to be happy with so I'm not quite just slapping it together and I am learning how to use my new Aztec 470 airbrush. Having good sessions and not so good (with airbrush but getting better) So far,,, fun factor 10. The basic build was easy and not tooooo time consuming. I'll post the rest of the build in pictures.
- 18 replies
-
- 6
-
-
- 1/35 scale
- German tank
- (and 2 more)
-
Thanks guys. Coming from you both I feel a bit better. Now to close it up. That has been a chore. Hours of dry fitting and removing tiny bits for clearance. Cheers, Brad
-
BJG reacted to a post in a topic:
1/48th HpH concorde
-
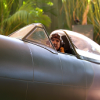
Calling this cockpit done. Apart from final adjustments as I put it together in a very special sequence these will be the last pictures I will force upon you as it will be very hard to see what's going on once closed up. ( Like most models I know) Some good. Some bad. I know I am going to have to learn to love and work with PE and resin as to be honest it has been a bit of a PITA!!! Bits breaking off and getting lost or broken and hours of dry fitting. All a great experience though and I will soon close up another Spitfire. (With more heart ache to come no doubt). Cheers, Brad
-
Fabulous build. That cockpit is a work of art. In awe, Brad
-
No worries Thomas. I hope you build has progressed faster than this one haha.