

ClumsyDude
-
Posts
2,849 -
Joined
-
Last visited
-
Days Won
9
Content Type
Profiles
Forums
Events
Posts posted by ClumsyDude
-
-
Thanks Shawn and Jim! Means a lot coming from modellers of your calibre.
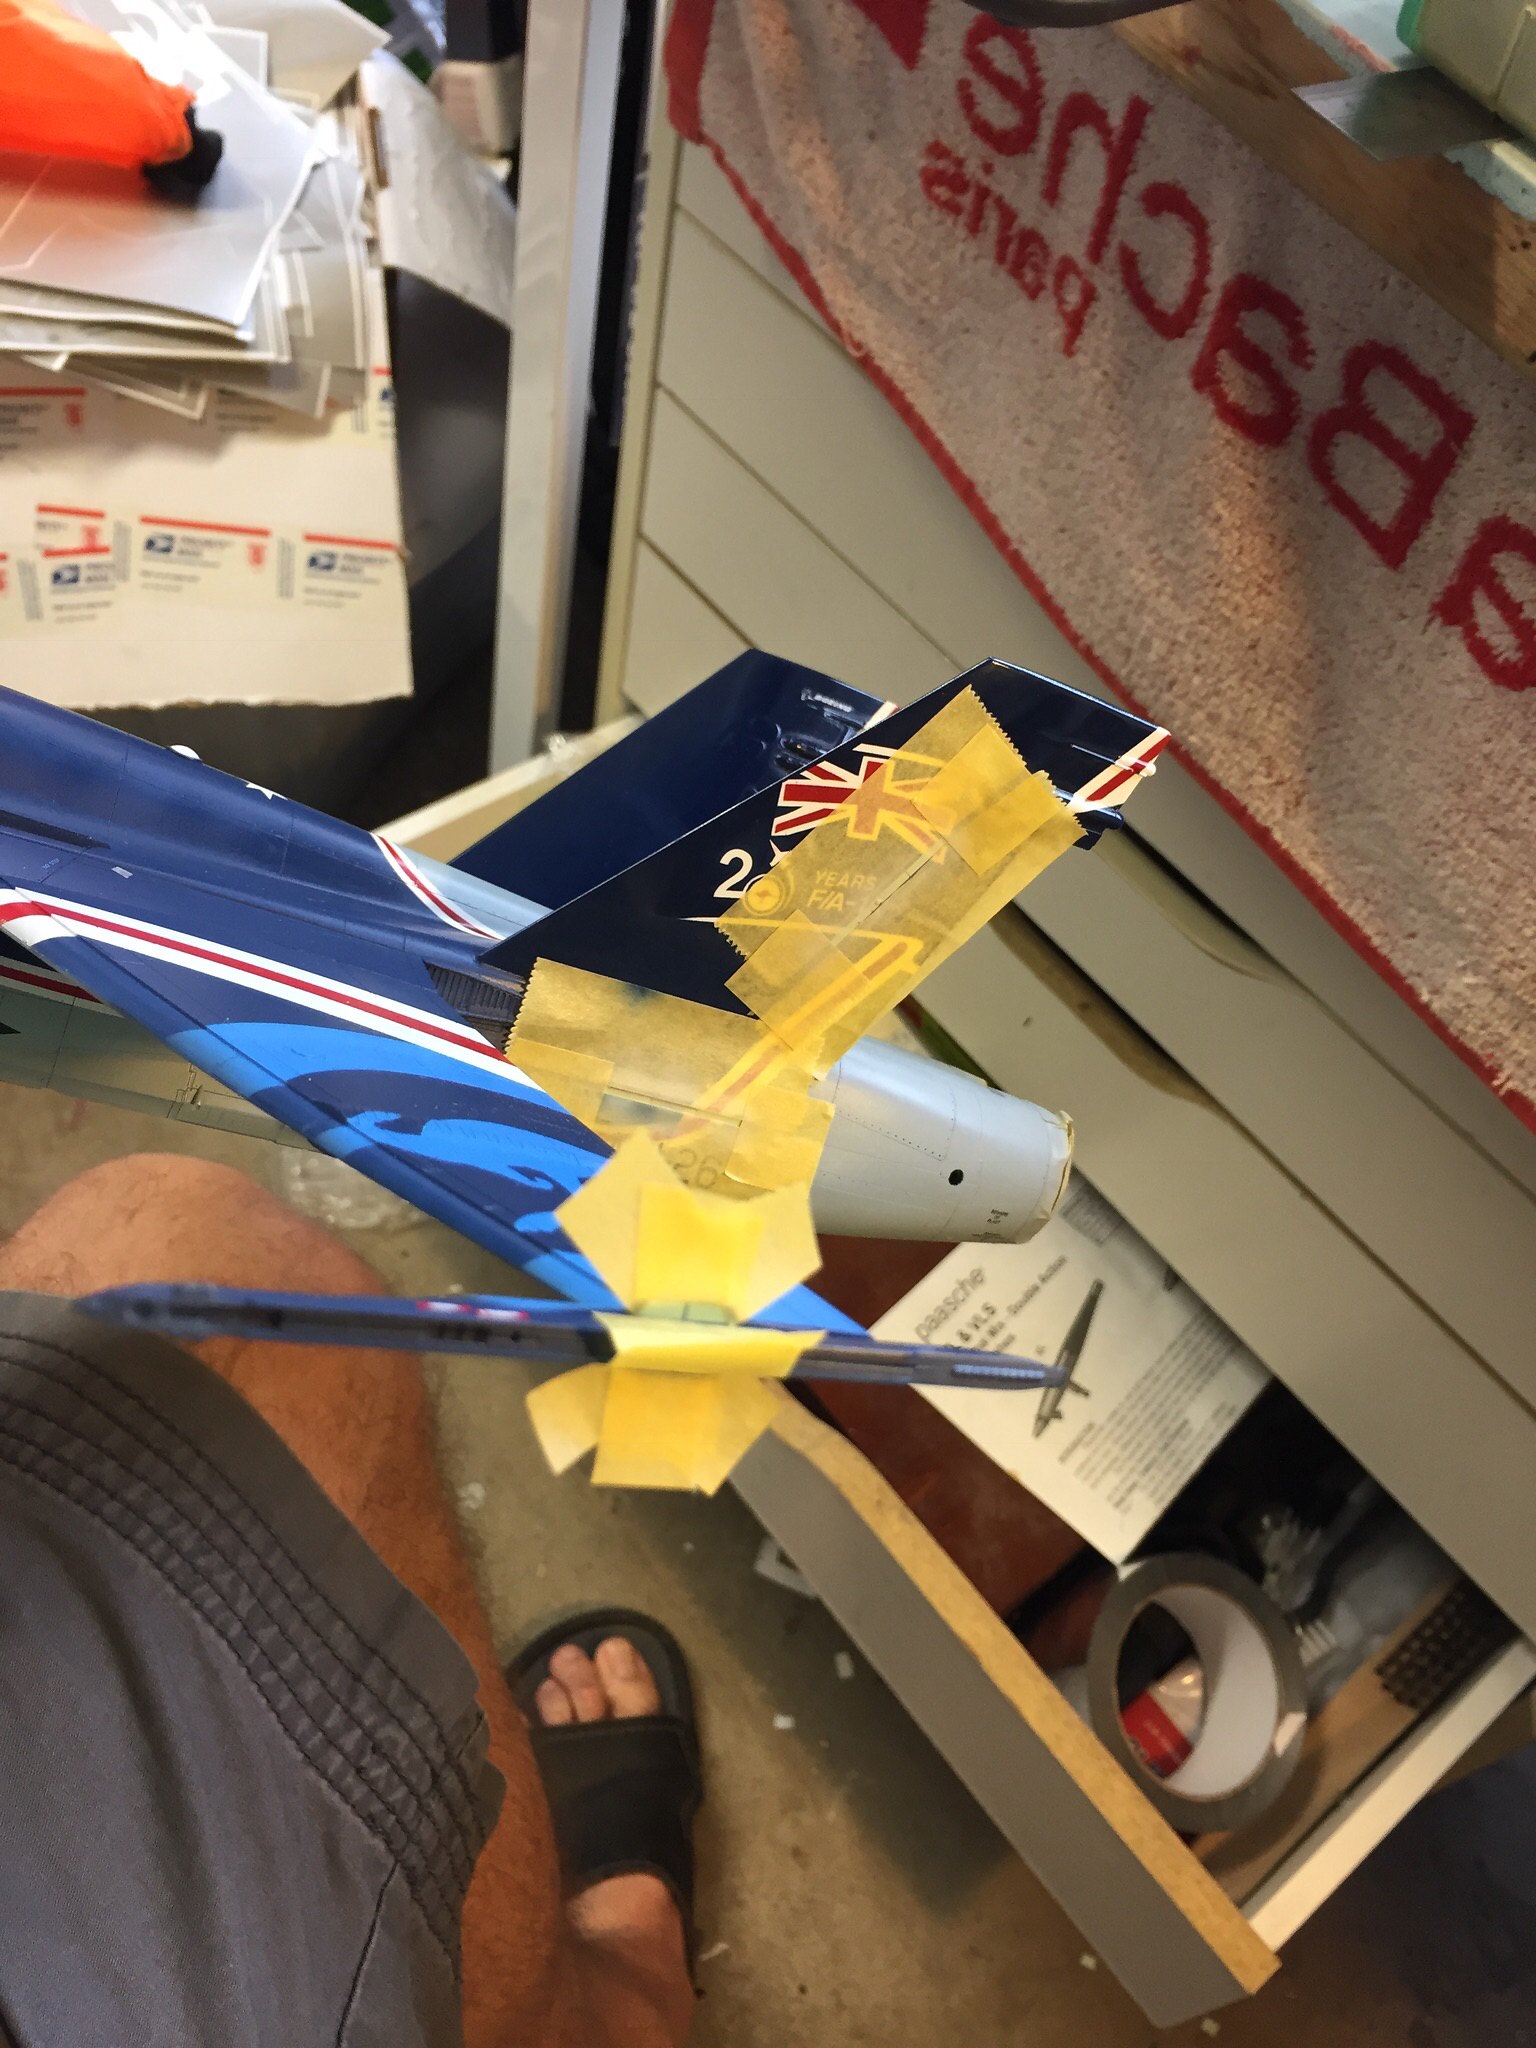
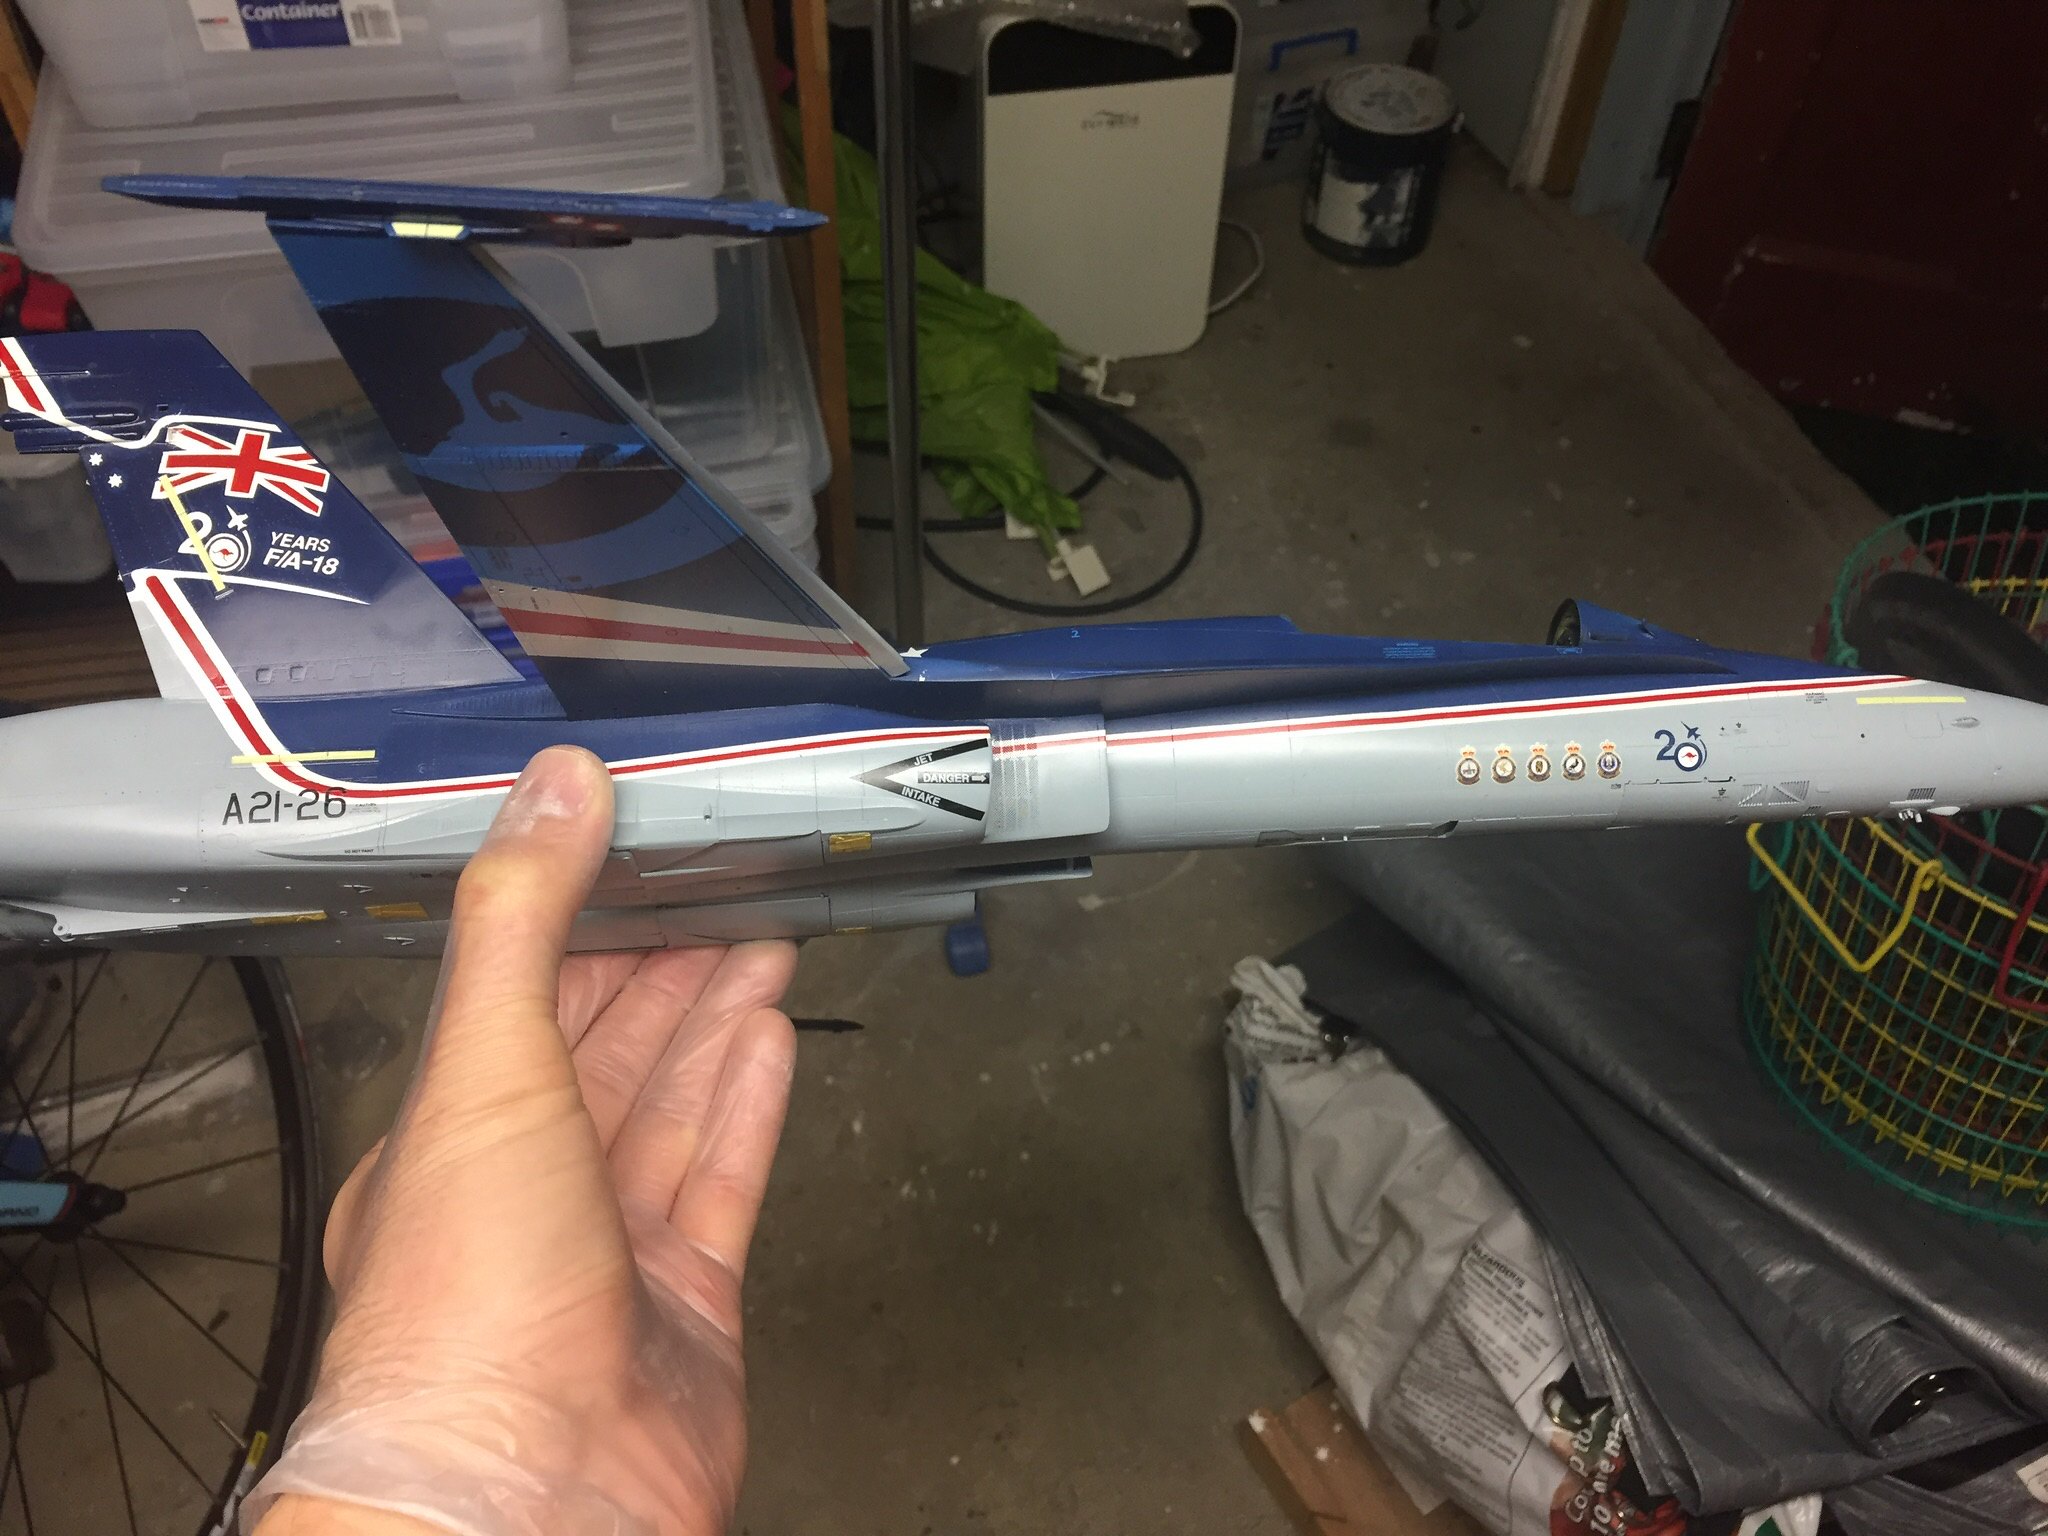
Ok, so a bit more progress. I'm not sure what the point of this update is, if not just to highlight the sheer tedium of the polishing progress ... I find it strangely zen like, maybe I'm bonkers.
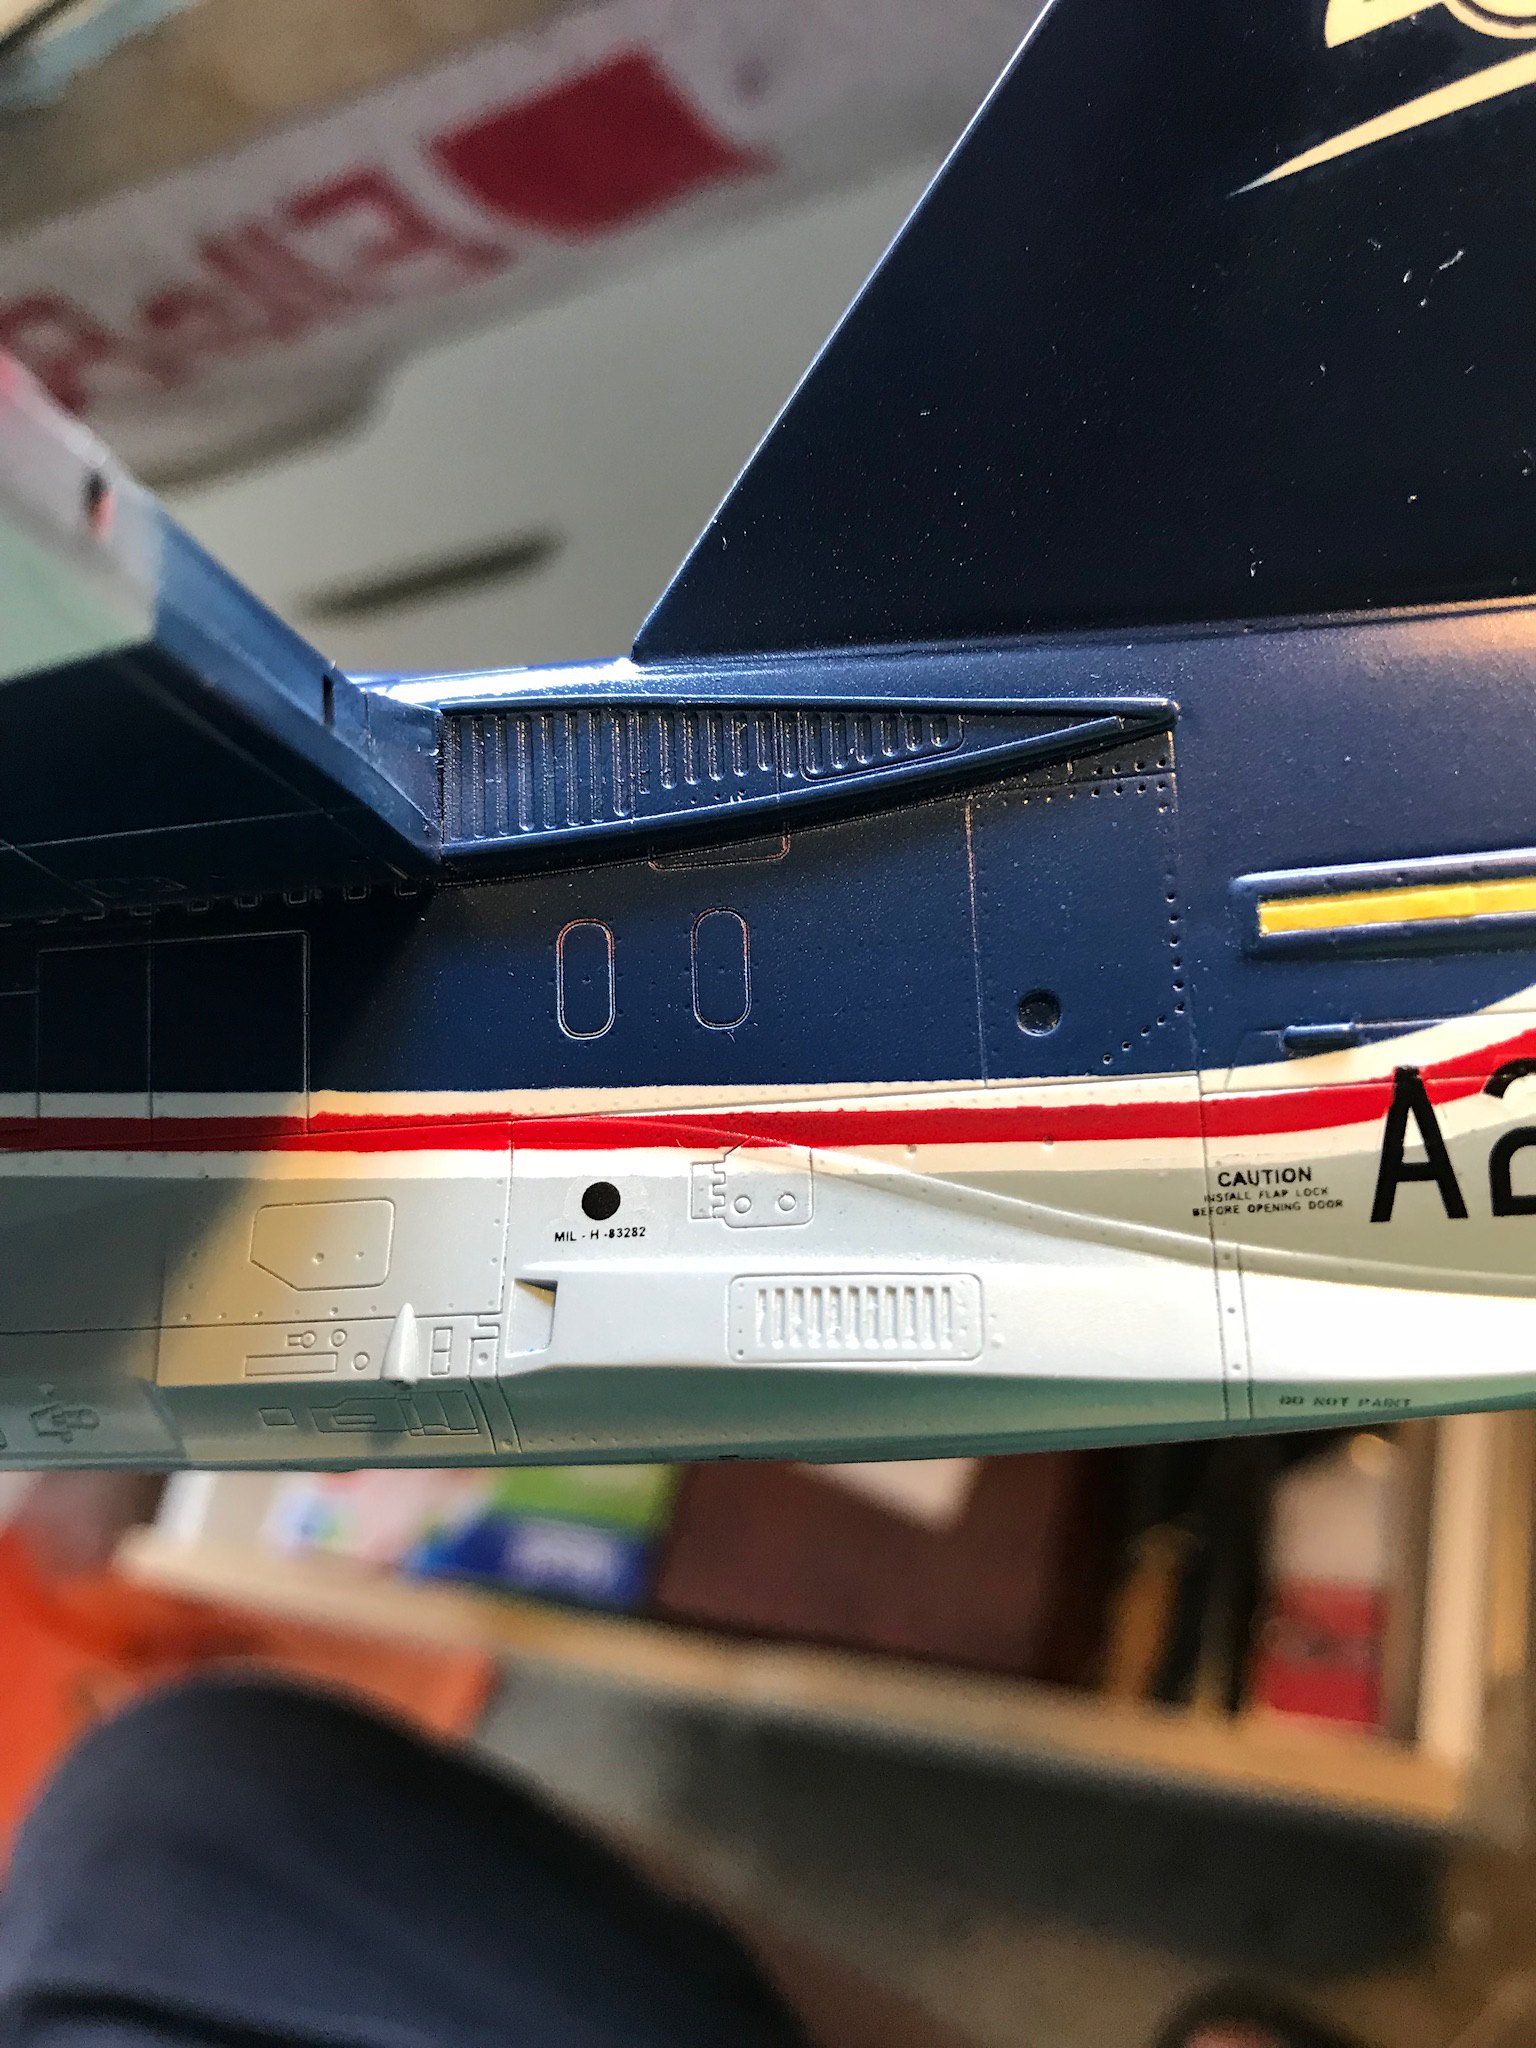
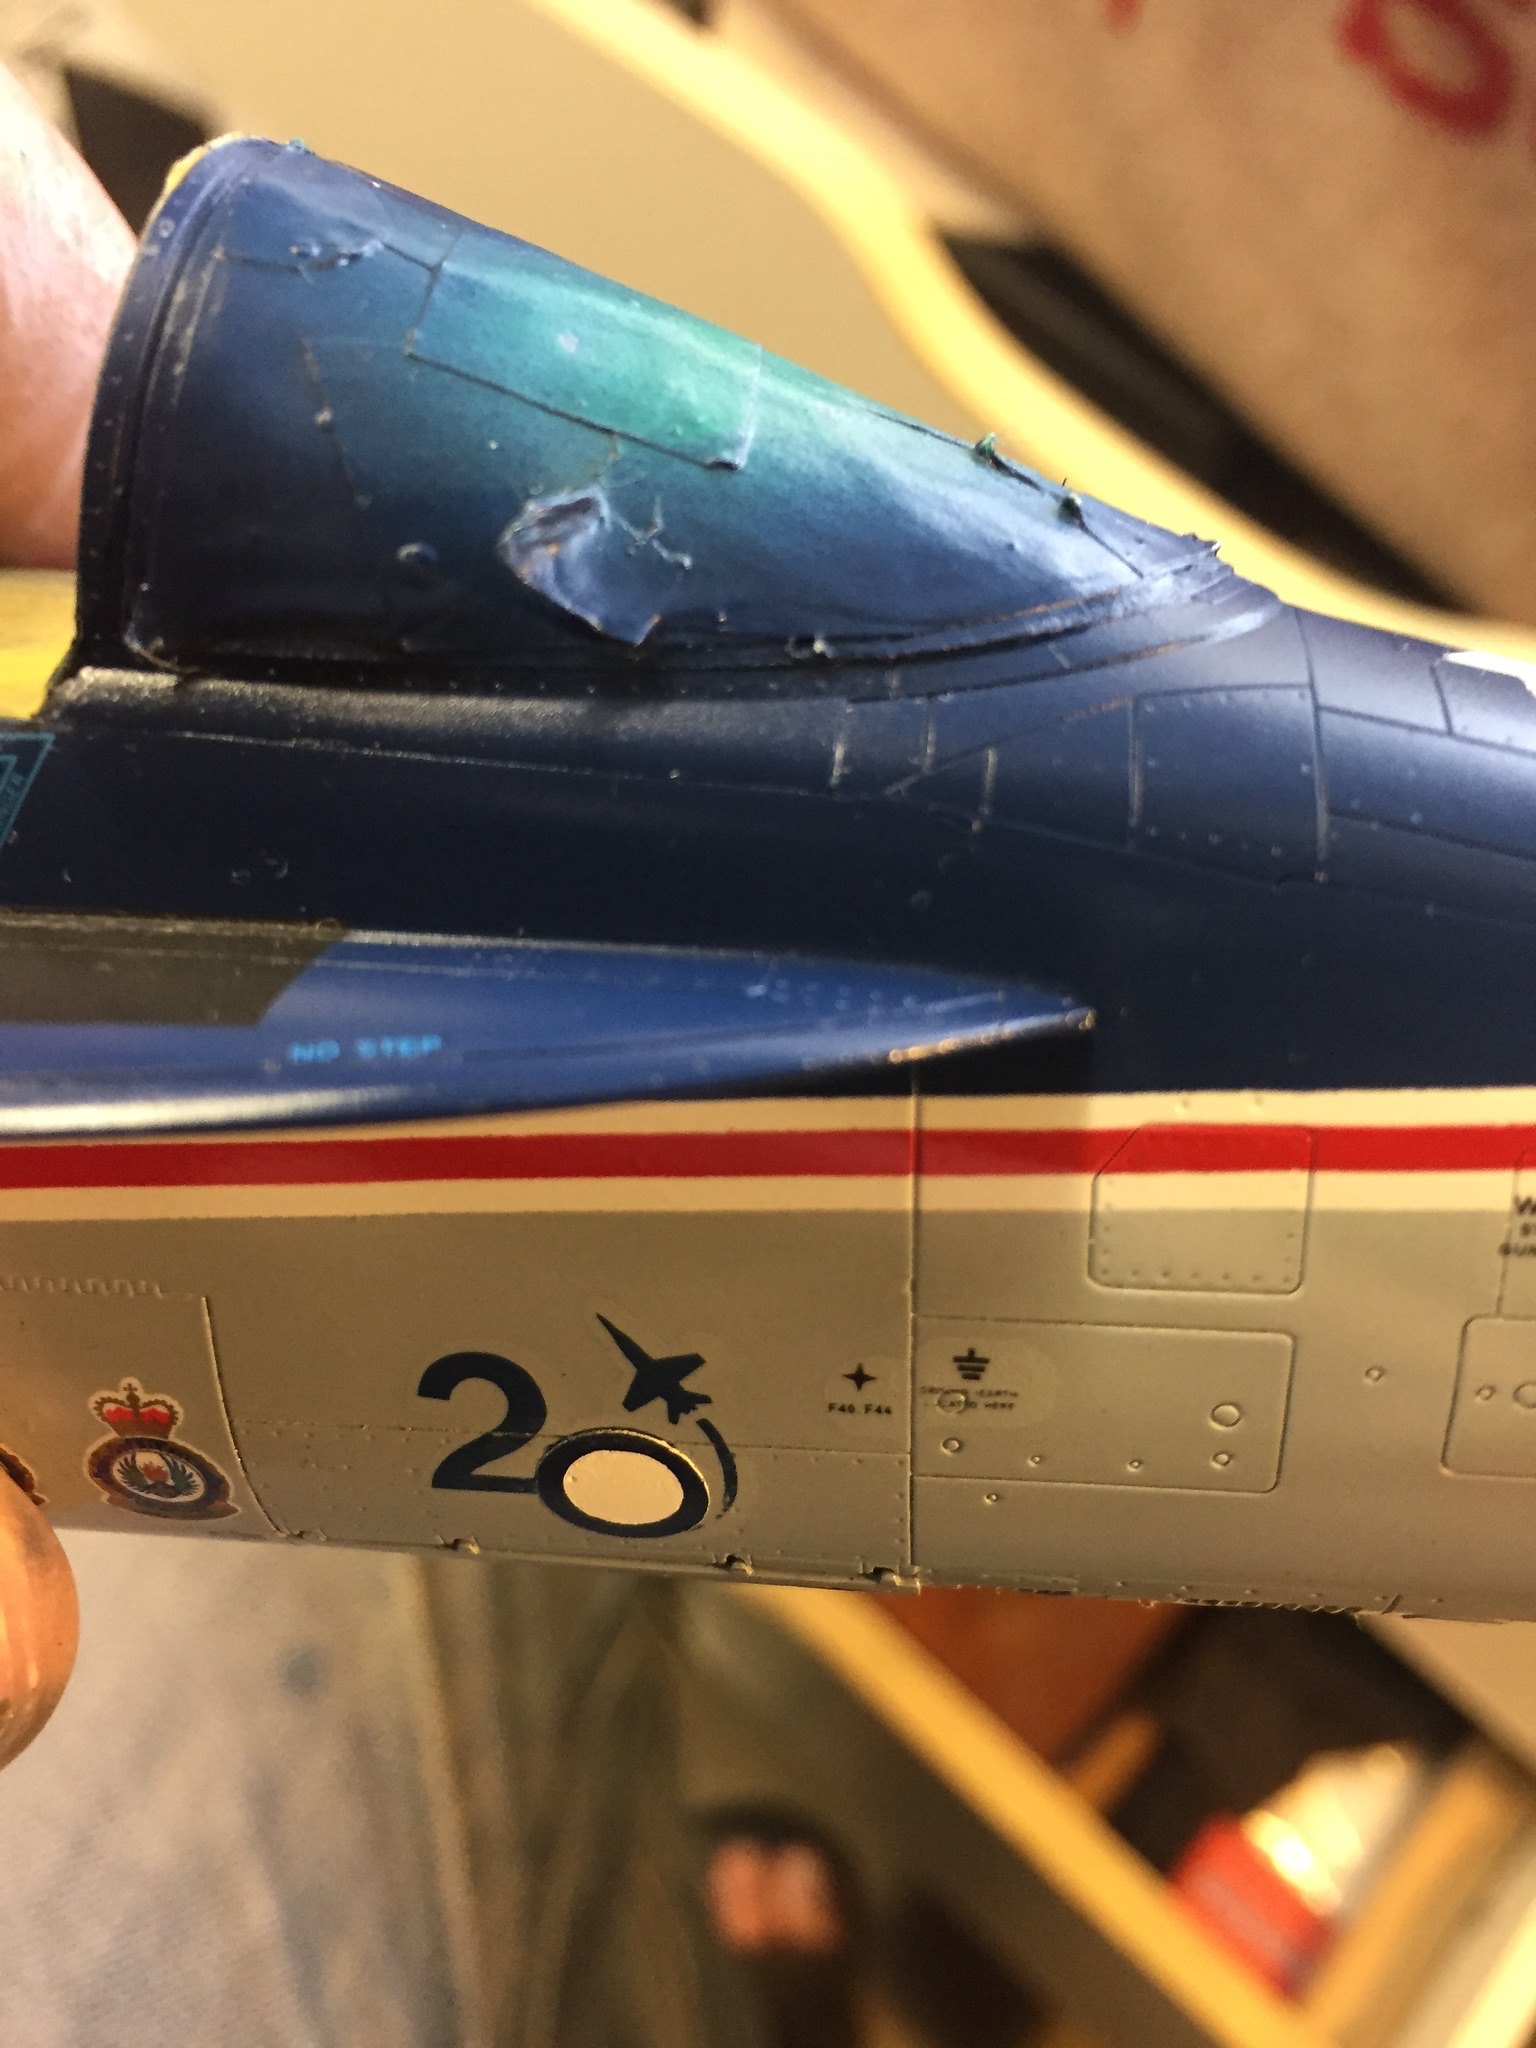
Anyway, before we get on to that - I mentioned in my last post that I'd had a weird issue with the Oxford blue paint. For some reason it was only that blue which was affected - the red, light blue and grey sailed through. For some reason the clear coat seems to have partially dissolved the paint right on the shoulder of the ridge of the panel line - leaving the primer partially showing through. Take a look -
I tried an enamel wash (Tamiya sea blue, if you're interested, which is a bit darker than the Oxford), but won't know how successful it's been until I get to polishing - the effect seems to be on the shoulder of the panel line groove, not in the groove itself. Might need a respray with blue.
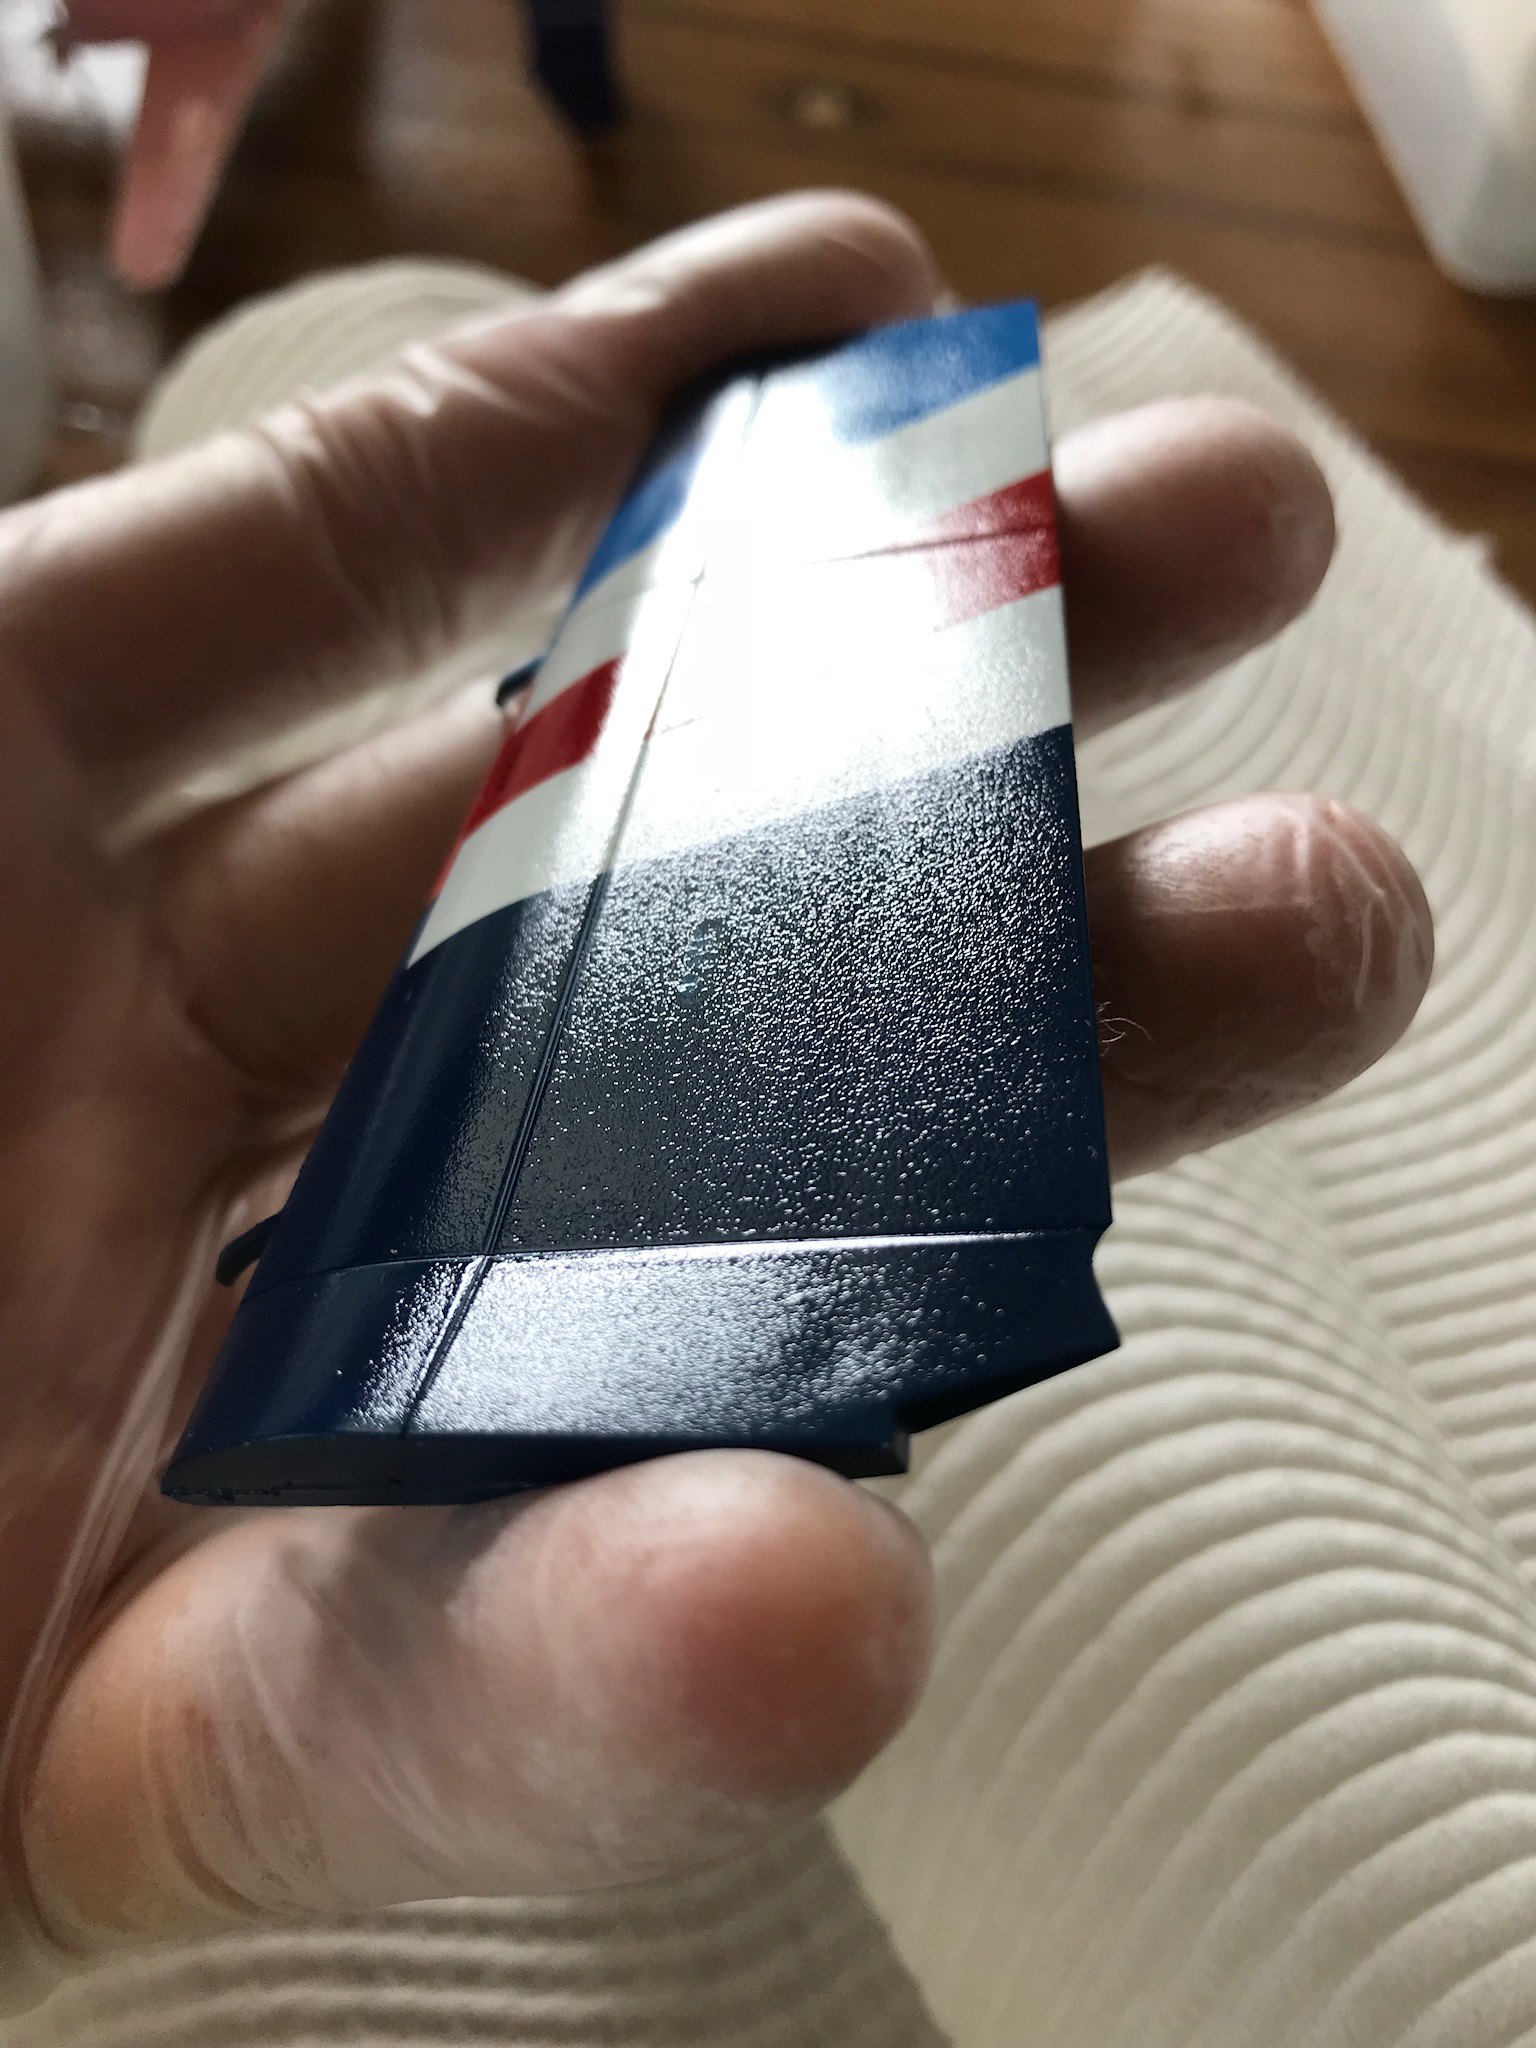
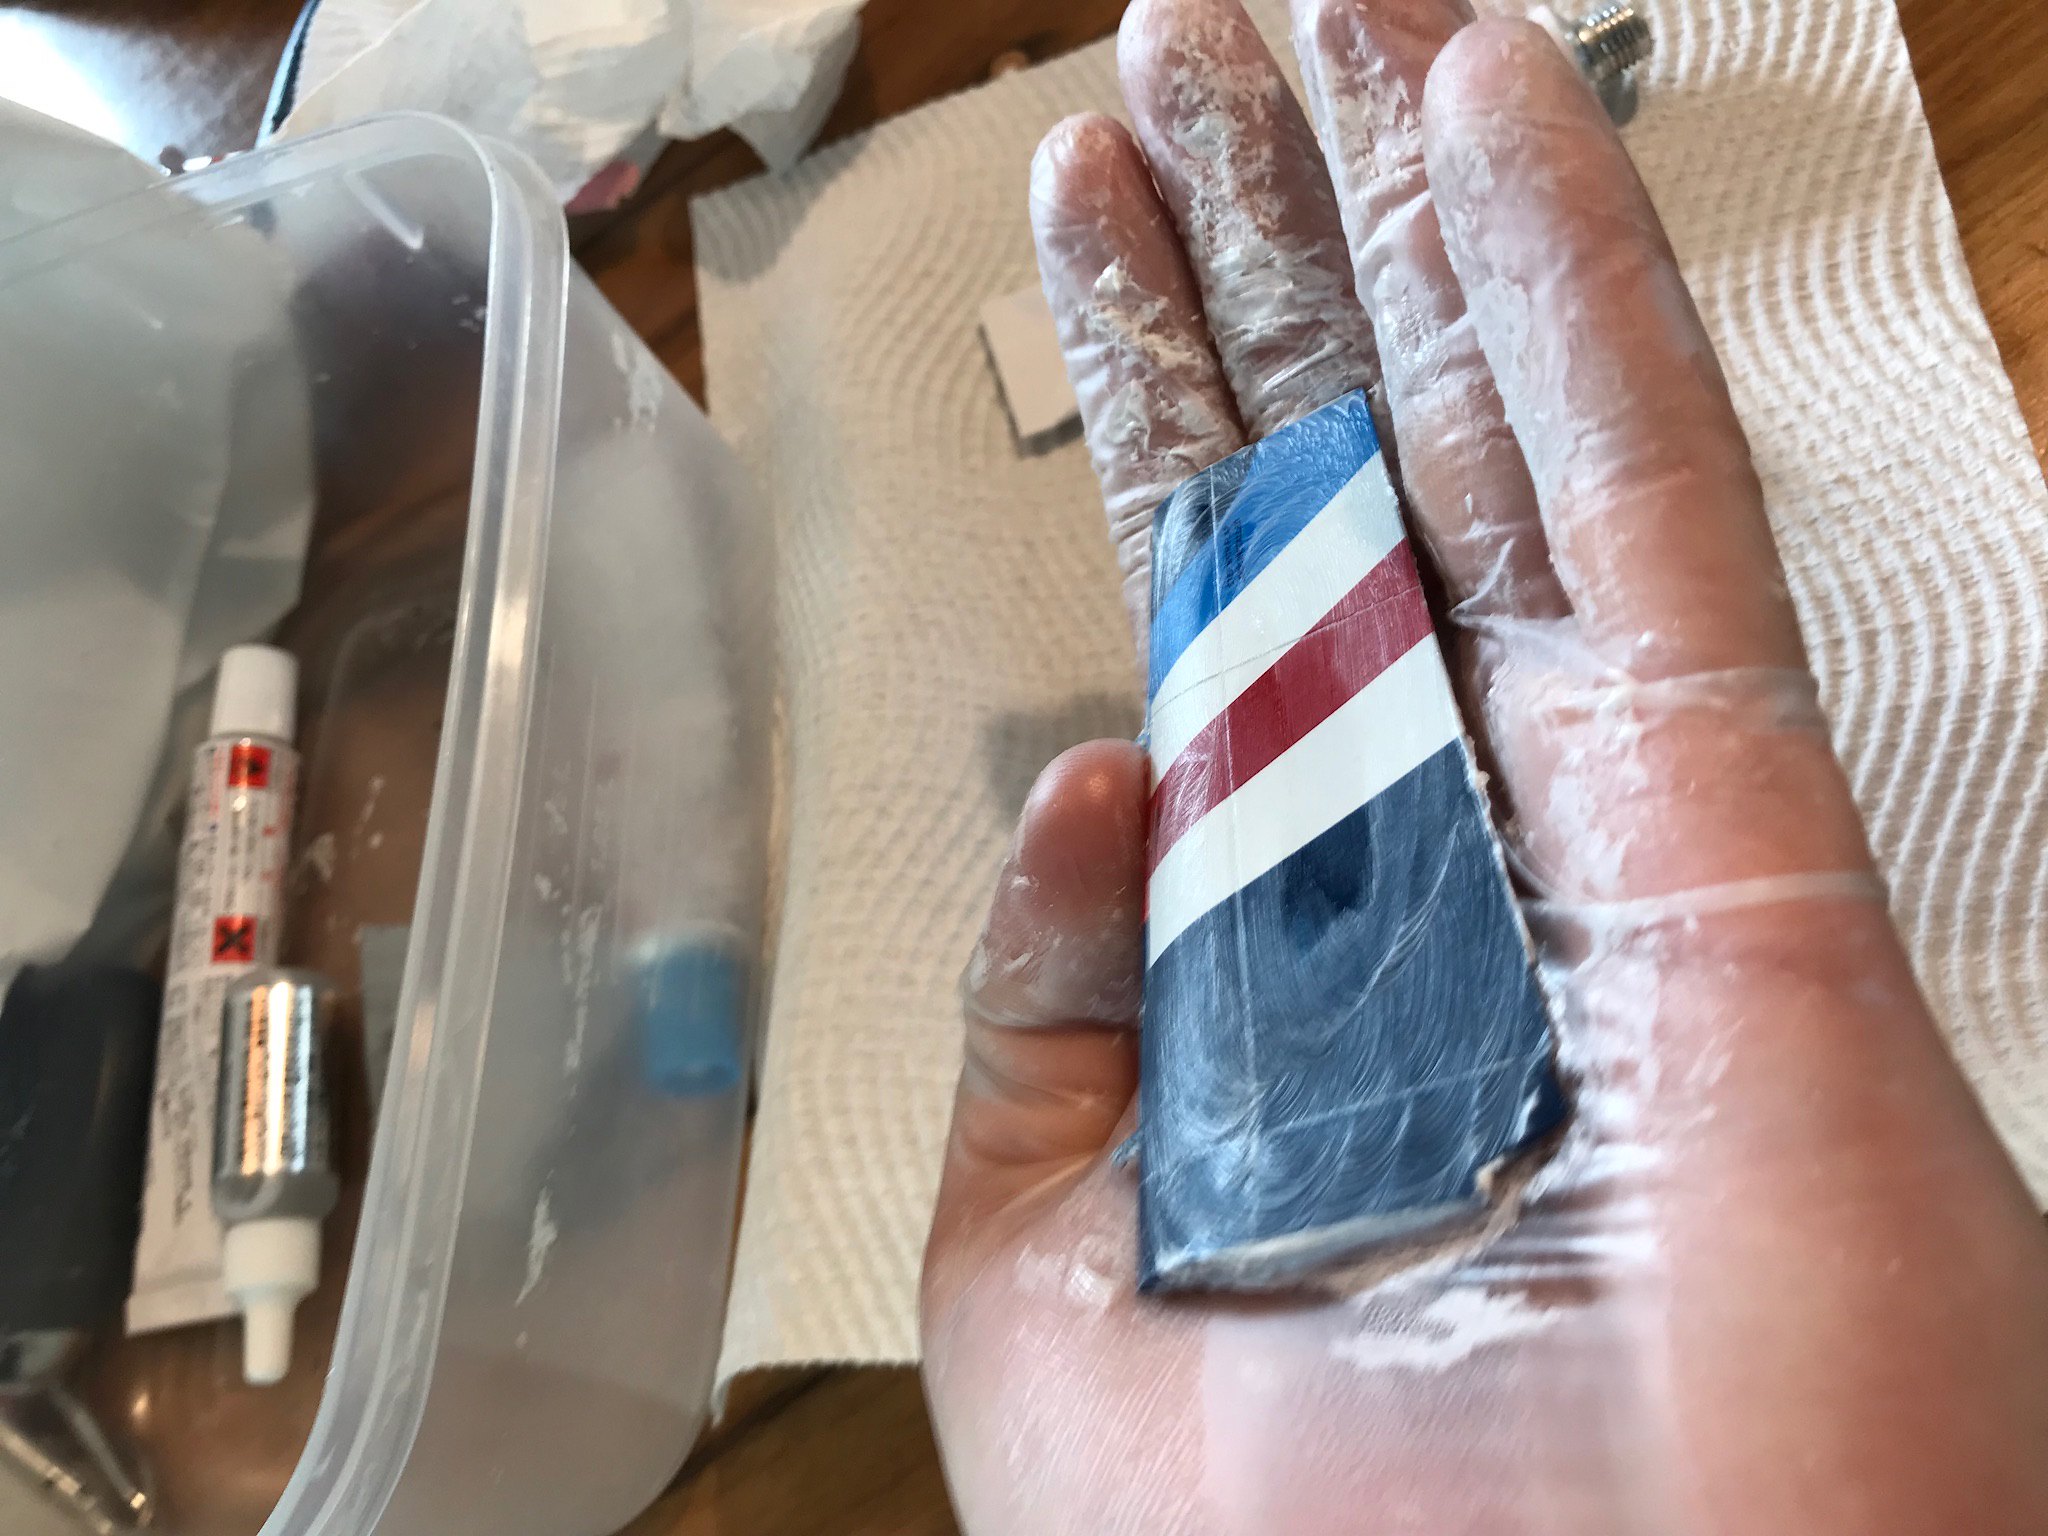
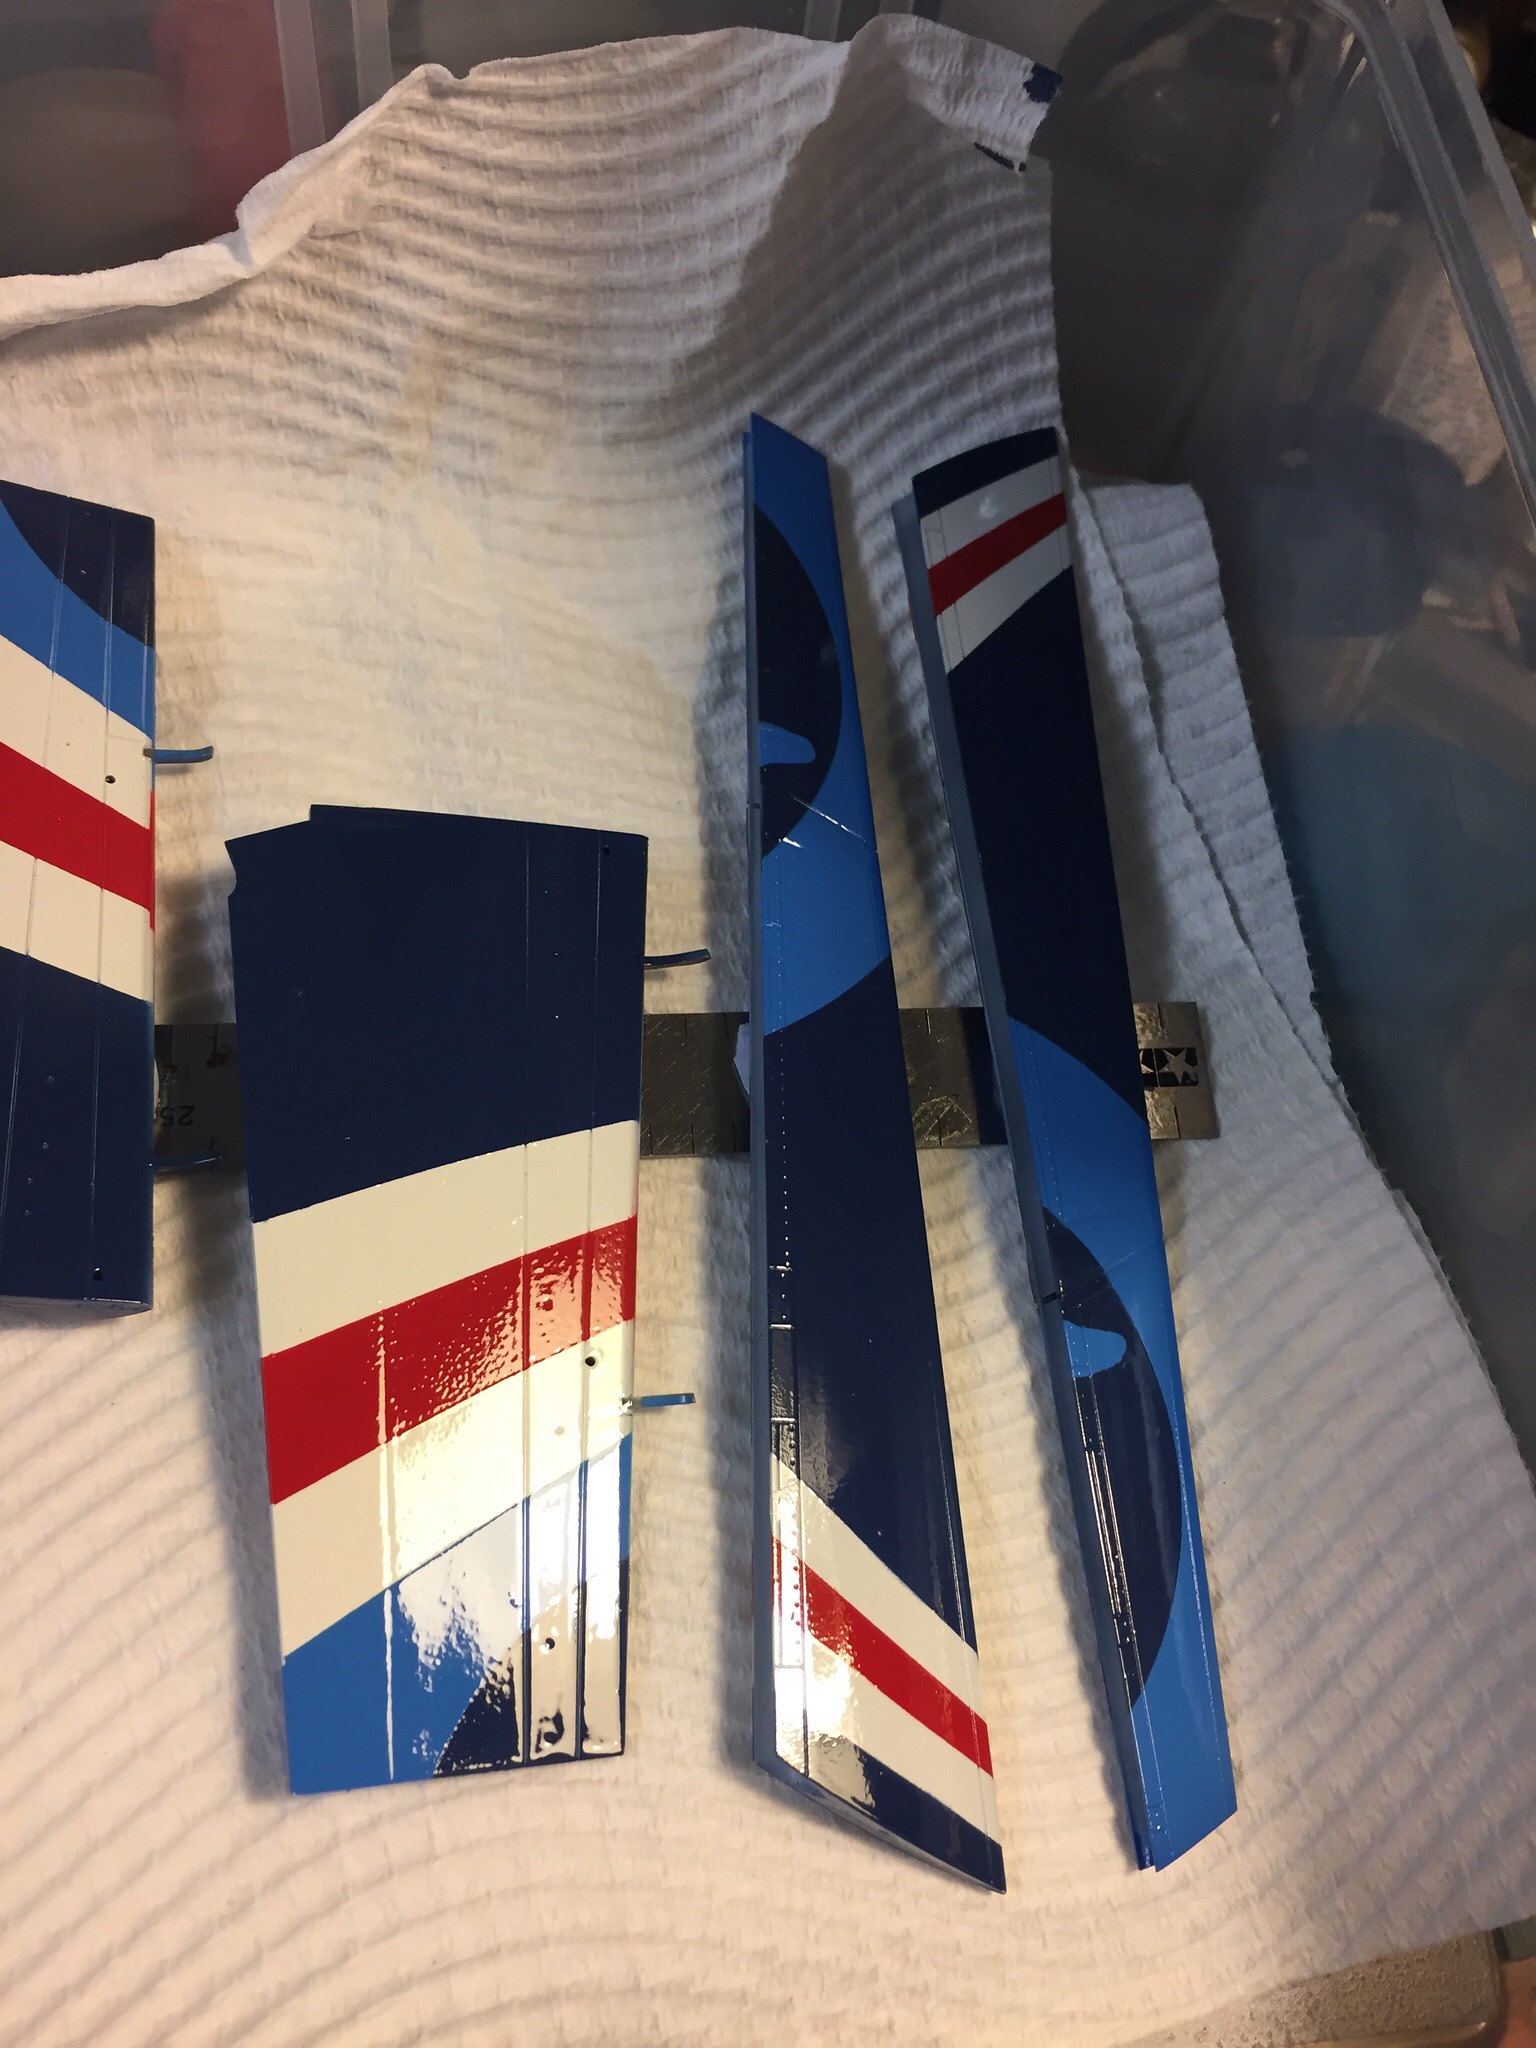
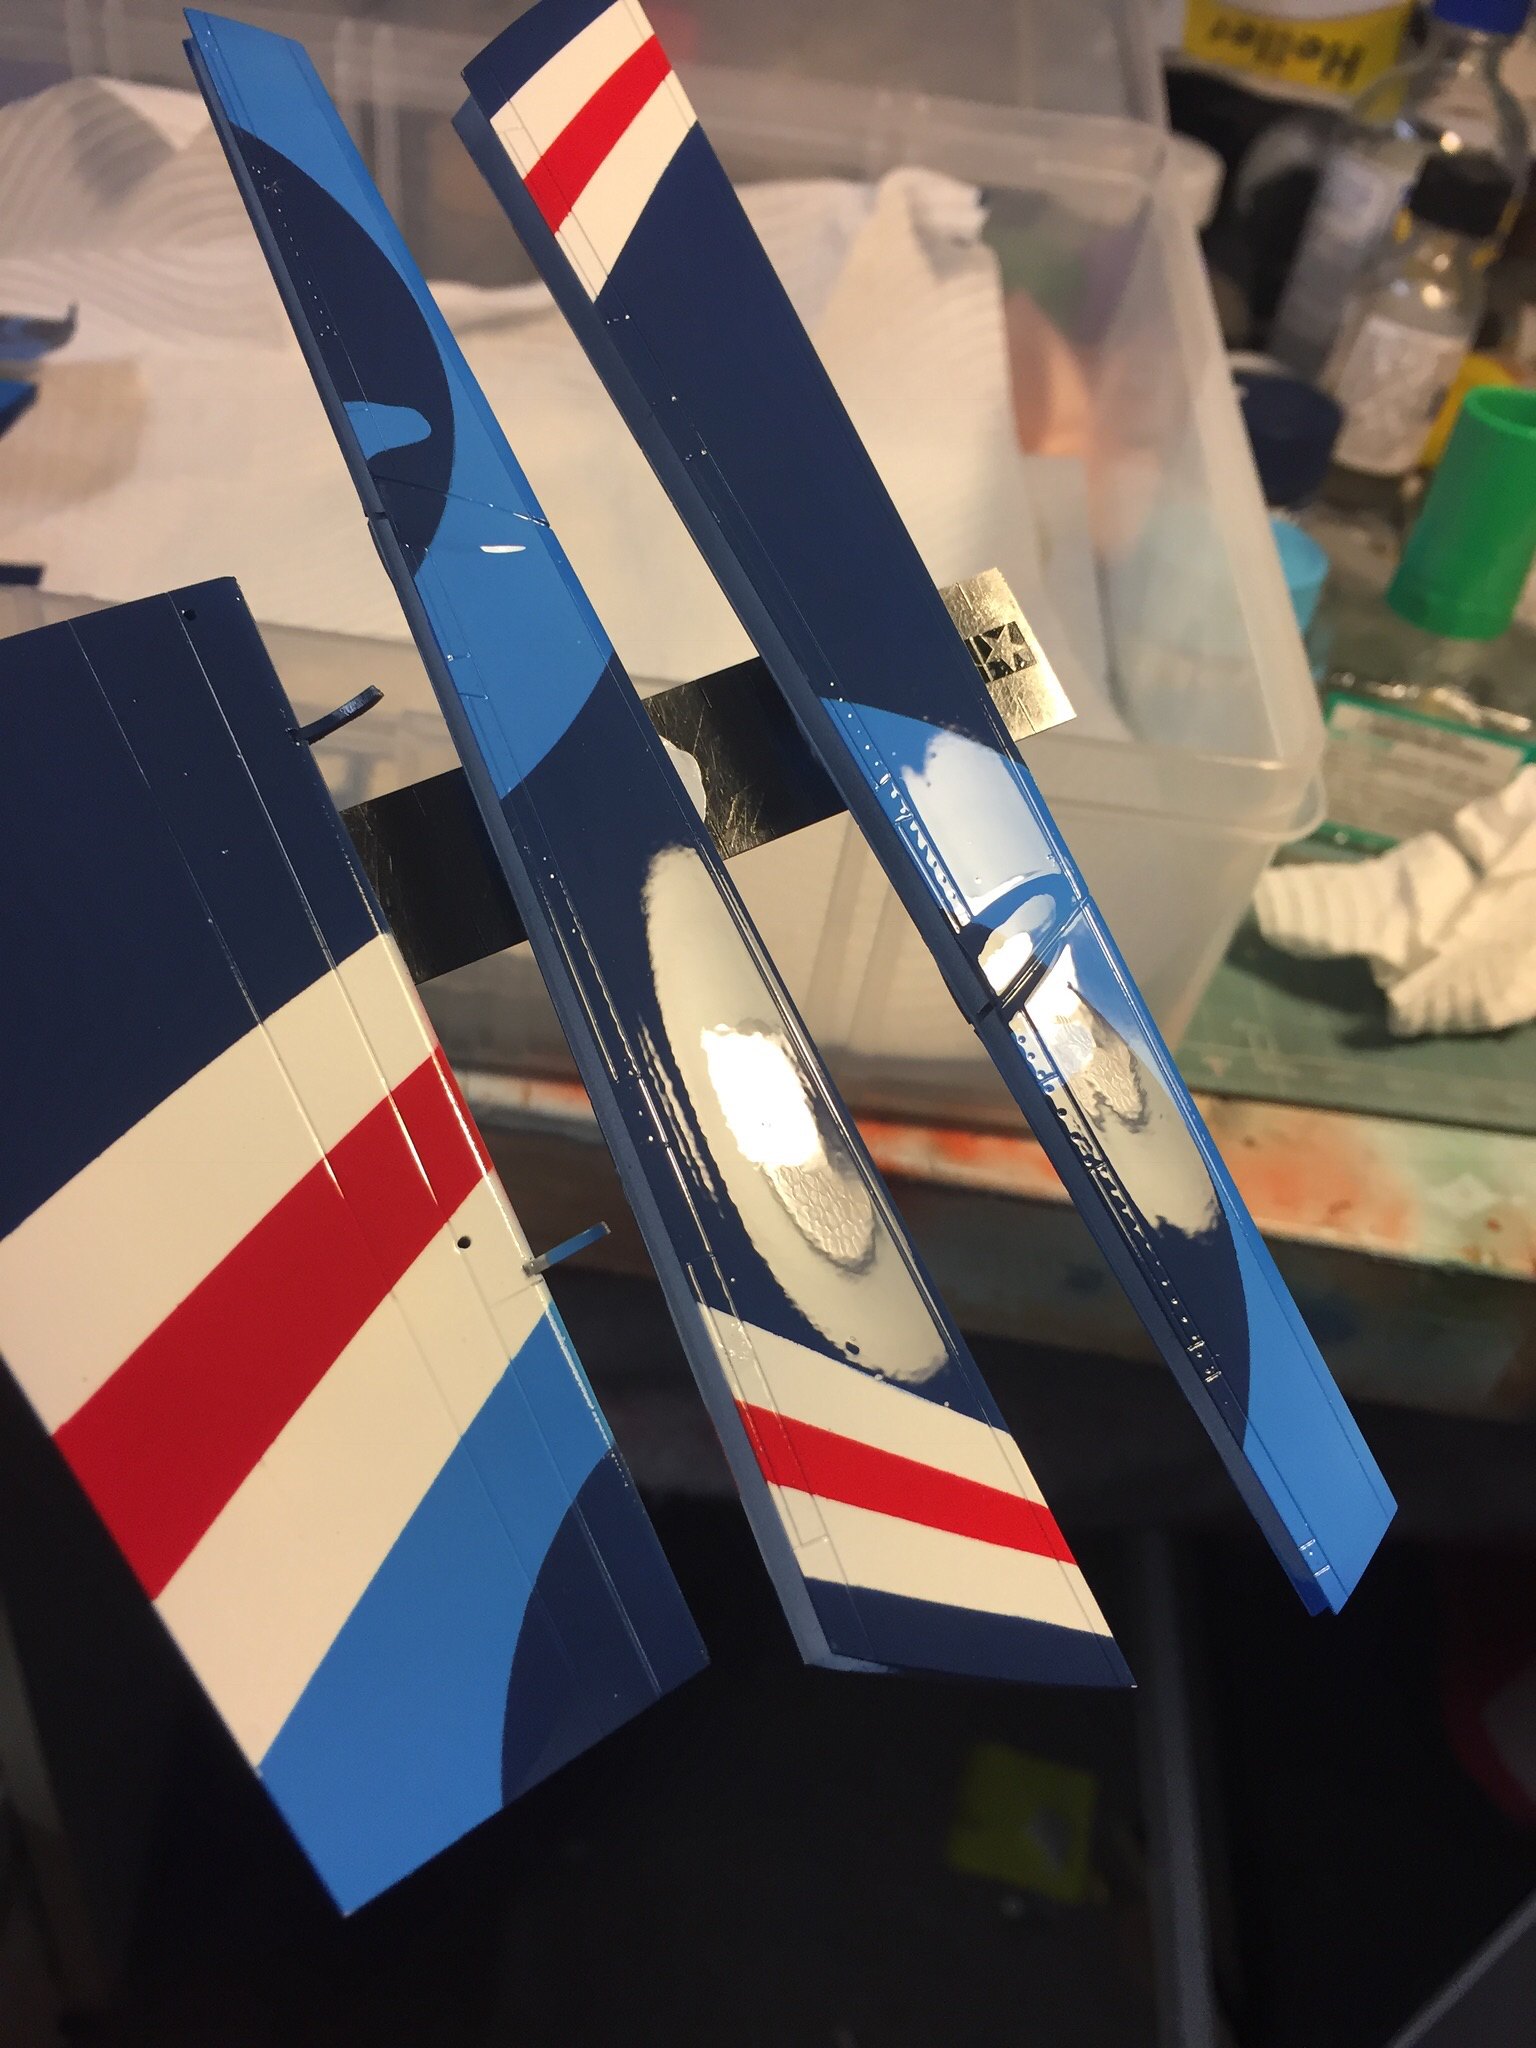
So, on to this morning's work. I mentioned in the last post that I had a nasty orange peel effect from letting my misted clear coat dry before laying down the wet coats. Here it is - probably the worst orange peel I've seen, and it was only lightly mitigated by drenching a couple of thick wet coats on to it. The good news is, it polishes out (I had the same effect on the outer flaps shown in the last photo, and managed a good shine on them) - if you lay down the clear thick enough you can recover it (but beware obliterating panel lines). The bad news is, it takes AGES.
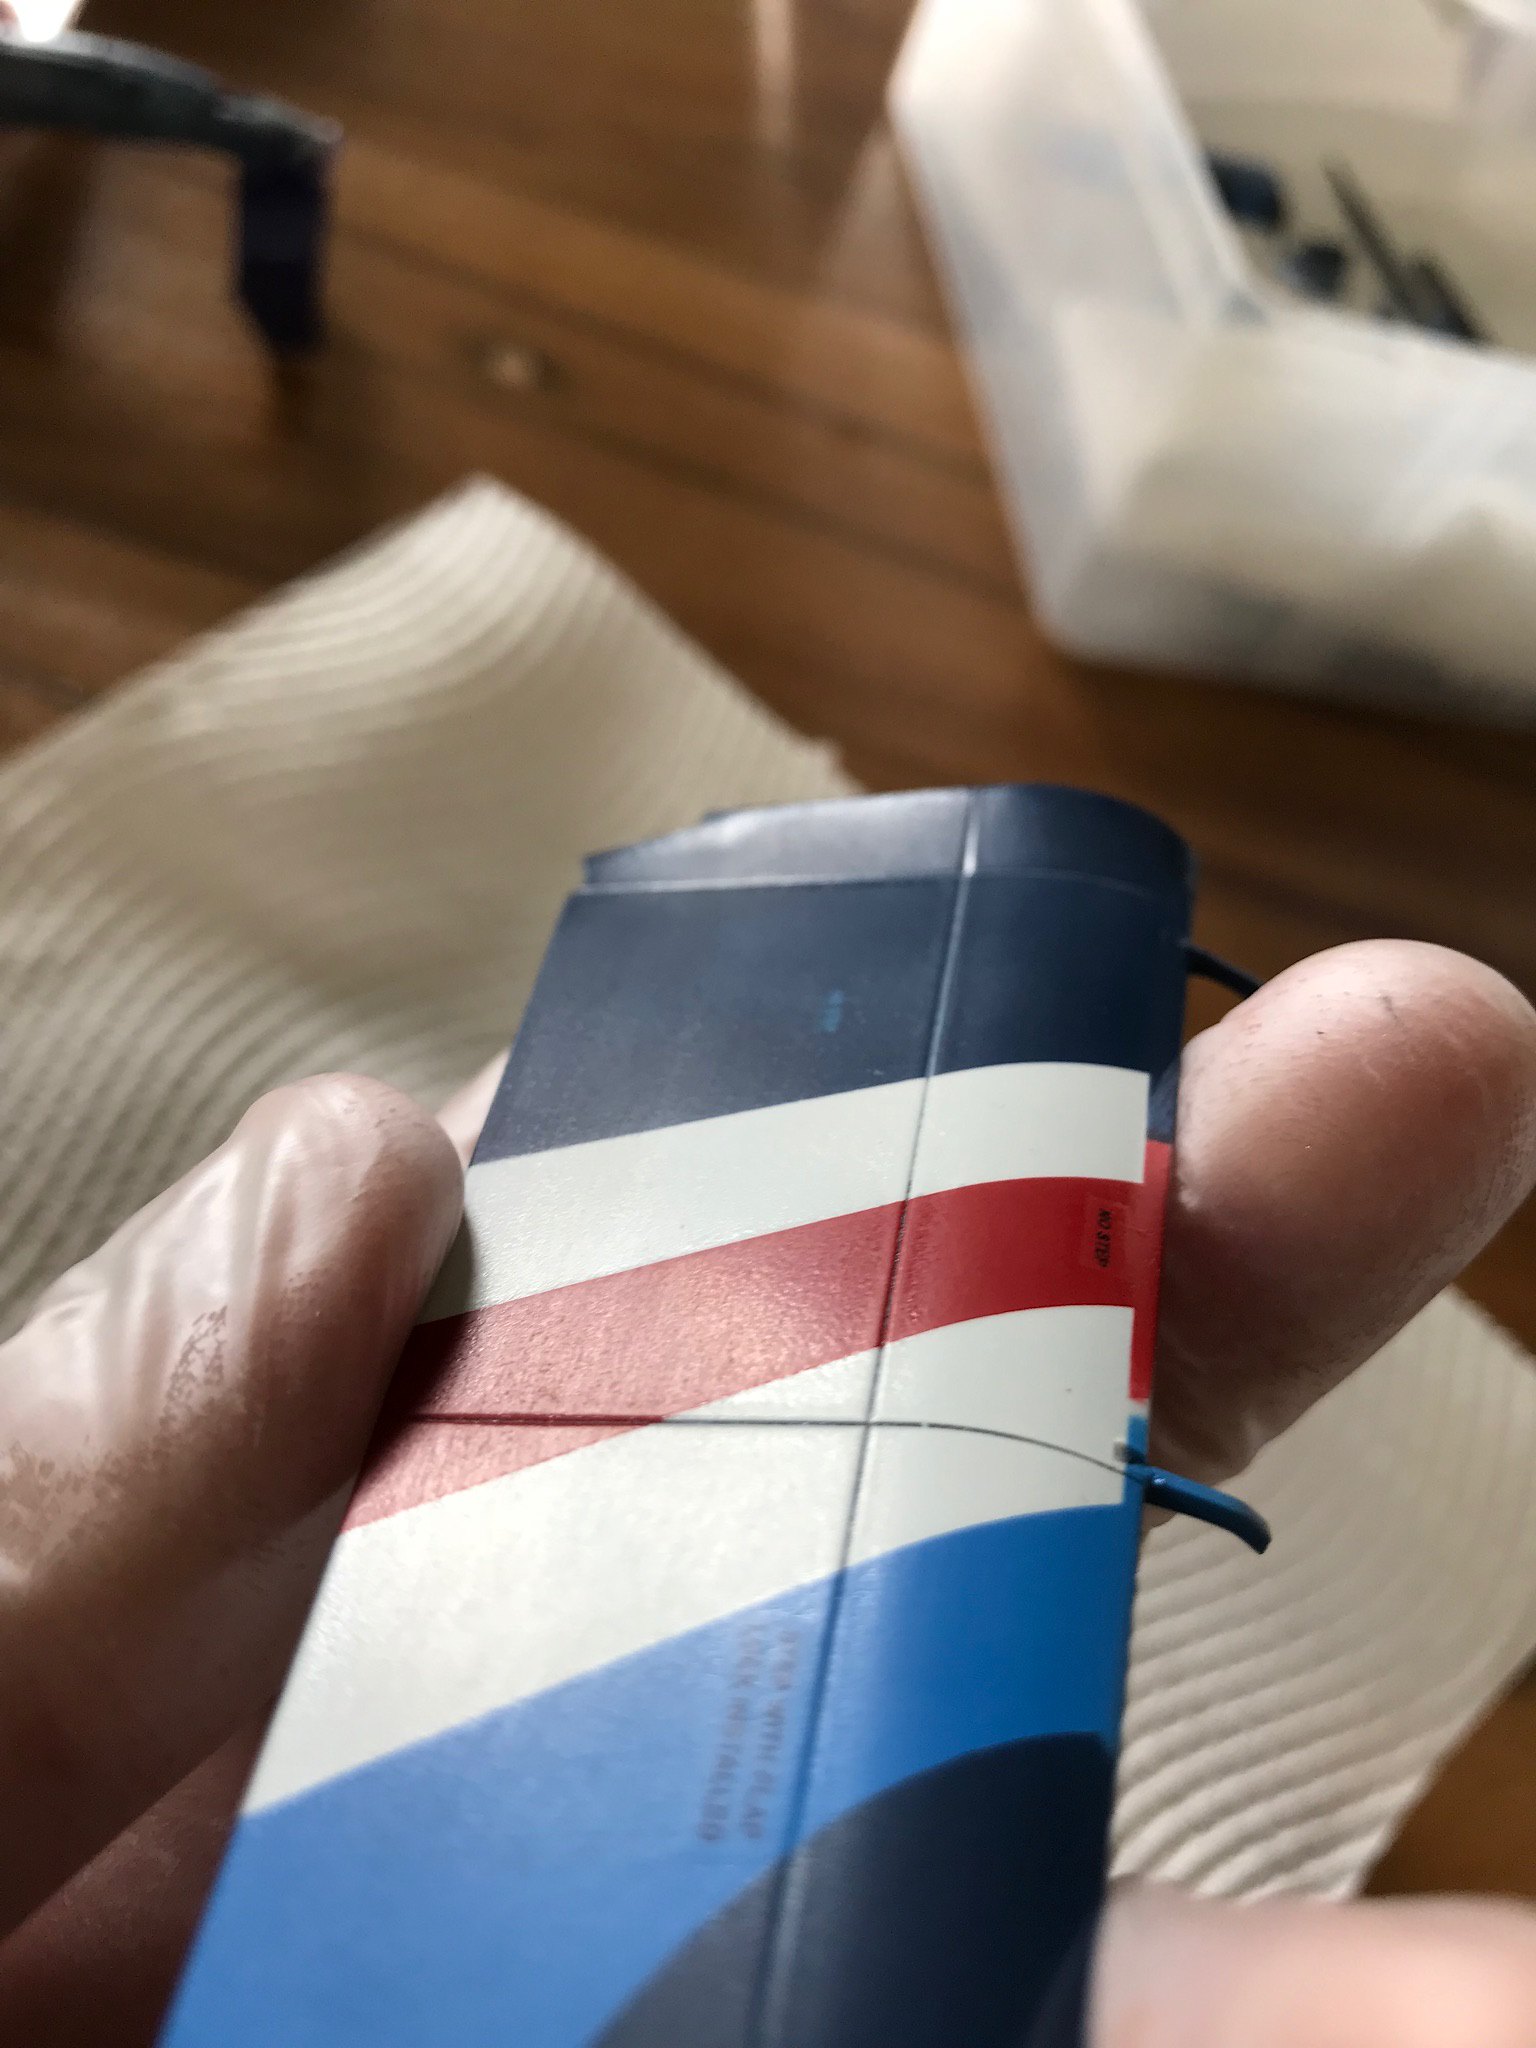
First step is to hit it with some 4000 grit micro mesh for about 10 minutes. You could shorten this time by using a coarser grade, but doing so includes two risks: first, that you'll sand through the colour somewhere (which breaks your heart, trust me); second, even such fine micro mesh leaves super fine scratches which only become apparent after polishing, usually an hour or so of it. Finer grades of micro mesh don't seem to solve the problem, so I decided the only safe way was to partially sand with micro mesh before grinding down to a smooth finish with compound. That way, the polishing that gets rid of the last of the orange peel also removes the super fine scratches.
Here's the results after micro mesh.
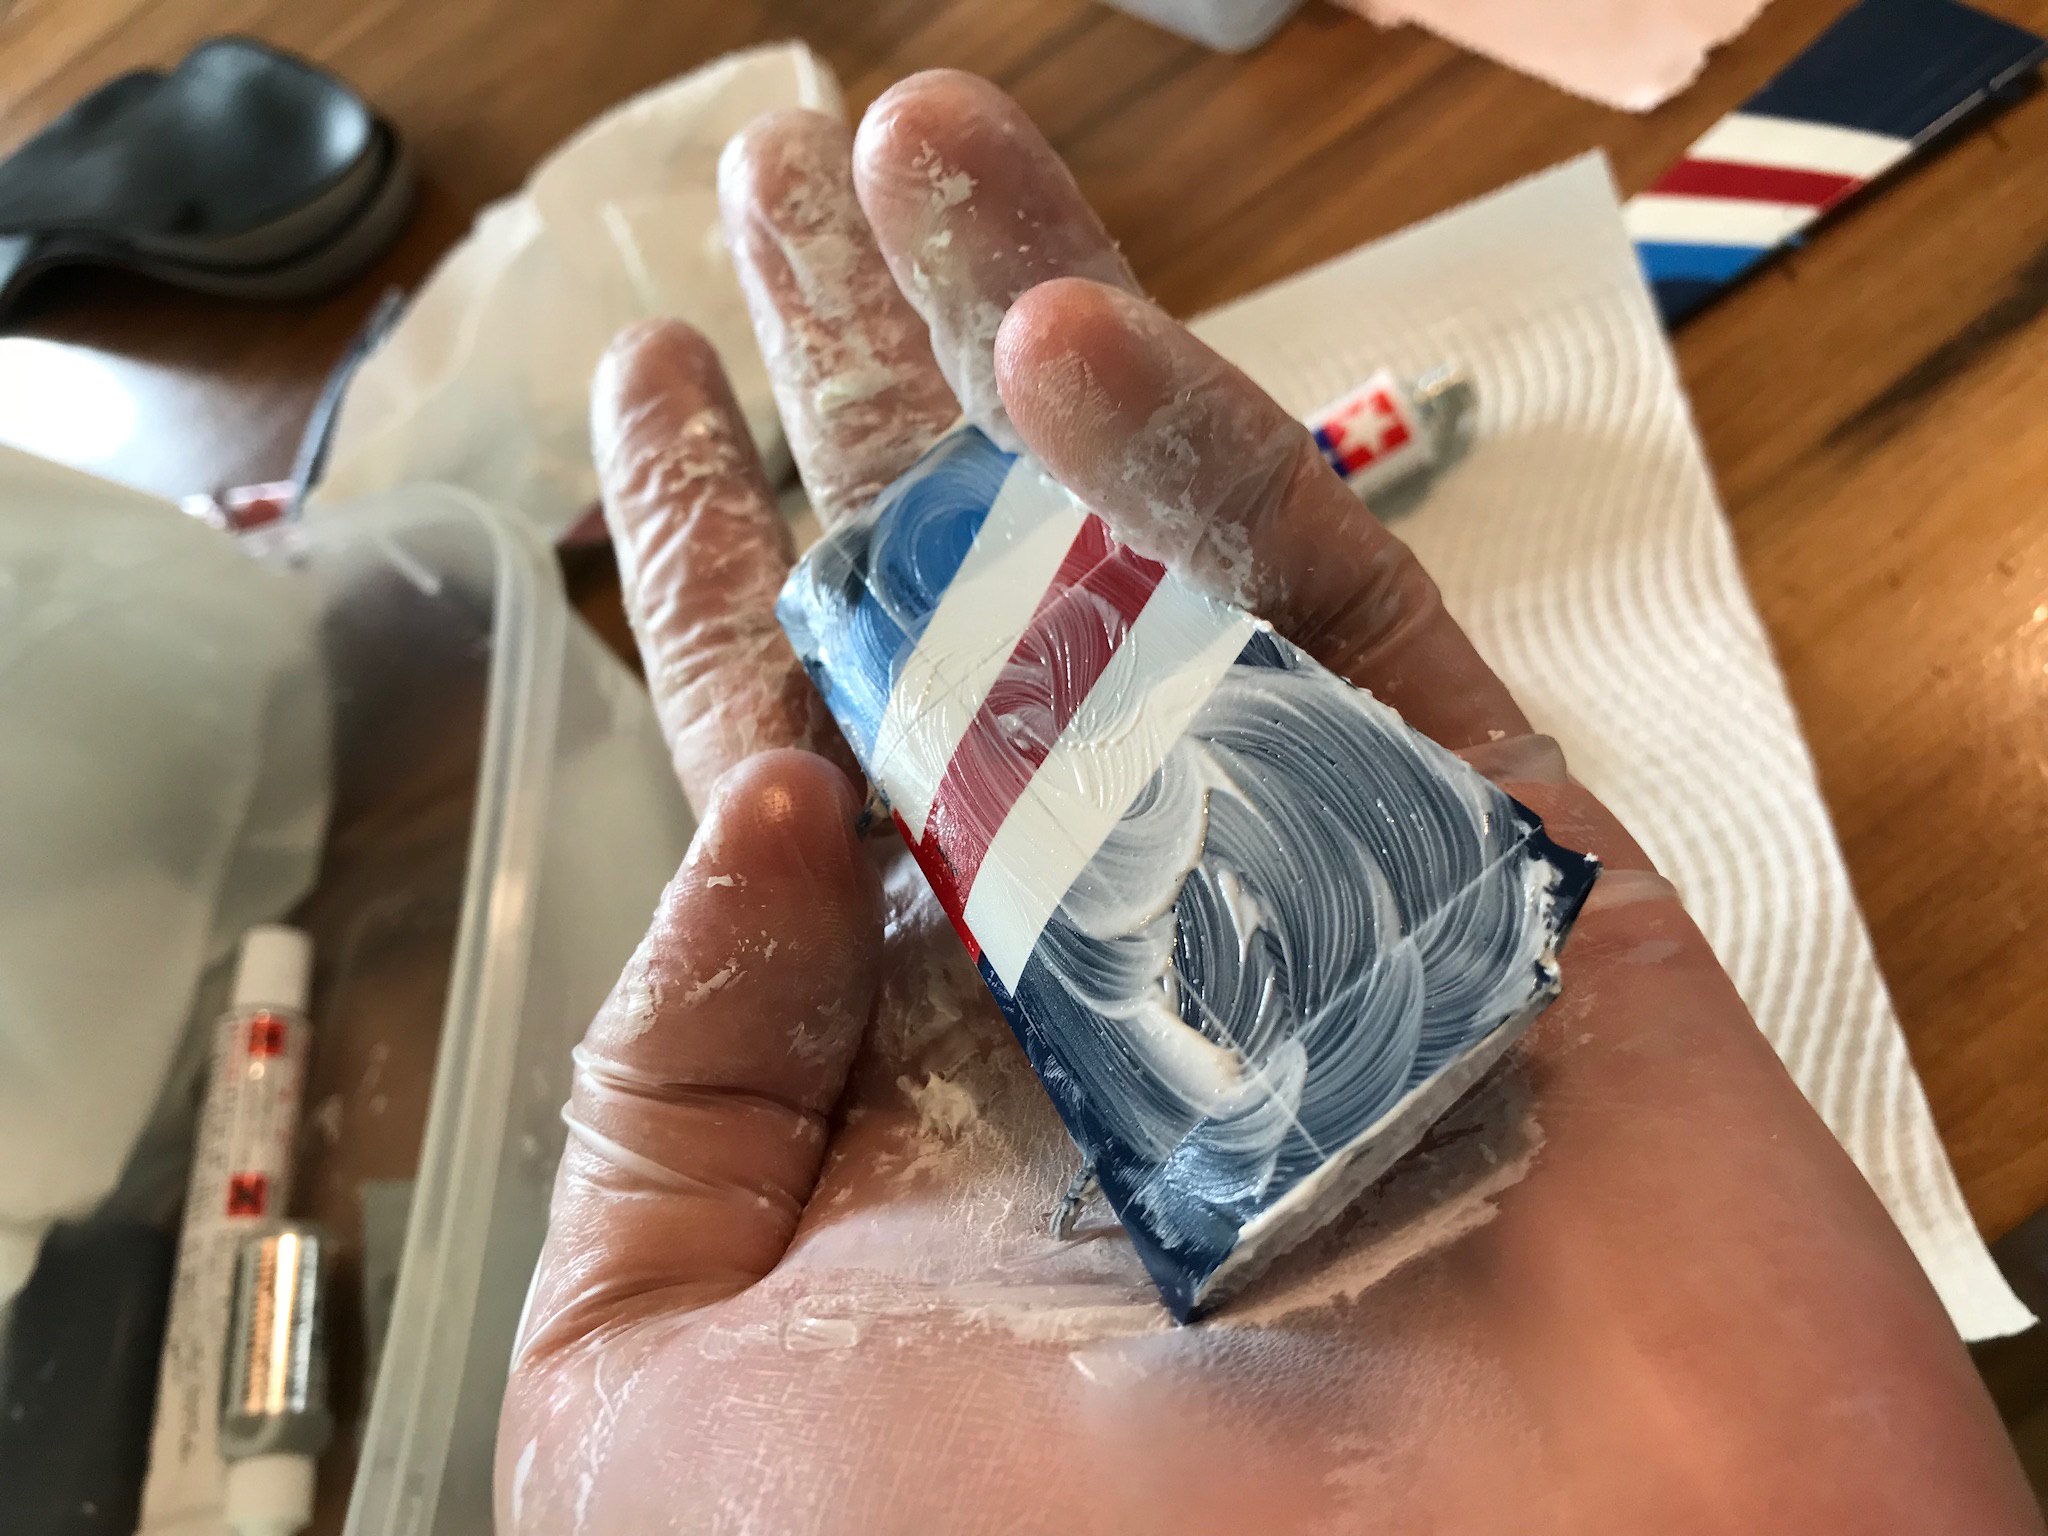
From here I start with a fresh microfibre cloth, and apply about a half pea worth of Tamiya coarse compound. At first it has a consistency like custard, thus:
After about a minute of polishing, the compound starts to take on more of a clay-like consistency.
After another minute of grinding away, the clay-like texture gives way to a glossy "window" to the part. That doesn't mean you have a smooth finish, just that you're through this application and need to lay down some more compound.
After about thirty minutes and half a tube of compound, here's the result - more than halfway there, but with a few bits that need more work.
I'm going to hit this again over the next few days and will post the step by step.
Cheers, and thanks all for the encouragement - there's a serious risk I'll lose my mojo through this stage, so I really appreciate the comments!
Have a good one
Jim
-
That gloss coat is amazing! I may need to give the Mr Super Clear a try. I'm assuming it's a lacquer.
Also, great save on the roundel.
Mike
Thanks Mike. It is a lacquer - I'm a huge fan of Gunze lacquers so I don't mind the respirator!
Cheers
Jim
-
No way ... you're such a pro Craig, it's a real pleasure to watch your work.
Jim
-
WOW! The paint and especially the gloss coat looks amazing.
What did you use for a gloss coat?
Rattle-can or airbrush?
Also, can you recommend a good micro-fiber polishing cloth set?
Hi Brian, thank you! The gloss coat is Gunze Mr Super Clear, to which I add about 100% levelling thinner and the another 30% retarder (give or take). I spray it with an airbrush (my trusty old Paasche VL with the fat #5 needle), two mist coats first, then wait ten minutes, then a couple of wet coats. Repeat a couple of days later. You'll notice on the wings, I got called away once after the mist coats were on and before I could lay down the wet costs, and got some nasty, nasty orange peel, which will take hours of sanding but I hope be ok in the end. I also got one very weird effect with the blue where it affected the underlying colour - I'll show in a subsequent post, it didn't affect the back but affected the first patch I sprayed quite badly.
Final thing on the gloss - with that much retarder in it, and laying down the coats so wet, it takes ages to dry. So I gave it about a month before even thinking about polishing - hopefully I won't uncover too many flaws.
As for the microfibre cloths - I bought a pack of 100 off eBay for about $3.50. I use one until it's a bit gooey with polishing compound and then toss it.
Man, that is gonna be one sexy build!
Totally awed!
Gaz
Thanks Gaz!
What a nice-looking model. Too bad it can't be in the 'Blue' Build.
Sincerely,
Mark
Haha I agree Mark, I saw that one and wondered briefly if I could prevail on the mods to let me in under the 25% threshold, but even with a tailwind that was never going to fly. But then, when I do things like waiting a month for the gloss coat to dry, I'm never going to be a shot at a group build time frame ...
AWESOME!!!!!!!!
good to see this back
Thanks! Got the next few days off so hope to show some polishing.
Fantastic and courageous work, Jim! It looks sensational. I too am keen to hear more about how you did the gloss coat.
Kev
Thanks Kev!
-
Super stuff Chris, you're inspiring me to get back to my hornet. Love the effect, it's really dramatic - as an air show bird should be!
Jim
-
First I had to sand it back.
Line up a mask:
And spray ...
Unfortunately the white was too thick, so I had to do it again:
Fortunately the tiny kangaroos in the roundels for the tails were the perfect size (thanks again Randy) ... I didn't take another photo specifically of them, but you can see it here, with the gloss down over the nose:
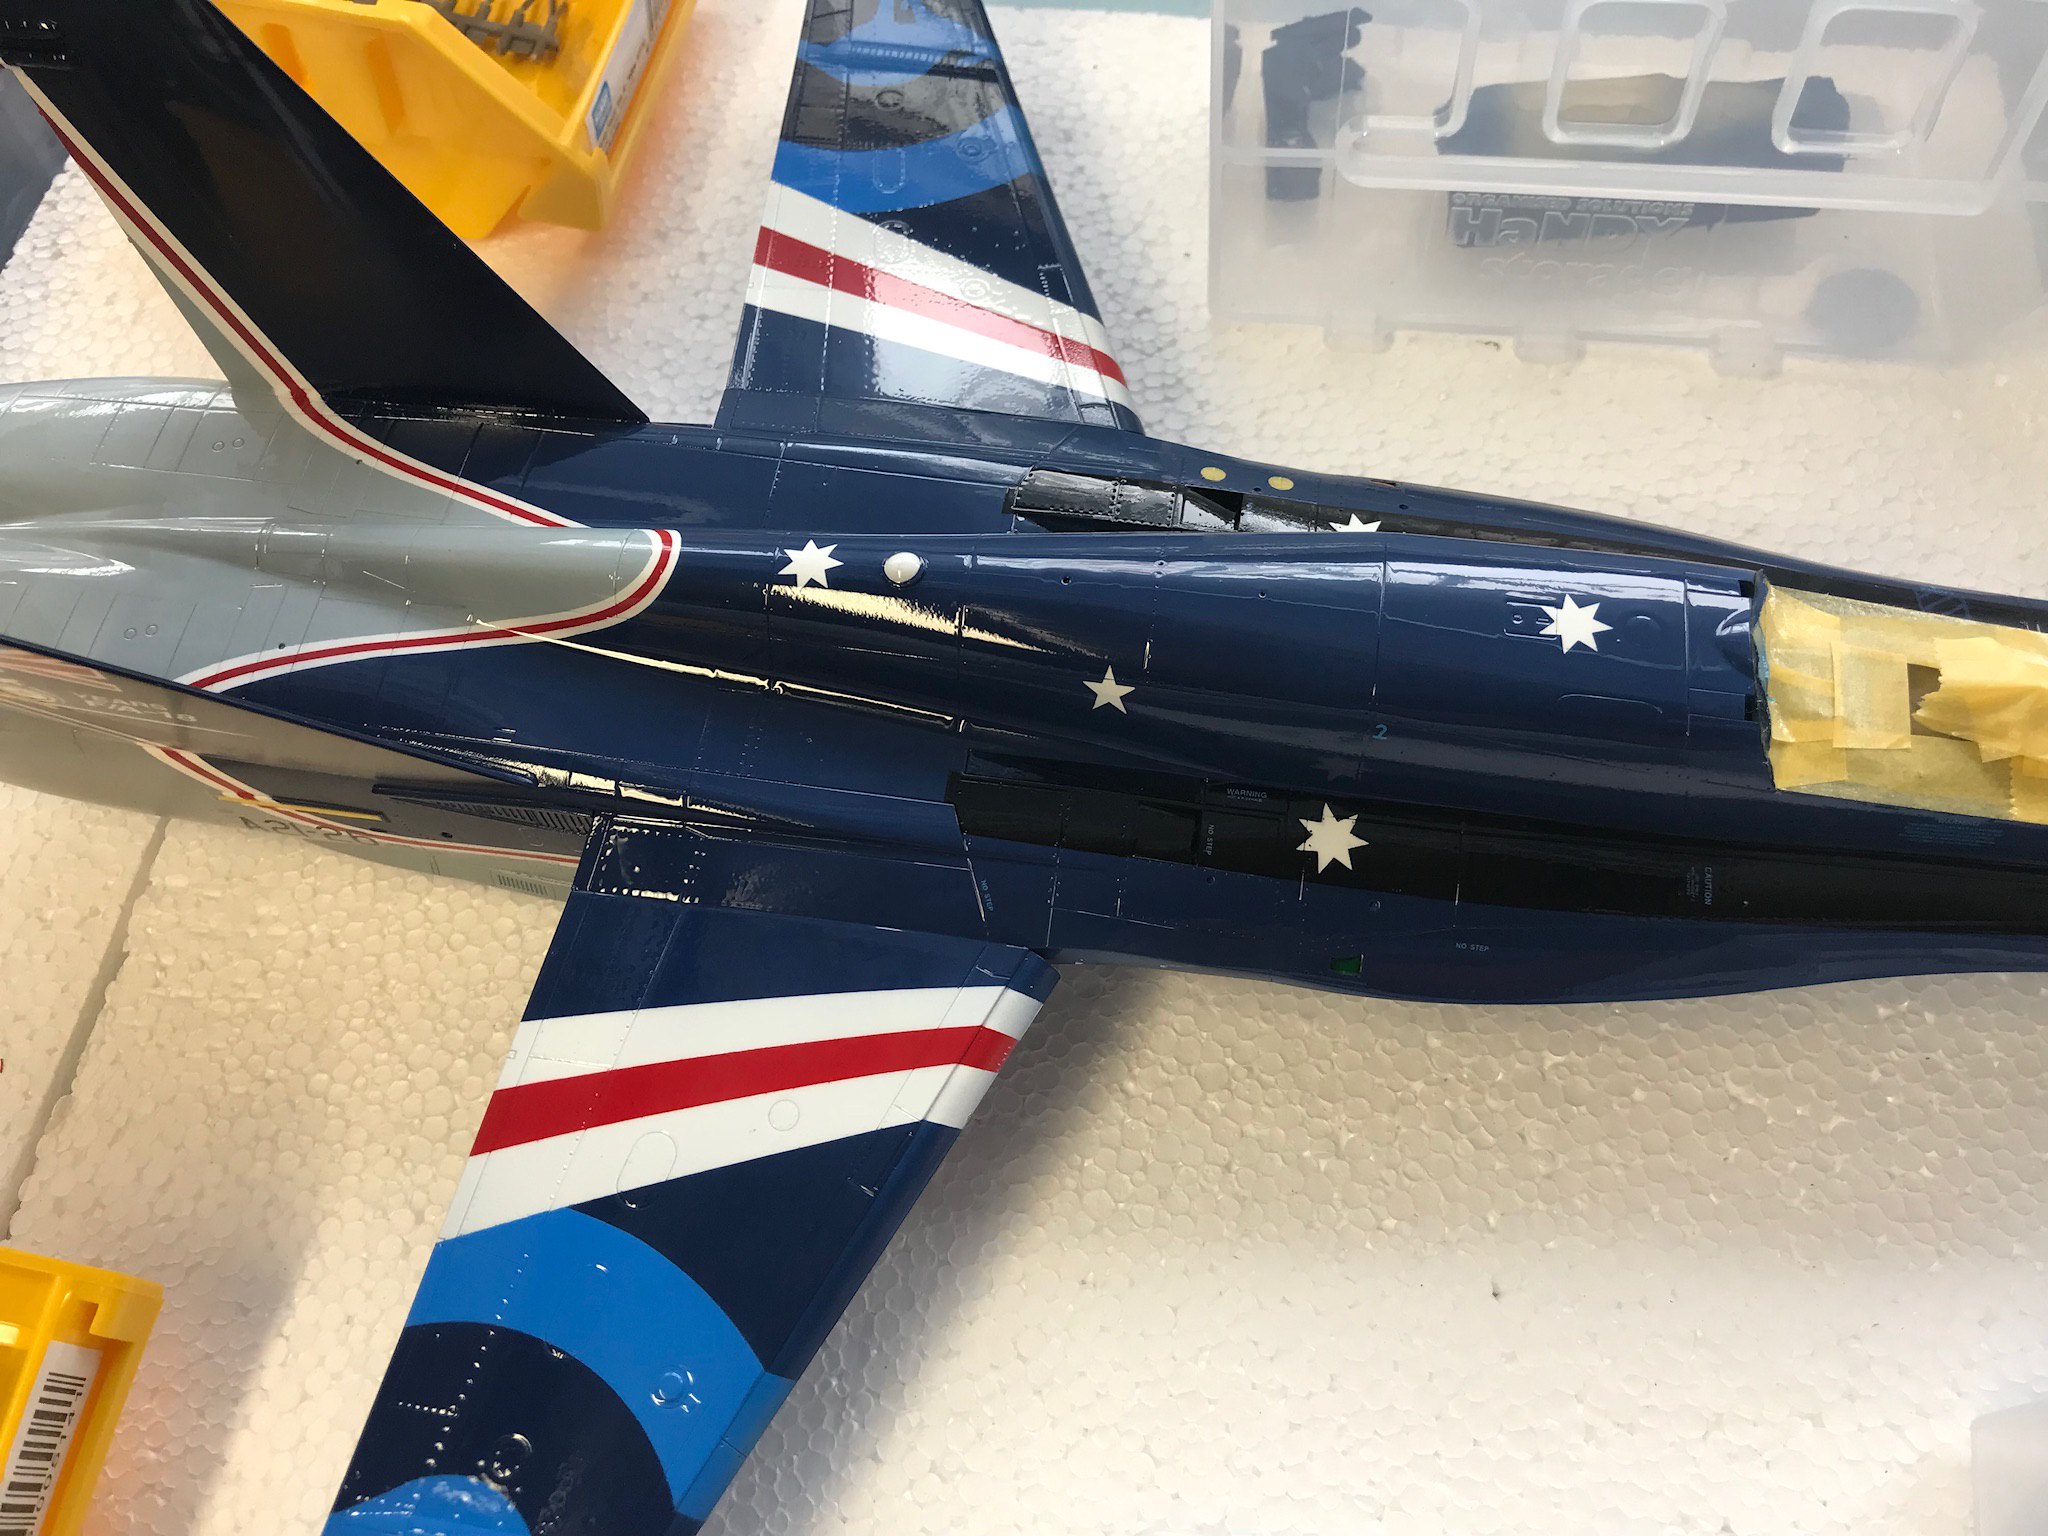
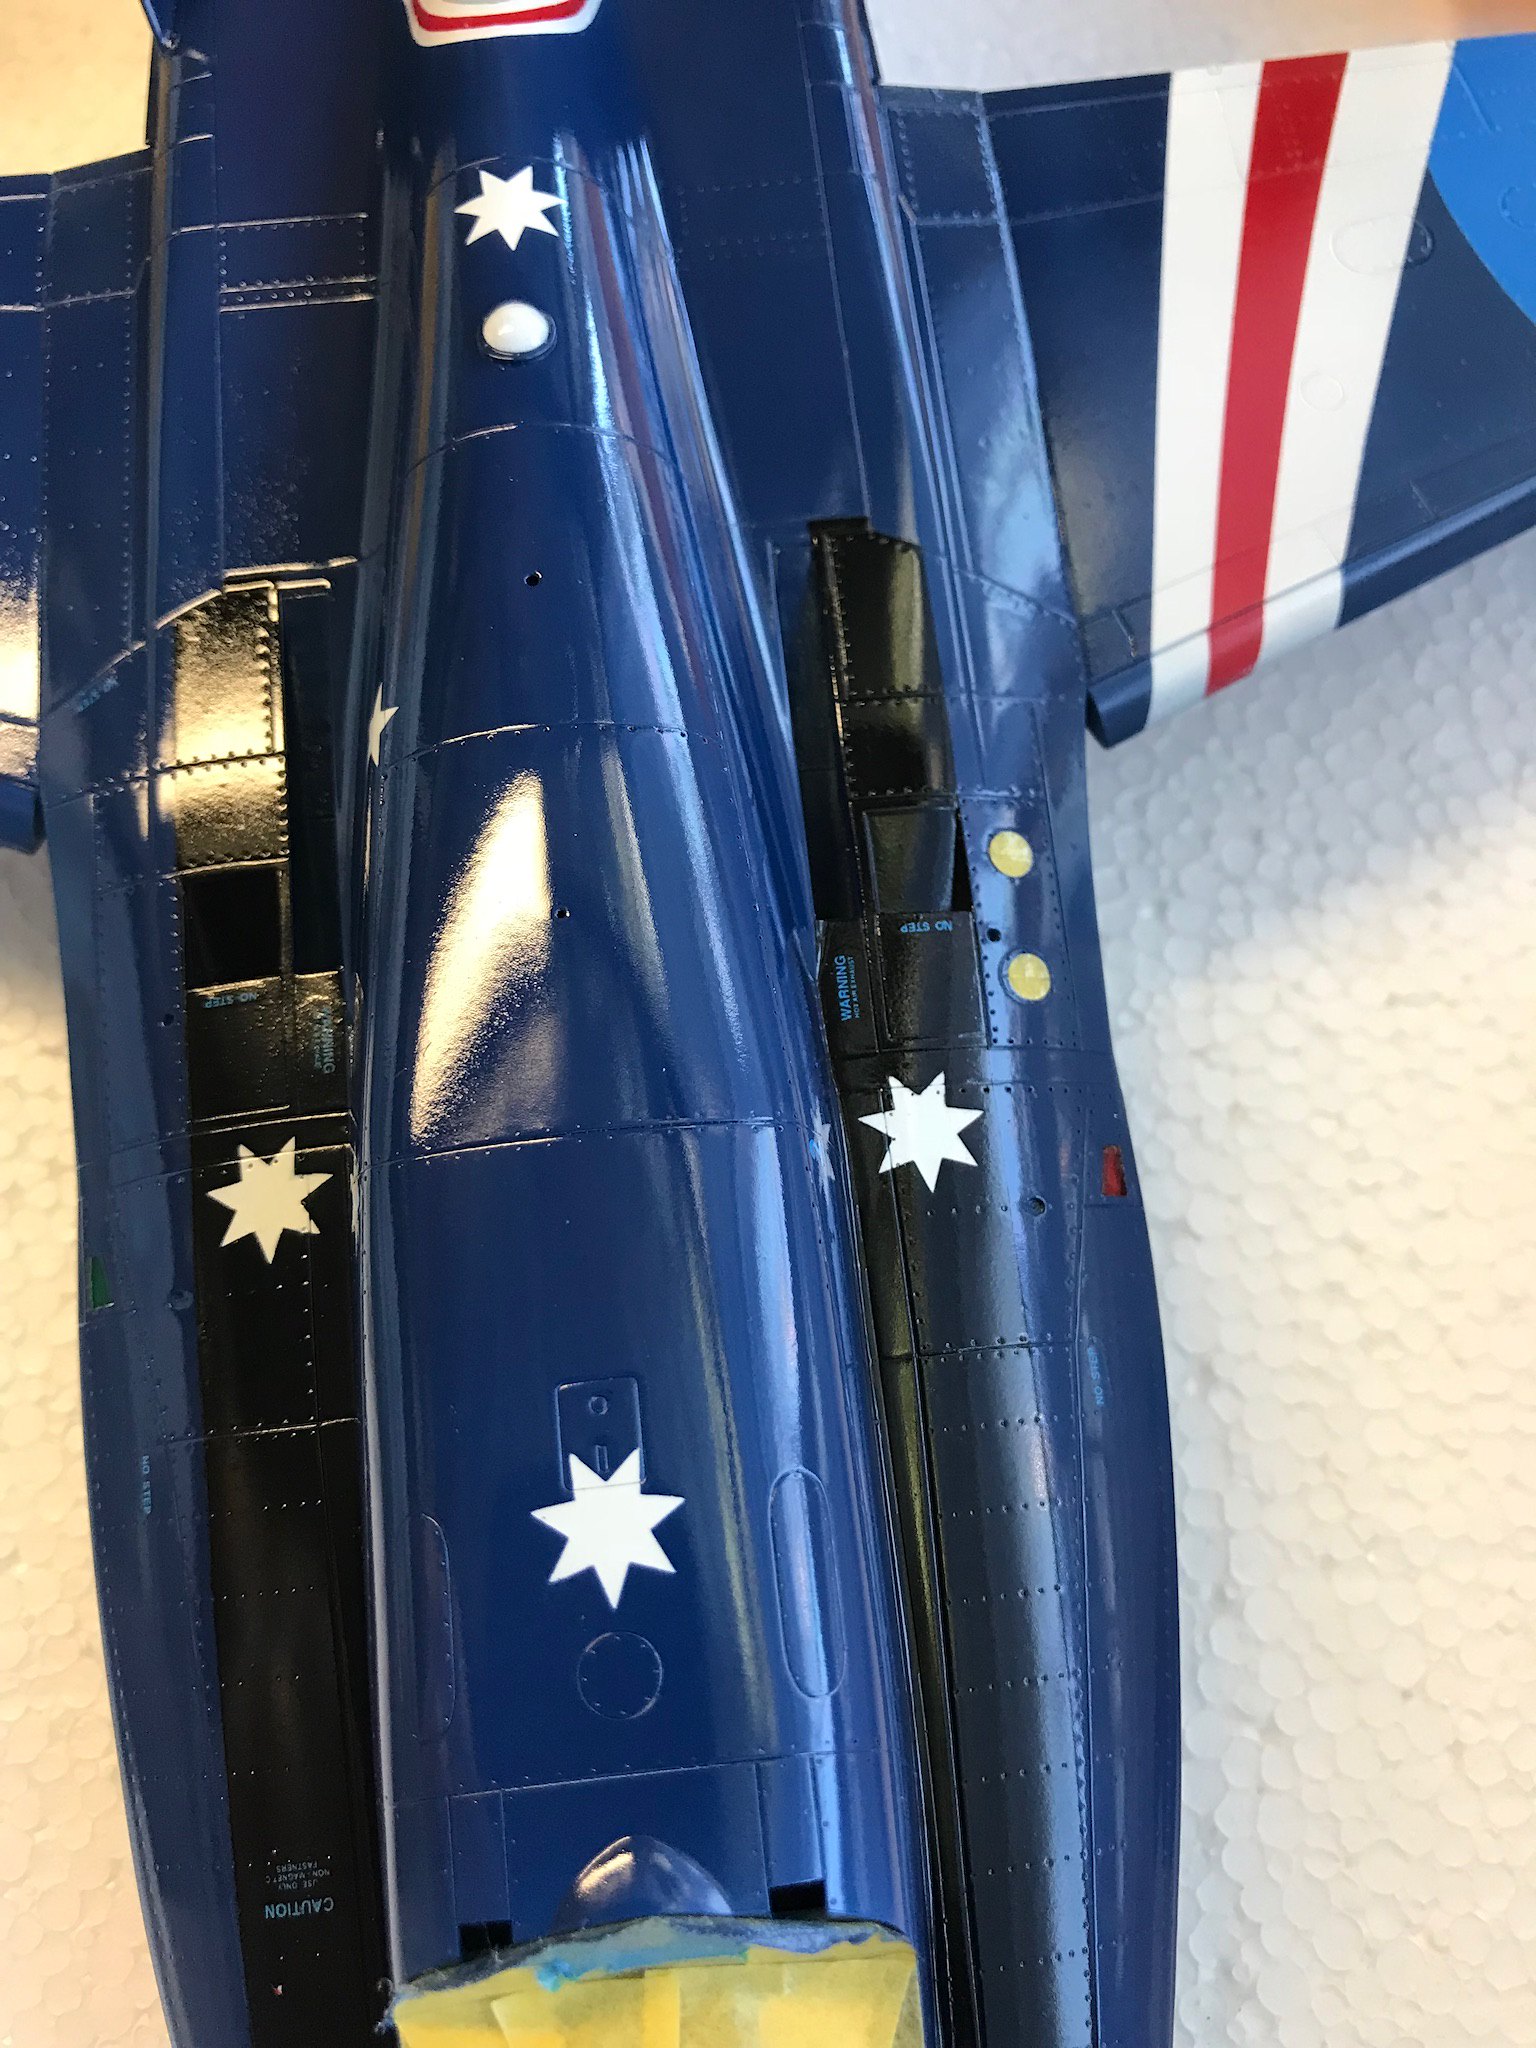
Gloss on the top fuselage, wet:
And dry ...
Here's that roundel again:
And I even got a bit of polishing done ...
Only about 100 hours of polishing to go I reckon ... got a Spotify subscription now, so that'll help!
Thanks all for following.
Jim
- LSP_Kevin, Lenny320, ShelbyGT500 and 7 others
-
 10
10
-
Next I wanted to do some texture work ahead of the gloss. I wanted semi-gloss finish on the slime lights, but didn't want to mask over my high gloss finish. So, some complex masking first, so I could put down a mask over the semi gloss ahead of spraying the gloss ...
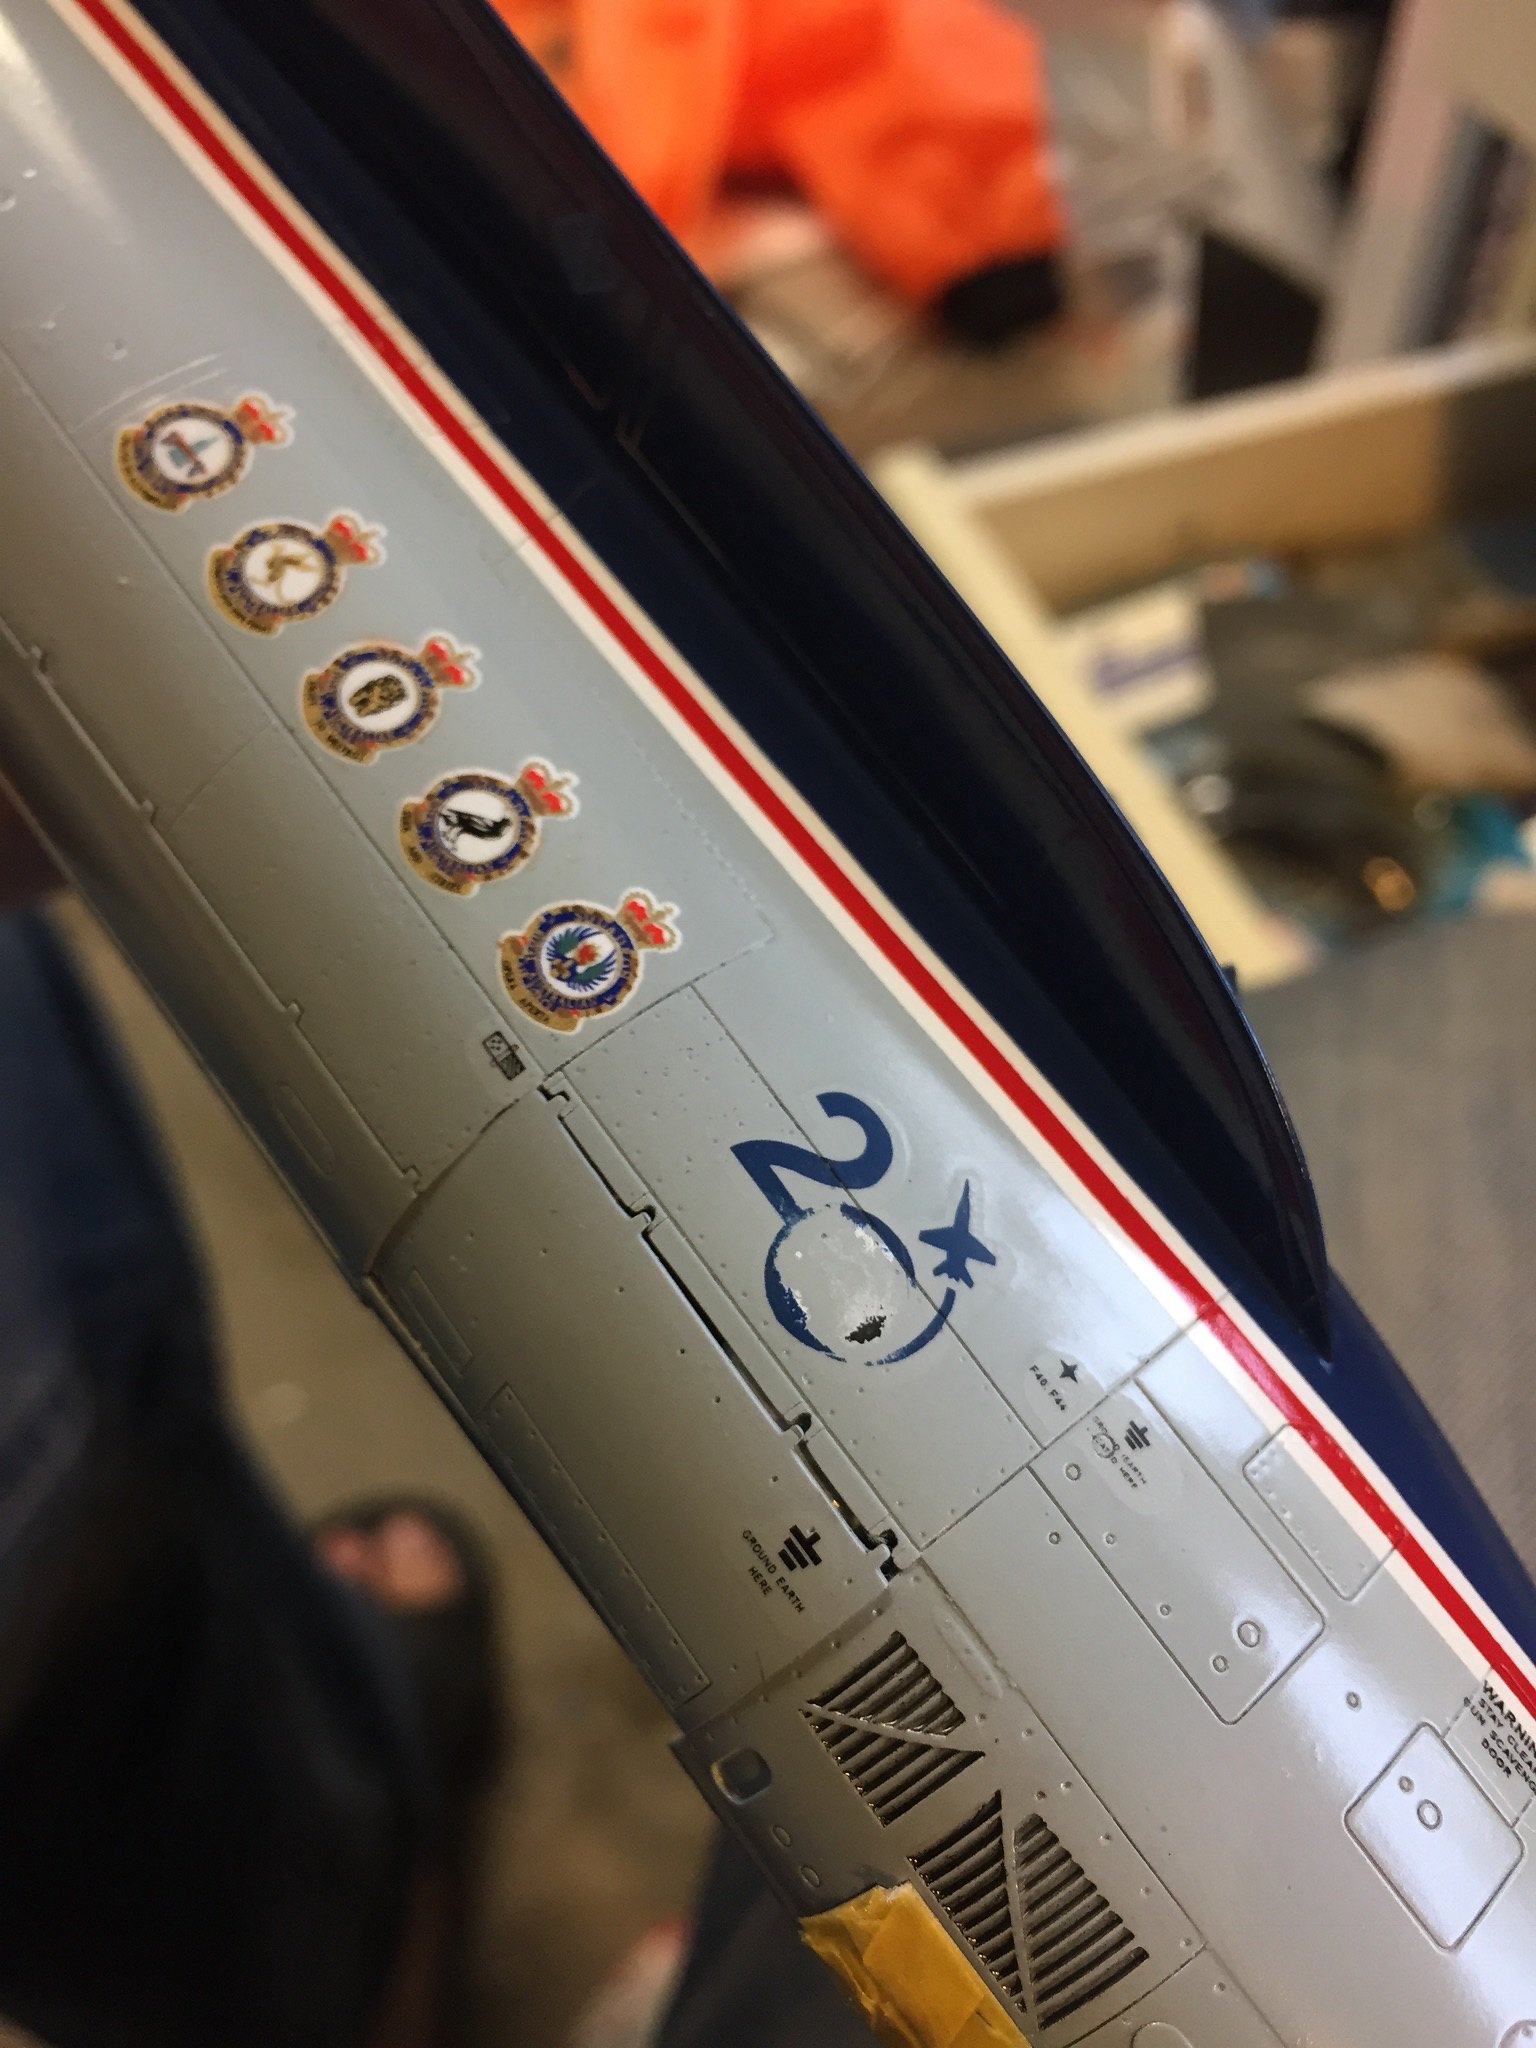
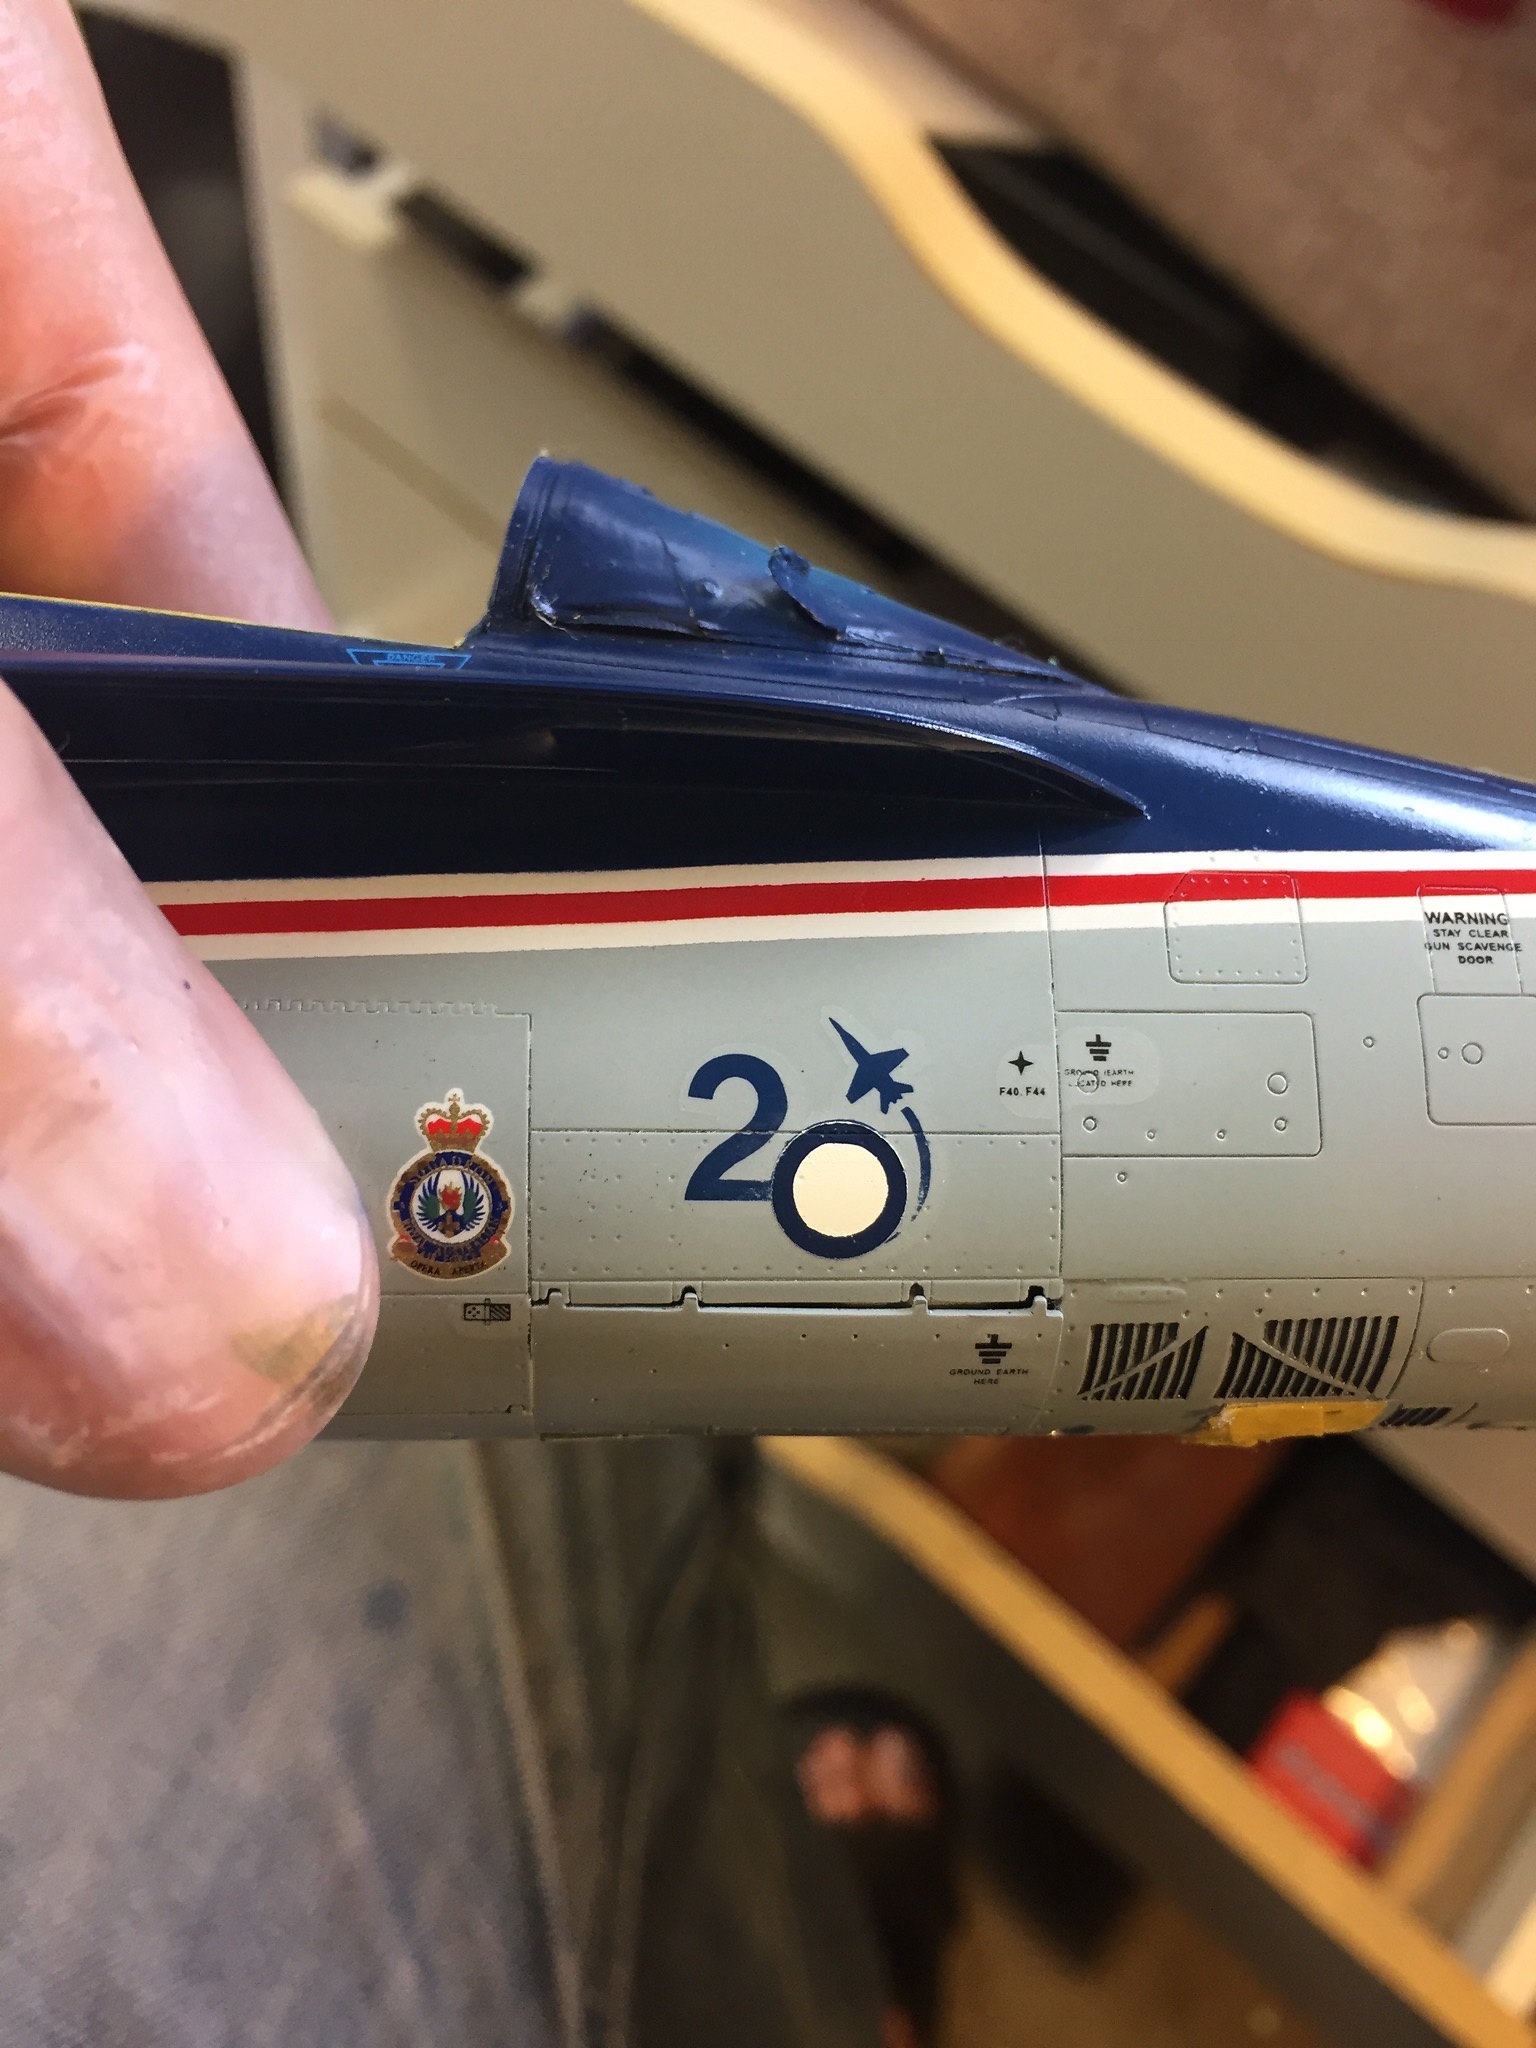
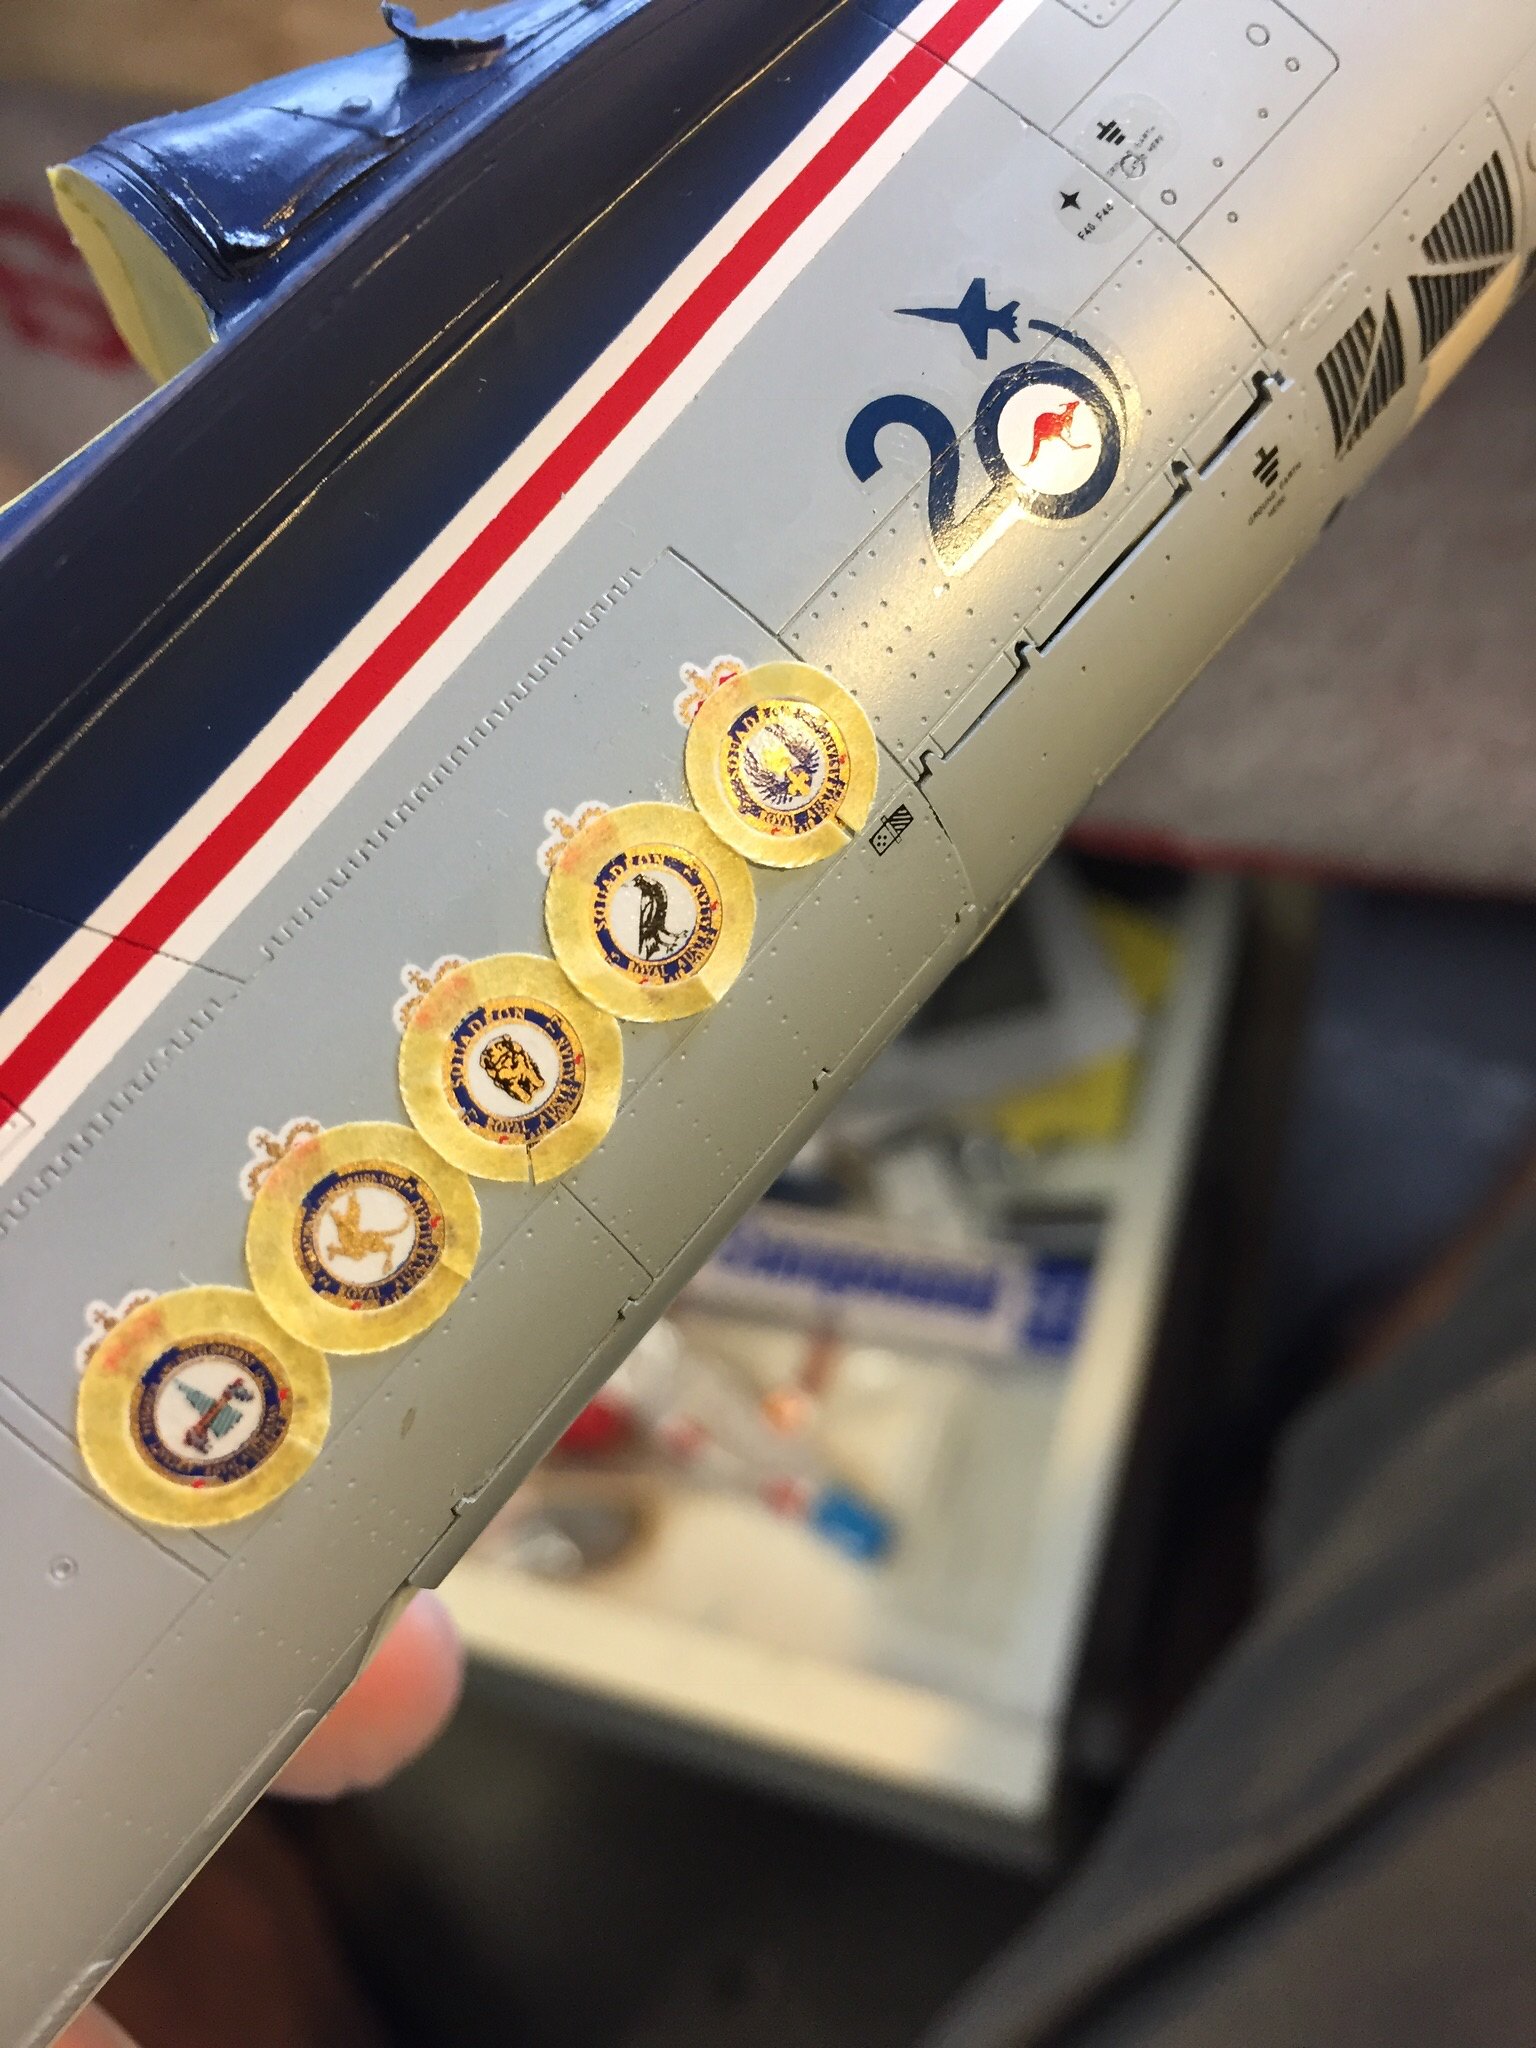
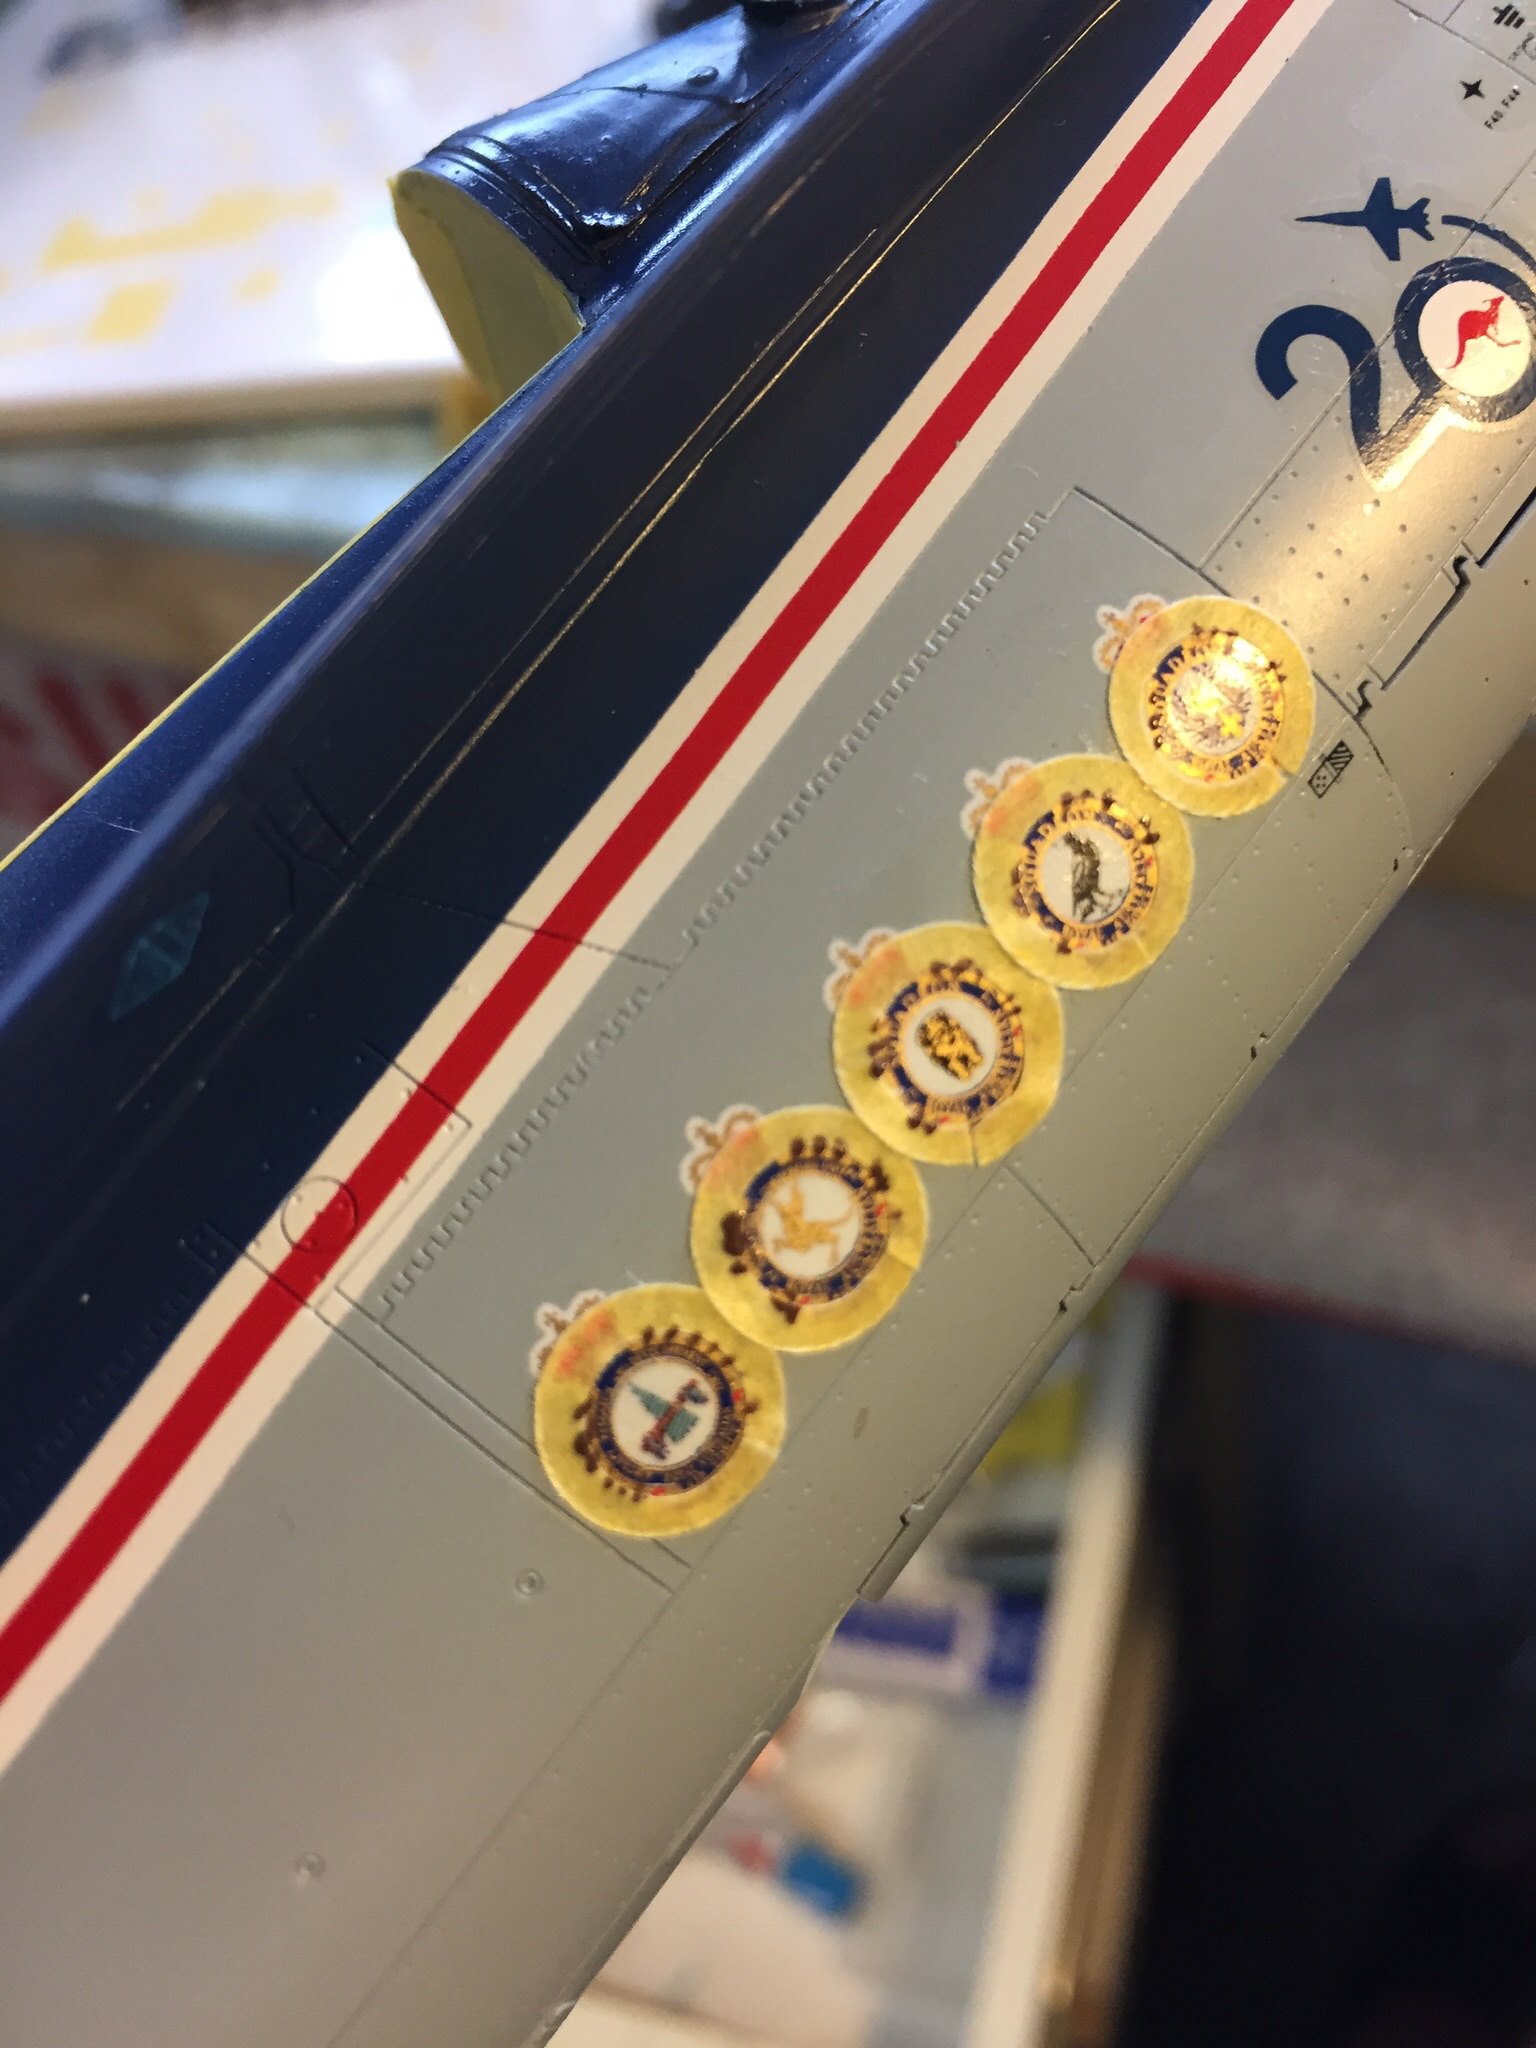
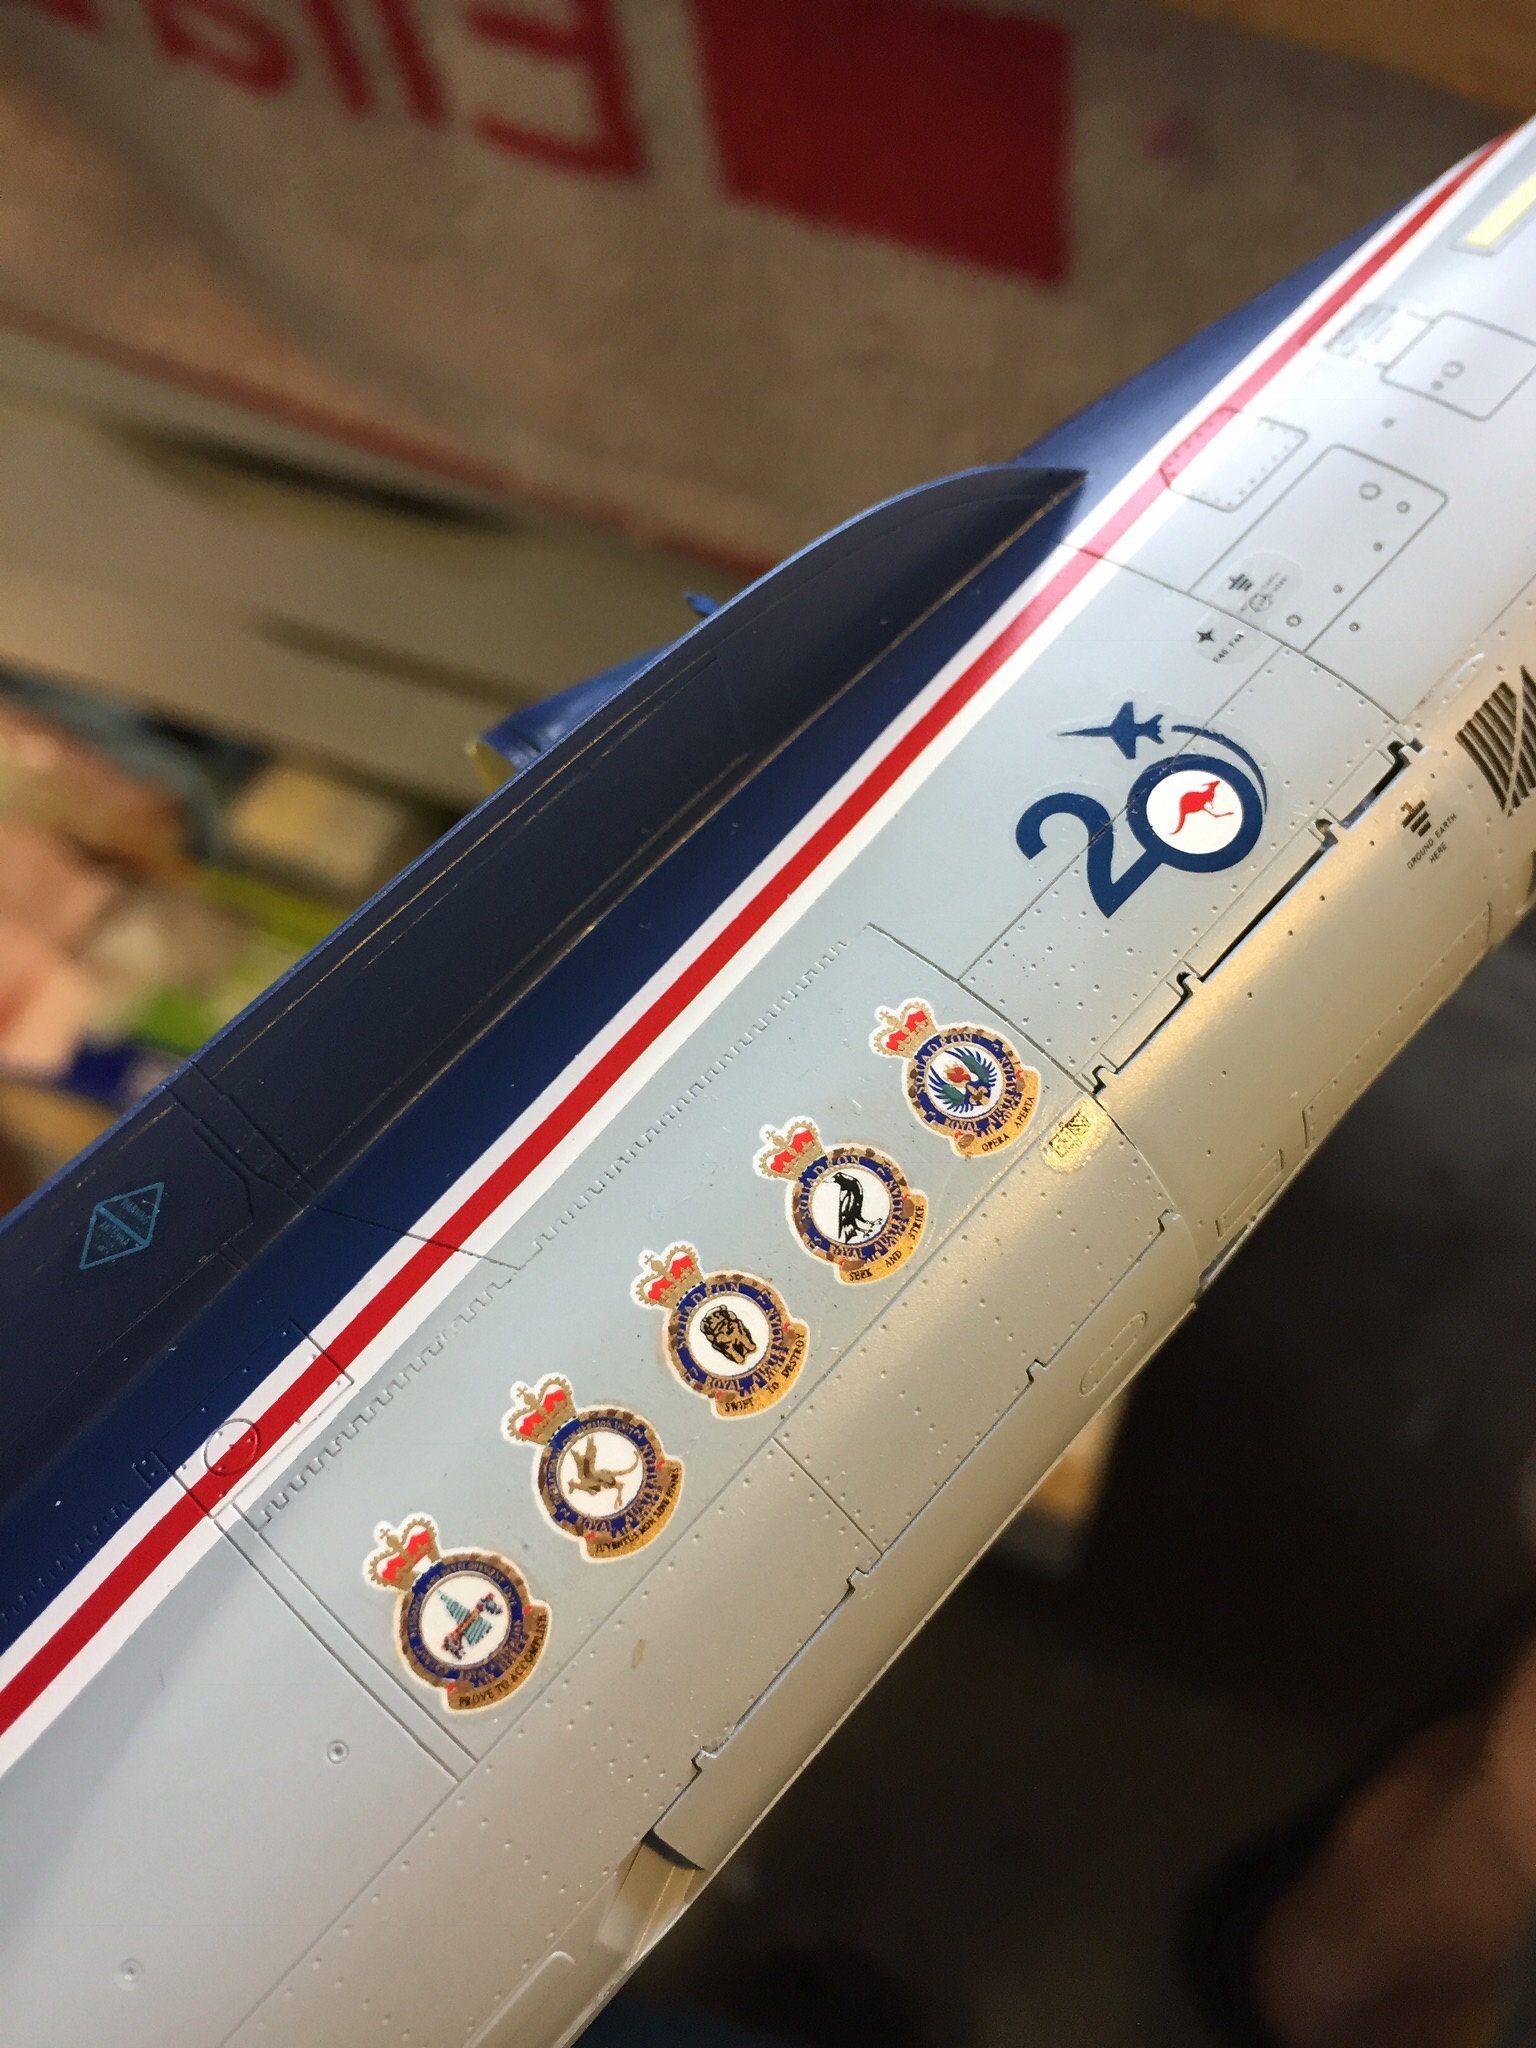
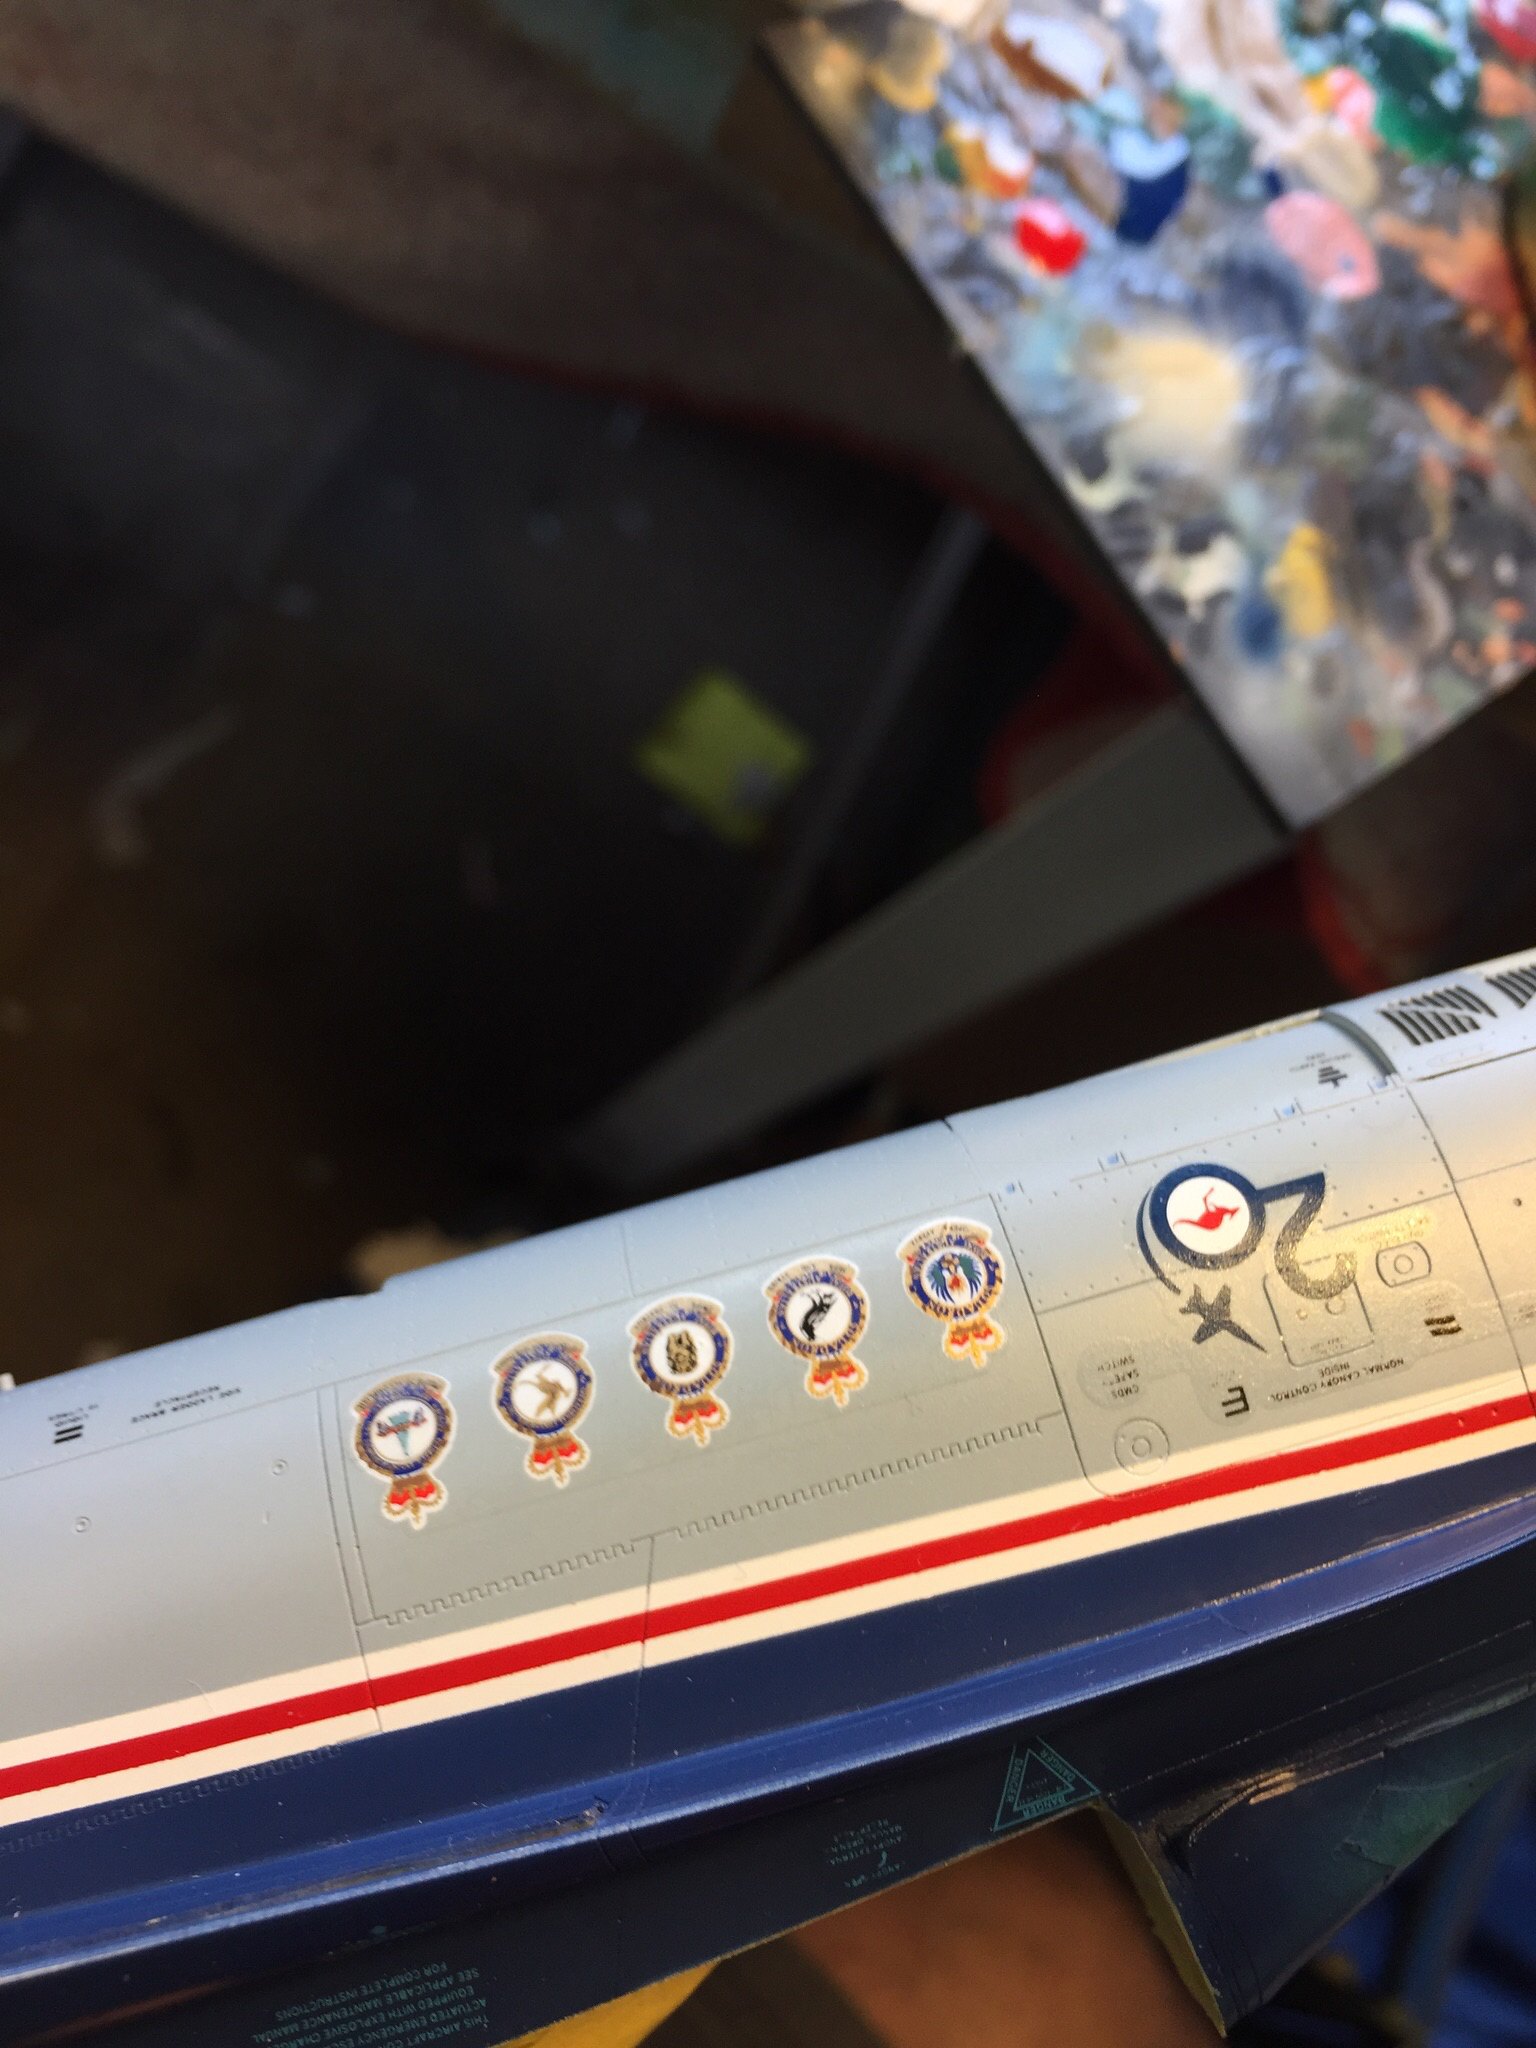
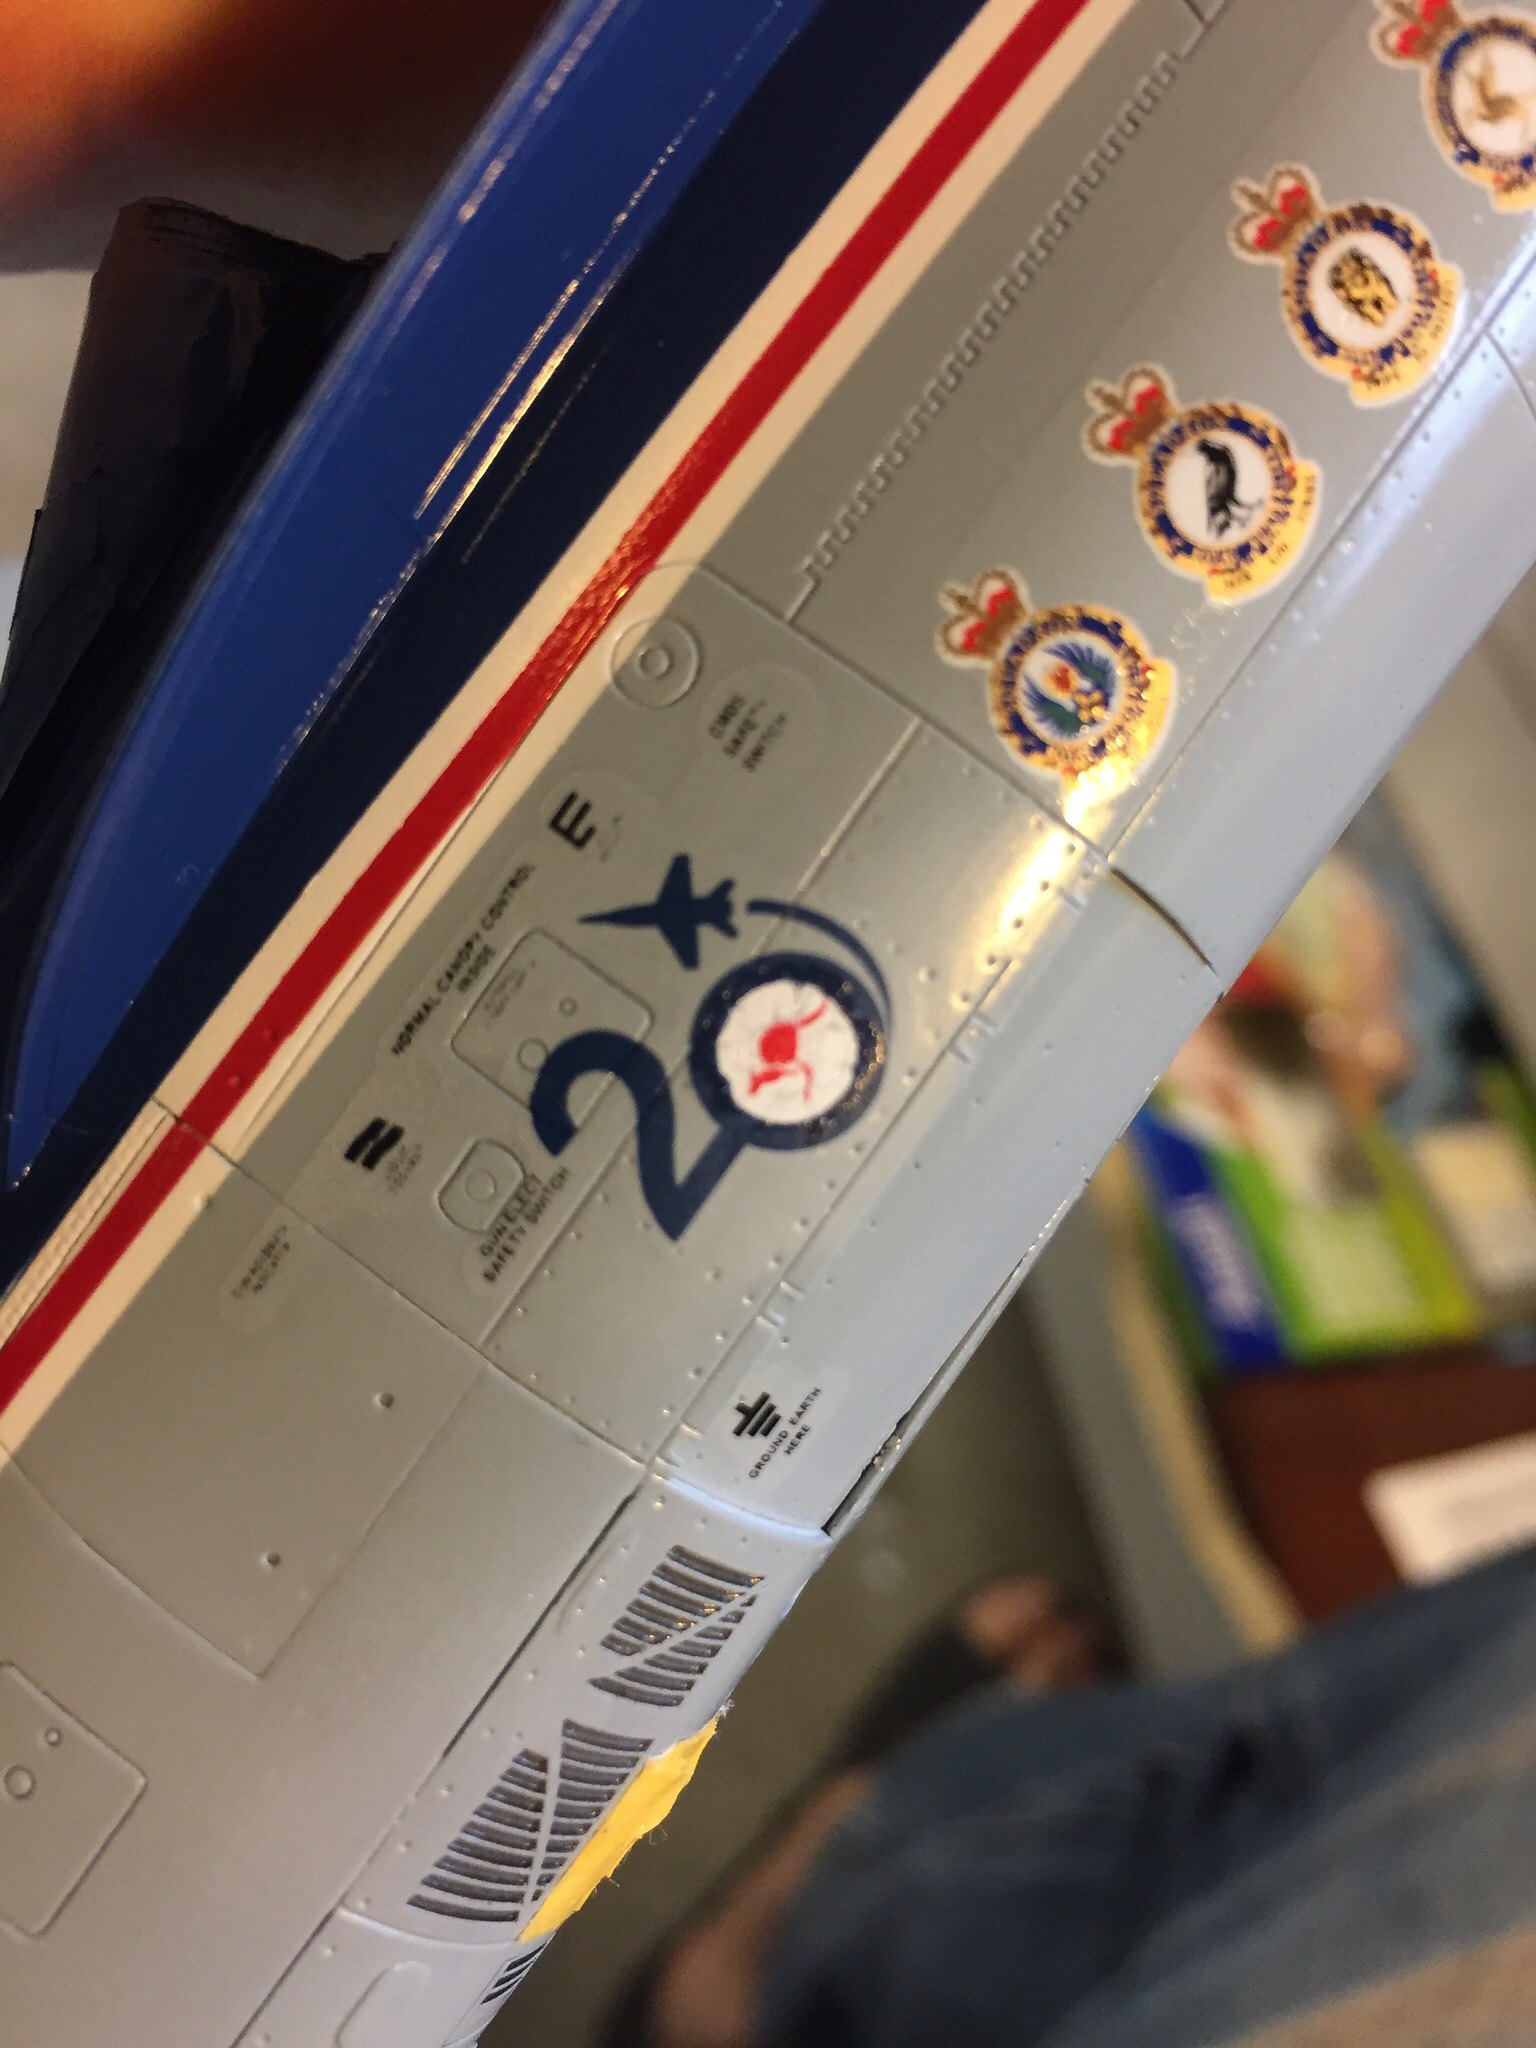
Then it was time to touch up some of the decals. For the squadron crests, I used the Model Alliance decals instead of the Leading Edge ones ... the gold is very prominent on the wreath around the crest, and I felt it was overdone. So I put a mask around them, and touched on some middle brown enamel paint.
Better!
Finally it was time for some gloss ... bit of pucker factor spraying the whole model, I don't mind telling you I was pretty nervous. Started on the flaps and slats:
... and moved to the lower fuselage ...
Upper flaps and slats:
Then I noticed a disaster - the white in the roundel had wrinkled under the gloss coat:
No idea why this happened, but I had to fix it. More on that in a sec.
-
Hi all, can't believe it's been two months ... life has been pretty crazy outside of modelling land, so I guess that's my excuse. Anyway, work has progressed a little, and what time I've had has gone on modelling rather than updating.
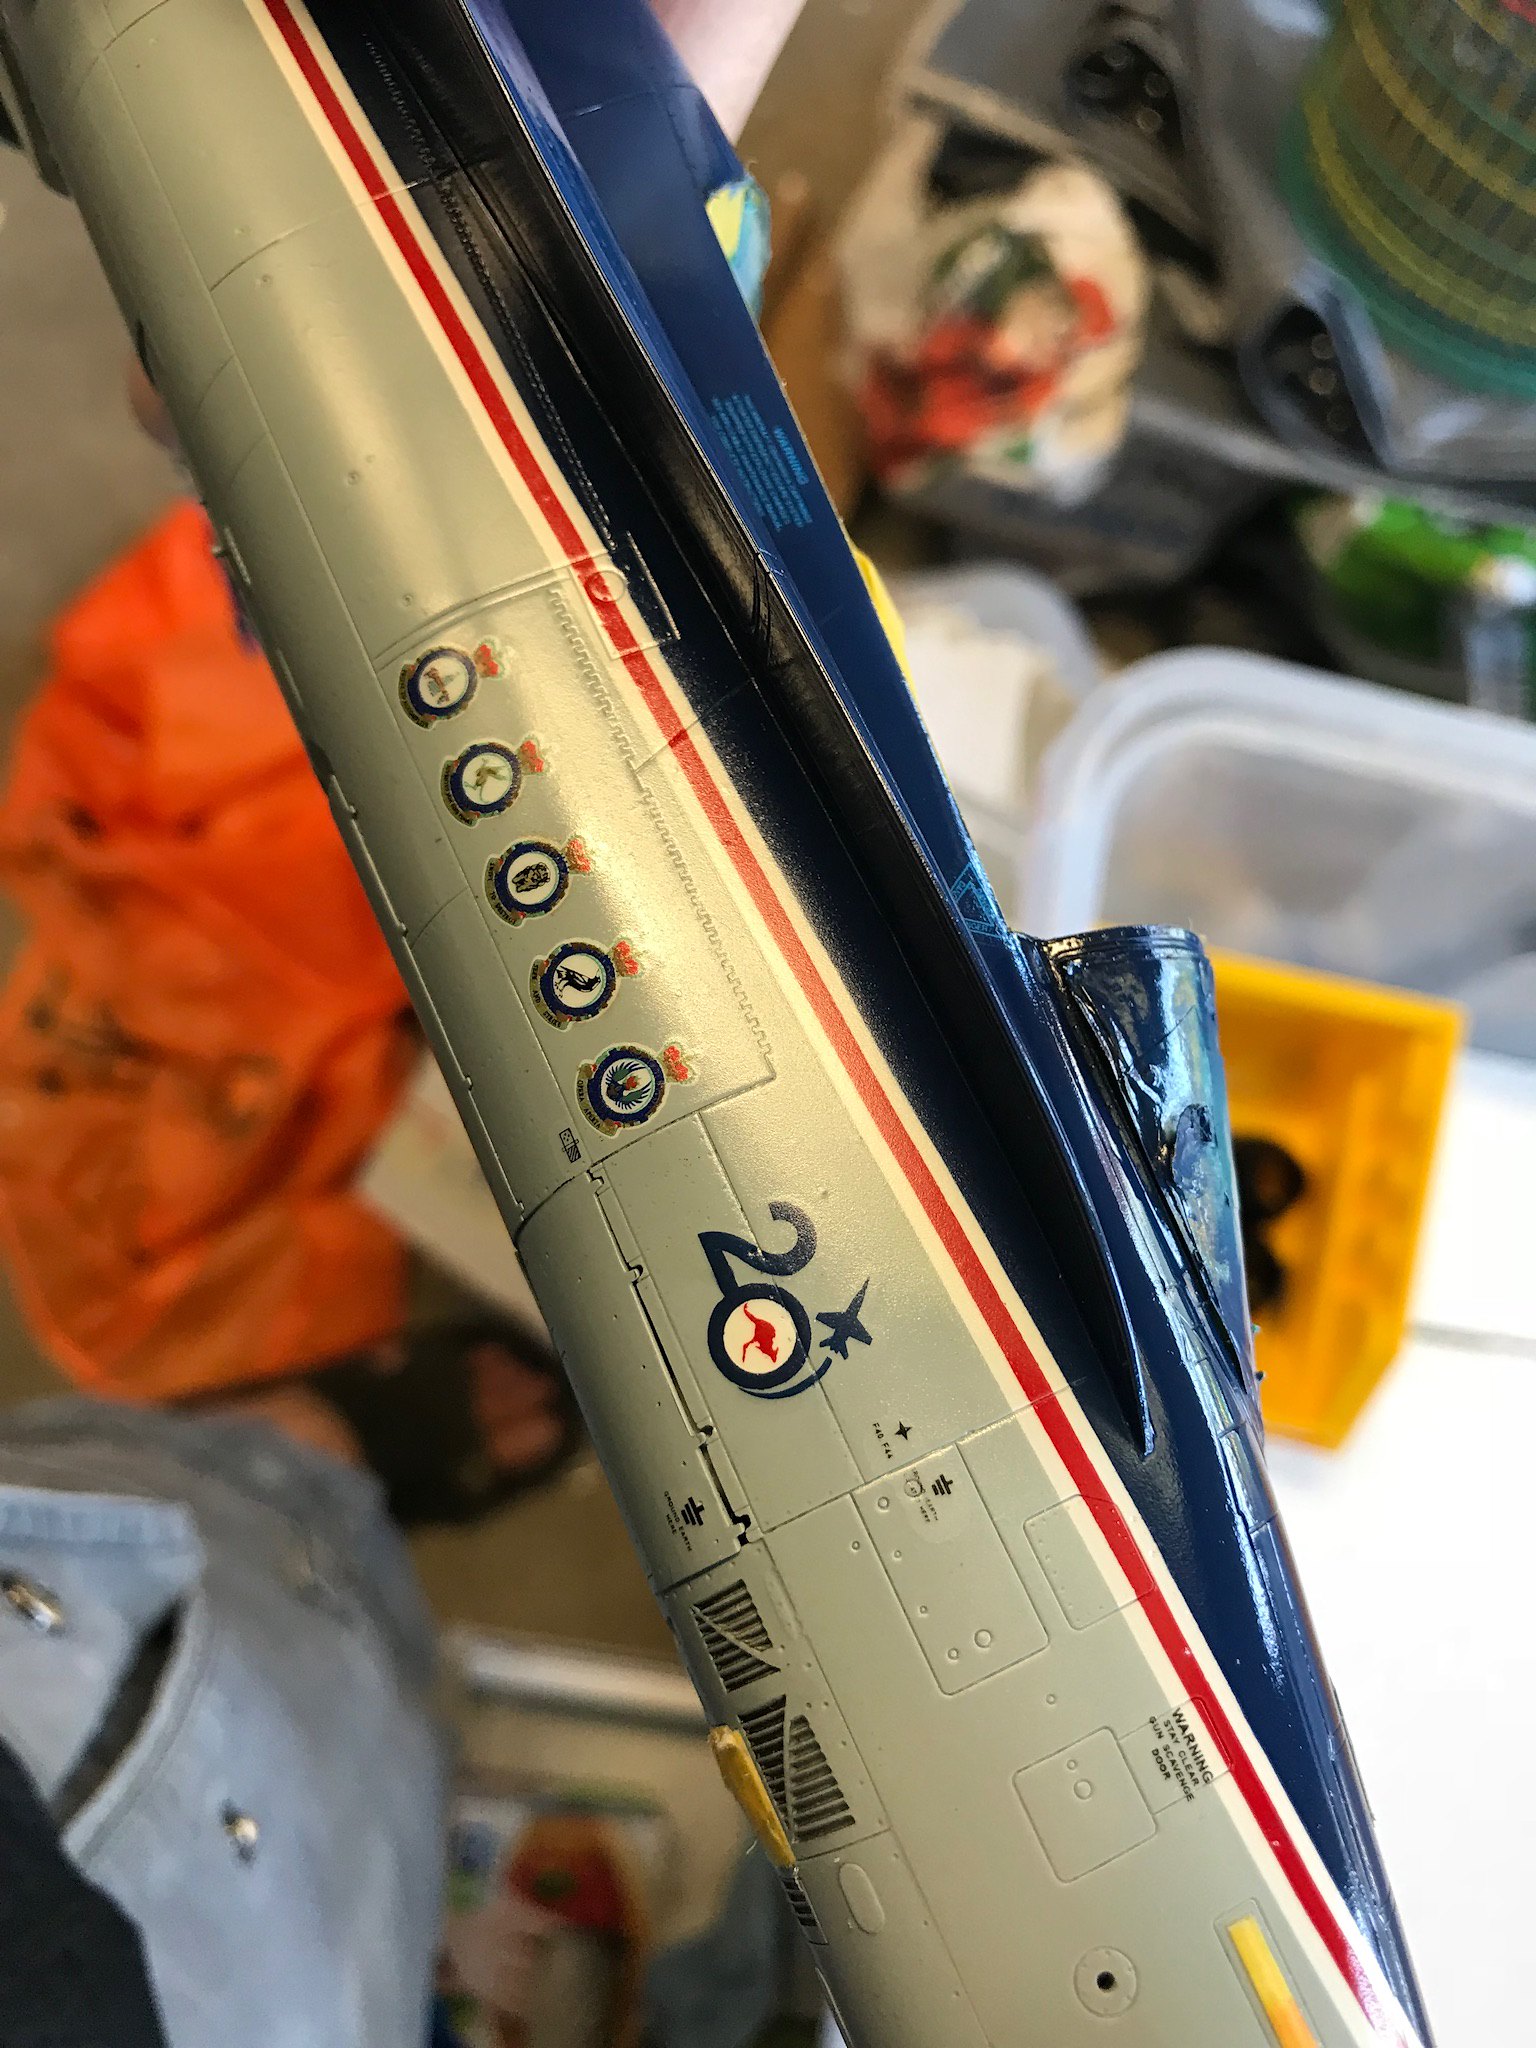
So, when we left it, the paint was down and touched up, and we were ready for some decals. So on they went:
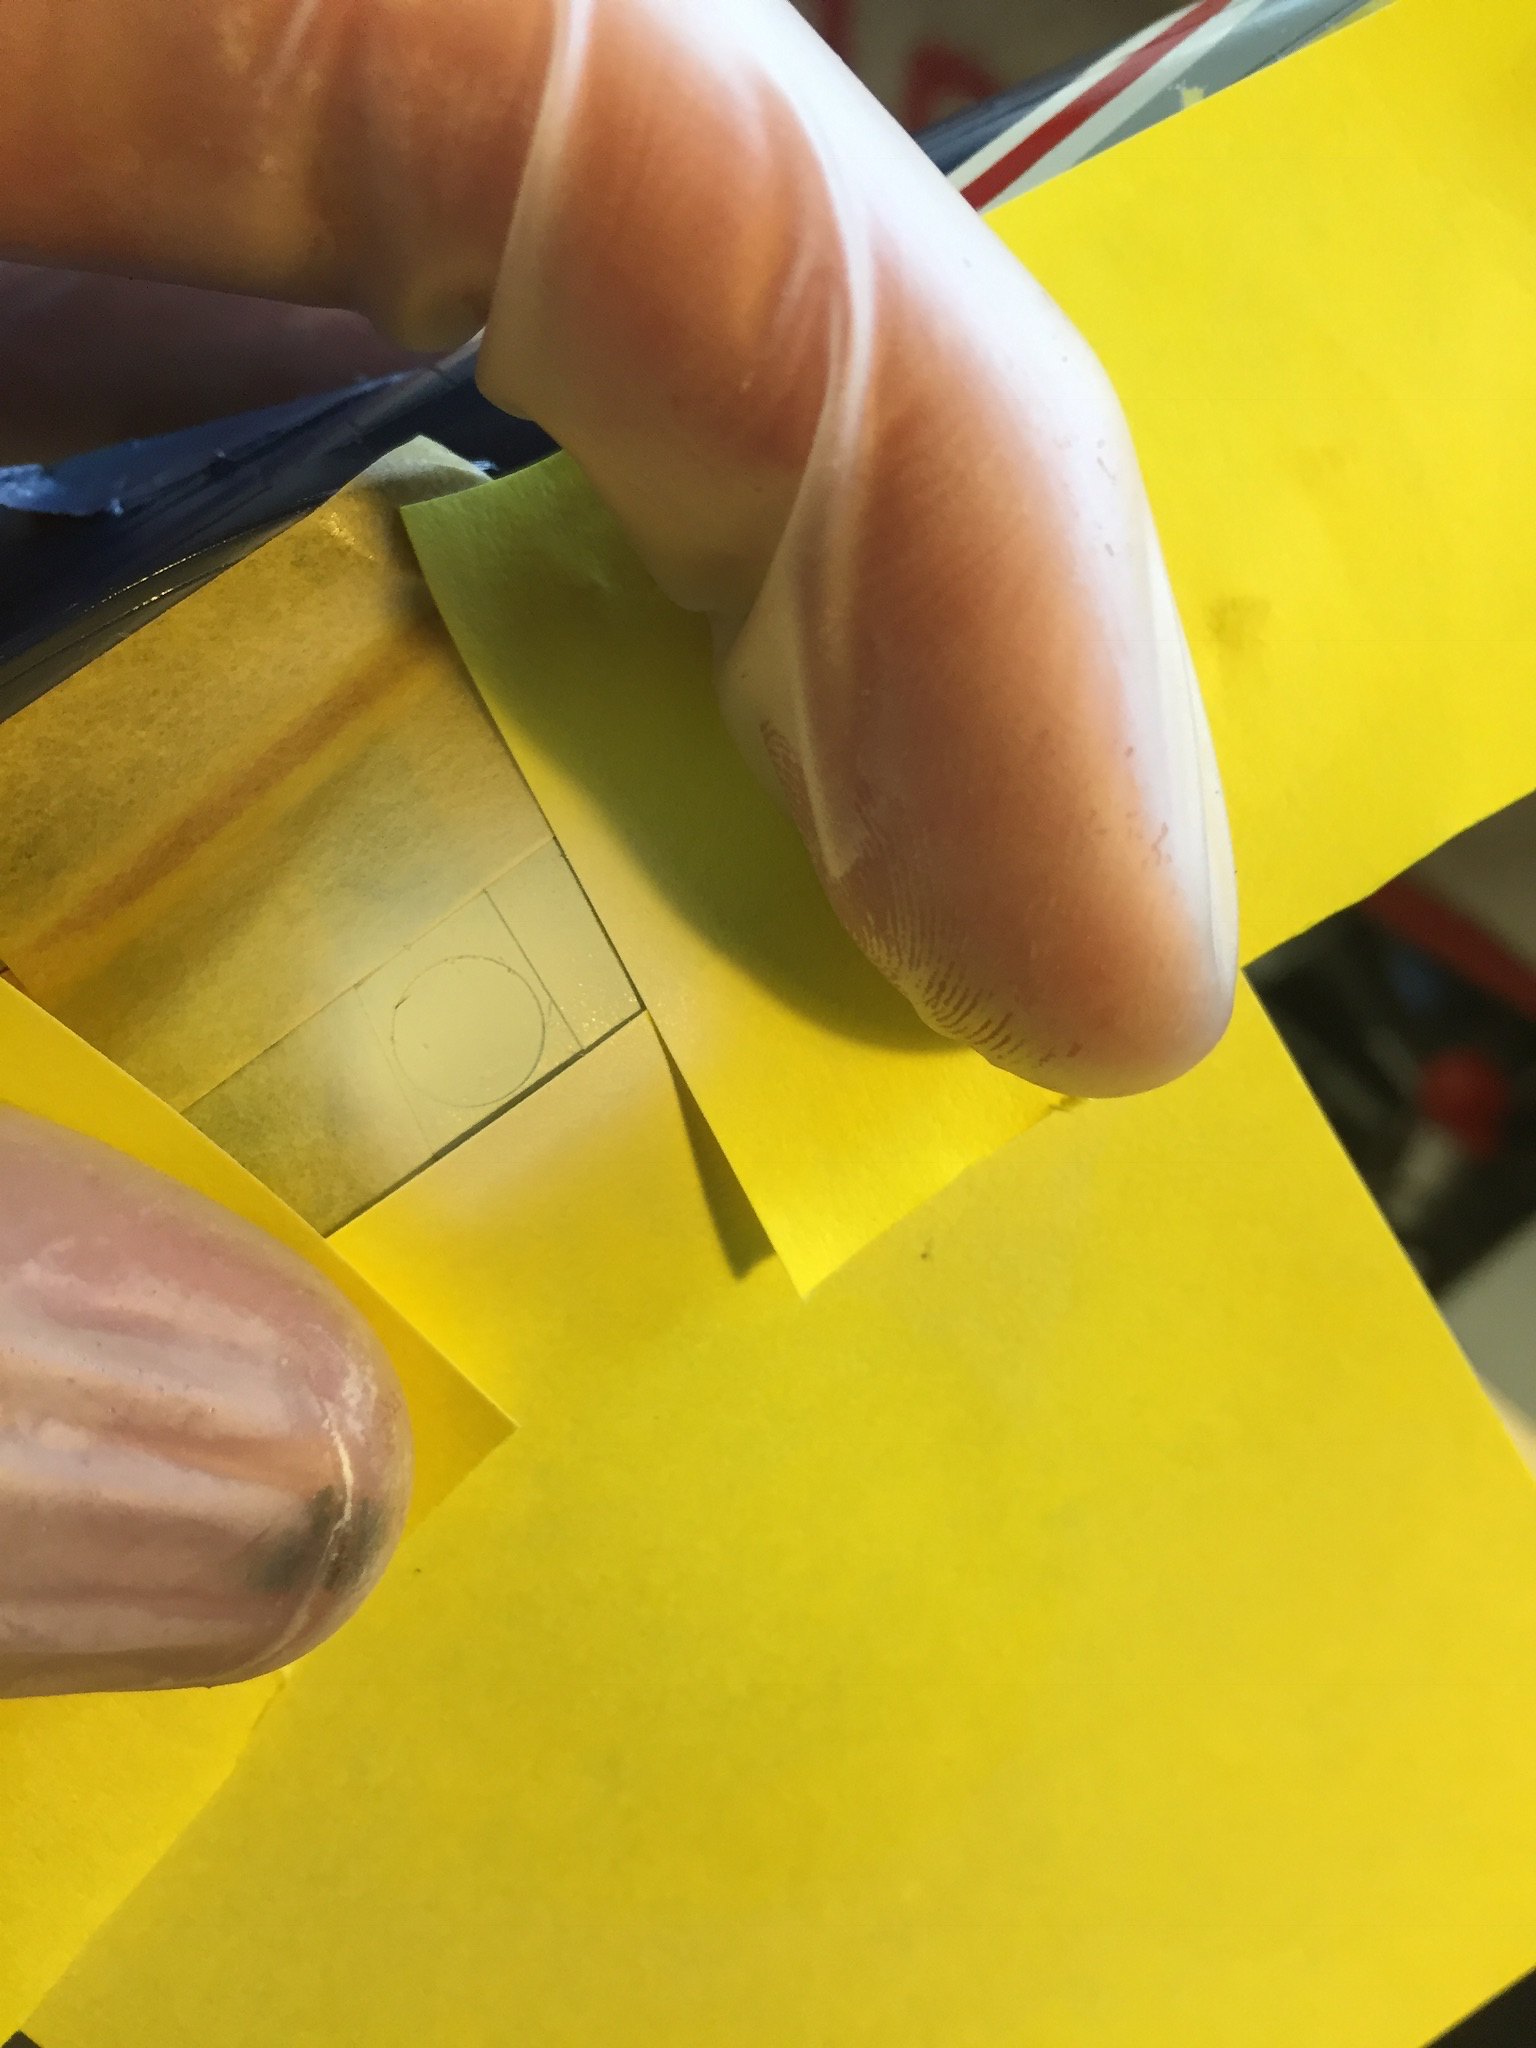
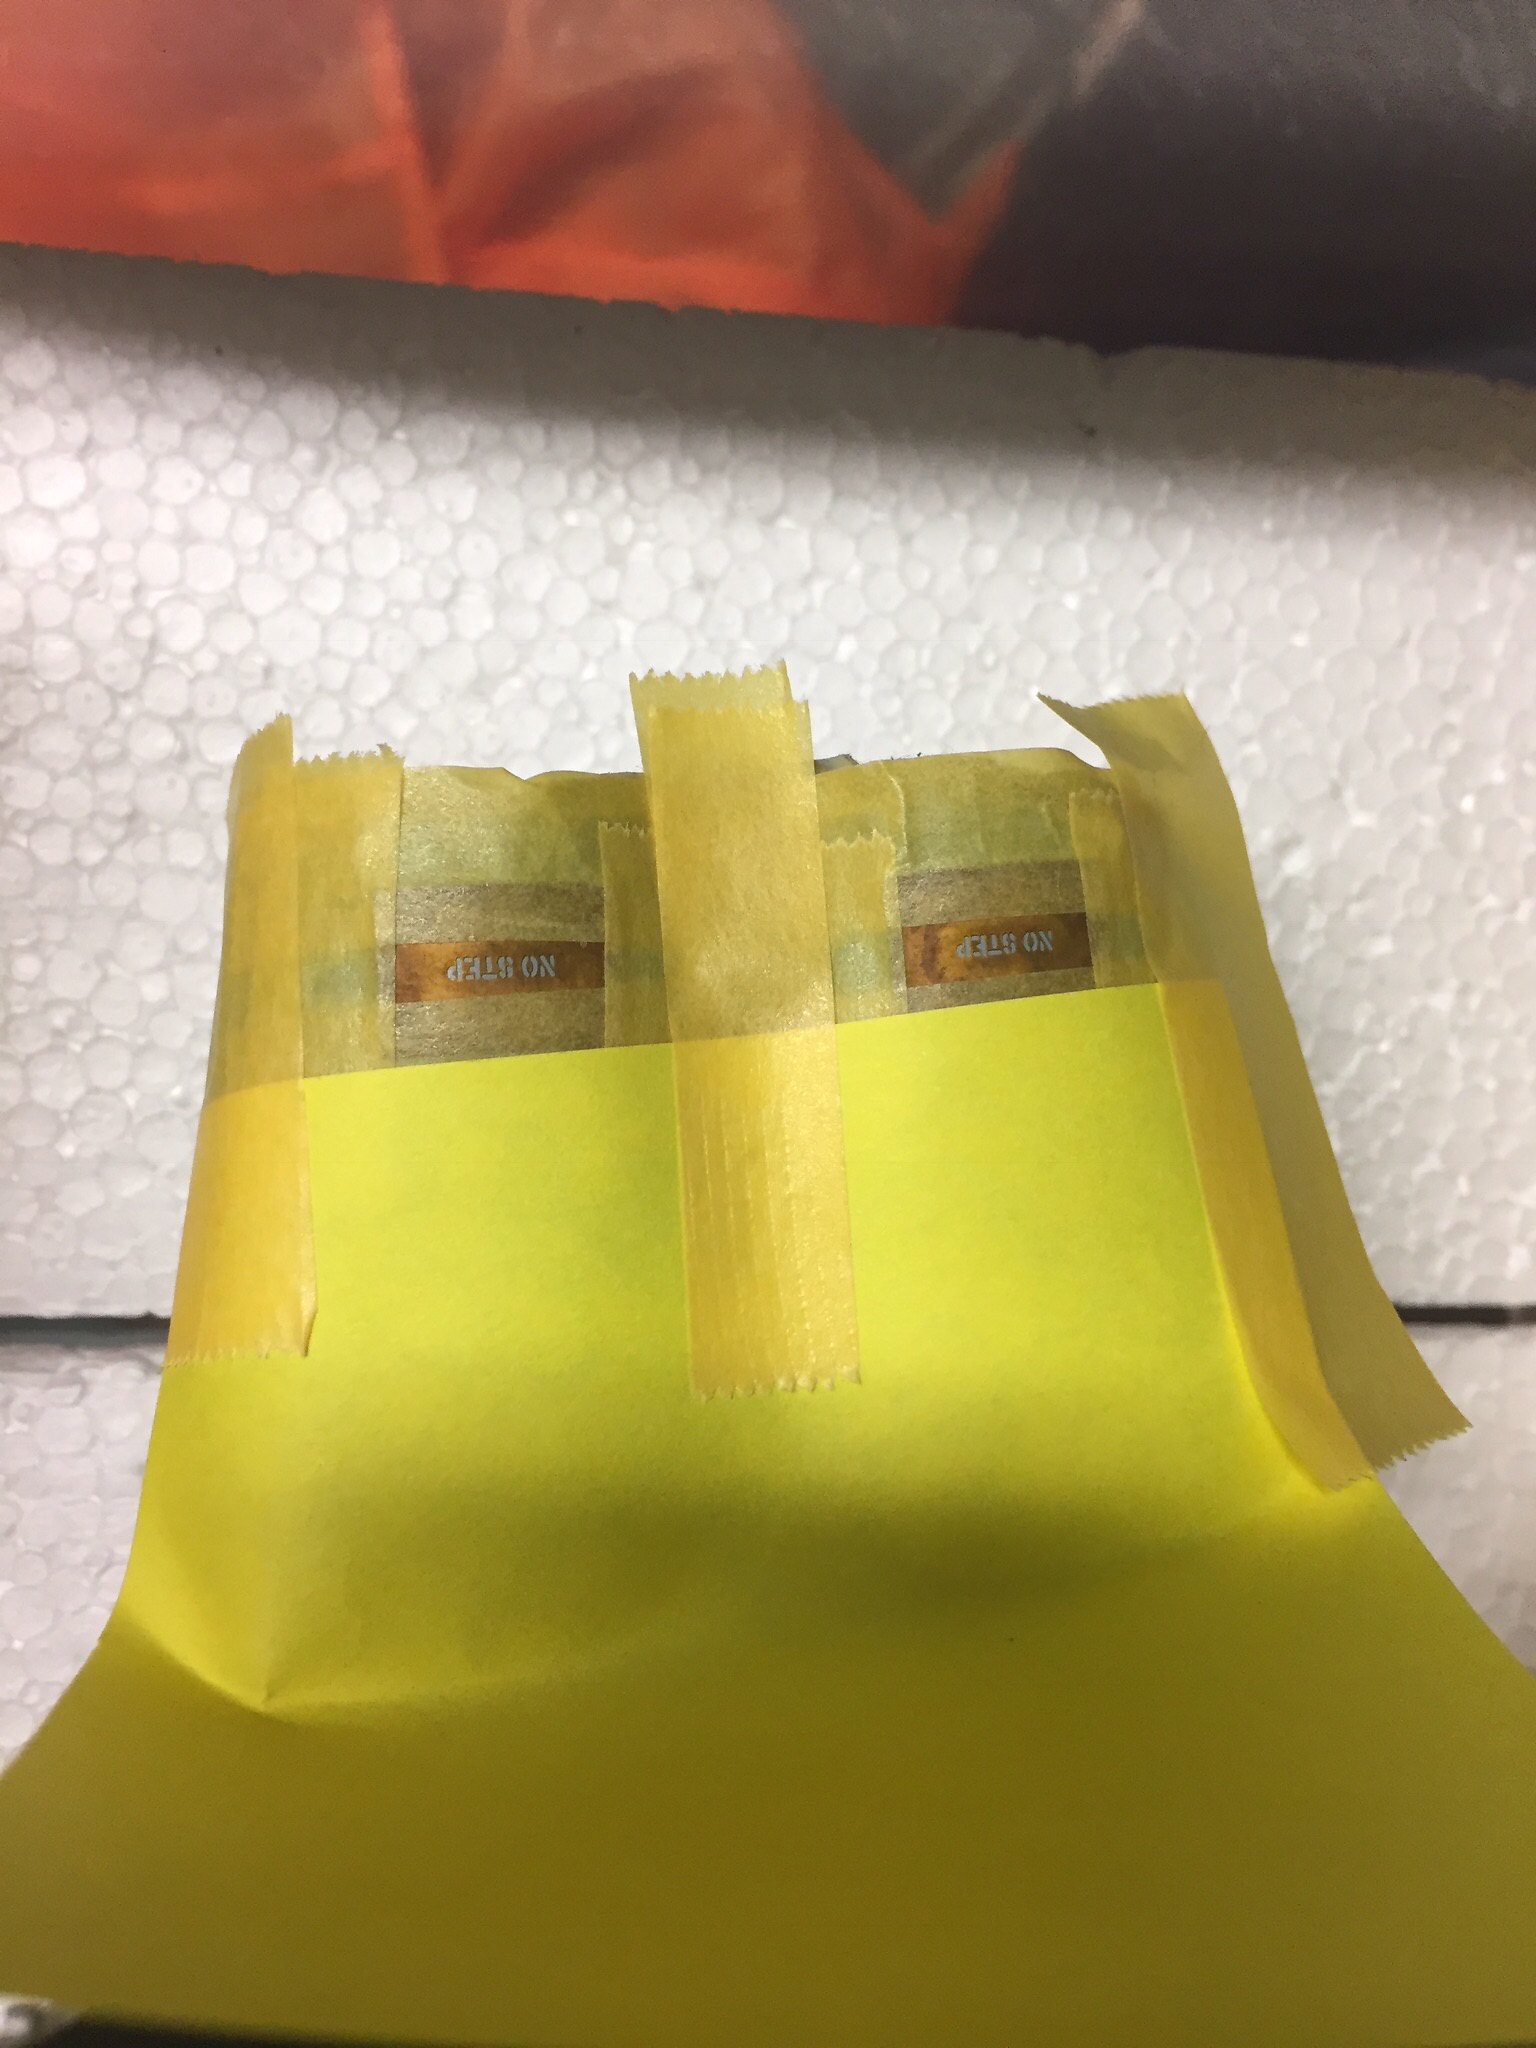
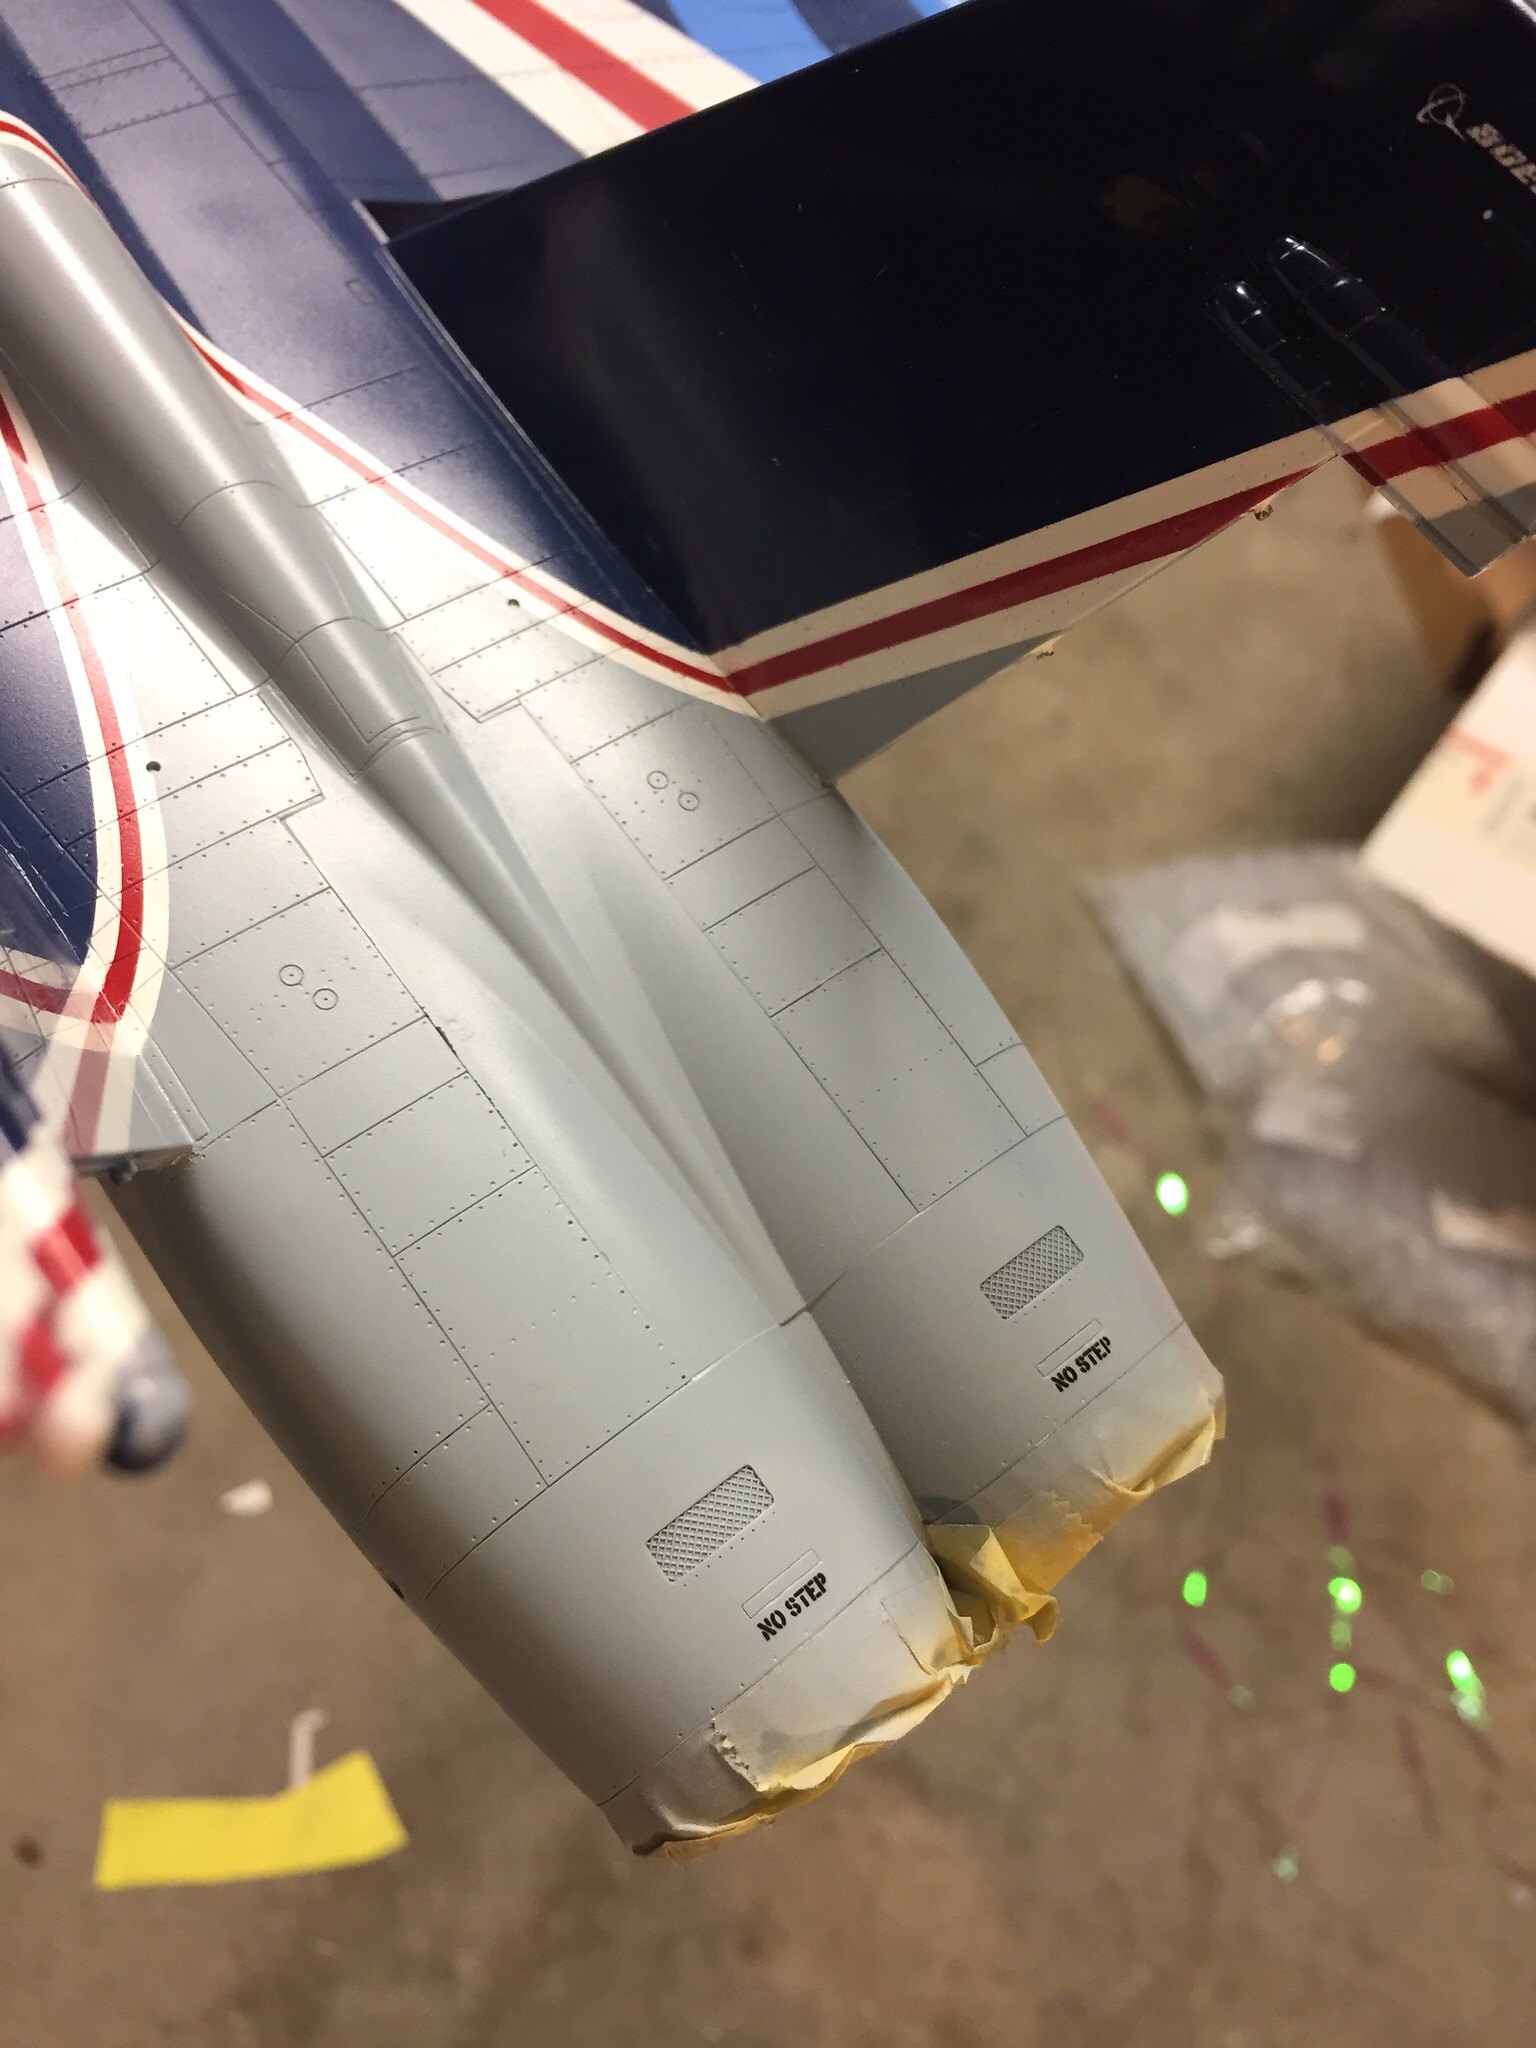
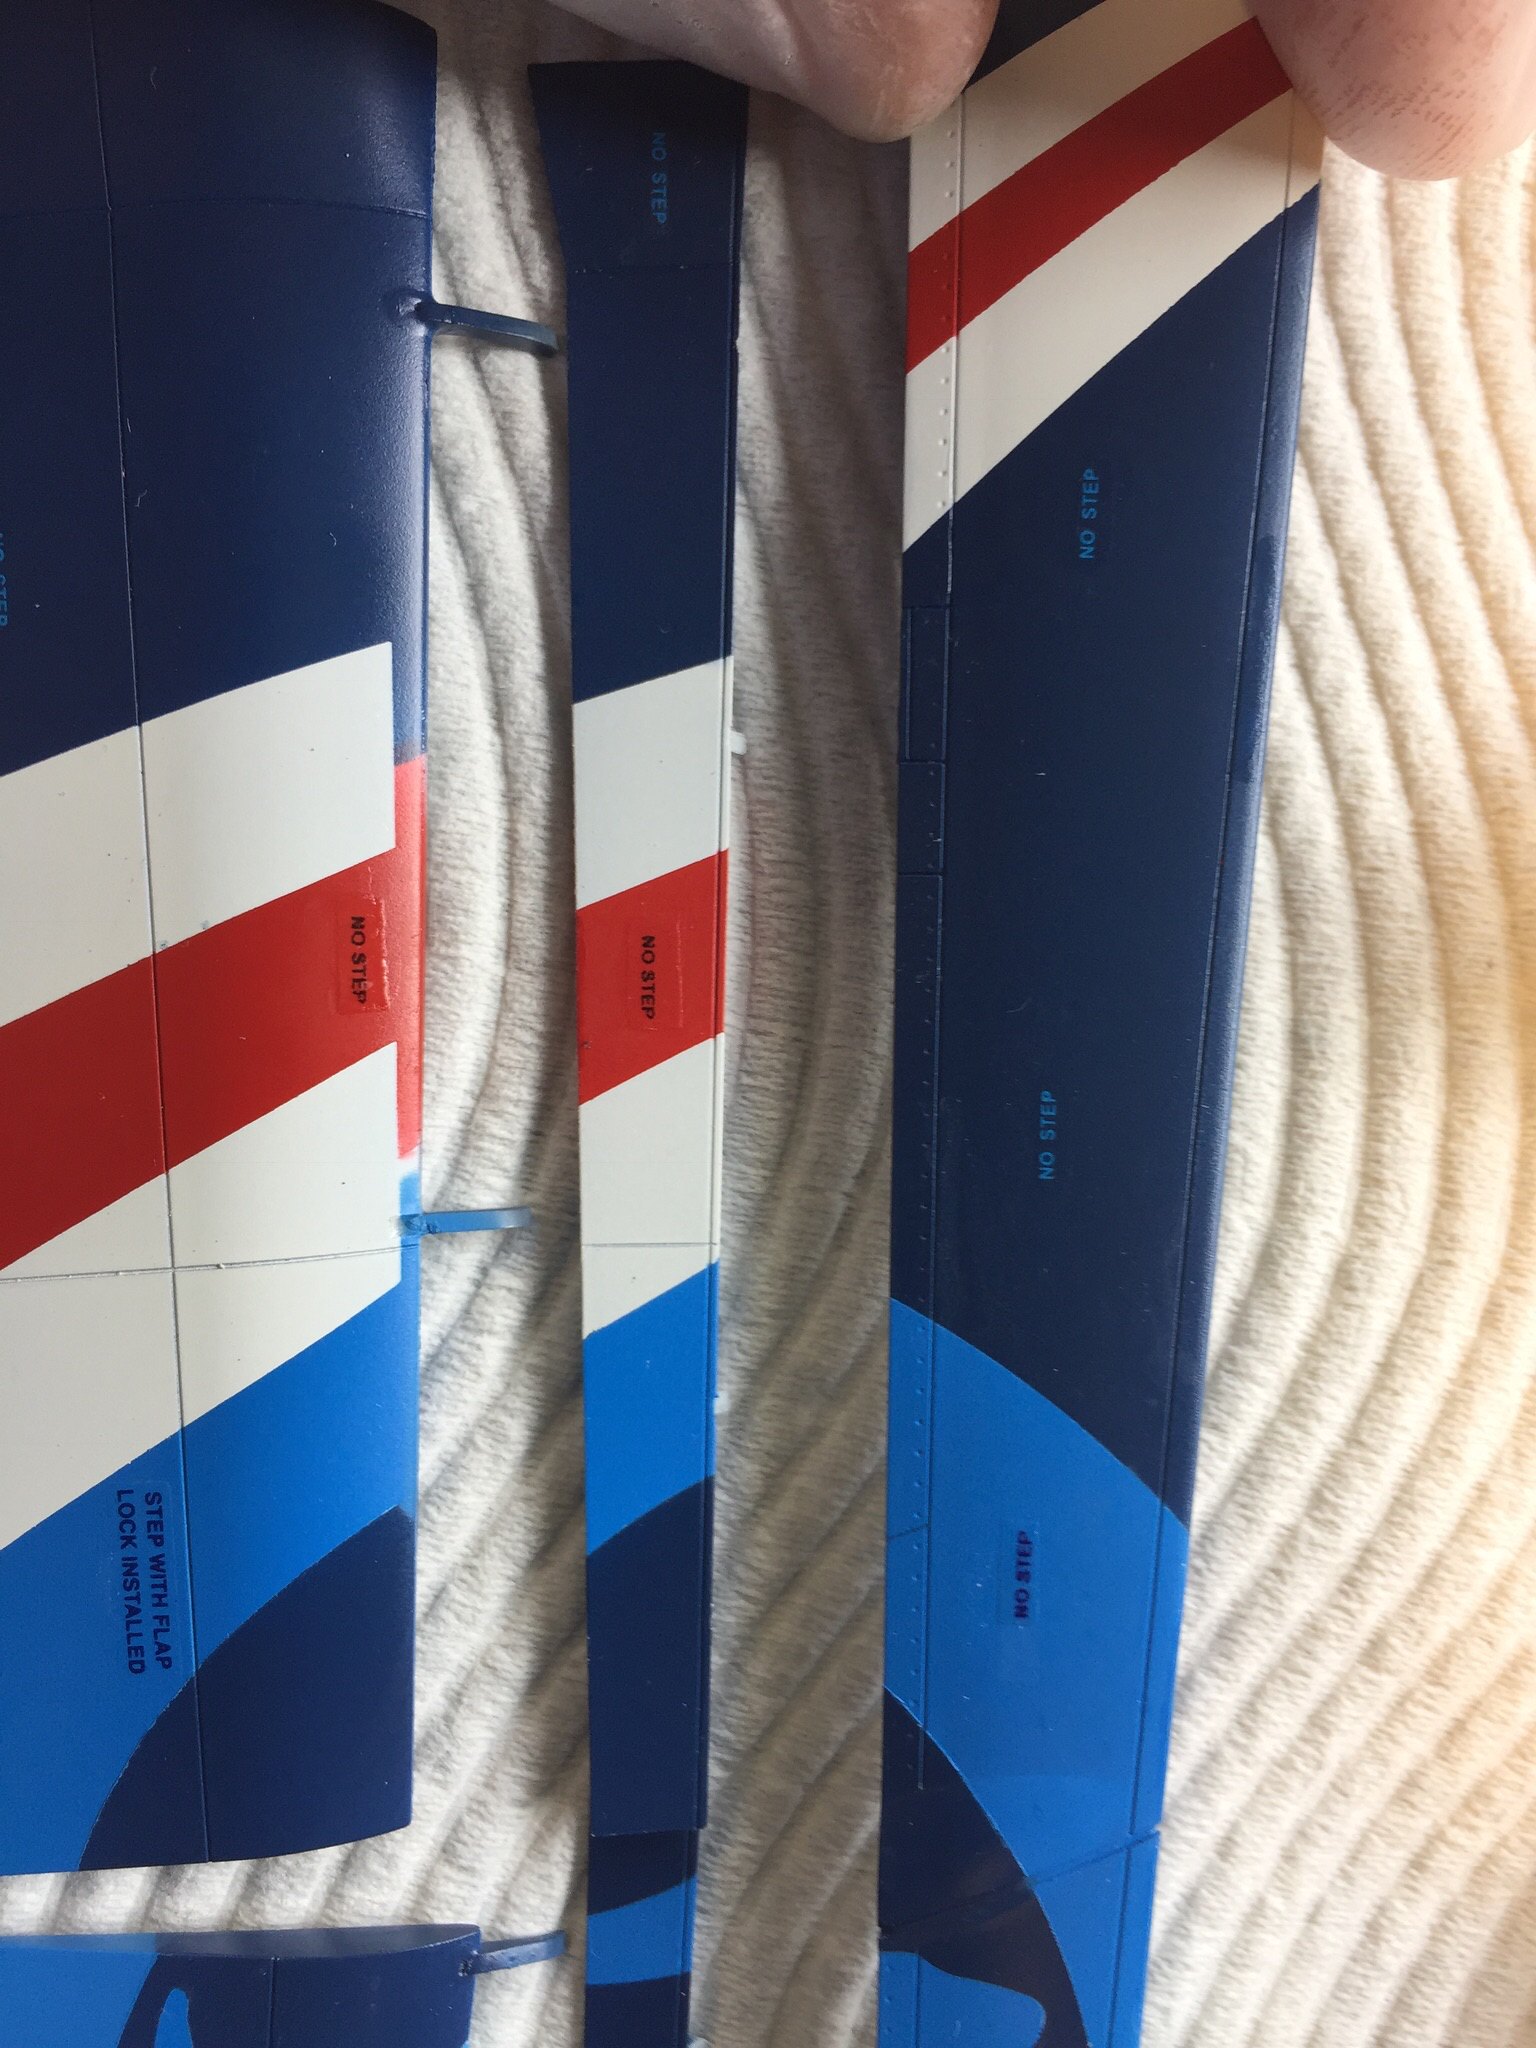
I then figured, in keeping with my masking theme, that I'd try to spray on the many "no step" markings around the plane. Here are some of the Eduard masks, taped down and ready to go.
And the results ...
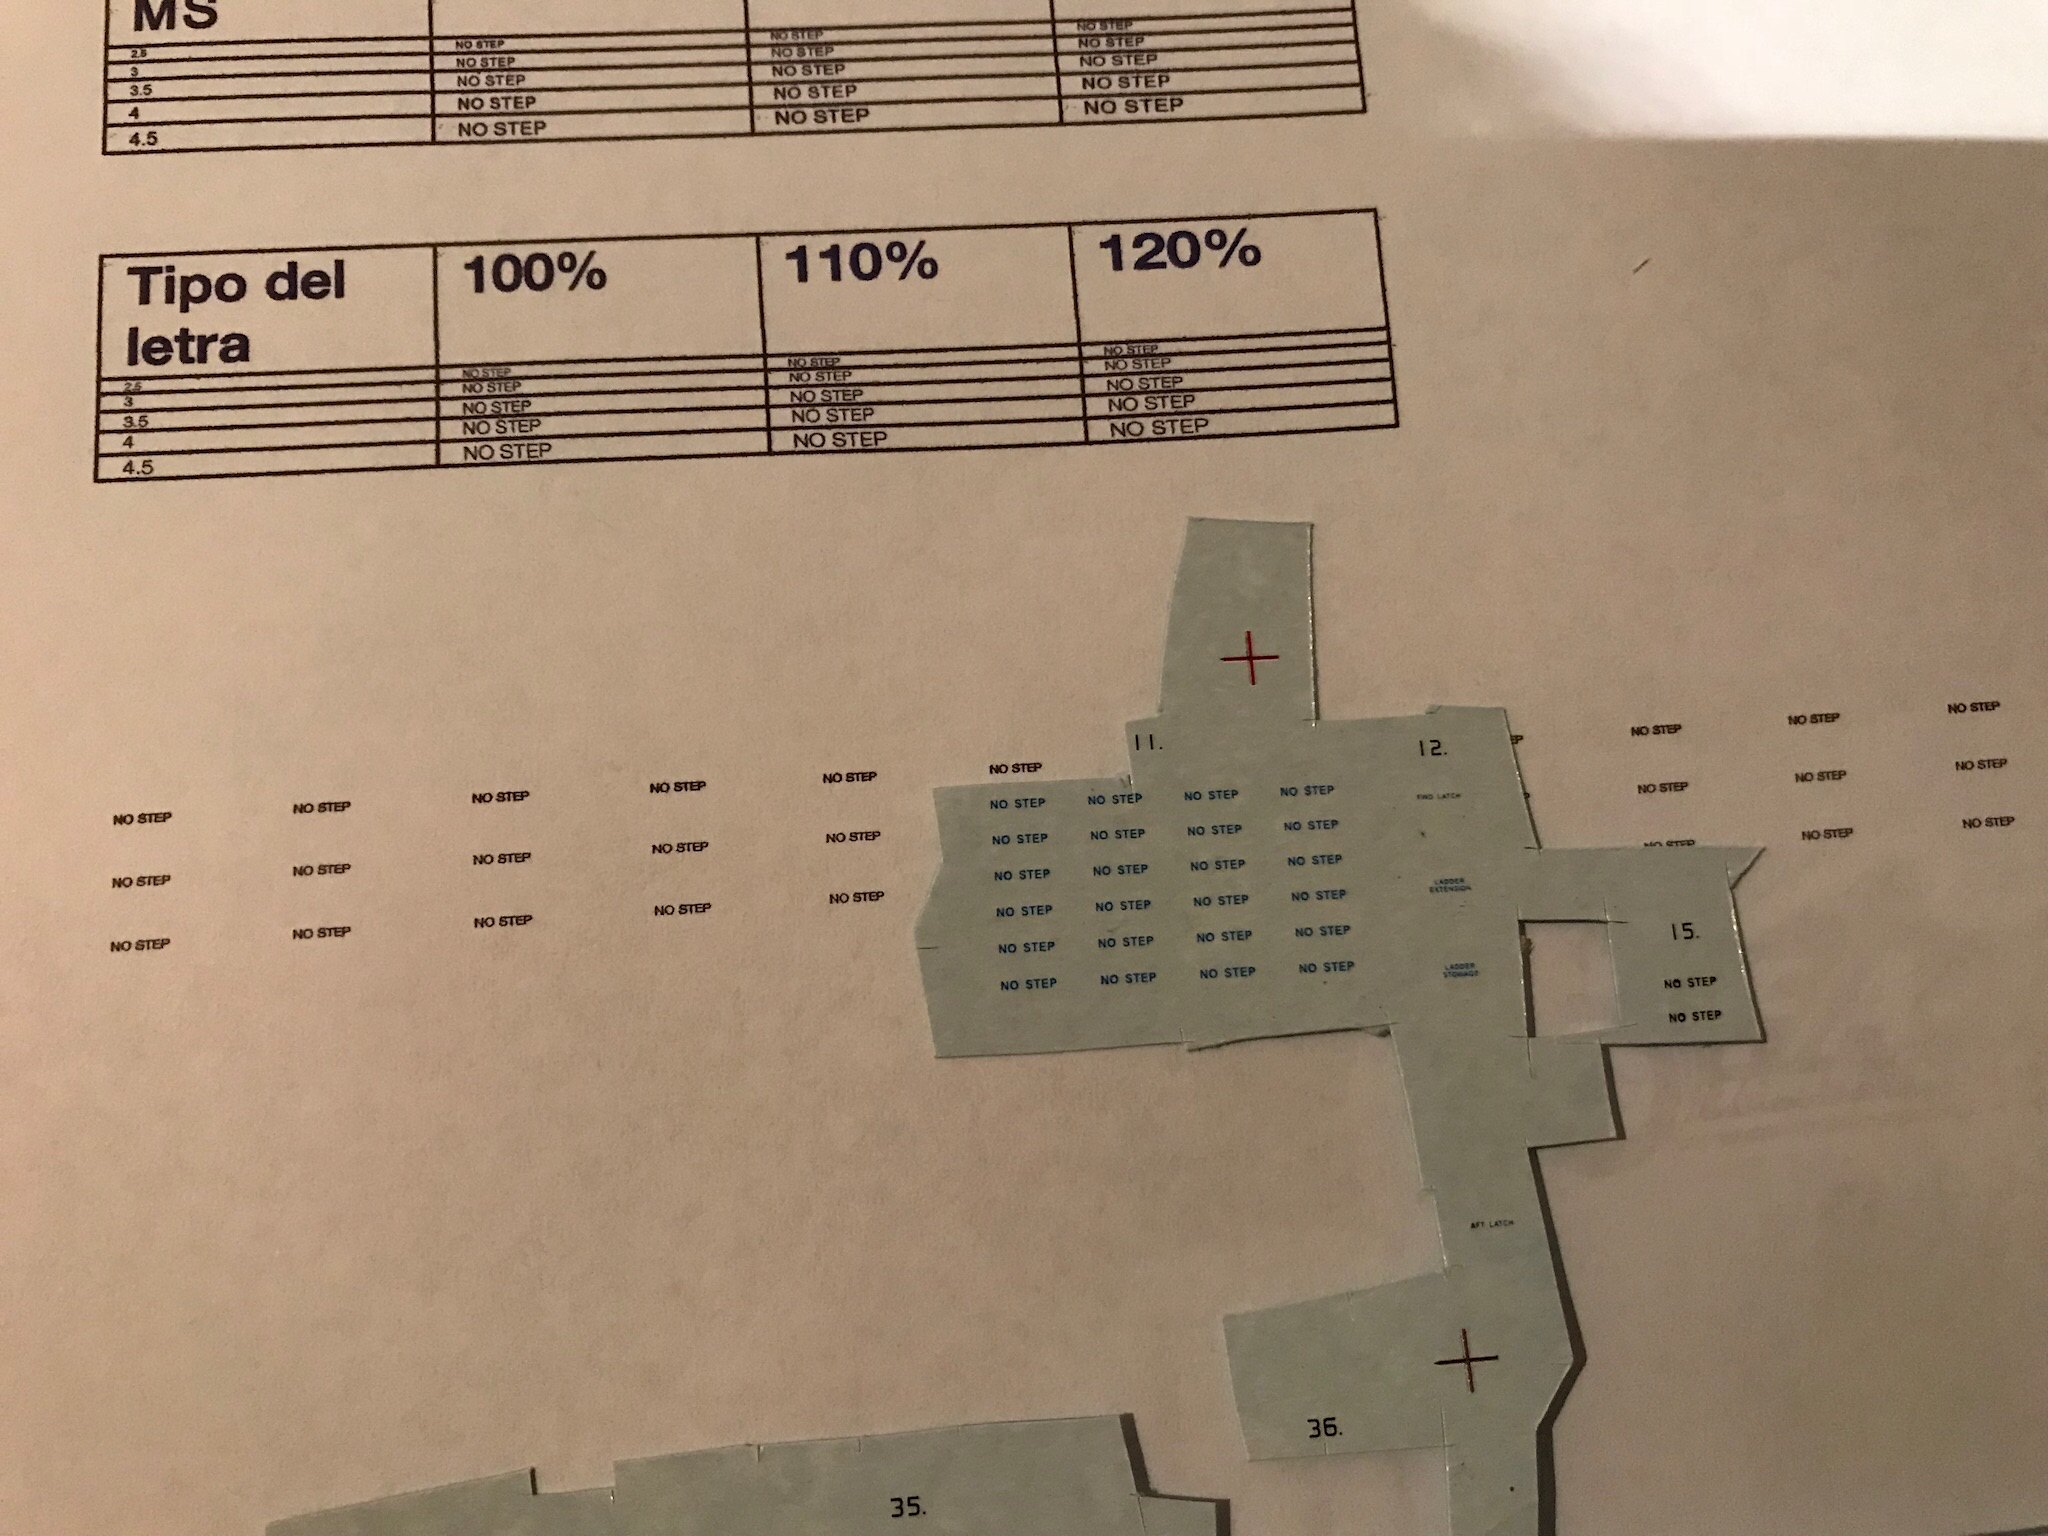
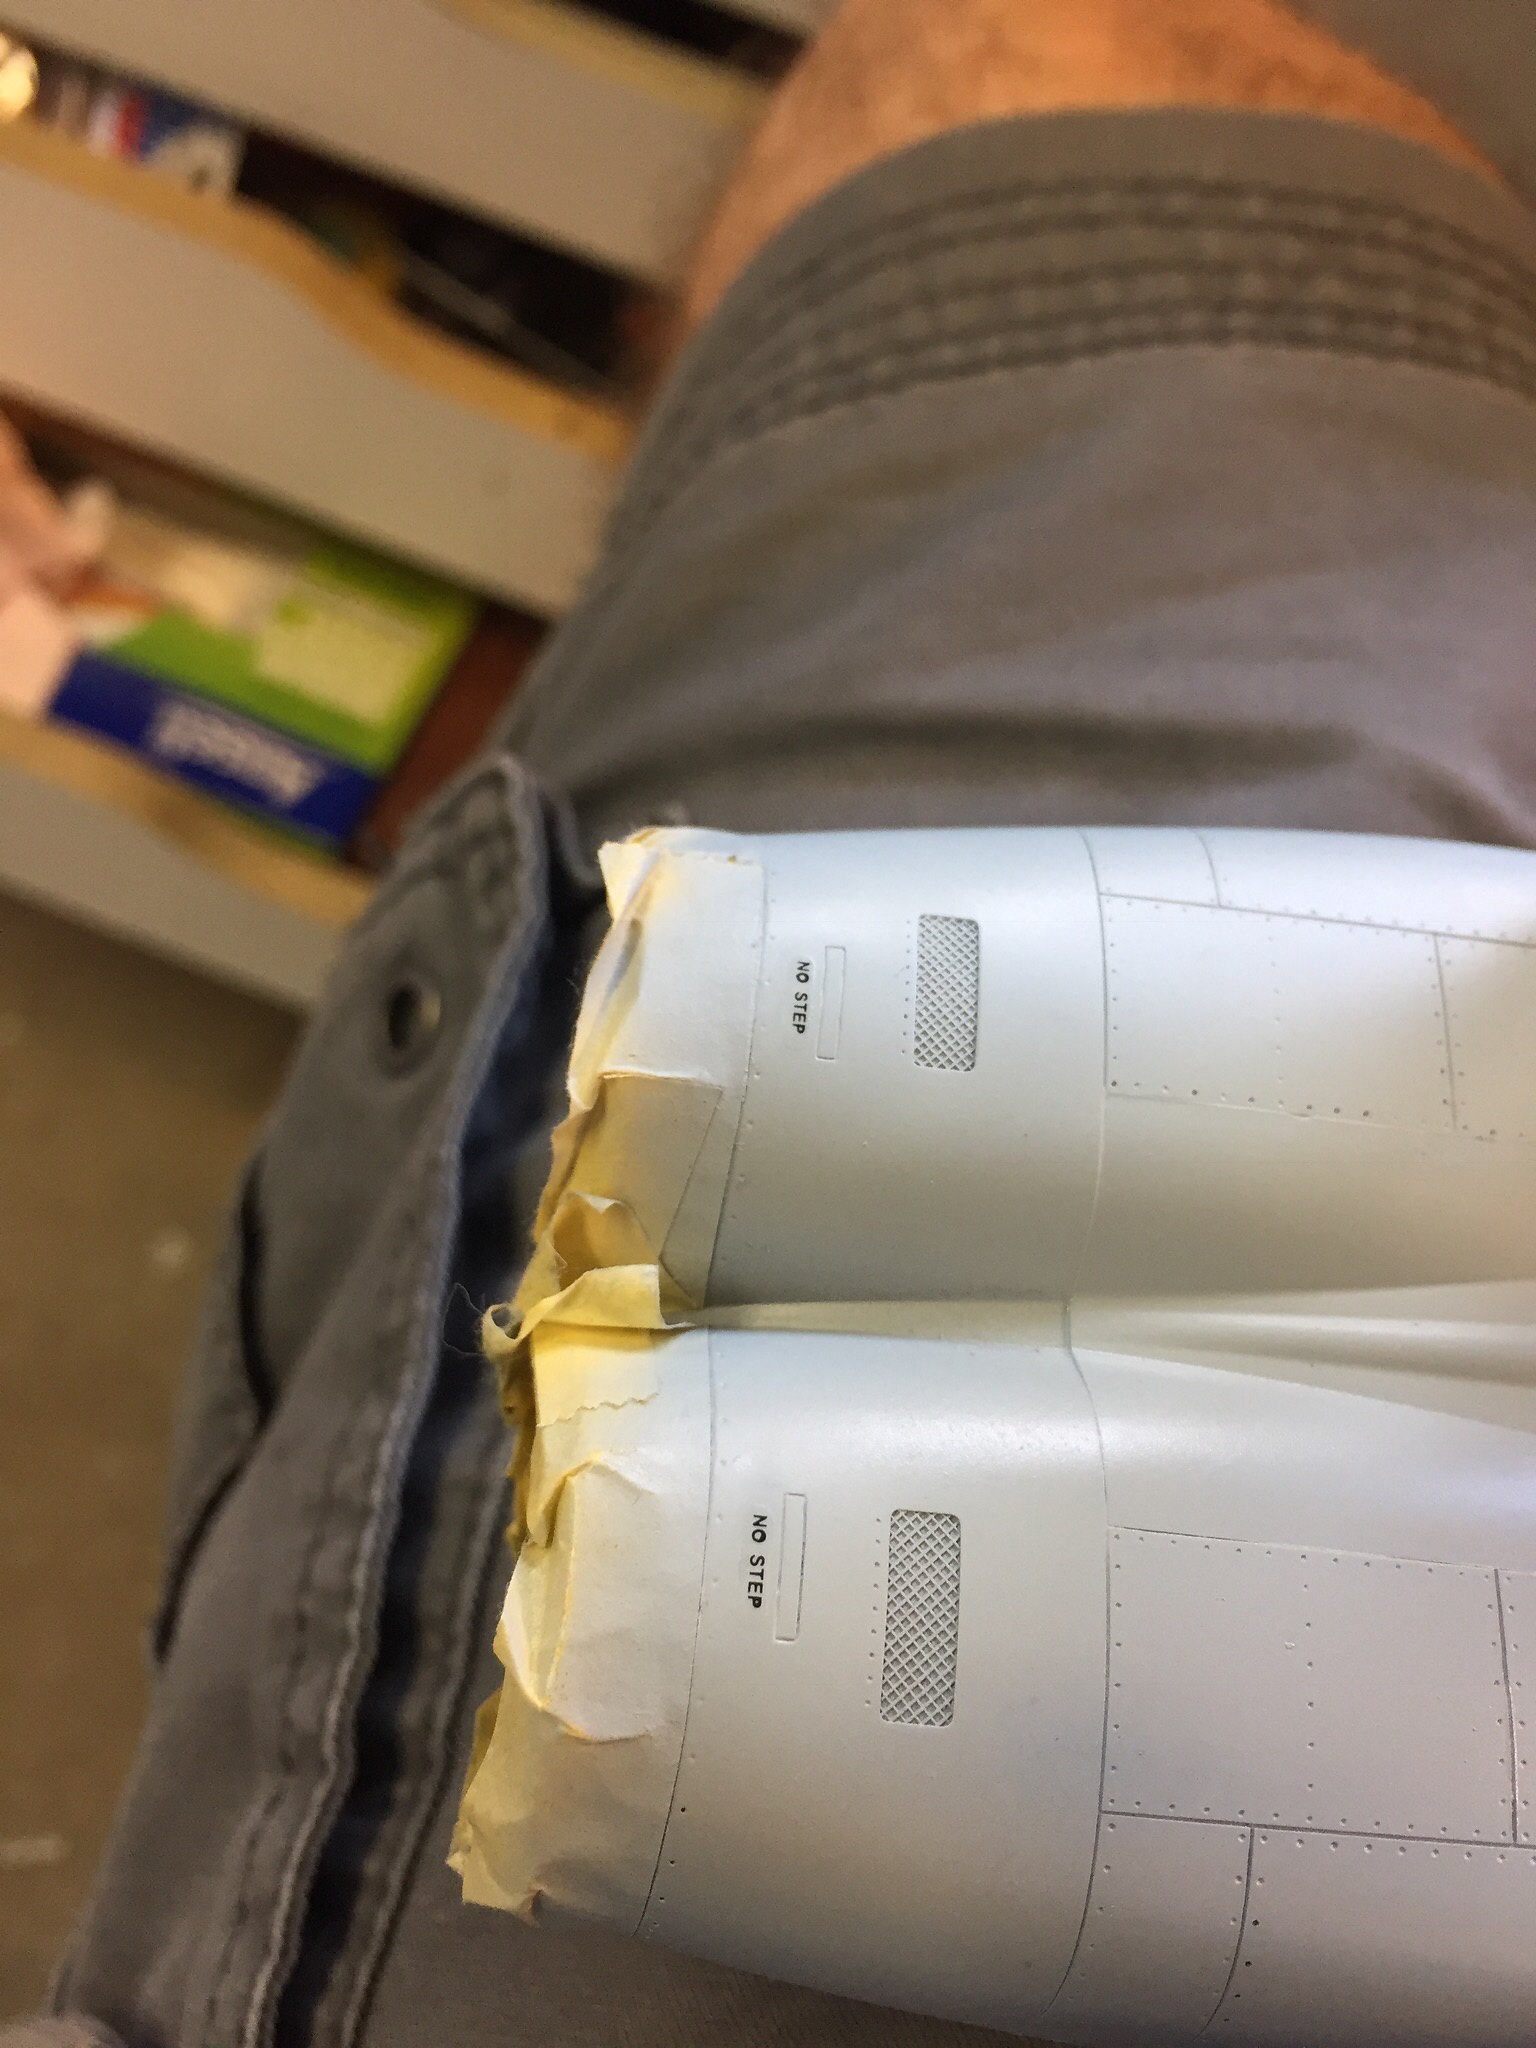
A bit too agricultural, especially when compared with reference photos - this jet had quite fine markings, without any of the gaps in the letters on the Eduard set. So I sanded them off, resprayed, and looked to try decals. The problem with the decals was, all of the dark blue "no step" markings on the (brilliant) Leading Edge set are included in the massive decals, which I had decided to replicate instead with masks. So, time to learn another skill - this time decal printing.
Here's my trial print, trying to ensure that my font and size were as close as possible to the other Leading Edge markings:
And matching the colour:
Printed on decal paper:
And on the model, next to the originals ... not bad I think!
More in a moment ...
- ShelbyGT500, tucohoward, sandokan and 3 others
-
6
-
-
Dude, that seat ... really?!?? It looks like you braided Tamiya tape to get that effect - it must've taken HOURS!
Jim
-
Looking super crisp Peter ... great stuff as always.
Jim
-
-
-
-
Dude, all RIGHT!!! You NAILED it! You must be on cloud nine looking at that, it is seriously totally awesome. Well done!
Jim
-
-
That last photo ..... waaaiiitt a minute .... that's not a MiG-23!!!
Jim
-
Wow, Milan ... awesome and unique. As always!
Jim
-
Looks AWESOME. Love an air show bird, and particularly one with custom masks.
Jim
-
Yeah, I had to sand the bottom pretty hard to get it to fit - it was quite papery and translucent by the time I got it where it needed to be, but I managed not to sand through it. As with most things in modelling, taking your time and checking regularly is the key. I started with my Dremel but finished off with hand sanding.
Jim
-
-
Wow, Milan, this is super ambitious. Good luck, I will be watching with interest as always!
Jim
-
-
Looks terrific, Mark - can't be far off the finish line now.
Jim


RAAF 20th anniversary hornet - the perils of polishing 23/12
in Works in Progress
Posted
Thanks Mark, Pip and Zac ... much appreciated. @Pip - your Canberra is one of my fave builds, how are you tracking on that?
Cheers
Jim