

Dragon
-
Posts
803 -
Joined
-
Last visited
-
Days Won
2
Content Type
Profiles
Forums
Events
Posts posted by Dragon
-
-
Intruder
-
-
-
-
Sad news indeed. My condolences.
-
If you want another set of the kit’s SAAF decals, let me know, as I’m not going to use them. Looking forward to your build.
Mike
-
Here's a snapshot my build in its current state. It's been ready to be painted for a couple of weeks now, but as I mentioned above I have another build going that has been taking time from this build.
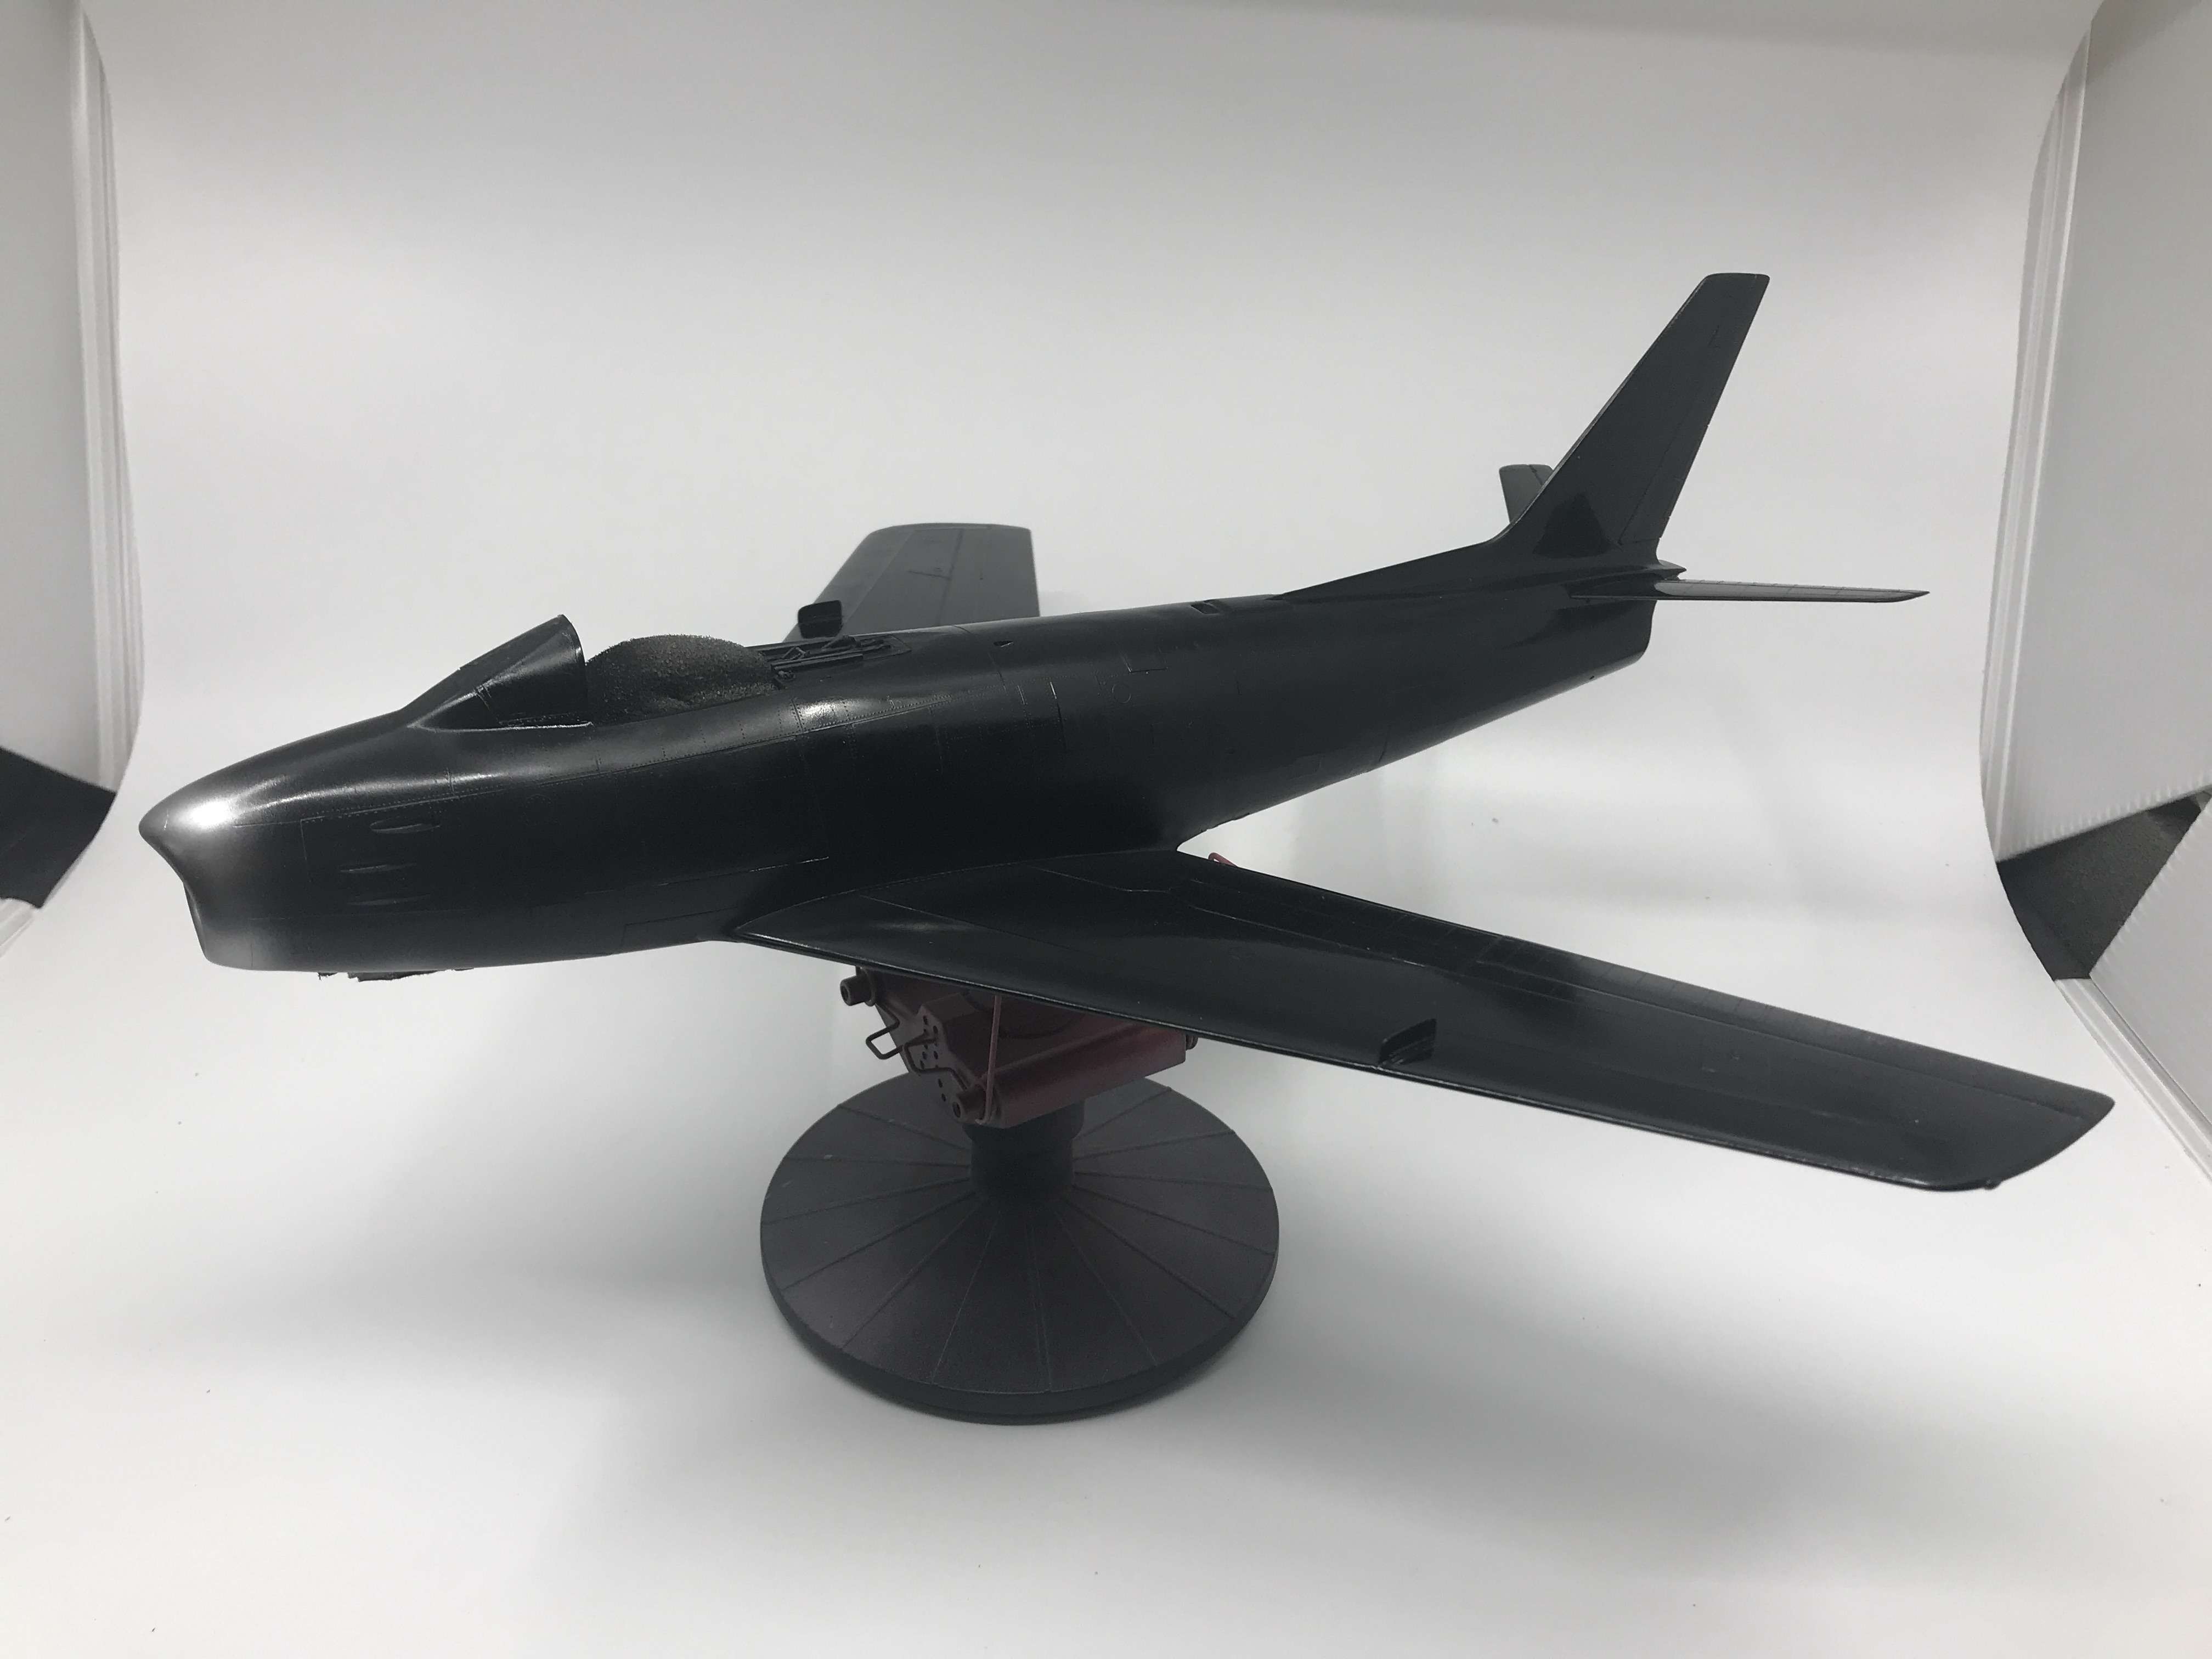
I plan on using Alclad aluminum for the NMF. It'll be my first attempt using Alclad for the overall finish, so there's going to be a learning curve on using it over large areas. Definitely be doing some Googling for tips. I've also completed and painted the canopy plus I've reshaped the wing tank fins and have those painted as well. I get pics of those posted on my next update.
Thanks for following along,
Mike
- LSP_Kevin, johncrow, themongoose and 6 others
-
 9
9
-
-
Chuck,
Thanks for starting this AM inquiry! It’s helped me identify what I should get for my build.
Looking forward to your build of this kit!
Mike
-
Thanks everyone for following along with my build.

Before I started painting the build, I needed to complete the wings. From what I've read, the 6-3 wing had wing fences, and I found information and images on the web to give me a sense of their size, what they looked like, and their location on the wings. One web site said the fence was located 90 mm ( in 1/32 scale) from the fuselage, and a build said the fence was 86 mm; I split the difference and went with 88 mm. Using a piece of tape to mark the distance, I applied a piece of Dymo labeling tape as a guide to cut a slot in the wing where the fence would go.

I used a pice of brass strip to make the fence. I cut it to size then filed it to the approximate shape. Here's a pic of the fence installed in the slot before epoxying it in place.

And here are pics of the installed fences along with my attempt at the angle iron bracing the fences had (well, at least in the pics I had seen). The bracing is on both sides of the fences.


I need to do a little cleanup on them, but overall I'm happy with how they turned out.
Next up will be getting the windshield prepped and and installed then it'll be time to lay down the gloss black as the base for the Alcad finish. I'm sure I'll find areas that'll need to additional work to get the surface in satisfactory condition for a NMF finish.
Thanks for looking in.
Mike
-
I feel the same John. Happy enjoyable modeling!
-
If you haven’t seen this:
-
I'm not knowledgable on which launch rails go on which aircraft, but would any of these work for a F-5E?
Thanks,
Mike
-
Over the past several weeks, I had been searching the internet looking for pics for confirmation the rear deck should have been removed and what the canopy frame and associated assemblies look like in comparison to the Avionix pieces. I was having zero luck, until I stumbled across this site: http://silverhawkauthor.com/canadian-warplanes-6-jets-canadair-cl13-sabre_676.html. In one of the pics, two airmen are holding the canopy up in the vertical position, and it's clear the rear deck was to be removed. Additionally, the pic provided me with a better understanding of the canopy frame and associated assemblies. With that, I was able to assemble the pieces and attach them to the frame.
Here are the pieces for the canopy frame and assemblies:

And here they are assembled and installed in the frame:

Because the canopy glues directly to the frame, similar to the Tamiya Phantom, I added strips of tape along the frame edge for paint protection which hopefully provides a better adhesion surface when I glue on the canopy.
That's it for this update and thanks for looking in.
Mike
-
Thanks all for the encouragement and for checking in.
Haven't had much time at the bench since my last update due to too much working and not enough play time, but I do have a small update. I removed the rear deck from the canopy frame per the Avionix instructions:

I used a mini-saw to cut away to deck:

Then I used a woodworking chisel to clean up along the inside of the frame

Up next will be securing the canopy brace and guide rail to the frame then some painting and adding the canopy.
Not much of an update but it is progress.
Thanks for looking in.
Mike
-
Not necessary.
-
-
-
-
Update time.
The bench time has been spent working on getting the wing tips and slats blended into the wing. After a lot of sanding, puttying, sanding, more puttying, and more sanding, I finally got them to my satisfaction. I'm not sure what I'm going to do about the panel lines since there is quite a bit of putty; I may try drawing them with a pencil. I need to scratch build the wing fences, but I haven't found a good pic of them yet to know what they look like or their size. I also spent time working on getting the nose cone and fuselage halves to blended better, not perfect, but since my builds are "3 footers", it'll due. I've glued the wing and fuselage together, and it's starting to look like a Sabre, still need to glue the wing roots.


Next up is working on the rear deck and the canopy frame.
Thanks for looking in on my build.
Mike
-
There are a couple 1/12 MFH multi-media kits I want but don’t need. Another want is a Lancaster (dam buster), but I don’t have anywhere to display it.
- scvrobeson and mpk
-
2
-
Thanks gents for the encouragement!
Tony - I was able to secure these same decals. Thanks for the offer, much appreciated.
I've spent the past week cleaning up fuselage seams, smoothing out some minor steps in a couple of joints, and blending the intake to the nose. As I was doing this work, I discovered I made a bonehead mistake. I forgot the IP when I installed the cockpit and closed up the fuselage
 . The IP won't fit into the cockpit now that the fuselage is closed up. I've trimmed the IP down in an attempt to get into position but to no avail. All I've done is scrape off some of the cockpit paint; touchup time. I've set the IP issue aside for now....
After that debacle, I shifted my attention to the wings and some plastic surgery. I've cut off the 12" extensions (these pics are of the bottom half wing):

Here's a pic of the wing tip snugged up against the wing:

After removing the 12" extensions, I glued closed the slats and cut the wing tips to length to match the wing's tip cord. This leaves the reminder of the wing tip short in length to match the aileron's width, so I'll filled the gap with small piece of styrene strip:

Now, it's time for some filling, sanding, and scribing of the slats and wing tips.
Thanks for looking in on my build.
Mike
-
I see Tamiya has announced this kit on their Facebook page. Pics look promising. Just wish it was 1/32.
https://www.tamiya.com/japan/products/61121/index.html -
Snowbird3a - thanks for explanation on the different wing types. To keep this easy on me, I'm going to keep the cord as is and make a 6-3 hard wing. I've spent numerous nights Googling Sabres, and I've found a couple of great sites with colored photos of Sabres during the Korean War. I'm starting to enjoy the research associated with the builds.
I've made some good progress on the build. I started with getting the cockpit sidewalls installed. After scrapping away the kit's sidewalls, I glued in the resin sidewalls:


After getting the sidewalls in, I next worked on getting the cockpit to fit, and after several nights of scrapping and sanding, I was able to get the cockpit to fit in the fuselage. Once I was comfortable with the fit of the cockpit, it was painted black along with the sidewalls, and the dial, gauges, and switches were highlighted. The front and rear sections were attached, and the fuselage was closed up. I failed to take pics of the cockpit and the assembling of the fuselage, but here a couple pics of the assembled fuselage.


There's cleanup work I need to do on a couple of seams, but overall, I'm surprised and impressed with the fit of the 70's era kit.
Next up will be working on the wings: cutting the extension, glueing the slats, and making the wing fence.
Thanks for looking in.
Mike
- Snowbird3a, Greg W, BradG and 9 others
-
12


LSP Kevin Thank You For All You Do
in General Discussion
Posted
Yes, thank you for all your efforts!