

blackbetty
-
Posts
5,874 -
Joined
-
Last visited
-
Days Won
30
Content Type
Profiles
Forums
Events
Everything posted by blackbetty
-
thanx texas small detail take a lot of time, pics of the eduard photoetch parts on the rear

-
i´m stuck with my hornet, and i promissed to myself to finish one at a time but the GB should run a couple of months, so maybe i can join in later
-
the rear of the fuse, ready for the fins (that will be mounted later, after decalling) this coat of primer brought the fun back into this project it starts to look F-18ish have you also experinced dead stops while constructing a kit? not because of other distractions, but because the thing in your hands just didnt appeal to you? then - after days (or months ) something, like a coat of paint or a subassembly just brings "it" back more soon (i hope )

-
the top of the fuse looks usable, i had to smoothen out some of the joints to the top part

-
the area in front of the wings needs a little more attention

-
a coat of automotive primer really brings out the detail

-
from below, some more putty will be needed on the intakes the wings fit really nice

-
flaps mounted

-
some more progress on the wings

-
a (test) coat of primer came next on the forward fuse to show the results its a pitty the landinggear can not be attached at a later point, all the wheelbay and geardetail that is allread painted is hard to mask and has to be touched up later :angry: on the raear i will use the geardoor to mask the bays feel free to criticise

-
the top fuselage decking from the blackbox pit also got the treatment

-
as the rear fuselage did this method i use only for gaps that mr surfacer 500 wont fill

-
the joint of the seamless intakes and the fuselage also needed some attention on the bottom

-
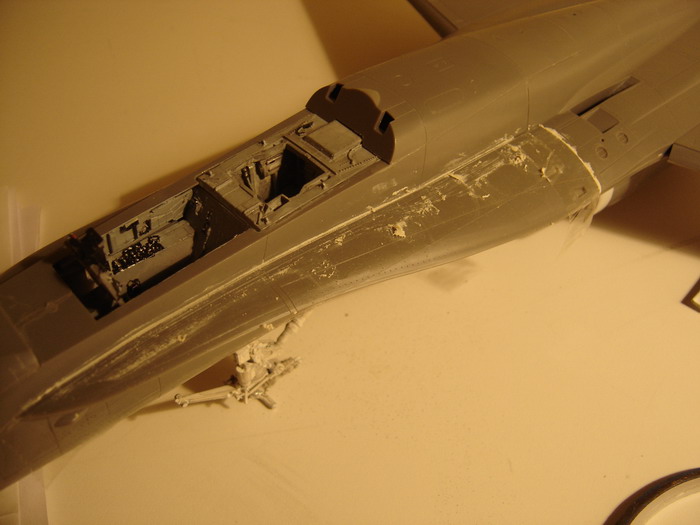
the nose gap in progress

-
the result: nice filled lines with very little destroyed detail

-
thanx texas for you comments i filled the gaps of my latest assembly next as seen on varoius builds i use the tried and true method of taping the gaps, filling them with (squadron white) putty and immedeately wiping them down with nailpolish remover
-
especially on the port side there is an annoying gap :angry: sime to break out the putty *sigh* comments welcome....

-
i also managed to mount the nose and was not particulary thrilled with the fit of it again but maybe its just me

-
painting the nozzles is next, but i will mount them after the final coat of paint, as one of the last parts

-
next i cut off the front part of the engines, these are not in view anyway and dont have to hold the intakes as with the kit parts the nozzles should be easier to mount without such a long part attached to them.

-
kit one on the left, blackbox on the right

-
well its been a while, work has been a little bit crazy lately (one museum and two exhibitions to finish) so not much time for the bug but the blackbox nozzles arrived, they look alot better than the kit ones

-
i´d love to join too, but i havent even had time to continue on the F-18 i started
-
with that little trick there are no gaps to fill and details to ruin with putty/sanding since i didnt glue the piece of sprue in, i could even put the radar in (wich i wont do) and display the nose open

-
thanx for the nice comments, makes me feel good i worked a little on the front fuselage on the weekend i wedged a piece of sprue between the forward halves to get a good fit of the upper and lower parts
