
BloorwestSiR
-
Posts
6,247 -
Joined
-
Last visited
-
Days Won
37
Content Type
Profiles
Forums
Events
Posts posted by BloorwestSiR
-
-
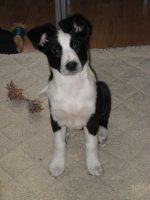
While letting that dry, I started on the cockpit. Here's where I ran into some issues.
The MC cockpit is definitely based off the Tamiya Mk XVI one. There are a lot of addtional details they've added as you can see here:
The painted parts are from either a Tamiya VIII or IX kit I'm doing at the same time so it was easy to do the comparison.
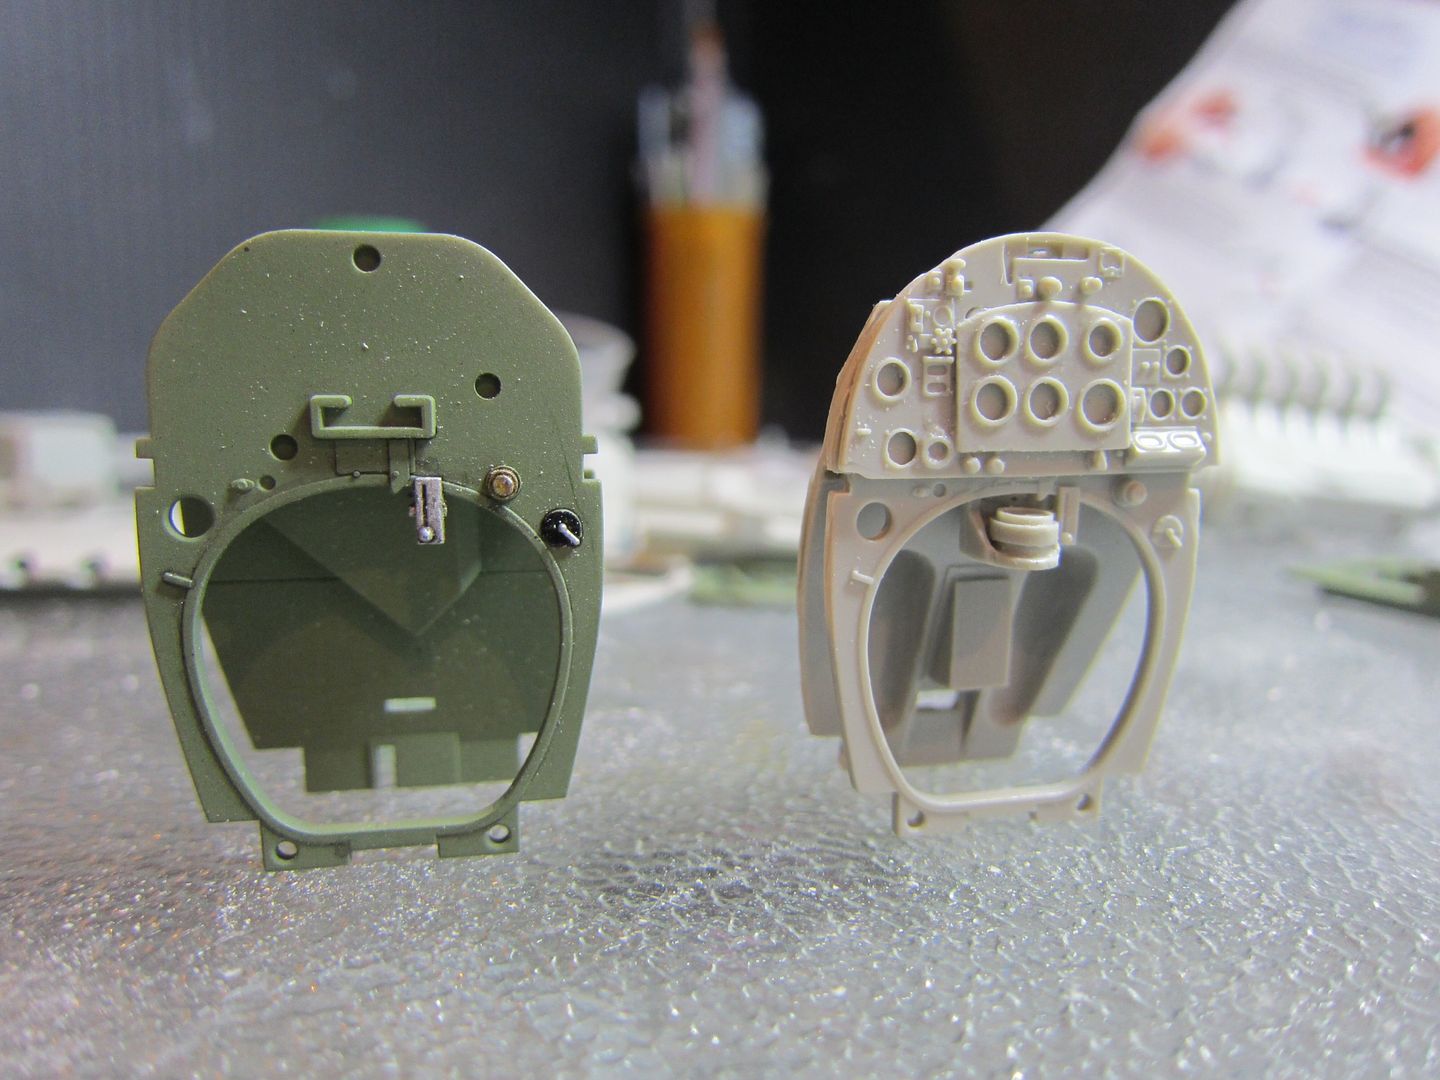
But, my copy has two issues. The first is the warpage of some parts is worse than I originally thought.
The second is that the parts have some shrinkage in them compared to the original bits. This becomes a problem because the 22 fuselage is wider than the Tamiya one. I think MC tried to make up for this by increasing the height of the sidewalls to go right up to the top of the fuselage sides. This leads to a different issue. If you use them that way, the cockpit walls at the top will be really thick. You can't thin the plastics down to get it to a more scale likeness or the cockpit then won't fit! A real catch 22.
-
So I've made a fair bit of progress. I can't believe I've been actually able to work on something three weeks in a row.
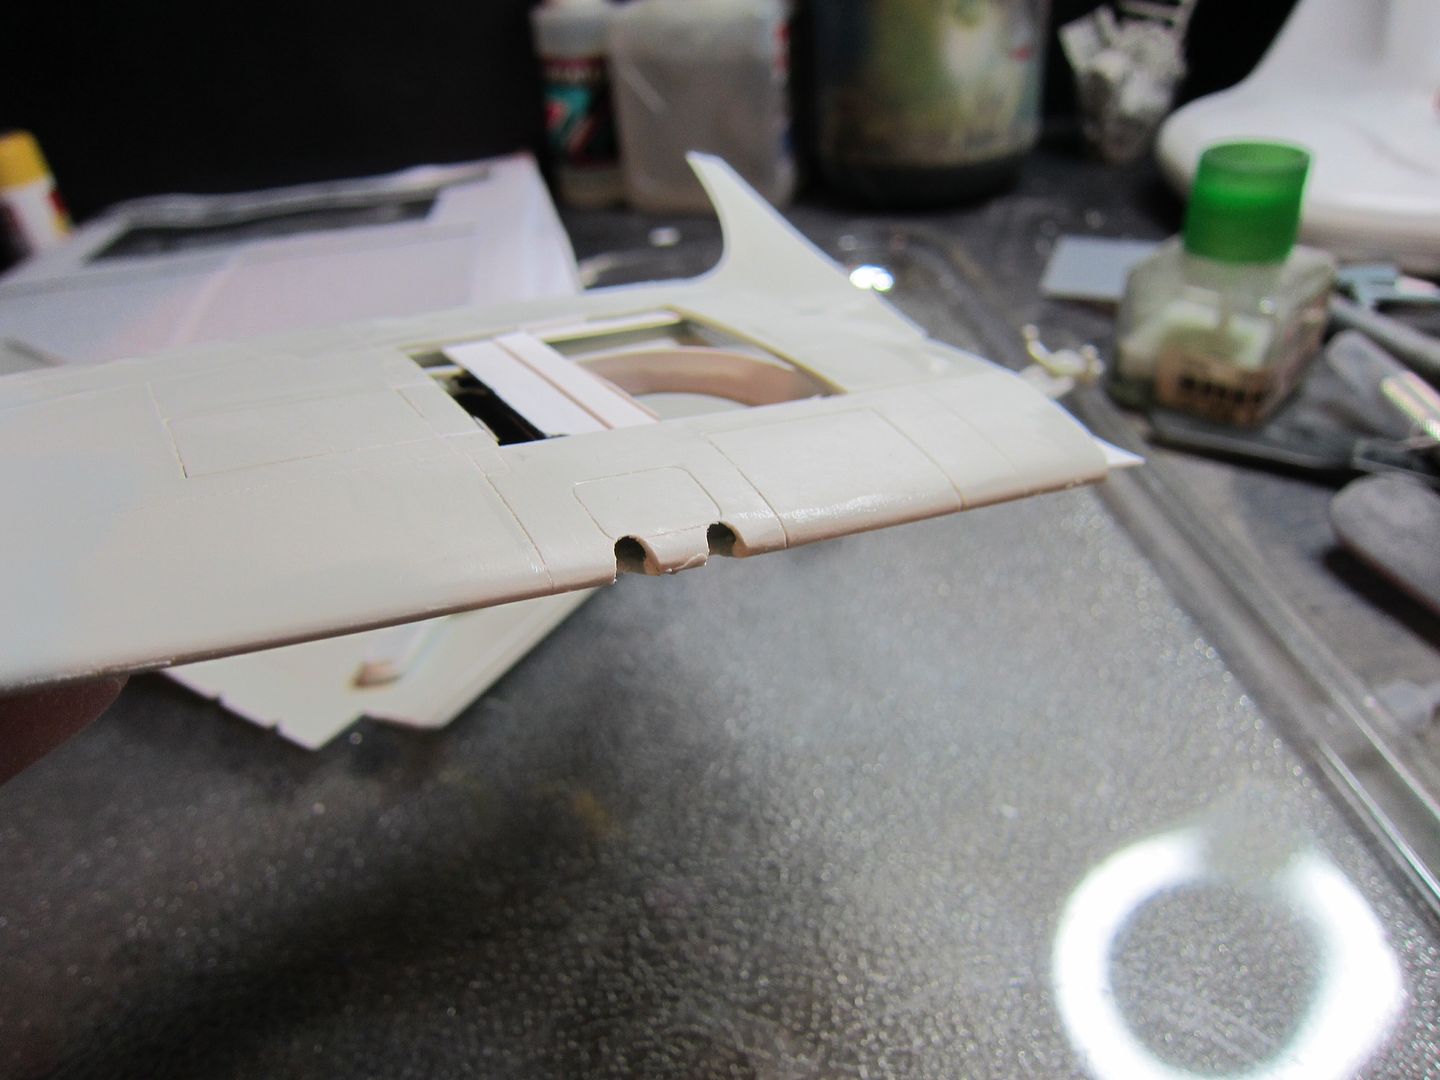
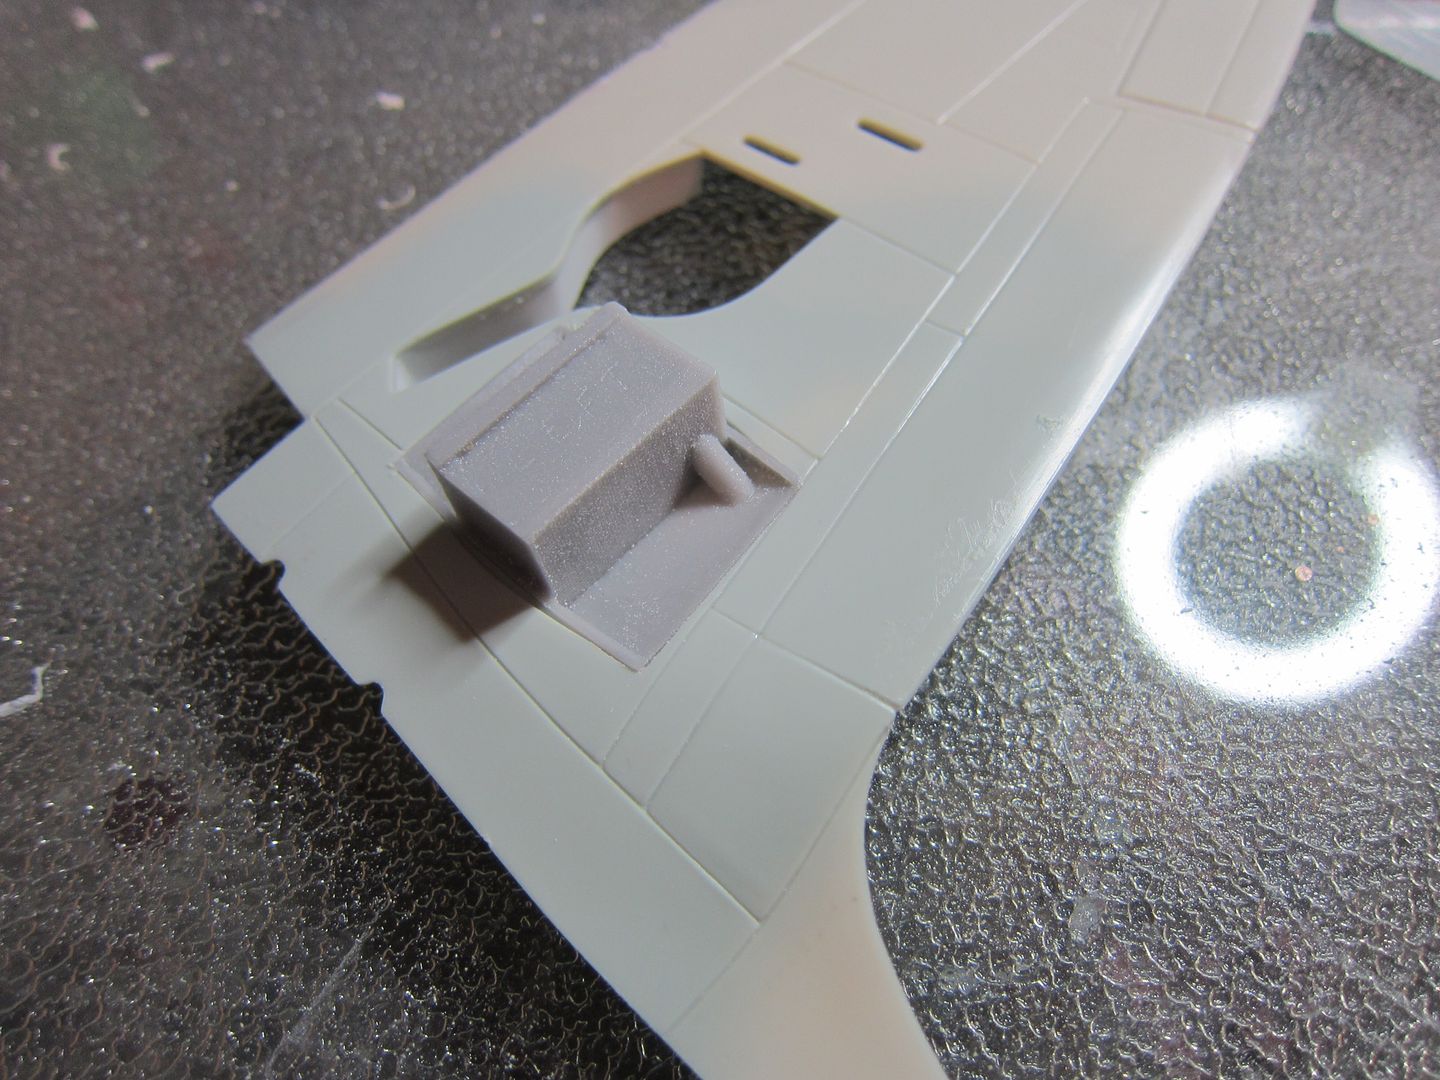
I added some shims to the top of the cannon bay frames. This will help to support the upper wing inserts:
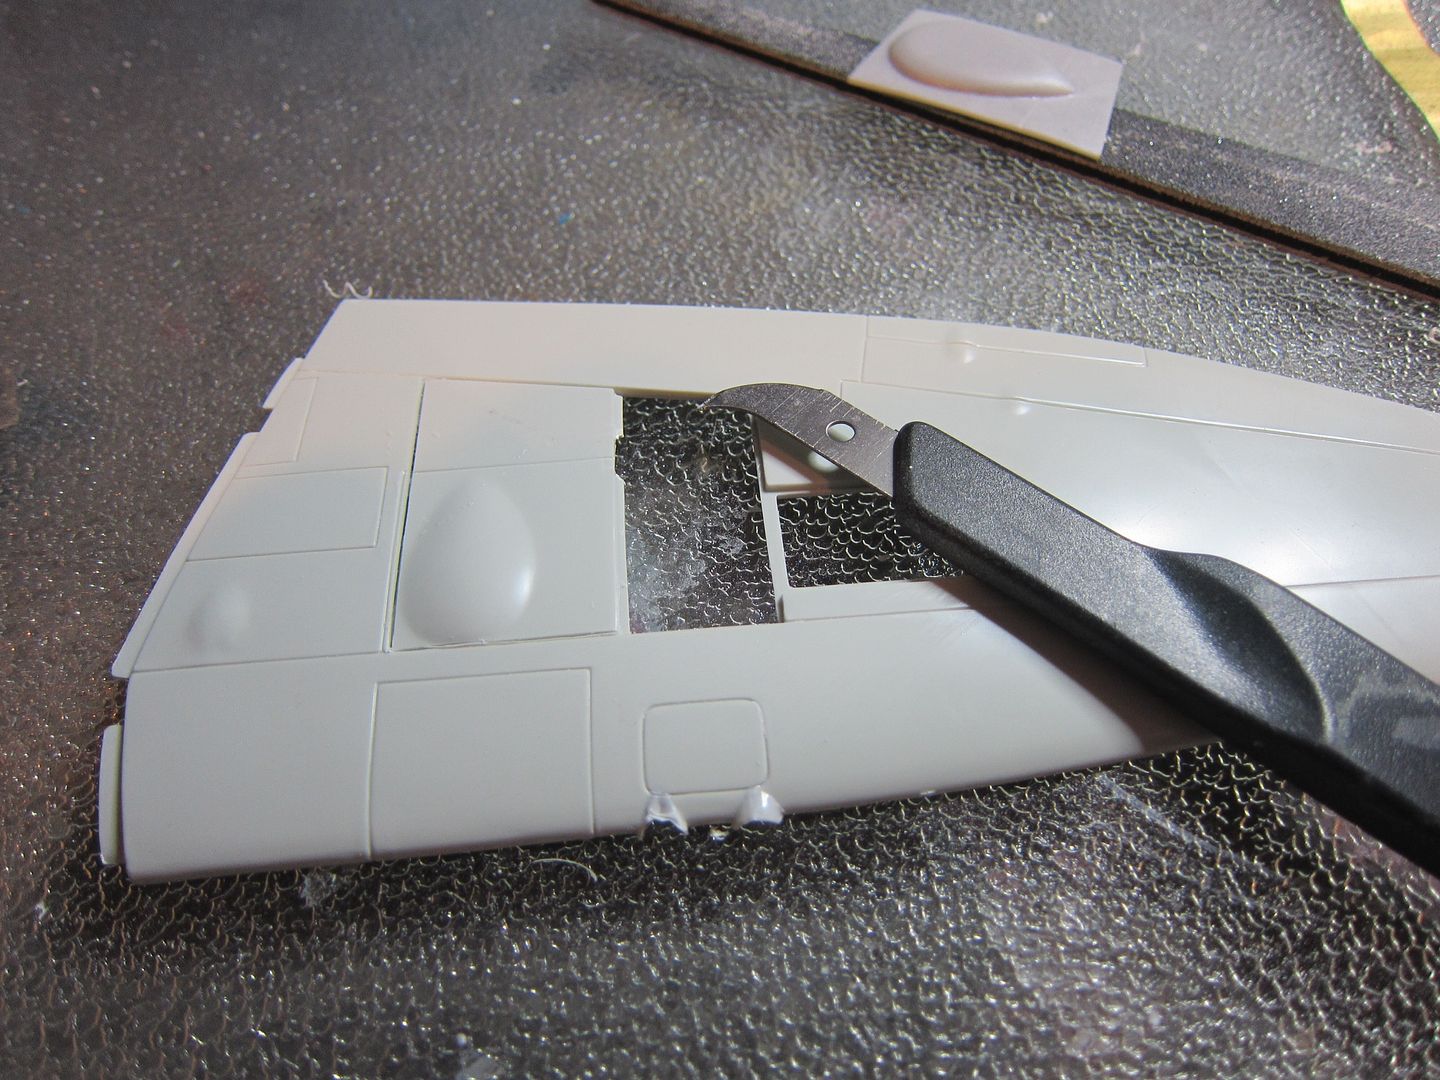
As I mentioned, I tried a couple approaches to making the EMD cannon barrels fit. Here, I used a file to remove material from the wing halve before gluing them together:

The original stubs have not been removed but are currently paper thin after all the file work. I then repeated this with the lower wing.
On the starboard wing, I glued the halves together and removed the stubs. I then tried drilling out the openings to ate them larger. This was the more difficult approach as the wing kept splitting apart.
-
Thanks Carl - any idea what type of base thinner it is?
Cheers
Derek
Hi Derek,
I believe it is alcohol based.
Carl
-
For the Xtracrylics, I use their own brand of thinner. It comes in a fairly large bottle and Hannants shipped it to me (along with the paints) in Canada with no issues. It may thin with Tamiya's acrylic thinner but I haven't tried. I do know Tamiya lacquer thinner does not work with it. If you try,it ends up the consistency of sticky bread dough. Which is not fun to clean out of an airbrush.
Carl
-
I've been using Tamiya and Gunze acrylics since they first came out in the late '80s. They've gone through a couple different formulations over the years but here's what works for me.
For airbrushing, I use either Tamiya's acrylic thinner or their lacquer one. Both are compatible with their acrylics. I usually use a 70-30 paint/thinner ratio.
The lacquer thinner has the advantage of a faster drying time but does have a stronger smell. It is a relatively cool lacquer and does not seem to attack plastic. In fact, I have used it full strength to remove paint from plastic without any issues. It may also be a bit tougher in terms of finish but I haven't done a comparision test.
For clean up , I use car windshield washer fluid. It's inexpensive (in Canada anyways at $3 for 4L), water based (same as the paints) and has some cleaning agents in it too. Don't spill/drip it on a freshly painted surface or it will strip the paint off. Don't ask how I know.
Over most putties, they're fine. I have sometimes seen a slightly different finish (a bit more matt and almost porous looking)over the Squadron putty comapared to bare plastic so a primer would be a good idea. Over Mr Surfacer, I haven't seen any of those issues.
The Mig oil based washes work well on them. In fact, their instructions say to use over arcylic.
Adhesion seems good to me. Most times, I don't use a primer coat (blasphemy I know) and haven't seen any paint lifting. The only paint where I have consistant issues with lifting is Model Master arcylics so I've given up on those.
Derek, Tamiya makes a retarder for their paints which I mostly use when brush painting. Their acrylics are not the greatest if applied with a brush as they dry too quickly. I haven't tried using it with an airbrush so cant say what that would do.
Hannants has a line of acrylic paints out which I have tried and they work quite well. They're a bit on the thinner side so seem to need an extra coat or two. Nice thing is they come in RLM and FS colours. How accurate they are I leave to others as being colour blind, it's hard enough to tell colours apart never mind shades. They are not compatible with the lacquer thinner. You will end up with a gooey mess if you try. They also go on well using a brush so I've been using them and Vallejo paints for any brush work.
Hope that helps.
Carl
-
Looks great Ken.
I've started the same kit (it's in the AOOB Group build) but will be building mine gear up so hopefully a little easier.
I hope it comes out as nice as yours.
Carl
-
I have a sheet of decals from Lifelike for a Malcolm canopy P-51B that is OD over NMF with painted over invasion stripes and a sharkmouth to boot!
Here's a link to them from the Hannants website:
http://www.hannants.co.uk/product/LL32015
I haven't tried any of their decals yet so can't attest to how well they'll work.
Techmod also do some Polish B Mustangs with Malcolm hoods.
Hope that helps,
Carl
-
Looks good to me. I haven't been brave enough to try those belts yet.
I've also switched to using Vallejo when I have to brush paint small details. If I have to brush paint Tamiya, they make a retarder that seems to help it go on smoother. I just dip my brush in the retarder and then into the paint I'm using. You don't much.
Carl
-
That looks amazing. Reminds me of the "Aztecing" you see done on Star Trek models which is just as complicated.
The thermal coats on your bombs looks great too.
Carl
-
I've been using XF-71 from Tamiya. It's what they call for in their Spitfire kits. Some say it's supposed to be a prefect match. Me, I'm colourblind so if that's what they recommend and it's not purple, I'm pretty good with it.
Carl
-
Thanks Peter, Derek and Frank!
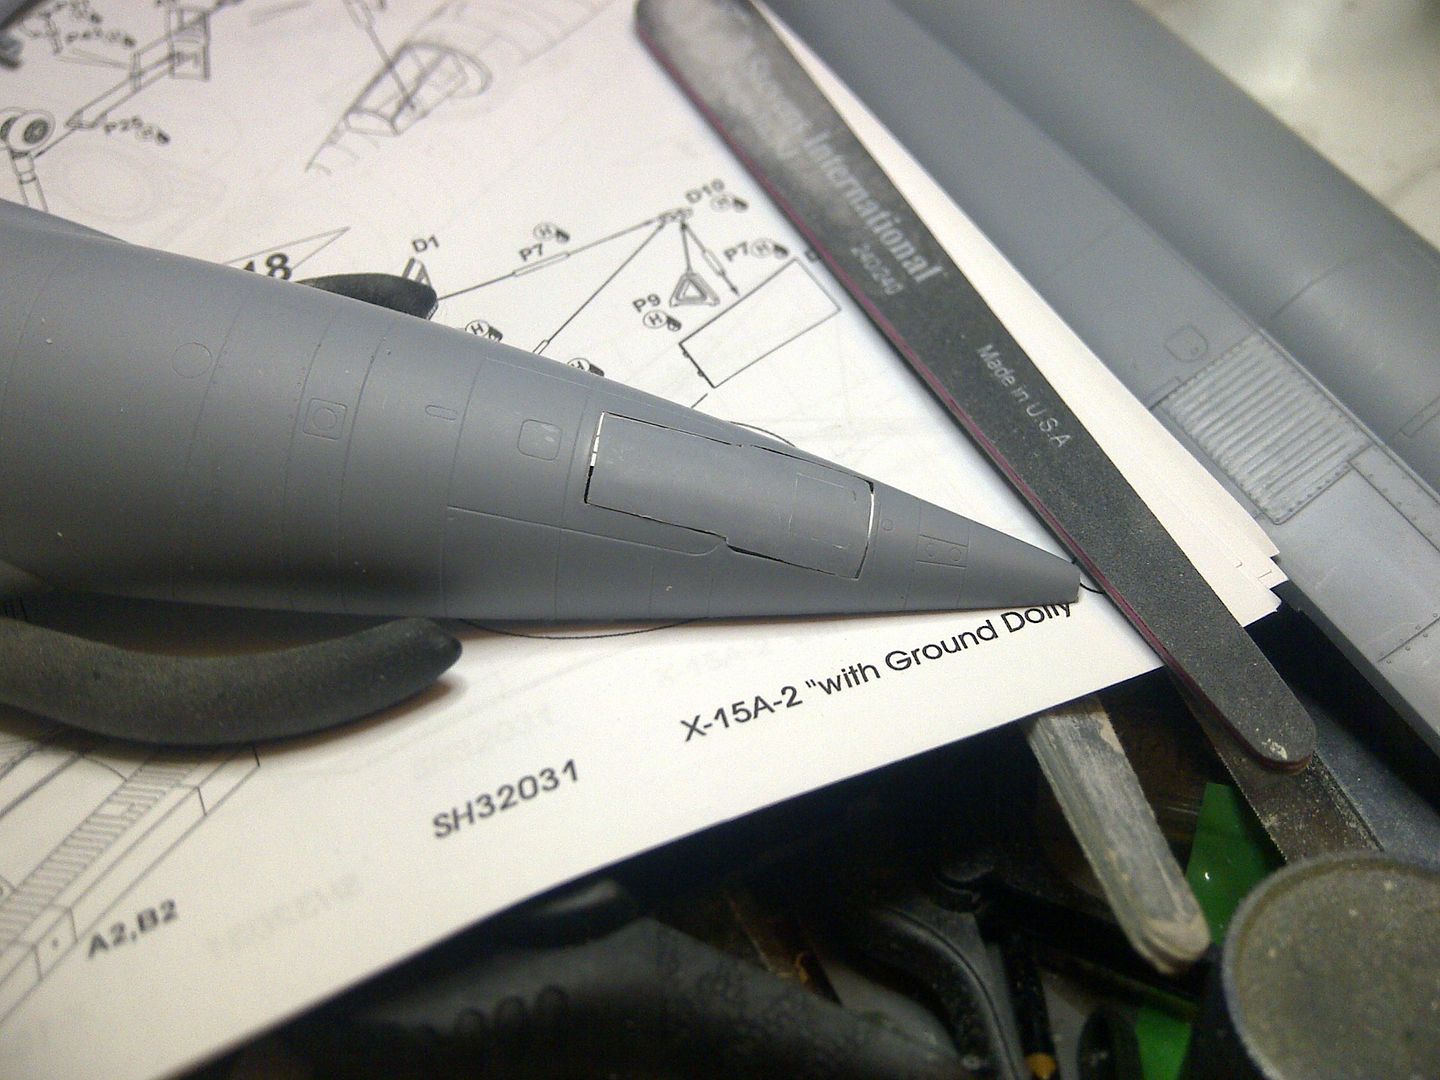
Just hope I can live up to the source materials. The Freightdogs conversion is nicely done. I think I've only found one pinhole so far, the instructions are clear and straightforward. Same goes for the EMD cannon set and Iconicair cowling. The Mastercasters cockpit set would have to be the "roughest" here. By that, I mean there's quite a bit of resin flash or webbing to remove and some parts are slightly warped but that's all fixed easily enough.
Looks like I'll be able to get some time at the workbench later this week. I'll post MER shots when I do.
Carl
-
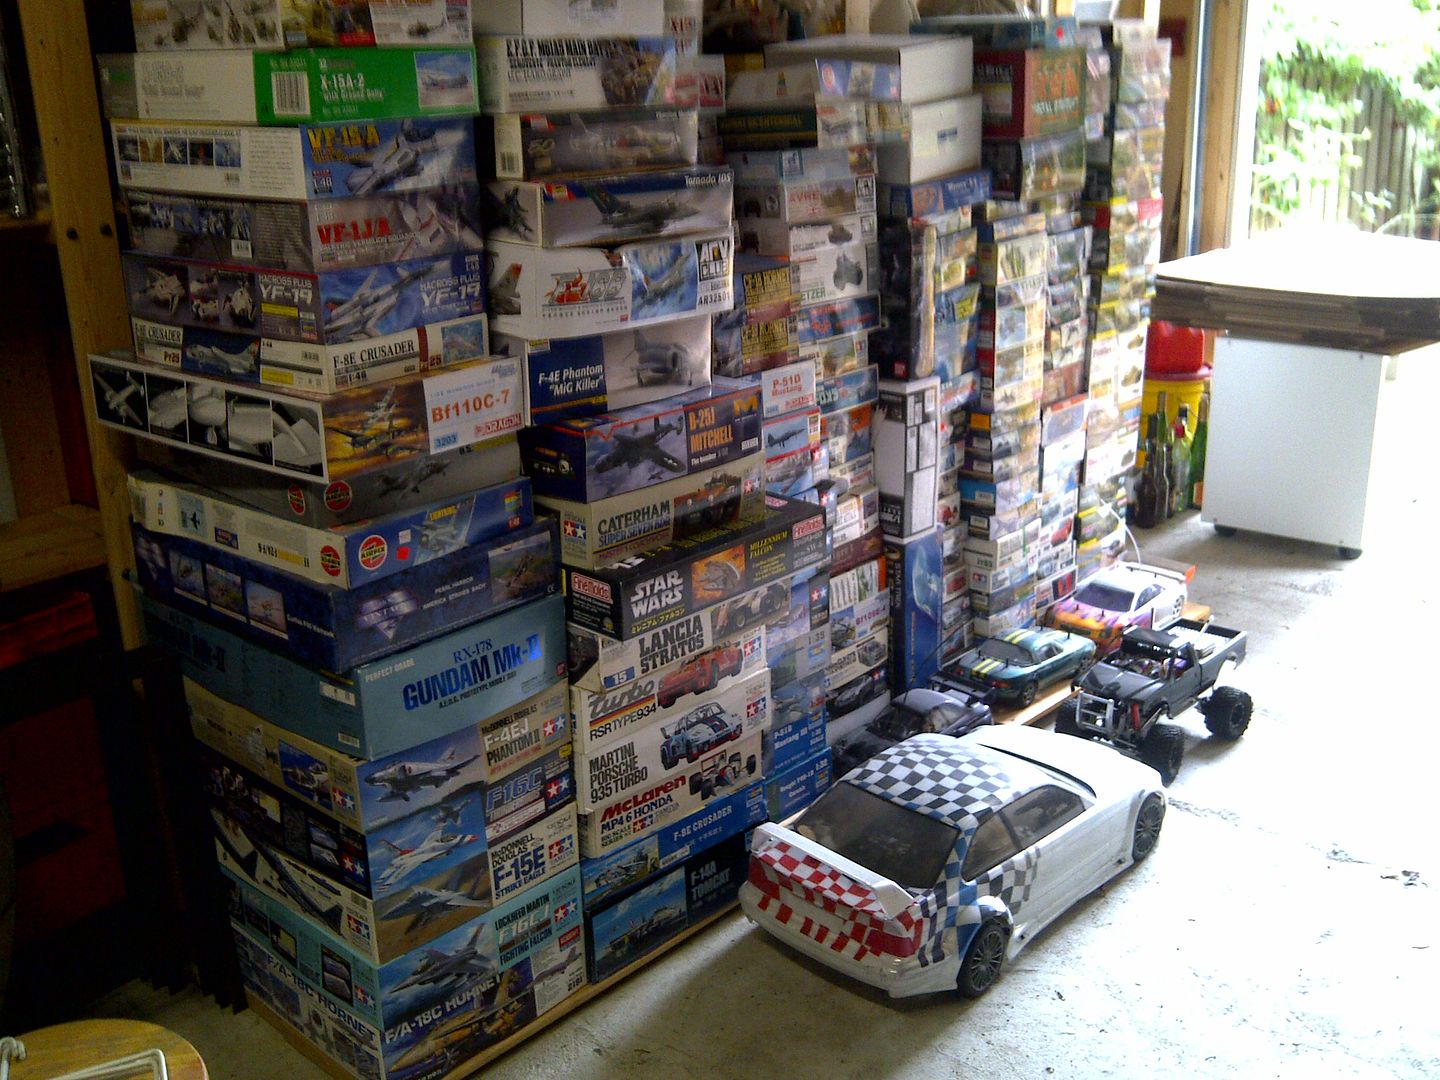
My wife and friends say the same thing. Or that I could open a combo hobby/bike shop. Here's part of the bike collection:Good grief Carl .... I'm a retailer and I think you've got more stock !!
 (looks like you're missing the Easy Eight from your Tasca Sherman range by the way).
This'll be a nice to follow - looking forward to it.
Grant.
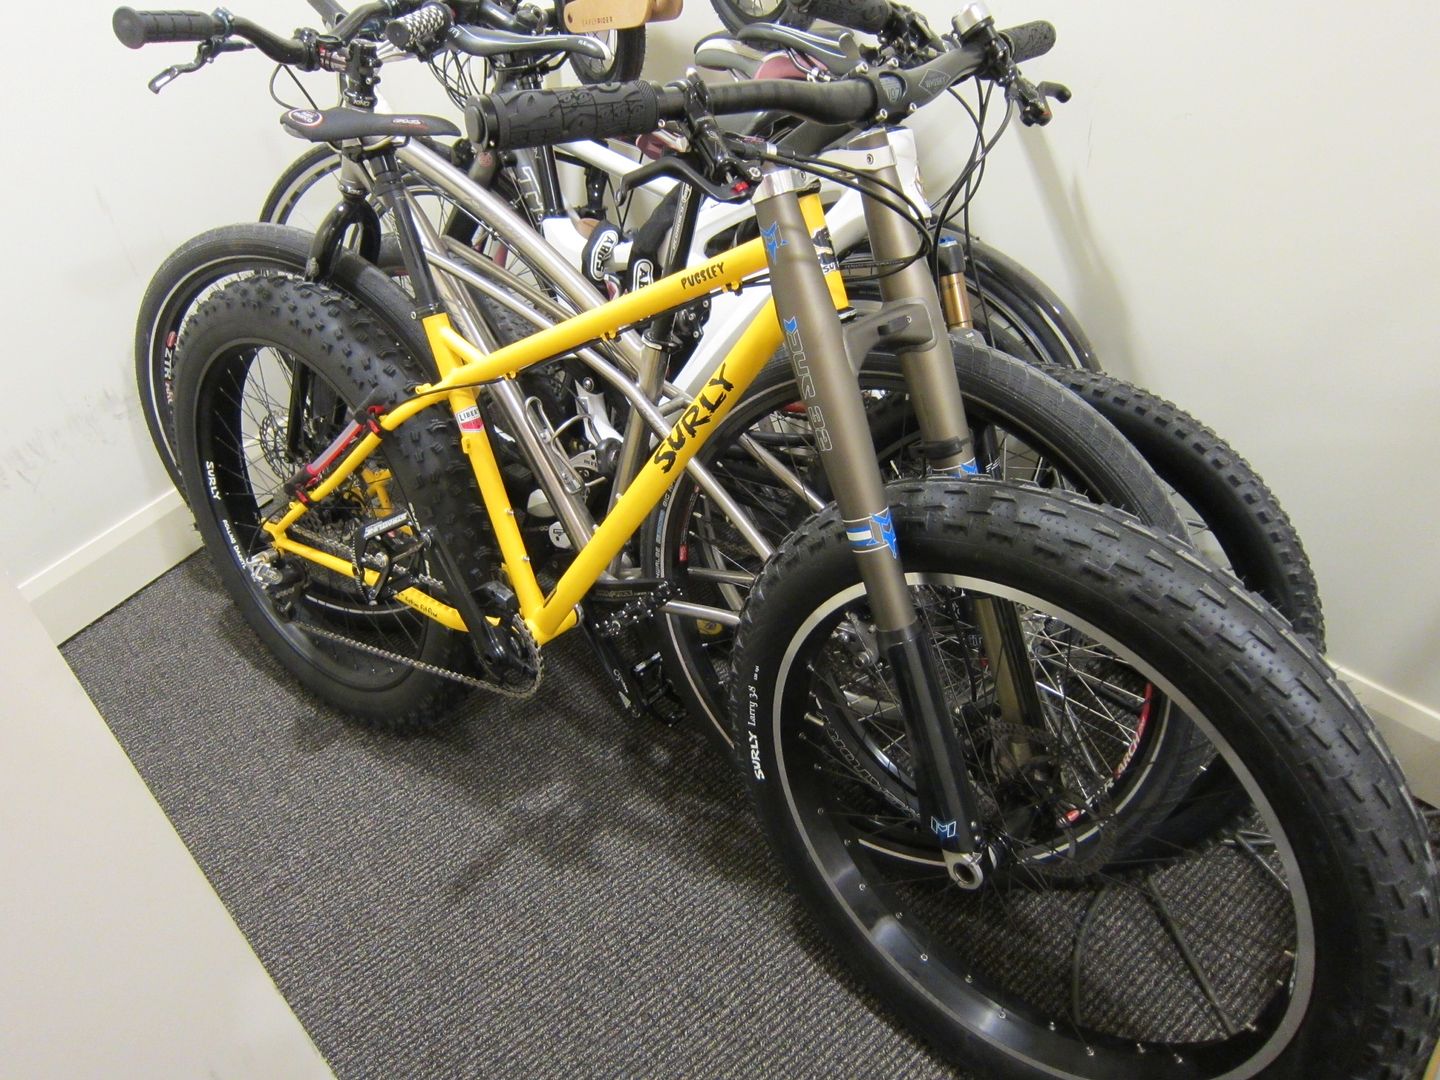
Got all frame types covered: steel, aluminum, carbon and my favourite, Ti.
I think the reason I don't have an Easy Eight is they were never converted into Fireflies. Every Sherman I have is a Firefly. Must be that 17pdr gun.
Carl
-
Nice one Carl! I'm going to use the MC cockpit on my next one, and am still toying with getting the Seafire conversion. Just a tip with Derek's cannon fairings though: if I were to do it again, I'd remove the kit stubs entirely, and replace them with some of Derek's extender pieces and fair them into the wings at the time of assembly. Adding them after the fact caused me quite a few hassles due to the mismatch in size between the resin parts and kit stubs.
Looking forward to your progress!
Kev
Hi Kev,
Thanks, combining so much AM from different sources is going to make this more interesting, that's for sure.
You're right about the cannon though. Derek also pointed out the same thing so I'm trying a couple different approaches to see which works the best. Either way, the kit stubs are going.
Carl
-
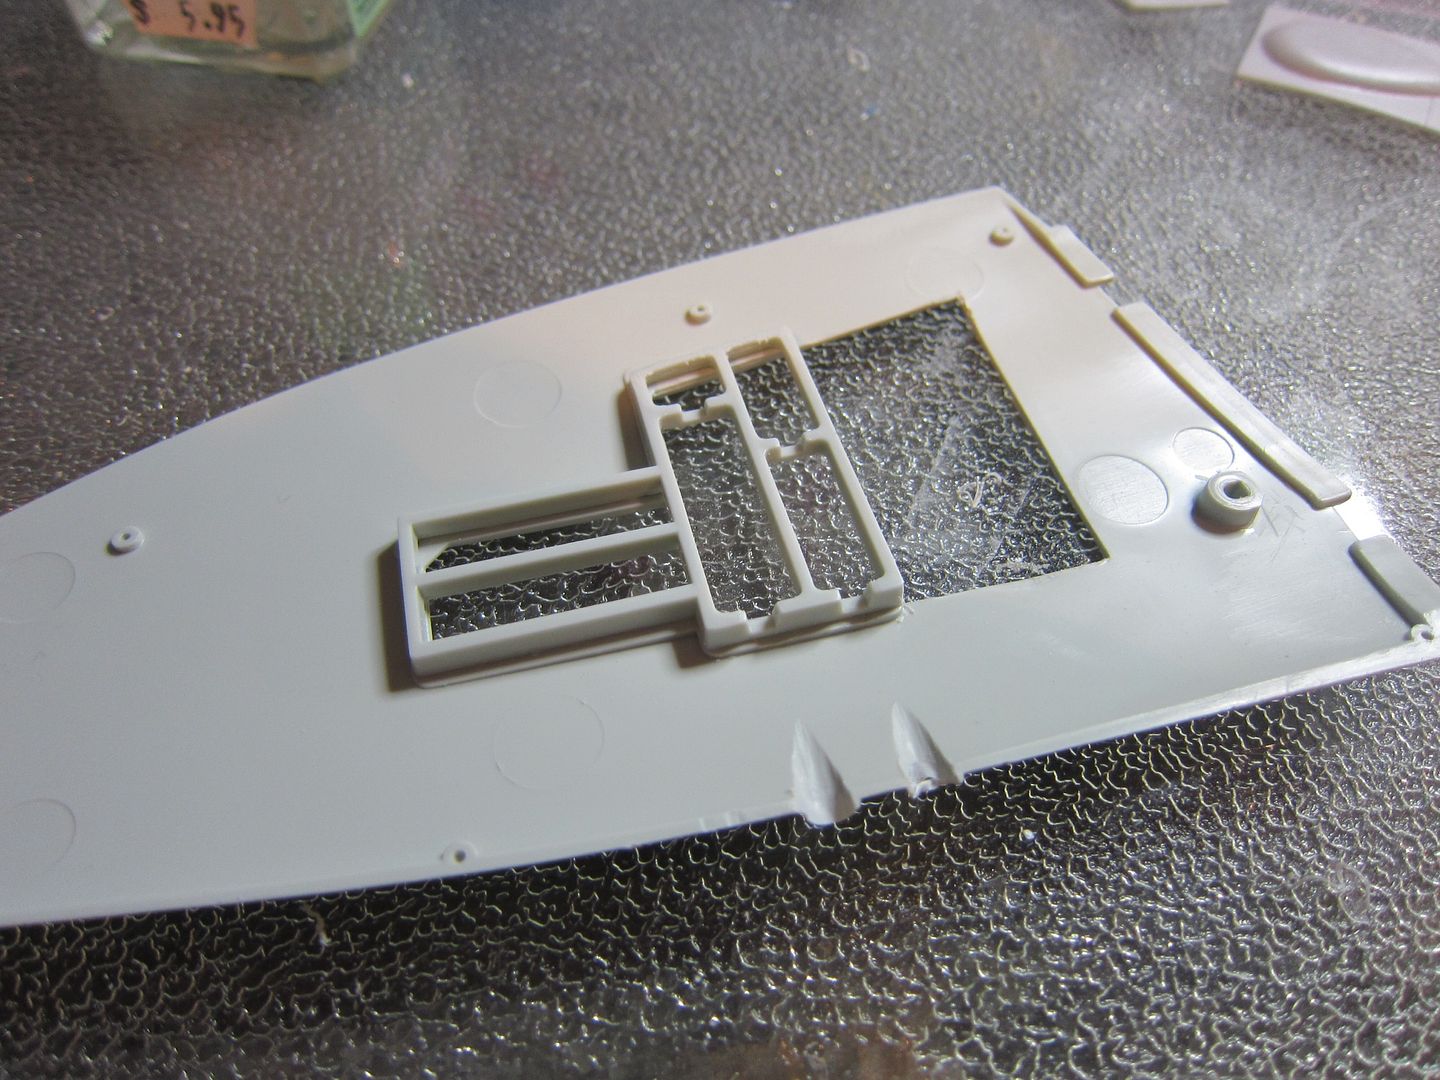
Using the same technique, I cut out a hole for the underwing rads. This was a bit harder since there is that slight step.
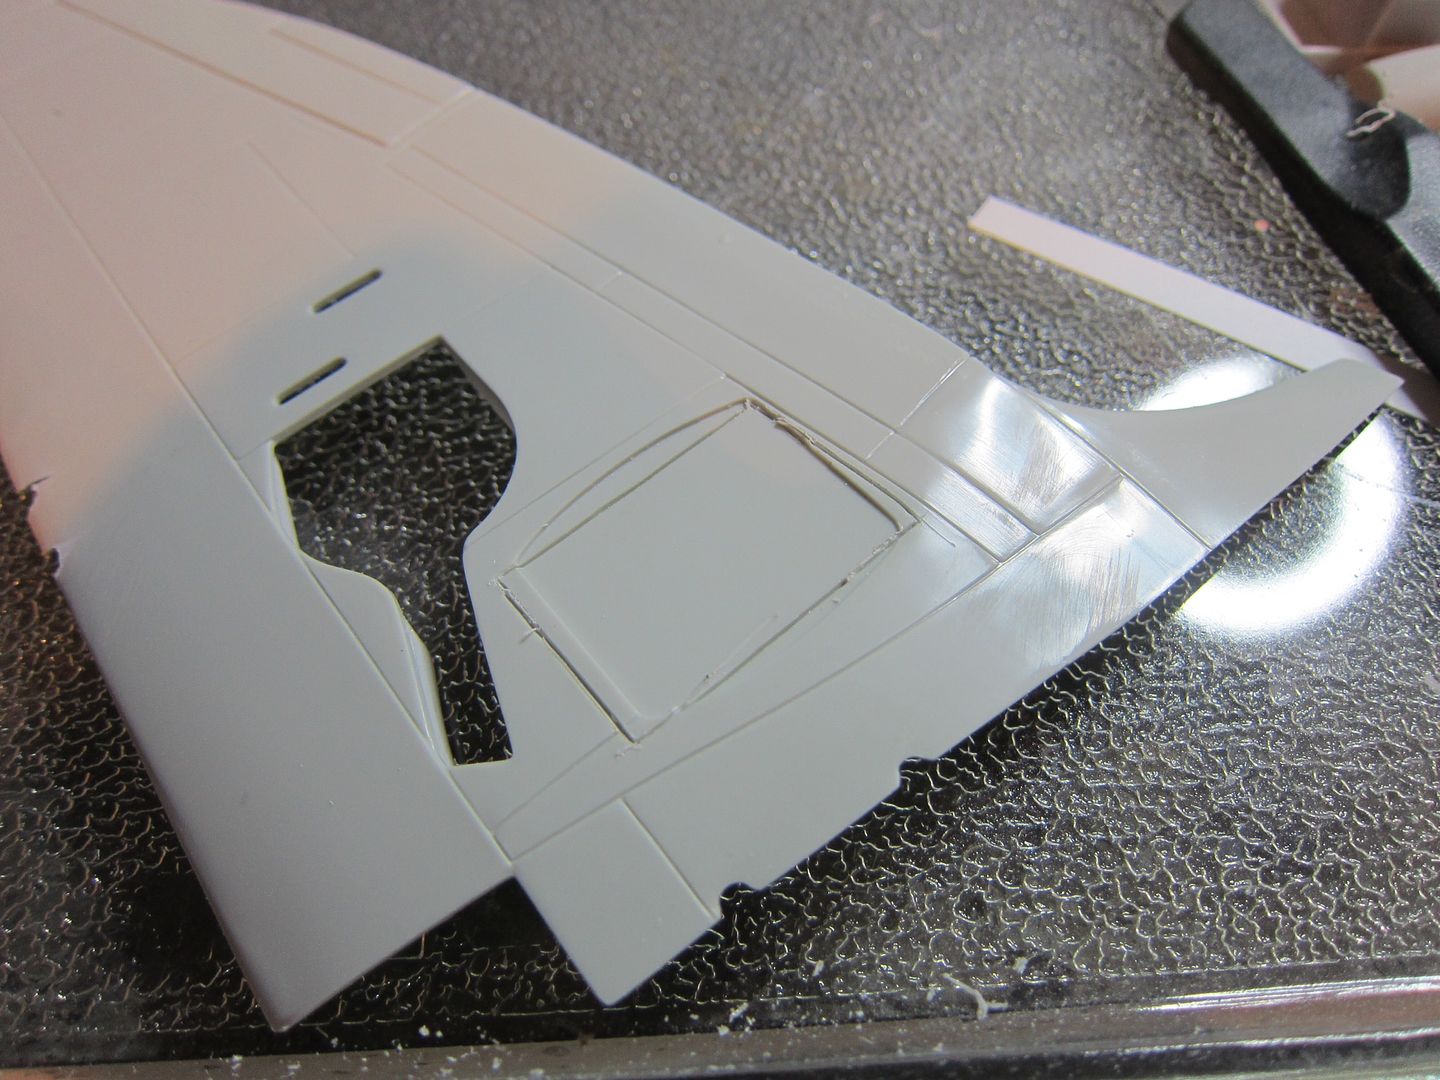
I also boxed in the gear bays using a strip of thin styrene sheet. I lucked out as the width I cut was perfect in height and filled the gap between the wing halves perfectly.
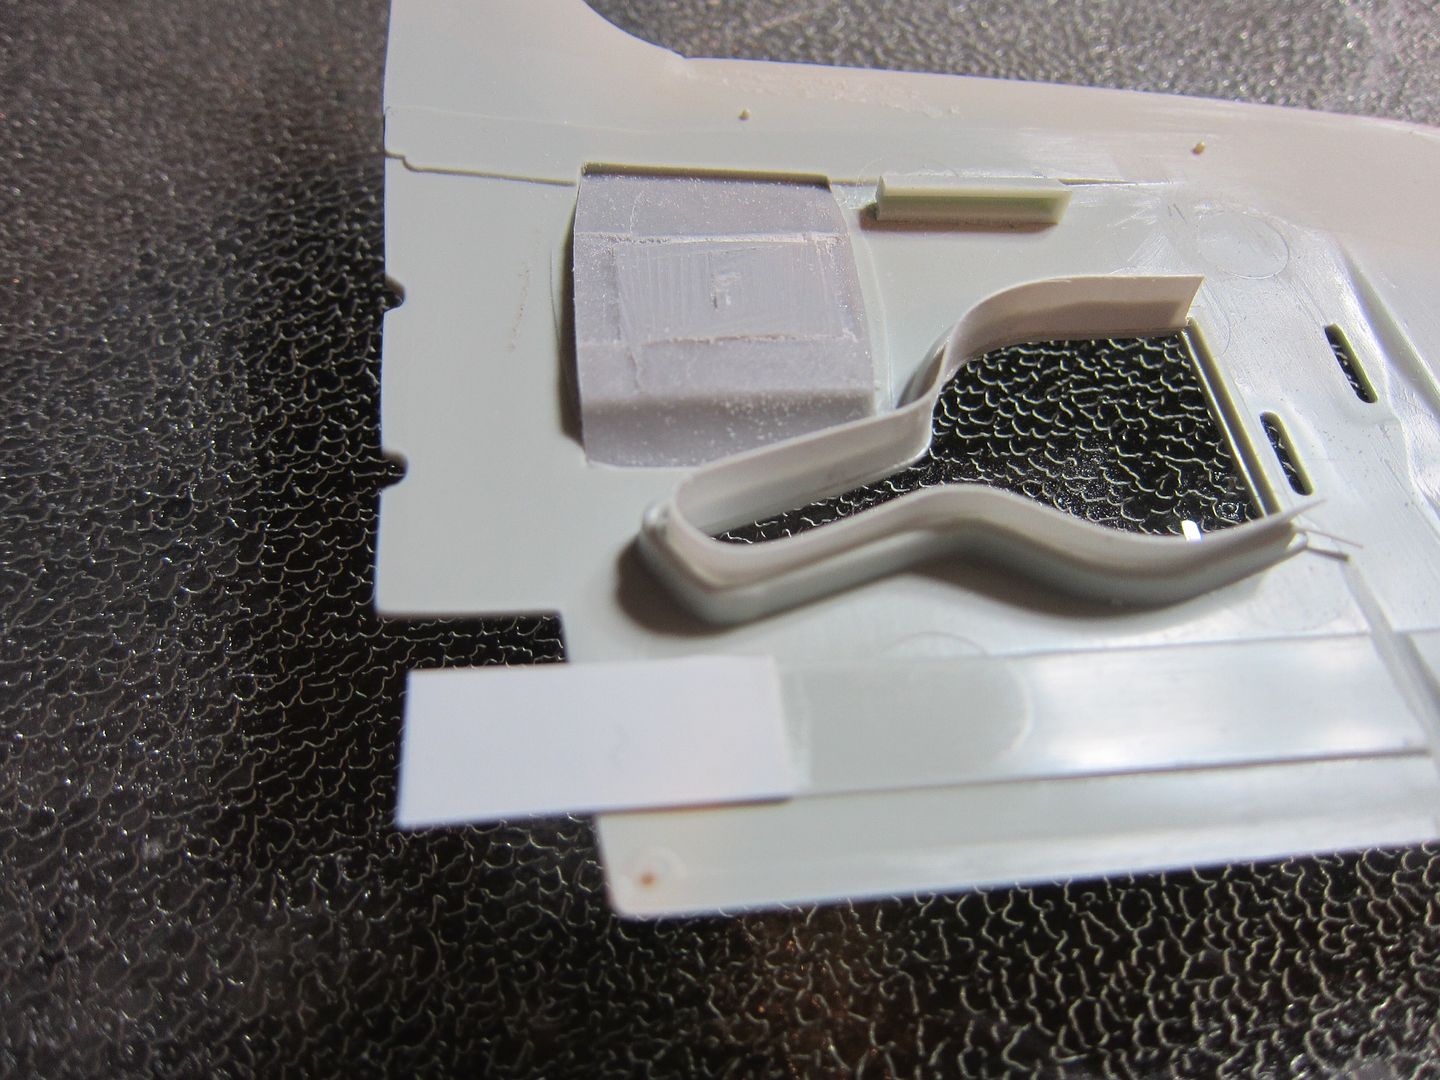
The rad is just placed into the hole to check the fit. I did better on this wing compared to the first one where the hole was a bit big.
That's where I left off today. Hopefully, I'll be able to keep at it over the next bit because come May, I most likely won't have any modeling time since my next child is due then
Carl
-
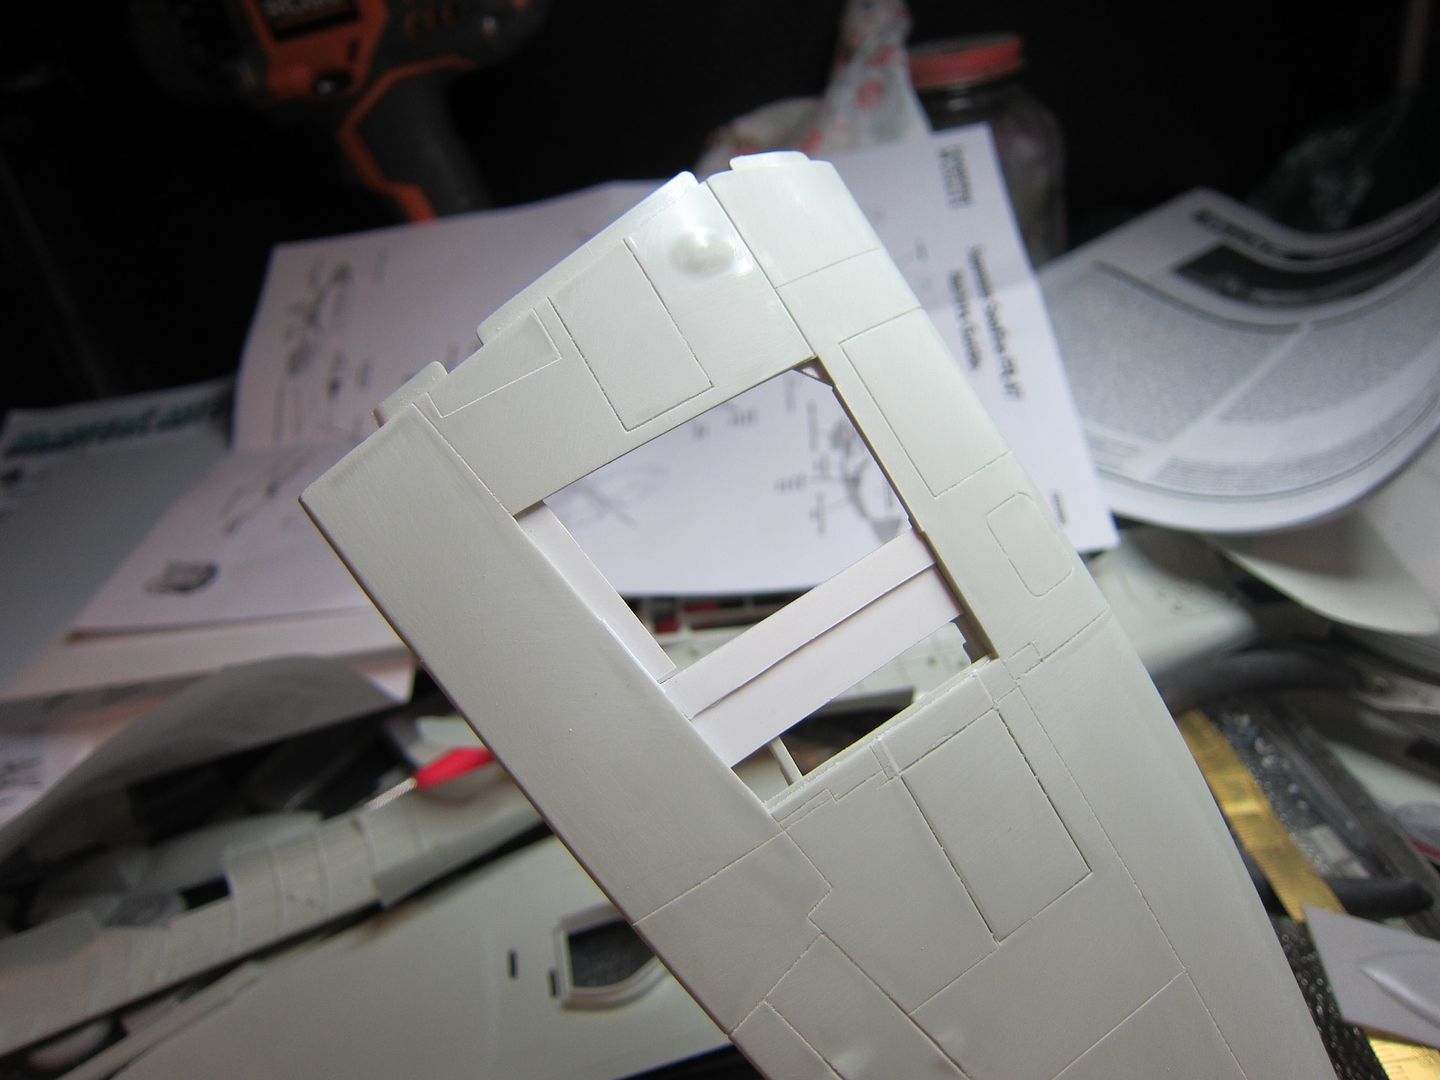
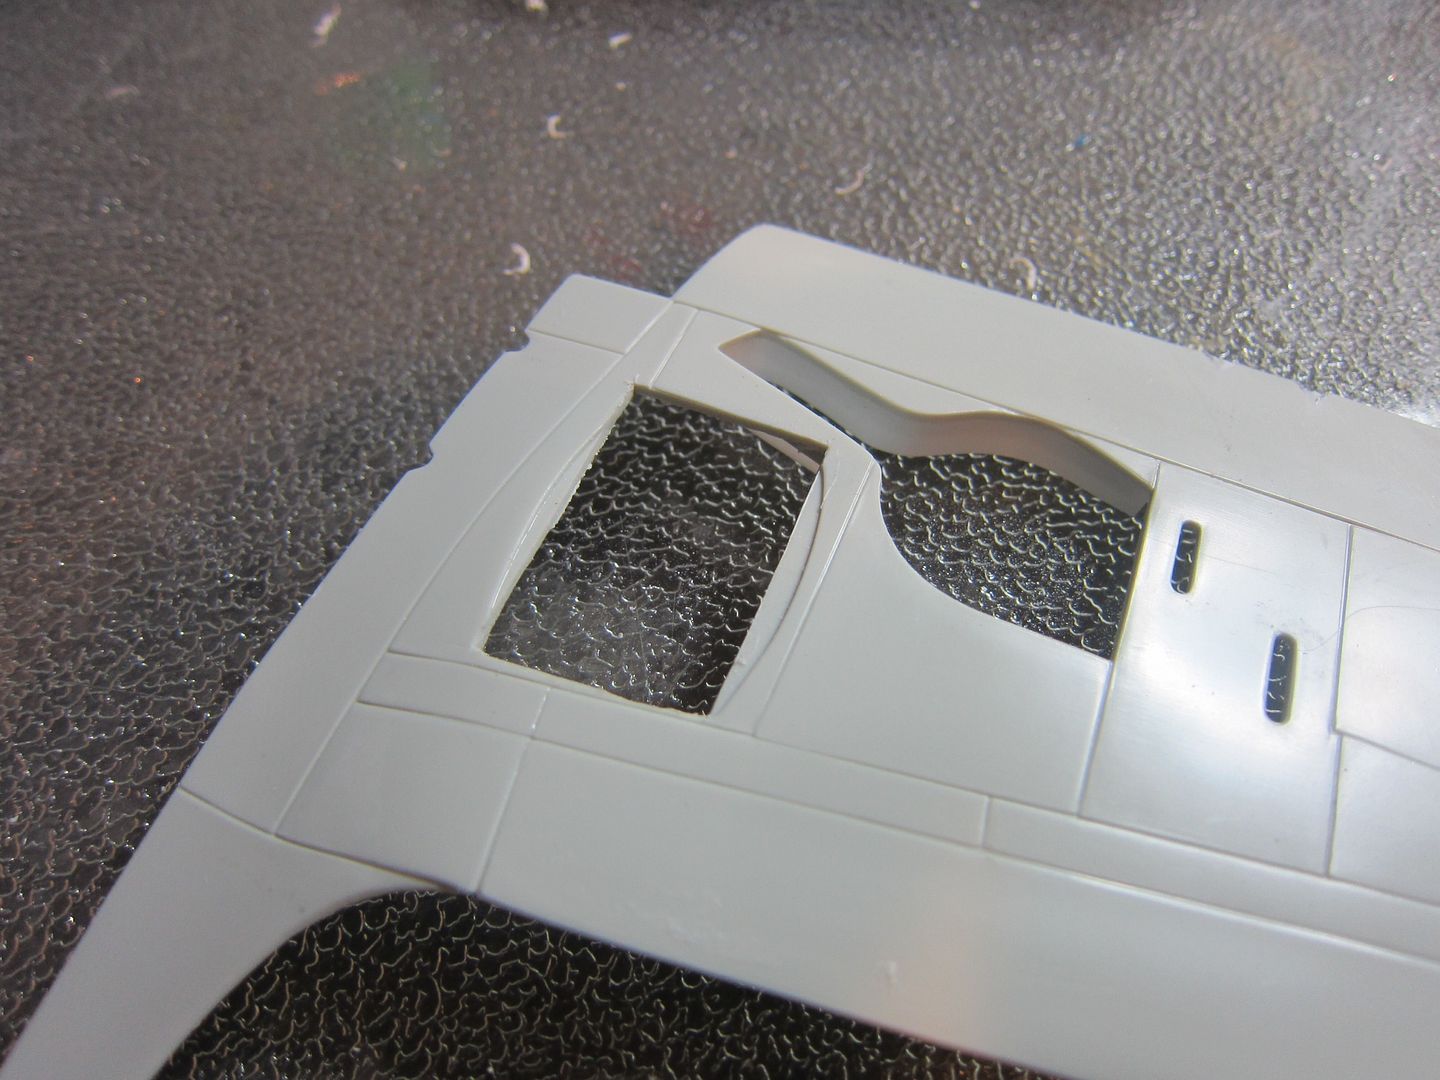
After reviewing everything, I decided that the most challenging part of the build would be the modifications to the wings so I started there.
Using a scribing tool, I cut out the upper wing gear bulge in preparation for installing the larger ones in the Seafire set:
The cut is more or less along a couple panel lines so that made it a bit easier.
Here's the wing with the section removed:
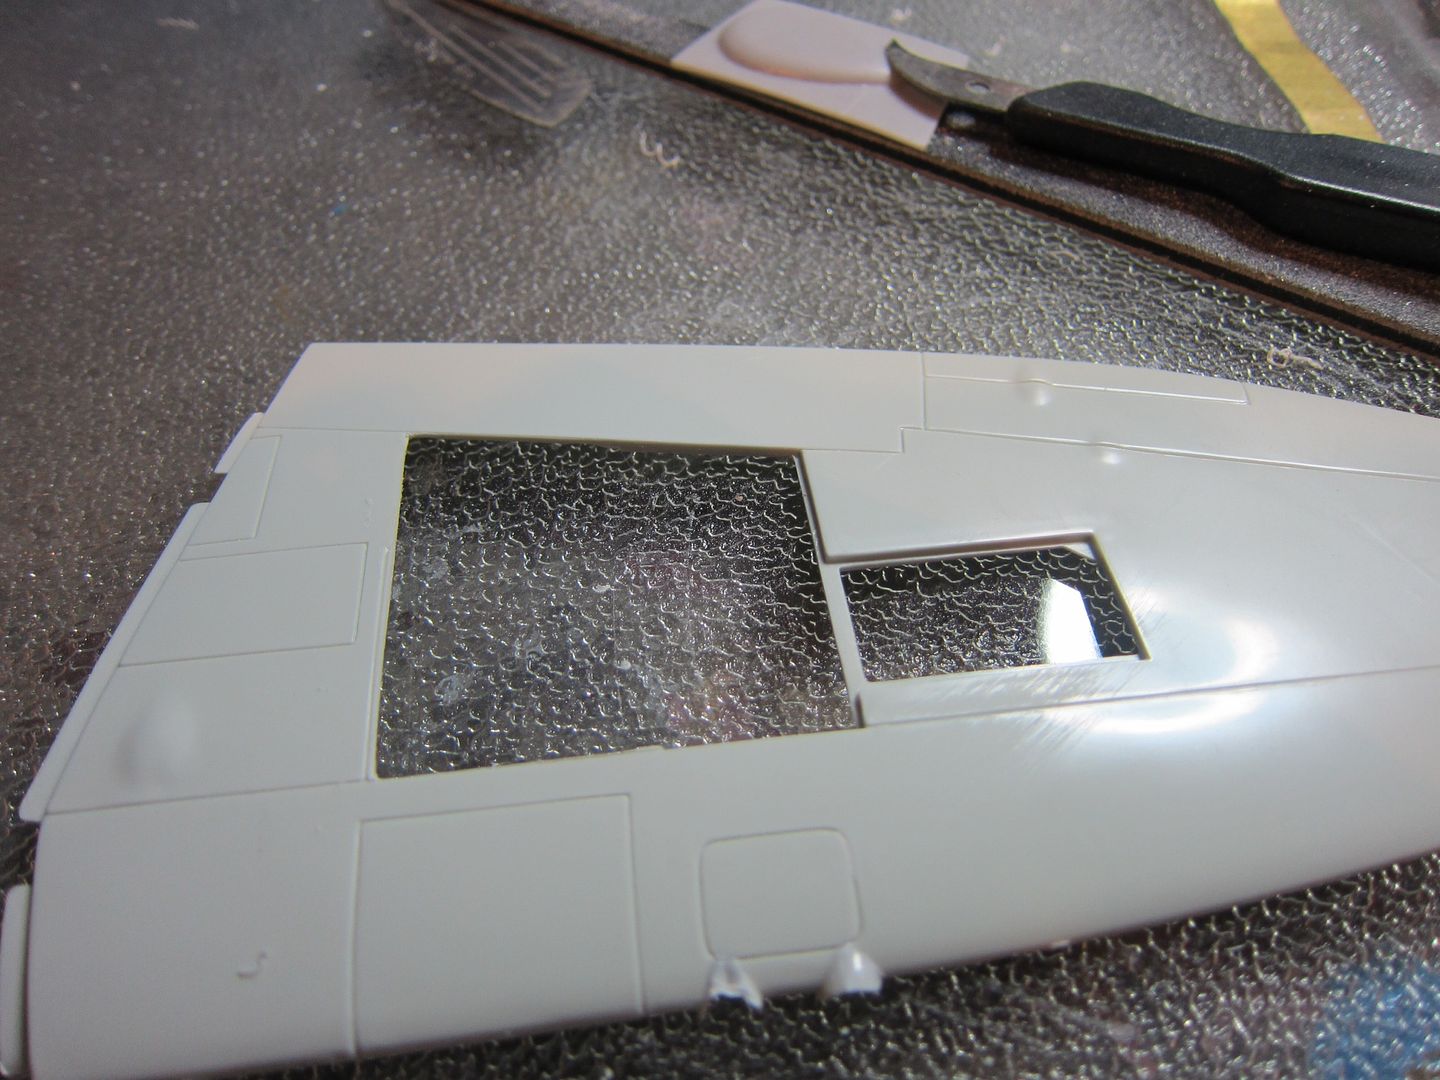
With such a large hole in the upper wing, I decided to glue in the gun bay inserts to act as a stiffener and also a bulkhead for the replacement panels to fit onto:
-
So after picking up the Freightdogs conversion set, Iconicair's cowl correction set, Mastercasters' cockpit set and EMD's cannon barrels, it was time to finally get the base Revell(née Matchbox) base kit and add it all to the stash.
But after watching LSP Kevin's build of the Spitfire 22 kit and having a new workspace, I decided to start this project.
First, the newly renovated and cleaned up workspace:
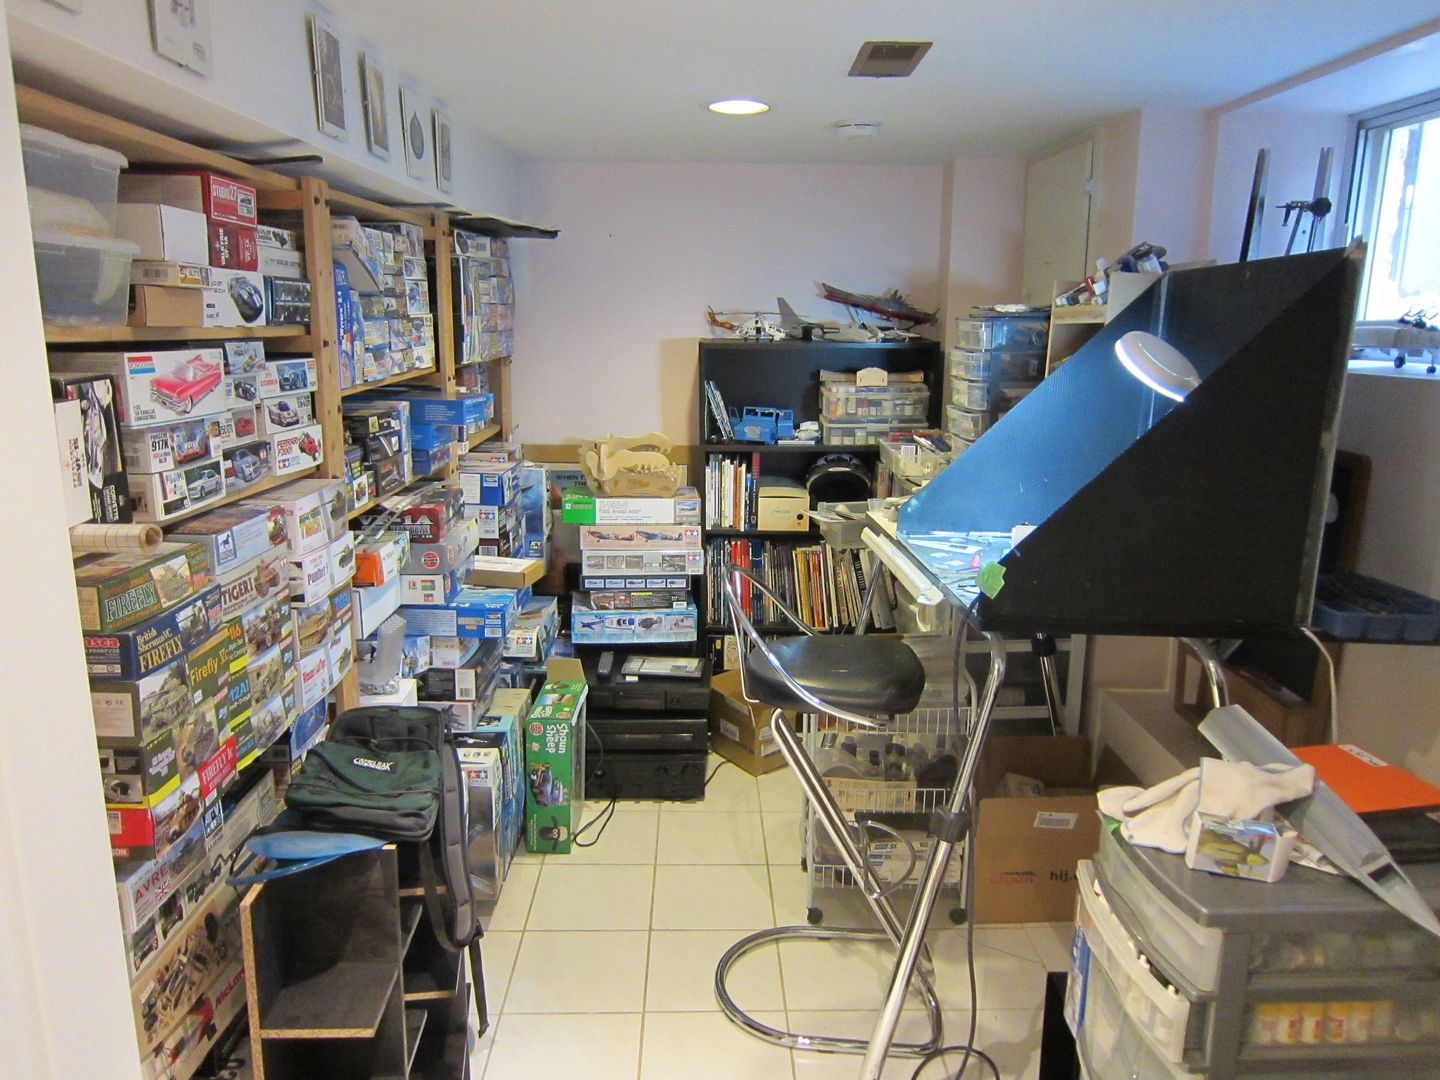
I've finally managed to get all my kits, supplies and reference material into one spot! We also installed a ventilation fan pretty much right above the work bench so that should go a long way to improving air quality in the room too.
Now onto the build.
Here are all the AM bits mentioned above with most of the resin pour blocks already removed:
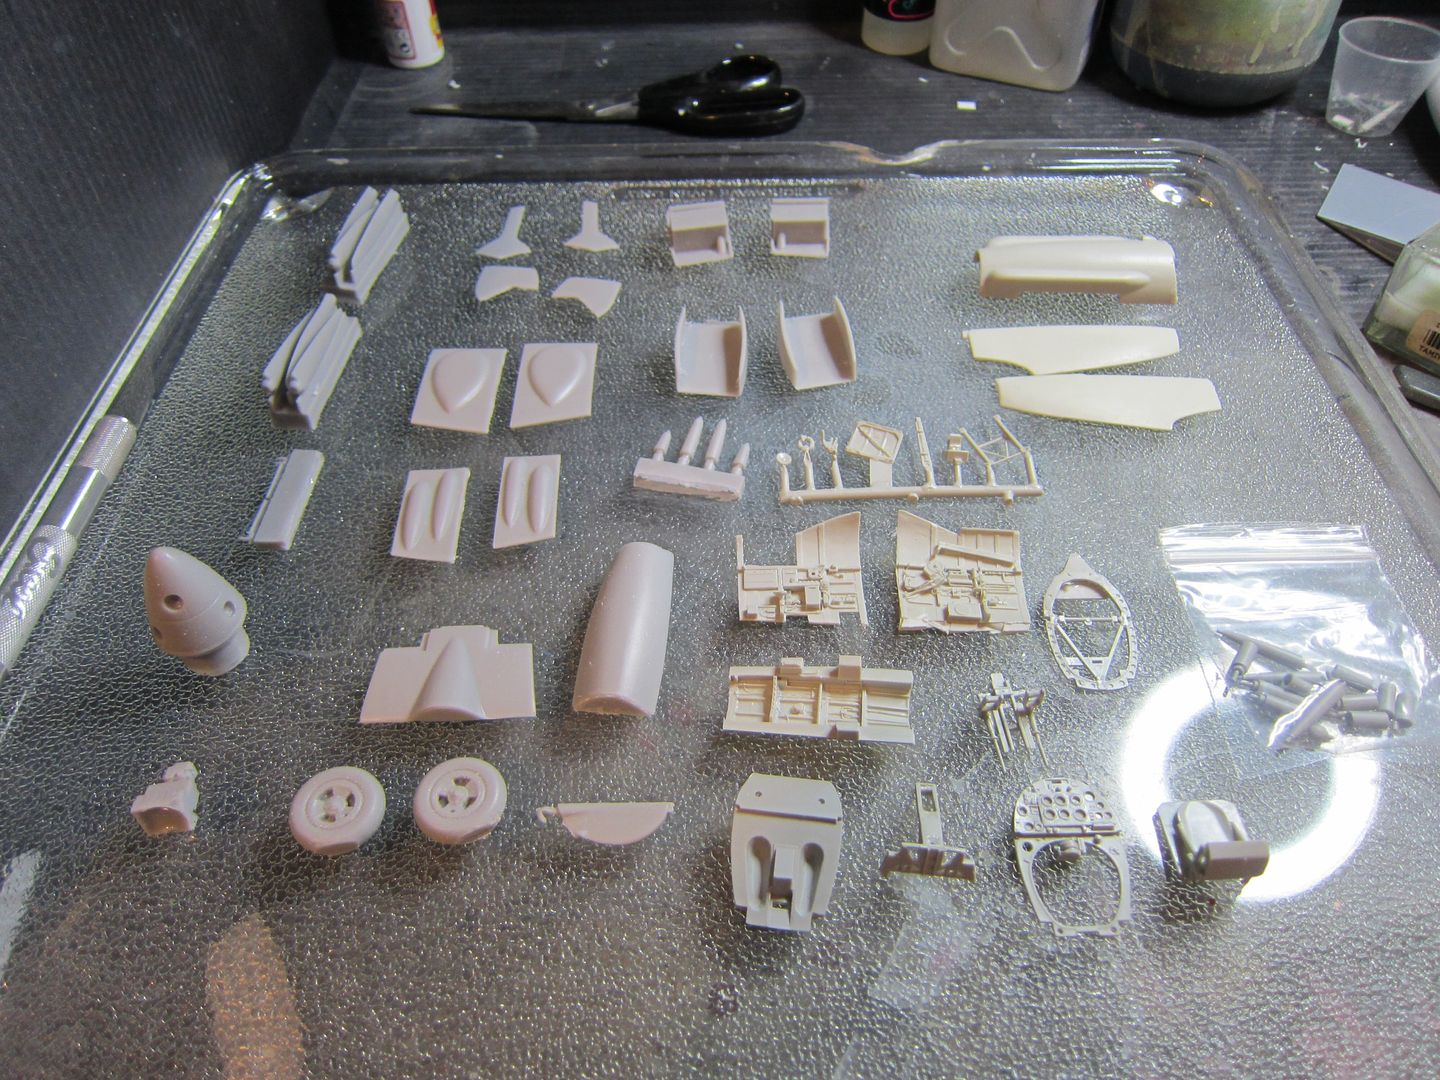
Going clockwise, the Freightdog bits are on the left, then the Iconicair cowl, EMD barrels, and Mastercasters's cockpit set .
-
Hi Mitch,
Looks great so far. I have a pair of these started and just received a couple more. The Eduard stuff is definitely nice and when you combine it with the Barracudacast bits, really make for an great looking cockpit.
Carl
-
Hi Kevin,
So I started removing bits from sprues on my kit and wanted to check if the Tamiya landing gear might work on the kit. The short answer is nope. The way they mount is completely different. The Tamiya gear goes into a hole that is parallel to the fuselage while the Matchbox one goes into a plug in the upper wing. Also, the gear legs are very different lengths with the Matchbox ones being quite a bit longer. Which led me to an idea to maybe spice the two gear legs together. Keep the upper portion of the Matchbox leg so that you have the mount and splice in the lower section from the Tamiya kit. You'd have to pin them together but the Tamiya legs are hollow since they're made to have a metal rod inserted in them so that makes it a bit easier.
Let me know if you want to try this out as a possible back up to Derek's efforts. I have some spare legs from a couple of Tamiya kits and could send you a set.
And thanks for doing your WIP, it's given me a lot of tips on building the kit and avoiding some of the shortfalls. I'll start my own shortly.
Carl
-
That's where I left off. We had to do some renos to the house and as a result, I had to pack up the work bench and my stash:
That was 2 months ago but everything is done now. The good news is I have a hobby room now with separate ventilation and no worries about other stuff encroaching on it. I should be back up and running this month and will try to get some work on the X-15 done.
Carl
-
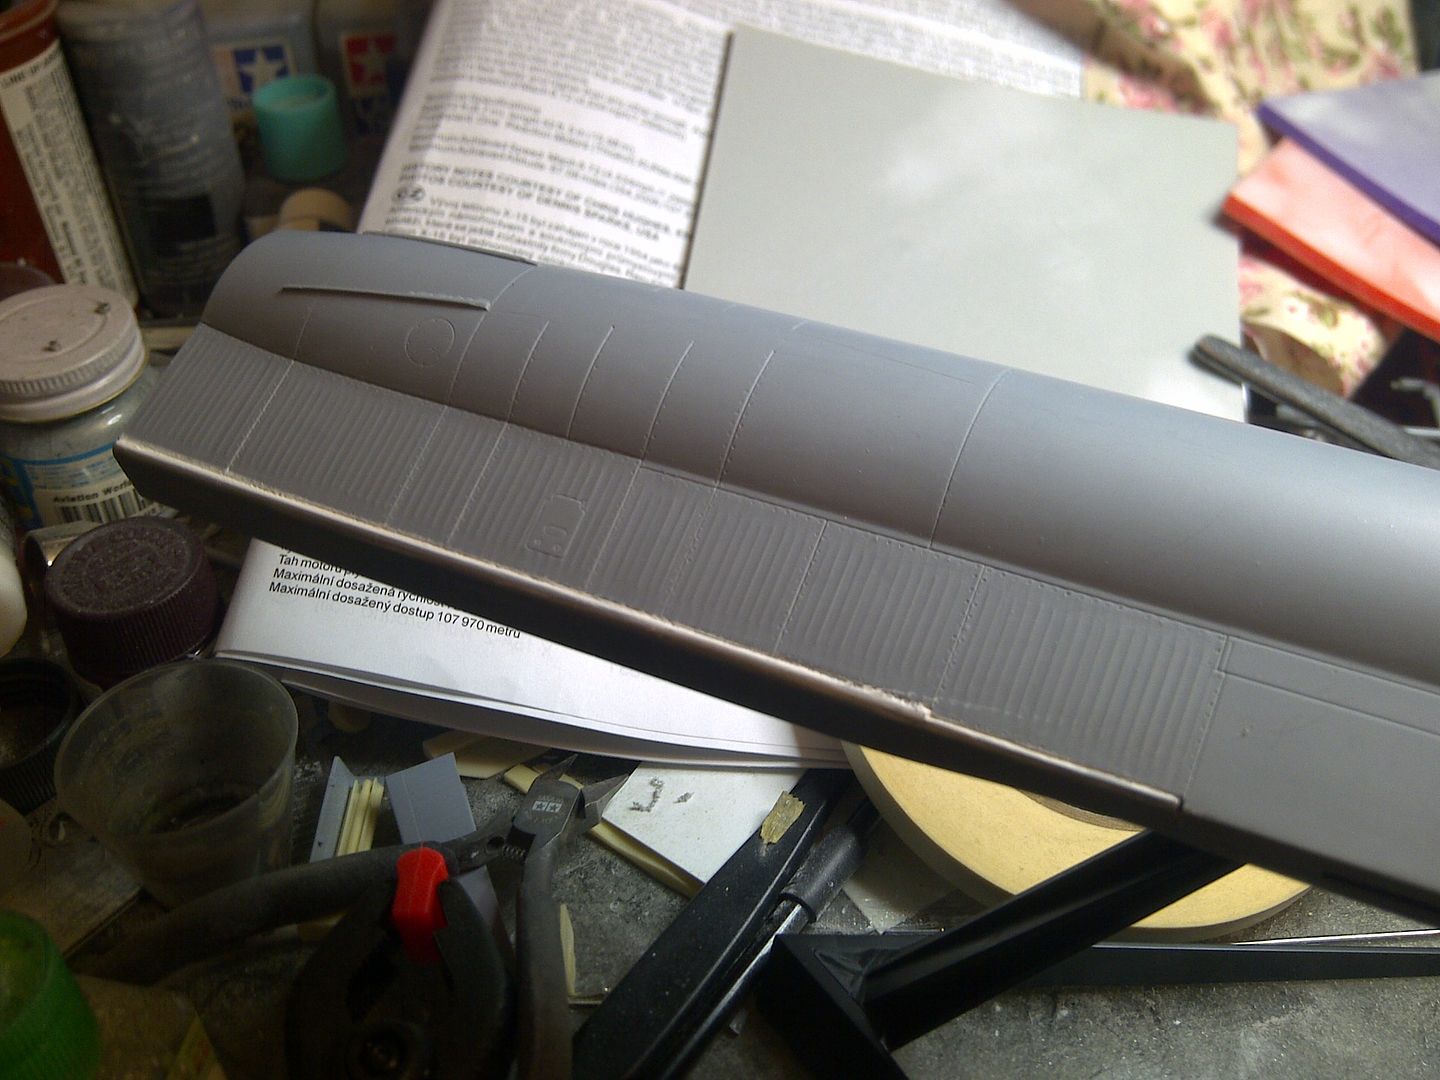
I then added some sheet styrene to either side of the rear fuselage to act as a more positive shoulder for the upper fuselage piece to rest on:
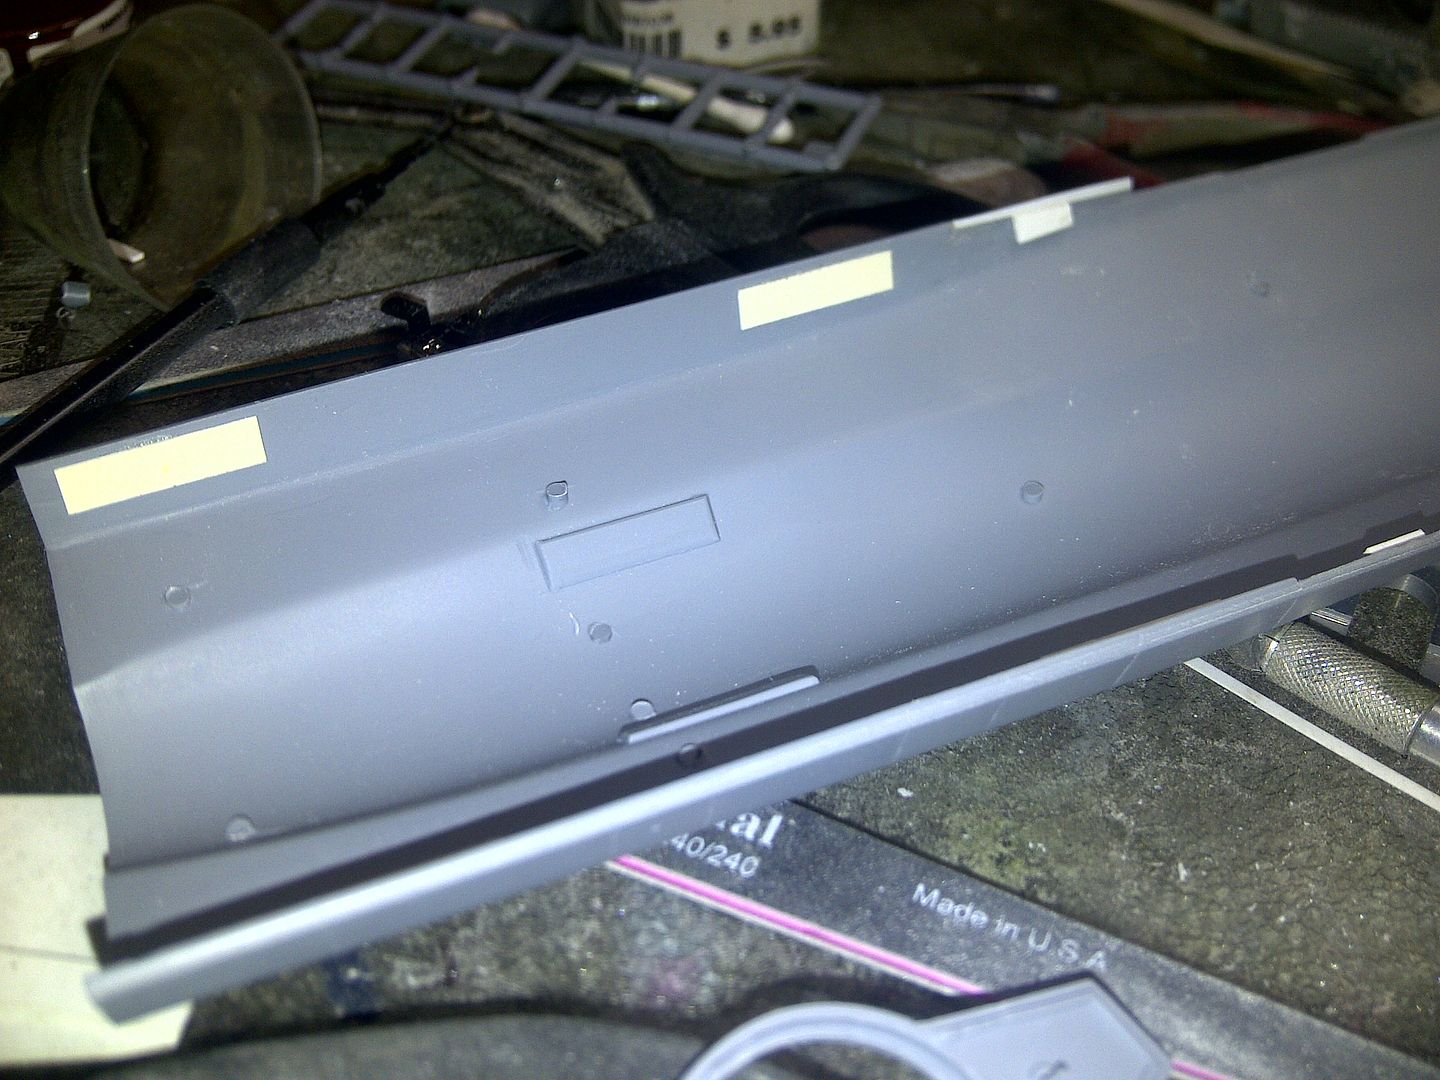
There are some gaps on either side that I filled in with styrene strip and that helped reduce the amount of sanding as I didn't want to lose all the corrugated surface detail:
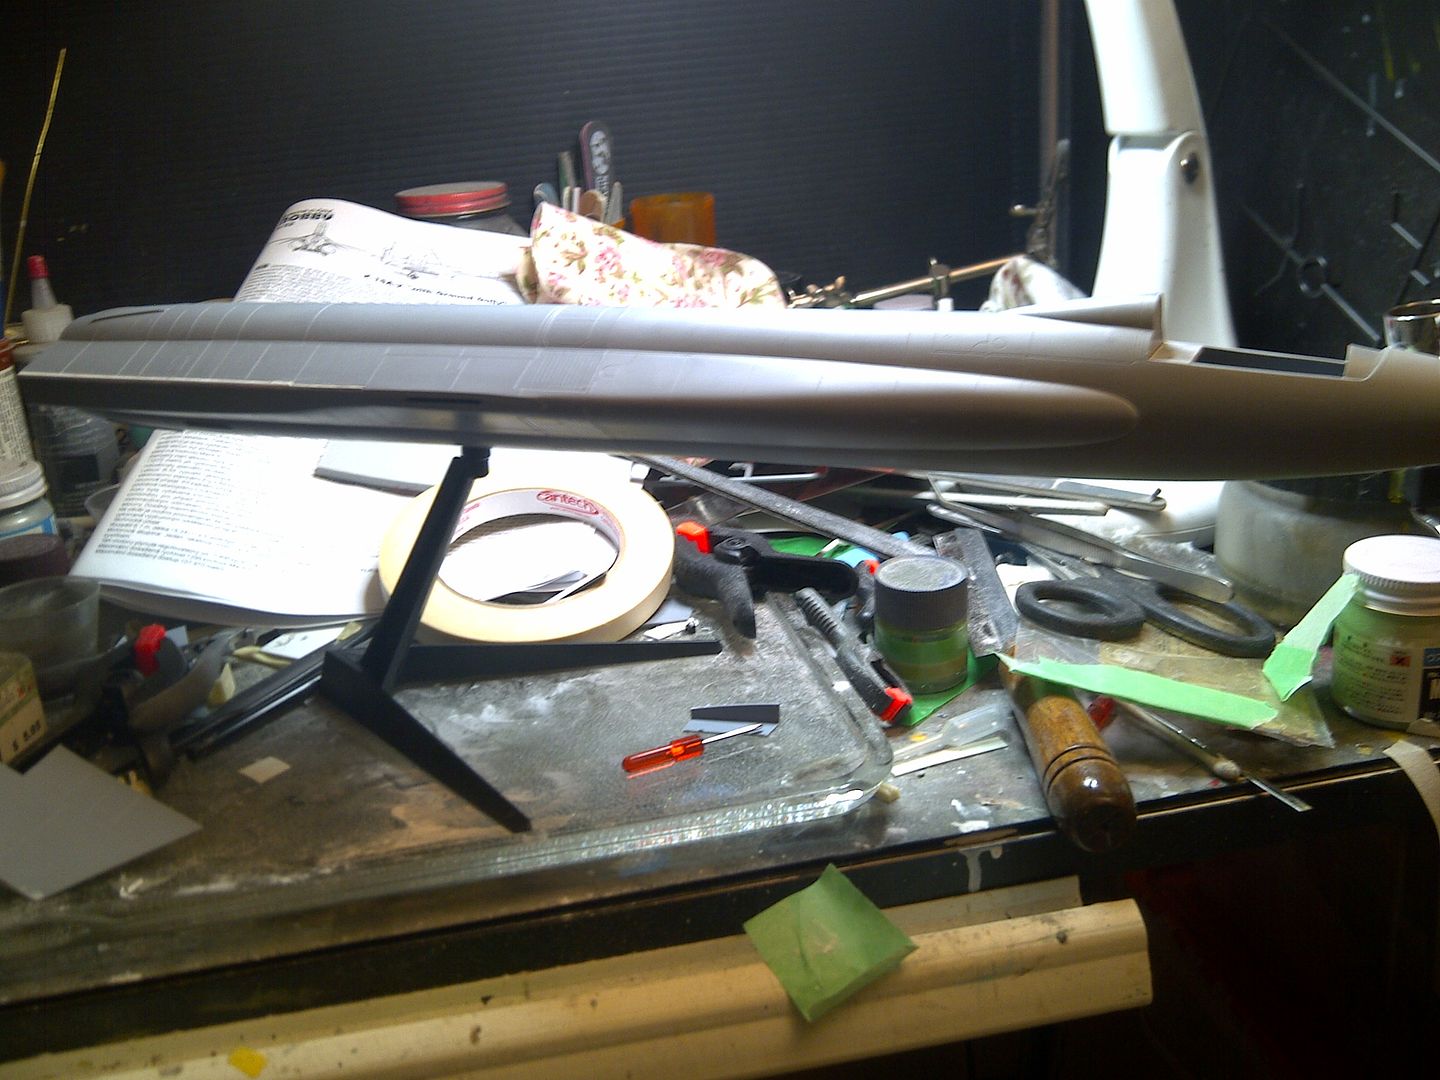
Here's the fuselage mounted on the Tamiya Spitfire stand:
-
Hi Maru,
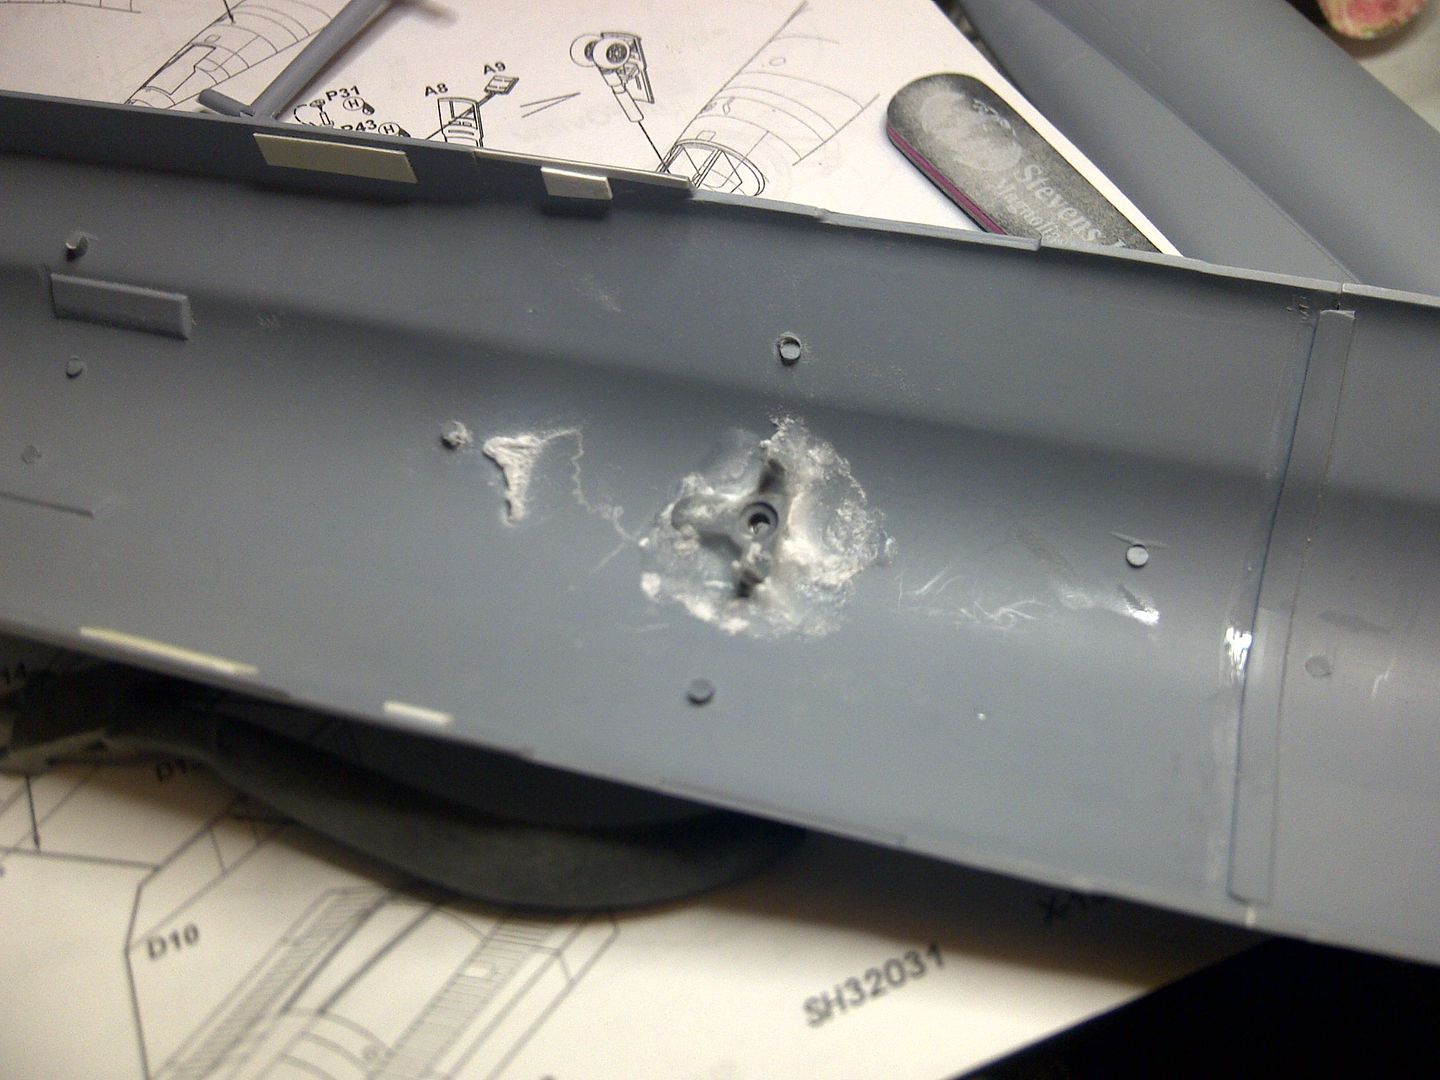
Here's where I left off. I went ahead and closed up the gear bays. The nose gear doors were a bit of a challenge as they weren't a match to the opening in the fuselage so there are some gaps to fill in:
I then modified the stand bit that goes inside the Tamiya Spitfire slipper tank to fit the fuselage. I reinforced it with a bit (a lot?) of CA so it doesn't come undone:
-
Not sure if this helps at all but this is a pic I took of the rear cockpit in the FGR at RAF Hendon in 2009:
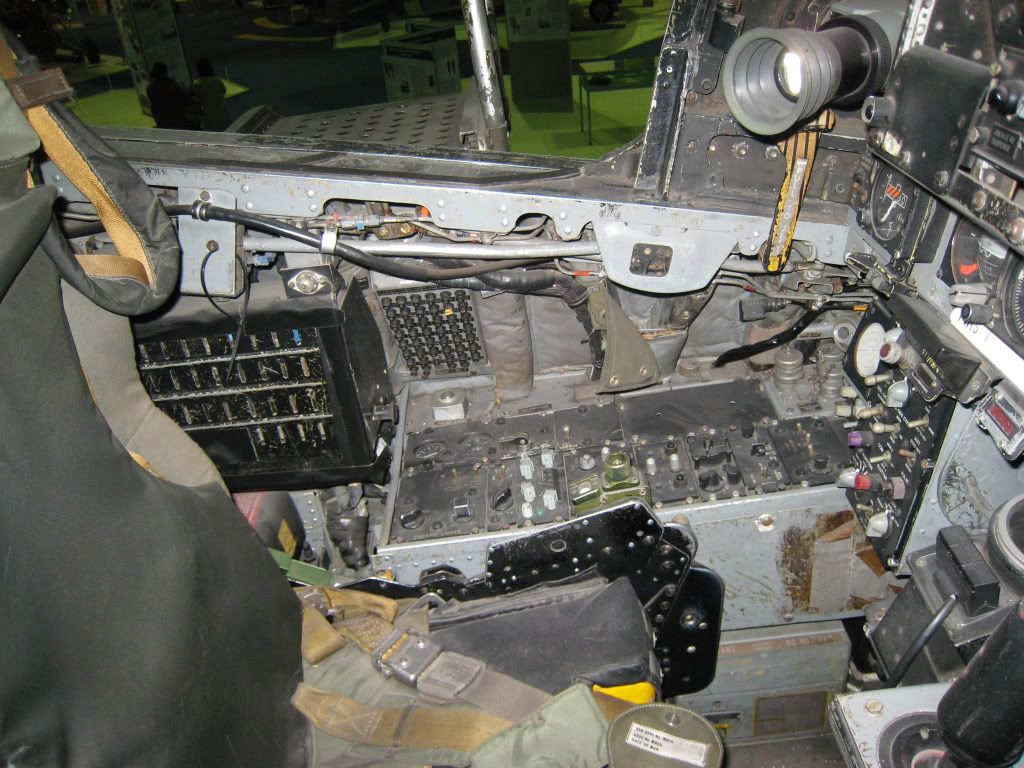
Although not a B, I think you can just make out the radar scope seems to be pivoted forward on the right side of the pic. So maybe it was a common feature?
Carl
-
Way to Go Carl! Cant wait to see what you turn it into! It's a fun kit ! I still have my P-38 J backdate under construction off and on, I'm doing a NMF bird, so its taking a while to get all the details restored as I build , should be in paint in the next month or so though.
All the best,
Paul
Thanks, I'm thinking of doing "Thoughts of Midnite" once I have the bench cleared a bit. So OD/ NG for me. I'm saving the NMF try for my B-25 Flying Bulls but that's a ways off even more.
Carl
-
I have one too so it'll be nice to see it being built.
Carl

Freightdogs 1/32 Seafire conversion with lots of extras
in Works in Progress
Posted · Edited by BloorwestSiR
Unfortunately I don't have any pics of this because I got carried away with my first attempt to resolve the issue.
My first solution was I would use the Tamiya cockpit floor to replace the warped MC one. I figured I was building one of my Tamiya kits with a pilot and in flight so it wouldn't be that noticeable that it was missing the floor.
It was then that the shrinkage became apparent, because although the MC parts fit on the Tamiya floor, doing so meant they wouldn't reach one another. At the same time, I decided to cut off the upper section to try and get the scale thickness more appropriate.
That failed completely.
The simple reason is the cockpit is too small then to fit the fuselage.