Cees Broere
-
Posts
2,075 -
Joined
-
Last visited
-
Days Won
2
Content Type
Profiles
Forums
Events
Everything posted by Cees Broere
-
Thanks for the kind comments guys, It's LSP that got the ball really rolling. Taking every substantial assembly as a project in itself helps keeping it fun. When I get bored about the 1/32 Hally, I can switch to the 1/48 or 1/1 cockpit projects. Cheers Cees
-
Now that the undercarriage leg is finished I can now start on the next assembly. The bomb door interor. Some very nice people have sent me pics from NA337 and having some original Halifax manuals helps a great deal. The interor of the Halifax bombbay is very complex........ Take a deep breath and.. Cheers Cees
-
Brian, Don't worry, there are now many options for me to experiment with. Thanks guys, I really appreciate it. Phil, I have one point of critisim for your Halifax...........It's too small Here is a pic of the undercarriage leg I was rambling on about. I think it worked out very well. The grey colour serves as a primer to blend the various bits and pieces in. If it works to use it as a master then I am one very happy bunny Cheers Cees
-
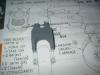
Mmm, I have been working on the undercarriage legs of the Halifax. As you know these are the messier type and orignally were large magnesium castings. The first attempt is to build the leg from plastic card with an open front and fill this with Milliput (first time I used this). I had a pack for years and it turned out to be the terracotta type. This is very hard to work with (think it's over time as well) but managed to do it in the end with a amount of water. It is now rockhard but difficult to sand. Should I use Milliput white (fine) and make one master for casting two identical legs? The idea of doing it again doesn't quite appeal to me
-
Thanks Jay, With my exams over this afternoon I can now start on the detailing in earnest again. The various tips are exremely helpful for the weathering of the interior. Jay, any pics of the ID Hampden? Just to show what it looks like? Cheers Cees
-
It's wrong. The starboard side should be alsmost square if looked at from above, while the port side slopes backwards making it assymmetrical as it should be. Apart from that the starboard side of the main canopy sits lower and has more area than the port side. Pheww, try explaining that to a Brit being a Dutchman If you look at some photographs of Halifaxes you see what I mean. The ID Model Halifax fuselage halves before the aperture for the cockpit was cut out, is correct while the canopy provided was wrong (strange). Thanks to this I can use the excess material I cut out for making a mould for a new canopy (I hope, never crash formed a canopy before). Cheers Cees
-
Keith, Which one? The incorrect windscreen or the fact that F for Freddy was an early Mk III and didn't have the rounded wingtips. I cut those off on mine. The general shape is OK but the interior is useless. The ID Models Halifax I am working on was based on the Al Bentley drawings, they are very good but the windscreen is wrong again (not being assymmetrical enough). That ID Models Hampden sounded cool, hope they will be made available again in the near future. Cheers Cees
-
Grossartig Chris, Well done. Your painting techniques look very convincing. Tchüss Cees
-
Hi Keith, Thanks for the tip about the future wash. I will try that as well. I use the "classic" Humbrol paints. Just for your information, I have used dark grey for the nose section (it should be black) to avoid the black pit syndrome. Aft of the nose section the interior is natural aluminium. I have two FM Halifaxes as well on the bench, see one of the earlier photo's in this thread. One of these is also having the interor built up as this 1/32 model (but a bit more simple to speed up things). I am thinking about a 1/32 Hampden, perhaps scratchbuilt if there are no kits about. The shape is simple. But first have to finish this brute Halifax first. I can recommend large vacforms to anyone as they give you a lot of pleasure and you learn a lot about the aircraft structures as well. Cheers Cees
-
Thanks Astro, Good idea to use smoke. I will try it. Although I have this kit since 1996, progress was very little and I even sold it in 2002. I have achieved more the past few weeks than I could ever have imagined. This board is a great inspiration. Cheers Cees
-
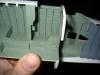
And finally the beam aproach equipment at the back of the pilot's bulkhead (the bluegrey give it a bit more colour other than just cockpit green and black. So far no weathering but I have no experience with washes. I do use a lot of drybrushing but does anyone have any tips how to apply a wash to the interior (not for the panel lines). It would be nice to give it more depth instead of just painting it. Thanks for looking Cees
-
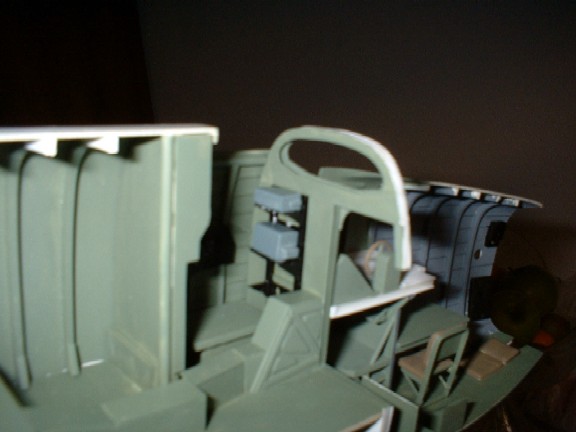
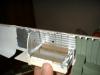
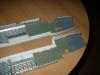
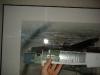
The rest bunk with cushions and back padding fitted. Some heating ducts still to be made.
-
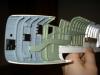
The port fuselage half with the wireless postion detailed (needs some more equipment), the pilot's chassis being worked on. A new seat is made but forgot to photograph it
-
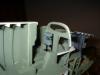
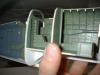
The two junction boxes in the starboard fuselage
-
Some more progress. This past week I have been going very fast with the flightdeck almost completely rebuilt (again) and painted. Some junction boxes are installed. By glueing wire into the sockets between the boxes I hope to get a nice representation of the complicated wiring looms.
-
Absolutely magnificent build Brian, What's next? How about a RAF twin (HP Hampden, Bristol Blenheim?) ready for the Cauchi treatment? That would be something to look forward to. Cheers Cees
-
Hallo Jack, Je Nederlands is niet slecht (your Dutch isn't bad) Thanks for the comment. I will build the Halifax with open bombbay ( otherwise I will kick myself in years to come for not doing it ) and it will also give the fuselage more strenght, which it needs. Believe me. If you have ever seen the structure of the bombbay, then compare it to the Lanc and then think why I chose the Halifax (not because it is simpler in construction, because it isn't) but because it is much more interesting. Cheers Cees
-
Hi Piet, The front nose section was normally painted black to prevent the otherwise cockpitgreen paint from reflecting while caught in searchlights. The Air Ministry obviously thought the green would reflect too much compared to matt black. The cockpit area is cockpit green and aft of the flight engineer the interior was natural metal. This would save on weight and as there were only a few portholes the risk of glare was less. I will paint the rear of the fuselage black as there isn't much too see when the fuselage is closed and I will keep the entrance hatch closed as well. I think I have spent enough time inside the fuselage these past years. It's about time they were closed. I haven't made up my mind if the bomb bay will be kept open. This will take a lot of work to represent the bombay structure But it would make the whole model so much more interesting. Cees
-
1/32 scratchbuilt Westland Whirlwind
Cees Broere replied to ironman1945's topic in Works in Progress
That Fowler flap is almost an aeroplane model in itself. Cheers Cees -
both fuselage halves, now the really fun part can begin. But I will have to take an exam in two weeks time so that will slow things down a bit. Cees
-
Well the repairs went smooth (had to replace some Evergreen strips representing stringers) The port side is painted now as well. All I need to do is complete the detailing of the interior and then the joining of the fuselage halves can't be far off. Never knew it would progress so much this past week. Thanks Cees
-
1/32 scratchbuilt Westland Whirlwind
Cees Broere replied to ironman1945's topic in Works in Progress
Fantastic, an inspiration to us all. Cheers Cees -
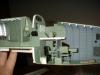
the last one for now
-
another one
-
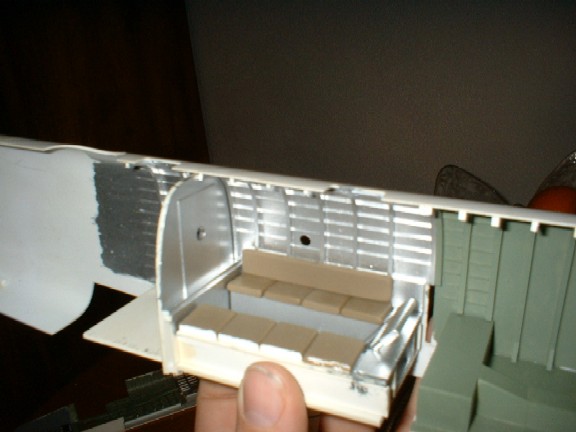
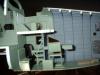
another one, the front section was painted dark grey to give some contracts to the black boxes etc. Otherwise it would be a dark pit you were looking into. The rear part is painted aluminium as in the original Halifax.