Leaderboard
Popular Content
Showing content with the highest reputation on 10/02/2022 in all areas
-

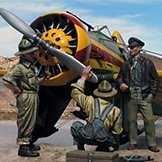
Curtiss Hawk 81-A2, F/L Clive Caldwell, 250.Sq. RAF, Libia 1941
Boch and 11 others reacted to Miloslav1956 for a topic
Project 19/22 1/32 GWH model, Montex mask,Art Scale mask, Quinta Studio 3D decals, Eduard wheels, Tally-Ho stencil decals, all colours MRP12 points -
added the photo etch cockpit stuff, airscale decals to the instrument cluster and some detail painting Thanks for looking10 points
-
The games have begun on the aft fuselage - it's going to be a long project. The Rhino digital layout has been started: First though, I made a somewhat crude repair of that lifted paint: How 'bout that Imgur "huge thumbnail". Ugh. I don't mind that much though. As these pictures will show - this warbird is a mess, intentionally so. I have done about all the weathering I intend to do on this part of the aircraft. I show you pictures, and then it gets put away until the aft fuselage is done and ready to be joined. Please comment if you have some suggestions for improvement (as long as it doesn't constitute a big re-do). The prop - recall this prop (hub and blades) are 3D printed from my own Rhino models, designed from Hamilton Standard data: The part number decal is my own making, the Hamilton Standard emblem came from Airscale's 1/18 Lope's Hope decal set (he sent me a few sheets). Fuselage panels and sealing tape: Yup - Lt. Commander Hedrick, 9 victories, March of '44. The "dead flap" panel is still just laid on there - it will look better when it is time to glue it down. The decals (most of them) were provided by Peter (Airscale) Castle. Thanks again Peter! That RH side engine accessories panel lost alot of its dark blue (the LH panel didn't). It wasn't that way prior to the Flory wash. I may just leave it that way, but I'd like some of your opinions. Perhaps I can shoot a bit of blue onto it.... And, I know some of you don't like that tape very much. I may rip it off and do some sort of paint job instead; any residue might just enhance the realism. Or I may leave it as is - I kinda like it. A couple more: The bottom (the trained eye will see the LG door hanging by a thread : ) I might augment the exhaust stains and oil streaks with some dry brushed black. I have seen pictures of wartime Corsairs with horrible looking exhaust stains and oil streaks. Why not? And those wheels and tires - even after repeated Flory washes they still look too clean IMO. Maybe I dry brush some filth on them too. Accepting ideas. OK, say good bye to the forward fuselage; next post you can say hello to the aft fuselage (or at least it's digital model). I am looking forward to the work. Later alligators.9 points
-
1/32 Pacific Coast Models Hawker Hurricane Mk.1
sillymodeler and 6 others reacted to Tolga ULGUR for a topic
This is 1/32 PCM Hawker Hurricane Mk.1 from 43 Sqd during Dunkirk evacuation. I saw the model built by Tony OToole on some model sites and was inspired for this project. Cockpit enhanched by seat and control stick from Grey Matter Aviation. Canopy replaced with Fly's vacuform product I have used Gunze Sangyo acrylics as usual. Grey fuselage code letters are from Xtradecal set. Happy modelling7 points -
After a few months of break due to an accident, I come back with my first completed model. This time something more difficult, i.e. NMF, and a lot of burns at the engine. F-100C Super Saber Trumpeter 1:32 At the beginning, two photos of what is most difficult to do in this model. F-100C Super Sabre Trumpeter 1:326 points
-
Goodmorning, Campers! Work continues. Surface work and final joins of some panels. There were a few sink marks. Since I hate waiting for Mr. surfacer and other hot putties to dry, I added gouges giving black CA something to hold on to. A spritz of activator, and then sanding. I will say that I do love some things about this kit. I have perfect dorsal and ventral seams. Something I can never do on my own. But since all of the cement holding the halves together is on the internal frames, there is no rounded glue joint requiring scribing. Below, you'll notice a segmented line of black CA between the oil cooler ring and forward edge of the cowling. The reason is because the profile of the cowling didn't mate up neatly with the oil cooler ring. The problem was that I needed to push the cowling out to mate neatly with the cooler ring. Fortunately, I have some filo files that are curved at the ends. I was able to insert them though a gap in the top of the oil cooler and apply pressure and a few drops of black CA. Perhaps if I put all of the engine plumbing in, this might not have been necessary. YMMV. I have also been sanding the textured surface of the model.6 points
-

1/32 Douglas TBD-1 Devastator by Trumpeter - TBD-1A in October 2023!
levier and 5 others reacted to Pete Fleischmann for a topic
I have a proclivity for obscure facts like this one. The analogy was just too perfect to not throw out there..glad some folks got the reference to the not so extinct fish.. The irony of your reply made me chuckle; because by making the comment above, you too dated yourself! If that was on purpose I appreciate it; because that is great high-brow humor! And if not..we’ll..it’s still funny. good stuff. My being able to rectally-extract facts like the Coelacanth is the source of much eye-rolling by my friends and family; but everyone always wants me on their team for trivia night at the bar. Happy for the folks who are excited about the Devestator. I built the Monogram 48th kit as a kid..and I think I eventually blew it up in the backyard with a string of firecrackers. cheers Pete6 points -

The ‘Viper’ pit - A short break to build other stuff.
johncrow and 5 others reacted to Stokey Pete for a topic
Well, it’s been a little while since I visited this, now not so small gathering of Vipers. The nest is growing ever larger. This jet being number 8 from 11. The ‘Venom’ painted F-16 Demo’ Team aircraft. I’ve been procrastinating a lot about the masking set, and agonising over how I was going to apply them. It turns out I had a master stroke of genius idea. I wet each mask before application, this allowed me to ‘slide’ each one into position in a similar way to decals. Thus allowing me the possibility of minute corrections to positioning long after application. So far, I’ve only applied the top surface. If it didn’t work out to my satisfaction, I was gonna remove the paint and switch schemes. But…….after many hours, much swearing, and careful study, I have this. There’s a fair amount of overspray to correct around the nose, canopy, and edges of the wings. But I’m relatively happy with how it’s turned out. The symmetry of the scales isn’t perfect, nor is it so bad as to be blatantly obvious. I’m gonna let it breathe a bit now, while I devise a strategy for the touch ups and repairs.6 points -
1/32 Hasegawa FW 190 F-8 “White 4”
Fanes and 4 others reacted to Tolga ULGUR for a topic
This is 1/32 Hasegawa Focke Wulf Fw 190F-8 with the markings of “White 4” from 7./SG 10 in May 1945. The inspiration for this project is the profile in Kagero Fw 190 vol 3. Cockpit modified by Eduard Löök set (instrument panel and seatbelts. Other additions are as follows: -Quickboost exhaust set -Barracudacast wheels -Henri Dahne propeller set I have used Gunze Sangyo acrylics. Decals are from my spare box except for “White 4” which is produced by CustomHobbyDecals.5 points -
RAF FG.1 XV571 WILD HARE Phantom Conversion
Greg W and 4 others reacted to Anthony in NZ for a topic
Thanks MARU, as always your enthusiasm is fuel for me on those days where it is doing my head in! Glad you like the Tamiya Mustang I just finished in RFI as well....I'm surprised at the response since it was a bit of a 'throw together' to get me going again! Yup I reckon too buddy! That means a lot after seeing your amazing cockpit work to date! Cheers buddy Haha, thanks Rick! Now get back to your one!!! Thanks for the feedback chaps! Kerry's been beavering away on the radar scope in the back as I am just not happy with my scratchbuilding skills to do it justice. Kerry is a legend and am forever indebted to him. Whilst he works on that I am trying to make sense (again) of the engine detail inside the lower aux doors and rear panel upper section Cheers guys Anthony5 points -
1/18 Scale Blue Box F4U-1A Corsair Modification
ctayfor and 4 others reacted to Oldbaldguy for a topic
I know you are putting this end of the airplane to bed for a while, but there are a couple of things to consider in your off hours: Tires - if the airplane you are modeling operated off a dirt or coral strip, then the rolling surfaces would be a lighter color than the rest of the tire, maybe by quite a bit. The side of the wheel adjacent to the brakes will show a lot of brake dust staining. Tank filler - any fuel spilled over at the tank filler will run down the fuselage sides and will clean off some of the exhaust and oil stains wherever it goes. It will also bleach out the paint a bit as well. Fuel spills are additive, so there will be several layers of it. Because avgas is as liquid as water, the leading edge of the spill will be pretty sharp and straight, and will leave the most significant mark. The spill will fade to the rear because the gas wicks away as it runs down hill and toward the rear of the airplane. Because a gas evaporates quickly, it doesn’t smear like oil or exhaust residue. POL stains - there is a lot of high speed air pushing oil and other viscous goo aft in the slip stream. These too are additive in that they happen every time the airplane is flown and tend to run much farther aft than you would expect. When my last Cessna 182 sprung a tiny leak, the oil covered the belly from the firewall to the rudder but there was no noticeable loss on the dipstick, the point being it doesn’t take much to make an ugly mess when the goo is accelerated to 300 mph in the slipstream. Not all grunge is hydraulic. People leave foot and handprints all over the place so places that are handled a lot will show dirt. Surfaces where guys had to walk to load ammo, work on stuff or whatever will show the color of the local dirt from their shoes ground into the paint. Otherwise, you’ve nailed it.5 points -

Another Hasegawa T bolt Bubbletop, my first LSP. November 12, 2022, It is DONE at last!!!!!!!!
JayW and 4 others reacted to Citadelgrad for a topic
Painted up the oleos that move the inner gear doors. i went with a darker zc for the mechanism and a chrome pen to do the oleo itself. That nasty nub on the mechanism is not a sprue gate, i cleaned it a bit but i might have to remove it, it looks bad blown up. more later. Not sure how long the chrome needs to set up.5 points -
1/32 Douglas TBD-1 Devastator by Trumpeter - TBD-1A in October 2023!
europapete and 3 others reacted to Timmy! for a topic
I'll just leave this here...4 points -
Here is a photo of a flyable Bouchon. https://www.alamy.com/hispano-ha-1112-buchon-spanish-built-messerschmitt-bf109-me109-german-luftwaffe-fighter-plane-tail-tailplane-and-rudder-space-for-copy-image222388623.html https://www.alamy.com/stock-photo-british-airways-city-flyer-aircraft-departing-london-city-airport-125873799.html I am not trying to defend some kind of "huge flange" on any model because I do not know of any model with such huge flanges. ALL I am saying is that on a model the flange MUST be represented as an item standing out from the vertical surface of the fin/fuselage. A flange standing out at 0.25 to 0.3 mm in scale 1/32 is sufficient. That is NOT enormous. Take a metric ruler, look at a millimetre, now picture a fraction of it. LET us not 'throw the baby with the bathwater." There are people who have an unhealthy obsession with destroying models. I am trying to create here, not destroy. Radu4 points
-
4 points
-
I've finished another project that I'd been working on a for a few weeks. This time it's Hasegawa's 1/48 Typhoon Ib with the Teardrop Canopy. There's no 1/32 injected kit of this version of the Typhoon so I had to scale down. Since I've always wanted to do the "Sharky" aircraft, I needed to get some aftermarket items to enable me to do it accurately. I purchased (but only used parts of it) the Barracudacast Typhoon cockpit set for the bubble canopy, the Barracudacast radiator intakes and exhausts (I used the "cuckoo door" version), Barracudacast resin main and anti-shimmy tailwheel (the kit does not come with the anti-shimmy tailwheel so prevalent on later Typhoons), Ultracast 4-blade prop, Ultracast tail wheel well, and lastly, the Ultracast Tempest tailplanes. With these in hand, I set out to find the decals for "Sharky". I found none at anything but highwayman prices. I discovered that Montex makes a maxi-mask set for this aircraft so I ordered and used it. This was my first attempt at masking markings; I don't think I did too bad but it was a learning experience. I have a Silouette Cameo 4 and ended up making new roundel masks since I buggered up the Montex ones. I used the Barracudacast seat, some of the black boxes, the gunsight, and the rudder pedals from the cockpit set. I could not, for the life of me, get the entire cockpit to fit in any kind of decent manner so I created a Hasegawa-Barracudacast hybrid. I think it came out ok for what you can see of it. The Ultracast Tempest tailplanes are "slip over" parts meaning they slip over the plastic tailplane roots. There was some deformity on the separate elevators but I fixed that with some sheet styrene and CA glue. As for modifications to the basic kit, I did the following: Thinned the back edges of the radiator housing/fuselage as well as the flapper edges. I drilled a hole in the intake trunking and ran a 0.020-inch styrene rod from there to a chunk of half-round styrene rod I glued to the inside of the door. I drilled out the navigation light lenses (boy that was a task-and-a-half) to better represent what these lights actually look like. I drilled a hole for the obligatory whip antenna on the upper fuselage, behind the canopy Rescribed all lost detail (including the oversized removable panel fasteners. Eliminated both wing leading edge landing lights. I read that rocket firing Typhoons usually had this done to them so the rocket exhaust jet wouldn't break the perspex and create a big issue. Drilled out the teeney-weeney 20mm cannon muzzles. Removed the clumsy canopy rail that Hasegawa provides and replaced it with a strip of styrene Redesigned the clear light behind the pilot's armor plated headrest to better resemble the actual item. (I then proceeded to launch the Hasegawa clear bulb part into oblivion when holding it for installation with a pair of tweezers...I made a replacement but it's not as good.) Drilled out two light fixtures just forward of the inboard landing gear doors. I've read that later Typhoons had lights here (red-left, green-right) so I created them with Molotow chrome, Gunze Sanyo aqueous clear green and clear red with 5-minute epoxy lens. I painted the kit using old Floquil enamel paints for the Medium Sea Grey, Ocean Grey, and Dark Green. I scanned the instructions, resized them and cut out paper masks for the camouflage pattern. The roundels are a mix of MRP, Xtra enamel blue and Tamiya White (as are the shark teeth). The mask for the black edging around the mouth did not do well so I ended up painting it by hand. The prop is Mr. Finishing Surfacer 1500 black. It needed no further paint to make it look the part. The squadron codes are again Floquil enamel RAF Sky but the serial number decal was too small to paint (at least for me) so I created a decal for the serial numbers. It looks good and the font is correct I believe. That about sums it up... Now on to the photographs. It's not a perfect build but I'm happy with it even though the pictures seem to always locate the minutest of errors and blow them up so they are unmissable...Oh well, I'm glad the contest judges don't have this ability.4 points
-
Not inner well doors but metal covers which act like a ceiling on top of the wheel bay and protect the fuselage innards from dust.4 points
-
Not sure if this has been mentioned before , apparently it's due for release in 2022/233 points
-

1/32 Douglas TBD-1 Devastator by Trumpeter - TBD-1A in October 2023!
Rick Griewski and 2 others reacted to LSP_K2 for a topic
Sometimes I feel like I am a living fossil.3 points -
I disagree. The BoB trilogy will always be more famous than anything else, if, simply for the reason that it is immortalized in film. You aren't going to get orders from the world market with a niche model that will sell like hotcakes in NZ. Decal sets for BoB aces would make all three sell even better.3 points
-
I believe it when I´m holding the kit in my sweaty, trembling hands! Stefan3 points
-

HK B-17...C 5/4 sweating the metal
Anthony in NZ and 2 others reacted to brahman104 for a topic
It's been a while! Not spectacular progress, but it did take ages to get to this point. The colours on the rudder (red,white and black) demand the highest standards of surface finish I can possibly achieve. I've lost count of how many layers of primer followed by sanding I had to do to get things to this point. Someone who wasn't thinking ahead also needed to re-attach the trim tabs, which of course required even more smoothing work. Finally I felt I'd got it to a point ready to add the trim tab actuator fairings, made in much the same way as how Peter does them for his various builds, just much smaller..... . I also marked out where the different colour bands were going to run, hence the mess of pen marks....... I wanted to make the rib stitching a bit more pronounced (after I'd spent FOREVER trying to remove the printed detail I'd added -- yes I do like to make life hard for myself!). So I cut some plain decal strip and lay it over where the stitching should be. I also doubled it for a bit more of an effect. Not entirely sure how it'll come out, but it will need quite a few gloss coats to seal prior to the masking tape....... That's all for now. Just plodding along slowly! Cheers, Craig3 points -

Hasegawa 1/32 Fw 190D-9 Late "Brown 4"
ProfessionalAmateur and 2 others reacted to Thunnus for a topic
Beautiful quarter scale Dora, Hoss! Love it! Ok... I'm gonna be rushing through these next few painting steps. I'm leaving for a week in Hawaii and I wanted to get the hairspray chipping done before I leave tomorrow. The main fuselage color is the late war variation of RLM 76. It's a yellow-green color similar to RAF Sky. You can see that the Mr Hobby Aqueous version of RAF Sky matches the paint chip pretty well. Being described as a "fragile" color and prone to color fading, I'm going to tint the Mr Hobby Aqueous color with some tan (Mr Hobby Aqueous Hemp). Using a thinner:paint ratio of about 1.5:1, the Sky color is slow added to the fuselage, working small areas at a time. Using thin mixes, you can modulate the pre-shading effect exactly the way you want it. In my case, I want a very subtle, almost invisible to the eye, effect. Leaving the tail assembly for later, I move on to the upper fuselage. Covering large areas with a thin mix of paint takes time but it's a good practice of airbrush control, especially if you paint within panel lines and around objects. After the fuselage is done, I move on to the next color, which is the lighter RLM 75 Grey for the wings. The second wing color is RLM 74 Dark Grey. Both grey shades are Mr Hobby Aqueous colors. No masks have been used, just careful spraying with the Iwata HP-C Plus. After I let the grey shades dry for about an hour, I attacked the wing roots with a stiff paint brush and water. There's a little more paint over the hairspray than is ideal but I was able to eke out some chipping. I'll catch you guys later in about a week!3 points -
It's coming along beautifully, John. Looks awesome. Regarding the paint scheme, I went through a similar exercise with a 1/48 scale Mimetall Dora, Black 4 W. Nr. 500576 and ended up with the high contrast wing pattern and the brown RLM 81 under the wing leading edge, even though Jerry's profile indicated RLM 75. I also based the upper camo on Blue 12. It's always a puzzle. By the way, have you tried Mr. Color Rapid Thinner with their Super Metallics? I've been experimenting with the Super Metallics and have found that Rapid Thinner results in a very smooth metal finish. It's smoother and less grainy than when used with Mr Color Leveling thinner. Loving your build and learning a lot.3 points
-
In my humble opinion, most wartime photos show a lot more filth and grunge than chipping. It's easy to overdo chipping but not grunge. Grunge, not chipping, is the challenge.3 points
-

Pacific coast models Spitfire Mk IX Completed
Alain Gadbois and 2 others reacted to chrish for a topic
So, as if there wasn't enough work to do, I decided to add rivet lines (copying the Tamiya rivet lines) This'll add a little more work I guess. Thanks for looking3 points -

Another Hasegawa T bolt Bubbletop, my first LSP. November 12, 2022, It is DONE at last!!!!!!!!
TAG and 2 others reacted to Citadelgrad for a topic
Thank you. There is not a great deal of readily available information, but I started a thread This one photo from TAG in particular, shows where the penetrations are. Edit to add, here is my interpretation of the same area3 points -
Since I have quite limited scratch building skill, I have resorted to adapting and combining available items in order to come up with a better looking replacement for some dodgy parts. In my opinion, the propeller blades, propeller hub and spinner are all quite poor on the big Airfix 109. As I looked at reference pictures of the propeller hub, I knew that I was not up to the task of making one myself. After checking out some of the 1:24 offerings on the Model Monkey website, I ordered a spinner/prop hub designed to be used with the Trumpeter 1:24 Bf 109 kits, link below: https://www.model-monkey.com/product-page/1-24-messerschmitt-bf-109-f-g-and-k-spinner I was curious to see if I could use the propeller hub to cobble together a better looking unit that I could attach re profiled kit blades to. Is it super accurate? Of course not but I think this is a path to a much better end result (given my abilities) than what is provided in the box. See what you think and add your two cents! Lets take a look a my experiment... Below, kit parts fresh off the runners: The modified Model Monkey hub next to the original. In order to fit the spinner over the hub, the cannon barrel had to be removed. A little trim brings the MM replacement to the same size as the kit part. Test fit of the new hub and spinner (hub still un-trimmed, original size). Not a bad start! Reworking the spinner a little and re profiling the propeller blades, should yield a much improved result. I hope this little side venture is helpful to others building this kit. Thoughts/comments? Greg2 points
-
Macchi C.202 Folgore, PCM
themongoose and one other reacted to Phantom2 for a topic
Hi all! I´ll jump in with this old kit, it has been lying around for several years and I think this will fit the theme quite nicley. Untouched and all parts still in their bags… I guess most here know about PCM, but for those who don´t what this Is/was. The kit is designed in USA, Plastic molded by MPM, etch by Eduard and the Resin parts by (?) in Czech republic, box made in Hungary and the Decals are printed by Cartograf in Italy. A truly international effort! The kit is a true short-run multimedia affair; I can´t remember who made the resin parts, but they are very nicely made; The decals are as usual in these kits from Cartograf and very well printed, in register and very nice, indeed. The etched parts from Eduard; The instructions are nice as usual from PCM; There´s a very generous selection of eight different decal options to choose from. My choice for this build is the one with smoke rings and a white nose. Time to get building! Cheers! Stefan2 points -
While I am at it I've started another Toon tank conversion too: A Panther converted to the narrow turret mark F. The conversion set requires to carve off some details from the hull roof. Also removed the single crew hatch (drivers side) to relocate it and to add a second one for the wireless operator/bow gunner. Made some scratches and filled them with putty. Well, two of the Panther F really made it into combat in these May days in Berlin. With conventional mark G turrets, but mark Fs nevertheless. There are a lot of photos of these two white elepahants in the "Panzers in Berlin" book They were made by Daimler-Benz in Berlin, so we have got our diorama setting: A Panther F in front of a more or less damaged factory with a factory sign: "Daimler Benz. We are open!" Regards - dutik2 points
-
Here are some photos of a Finnish Bf 109: http://www.virtualpilots.fi/en/feature/photoreports/Mersujuhla2003/ Of note are the following photos: http://www.virtualpilots.fi/en/feature/photoreports/Mersujuhla2003/HPIM1990.JPG http://www.virtualpilots.fi/en/feature/photoreports/Mersujuhla2003/HPIM1996.JPG More photos of this aircraft here: https://www.lentoposti.fi/uutiset/juhlavuoden_messerschmitt_nayttely_avautuu Note this photo: Here is one photo of another Finnish Bf 109 taken from this link: http://109lair.hobbyvista.com/walkaround/167271/167271.htm Note the gap: http://109lair.hobbyvista.com/walkaround/167271/271mo-33.jpg This one is restored. Note the gap: http://109lair.hobbyvista.com/walkaround/611943/POF064.jpg This one was flyable. Note the gap: http://109lair.hobbyvista.com/walkaround/151591/151591-rudder.left.jpg Anyway, to make a very long and very boring story even longer and even more boring, as was mentioned elsewhere, the flanges were adjustable, respectively the distance between the flange and the fuselage could be adjusted. So... Radu2 points
-
1/32 Douglas TBD-1 Devastator by Trumpeter - TBD-1A in October 2023!
scvrobeson and one other reacted to Panzerwomble for a topic
Personally quite like the idea of a yellow wing Devastator , did the ol' Airflips 1/72 way back when , been thinking about a 1/48 re visit, but maybe a reasonably priced Trumpy one would be good .2 points -
1/32 Douglas TBD-1 Devastator by Trumpeter - TBD-1A in October 2023!
Pete Fleischmann and one other reacted to ivanmoe for a topic
You guys who are talking Coelacanth are really dating yourselves, as that was in the news a LONG time ago, not in living-fossil terms, mind you, but certainly from a human perspective.2 points -
Gentleman, I would like to clarify that Radu is a friend of mine and I respect and value his expertise. We just met with a different viewpoint. In my opinion the ZM kit is still the top dog and that will reming unchanged for a while. So please let us be respectful and constructive. Yes there is a transition gap and it is up to everyone how to represent it in scale.( I collected few pictures for you to consider), but nothing close to black 6. Please note the sharp overspray line , visible on a few and how smooth is the transition of the flange. Regarding the fix, I discussed this with Carl over the plastic itself and it is not that tragic as it seems. He is actually writing a build review. On my 109s I always scribe this area, so as the wing root, closed slats etc. Trick that I learned from Paul Budzik.2 points
-
Has anyone heard of a new B-24 being made in 1-48?
scvrobeson and one other reacted to cbk57 for a topic
Like Kevin said their norm is to do a 1/32 first. However I agree with you that a 1/48 Liberator would make a lot of sense. I actually think that 1/32 4 engine bombers are a bad idea and HK would be better on the liberator doing it and leading with 1/48.2 points -

1/32 Douglas TBD-1 Devastator by Trumpeter - TBD-1A in October 2023!
LSP_K2 and one other reacted to Alain Gadbois for a topic
Hey, most of us know things other than P-40 seat types and RLM late war colors! The first Coelacanth found was bright blue and obviously stunned paleontologists! I believe I always knew about this species from books we had at home. I will admit I did not know until recently how to pronounce the « Coe », when I watched a video on YouTube about it. Alain2 points -

1/18 Scale Blue Box F4U-1A Corsair Modification
Gazzas and one other reacted to geedubelyer for a topic
Hi Zorro. It's necessary to upload the image to a hosting site before adding it here. These forums do not permit direct uploads for safety and security reasons. The forums have been hacked in the distant past which caused mayhem and a huge headache for the mods. HTH2 points -
Are we still talking about ZM unfortunate tail section design here? Hi Radu, first of all thank you for hard work on the new 109, much appreciate that. There are not many among us so dedicated and focused on true research with an exceptional attention to detail as you are. So again, Thank you and the rest of the team as well. I was trying to stay out of this, but can not. This airframe (black 6) was restored into static condition after its famous accident in 1997. The structural damage, especially on the tail is still markable (sheet metal is distorted, most notably in the spine/tail connecting point). Here is the Avia from Kbely, yes it is an Avia, but the tail is still 109 specs. (German tolerances) Yes S-199 was pieced up from different parts, therefore the original condition may differ, however CS-199 wasn't, in matter of fact it is an untouched example, abused as a learning tool during her service. Despite the harsh treatment, there are no major gaps and most of all the flange is following the contour of the fuselage/tail transition. Why is it like that, because it was designed as a press fit. The flange is sliding on the surface under its own tension. If Black 5 would take off again, soon we would be able to observe staining created by lubricants seeping through the gaps from the adjustment bolt/shaft assembly. Is there a gap?, sure there is. Yet not a wavy ridge as it is in example of the Black 6. To use a compromised airframe as the manufactures standard might not be a wise approach. Cheers Martin Related discussion on Large Scale Modeller can be seen here.2 points
-

1/32 Douglas TBD-1 Devastator by Trumpeter - TBD-1A in October 2023!
Alain Gadbois and one other reacted to Pete Fleischmann for a topic
Wow. just like the Coelacanth- P2 points -

DigiHell & the F/A-18F Super Hornet - 3rd Wire & On The Deck
Greg W and one other reacted to themongoose for a topic
Moving right along on this one…seems like a long time since i posted however it has been unfathomable how long it takes to draw squares and rectangles so, at 1st i did all the squares and rectangles on the same sheet. Figured to pluck off what i needed and apply it. Holy cow, it took me a whole football game to do the light ghost grey on the wings and another Sunday afternoon game to do the top of the fuselage, that was definitely not going to work. I ended up taking time to learn how to draw in layers in the Silhouette Designer software. The LERX were then redrawn in layers. Costs 3x the masking sheet but way worth it for speed and how much better the alignment is now. ive got another 6 hours into drawing the fuselage sides so plan to print and apply those this weekend. Oh yes, it’s like watching paint dry it takes so long to do. I’m committed now tho!2 points -

Revell 1/32nd F/A-18E Super Hornet 'Vampires'
Loach Driver and one other reacted to tomprobert for a topic
Afternoon all, After over a year of being on and off the shelf of doom, this crossed the line last week. I bought this cheap on a well known auction site and upon opening the box, thought it looked pretty decent so with a wave of enthusiasm, dived right into the build. I'd read the horror stories about this model previously and usually take these with a pinch of salt, but sadly most of what you read about this kit is true. Before you can begin assembly there is lots of flash on numerous parts that needs removing, as well as many visible seam/moulding lines. The fit of some parts is rather 'interesting' and more akin to building a short-run kit than a supposedly state of the art 21st century kit. All of the interior bulkheads need reducing in height to ensure the upper fuselage fits the lower, which is well worth doing as it reduces the amount of filling and rescribing needed by 90%. The fit of the undercarriage is poor and this isn't helped by the rather hard-to-interpret instructions, but with with patience and lots of superglue you can get it to stand on its own feet with out too much issue. Saying that, the landing gear does feel a little weak - it survived a trip to my local model club the other night and is holding up fine so far, but time will tell... When I came to join the nose section to the rear fuselage (this is the natural break where either single or two-seat noses can be fitted) the join was terrible and the fuselage had a noticeable twist that needed lots of clamping and gluing bit by bit to eliminate. There was, in places, a 2mm gap along the underside of the leading edge extensions where they meet the fuselage and this meant the nose had the structural properties of a windsock - these all needed filling with plastic card to strengthen everything up. When I came to fit the canopy I found you couldn't close it because the ejection seat sat too high - the bottom 2mm had to be shaved off to close the lit. The instrument panel is too tall meaning the coming above fouls the forward part of the canopy - this then resulted in me breaking the canopy when trying to force it on in a moment of frustration. Thankfully Revell provided a replacement but beware! The solution was to trim down the instrument panel (again by 2mm) which means you can just about get the forward clear section to sit ok. I found the fit of the weapons really poor and every single one needed filling. The rear stabilisers are supposed to attach to the fuselage using the smallest tabs you can imagine which are completely useless - I got rid of them and used brass rod instead. The fit of the twin fins is probably the worst fitting part of the whole kit - the slots are far too big for the tabs and they slop around all over the place, leaving at least 2mm gaps all round. Again I pinned these with metal rod and built up the farings with Milliput. I wanted the wings extended on mine and again the fit of the outer wings was poor - the hinges foul the upper fairing/plate and need to be trimmed considerably for them to fit. I think the kit was designed for wings folded to be fair. There are some positives, however. The detail in the undercarriage bays knocks the Trumpter kit into a cocked hat, and panel and surface detail over the kit is really quite excellent. The decals are superb and bed down beautifully with setting solutions. Cockpit detail is good out of the box to be fair, and seat comes up well with some careful painting. Er... that's about it. The crowning glory of this build was when I had masked up the black areas to spray the upper grey, and when removing the masking tape paint started coming away resulting in most of the upper surfaces exposing the bare plastic beneath. This was despite a thorough cleaning and priming, as well as a mottle coat beneath. At this this point it very nearly went into the bin, but I thought I'd got so far as may as well strip it and repaint - thankfully the problem didn't repeat itself of that really would have been it. In short, expect a bit of a battle when building this kit - it's worth sticking with as it does make a very impressive model when done, but it's one well of a journey! This certainly is not my best work, but considering the trials and tribulations along the way I was just glad to get it done. All the best, Tom2 points -
Tempest Crossbow, Operation Diver, June 1944
Kagemusha and one other reacted to Suresh Nathan for a topic
Hi all. Just did this. It features the Revell/Special Hobby 1/32nd Tempest V & V-1. I wanted to do an in-action diorama with the Tempest tipping the Doodle bug into a spiral. This was successfully achieved in at least 16 V-1 intercepts. https://www.largescaleplanes.com/articles/article.php?aid=36982 points -
Kotare 1/32 Spitfire Mk.Ia (Mid), with Mk.I (Early) and Mk.Va announced
KiwiZac and one other reacted to Dpgsbody55 for a topic
Given New Zealand's association with the various P-40 from the E onwards, both in WW2 and their present restoration efforts on these, I'd have thought that Kotare would have this plane high on their agenda. And they'd be filling a gap in the market too. Should sell like hot cakes. Cheers, Michael2 points -

Pacific coast models Spitfire Mk IX Completed
John Stambaugh and one other reacted to chrish for a topic
sidewalls glued in, and dry fitting the stations to make sure the fuselage still closes up with the stuff I've added so far...so good Thanks for looking2 points -

Italeri Mc-202
Azor and one other reacted to alaninaustria for a topic
Got an update from Italeri today: they said it will be released before the year end and to watch for the update on their website! So, it could come anytime from now! Sure am looking forward to it! Cheers Alan2 points -
No shell ejector chutes on this so more cutting and swearing. Using a reference drawing I locate the shell ejector chute location. And here we go... Drill then cut. MDC ejector chutes are prefect for this. F.I.C.E.2 points
-
Some work on the pit has been nothing but an interesting journey. I'm raiding my spares bin for detail. White stryene strips place to floor instruments. I seat will be glued to the floor. 30mm cannon cover is an Aires resin for Bf109. The white rods on seat will be used to guide the harness in position. The mount in front of the rod is the trim wheel borrowed from an Bf109. Instrument panel smoothed to accept pe replacement. The Revell IP is almost identical size as the He100. Mount tabs are thin stryene strips for the dashboard comb. There's gonna be plenty of this action through out the fuselage assembly.2 points


