Leaderboard

Popular Content
Showing content with the highest reputation on 06/03/2022 in all areas
-
posted on ICM website https://icm.com.ua/aviation/yak-9t-sovetskij-istrebitel-2mv-100-novye-formy/13 points
-
This GPU has been a common sights on RAF stations for many years, it provides power to various aircraft like Hunter, Lightning, Phantom, Harrier, Jaguar, elicopters and many more, ideal to complete all the dioramas with RAF aircraft. Resin parts, 3D printed parts and decals for one version.9 points
-

In COD we trust - Grumman C-2A Greyhound - scratchbuilt
A-10LOADER and 8 others reacted to Starfighter for a topic
Almost no progress at the moment due to a severe lack of time... the rear of the fuselage requires a bit more attention, but we're getting there. The transition between fuselage and wings was pretty complex to design but I think I finally got ir more or less right.9 points -
OK, here are the before images with the goodies I'll be using The AM stuff will consist of the AML (ex Owl) conversion kit, HGW interior, belts and riveting set, a Yahu IP and Master brass barrels!8 points
-
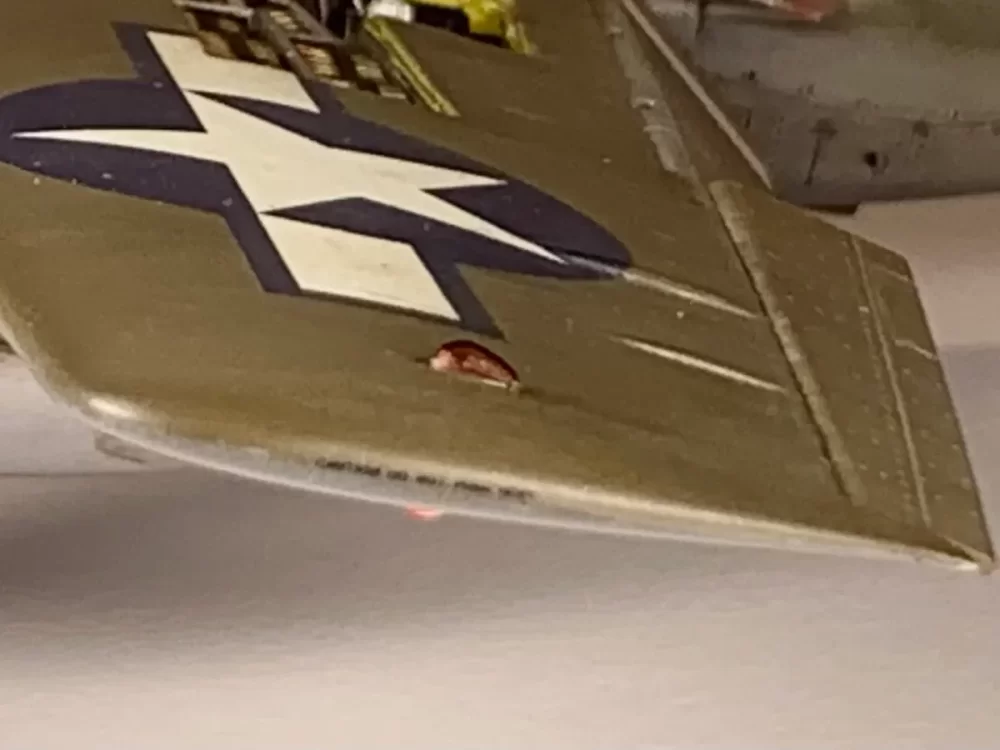
Thanks guys! Pretty pleased at not only the results of the paint repair but how straightforward it was to implement. When first confronted with this issue, my mind started turning over options in my head and the idea of using masks to cover the existing markings came immediately to mind. The Portrait craft cutter is such a handy tool and it makes things like this fairly simple to do. After the re-painted Ocean Grey area on the port side had dried, I re-painted the JJ code. I also put the walkways through another round of salt chipping. The walkways look better but the masks lifted some paint, most notably on the starboard side so I'll have to retouch some areas. Two steps forward and one step back means I'm moving ahead right? Another view of the port side markings. I've also performed some touch-up repairs to the fuselage roundels as well as re-spraying the red on the port fin flash.8 points
-

1/16 scale scratch built AT-38B Talon-The Smurf jet is back!
Azgaron and 6 others reacted to Pete Fleischmann for a topic
Busted these out! man- I made them a looong time ago- Anyhoo..While Timmy! And I sort out the front end, thought I’d concentrate on the back end..tail feathers and tailpipes, etc here is one of the nozzle/burner/flame holder/ turbine assemblies that will be buried in the fuselage- not surprisingly, they mate perfectly with the printed tailpipes the tailpipes will get wrapped in .005 aluminum..actually the whole friggin’ model will get skinned in aluminum. lots of skinning going on aboard these forums lately, which is awesome! I remember the first time I saw that technique (Timmy’s OV-10D over a decade ago! ) and skinning with aluminum was always the plan when I started this project 12 years ago- crazy. cheers P7 points -

Top Gun Maverick
JeepsGunsTanks and 5 others reacted to Scotsman for a topic
Each to his own ...6 points -

Infinity Models de Havilland DH.100 Vampire - first test shots
Paul in Napier and 5 others reacted to Martinnfb for a topic
6 points -
I believe the Trumpeter MiG-29C kit is basically a 9-13 I just finished this one.. Pics just taken with my mobile phone..5 points
-
So basically we have Loved it SO much I couldn't stop smiling an hour after I saw it & What an awesome movie, I'm going to see it for a 3rd time! To Worst moving Ive ever seen - SO unrealistic I couldn't sit through the whole thing & Horrible - so bad it ruined the 1st one. lol - VERY polarizing movie it seems5 points
-

Tamiya F4U-1 Corsair as a FAA Corsair I, 5F JT 150.......FINISHED
Sasha As and 4 others reacted to monthebiff for a topic
Flaps all fitted today after sorting my oversight on the painting of outer flap. A little adjustment on the weathering needed too blend everything in but much better. Also spent today painting all of the smaller parts and began preparing them for fitting. Obviously the large drop tank isn't going on the Corsair though! Regards. Andy5 points -
getting ready https://www.facebook.com/infinitymodels.cz/photos/pcb.125326516841175/125326333507860/5 points
-
Thanks Bevan! Cockpit painting is coming up but it'll probably wait until I'm further along in the painting process on the Tempest build. But here is a very minor update on the Dora... I got the replacement tail wheel from Eagle Editions. You can see the difference in tire styles. The photoetch foot pedals have been folded up and mounted. I cut off the very thin straps and replaced them with a little wider strip of thin brass sheeting. The Eagle Edition resin set comes with a PE/resin replacement for the canopy crank wheel.5 points
-

1/32 Rook Twin Seater Clover Camo - Ukraine
themongoose and 3 others reacted to Eagle Driver for a topic
And just like that, another Ukrainian Su-25 appeared in our mask line: Clover Camouflage - Su-25UB Ukraine Air Force Interesting with this bird is that it has been seen brand new, heavily worn or in between. A LOT of choices here.4 points -

ICM Fiat CR.42 CN from 377 squadriliga - completed
r0t0rdr1ver and 3 others reacted to Fanes for a topic
Well, there's the nice ICM kit in my stash. Then there's me looking for a new, but small project. But of course there has to be a small challenge (building the Falco shouldn't be one ) - an all black finish. The Fiat I plan to build is 377-4 with its unique markings - a black cat sitting on a crescent moon: and some scribbling on the engine cowling: This translates roughly to: "I can no longer sleep at night" - isn't that a perfect match for our nocturnal acivities? More on the project inventory and the first pictures from plastic will follow tomorrow. Cheers Joachim4 points -
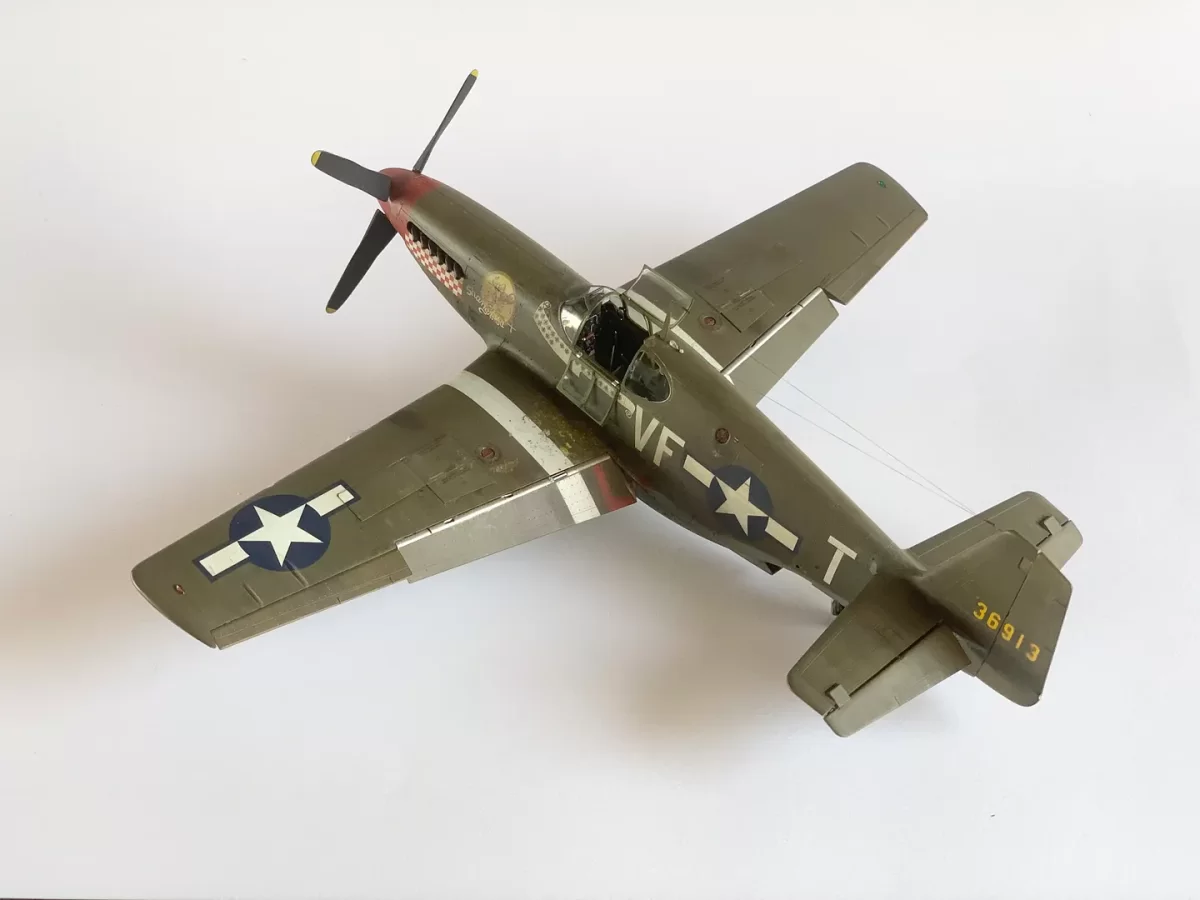
On to weathering, my area of least confidence and most to learn. After the decals and another gloss coat to seal them, I applied an oil wash using mostly burnt umber. I used black for control surfaces and access doors, etc. I followed this up with some careful sanding of the wing root areas and spaces around the ammo bays, trying to depict some chips and scratches. A wash of burnt umber was applied to give a base level of grime and foot traffic. A light flat coat (Mr Color GX114) followed. I'm in the "realism" camp when it comes to weathering philosophy. I'm going after a well used, well maintained, operational fighter look -- neither showroom nor scrapyard weathering. Here you can see the subtle scratching and grime around the ammo bay doors. I have not done anything to the doors themselves except a flat coat. I also added some scratches and chips to the high traffic areas around the black stripes, showing them worn to the paint underneath. Later on I plan to add some specks of primer color and bare metal with colored pencils in the heavy wear areas. There will also be some added dirt since photos of the plane show generous amounts of exhaust staining and general grime on the fuselage sides and wing walk areas. Here's a view of the starboard side. It's interesting in this view with the angle of the light and a flat coat how similar the NMF flaps and upper wing surfaces are in color. Here's the nose showing the results of the wash and flat coat. More later. Thanks again for looking. Comments and critiques are more than welcome.4 points
-
Life would be pretty boring if we all liked the same things Cheers Dennis4 points
-

Top Gun Maverick
Martinnfb and 3 others reacted to BloorwestSiR for a topic
Gorilla Glue?4 points -
Friday? Again? Heavy metal! Alright, finally done with the cammo! While masking for the dielectric panels I noticed I had made a great dodo! I had switched the tailfins! I painted the right one as the left one and vice verse! I'm just going to live with it....no way I'll redo the fins!!! It looks good enough! Who'll notice? The nose got dark gray too. Heh, the Flanker would look good with tilted fins . Now for the overspray... I just polish with a 2000 grit pad. Before.... After.... Now masking for all those metal surfaces. Then I shot Alclad Gloss Black Base. And here the canvas is ready for metal effects,heatstains and what hve you Cheers!4 points
-

Miss Jolly Roger
Derek B and 2 others reacted to blackbetty for a topic
Finally picked my next project, the Islandic fine art Buccaneer its a full resin kit and has been discussed on this site before, so i am not getting into this again its pretty big3 points -
Hello Here's my A6M5 fromTamiya. I built the A6M2 some years ago so no surprises. This is a great kit. Humbrol paint, handbrushed as usual. Paint stripping is done with aluminum paint and a sponge. Aotake from AK interactive 3rd gen. Great paint. Only few addons: Berna decals and guns from Master.3 points
-
The kit comes with a clever system of rods and gears to align the weapons stations with the direction of flight. I thought the pivot points were fairly loose, I decided to make some aluminum bushings to make the fit a little more snug. While the bushings I made will work great at tightening up the pivot points...and while I was patting myself on the back for my genius (Wiley Coyote) I found I'd lost both pivot point for the right wing. I searched for hours, cleaned out the garbage and looked everywhere I could imagine I may have put them. Nope, I had to knuckle down and make a couple of new ones from sheet and rod plastic, here's the result of all that. here's the kit parts with the aluminum bushings ready for the left wing; Aaannd my home made parts (made necessary because lose things and am an idiot) Viewers may notice I also cut the slot for the pylon key on one of them on the wrong side first time around but am still using to part. Thanks for looking3 points
-
After masking the undersides I airbrushed the Ocean Grey, for this I used Xtracolor X6, and it turned out rather nice, next up some paint fading. Cheers Dennis3 points
-
Still chugging away on the Tornado. So far, although with a bit of flash here and there, fit has been perfect. My resin seats from Sprue Brothers showed up yesterday saving me monkeying around with the brass P.E. seat details in the kit. The assembly manual (I don't read instructions) calls for a hefty nose weight, I super glued two 14 gram weights into a large nut then glued that to the rear of the station the mounts the radar major assembly begins; I forgot to get pictures of the gear bays under construction, they go together perfectly though. Thanks for looking3 points
-
Cool pic, Jari! Here's a couple showing how they did it bei der Luftwaffe. Also seems pretty labor-intensive, especially painting that entire spinner cone with such a tiny little brush. - Thomaz3 points
-
Did someone say "Quad Otter"?3 points
-

Mirage 2000D [KH 1/32]
Loach Driver and one other reacted to discus for a topic
Hello Another KH M2000 twin seater : this time the D variant: Xtracolor paint X110 et X005. (X001 and Mat varnish for the nose cone. Pod Damoclès, exhaust, and other stuff 3D printed by Eric Jolly. Missile launchers and pylon for the pdo from L'Arsenal Mix of Berna & FFSMC decals Cockpit has a Quinta studio set of 3D decals. Wheels are from Reskit and the drivers from Reedoak. The GBU-22 are from the Trumpeter US weapons set.2 points -

ResKit F-111 cockpit modules (1/72, 1/48, 1/32)
scvrobeson and one other reacted to Dennis7423 for a topic
All- I recently received my F-111 cockpit module from ResKit in Ukraine. It was their first venture into transparent canopies, so I was curious what was going to be in the box. I ordered one to compliment (and hopefully enhance) the Hobby Boss 1/48 F-11E kit I purchased a while back, which has shape issues in the cockpit area. Upon opening the box, I was delighted to see their typical grey, well cast and complete resin, and injection-molded canopy parts! They didn't even attempt clear resin, they created a mold to make new transparencies. Now, I haven't had a chance to check for shape accuracy, but everything sure looks outstanding in the box. It was a nice package, and a great upgrade over the kit parts. - Dennis S. Thornton, CO USA2 points -
For those in the US, where do you source your resin from? I purchased an Anycubic printer and resin, but the resin hasn't shown up yet. Dave2 points
-
+1, which resin are you looking for?2 points
-

Question about the Kitty Hawk 1/32 T-28 Trojan
scvrobeson and one other reacted to Out2gtcha for a topic
There are no such offerings for the T-28 in AM that I am aware of. However, If it were me and I was doing a shiny new civi bird or a resto war-bird I might consider taking some clear green and just masking and spraying the inside of the canopy.2 points -

Top Gun Maverick
Ryan and one other reacted to thierry laurent for a topic
Simple when the 'force' is with you...2 points -
That is a bugger I used Mr Surfacer for most of it - The main IP would benefit from a load of PE, (Lightning forming the basis of it) , Bottom line - It's a slog!2 points
-

CMK LTF5b torpedoes Ju88/Ju188 pylons?
Kagemusha and one other reacted to Isar 30/07 for a topic
One thing we all face from time to time: Searching up and down on a certain project but no information available what we are looking for. Ok, let´s do this without the questions answered (if I didn´t get an answer on my questions, then no one can say that I´m "wrong") - and after completing the project someone comes around and has the answers I was searching for.... Modeler´s fate. One last note of Bodo Diemers memories: When based in Norway, his Ju 88 A-17 coded 1H + NH (strange enough he describes his A/C as the one without the BoLa BUT the crew still 4!) was equipped with FuG 200 in late 1944. Happy to be enabled to detect allied convoys (and no more flights for hours and hours without any contact to an allied convoy) from now on, they soon realised the other side of the coin: Their so equipped could be detected by the allies as well. As soon as they realised this, the FuG 200 was no longer used (but still mounted). Let me see, if I can help Thierry. It might take some days. Reimund2 points -

The Mighty Eighth Over Europe Group Build Gallery
Model_Monkey and one other reacted to BradG for a topic
mc65 has bought the cavalry with him, finishing a very nice Mustang in famous markings. Great job mate. Link to build thread;

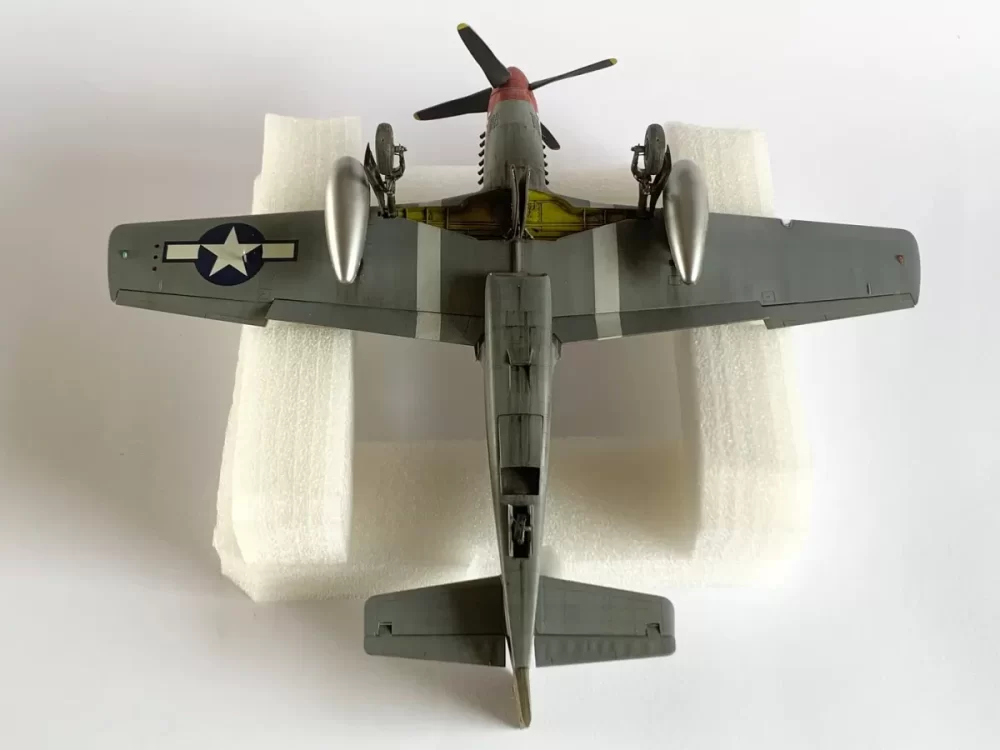
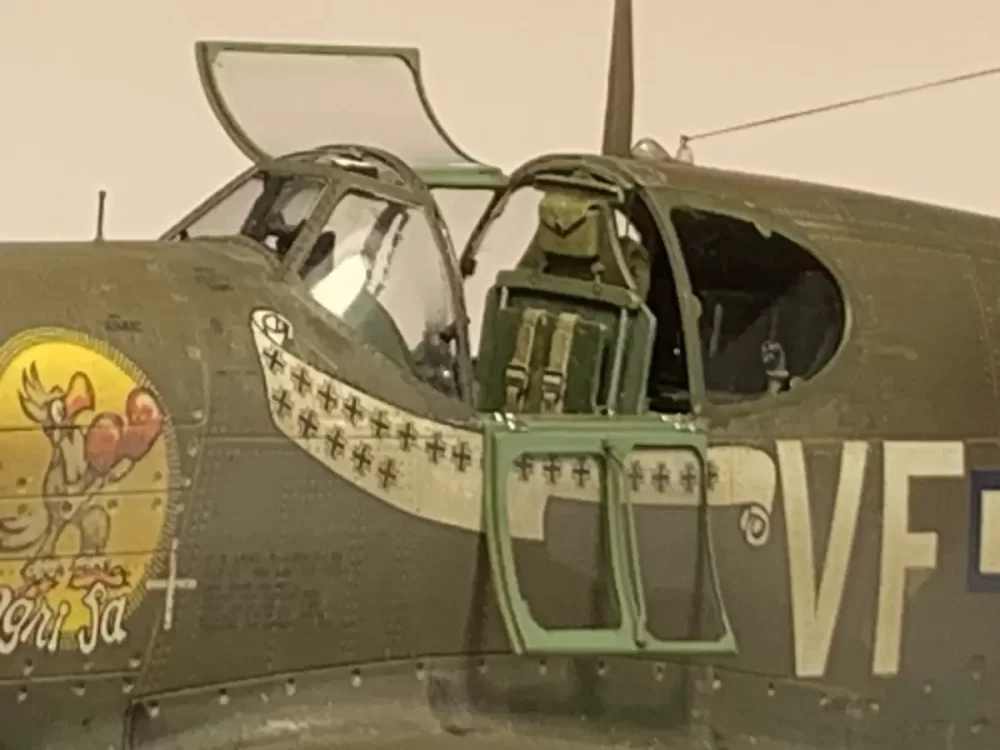
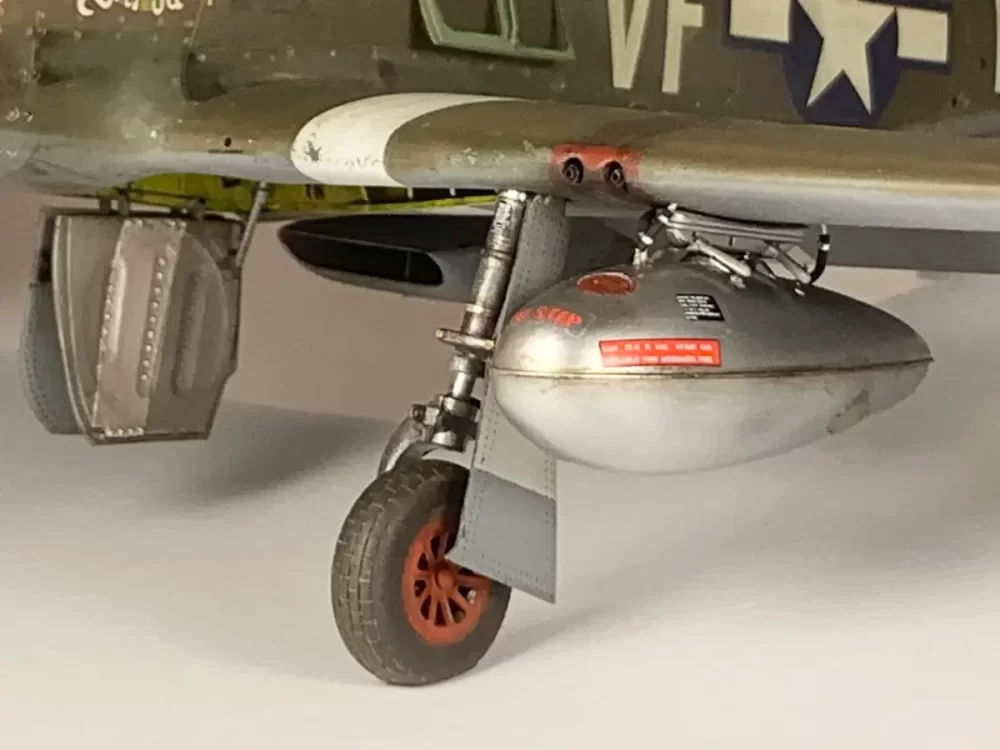
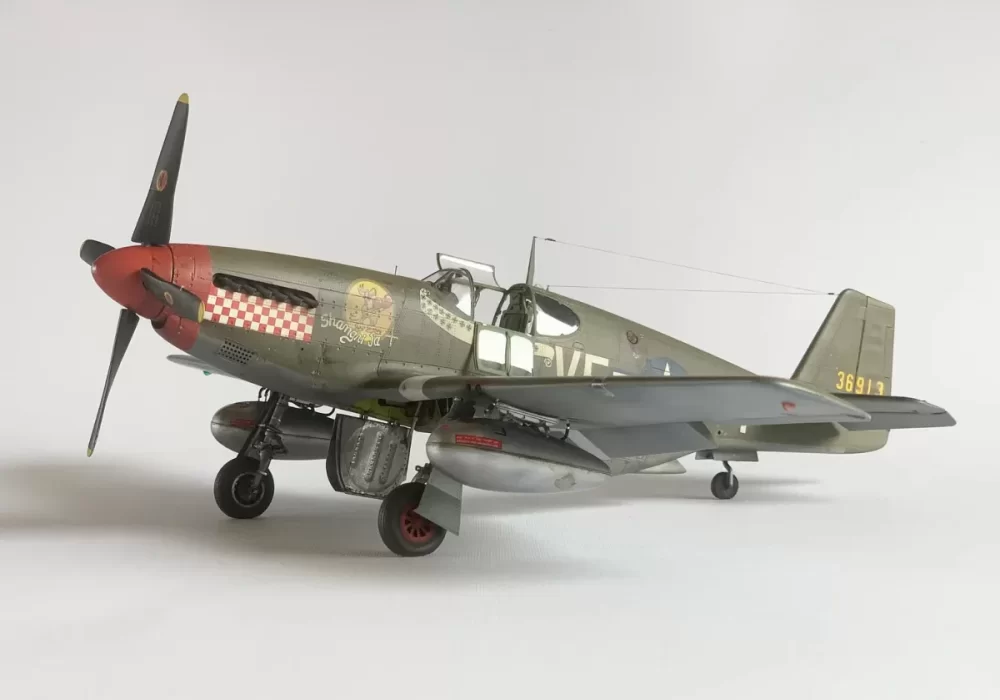
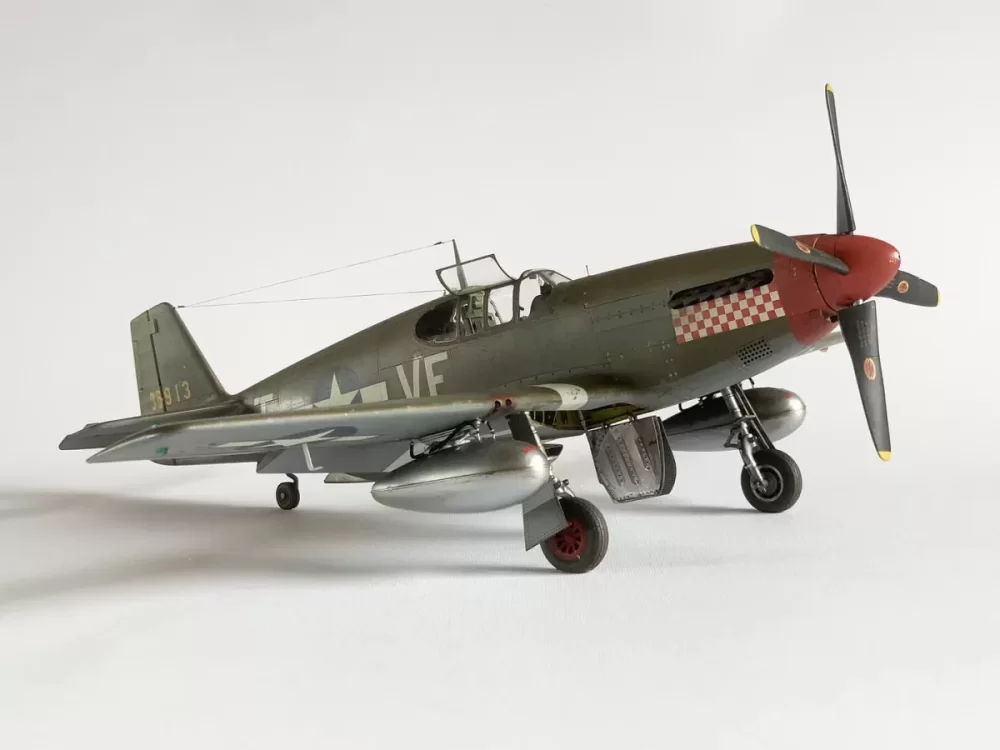 2 points
 -
Have a flick through here https://www.stlfinder.com/3dmodels/aircraft-tripod-jack/2 points
-

3D resin printers - do they smell ?
scvrobeson and one other reacted to LSP_Kevin for a topic
These just arrived: I'll try another test print soon, and report back on their efficacy. Luckily they're pretty cheap (I paid AU$40 with free next-day delivery on Amazon), so I don't feel I've wasted a ton of cash if they don't work that well. Can anyone recommend a good source for pre-supported STL files for a rookie like me? I really have no interest in printing Elegoo's test pieces again. Kev2 points -
The top of the mark will be a Tiger I with interior. That said, a couple of Shermys with interiors would prolly be good sellers.2 points
-

Detail painting 1 to 1 scale
thierry laurent and one other reacted to adameliclem for a topic
Especially since the spiral has already been masked with tape. The photographer probably thought that posing his model with an artist’s brush would make for a better pastoral scene. Cheers, Adam2 points -

Top Gun Maverick
Jack and one other reacted to R Palimaka for a topic
Saw it last night in IMAX, in a D-Box recliner ( basically an enormous armchair with a huge vibrator in it ) It was precisely what I expected and wanted, and more. Realistic, maybe not. Not all the characters completely worked for me either, but that’s just me. I thought the inclusion of Val Kilmer was perfect. Entertaining…in bucket loads. Some excellent humour too. We’ll see it again. It’s interesting, my partner Ruth went with me and absolutely loved it too. I’ve subjected her to a few war films, and she said that it totally reminded her of 633 Squadron. The secret mission and rehearsals, an almost impossible to hit target, the winding approach in a valley at low level, and a number of other similarities. And she’s absolutely right! It didn’t even occur to me. And it begins and ends with a Mustang, what’s not to love? Oh, and Jennifer Connolly… Richard2 points -
CMK LTF5b torpedoes Ju88/Ju188 pylons?
nmayhew and one other reacted to thierry laurent for a topic
Found it on the web! Look here: https://forum.warthunder.com/index.php?/topic/547239-2130123-missing-lt-f5b-torpedoes-on-the-junkers-ju-88-a-4/2 points -
CMK LTF5b torpedoes Ju88/Ju188 pylons?
AlanG and one other reacted to thierry laurent for a topic
Sure, Here it is: There must be a technical manual somewhere as John showed me one view coming from what looks like an official document. It had the FTV-Dru B88/62 reference. I'm still trying to identify it. Hope this helps Thierry2 points -
Miss Jolly Roger
Derek B and one other reacted to blackbetty for a topic
some reference in book form (lots more on the web) and some aftermarket2 points -
The idea for this one is from an article on the Dash 7 in an issue of Air International and is based on an early (1967) concept for a larger successor to the Twin Otter which eventually after a big rethink (in the 70's) became the Dash 7. So this model is just a bit of fun being in between the two as a growth of the Twin Otter (30 Seater?) with Dash 7 influences as it's not as big and powerful as a Dash 7. Build was started in the Matchbox 50th Anniversary Group Build over on BM. Maybe if the Mojo holds up I'll have a go at a Dash 7 in 1:72 but before that I should really have a go at fixing up the Hobbycraft Dash 8 and even stretching it to a -300 and if really brave later on maybe have a go at a Q400.2 points
-

Revell 1/32 P-51D-5NA Mustang
Greg W and one other reacted to Nikola Topalov for a topic
Hi gents, Weathering has begun! First was the colour modulation (which I should have done before decals but life ain't complicated enough so I like to spice it up a bit ) Lesson learned. Next are washes, post-shading, oils, pencils...2 points -

Another Hasegawa FW190. I FIXED IT!
scvrobeson and one other reacted to Woody V for a topic
Kev, Over the top after the decals have completely dried. "Softener" doesn't quite describe it, it's more like a "liquefier". Decals are made from lacquer and since dry lacquer can be re-wet, the thinner essentially turns decals into liquid/gelatinous lacquer paint. Sounds scarier than it is. Not sure if this would work over water based paints.2 points -
Well, all the miscellaneous decals are on so the next step is to get a satin clear coat on see what horrors await me under the canopy masking. But first, if you remember from our previous episode I mentioned that there was some silvering to be dealt with and poking holes in it with a needle and then adding Micro Sol was the way to go…. WRONG. I did a little test and discovered that a wet coat of Mr. Color Leveling Thinner is so much faster and effective. MY TEST On the right is a spare piece of the rivet skins applied with water only on bare styrene. It may be hard to tell in the photo but it is completely silvered (a air gap between the decal and plastic) and is barely attached. On the left is what happens with a wet coat of Leveling Thinner applied. You will notice that the clear film, which is lacquer, turned into gloss clear lacquer and is completely bonded to the plastic. All the milky looking areas are reflections coming off the wavy surface of the Hasegawa flap. Whole model hosed down with thinner and stencil decals applied. And of course it just wouldn’t be one of my builds without a busted antenna post. So that’s where I am as of today. Stay tuned for the further adventures of man vs. Hasegawa.2 points
-
I was hoping to be able to power on through the rest of the build from here, but I've been distracted by setting up my new 3D printer: And after some nerve-wracking fumbling on my part, I was able to produce this: It's just the test file that Elegoo provides on the USB stick that comes with the printer. Now that that's out of the way, perhaps I can get back to the Mustang! Kev2 points
-

Top Gun Maverick
TAG and one other reacted to Phartycr0c for a topic
I went with the better half to see it last Thursday. Since we have been together she has been subjected to aviation crap in one form or another, in fact we discussed the original Top Gun as one of our first nervous "look we've got something in common" chats. Fully taking on board the fact that TG has more than its share of Hollywood licence (Final Countdown anyone) the relase of Maverick with all its enhanced graphics was much anticipated. Fast Forward to last Thursday without issuing a spoiler for anyone who hasn't seen it, in one scene my good lady curled up in her cinema seat into what could only be described as a foetal position and at the top of her voice screamed "EJECT!" I must admit I half expected all of the seats around me to disappear through the roof! Possibly an indicator as to how immersive it can be, and that was in "normal" mode. Next up Imax!2 points -

A swarm of Mossies!
HB252 and one other reacted to Bruce_Crosby for a topic
Hi Guys, I'm having another break from the Mossie builds so here's progress so far. I managed to drop the front end of one generator somehow. So I used one of the gun parts and some plastic sheet details to make another one. I'll be using Brassin guns so it's no big deal. Some painted do-dads to go on the engines. Do-das fitted. Engine fitted to the first nacelle. Coolant header tanks assembled and painted. Brassin resin exhausts fitted. A lot of struggle and swearing as they just don't fit! Header tank in place too. Coolant pipe from header tank to pump fitted, Engine nacelle test fit. Two engine test fit. And here we are with all the engines test fitted. The eagle eyed among you will notice the bottom coolant pipes aren't fitted on the top Mossie in the photo, the viewing isn't in sequence with how I actually built the models. Hope you've enjoyed it so far. Regards, Bruce Crosby2 points