Leaderboard
Popular Content
Showing content with the highest reputation on 04/14/2022 in all areas
-
Got the venom back on the desk and managed to get cockpit/cabin extended Got it glued in and braced on the bottom side. got fuselage mocked up again after cockpit/cabin extension to see about how to fill in the gaps now on the fuselage. and next to my UH-1N gunship hope to start making more updates!9 points
-

Fw-190 A-8/ R-2 "Sturmbock" Revell 1:32
Archimedes and 6 others reacted to Sasha As for a topic
The engine is finished. It will be on display as a separate piece. Then hidden in the bowels of the 190. )))))7 points -
Hi everyone I have a bunch of new products coming out in the next few weeks and the first two are ready to order First up, Prop Logo's 1/24 @ £10.95 1/32 @ £9.95 1/48 @ £7.25 Each set includes: Individual Propeller manufacturer logos and specification decals in 1:48 scale are designed for kit, modified or scratch built models and represent many prop manufacturer logos found on piston powered WW2 military aircraft Suitable for both Allied & German aircraft, featuring manufacturers like Hamilton Standard, Rotol, DeHavilland, Curtiss, Aeroproducts and VDM. Each logo is separate on the decal sheet with a minimum of carrier film Fully illustrated instructions _______________________________________________________________________________________________________________________________________________________ ...and also as our RAF set was one of the first sets we ever released, I wanted to remaster them with additional instruments and most importantly in full colour, these have come out really well.. 1/24 @ £8.25 1/32 @ £7.25 1/48 @ £6.25 Each set includes: Instrumentation as found in the Spitfire, Hurricane, Mosquito and common to most RAF types Instruments for flight control, navigation, engine, oxygen and ancillary management Each instrument is separate on the decal sheet with a minimum of carrier film Includes a small sheet of optically clear replacement simulated instrument glass Fully illustrated instructions I hope they are a welcome addition to our hobby Next week will see two more new releases in the 1/24 Harrier GR1 / 3 PE panel & decal set for the airfix kit and the 1/18 Fw190-A8 PE & Decal cockpit upgrade set for the Hobbyboss kit, shortly followed by a range of Seat Belts for RAF, USAAF & Luftwaffe aircraft in 1/32 & 1/24 busy times All the best Peter6 points
-

1/35 ch-47 chinook’s (yes two) :)
blackbetty and 5 others reacted to matt_1185 for a topic
Also small update on the chinook after starting fuel boom I figured I need to try and just convert whole thing to MH-47 ! so I got started on the nose. This is just a rough draft but now I know it’s “ doable“ lol made from air dry clay! It was easy to shape and it dried rock hard and sanded like a dream! that’s all for now on this bird6 points -

SH / ICM AH-1G early cobra in 1/32(we got personality now)
Buster99 and 4 others reacted to oppenheimer for a topic
Hello everyone, i know in this forum people goes crazy for airplanes in large scales but i go crazy for helicopters in 1/32 or 1/35, so i will post this work. So far the cockpit is done, the only after market used is the instrument panels from quinta studio, the rest of the resin and 3D printed pieces came in the box here is the box of this kit the cockpit so far the fuselage fitting is excellent, so far not a single drop of filler putty on this one5 points -

1:18 21st Century P-51D Conversion to "B" Model With Metal Finish
Javlin1 and 4 others reacted to patricksparks for a topic
A little progress on the cockpit, I made up the throttle controls, the cover is made of aluminum, the levers aluminum sheet, the knobs styrene sprue turned in my hand drill, again using "AIRSCALE"'s decals to decorate, what a boost !!! The letters on the mixture and pitch control levers are dry transfers that I put on clear decal film and punched out into round decals to fit the knobs. I have installed the throttle and side console into the cockpit, I now have to start making the details for the right side...5 points -
Frank, Mike, John, thank you for your kind words Before resuming the build, we’d take the opportunity to refine and to add some details to the already accurate and precise mouldings. This rather simple extra task would add much to the realism of the model. The underside fairing - the infamous ‘nun’s hat’- is correctly shaped but would need some extra detailing. 1-The two parts of the fairing should be separated and the upper lip refined and thinned (red arrow) 2-I suspect the small gap (yellow arrow) is added in provision for the belly tank of the P-40C. It's not present on the earlier variants and should be filled. 3-The crude moulded fuel and oil dump lines are removed and replaced with appropriate tubings. The 2 parts of the fairing are separated Upper lip thinned, gap filled, drain tubes Primed The electrical tab on the left wing only applies to the USAAC planes. On the export H81, it should be removed … …and replaced by an external tab on both wings. The windscreen on the H81 is a delicate affair. The armoured glass is installed first. Like on the actual export H81, no gunsight is provided in the kit as it was up to the recipient air forces to provide the appropriate sight. Our RAF Tomahawk will get a Barr&Shroud MK2 salvaged from a defunct Fly Hurricane mounted on a sprue cross-bar. When the mods are completed, the main components of the airframe are assembled, the joints checked and ready for a final coat of primer before rolling to the paint shop. Until then keep well. Cheers, Quang5 points
-

1/24 Airfix F6F-5 Hellcat "Kicked Up A Notch": New eBook Now Available!
BrentE and 3 others reacted to chuck540z3 for a topic
April 12/22 Well, I’m finally done! This model took me almost exactly a year to build, which is normal for my past efforts, including not much modeling during the summer months, which here in Canada isn’t very long. I really enjoyed this kit, because it had just the right amount of quality, details and flaws to keep me challenged throughout. Before I forget them all, here are a few of the main positives and negatives: Positive · Excellent detail and I didn’t have to recover hardly any fasteners or panel lines · The kit is fairly accurate · Big! All of the detail is easy to see · The engine is a detailed model in itself · Stressed skin on fuselage and wings · Great instructions, although there are a few errors in Step 140 and 141. F24 is F28, F25 is F29 and F37 is F41 · The aftermarket is strong for this kit, as used below Negative · All large parts are very rough, which requires careful sanding to remove, while still retaining the stressed skin look · Just about every join is too tight, so most joins need to be altered by sanding and trimming to fit · There are a lot of parts and detail that will never be seen again unless you open up extra panels, etc.. (eg. Behind the seat radio and tanks) The instructions should alert to this, before you put in a lot of wasted effort. · Seams lines are significant in almost all of the parts · Tail antenna should have been a separate part. It’s always in the way and I’m surprised I didn’t break it, despite banging it around many times · Airfix customer support was poor. Despite a clearly miscast Sprue F that had flaws (short shot the above parts F28 and F29, amongst a few others), Airfix made me pay for shipping a few replacement parts. It’s not the $20 I had to pay, but the principle where they really dropped the ball and took no responsibility, that I found so annoying To recap, here is the laundry list of the kits used to create this Hellcat: · Airfix 1/24 Grumman F6F-5 Hellcat Kit, A19004 · Aerocraft Brass Landing Gear · Airscale Instrument Panel · ANYZ Spark Plugs and Wiring set, AN011, AN013, AN015, AN016, AN017 · ANYZ Dials, Knobs, Switches and Cockpit Handles. AN028, AN029, AN030 · HGW Seatbelts, 124511 · Barracuda Diamond Tread Tires/wheels, BR24412 · Eduard Canopy Masks, LX006 · DN Models Paint Masks for Insignias, Letters and Numbers · DN Models Paint Masks for Canopy, Wheels, Lights · Fundekals Grumman F-6F-5 Hellcat Decals · Adriatic Models Cockpit Resin Details And other than extensive research on the internet, this was my main reference: · Detail & Scale, F6F Hellcat, by Bert Kinzey and Chris Sakal My build thread for this model is here at LSP: 1/24 Airfix F6F-5 Hellcat, Kicked Up A Notch And now the final pics with a few comments. The F6F-5 Hellcat did not enter the war until roughly the last 6 months, so although well used, they were not around long enough on carrier decks to be abused with heavy weathering like the F6F-3’s, although the big fuel tank that was interchangeable with the "3's" was usually filthy. They were also mostly dark gloss blue in their entirety including the wheel wells, so showing off color contrasts on such a dark scheme is difficult, which is why I chose the VF-12 fighter squadron of the USS Randolph during May of 1945, which was disbanded only 4 months later in September after the end of the war. While this scheme is very popular and not very unique, it does show off a lot of contrasting white and the DN paint masks for this scheme were readily available. Since I put so much effort into the engine area, I left most of the cowling panels off as it would be "under maintenance" and due to the modifications I made to the engine area, they wouldn't have fit anyway. First a fun one, to show how big this model is with its 21” wingspan and 17” fuselage, which was hard to photograph in its entirety within my fairly big 26” photo booth I only use for final pics. Here it is (along with the edges of the booth in the background), next to my 1/32 Tamiya Spitfire, which appears tiny in comparison. And a bit of a walkaround Yes, Hellcat wheels toe-in a bit... Rear antenna spring was made from fine computer wire twisted around a needle. Tiny hole was drilled using a #80 bit, and the line is dark nylon sewing thread. Antenna base extension and insulator was made from wire insulation, while side connection to fuselage is a 90 degree ANYZ connector that was drilled out and attached with a pin. It is critical that you trim and dry fit the navigation light lenses before painting, because they don’t fit at all without doing so. The blue/green light against a dark blue background obviously doesn't show up very well. The tail hook assembly works really well, although this may be the last time anyone sees it The cockpit is really hard to photograph, but can be seen very well with the naked eye at this large scale. Here’s a few attempts to show off the beautiful Airscale PE/ Decals and Adriatic Resin improvements. And a few of the undersides, which will likely never be seen again with the super fragile antenna now installed on the top. This is very hard to photograph because it looks too clean under bright lights against a dark background, so you’ll have to take my work for it that it’s a lot dirtier than it looks. This angle shows those oil lines into the firewall just left of the air intake I had such difficulty in locating earlier. Thanks to Craig’s help, I think we sorted them out correctly now. So that’s it for this build and the only dilemma I have now is where the heck I’m going to place this big pig in my modeling room! I have no shelf space left, but I’m sure I will find somewhere to place it until I start my next project, likely next October or so when the weather becomes cold again. Until then, I will always be lurking these forums for tips, comments and your interesting builds. Cheers, Chuck4 points -
Here are some screenshots from a home movie taken in the 1930s...4 points
-

Tamiya Factory Shop
Landrotten Highlander and 3 others reacted to LSP_Ron for a topic
This would be a very fun and very expensive place to visit. Warning, turn off your sound first.4 points -
SH / ICM AH-1G early cobra in 1/32(we got personality now)
matt_1185 and 3 others reacted to oppenheimer for a topic
here i am again, let see how this experiment will work at the end, differents shades of green as a base coat some white and black splashed to simulate faded and weathered paint at the end4 points -

RA-5C Vigilante - scratchprinted
Landrotten Highlander and 3 others reacted to Starfighter for a topic
Hi everybody, it's been a while - sorry for replying so late! I actually had the dubious pleasure of getting Covid after the show (probably even caught it there, luckily none of my buddies were affected...) and did not do any digital modelling since. Working on a computer somehow was too much for my brain... but it's getting better. On the other hand, I have spent some 110 hours at my workbench during my 9 days of confinement which enabled me to make some serious progress on anotehr project... but more on that later. I first have to catch up a lot of work in the office, once that's done and dusted I'll get back to the Vigi. The new wings will require quite a bit of work but that should be no problem. Mattcour, the canopies will 3D printed using clear resin. Engage, there are no plans to sell the STLs (which is totally out of question) nor to print and sell the parts. 120 hours printing time rfor the fuselage parts alone... If you buy me two new printers, say a Sonic Mighty 8 K for the large parts and a Mini 8K for the small parts, I may change my mind though...4 points -
Speaking of books, these six just recently arrived for me to review. And I added a few of my own as well.4 points
-
SH / ICM AH-1G early cobra in 1/32(we got personality now)
Buster99 and 2 others reacted to oppenheimer for a topic
blending everything with the final color, looks good to me, opinions welcome as always3 points -

1:18 21st Century P-51D Conversion to "B" Model With Metal Finish
patricksparks and 2 others reacted to easixpedro for a topic
Good lord that's impressive. It's like watching Peter's work all over again!3 points -

Science
Landrotten Highlander and 2 others reacted to Rockie Yarwood for a topic
After careful study of that recording, I believe we can conclude that Nesyamun was a model builder. That is exactly the sound I made when the X-acto knife rolled off the bench and buried itself in my thigh.3 points -

Tamiya Factory Shop
easixpedro and 2 others reacted to b757captain for a topic
I went there quite often when I lived in Japan. Nice store, three levels if I remember, ground floor was kits and accessories, basement was R/C and second floor was a racetrack and building area where they had mentoring and tutoring sessions.. They carry everything Tamiya currently produces, so unfortunately no F-16 Thunderbirds while I was there. And lots of superb display models. Good prices too, I think I picked up a Corsair and P-51 for about $20 or $25 off anywhere else.3 points -
Pretty grimmy bird.3 points
-
I got a little progress today. Glued the engine, and cowling to the fuselage, got some color on the cowling, and prop, and assembled the flaps (not installed, just test fitted). The wife went with her sister to the Disneyland resort and left me home. She told me to fend for myself for dinner, and go to McDonald's or something. Yeah, right...I cooked for myself instead. That'll teach her to leave me home alone...LOL EDIT: sorry Maru.......3 points
-
LSP Engines
Trak-Tor and 2 others reacted to chuck540z3 for a topic
My 1/24 R2800, finally installed in my Hellcat. Cheers, Chuck3 points -
1/24 Airfix F6F-5 Hellcat "Kicked Up A Notch": New eBook Now Available!
Squizzy 78 and 2 others reacted to chuck540z3 for a topic
Thanks Guys! Thank you so much Mike. Your kind words mean a lot! Thanks. How about this pic, next to a 1/32 Tamiya Spitfire? As mentioned, I'm now DONE and took a few pics today, which are now in the RFI forum here: 1/24 Airfix Hellcat, Kicked Up A Notch Now a few more selected pics to close out this build thread.... Hellcat wheels actually toe in a bit... Thank you everyone for your kind words of encouragement, tips, and info to make this build so much fun. Cheers, Chuck3 points -

RA-5C Vigilante - scratchprinted
Starfighter and one other reacted to wunwinglow for a topic
The 'lines' are on the surface. The resin below the surface, with a decent cure, will be solid, so once you have polished these off, yes, you can get it smooth and clear.2 points -
Engines? Here is my 1/18 P&W R2800-8 for a F4U Corsair (currently under construction). This engine is scratch built in its entirety.2 points
-

1:18 21st Century P-51D Conversion to "B" Model With Metal Finish
patricksparks and one other reacted to airscale for a topic
been meaning to drop in for weeks now and say how impressed I am Patrick, you are doing an incredible job here and for me it is like reliving my P51C build a big difference is I had the luxury of PE to make up loads of bits and you are just turning them out by hand which is waaay harder. The skinning & details look magnificent and I tell you this, once you start building using in metal you never go back... wonderful to watch Peter2 points -
The nacelles and wings are pretty much done, a couple of minor issues to be addressed but I'm reasonably happy with the final result given the battle that it's been! They've been primed and one has had a thin RLM76 coat applied: The reference picture seems to show a fairly heavily mottled G4, I think I'm going along with something like this one, especially since it's in the right time frame and was probably a converted G2 as I think the one I'm modelling was: Luckily I have masks already drawn from earlier Bf110s, so once I run them off on the Silhouette I should be able to crack on.....2 points
-
.thumb.png.64af68ce3763f9af8a91e71374ce741e.png)
SAAB J-29F/B from Fly model
Christoffer Lindelav and one other reacted to Ali62 for a topic
I do not even have a kit as yet, but when you have these sets available I will certainly purchase some. I do not believe any other sets or corrections will be as accurate as your ones due to the back up information and research you have and are doing, well done. Ali2 points -

Science
Rick Griewski and one other reacted to GreyGhost for a topic
So the 3D printed Velociraptor Resonating Chamber in Jurassic Park III wasn't to far fetched after all ..? Interesting Pete, thanks ... -Gregg2 points -

Why no 1/32 Hawker Seahawk?!?
wunwinglow and one other reacted to GrahamF for a topic
I'd want 250 confirmed orders or it's a no show! I've been disappointed before.... Graham2 points -

Science
D.B. Andrus and one other reacted to Smokeyforgothispassword for a topic
Here’s a different version - Neanderthal voice, aka a night out in Sydney2 points -
Fw-190 A-8/ R-2 "Sturmbock" Revell 1:32
scvrobeson and one other reacted to Sasha As for a topic
Kevin , thank you ! I hope I will have the opportunity to assemble this engine separately in a resin version.2 points -

RAF FG.1 XV571 WILD HARE Phantom Conversion
Anthony in NZ and one other reacted to jimbo59 for a topic
this is my favorite WIP I love seeing any progress you make2 points -
Tamiya Factory Shop
scvrobeson and one other reacted to GreyGhost for a topic
Very cool ..! Soooo... What happens when you walk in and ask where the Hasegawa kits are ..? Thanks for posting the video ... -Gregg2 points -

SAAB J-29F/B from Fly model
dutik and one other reacted to Rudolf_Filip for a topic
Oh... By the way! I've been playing around with some other files. It sure is wonderful when you have access to all this new technology! I did a few testprints with the seat. I'm not quite there yet... Hopefully it will be ok after some fine tuning. What do you think? Andreas2 points -

decisions, decisions... set! NAA P51B Trumpeter 1/32
Model_Monkey and one other reacted to mc65 for a topic
thank you all, but don't be too generous with me, otherwise the goddess of bad luck gets jealous and comes to visit me... usually the stage ahead is the one where I make the biggest mistakes! so, little big advance, today. but let's go in order: the Torquemada method has paid off. I had not highlighted how much it was necessary to intervene with an iron fist... here you can see the extent of the step that afflicted the wing-fuselage connection. I suspect that this is due to the replacement of the whole landing gear compartment with the Aires resin one. and here after the night under torture. satisfactory, I would say. oh, finally the zinc chrome yellow has arrived. it stays a little on the psychedelic side, but then I'll tone it down, I promise. the rest of the junction wing-fuselage is close to perfection, luckily for me. the Karman lacked the screws at the bottom and the vertical junction lines between the various segments. unfortunately the difference between the screws in the kit and mine is quite evident, but I didn't feel like digging wells to bring them to the same depth. since I was with airbrush at hand, I uncovered the gun compartments and gave these a yellow coat too. it's not a perfect job, and the yellow makes it stand out, but I hope to disguise it when I install the Brownings with ejectors, ammo belts and various cables. in parallel, as usual, I started working on other parts, in this case the landing gear. I must say that the particular engineering of its legs facilitates the process of adjusting the compression of the shock absorbers, even if it seems that there is no need to intervene in this sense. Note that there are two pairs of main doors for the LG compartment: the ones at the top are Quickboost, and frankly they don't seem indispensable to me. I think with a few modifications I will use those of the kit. yes, oh well, you will say, but these advances? here is all crap! alright then... the true is that, as said, this is the phase of the models where I usually make epochal mistakes, so I'm always a bit uncertain. well, here it is. neutral gray. it seemed too dark to me, so I lightened it with white. result: now it seems identical to the test with the original color done on the side. and so far it was easy, almost fool-proof. now, wanting to reproduce some scratches taking into account the characteristics of the original, see vintage photos in which you can see any emerging from the olive drab, I had to divide the wing into two sections, and give two different primers: gray for the front, and yellow for the rear. so it was and so I did. then I started with the chosen base color, the Mr. hobby H-52, highlighting the panels and riveting lines with a sort of preshading. to then veil all over the same color, and on the areas most exposed to light (back of the fuselage, line of the wing spar) begin to intervene with a lighter color tending to khaki, the AK RC 024. now would be the time to leave with magical effects and tricks, and instead I have to suspend operations! to be continued... cheers, Paolo2 points -
LSP Cockpits
nicolas96 and one other reacted to chuck540z3 for a topic
Now that I'm finally finished my 1/24 Hellcat, an update to my earlier cockpit installed in the fuselage. Cheers, Chuck2 points -

RAF FG.1 XV571 WILD HARE Phantom Conversion
Model_Monkey and one other reacted to Anthony in NZ for a topic
Thanks...getting there! Thanks Derek, I will go back and fix that up with a dark grey paint. Thanks for pointing this out and the pics! Oh thanks Jeroen! Do those decals have any white stencils? I am not sure how I am going to tackle that part yet. I might be interested if you decide to sell them. yes I love the 'S' version too. Always it seems there is more than we first think isnt it LOL Thank you I am not sure yet mate. I have a pile of seats from different manufacturers and havent even started thinking about them. The cockpit structure and differences alone are daunting me. I cant shift my focus to seats just yet. I am dreading it quite frankly Well as long as I am on here, I got some progress made last night. Kerry's printed part arrived yesterday and I trimmed, painted and installed it. Even the toggle switches printed! Even more impressive is that I managed not to snap them off! Painted and glued in This sidewall has already been modified and extra cable added The junction box on the right side was scratchbuilt, painted, yellow markings applied, weathered lightly and glued in. Also of note is that the BB shelf it sits on was lowered too. Ugh terrible photo's And everything is waiting patiently to fit in the fuse.... Bit of a rush unexpected update, scuse the terrible photos Cheers Anthony2 points -

RAF FG.1 XV571 WILD HARE Phantom Conversion
Model_Monkey and one other reacted to Derek B for a topic
Hi John, They are the inner strips. FG. 1 cockpit FGR.2 cockpit (Looks like the strip has been lifted here) Derek2 points -
Fw-190 A-8/ R-2 "Sturmbock" Revell 1:32
Archimedes and one other reacted to Sasha As for a topic
Painted the exhaust manifolds.2 points -
1/24 Airfix F6F-5 Hellcat "Kicked Up A Notch": New eBook Now Available!
Buster99 and one other reacted to chuck540z3 for a topic
Thank you Gents! Well, I'm finally done! I need to take a bunch of RFI pics in a much larger photo-booth, which I hope to do real soon- maybe even tomorrow or the next day at the latest. I think this model turned out better than I had hoped for and although not perfect, the flaws are minimal. Until then, here's a teaser, just 'cause..... Cheers, Chuck2 points -
1/32 F-15E testing.... paint something after 2 years was a bit challenging...2 points
-
RAF FG.1 XV571 WILD HARE Phantom Conversion
Model_Monkey and one other reacted to Anthony in NZ for a topic
Thanks buddy, I am struggling though Cant believe the hours just gone into this today...talk about 50 shades of grey Still a lot to go in the rear pit, including some placards and a couple of stencils......tough to photograph at night. Anyhoo, I am conquering my fears! As you can see in this last photo there is still a lot to do with some more wear with the silver pencil/paint and washes. I have just got to try not to overdo it Thanks for looking in guys Cheers Anthony2 points -

HK B-17...C 5/4 sweating the metal
Greg W and one other reacted to brahman104 for a topic
Thanks mate Thanks Rich! Been a while since my last update, but rest assured there's still things happening I wanted to get to grips with the pitot probes and "football antenna." As you guessed it, these differ yet again from the HK kit so the probes were scratchbuilt and the football was modified from the kit part. I think the Football should be natural metal too, so I'll probably use some kitchen foil for that a bit later on. The pitot probes took a surprisingly long time to get aligned and covered. I still need to add a little silver paint to them but they're otherwise finished. While I was on a roll, I also covered the top hatch. This remains removable but was a very tricky part to skin as the acrylic was already glued to the styrene. I had to slowly and carefully refine the inside shape first, then slowly remove material from the outer edge to make sure it sat nicely in the existing hole. Came out pretty well I think I'd put it off long enough, but it was time to cover the bathtub. Again, there's some interesting and nasty curves, but for the most part things seemed to go well. Still a lot of glue residue to remove, but I think you get the idea I wanted to move on and get as much of the underside done as possible so I could add the vertical fin and in order to do that I had to tackle the bomb bay doors. Sooo, remember waaay back when I scratchbuilt the bomb bay? Well that came back to haunt me now.... Have a look at how the doors are sitting right now, what's going on there? Oh dear........ Despite my best efforts when I built it, it didn't quite fit the hole exactly and a big beefy brass rail ended up poking out above the surface, which I conveniently decided to ignore until now.... The only thing for it was to mask up the area as much as possible, then grind the excess brass away until the door sat as it should.... Messy, but I couldn't see another way around it. However, during this process I noticed something..... I'm pretty sure this is not just me, the little holes are original kit and when I aligned the tabs on the door with the kit part, I noticed that the indoor rib detail is actually backwards.... the rectangular shape should be on the aft half of the door, whereas the kit part has it on the forward half...... (left side of pic is forward....) Compare this to the real Memphis belle doors.... Anyone else with the kit found this? On ya, HK!!!! Not that it matters for me, I have to remove all the rib detail anyway to get the door to fit, then build it on again in metal.... "sigh" more work!!!! Anywho... after another solid bout of Craig butchering, I coaxed the door into fitting reasonably well.... Still room for improvement but a lot better than before! I hope my taping effort has held up okay and the bomb bay is now not filled up with brass shavings, as that would be bad..... Still got the other side to go, but I think I should be able to walk away from this with my dignity intact Just when you all thought the fuselage done and dusted! To be continued......... Craig2 points -
RAF FG.1 XV571 WILD HARE Phantom Conversion
Model_Monkey and one other reacted to Anthony in NZ for a topic
LOL, ok I was wrong. I thought because it was dragging on so long people would be bored I better post something whilst I am here I have sprayed the sills black, silver, black/grey and slowly with a micromesh 6000 cloth buffed it back. A little more on the left where the crew ingress and egress and where the ladders hook on. I might later use my prisma silver pencil to put a few scratches where appropiate. Back to working on the rear tub this weekend Cheers Anthony2 points -
RA-5C Vigilante - scratchprinted
Pete Fleischmann and one other reacted to Timmy! for a topic
Looking good Ben, cockpits are always such a hit but rarely the hard part…not that it doesn’t look great. It’s the mundane stuff that actually sets a model apart. Happy belated by the way, hope you added to your stash or got play with a fast car. Since this bird is on my list of scratch project…you have saved me so much time since I can clearly just use your model….(teehee) I’ve enjoyed myself immensely lurking on this thread, thanks! Timmy!2 points -
Westland Lysander Mk. III SD Matchbox-Revell 1/32
Bobs Buckles and one other reacted to mc65 for a topic
thanks to everyone, in particular to Mike: I went to look for as many photos of the extended slats, and in fact in several you can see some asymmetry. ok so, then. and now a small update for those who were worried (I was a lot) for the realization of the ladder after the wing was installed. done! after having sketched the parallel uprights and having oriented and fixed them with bicomponent, I prepared a template to position the steps. here too everything is taken from various photos, no serious drawing available. as it is as it is not, here we are: the best reference I had was this I would say that I can be satisfied. now I have to paint it on site, but I have faith. cheers, Paolo2 points -
Googling for one thing, and came across this, extremely useful, as they all are.1 point
-
Cool. Very diverse product line.1 point
-
 Thank you for this suggestion! It sure is. Heres what a great idea that is, John. i found the acetate my 5 minute epoxy came in, hows that for irony, the packaging for my solution itself surpassed the contents as a solution. i carefully selected a punch of the correct size, more luck actually, then punched out six discs, two for each color, because if i plan ahead and make spares, that guarantees i will not lose a single piece. then i shot them blue, red, and yellow. i had to put them on my white tile i use for various mixing and PE cutting to show what they look like, and here they are. So far so good, and this method eliminates what i have been dreading, slopping clear or tinted epoxy on my paint job. So naturally i had to see what they look like, right? i would like input on this, but i am really happy with how these look. They are just sitting in the holes, but it will be a simple matte to pick each up and drop a bit of white glue/ AK canopy glue. i think i got what i needed here, but input is always appreciated. To be totally honest, i should have researched these earlier, there is a prominent ring around the lenses in photos, absent in the Hasegawa miniature, but i am not about to try to add those now. thanks again, John, that worked really well for me.1 point
 -

Let's get to know each other a little better. Show a photo of your
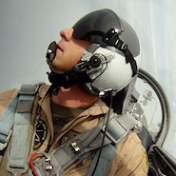
Gerhard reacted to Viper_Crewdawg for a topic
I prefer how I was to how I am now!1 point -
Hello, some update here. The main undercarriage wheel bays plastic parts has a good level of details but I've also added some details as a lot of hydraulics lines ,stiffener plates, fuel cap and so on. On the upper surface I've added some details around the auxiliary air intakes, using plasticard and PE parts. Also, I've opened a pair of oval air intakes and a circular inspection windows on the right side. ...1 point