Leaderboard


Popular Content
Showing content with the highest reputation on 01/30/2022 in all areas
-
Y'all really liked that last post judging by the comments. Is it transparencies? OK, last post showed newly installed transparencies for a scratch built windshield. Still to go was the exterior framing. But, the exterior framing, at least some of it, is basically installed on top of the fuselage skin. And the existing skin surface needs work. I have decided, rather than putty over panel lines and rescribe, that I am going to skin this beast with aluminum. You saw the mule I purchased to practice on - here is some practice: The Imgur "huge thumbnail" reveals much. The larger painted one was my first try. From it I learned what glue not to use (some Revell Germany contact glue). I also learned that annealed aluminum sheet is a little soft for this application; it's a little lumpy, and the awl-pressed rivet heads deform a bit too much. And importantly I learned that paint doesn't adhere very well to the aluminum panels. That's going to have to be addressed for sure. I am open to suggestions. The large blank panel to the left was an experiment with a different contact cement - better stick, but still a bit lumpy. And the third panel (the smaller one with all the rivet heads) turned out pretty good. Good enough for me to try my luck on the Corsair. Here we go - small panels surrounding the windshield: I am pretty happy with these. Even though they are soft (annealed), they laid down pretty smooth, and the rivet and Dzus patterns are pretty good (required a good bit of burnishing with balsa block, brass roller, and toothpick). I didn't have to worry too much about the boundary between the aluminum and the "glass" - it would be covered by the framing. These panels are the tip of the iceberg. I am now waiting for some heat treated litho plate (in the mail from my BFF Peter Castle, who is helping me with this skinning effort). What a pro - I could not ask for a better instructor. Once obtained, I will be ready to attack the acreage. I am not sure whether or not to wait until the wing center section is joined to the fuselage - must hand-wring over that some. Anyway - I continued on with the rest of the skinning around the windshield: I am pretty certain many of you watching this build are happy that I am doing something with the pock marks and trenches on this toy. In the past I have ignored this stuff, happy enough with a well shaped and realistic modification of a toy. No longer - gonna dive into the world of exterior finishing where I can do something worthy of the rest of the effort. Not my strong suite, so wish me luck. Once I got the rest of the small alum sheet panels glued on, I could do the exterior framing. Here it is: VERY stressful work - must not put a glue smudge on the glass. And I didn't! The effort isn't quite ready for prime time - I have a bit of smoothing to do. Note there is less transparency there - it looks kinda like a Corsair. The customary comparison shot with the old part: Makes me glad I went ahead with the scratch built version. What ugly screw marks! My list of things to do before joining wing to fuselage says it's time for the firewall, by God. So that is what you will see next I think. Stay with me, and keep those suggestions rolling in!15 points
-
Sunday updatey timey Decals?! Who'd have thought? How incredible it yet seems it is time to start on the decals! It's been a long road to here but now it´s time. First off I had a look at the roundels....I thought they looked a wee bit to bright. So I scrounged up a sheet with Swedish roundels in different scales. Then I compared...hmmmmm Then I compared with another set too......hmmmmm I decided to try on a darker blue roundel to see how it looked....and well It looks good. Unfortunately I noticed that the roundels for the flanks weren't centered So off with the darker blue and on with the Jetmads, really thin and nice decals btw. And the roundels look alright. Next I ruined a decal.....demn Well off with it, I'll have t paint it no biggie, it´s just a black square. It's identity is soon revealed. And there I'll take a break for today and let the decal fluids work their magic. The F4 wing shield looks awesome....a really fragile decal but I´ll seal all my decals before I start weathering. Cheers!11 points
-

Tamiya 1/32 P-51D/K "Mrs. Bonnie"
dodgem37 and 9 others reacted to Phil Smith for a topic
Made a bit more progress on the P-51D today. I finished up the sidewalls of the cockpit. The starboard side of the cockpit contains more instrumentation than the port side. Ultimately, this meant an opportunity to add a few wire bundles to a few black boxes, and I scratch built a new oxygen hose by winding fine copper wire around a brass wire core. The port side features throttle controls, flight controls, bomb release, map holder, signal gun, etc. In addition to the standard details in the kit, I replaced the bomb release lever, a wire bundle, and two rods coming out of the throttle control., Finally, both sides were distressed by simulating chipped paint, grime, and dirt. I then fused the cockpit-engine assembly into the port side fuselage half. The Tamiya kit is so well engineered that this process was uneventful. I was worried about engine fit, because I added a lot of additional details, like hoses and pipes, and these could have affected fit. Fortunately, it appears this was not an issue. The next step is to build the radiator and oil cooler assembly.10 points -

Westland Lysander Mk. III SD Matchbox-Revell 1/32
Rockie Yarwood and 7 others reacted to mc65 for a topic
thank you all... I'm actually wasting time waiting for the courage to work on the wing! also, thanks to a friend that closely observed the MA*J pictures, now I'm aware that also the letters "MA" wew on the fuselage. so I had to rethink all the paint workflow. let's start from the known fact that these planes arrived at the squadron all black painted, and that only later were these camouflaged in the lateral and upper areas. from the only two available photos I understand that the codes in the fuselage were left surrounded by black, rather than going to paint around them with camouflage colors. ergo, the first thing to do is to understand exactly where these are located in the fuselage, in order to trace with certainty the black border beyond the areas of their relevance. and so far it was an easy task. having understood this, I would proceed like this: I'll give a black base coat to the whole affected area, and then I paint letters, numbers and roundel with masks. having done this, I protect the insignia and proceed with the colors of the camouflage. this should give me the opportunity to work peacefully on the signs without fear of damaging the completed camo, and above all avoid to place the signs in the wrong spot as too often happens to me. sounds reasonable? talking about painting, as I advance I give the - few - metal parts of the plane an aluminum color, in order to leave my hands free for any subsequent scratches. meanwhile I was doing all these great arguments, and at the same time spasmodically trying not to face the wing, I made a series of side cuties that I had in the menu, stuff pilfered from historical photos, just to keep my hands busy... I go to illustrate: the shortened spinner equipped with an ugly reinforcement ring. to finish or trash, I haven't decided yet. little frame. usually in these there are removable cards with the correction values of the magnetic compass, but given the position I do not exclude they were codes relating to the morse identifier, which changed from mission to mission. holder for...thermos?? you guess. but from the photos of some SD, and of MA * J in particular, you can see these artifacts. moreover, in the aforementioned book, the author speaks specifically of comfort items in the rear passenger compartment, particularly hot drinks. oh, I made it equal to the photos. for me these are handcrafted clusters designed to house cylindrical objects. i.e. tea and coffee. sooo British. that ugly file mark on the struct has already been eliminated. ditto for the steps on the spats. some aircrafts had these, others didn't. it seems to me that there were in mine, so here these are. cowling. here multiple interventions. in some photos you can see some nice dents, and a mysterious tube that comes out in that position. I honestly do not understand its use, it would seem an oil breather, but usually these have a diameter of a few mm, in the order of 5, while this from the photos I would say is something that goes for 25. oh well, I made dents and big tube, whatever it is. still in the cowling area, from a technical drawing and a couple of photos of the cowl removed, it seems that there were two other closures in this position. to be refined, hoping to have got it right. and finally (hopefully!) this area, what I imagine was the prop pitch command. also this to be finished and painted. the tailwheel has won a series of PE bolt heads, and once painted I will have to finish the outer part of the shaft, now held in place by cladding sections of electrical cable, but which will have to have another final shape. the tail planes received further details at the ends and some tweaks to the riveting. I also used them for color tests, as you can see. and nothing, in the end I had to surrender to the evidence that the wing alone is not made... so I traced the position of the ribs, then the intervals thanks to Rosie the riveter, and I left to lay a zillion of drops of black attak, which will then be covered with strips of adhesive aluminum, as already done for the movable surfaces of the tailplanes. now I just have to wait for my eyes to stop bleeding to move on to the upper surfaces. cheers, Paolo8 points -
No, this is5 points
-
Ha, did you think I'd forget the Friday update,eh? WRONG! here it comes! A bit of this and that The big boy next to a 1/48 scale brother HAppy news, I got a friend to make me a correct F4 wing shield and while waiting for the decals to arrive I set out to do some small stuff that still needs to be done. I´m not entirely sure what those plates are but they are painted and glued now. NO worries that they have a slightly different hue, they aren´t gloss coated like the rest of the kit A good time to finish the forward radar sensors... They are primed in flat black and I masked off the forward parts... ... To paint the rest gloss. Then I masked and painted the aluminium part.... And topped off the caps with a liquid chrome pen I put the sensors aside for now and sanded the gear bay doors.... darn layers! After repriming one looked good... While the other still needs work, demn it....well the thick primer coat has to cure before I can do anything. Well then, time to cut the cabbot from the block, fragile thing...hoping for the best! I somehow managed to not damage it...yay, good for me! It fits into the canopy like this and the hinges of the canopy are part of the cabbot I cleaned the cabbot and then I glued on the rear mirrors. Then a thick flat black primer coat and off to cure. Next I added the fins to the drop tank...incredibly thin and fragile....and full of printlines. I finish today's session with glueing on the radar sensors, they look really smart Hope I get the decals tomorrow then I can start with the decals this weekend. Cheers!5 points
-

Messerschmitt Bf 109K-4 White6 JG4 1/32 Revell/Hasegawa
Bruce_Crosby and 3 others reacted to Lud13 for a topic
Hello Finished this one a while ago but was too lazy to snap a few pictures This is Revel Hasegawa Bf 109K-4 from 9./JG4. It was flown by Fw Hans Braun from Juterborg-Damm in March 1945. Paints as always are from Model Master Authentic range with Valleyo varnishes and wash done by oils. Decals are from excellent Aims sheet Late war 109s Vol.2 . So... now back to Erla G-10 from KG(J)6 !!! Hope u like the model...4 points -

No New Updates
chuck540z3 and 3 others reacted to LSP_Kevin for a topic
Yes, Brian is correct - and I probably should have made a public announcement about it here to allay any fears or worry. I've spent the last month preparing for and executing a major house move - our first in 20 years. The move is technically complete now, but there remains a lot to do at the old place before we hand the keys over at the end of this week, and the new place is in complete disarray - though getting better slowly. It will be quite some time before I have a usable workbench again, however! A new update will be coming, but I can't promise when. Kev4 points -
Thanks Brian. The genie is out of the bottle; the toothpaste out of the tube. My hand is now forced. I should have made this decision before I did all that wing work - now the lower surface of the center wing is dominated by the landing gear and the gear doors. They obstruct the wing skin a good bit, and pose a breakage threat if I try to skin the lower wing. So I am almost certain I am not going to do it. And if I don't do the lower wing skin, I won't do the upper either. That would look very mismatched. I will do the flaps though. So I think I am going to limit skinning to the center and aft fuselage, tail surfaces, and maybe the wings outboard of the fold. The cowls forward of the firewall will be scratch built and removable - I do not think they will need skinning; I will provide the necessary detail on the .02 plastic sheet instead. At least that's the current plan. Were this a NMF airplane, I'd have a different plan. Gonna be an adventure! Thanks for looking in.4 points
-

Poll on Trumpeter and Hasegawa A-4E/F Landing Gear Sets
LSP_K2 and 3 others reacted to D.B. Andrus for a topic
Hi Tony We're getting ready to issue Trumpeter and Hasegawa sets with a modified Hasegawa nose and main gear to correct the stance of both kits. Finishing up the last of the molds this week. I'll post photos of pre-production samples this week, as well. Cheers, Damian4 points -

Bf-109E-1, 1/32, Eduard. Legion Condor - Birth of the Luftwaffe
williamj and 3 others reacted to Hartmann52 for a topic
Today I made some progress - I decided to put the chassis before weathering4 points -
Waste of time considering what they go for these days. The surface detail is lovely, BUT.. one needs a full replacement cockpit, wheel well set and new prop/ spinner. You are much farther ahead getting the Tamyia kit. I finished mine but would never do it again.4 points
-

The Book of Boba Fett
europapete and 3 others reacted to petrov27 for a topic
Neat to see the Mando in this fighter but it does not seem as practical a ship as the Razor Crest was. I guess this is the Mando's mid life crisis - kid has gone away to college, family sedan got wrecked and instead of replacing with a useful truck or SUV he gets a old hot rodded up sports car.....4 points -
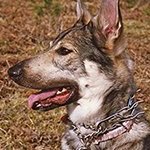
Is that a Dogwood? Thanks Martin.4 points
-

Hawker Hunter - Masquerading as Miss Demeanour - Finished :-)
KiwiZac and 3 others reacted to themongoose for a topic
No worries j. Appreciate you stopping by, plus a wip that brings back memories is the best of all This morning I finished up all the lacquer on the aircraft itself. The wing tnks needed another coat of white so they are out of sequence for now lol applied all the shining star masks over the insignia white then the primer fade - white to gray to hazy black to solid black and then to the paint booth im really glad i opted for grey over most of the white. The transition would have been to stark otherwise. next to last was plucking all the stars back off the sky! and last was flicking distant stars onto the night sky with a toothbrush. WetSanded with 3000 grit paper. Some clear coat and it’s ready to dry for a day before i start the enamel colors.4 points -

The Book of Boba Fett
europapete and 3 others reacted to scvrobeson for a topic
I did enjoy the Boba Fett/Lawrence of Arabia storyline from the first few episodes. Wonder how long it will take before we see either a full kit or a 3D printed conversion for the N-1 to bring it up to Mando's new specs? Matt4 points -
And the Hasegawa vs Vondracek test of wills continues. This is where the wingtip light is supposed to go so this has to be fixed too. GRRR! I cut out the surrounding area and glued a piece of round stock in to fill the hole. I added some melted sprue to fill in the gap too - not shown in this picture. Then I sanded it down and in the process squared off the surface where the light is supposed to be. Hasegawa gives you a locator guide on the inside of the wing so you know where to make a hole where the outboard guns are supposed to go. Unfortunately it’s not centered in the panel, and it’s like this on both sides. Why they didn’t just provide this part contoured to the wing so you don’t have to carve out a hole is a puzzlement. I’m just going to fill the panel line and fasteners and see if I can fudge this later, but I’ll probably just let it go as is. The white stuff in the surrounding panel lines is just dust from the sanding, and I’m not planning to use the kit guns - I just used them to help with alignment. I’ll cut them off and they’ll make it easier to locate and drill out the fairing for brass guns. Man, do I love this Perfect Plastic Putty! I thinned some with water and slathered it around the seam and there’s no need to be careful either which my spastic hands appreciate. You can see that I thinned it so much that even wicked into some of the surrounding panel lines. Easy, peasy, lemon squeezy. I used a stubby brush and a cotton bud moistened with water and in no time, with no effort, the seam is filled perfectly. In case you’re wondering, I’m building with flaps up and these are from the Revell F8 kit. They fit just fine, the tabs even lined up. That’s it for today kids. Hard to believe but the next step is to get everything masked off and hit this thing with some primer (or a hammer) and more sanding. Thanks for watching. More laughs and groans are on the way.4 points
-
Tamiya 1/32 P-51D/K "Mrs. Bonnie"
Paramedic and 2 others reacted to Phil Smith for a topic
Yes. Another bloody Mustang. I purchased the Tamiya kit many moons ago after reading glowing reviews. I was impressed with what I discovered in the box, looking forward to the build. However, I had other projects to complete, including a scratchbuild subject that wrapped up in November. I broke out the Tamiya kit in December after securing a handful of aftermarket bits, and I must say the journey has been an absolute pleasure. In accordance with the instructions, which one clearly should follow in this particular case, I began with the Packard V-1650 Merlin engine. The detail is magnificent, but I just can't leave well enough alone so I added a bunch of additional detail using plastic and wire. Here are a few pictures to get the ball rolling. I probably went overboard on the weathering, and will make sure to temper the impulse to over do it when it comes to the rest of the aircraft.3 points -

Gloster Gladiator 1/32nd scale
R Palimaka and 2 others reacted to HL-10 for a topic
I do not like bi-planes! Too many wings, and the rigging is a stuff of nightmares!!! Then along comes ICM's superb Gladiator. I have always had a soft spot for this aeroplane, despite it being a bi-plane. An absolute joy to build with no fit issues at all! Everything went together perfectly. I used some aftermarket seatbelts, and the decals are from AIMS. The chequerboard on the top wing disintegrated when I tried to apply it, so I had to paint it on. For the overall aluminium dope finish I used Tamiya's flat aluminium. The rigging was done with flower arranging wire. It was pulled and stretched taught before being cut to length and superglued into place. Thanks for looking Angelo.3 points -

1/48 Hobby Boss F84 F Thunderstreak ......Iteration No 4 in the NMF trails .....
themongoose and 2 others reacted to Panzerwomble for a topic
Continuing my current obsession with NMF , alcad et all , more filthy aluminium adventures in 1950's jet world . Hobby Boss's F84F in 1/48 , literally fell together , nice engraving and panel lines, apparently more accurate shape than Kinetics offering . Even the cockpit as half ok , with some PE belts thrown in . Gotta thank Max @mozart for his words on encouragement a while back to buy a Silhouette , as it seemed a lot of outlay to risk to me, especially as I'm not great on computers anymore . So...... this model is 80% masked as well. Woot - I can now scratch and sand the markings to my hearts content and goodbye sneaky shiny decals, glossing and microsol ripping up my paint .....mostly . Laters PW3 points -

1/32 Ju EF-126 „Elli“ / EF-127 „Walli“ (3 in 1 injected plastic kit)
Rick Griewski and 2 others reacted to Troy Molitor for a topic
3 points -
1/32 Ju EF-126 „Elli“ / EF-127 „Walli“ (3 in 1 injected plastic kit)
Rick Griewski and 2 others reacted to Troy Molitor for a topic
I was judging our local Chattanooga IPMS chapter contest on Fri/Sat and ran across this Ju EF 126/127. Wow. what a good looking model.3 points -

Lighting
John Stambaugh and 2 others reacted to Smokeyforgothispassword for a topic
Damn, I saw the title and thought we where getting a new P-38, F-35 or EE Lightning3 points -

EA-6B Prowler (02 April: Done!)
Dadeo911 and 2 others reacted to easixpedro for a topic
Quick update as I’m deep in the midst of scribing all the stuff around the nose. Here’s how I scribe the one off shapes like the hand hold doors and various handles. Simply cut a piece of styrene and carve out the appropriate shape. Super easy and allows you to keep things symmetrical etc. you can see how I’d already done the boarding platform and the panels on the cheek. Here you can see the end result. Took all of about 2 minutes to make one handhold… you can also see where I’ve drawn out locations for the others. Also used Chuck’s trick of putting a wash in place to see how everything looks. Tough to see with the approximate 49.67 shades of gray on the nose. off to work on the hinges for the canopy, and all the panel lines on the turtle back (plus all those dzus fasteners). -Peter3 points -

The Book of Boba Fett
scvrobeson and 2 others reacted to LSP_Matt for a topic
I'm absolutely loving it. The series are fleshing out the Star Wars universe in so many ways. Its kind of refreshing to see enthusiasts like Favreau and Filloni put in charge of something so big. Their passion and respect for the subject matter reminds me of the people who worked for Wingnut Wings. People who are passionate and supported can create some amazing things. There's so much potential content in that universe it's like Disney brought a gold mine that will never be exhausted. I also love the Maori vibe that Temuera Morrison brings to the character of Boba. I always remember him from the Kiwi movie Once were warriors. Matty3 points -
A very nice little kit I decalled this week while awaiting some parts to build a different project. V-1 decals Tamiya lacquers for paint Thanks for looking3 points
-
howdy folks Hey Jay - the fuselage frames are PE laminates taken from the Curtiss drawings on aircorps library, with a thin strip of litho on their edge as you can't add a folding edge to a curve... it's all well and good, but it does require the skin to be exactly the same profile as the drawing and mine weren't so they needed reworking. ..now Chuck, I can assure you that quite apart from blushing when I read this, the feeling is entirely mutual for you and many other fine modellers we are fortunate to have grace this place so, I started to complete the fuselage sidewalls with the remaining structural details and some of the components - including the canopy retraction wheel - this is a superb pic kindly supplied by Jennings.. ..you can see not only the wheel, but the curved guard panel that covers the cables to it's right.. ..I made this up from PE and other bits, also made the map case and got them ready for priming.. ..the right side is structurally complete with mounts for various things, stringers, formers etc and that guard for the canpoy winder thing.. ..and the other side, which has a guard for the elevator / rudder trim control cables... ..after priming with mr surfacer, it was all given a basecoat as soon I won't be able to get in all the nooks & crannies.. ..temporarily mounted the wheel for the pic and added the map case - this seems to be in different positions on early models so I went with the one that gave most clearance with the seat.. ..the green seems very olive drab in the pics, but i think its the lighting or blue background washing it out.. ..still an awful lot left to do.. TTFN Peter3 points
-
After some light sanding it looks a lot better., a little more correction tomorrow, clean the dust out of the panel lines and its ready for some primer. The dissolved putty worked very well filled the runaway tracks nicely and sanded smooth easily. Although a fan of black basing, for this model I am going to use grey as I think it highlights the imperfections better.3 points
-
Hello all I brought this one across the finish line just before New Years but I only had time to take some pictures now. (For the Photo Geeks amongst us, I used a Canon EOS 5Ds with a 24-105mm L lens and a 80x80x80cm lightbox) The kit was my first full blown resin kit and it was a little intimidating to say the least. Up until now I did not enjoy using large amounts of CA glue but it has been a good experience. The fit is overall very good, especially between the 3D printed parts. It is a big heavy model but the landing gear (3D printed as one piece) is very sturdy and supports the model very well indeed. How great is it to have a 1/32 JA37 Viggen! - now bring on the Draken!! Enjoy /Niels2 points
-

No New Updates
Out2gtcha and one other reacted to Rick Griewski for a topic
Kevin, how many boxes, pick up trucks, moving vans and or box cars were needed to move the kit stash? What will the new hobby room and bench look like?2 points -

1:32nd scale Sopwith 'Comic' conversion
Uncarina and one other reacted to sandbagger for a topic
Sorted Mike2 points -
Panther V Aufs G 1/16 Trumpeter
Sasha As and one other reacted to josebagasteiz for a topic
Hi friends. Here's some update with the engine finally in place. In addition to the placement of radiators, fans and fuel tanks finished. A closer image where you can see the butterfly mechanism located in the firewall. As well as the throttle rod actuator. Now some photos of the unfinished ammo racks. And some more details of the finished driver and radio operator positions. That's all for now. Hope you like. All the best.2 points -

No New Updates
John Stambaugh and one other reacted to Out2gtcha for a topic
Hey Brad, If you mean the what's-new updates Kev puts out, there will be a bit of a delay in putting them out as K1 is extremely tied up ATM with personal things. Life can get in the way occasionally, and this is one of those times. Kev will have a new one out as soon as he is able.2 points -
An N-1 with a Holley? What's not to like? Bob2 points
-
1/32 Bf 109 E-3, E-4 & E-7 trop from Hobby 2000 (Dragon rebox) - released
J.J. and one other reacted to Rick Griewski for a topic
It turns out that I do have a Dragon Bf-109 kit. So I compared the wheel well inserts with the Eduard kit inserts. They are very, very close. The Eduard part fits into the Dragon wing without modification and matches up with the part for strut area of the wheel well. I plan to cast copies of slightly modified Eduard parts (could be a perfection trap LOL). I will post pictures later today.2 points -

Doyusha 1/32 kits?
Troy Molitor and one other reacted to thierry laurent for a topic
Alas the cockpit from Pascal is OOP for at least 15 years and he just produced a small quantity. So it is VERY rare. I've never seen one on eBay.2 points -
Two tips to scribe vacs
D.B. Andrus and one other reacted to thierry laurent for a topic
Hi guys, Vacs are more difficult to scribe than classical IM kits as the plastic is noticeably softer. Moreover, it looks the heating process used to make them has a physical effect on the plastic structure as it is also more difficult to scribe as regularly as you can do on a new sheet of styrene. After having tested many scriber types I can testify the best ones (at least for the straigth lines) are the ones with a hook-shaped tip as they remove a fine string of plastic. Hasegawa and Tamiya are making some excellent ones. However, even with excellent scribers, avoiding some hiccups is close to impossible. I'm generally using soft CA glue to fill them on IM kits (such as the black CA). Alas, this is not the best approach on vacs for the same reason: because of the softer plastic you will sand more plastic than glue when you will try to sand it to clean the area. After having tried different products, I'm finally using a bottle of white Tamiya primer with a toothpick. When dry this does not become rock hard and can be sanded without damage. Highly recommended ! Hth Thierry2 points -

Dornier D0-335A-12, by Zoukei Mura - Finished
Landrotten Highlander and one other reacted to Dpgsbody55 for a topic
I've only had a few hours on this since my last update, but I thought I'd post a few pics to illustrate my comments from yesterday. Here's the fuselage, now closed up. I've also added the cooling flaps for the rear engine radiator as well as the second canopy ejector lever for the front cockpit. Incidentally, one thing I didn't mention in my Wednesday update was the rear engine prop shaft. This is one long shaft from the engine to the prop reduction box you can see painted black at the tail of the plane. It passes though a number of bulkheads mounted onto the radiator ducting so it needs a lot of careful alignment when assembling this area. Then it needs to be checked again when the engine and radiator duct assembly are brought together as it may not spin, leaving the modeler with a frozen rear prop. The whole shaft needs to rotate cleanly, so a little filing is needed, but thankfully not much. One more thing I did before joining the fuselage halves was to fashion a recess into the right side to permit the later fitment of my canopy hinge. As the piece came out of the box, the area below the canopy was higher than the area below the windscreen. Here's a closer look. The next job was to put the inner wing structure together. Most of this is one piece, but there's about eight pieces added to each wing to form the undercarriage wheel well structure. These will be painted RLM02 before any more work is done on them, then they'll be joined together. After that, I'll be adding the wing tanks forward of the main spar which will be weighted, together with the upper and lower "skins" at which point they can be added to the model along with the wing fillets. Before I paint the inner wings, I also want to build up the rear engine cover which will be hinged then also painted RLM02. Might as well do the two at the same time. The engine cover has to go onto the model before the rear cockpit cover, so here you can see the cover, side cowls and rear cockpit all taped into place. It's important to do this to check where I'm going to fit the hinges as perfect alignment is vital, not only to ensure the hinged cowls will sit properly against the fuselage, but also that the exhausts poke through the cowlings. The hinge line will be along the top of the cowl. The windscreen has been glued into place too, after painting and mounting the kit gunsight. The left side cowl is perfect. The right side, not so much. The first fitment test showed that the cowling didn't want to close properly, so I filed away a little chamfer along forward (right hand) edge of the cowl. Still didn't fit, so I flied a bit more and the test fit showed I'd gone too far. I've let in a piece of stock plastic to fix that and puttied it, as well as fixing the gap at the rear (left hand) end. I can only assume I've made an error when putting the exhausts on this side. At least I got the vertical alignment right on both sides. I'll be closing up the left side gap a little more too. However, It's got me thinking about the same issue when I build the front engine. As we say where I'm from; "Think on, lad!!". That's it for the moment. Next time, I'll have this engine cover finished and fitted, as well as the rear cockpit cover done. Cheers, Michael2 points -
I agree with Coogrfan, considering they're 1970's technology. they're not bad.2 points
-
BF 109G-2 Winter
williamj and one other reacted to D.B. Andrus for a topic
William That cockpit is done in a beautifully subtle manner....did you get one of Wolf's shrink ray devices? Cheers, Damian2 points -
Hawker Hunter - Masquerading as Miss Demeanour - Finished :-)
themongoose and one other reacted to Out2gtcha for a topic
Wow! That looks terrific!!2 points -
EA-6B Prowler (02 April: Done!)
JeepsGunsTanks and one other reacted to Out2gtcha for a topic
Haha, same here. I'm hoping and thinking I can get the F7F done in time by August, but am not expecting anything out of it, as it will be far from perfect.2 points -
2 points
-

Dragon Messerschmitt Me-110D 1./Ergänzungs-Zerstörergruppe Værløse 1940, 1/48 Scale
Rick Griewski and one other reacted to Gazzas for a topic
Hi Everyone, Last year I made the concrete decision that there would be no more builds without figures and a base. Consequently, my production rate has dropped while my other skills may have made slight improvements. 1./Ergänzungs-Zerstörergruppe Værløse was a temporary unit set up in Denmark for the creation of a Gruppe of NJG 3. It began with a veteran Gruppe from ZG 76 and was fleshed out with new pilots. The nose art is part mask, part decal. And the Stammkenzeichen are masks cut on my Silhouette Portrait. Thanks for looking.2 points -
I’ve had good luck tightly wrapping small gauge strip styrene or stretched sprue around a rigid form, such as brass tubing, securing it in place with a layer of cellophane tape and then submerging the assemblage into a pot of boiling water for 10 to 15 seconds, followed immediately by a bath in cold water. After this tempering and quenching process, the plastic holds its new shape quite well. I use it to create circumferential “weld beads” for aircraft fuel tanks, for example.2 points
-

The Book of Boba Fett
TAG and one other reacted to BloorwestSiR for a topic
If they're frozen in Carbonite, maybe he could sling them underwing on a bomb rack? Carl2 points -

1/16 scale Boxer reconnaissance vehicle
Starfighter and one other reacted to GMK for a topic
Started on aligning the CAD with the Block 1 gun cars. Not there, yet. But a lot closer. Thanks for looking in.2 points -
I’ve become very interested in the early years of the Pacific campaign, so after my Wake Island Wildcat I decided to build an SBD that flew out of Guadalcanal. This build took 14 months to complete and, if you’re interested, the build thread is HERE. This is a nice kit, but it sure reinforces the Trumpeter A-team, B-team theory. The cockpit, engine and smaller parts/assemblies are easy and well engineered. The fuselage and especially the cowling do present some challenges which are detailed in the build thread. Aftermarket parts were limited to the Eduard Interior placards, Archer Rivet Skins and data stencil decals. Other than that I made the seatbelts out of paper using the kit PE hardware (despite it’s poor detail) and my own decals with lacquer and masks I cut on my Silhouette 3 and clear decal film. Again, the process to do this is detailed in the build thread. I used AK Real Colors for the Blue and Gray and Mr.Color for everything else - all lacquer and all weathering was done with oils. Okay, enough blathering, here’s the glamor shots: Inspired by: Thanks for looking!2 points
-
Tamiya 1/32 P-51D/K "Mrs. Bonnie"
Paramedic and one other reacted to Phil Smith for a topic
Moving on from the engine and its firewall mount, I’ve started work on the cockpit. Thus far, I’ve worked the floor, auxiliary fuel tank behind the pilot’s seat, and the seat itself. The tank is interesting as the real thing, made of layers of vulcanized rubber, featured a textured surface. I recreated this effect using strips of Tamiya tape. Much of the rest of the assembly is straight out of the box, though I did use aftermarket seat belts and buckles from HGW. As for instrument panels and the like, I prefer to do my own scratch building when possible. But I was so impressed with the work produced by Quinta Studio - an outfit in Russia that manufactures superb cockpit decals using additive manufacturing - that I decided to give that a try. It's a little less fun than working the details on my own, but the result is too good to ignore. There is just no way I will be able to produce the same level of detail without printing my own decals, and what's the point of that? A few more details on the dash remain, like knob and handles, which I will add after that piece is more fully integrated with the cockpit tub.2 points -
Here's a bunch of Rufe photos I used for research. Enjoy.2 points


