Leaderboard
Popular Content
Showing content with the highest reputation on 12/15/2021 in all areas
-

1/24 Airfix F6F-5 Hellcat "Kicked Up A Notch": New eBook Now Available!
Alex and 15 others reacted to chuck540z3 for a topic
Dec 14/21 Well I got a lot of the engine completed, wiring and all, and it was quite a journey. I learned a lot of things, made a few mistakes that weren’t really my fault, but also made some discoveries that I think will be beneficial to anyone tackling this engine assembly in the future. Here’s what it looks like today. So here’s a step by step guide of all the major components and what I did with them. Thankfully I tried to dry fit the (intake?) pipes (J30) to the assembled engine and found that there is just no way to fit them cleanly and even if you tried, you would scrape off a lot of paint doing so. I have no idea how others have accomplished this task, but the simplest thing to me was to cut off the base “foot”, which has no clearance once the engine parts are assembled. Further, the pins on the end of the pipes that fit into the cylinder heads are much too long, while the entire pipe assembly is full of big seam lines. Here are the unaltered parts on the bottom with cleaned up ones on the top. Like I always do, I painted all of the engine parts with Tamiya gloss black lacquer (TS-14), then masked off those areas that I want to remain black, before I sprayed most of the parts with Alclad Aluminum and Steel. All painted and waiting for assembly. Note that I have used straight ANYZ sparkplugs for all of the cylinders, including the back of the front cylinder bank on the left. I should have left just holes here, as I will explain later. Engine assembly begins with sliding the engine cylinders and related parts over the central core tube, which as mentioned earlier is way too wide and oval to do cleanly. After lots of sanding, the parts will slide into place with no need for glue. The kit instructions call for #125, US Dark Grey for the engine color of the front and back, which looks almost black on the color chart. No way. Checking dozens of pics of the real deal, there is a whole spectrum of grey paint, both light and dark, with most of them having a slightly blue tinge to them. I was going to mix a batch of grey paint and add a little bit of blue, when I remembered the Ocean Grey camo color of both my Spitfire and Tempest builds were a bit blue to begin with, so I went with that color instead. I think this color looks just about right, no matter what brand of paint you use. Same color on the rear. To add spark plug wiring to this engine, I will be handling this engine assembly a lot and other than solvent, nothing strips paint more than the oils of your hand. I found this out the hard way when detailing the Merlin engines of my Mustang and Spitfire builds, where I was always touching up paint erosion. The partial fix is to wear a glove on the hand that holds the engine, but I find that rubber gloves are a bit too hot, so I bought a bunch of “jewelers gloves” that are made of cotton, are soft and they breath. If you’re not picky about fit or quality, you can buy about 20 pairs for $25 on Amazon or eBay. One common characteristic of assembled R2800 engines that I’ve seen, is that there is a small gap at the ends of the pushrods where they touch the rockers. It’s not huge, but by adding a bit of thin CA glue to the ends with a microbrush, the gaps are closed and, in many cases, it didn’t harm the paint at all. The key is to just touch the join with the brush without rubbing it. Another angle. All push-rods touch. Here is the back view, where the twin pipes fit on the right side of both front and back cylinders. While the shorter pipe that fits on the left is fairly straight, the longer rear pipe is angled and crowds the spark plug a great deal. As mentioned, I should have just left holes and left the plugs out, since you really can’t see them very well anyway. I heard from others earlier in this thread, that the ANYZ braided lines are tough to glue, because CA glue wicks up the thread, changing the color of the line and making it hard. One solution by Brian (Out2gtcha), is to melt the tips of the lines with a soldering iron, which creates a partial block to the wicking. So I set out and did a number of experiments, using thin CA glue, thick glue and melting the ends of the lines. While melting the tips did help some, it didn’t take much for the glue to completely take over the threaded line if you got too much glue on, so I was a bit perplexed at what to do. One long shot was to try a totally different glue, so I experimented with Gator’s Grip hobby glue, which I understand is no longer made. Too bad, because it worked great! The key to using this glue is drying time. The glue doesn’t really start to take hold much until about 10 minutes of drying time. After 20 minutes, you have a good and flexible bond that you can stress a bit with a bend. Wait too long- say 2-3 hours- and the glue is a bit too hard and might break is you stress the join, although it always remains at least slightly flexible. The perfect time window is when the glue has turned from white to almost perfectly clear. Here you can see some plug leads that I have cut, added a droplet of glue to the end, then held them against the end of the spark plug for a few seconds to set a bit. The engine is almost vertical so that the long thread isn’t fighting gravity, so it remains fairly straight. It doesn’t have to be perfectly straight, but the straighter the better. The end of the spark plugs has a small depression, which is perfect for accepting glue and creating a better bond. These leads were left to dry for 20 minutes, then I carefully threaded them through the plug wire guides at the top of each cylinder. Despite the significant bend to the thread, the bond did not break and if it did, it usually meant that I didn’t have enough glue on the tip in the first place. Note that I have two wires on the right side already. As Peter mentioned earlier, I should check the lengths of the lines that Airfix has suggested. The Airfix lengths are good if you are just stuffing a line into a hole, but with the spark plugs, this length should be shortened by quite a bit. Through lots of trial and error, I think these are the best lengths if you use ANYZ plugs. For the shorter leads at the front, the weight of the lines is almost inconsequential and they tend to remain relatively flat without too much trouble. Again, let them dry for 20 minutes, then bend the outside tip into the wiring harness according to the instructions, which brings up a few points. I bought the ANYZ “Kit” for this build, which includes Rust Brown thread in 0.5 mm (AN011), Silver thread in 0.8 mm (AN015), resin spark plugs (AN013), and two sets of wiring connectors (AN016, AN017). If I could do it all over again, I would just buy the brown thread and the spark plugs, because I’m not using the connectors at all. The kit wiring harness fits the thread perfectly and if you use the connectors, these hollow receptacles need to be cut off. While it can look great if you do, getting this wiring done to this stage is a ton of work already and you risk a second chance for the wire to break off. Once glued into the kit receptacles, they are rock solid and I will take that over esthetics any day. I don’t mind having all these other ANYZ parts, however, because they will look great in future builds of cockpits and landing gear wells where connectors are used all the time. The other thing I discovered is that the L-shaped spark plugs (like on pic above) are super fragile and were more of a PITA to use than the straight plugs, so I drilled them out and left holes. For the very front wires, I glued on a plug off the engine, then installed the plug with more Gator glue after another 20 minutes of drying time. You are probably wondering just how strong this glue actually is. Well, it’s not CA glue by any stretch, but within the wiring harness it is very hard to remove once the glue has dried thoroughly. For the spark plug connections, it’s pretty strong, but it won’t let you grab or bend it without breaking off, but that would take a real effort, either on purpose or by accident. The good news is that for all spark plugs, other than the rear of the front cylinder bank, replacement is easy. More on that in a bit. With the wiring out of the way, more parts were added to the front of the engine. The rear plug wires should always drape over the cylinder tubes, not underneath them as you sometimes see. At least that’s what my reference pics show. Side view Here is the problem area I have referred to a few times above when I glued in the pipes with CA glue at the base of the pipe join. When that pipe at the rear goes to the opening in the cylinder, it bumps the spark plug and you may break off the wire, which is next to impossible to fix with the pipes glued into place like you see here. Since you can’t really see the rear of the cylinder very well with the pipe in the way, I wished I had just put the plug wires into holes and left the plugs out. There would be lots of clearance and a repair would be relatively easy if a wire pulled out. Of the 9 cylinders, I broke 2 of them off which I was able to repair, although not cleanly. Thankfully they were at the bottom where they will never be seen again. Another angle showing that most of the rear wires are still OK. Front Bottom, where we have another problem. The tube (J26) on the bottom of the engine collides with where the spark plug for the bottom cylinder should be. I suppose I could have fashioned a wire replacement to give it more clearance, but at this stage I’m sick and tired of wiring and since it’s on the very bottom and will likely be partially if not totally hidden later, I just ripped out the plug and stuck the wire in the hole. J26 doesn’t really fit the parts at all and there was a hole missing in the bottom of the J2 ring where you’re supposed to glue it to, so I drilled a new hole and kind of forced everything together. Good enough! As pretty as the engine looks, it can’t be super clean for a war time bird, even if it’s in the latter stages of the war, so I dirtied it up a bit. Here I used mostly the water-based wash, “The Detailer” in Brown rather than traditional black, because I think it looks a bit more realistic. It’s super easy to use and you can modify it with just a touch of water until you get the look you want. Even the plug wires had some of this wash applied, to knock down the bright color and the small black parts were dry brushed with silver. Finally, everything was sprayed with dull coat to knock down the shine. I added some Tamiya pastels in “Rust” to give the pipes a bit more of a corroded look. Done, at least for now. The next step is all of the super complicated exhaust pipes, which like the other pipes, will need lots of work to clean-up. So in summary, here are my recommendations: 1. If you want to go with the ANYZ upgrade, just buy the spark plugs (AN013) and Rust Brown thread in 0.5 mm (AN011) 2. Don’t place any spark plugs into the front cylinder bank until the end, when only the front ones will be used. For the rear of these cylinders, just place the plug wire into a hole at the back 3. Glue the thread with Gator Grip or similar white hobby glue, letting the glue dry for 20 minutes before bending it 4. Always wear a glove when handling the engine to help prevent paint erosion 5. Glue plug leads 3 to 4 at a time at the top of the engine in a rotisserie assembly line, allowing the leads to rest on the engine with gravity 6. Cut the bases off the pipe parts, Part J30 7. Take your time, especially when you need to wait for several 20 minute intervals. I bet the wiring alone on this engine took me 6 continuous hours, although if I had to do it again, maybe 4 hours. Thanks for your continued interest in this build. Cheers, Chuck16 points -
Work continues apace as I sense a pre-Christmas end to this project. Unless one box goes in the trash, it feels wrong to ask Santa for another! Even though I suspect the bands etc were actually painted in gloss paints, I decided to spray a matt coat over them to seal the decals, and increase the contrast with the 'metal'. Then it was finally time to dip into the pre-prepared loose bits. I thought I'd start with an easy piece; the pitot tube. Foolishly, I forgot to drill a hole and dry fit before painting the wing. Then I did that famous move, and drilled a hole in the wrong wing. The pitot is on the right. After drilling the correct wing, I discovered that the Quickboost pitot is too thick (specifically for the Hasegawa kit). Out came my collection of hypodermic needles, and I fashioned my own. Note that it is the bent version in this case, since there are slats. Adding 'glass' is often a trying exercise. Inevitably it ends up in some touching up... Now finally, to get the lady onto her legs. When one has fiddled with the gear legs, expect some fiddly adjustments! This axle was slightly canted to the vertical, and as I squeezed it to rectify the leans, it did what it always does - break off. Sigh. Before sticking the real break-it-off-by-accident stuff on, I did a bit of paint chipping (brushed on Tamiya AS-12), and a panel wash. I had fun adding some gloss detail inside the airbrake bay. Luckily the nose wheel went in without any issues. I think it was worthwhile adding all the extra detail. Nearly there. Cheers, Sean (Thanks Iain and Gerhard for commenting while I was typing up this report. Gerhard, you are in for an interesting time. Luckily it is such a beautiful aircraft that one forgets the challenges eventually!)9 points
-

Bf 109 F on the cheap
Rick Griewski and 8 others reacted to Radub for a topic
Honestly, when I was talking about the issues with the Trumpeter kits, my intention was to point out what needs to be fixed, rather than discourage people from building them. The Trumpeter kits are not entirely perfect but they can be used when nothing else is available. I have seen them built and they look fine. Some of the problems are related to the engine and if you plan to make a model with closed cowls, then that is not a problem. The rudder is a tad too short in chord and you can get a replacement from spares box or aftermarket. The underside of the nose as well as the cover of the oil tank just behind the spinner are the biggest issue, that whole area is not the right shape - it just lacks that hard to describe shape (“hamster cheeks”?) dictated by the wide bottom of the engine making the nose look “pointy”. That can be fixed with some putty. You will need a new propeller spinner. There are aftermarket cockpits for the F. Whether you start with Trumpeter or Revell, you still need to put in some work. Radu9 points -

Make the others jealous
dutik and 8 others reacted to BloorwestSiR for a topic
Got this not-so-little guy on Sunday. Nine weeks old and 20lbs already. We named him Jimmy after a local coffee shop. Which fits as our other dog Zoe is named after a bakery.9 points -
Proof of concept. I spent a big part of today working on the masks, with a trial run using Oramask 811. I think it looks promising! Cheers, Tom8 points
-
This build was VERY lucky to see the light of day, almost gave up on it quite a few times, but happy to say, it made it to completion (after 2 years on and off) and not the final flight against the wall Base kit is the Revell ju88A-4, wish I'd had the A-1, would have saved me a lot of hassles, especially in the cockpit area/rear glazing to fuselage fairing. Fit of the kit wasn't the greatest, plastic was quite pebbly and soft. Not totally satisfied with the end result, but here she is! With a HUGE shout-out to @Pastor John from AIMS, people like him and others, keep us modellershappy! Ju88C-6 with Fug 202 of 4./NJG100 on the Eastern Front Revell Ju88A-4 AIMS Ju88C-6 "Nachtjager" Resin conversion set AIMS Decals "Ju88 Fighters" AIMS Luftwaffe Gun Sights AIMS Ju88A-1 Tail Wheel bay Eduard Brassin Main and tail wheels and cockpit details Owl Fug 202 antenna Master barrels Profimodeller Main wheel bay detail set HGW seatbelts and a TON of scratch-building! All paints Gunze laquers6 points
-
Looks like KASL is making the light landing gear which seems to be one of the bigger stumbling blocks to doing an earlier F-16 or T-birds plane. Apologies if this has already been shared.6 points
-

Do you want a 1/32 P-3 Orion?
Tony T and 5 others reacted to thierry laurent for a topic
I got the other part of the kit today. The amount of parts is quite surprising. Obviously far more details could have been added but the number of inside components is already surprising when you consider what can be seen. A preliminary check is showing that the LG legs will ask for a lot of work but look usable. Actually close to all the kit parts will require work but globally I thought the surface detail would be worse because of the printing limitations. My feeling is that the larger is the kit, the easiest it is to clean or improve the parts. So, in that perspective, the 1/32 scale is probably to most appropriate one for such a production technique. I purchased car primer and putty and will try them soon. One thing that really surprised me is the weigth of the kit: less than 2.5kg for all the parts of a kit that is covering at least a squared meter! So, it is closer to a plastic than a resin kit from that perspective. Fortunately, all the attachment points look sturdy, possibly overscale in some cases but at least the kit will be very solid. I should do a global review for LSP end of this week. This is not a kit for the 'assembler' modeller as this will ask for a lot of clean-up, scratchbuilding details, adding your own clear parts and vacuforming the bulbous windows, creating decals and stencils, etc. etc. So, this is not a weekend project and from a detail perspective, this looks like an enlarged 1/72 model but I love that kit!6 points -
AIMS News
Anthony in NZ and 5 others reacted to Pastor John for a topic
Thanks guys I made up some 1/32 wheel chocs this morning. I liked them very much. They really need 0.5mm wide chain link to finish nicely in this scale.... As well as obviously being sunk into the ground...... I can only find 1mm chain on the internet which would be better for the 1/24 product, but while i am still off work perhaps you can be hunting for yourselves if you intend to purchase latter Best wishes John6 points -
1/32 HK Models Lancaster B Mk.I Nose Art Kit RF128/ QB-V Victorious Virgin.
scvrobeson and 5 others reacted to monthebiff for a topic
I have the fuselage halves ready for decals and weathering after basic detail painting I've decided to break it down and concentrate on fuselage halves first, then cockpit floor to break it down a little as I want the pai ting weathering to be as good as I can get as it is just the nose section so one big focus point. Regards. Andy6 points -
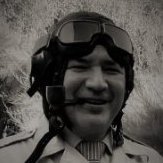
Avia S-199
scvrobeson and 4 others reacted to s00ntir for a topic
This is my last year project - conversion of Revell 1/32 Bf-109 G-6 with AML Avia-S199 "Sakeen" conversion set, Eduard's seatbelts, panel and bronze legs plus some additional scratchbuild. Not an easy task - but it went without serious problems. Just follow the rule: measure everything and test fit carefully 3 times before glueing together. Almost no putty used - except some small amounts of Mr. Surfacer. This was a really terrible plane with really poor take off and landing characteristics - more dangerous to its own pilots than to enemy - but in the early days of independendence this was the only fighter plane available to Israeli pilots. So some of them called it a "Messer-****". Teribble - but somehow great looking for me. I've used several shades of Hataka C170 Red Green for painting. Kit decals were very thin and hard to use - breaking for pieces sometimes. Propeller blades are exactly the same colour as the rest of the kit - but due to some light / shadow play they look much darker on the picures. I hope you enjoy.5 points -
Christmas Raffle 2021
coogrfan and 4 others reacted to Rick Griewski for a topic
And since IMHO this kit is a bit long in the tooth I will send a set of “braces” by Eduard; Photo-etch, 32-058. I will mail the set directly to the winner of this kit. Merry Christmas5 points -
Christmas Raffle 2021
coogrfan and 4 others reacted to Rick Griewski for a topic
And…. I will send a set of decals by Zotz. Part 2 of a series: USA, Greece and Portugal to the winner of this kit. The decals will be mailed by me to the winner.5 points -

Another Hasegawa T bolt Bubbletop, my first LSP. November 12, 2022, It is DONE at last!!!!!!!!
Greg W and 4 others reacted to Citadelgrad for a topic
Tonight i just had time to get the calipers and run one piece of tape at .105” left of the centerline, helpfully marked by the first line i ever successfully scribed, and another line .059” behind that panel line, to borrow Jay’s calculations. It wa actually only slightly closer to the center line than i eyeballed it. as near as i can measure without actually scratching the finish, the left edge of the fore aft tape and the front edge of the port starbord tapes are the correct measurement, therefore the left front corner of where they cross is where the pin should go. Edit, that's partly the camera angle, partly that I got lazy and was precise only from the front edge to the area where the pin will go. The line is straight and parallel to the panel line where it needs to be. My OCD appears to be way out of hand today.5 points -
This picture, taken in oblique outdoor lighting accentuates the raised rivets that festoon the metal seat pan.5 points
-
slow going and yes another paint update. One side almost done then touch up time Mark4 points
-
I forgot to mention Chuck - I appreciate how you always have the modeler in mind when you post your progress. Do's and don't's, how you accomplished a task, etc. Sharing the art so others can learn. Not just showing your accomplishments perhaps looking for praise, or just to show eye candy. All of us who are posting on their projects should be doing same - something I occasionally forget.4 points
-

WIP 1:32 A6M2-N Rufe (Tamiya/MDC Conversion)
Rockie Yarwood and 3 others reacted to Rick K for a topic
Razor Saw is my friend.4 points -
Still going... Three bits of sheet styrene made into a sandwich, then cut into little bits: Cut to shape and stuck around the wheel well: Making something that looks slightly more like a Hunter: I was concerned about getting the AM leading edges and wingtips to bond properly, so I cut the kit parts about instead: Richard4 points
-
AIMS News
dutik and 2 others reacted to Pastor John for a topic
Hi everyone, I am off another month yet but before my last surgery I got some new sets 3D printed. So to be clear I am not taking orders - I just thought you might like to see them. I also had started selling the decals from my 1/32 Bf 109 G-2 and G-4 conversion sets as stand alone items. So I wish you all a happy Christmas and look forward to hearing from you perhaps at the end of January. 24P001 Luftwaffe airfield set - 2x Type C Trestle and 2x Wheel Chocks £24.00 32P031 Luftwaffe airfield set - 2x Type C Trestle and 2x Wheel Chocks £18.00 32D029 Bf 109 G-2 (as found in set 32P015) £7.50 32D030 Bf 109 G-4 (as found in set 32P016) £7.503 points -

US Storms!
D.B. Andrus and 2 others reacted to Out2gtcha for a topic
Hoping all are safe right now............. We have tornado sirens here in Omaha in the middle of the US. We have had reported 110mph wind gusts in our neighboring city of Lincoln, and tornadic activity reported in Western Nebraska. Tornado warning here until late this evening. I was just standing out in front of my house just now, and the yellow and black sky along with the near 75f deg temps feel like many a spring days under tonado watches. ATM, its eerily silent here in-between bouts of the sirens going off. Hope all are safe!3 points -
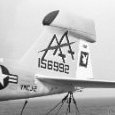
New Martin Baker Mk. H7 Seats From Sparkit
blackbetty and 2 others reacted to allthumbs for a topic
These look really good, as do the others in their line of ejection seats. A bit pricey, but I ordered a set as a Christmas gift to myself! After they arrive, I’ll post an informal review and comparison.3 points -
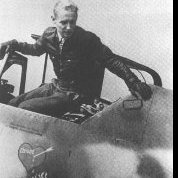
Bf-109E-1, 1/32, Eduard. Legion Condor - Birth of the Luftwaffe
MikeC and 2 others reacted to Hartmann52 for a topic
Well, gentlemen, my long-suffering "Emil" and I are "back in the saddle" (c) The first photo is a decal offered by AML, the second photo is a decal that a friend made for me. The only difficulty was to remove the old decal, to repaint two sections of the fuselage with the main color ... Full kaput, in short. In general, so far something like this3 points -
1/24 Airfix F6F-5 Hellcat "Kicked Up A Notch": New eBook Now Available!
JayW and 2 others reacted to Rainer Hoffmann for a topic
I 2nd that, Jay. I keep forgetting that most of the time, not only occasionally. I especially keep forgetting all the failures along the way. Chuck, pristine work on the engine! I like it very much. Cheers Rainer3 points -

Make the others jealous
Rick Griewski and 2 others reacted to BloorwestSiR for a topic
We were hoping to get another border collie/collie mix but since we wanted a rescue, we're happy to have a pup that needed a home.3 points -

Make the others jealous
dutik and 2 others reacted to BloorwestSiR for a topic
We're at two dogs and two cats. Here's our other cat Fursnake She's a Spitfire fan.3 points -
Another route is the Revell/Monogram Bf 109G-4 kit, which has been available cheap, together with the Aires Bf 109F conversion, which again can be acquired for a reasonable price. If you post a request in the Traders Board you might get lucky.3 points
-
AIMS News
Rick Griewski and 2 others reacted to Pastor John for a topic
Hi everyone - I just found this product - perfect for 1/32. Perhaps also the best you will get for 1/48. - you know that other scale! My thanks for the engineering drawings for the trestle and chocks from Arsenal 45 and the 3D work by Otto Jozsa. So a lot of money invested - hope they sell haha3 points -

Make the others jealous
Furie and 2 others reacted to BloorwestSiR for a topic
Our other dog Zoe is a border collie mix. Love her to pieces. She turned 14 at the end of October.3 points -
Extremely well researched, accurate and bristling with detail; those were my first impressions of the new 3D printed Martin Baker Mk. H7 Ejection Seats (late USN/USMC version) in 1/32 scale by Sparkit Models. From the petite raised rivet detail so characteristic of MB seats; to the realistic fabric folds of the backrest cushion; to the myriad hoses and cords, standing proud of the structure where appropriate; to the upper harness properly restrained by inertial reel tension (a feature that eludes many aftermarket seat manufacturers); this seat earns top marks. In my opinion, it’s the best H7 in 1/32 scale. And this despite some very good competition from the likes of Aires/Quickboost, Eduard and others.3 points
-
Scratchbuilt 1/24 Grumman F8F-1 Bearcat
Paul in Napier and 2 others reacted to Jim Barry for a topic
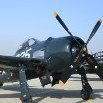
Thanks for the supporting words, guys. Much appreciated. Yes, Jay, this LSP thing all makes so much more sense in retirement! I've got a long one, too. I'm 55. I'm already shopping for supplies and building up my scratch workshop again. My hobby space (a 10'x10' "tiny house") had fallen into as much disrepair as the Bearcat and it too is being re-launched for 2022. (no mice allowed !!!)3 points -
Make the others jealous
coogrfan and 2 others reacted to Rick Griewski for a topic
Nice, nice pup. Our Border Collie Ludique was three December 9th. I have to go through my photo collection on my phone to believe that it has already been 3 years.3 points -
Hello again Some more images taken, this time it's a FW190A-6/R11 of 6./NJG300. Hasegawa Fw190A-6 kit Eagleparts cockpit, spinner and prop, outboard cannon wing fairings, tail wheel set, main wheel/tyres EagleCals Fw190's JG300 Part 2 (used as reference for the major markings to cut masks, some decals used) Master Barrels and pitot set HGW seatbelts Quickboost Revi C/12D gunsights Owl Fug 217 antenna plus SB items AIMS Fw190 Oleo markings MDC Drop tank Landing light in the left wing leading edge SB. Now.....when I was building this kit, my references plus the riveting plans I was using showed the cannon fairings/bulges on top of the wings. I was told just after I laid the paint scheme down that the A-6 didn't have them. So disclaimer - I've probably messed up . I wasn't going to destroy everything to take them off. It is what it is. Paint is Gunze Laquers - RLM74/75/76 scheme, with the 74/75 misted over with 76 to reduce contrast. Thanks for looking Iain3 points
-
I have just read all 12 pages of this thread Jim, and enjoyed every one of them! welcome back - you love this aircraft much too much to let it languish unfinished. good luck with your continued efforts, as there are many bearcat lovers out there still waiting for this beauty to see the light of day in all of her glory! Cheers Derek3 points
-

Italeri CF-104 Starfighter "Kicked up a Notch": KLP Publishing eBook now Available!
Sasha As and 2 others reacted to chuck540z3 for a topic
Hi, If you want a full comprehensive guide, I'm pleased to say that the next eBook from KLP Publishing will be this very build: Building the Italeri CF-104 Starfighter in 1/32 Scale, Build Guide Series 12 According to Kevin it should be done by the end of January or early February, so not too long to wait if you want a step by step guide without sifting through 41 pages of this thread. It will also have over 100 walkaround photos by Gord McTaggart, of the CF-104 that currently resides at The Military Museum here in Calgary Alberta, Canada, which I used a lot for references. Cheers, Chuck3 points -
Wolfpack Phantom - 8th TFW F-4C
Paul in Napier and 2 others reacted to John1 for a topic
Seats are done, except for some tinkering with the paintwork as I'm apt to do. Very happy with AIMS's product. I think I spent more time on these seats than I used to on an entire kit when I was a kid. Added the Tamiya seat decals, trimmed to fit around the lap belts. Also added a couple of placards on the left side from the very useful Airscale placard decal set. Did a bit of paint chipping with my handy silver artist's pencil and used a Flory wash. Probably need to clean up a bit of it on some of those lapbelts. I also used it to tone down the yellow on the ejection ring pull handles. It's a major PITA to paint the yellow/black striping. Depending on what the Quinta handles look like, I might end up using them instead. We'll see. Anyways, here are some pics. That's it for now, thanks for looking!3 points -
And here are some comparison photos. They compare well in many basic respects…both seats capture the distinctive look and proportions of the original. And both feature “busy” and complex detailing…again faithful to the real seat. There’s a noticeable difference in the size of the overhead pull handles though. Fortunately I had measurements taken from a nearby museum example. It turns out Sparkit is spot on in terms of hoop diameter and spacing. If anything, they are very slightly too thick and would benefit from additional droop. Quickboost’s are oversized by about 35 percent, which is enough to throw off the scale appearance - a scratch built replacement would improve matters considerably. As mentioned before, Sparkit captured well the raised rivet effect across the metal seat pan and frame. For the most part, Quickboost represents this feature with recessed indentations that are faint and inconsistent in places. And no appraisal of 3D printed parts is complete without mention of layer lines. Yes, they are visible across some of the flat faces of the Sparkit seats. But they’re subtle, as these things go. Careful print orientation has limited the most visible traces to the lower aft seat pan, an area that won’t be seen once the seat is installed inside the cockpit. But I’m curious to see what they look like under a coat of primer. When I get to this stage, I’ll post the pictures. Finally, the biggest difference is one that can only be fully appreciated with the naked eye. And that’s the see-through, truly 3 dimensional effect achieved by Sparkit’s printing technology, something not attainable with single piece resin casting, no matter how well executed. Rich2 points
-

Bf 109 F on the cheap
Model_Monkey and one other reacted to Radub for a topic
I know, it is not the best description. As I said, it hard to describe. That shape is evident when you are "face-to-face" with a Bf 109 but it is very hard to capture in 2D photos. Here are some photos of "Black 6" from their superb Facebook page https://www.facebook.com/Me109-Black-6-352717801421301/ If you look at the bottom where the cover for the oil tank meets the lower cowl, you can see that the transition from a circular shape behind the spinner to the flatter shape at the front of the lower cowl causes those "bulges" that I was trying to describe. And now that you know where to look, have a look at this: Anyway, the shape of the Bf 109 nose is quite complex and whereas Hasegawa and Revell did a good job of capturing it in 1/32, Trumpeter just missed all the subtleties. HTH Radu2 points -
Scored a great deal at the local Hobbyshop
BloorwestSiR and one other reacted to Sabre F-86 for a topic
Dropping in to Sunward Hobbies in Toronto yesterday to pick up some ordered materials and found a Special Hobbies P-39 for $80. Came with a CAM resin set, PE seatbelt set, cast landing gear struts and a Big Ed photo etch sets. They had other good deals on 32nd scale items as well. Worth having a look if you are local.2 points -
Engine swap, picture thereof
Oldbaldguy and one other reacted to Juggernut for a topic
Outside of the environmental considerations, what makes Guadalcanal different from any other place a Wildcat engine is changed? If the environment is the only difference than I would think you could use basically any photo of the respective environment (airfield - marsden matting, etc) and meld it with an engine change.2 points -
Do you want a 1/32 P-3 Orion?
IainM and one other reacted to Anthony in NZ for a topic
That's fantastic! I look forward to seeing your thoughts further...minse is still in Tokyo 'outward Despatch' , so could be a while me thinks! I will try not to get too jealous you have yours already LOL Thanks for the update!2 points -

1/24 Airfix F6F-5 Hellcat "Kicked Up A Notch": New eBook Now Available!
JayW and one other reacted to chuck540z3 for a topic
Thank you everyone! Thank you Jay and yes, I did expect some feedback from an expert like you and I really appreciate it! As for the part on the bottom, J13 in the instructions, it calls for color #85, which is "Coal Black", although I did note that all the pics I have show it to be grey like the rest of the front as you have shown. Always looking for color contrasts, I kind of like the black, so I think I'll just leave it. In any case, I can always claim that I was just following the instructions. I thought about clamps on the wiring, including on the tubes, but everything I can think of using that would be to scale, it just too darn tiny and I'm afraid of pulling a wire, scratching the paint and/or leaving a glue mess. Sometimes less is more and in this case, I'm happy to punt and call the front half of the engine done! Cheers, Chuck2 points -

Hobby Boss B-24L (26 Feb 2023: tail turret)
Paul in Napier and one other reacted to easixpedro for a topic
I guess that's what really intrigues me. World War 2 was such a cataclysmic event, and here we are 80 years later with relics still out there and I bet folks don't even realize what these things are or what the purpose was. I've been to almost all the major Pacific battlefields. Iwo spooked the hell out of me. There's still bunkers and gun emplacements with cannons in 'em. When you realize how many humans lost their life on what was a really small island, it starts to sink in. I vividly recall standing on the beach and finding a gigantic chunk of shrapnel that was exposed by the waves--as big as my foot, and all mangled. Sobering really, and a grim reminder of what 'humanity' is capable of. But enough of that--have the next few days off and really looking forward to getting after this build and the Prowler! -Peter2 points -
V-ger
Out2gtcha and one other reacted to Landrotten Highlander for a topic
Correct, V-ger is the fictitious Voyager probe 6 (there were only 2 launched). The probe has been found by a machine society, repaired and enhanced with a faster space ship to fullfill its designed function (which is to provide its 'creator' with all the data it has collected); i.e. us humans, but the machines do not consider carbon based units as life-forms and hence this becomes the danger for earth in the film.2 points -
It's really important to make grooves with a hobby knife on both sides of the desired fail poin to make it work.2 points
-

Das Werk 1/16 Sturmgeshutz III ( STUG III )
Rick Griewski and one other reacted to Uncarina for a topic
Sprue pics here: http://www.panzer-modell.de/ausgepackt/archiv/daswerk/16001.htm Cheers, Tom2 points -
My Sparkit Models 1/32 Phantom seats arrived today…exactly 14 days turnaround from France to the Western United States - impressive given the holiday rush and the overall strain on global shipping we’ve experienced over the past year and a half. Even more impressive is the product itself…in a word: exquisite. Sparkit have done for modern ejection seats what Reedoak (another Gallic firm) have done for figurines, which is to say they’ve advanced the state of the art. Vive La France! Hyperbole you ask? Perhaps, but wait until you see the pictures, which I’ll post right here later today. Rich2 points
-

Hobby Boss B-24L (26 Feb 2023: tail turret)
Paul in Napier and one other reacted to blackbetty for a topic
those flak towers still exist 3 gun towers with (then) a dual 12.7cm gun plus four 20mm quads each 3 measuring towers its not financially possible to take them down, partly because they are in the middle of the city (no explosives here). some are in use, one is the chancellors bunker in case of a crisis, one is a giant aquarium and zoo, some are just unused shells. i have been on top of one, all are in sight and only differ in absolute height by centimeters2 points -
Tamiya Spitfire VIII
Pastor John and one other reacted to DrDave for a topic
[url=https://ibb.co/j9tCk5W][img]https://i.ibb.co/hx0GFMZ/4-BBAA52-F-5141-4940-8043-98-DA57-D038-B2.jpg[/img][/url] [url=https://ibb.co/m467LTy][img]https://i.ibb.co/kXQFRBD/28-E83453-5720-40-C7-8629-6-ECE702-C7905.jpg[/img][/url] [url=https://ibb.co/tbXKbvR][img]https://i.ibb.co/D7pW7vd/CAB59-D5-B-1459-401-D-91-EF-2-B10139-E68-A1.jpg[/img][/url] [url=https://ibb.co/z6RZK6K][img]https://i.ibb.co/xFj6VFV/AC10-ACB7-8322-4905-B36-F-6581-F75-A7382.jpg[/img][/url] [url=https://ibb.co/xjXjjfn][img]https://i.ibb.co/7WjWWR3/4-E843779-F686-4-AB9-B88-C-D93-AD8706-A03.jpg[/img][/url] [url=https://ibb.co/1Mc0F1x][img]https://i.ibb.co/gdYrkNC/C3-EC1-C3-E-EE07-4669-9704-53693-EEA4-BA5.jpg[/img][/url] [url=https://ibb.co/Qk8NCfj][img]https://i.ibb.co/68vP1mJ/75-AF27-D7-2-B6-E-4-AFE-A389-3-D76-D2-FF84-D0.jpg[/img][/url] [url=https://ibb.co/TL20N37][img]https://i.ibb.co/tXK21rv/00-A40-B73-9214-4-FED-8-FD4-516968095298.jpg[/img][/url] [url=https://ibb.co/NCn4d6K][img]https://i.ibb.co/9g3Mk9W/B5-C46-DD2-94-C6-4-C8-A-B4-EF-CA0-E5-DC4-FCE7.jpg[/img][/url] [url=https://ibb.co/JdCWQwh][img]https://i.ibb.co/FWnkVLP/4-FF300-FD-58-A2-4-B71-A0-A2-9-ABB124-FC1-D4.jpg[/img][/url] [url=https://ibb.co/0KN73SR][img]https://i.ibb.co/pQD7p8B/301-C612-F-AC9-F-45-E8-BBD8-57-B2-E98-FF6-E4.jpg[/img][/url] [url=https://ibb.co/Nmv0Lw9][img]https://i.ibb.co/txG0byq/3-D92-BF74-485-F-4859-8-F4-C-5-A212-FD53986.jpg[/img][/url] [url=https://ibb.co/QM7rkGK][img]https://i.ibb.co/2d0gSBk/C09-AF315-41-BB-454-F-8-B53-A12-EF05-F0018.jpg[/img][/url] [url=https://ibb.co/McgPr1b][img]https://i.ibb.co/K25VdsY/172-B1-FFA-3-BA3-451-F-AFB5-88388-F48-DDED.jpg[/img][/url] [url=https://ibb.co/xSXtVgX][img]https://i.ibb.co/mCbVQyb/103-F9-E09-0253-4-B9-B-8-F26-EB10-D0-BE6-B9-E.jpg[/img][/url] [url=https://ibb.co/yRjZC48][img]https://i.ibb.co/8BZfwYj/E3-BEF368-E997-4-A28-9-C06-EF0-C6-DE361-FC.jpg[/img][/url] [url=https://ibb.co/ncfYTH0][img]https://i.ibb.co/Kq7fYMG/F4-BF88-D9-8-DED-4135-A222-A7-DB8-A0-E99-C6.jpg[/img][/url] [url=https://ibb.co/7zqwj8Z][img]https://i.ibb.co/cvjGkMZ/C099102-C-2-AE4-47-DB-BD50-D1-B65-CE14-AD2.jpg[/img][/url] https://i.ibb.co/cvjGkMZ/C099102-C-2-AE4-47-DB-BD50-D1-B65-CE14-AD2.jpg [url=https://ibb.co/9TMq7c3][img]https://i.ibb.co/Kq19Jbz/915802-DF-E102-4911-8519-A7-BA39533-CB4.jpg[/img][/url] [url=https://ibb.co/XtZqryz][img]https://i.ibb.co/L1z3XQC/C4579-E71-5779-49-D2-B943-E29-EAFF39-CF6.jpg[/img][/url] [url=https://ibb.co/6XmZhPZ][img]https://i.ibb.co/Rj9Sn0S/E9-B1-B7-A7-3-FB3-4930-B6-D8-B91-BE727-E567.jpg[/img][/url] [url=https://ibb.co/P6hLXxY][img]https://i.ibb.co/vjPFy1B/4-C746-A17-2-DE8-4641-8788-9-AC6437-DA0-FF.jpg[/img][/url] [url=https://ibb.co/Xz3Nfb9][img]https://i.ibb.co/SKdWDP2/2-C0-F9-AB3-D476-41-B2-840-A-94-CFD48-FD726.jpg[/img][/url]2 points -
Wolfpack Phantom - 8th TFW F-4C
Paul in Napier and one other reacted to John1 for a topic
While I'm finishing up the seats, I'm starting to plan the rest of the cockpit. First off - I'm a big fan of cockpits that looked heavily used. Immaculate 'pits have their place but not on combat aircraft that were flying at a high tempo. Not going to see mud caked on the floorboards, but SEA was hot and dusty at times (other times it was hot and raining) and the jets were flying a very demanding schedule. Crew Chiefs took pride in their jets and made sure the canopy / windscreen were spotless but they weren't going to bother touching up scratches and wear marks after each mission. Here's a great picture that shows two realistically beat up IP's. Here's another good shot I found while wandering the web. Note the patina of dust and grunge, especially behind the panel. By the way, if anyone wants to checkout a very used F-4C cockpit, I highly suggest you go here: http://www.nmusafvirtualtour.com/cockpits/SEAW_tour/SEAW-10.html (front cockpit) http://www.nmusafvirtualtour.com/cockpits/SEAW_tour/SEAW-11.html (WSO cockpit) These are fantastic 3D "virtual cockpits". You can move around and zoom to your heart's content. They are from the F-4C that's in the USAF Museum. The exterior of this jet was completely "restored" and re-painted but the interior looks like the pilots just shut her down for the last time a few minutes ago. This will be a fantastic reference when I start to add details and weather the cockpit. Also - for the first time, I'll be using these: That's it for now, thanks for looking.2 points


