Leaderboard
Popular Content
Showing content with the highest reputation on 10/05/2021 in all areas
-
Hello all! Here are some pictures of my latest build, the Lukgraph resin kit of the Friedrichshafen FF.33L... Scratch build Railcar with Miniart parts, figures from Copper State Models, Kellerkind Miniaturen, Elan13 and Riich Models. Vignette: Rails and cobblestones from Italeri 'Long dock' kit. The German Naval Hex decals (two different sizes) are made in collaboration with Lukgraph. Link to build thread: Thanks for looking in: Kent12 points
-

MH-6M Little Bird
CODY and 8 others reacted to Pete Fleischmann for a topic
….and we’re in! a few odds and ends..cyclics, etc to go. Had to rip out the Garmin- it interfered with the windscreen- cheers P9 points -
Odds and ends, part 2. All of the bombs have been added to the airframe. All of the missiles have been painted. And finished gear bays. Thanks, Dan9 points
-
More masking more painting and the tape came off tonight, some touch up work will be needed here and there but it looks a bit like the prototype I am trying to model. It's definitely not in military colors anyway Thanks for looking8 points
-
Time flies when you are having fun. So where am I? First, the inboard rib on the other wing is complete, and looks the same as the one I already posted. That is a victory, but one I need not show pictures. Second, it became apparent to me I will need the landing gear doors in order to do the gear door actuators that adorn the aft face of the spar, plus the hydraulic hoses for those actuators. Of course, of course!, the gear doors supplied are just not going to do it: Nice try, 21CT, but they are waaaay too thin. Plus the peripheries are wrong. I can do better - with 3DP. To do that, I have to create the doors digitally: I tell you - those were hard to do, and time consuming. For me anyway. All those depressions - OMG! That is why I will have these 3D printed. And the gooseneck hinge fittings were a challenging integration effort - the thick wing skins make them quite different from the real parts on the real airplane. Fortunately the drawings for all these parts were fantastic. So very soon I will send the door models (not the hinge fittings) off to my 3D print supplier, and hopefully get some parts soon. In the mean time, work continues on the wheel wells. Here is a picture of the real thing where I have labelled some of the components I am trying to accurately model (or have already): The stringers on one side have been done. Here: The paint wasn't even completely dry when I took this shot. It needs weathering of course. I made them out of .06 x .06 square rod on top of .01 x .125 strip. In real life they are box sections, and as you can see they terminate on that "intermediate rib", which I have represented. On the other side of that intermediate rib will be stringer continuations with deeper channel cross sections, which will terminate on the OB rib - the component next on my list. And with the upper and lower wing parts together: It's comin' slow but sure. Stay tuned!7 points
-
Some more photos with the forward fuselage.7 points
-
This is my first print of the SH-60B weapon station so far it came out ok but I am going to redo it there are a few things I know I can do better on7 points
-
Hi, just starting on this kit painted up the wheels also used one of the different front rims for some random interest6 points
-

MH-6M Little Bird
CODY and 5 others reacted to Pete Fleischmann for a topic
Ok all- last look before I glue these homies in. Gonna be kinda hard to see once the cockpit is all closed up- cheers P6 points -
Academy 1/32 F/A-18C Hornet - Backdated to F/A-18A+ / VMFA-142 "Gators"
Starfighter and 4 others reacted to Starfighter Jock for a topic
(Photos Credit: Seaforces.org) After a long break from doing any serious model building, and since we are moving into the fall/winter season here in northern Michigan where I live, I have some regenerated mojo to spend some time at the workbench and get my model building hobby back into forward gear. After looking through my kit collection and all the aftermarket stuff I have collected over time, the Academy F/A-18 Hornet grabbed my attention, along with Flying Leathernecks USMC F/A-18A/C “Hornets Swarm” decal sheet. I had my subject, a F/A-18A+ assigned to VMFA-142 during Operation Iraqi Freedom in 2005. Specifically, BuNo 162469 “212”. As the building of the Academy kit has been covered in-depth in both book and forum formats over the years, I am not going to present a blow-by-blow build report, just going to highlight what I am doing with the kit as I move through this work in process. That said, here is a listing of the products I intend to use on this build; Academy 1/32 F/A-18C Hornet kit. Avionix - F/A-18A Cockpit w/ Tail Fin Conversion set. Legend Productions - SJU-5/6 Seat . Aires - F/A-18 Wheel bays set. Quickboost – F/A-18 APU starter, Access panels, Lex Fences and APX-IFF Antenna sets. A.U.M.R. Reaver - F/A-18C/D Louvers and Meshes set. Eduard - F/A-18 Interior & Exterior PE sets. Dmold Modelworks - F/A-18 Profiled Intake and F/A-18C Top Panel sets. Rhino Modelworks - F/A-18A/B/C/D Exhaust set. Flying Leathernecks - F/A-18A/B Pylons, F/A-18A Tail Stiffeners, F/A-18A/B/C/D HUD and HUD Glass sets. Flying Leathernecks - USMC F/A-18A/C in Combat “Hornets Swarm” Decal Sheet. Let the progress begin…………………….. Kirk Johnston (KJ)5 points -
ICM doing a new Yak-9 family of fighters in 1/32?
Uncarina and 4 others reacted to Dpgsbody55 for a topic
Holidays over for me, and have returned to the land of passably reliable internet connections. I did post a couple of comments when able while away, but not on this. Firstly, I'm glad to see ICM returning to WW2 fixed wing as I'm not a fan of aerial egg beaters. Secondly, I'm a little disappointed to see it's another Yak, but I'll probably get the kit anyway as it's ICM and not a plane I've ever built before. I could have wished for a different Russian plane such as a Lavotchkin, but maybe there is one in a future ICM release?? Who knows. So to console myself, I bought a Tamiya Mustang yesterday as I don't have a P-51 in my stash and although the D is not my favourite, it's Tamiya and their kits are wonderful. But I wish that had been a B model as I much prefer the look of that version. There's no pleasing some folk, is there.... Cheers, Michael5 points -
Painting (the fun bit) continues, masked with Tamiya tape for the sharp lines and painters tape for general coverage. The red is Mr. Color lacquer Still more to do Thanks for looking5 points
-
thank you for the attention! sure I won't try to move the undercarriage legs for any reason, it seems to me a miracle that it seats on these without troubles! well, it's time to arrange a decent base for the scene I have in mind. assembled a simple "mc-standard" wooden flat base, I tried different elements configurations, this one seems to be the winner: the area on the right of the airplane remains a little bit empty, but that's it. the focus of the action is on the stretcher bearers, so I drew an imaginary line on the stretcher's axle toward the two standing men near the cockpit, letting the left wing and fuselage lines working as orthogonal lines to force if not the prospective, at least the observer's view. well, more or less. wanting to give a title to the diorama, one could be "back home ticket", I guess... ok, I think this is the best arrangement with the available elements, I'm not enthusiast about that, there isn't any of the pathos of the bundesarchiv's image, may be more dinamic posture of the figures should work better, but I'm not a sculptor, no way about that. so, I'm trying some kinds of materials and effects to cover the base, this is something closer I want to obtain: a sligthly, wind blown, dry snow covered terrain. to be continued... cheers, Paolo4 points
-
Whether or not you can see the images Martin posted depends on which browser you're using. Those images are being served from a server using plain old (non-secure) HTTP, whereas LSP is hosted on a server using HTTPS (the S being for secure). Loading HTTP content into a HTTPS page or site produces a result known as 'mixed content'. Some time ago, certain web browsers (Chrome and its derivatives, mainly) decided not to allow mixed content by default, meaning that if it detected any HTTP content being loaded into a HTTPS page, it would refuse to load or display them. The thinking is that loading content into a secure page from a non-secure source breaks the security model. Whether true or not, that's the decision that was taken, and if you can't see the images, you're probably using Chrome. To test if mixed-content is the source of your issue, right-click on the image (or its placeholder) and load it into a new window or tab. If it loads, then it's a mixed-content problem. If it doesn't, then it's probably a broken image link. Kev4 points
-

MH-6M little bird with crew
A-10LOADER and 3 others reacted to matt_1185 for a topic
Thoughts on making operator #2 into a crew chief ? Since he’s holding on and not physically holding a rifle….?4 points -

MH-6M Little Bird
CODY and 3 others reacted to Pete Fleischmann for a topic
And a little weathering.. a little more work to do on that Garmin screen- cheers P4 points -

Zvezda Star Destroyer - a new detailing project
TAG and 3 others reacted to The Madhatter for a topic
Hi Everyone Well, its been a few months since I last updated this thread with some progress. I hope some interest is still there - understandable if its waned significantly though. It has been a while However, over the past couple of weeks, I've recommenced work on it and am happy to report that 99% of the detailing is now done. I still need to add a couple of bits here and there to the upper lip of the side trenches and install some flood lights but overall, it's ready to start drilling out the sidewalls for the fibers. I'm going to paint first then add the fibers as I want as close to the surface mating as possible and I won't be able to do that in these fine recessed spaces if I fiber then paint. I have sighted a couple of spaces that I missed in that rear left wall so I shall remedy that tonight that you probably wouldn't really notice - but I will I only took a few pics, so that's it for now. All being well, the next update should be the final floodlights and trench details and I daresay the last time you'll see it with no paint on As always, thanks for stopping by and having a look and sorry again for the delay in progress Si4 points -
I got on the base color of gloss white, a tough color for me for some reason but, most civil aircraft are...white. So anyway, primed, primed again with Tamiya white surface primer, then shot with gloss white, then shot with gloss white, then shot with gloss white....see a pattern? This is Mr. Color lacquer. I'd much rather use acrylic but acrylic gloss white would have me painting for the next three months and I always seem to end up with tape marks after masking gloss acrylic (anybody else?) next up is some masking and the (hopefully) color in red and black (C-FIMJ) Thanks for looking (and encouraging)4 points
-
hi all, thank you for you positive comments, albeit I feel myself a little bit unmotivated on this project, may be I'm just get loosing grip on it, approaching the diorama's phase... I choosed to do some light weathering on separate parts, and to build up the wing's strutctures on these before try to match these with the fuselage, adding in the process the last details, like landing light, mooring rings, air tubes for the foldable (yes, really!) pitot, fuel televel. on this session I added also vacu formed navigation lights covers, being the latter done with a scalded fishing line colored (speaking of the left one, the right was cologreen, ah ah). same for the landing light. I was concerned about the solidity of all these struts, but indeed all seemed to go straight on place. other details were the air scoop for the electric generator on the engine's RH and finally I added the exhausts, to wich ones I cutted the four front slots last item to go, the landing gear's brake lines and here we are, at last. I'll add doors and other little items when I'll be ready to glue it permanently on the base. with a slight modification on the lower cowling's exaust holes, I rendered the engine fully accessible. with the option to leave it without the lateral panels, as seen on many WWII images. but, being the idea to do a late autumn diorama, I think these will go installed, albeit with magnetos. well, after a glue hardening night, she seems to be sound and stable, really nice kit! really, I would like to know the designer of such intricate but efficient structure! what else? the kid that still lives in me ask for an engine run up... so, clear prop! next step, diorama base, stay tuned! cheers, Paolo4 points
-
The lower fuselage has been beaten into submission, at least for the right main bay. It took a lot of scraping, fitting, scraping (repeat ad nauseum) but we finally got there. I also removed the side guide rail to allow the bay to move further outboard, as I saw that was going to interfere down the road. This is how it originally looks (shown on the left side for comparison) And this is the alteration done to the right to allow for the gaps to be closed Finally, how the bay looks post shave I hope this helps anyone else who gets this kit/detail set combination! As always, thanks for stopping by the hangar!4 points
-

HE 162 C what if revell
Nikola Topalov and 2 others reacted to red baron for a topic
my last built , enjoy :3 points -
Top of my list would absolutely be an accurate and detailed 1/32 kit of the Macchi MC.202, with the 200 and 205 close behind. But given ICM's apparent love for "tweener" biplanes, a FIAT CR.32 would also be great. Lovely aircraft, nice variety of color schemes, and a nice bookend for their CR.42's.3 points
-
Thanks boys! I did actually (after a hellacious trial and error with a translator program) pay up my 1150 Rupees (about $16.00) and got myself this set: Its coming from the heart of Russia in Moscow, so no Idea when it will be here, but the whole chit turret is separate so seems a no-brainer to finish up and wait for the turret for last if needed. Cheers!3 points
-

Wingnut Wings Lancaster to be released by Border Model
Paramedic and 2 others reacted to Model_Monkey for a topic
Actually, the money accessed with the plastic cards we keep in our wallets and what we believe we have in our bank accounts or investment accounts isn't actually "real" either (Google "Lehman Bros."). It's not like we all have a private vault at Gringotts filled with gold coins and silver goblets. I wish I did have a vault at Gringotts. I'd buy 2 Lancasters, one as a dambuster.3 points -
Agreed JMcD! LM could very well 'revisit' this particular design, as it may now prove to be a very cost-effective solution to future capability requirements, especially when combined with today's advanced Viper features. Great work Dan - your model once again shows us what a beast of an aircraft this could have been! Derek3 points
-

JetMads 1/32 Viggen
JMcD and 2 others reacted to Stokey Pete for a topic
Speaking from my only personal experience of clear resin, I’d say it’s probably not going to be an issue. I’ve got an accurate armour lynx that has clear resin parts for the roof windows. They’re as clear as they were when I built the kit over 10 years ago.3 points -
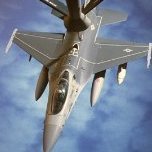
JA 37 D(I) - 1/24 ---- SOD
JMcD and 2 others reacted to Rainer Hoffmann for a topic
Thanks a lot, everything helps. If you could measure the 1:48 Maestro Models U95 pod, I could compare it with my drawing. It will be the two tone grey scheme which I actually like more than the splinter scheme Cheers Rainer3 points -

Make the others jealous
JerseyChris and 2 others reacted to Gazzas for a topic
Because my club is an armor SIG, nobody brings in LSP's. But, I did get two on my short list of armor for a sweet price:3 points -

MH-6M Little Bird
CODY and 2 others reacted to Pete Fleischmann for a topic
Getting closer on this- flat coat and FLIR screens coated with HiQ Parts Mirage Green Seal film- cheers Pete3 points -
This is more and more feeling like I'm working in a backshop instead of the flightline where I belong . I began today by adding a second application of the putty to the erroneous vent hole, due to putty shrinkage and the awkward location of the fill. While that was setting, I went to work hacking away at the rear cooling vent, completely removing the stock "mesh" (molded-in detail, that definitely looks the part from a distance, but I'm not about that life.) So on went a YT playlist and out came the knives. I carefully scored all the edges of the mesh, adding a slight angle to the cuts to allow for the AM mesh somewhere a bit more solid to sit when I get it in (I'll be using Aber 1/35 interwoven 0.5x0.5 mesh, it definitely looks similar to OEM from all the pictures I've seen of the mesh.) I did have a bit of an "oops" moment, and cut straight through the upper outboard corner. Luckily it was a straight cut, and after a bit of liquid poly and a sit in the bad boy corner, I can't even see the cut line While the rear panel was having it's time-out, I moved back to the main assembly, looking to smooth out the second coat of putty. Testing with my finger to see if it could handle the sanding, I proceeded to break out the sanding sticks and blend the putty to the housing. Once I was satisfied with the blend, I attached the front housing and seeker head, and lo and behold, more filling required. These were just seam lines, an easy task for any of us here, so after that glue set, I filled in the seam gaps. Lastly came the cooling intake scoop, and if you haven't experienced this kit, yet more ill-fit. This time there was a noticeable step between the scoop and main housing. So out came the knife again and I proceeded to shave the inner land of the scoop, periodically checking fit till I was happy with the level between the scoop and housing. That was then glued on and will also require putty to fill the seam gap. As the scoop is setting, I started to clean up the rear vent hole, evening out the cuts and making it more of a rectangle shape. That edge at the top is waiting for the glue to completely set before I attempt cleanup there. As always, thanks for stopping by the hangar!3 points
-

Roden 1/32 L-19 on floats
Alain Gadbois and 2 others reacted to chrish for a topic
Thanks for commenting! I've got some paint on the floats tonight (quitting time now) and weathered them with the stains I've seen on well used floats. hmmmmm...they look quite different to the naked eye than to the camera it appears. Anyway, that's it for now Thanks for looking.3 points -
Haha yup, that's me got a thing for float planes I guess. Thanks! I fitted the engine cowlings and windshield, front and rear; The kit's engine air intake and oil cooler were blanked off. I opened them up added a model car radiator for an oil cooler and a bit of p.e. from an F-18 kit gun vent for the carb. air intake. Thanks for looking3 points
-
Thanks for the encouragement! OK so I got the fuselage closed up (fairly uneventful) yes, I forgot to take pictures. I also got the wing(s) glued on today and test fitted the windshield and rear window, seems to be a good fit so far. I did have to...ok. so I didn't "have" to but I chose to, replace the front and rear V braces with brass rod for a stronger more to scale appearance. Thanks for looking3 points
-
Thanks for the comments! I've went a little off the beaten path and added some "civilian" components. An ELT hopefully visible behind the rear station. and as the kit includes two D sprues each with a "map case" I added a second (not called for in the instructions) to the rear seat side wall. The kit includes an instrument panel decal but the gauges are kind of generic pointers and numbers so, I used some Airscale instrument decals instead, much nicer. Thats it for now Thanks for looking3 points
-
Looking forward to your build.2 points
-
Just...an unfathomable marketing ploy to kick off a new line of kits. Why slap the name of your new line onto a repop that's 1)overpriced 2) has nothing to do with a new tooled, new line of kits and 3)doesn't even include the upgrade parts that you are peddling? Regardless of what you think of the Revell Phantoms ( I kinda like them for what they are, at the RIGHT price), this is not the way to do it. Not. Very. Wellthoughtout. And it just struck me, the extras they are shilling add up to another $89. Yeah, I'm all in...2 points
-
Thanks Mark. Lukasz actually contacted me offering to make the two sized hex patterns for the build. I then made some sketches and color samples and send them to Lukasz. A couple of times back and forth, and the new decals incl. some with only linen, were ready for testing. Now Lukgraph has issued a Limited version of the FF.33L kit with the decals. Cheers: Kent2 points
-

JA 37 D(I) - 1/24 ---- SOD
Rainer Hoffmann and one other reacted to Derek B for a topic
Great info Paramedic, thank you (I also found the same information as you, but did not post any links to it as it did not provide the specific dimensional data which Rainer is looking for). My modelling themes and passion are Hellenic Air Force and Swedish Air Force (Flygvapnet)/SAAB aircraft, so I am following Rainer's build (and all other Viggen builds for that matter) with great interest. Cheers Derek2 points -
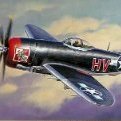
JA 37 D(I) - 1/24 ---- SOD
Rainer Hoffmann and one other reacted to Paramedic for a topic
Sure, no problem. yet to figure out how to post pics here, lol.. https://www.flickr.com/gp/184822879@N02/z5D7hG It is not quite 63.5 but a liitle longer than 63mm.. On the other hand, measured witha cheap, flexible, steel ruler.. 8mm thick just behind the "wings" 11mm across the "wings" looking from below. Anywhere else or any pics? I´ll cut it off the casting and clean it up if necessary.2 points -

JA 37 D(I) - 1/24 ---- SOD
Rainer Hoffmann and one other reacted to Paramedic for a topic
https://www.aef.se/Avionik/Notiser/Storkapsel_U95.htm I´lll help you translate whatever you want buddy. https://www.aef.se/Kopierade_dokument/Motmedel_Bengt_B.pdf Your build is amazing. If I can help _ I gladly will. Some call the U95 "Axel" - but "Axel" is as far as I know the SYSTEM in the Sk37E when it is active. The U95 was used passively in the JA 37Dis. Not really important but I mention it anyways. PM me if you need any help with sources, translations etc. I´m Swedish and I will do what i can. I have the pod in 1/48 if that can be any help.. (Maestro Models´)2 points -
Zvezda Star Destroyer - a new detailing project
TAG and one other reacted to Panzerwomble for a topic
I felt a quake in the forum ...as if a thousand likes had been clicked at once .....2 points -
Looks like we have our theme for today. Pics as promised........... All I can say is if I had done any research prior to just jumping in and buying a Master Model M-61 I would have easily found that it wasn't an M-61 in the chin but an M134 instead, which is about 1/2 as big around. I just jumped in not even thinking how small it really was. All I had to do was pull out the front 6 holed disk from the M-61 MM kit and compared it to the chin mounted M134 from the OOB Cobra kit and I could have saved myself 4 or 5 hours of complete hell. It really isn't even close, and I should have at least looked up what I was trying to replicate and would have found no such weapon in Master Models catalog. As I said, it isnt even close and I really should have paid more attention to what I was buying. Here you can see the partially assembled M-61 next to the hole for the M134. Of course this was after a full night of frustration. I had already cut the gun barrels down to fit within the chin turret, but failed to take into account the diameter of the gun: Well lesson learned. Since there is no brass version of the M134 (yet), Im hoping Master Model comes to the rescue with a complete brass kit for the chin of the AH-1G . However, I cant even begin to fathom how frustrating one could be to assemble with the problems I had with the much larger M-61. I would think they may have to somehow make a different assembly style for it to be even remotely possible to get right. With that frustration set in, I decided to get onto something else that I could successfully complete on the model. I installed a few small rare earth magnets to a plastic tube, and glued it into the tail of the Cobra with a long dowl attached so I could make sure that it got glued in straight. After that dried and with the magnets buried in the tail, I got a small stainless steel tube and cut it down to length and added a few more of the same magnets to that: Then easy peasy, the tail rotor attaches and spins freely, while still being able to be removed if necessary After that was completed I moved on to tarting up the pilots gun sight. This is the much earlier XM-69 reflex sight used in Cobras................. No, of course its not, there's no such thing. Its just the OOB gun sight with a bunch of PE, watch parts, wire, 3D printed knobs, micro-tubing, and some clear Squadron plastic sheet cut into gun sight "glass". Sorry for the crap pics, it was a hard lil booger to photograph. I know its complete fiction, but again, with limited parts and a desire for some fun I just went for something that looked cool and busy. Im heading back to the build tonight to get a dash of paint on the gun sight and some Future on the sight glass. Cheers!2 points
-
Odds and ends...... The F-16xl was able to carry 4 Amraams in recessed troughs under the wing up next to the fuselage. I chose not to gouge out the troughs but instead glue on some "half" missiles. And here they are. I found one actual Amraam in the spares box and used it to produce 3 half missiles. 2 AIM-9L's for the wingtips. Some more detailing to be done. Here is the tail end of the brake chute. I carved it out of a lump of Bondo and then added straps and a cable. Kind of hard to see, my camera is not the best for closeups. Thanks, Dan2 points
-
F-14D VF-213 NH101: Major Decision Time
themongoose and one other reacted to Crew Dog for a topic
Someone call a doctor, because this kit is now in major surgery! I have packed up the gear and bays in preparation for sending them off to @Ali62 at Aerocraft Models so they can work their magic on the struts. As such, no more will be happening on the fuselage for the time being (I have to wait for @Zactoman to finish his move anyway before I'm able to order the big box of goodies for the 'cat, hope the move is going smoothly Chris!) My attention has been turned to the ordinance, and while 99% of it will be AM (the AIM-54, AIM-9's, and GBU-16's) one piece that will be from the kit has a rather glaring error: the AN/AAQ-25 LANTIRN pod. As many, if not all of you know, Trumpeter has made the pod so that it will sit upside down when mounted on the rail, so the cooling intake scoop will sit on the inboard side instead of the correct outboard facing orientation. With this in mind, I set out to perform yet another fix to this. I began by assembling the main body of the pod, and when the glue has set for that, I used a thumbtack (the same one I will be using to re-rivet the wingtip nav light housing) to bore out guide holes on the opposite side of the adapter mounting holes. Once that pushed completely through, I took a 1.2mm drill bit and carefully widened the holes till they matched the originals. A bit of Perfect Plastic Putty on the originals, and the fit is actually better! As you can see here, the adapter mount now fits tighter, and can be held in place without glue being applied (it'll still be glued during final assembly) Of course, this modification leads to another issue: the cooling vent is now on top instead of the bottom. Out come the trusty drill bit again, and I started with a 1.2mm guide hole in the center of the original vent location, which you no doubt saw when I showed the new mount holes. I then moved through the diameters of drill bits till I came to 3.5mm, which is dang close to the diameter of the vent locator. After cleaning up the new vent, it almost looks like it belongs there! All that remains for this bit is to putty the original vent, and procure some mesh to attach both here and at the aft of the pod, which will also be cut out to facilitate the new screen. As always, thanks for stopping by the hangar!2 points -
Panther V Aufs G 1/16 Trumpeter
Alain Gadbois and one other reacted to josebagasteiz for a topic
Hola a todos. He pintado el interior del casco con Cavalry Brown de Vallejo. Luego enmascaré para pintar con Cremeweis de Ammo Mig. El trabajo de enmascaramiento fue muy complicado. Saludos y espero que les haya gustado!2 points -
Thanks for the encouragement! The kit comes with the vertical stabilizers for the float version but, not enough room between the horizontal stabilizer and the elevators to install them. I separated the elevators at the torque tube and added a longer tube to allow fitment of the vertical stabilizers. Before; after; pictures of the interior of the plane (I think it's the same one??) shows a pleated front seat, I decided to pleat both seats with Tamiya tape; Seats interior etc all ready to glue together; Not strictly accurate but better (just my opinion) than what was there (seat belt harness yet to be made) Thanks for looking2 points
-

Zvezda Star Destroyer - a new detailing project
TAG and one other reacted to The Madhatter for a topic
Hi everyone Time for an update. I have pretty much finished detailing the sidewalls on the starboard side and now just need to do the port side. Once the all of the detailing is done, I'll drill out the windows and then paint them ready for fiber installation. I am very happy with how its all come out! Anyways, that's it for now, but I will update again once the other side is finished Thanks for looking in Si2 points


