Leaderboard
Popular Content
Showing content with the highest reputation on 08/29/2021 in all areas
-
21 points
-
JetMads 1/32 Viggen
geedubelyer and 15 others reacted to mattcour for a topic
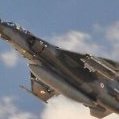
... and here it is: the long awaited 1/32 JA 37 Viggen. I toyed with it and had a close look all day, now I would like to share some images as I promised yesterday. The kit has many detail parts, I took about maybe a hundred photos and chose about a 30 or so, the most defining ones. First impression is that it is very very succesful kit, in my opinion. Absolutely worth the money and the wait. Beautiful and correct details, both as small parts in dozens and surface details. Two things make me really happy: Now I have a 1/32 Viggen and a very good one, my dream of many years. The second is that now there is a growing brand who is producing kits that the big fish do not. I really hope we may see some other interesting and long neglected subjects in our scale from Jetmads. By the way, I have reserved two new Viggens today from the second run, I have been told that there is very few kits available. I do not know yet how the parts go together, just tried the nose and it seems to fit quite well. Looking forward to start building it soon. This one I will build with splinter camo and the next two I wish to build as greys. Anyway, here come the photos...16 points -
15 points
-
12 points
-

1/32 Meng Me163B - Mojo Reclamation Project
Paul in Napier and 10 others reacted to Thunnus for a topic
Hello again! I hope everyone is doing well! It's been a while since I've posted an update. Which reflects my absence from the modeling room. Due to various issues, my mind has not been on modeling and I've been doing other things. Finally got the urge to fiddle with the plastic and hopefully this signals a more consistent return to the modeling bench. Looking at other Meng 163 builds, I am probably going to deviate from the kit's instructions to hopefully circumvent some of the fit issues that arise from a standard construction sequence. Some builders have reported good luck attaching the wings to the fuselage first and that's the route I'm going to take. I may even attach the rear fuselage halves to their respective sides so that I'll have a complete left and right halves. All of my panels will be shut but I've decided to assemble the 30mm wing cannons since the under wing ammo chutes look up directly into the gun bay. The cannons are obviously designed to be seen from above. Note that the ammo chute does not line up with the opening on the wing bottom. The view from underneath into the ammo openings simply shows the featureless bottom of the guns. To keep things simple and preserve momentum, I am just going to paint all of this black. The instructions would have you foolishly glue in a delicate antenna into the bottom of the wings during wing assembly. I had other plans so I didn't mind it when the antenna broke when removing it from the sprue. Instead, I just glued in the antenna base, with the whip antenna replaced with a hole. A wire or piece of stretched sprue will be used for the antenna at the end of the build. I found a spare oxygen bottle in one of my Me262 kits and decided to add it to the shelf just forward of the fuel tank per Reserve_22's comment.11 points -
small update engine cowlings painted and propeller assembled. i used the eagle editions spinner and propeller blades from amur reaver, did also some fading with highly diluted white oil paint and airbrush, and chipping with hairspray thanks for watching! Spyros10 points
-

Tamiya F-4B Phantom Conversion (Finished! 25 Sep)
Starfighter and 7 others reacted to easixpedro for a topic
Finally noticed it last night as I was putting the kit up for the day. Not sure how I did it, but I managed to take a chunk out of all 3 colors. Easiest rout to fix it might be to craft a small patch panel and call it good. I’ll cross that bridge soon enough. The astute will note I’ve started doing the panel line wash. Normally in the smaller scales I use a good ol’ #2 pencil and drag it through the panel lines and then hit it with a bit of thinner that makes it settle into the panel lines. It does a great job of replicating the grunge that occurs between 2 metal panels and the fasteners as they all rub against each other as the airframe is under stress. Think of the gunk that’s in your door hinges in your home—same thing. Depending on where on the airframe you’ll get a mix of hydraulic and oil and even exhaust as well. But then I discovered the Vallejo wash, and it works great for the more intricate details in the larger scales. Here’s the bottle ive had great success thus far my applying it sparingly, directly to the panel line—don’t do an entire section as it will stain everything. I’ll dab individual rivets to control the amount and make clean up easier. Here’s a small section I finished yesterday. Would have taken forever with a pencil, so pleased this is working out. It doesn’t do as well on larger sections, but I think it’s perfect for the panel lines. still plugging away…and thanks for following along! -Peter8 points -
1/32 DH Beaver ANARE/RAAF - Scratch build
wunwinglow and 7 others reacted to rhamilton007 for a topic
1/32 DH Beaver - Part 2 Many thanks for everyone's comments. MARU5137 - thanks for the walk-around links. Its been difficult to locate a good walk-around of the 'military' Beaver and these photos will do the trick for this build. I have had a productive week. The Beaver is mostly together and has been scribe and riveted. I still have to work-up the upper fuselage, front canopy and upper cowling, which is probably the most complex part of the build. The engine cowling is over-sized and will need to be modified and reduced. I have decided to build a float version based on the particular colour scheme - and the fact you don't have a lot of opportunities to build a float air-frame in 1/32. I have started casting the interior and other smaller parts. Once completed (and the floats), the build will start to become more like a kit build, Cheers Ryan8 points -
(Infinity) 1/32 SB2C-4 Helldiver
Martinnfb and 6 others reacted to Huub van Dijk for a topic
Hi All One of the more serious issues of this kit is the back canopy. It is too deep. The main issue is the first row of windows, these are too tall on both sides. There is also a hight difference between the front two windows and the back two at the port side. This step does not exist on the dash 3/4 and 5 version of the SB2C. This is how i corrected it. Not by shorten it at the bottom of the canopy but by taking out 3mm by shorten the first row of windows. This will correct these 3 issues (depth of the canopy/too tall 1st row of windows and the hight difference at the port side) one side corrected Also the lower part of the canopy is not correctly shaped (kit part missing the horizontal kink and correct shape of the lower edge) Here my effort to correct it (still a lot to do to refine it) I will have to add new bulges as the kit ones aren't correctly shaped either I used brass sheet. Why? You can more easily create a sharp kink instead of only using plastic card. 1st score a line at the backside of the brass sheet with a sharp knife and then bend it slightly. I covered the shaped brass sheet with plastic card. It is going slow but steady. Huub7 points -

F-4J(UK) - Tamiya (1/32)
Paramedic and 5 others reacted to tomprobert for a topic
Greetings all, This has been a long-time 'as and when' project that I completed this weekend - Tamiya's 1/32nd F-4J finished as an F-4J(UK) of the famous 74 'Tiger Squadron' in the mid-1980's. It was built more or less out of the box, but with Mastercasters' FOD covers and YellowHammer decals. Paints were all Xtracolor enamels. It's the first time I have added crew figures to a model as my daughter requested that the pilots should be in it. I might add crews in the future as it adds a bit of life to the cockpit! All the best, Tom6 points -

JetMads 1/32 Viggen
mattcour and 5 others reacted to geedubelyer for a topic
Mattcour, thank you for posting the images of the kit. The photos are crisp, clear and show the kit in great detail. It's obvious that alot of thought has gone into the design of the parts and the kit looks superb. Like many I am eager to see one of these built. I hope you will be able to make an in-progress thread to share your adventure. JetMads deserve every success for bringing this to the market. It would appear that they are selling the whole production run so that alone might encourage them to continue bringing modellers what they ask for. This modern technology is revolutionising scale modelling. Genuinely exciting6 points -

Little Bunny - Italian Front Thunderbolt
JayW and 5 others reacted to Pete Fleischmann for a topic
Looking great John- a few years ago, I took the master patterns for my 1/16th scale AT-38 to a plastic fabricator in Kingston NY to have them vac form the fuselage shells for me. I spent a few hours talking to the owner of the shop, who had flown P-47’s in Italy. He told me an amazing story about one mission, where he was strafing a ground target. He got fixated on his target, then realized he was going to hit the ground. He buried the stick in his lap in an aggressive pull up to avoid smacking the dirt. He had one of those “holy sh1t I’m alive” moments, and then looked up- too late to avoid a church steeple! Bam! He hit the church steeple at about 250 knots. Thankfully the church steeple was wood, and he was in a jug. He obliterated the church steeple and flew through it. The amazing thing was his wingman caught the whole thing on his gun camera, and he had a still photo of him hitting the steeple from his wingmans camera hanging on his office wall. He clearly loved telling me that story. Damn I love fighter pilots. cheers Pete6 points -

JetMads 1/32 Viggen
Paul in Napier and 5 others reacted to Out2gtcha for a topic
I'm thinking all the naysayers of this kit who didn't order one are thinking about now maybe they should have!6 points -

1/32 Roden SPAD XIII with added detail
Model_Monkey and 4 others reacted to kensar for a topic
Thanks again for dropping by and the comments. They are appreciated. Here is a test fit of the PE bellcrank mount for the aileron on the lower wing. It's pretty fragile, so I reinforced it with another PE piece. These parts came from the PART PE set. The turnbuckle and the strut mounting plate are attached to the brass strip with nylon monofilament, heat shrunk at both ends, which traps the parts like a bolt. I have the base color on the fuse and top wing. The metal panels are slightly darker than the linen. The paint is a mix of tan, yellow, and white Testor's enamels. The roundels are painted on, as well. There's a couple more panels to paint on the fuselage before moving on to more detailing and decals.5 points -
JetMads 1/32 Viggen
adameliclem and 4 others reacted to tigger for a topic
I am thinking that I will probably use casting resin for a glue. Essentially this is a two part mix which should be similar to the material of the parts. I did it on my build of the Dargon Rapide as I wanted strength in the mid spine joint. I ended up using the same resin for the wing joints. Worked a treat and is so much stronger than superglue or epoxy. the other possible alternative is to use the 3D uv printing resin set with a uv lamp but I am yet to try this method on a kit.5 points -
Me again. Despite the radio silence, I am making progress - albeit with numerous distractions, the first and most enjoyable of which was a visit to the Royal Armouries site in Leeds. If you've never been - go; there's a wealth of by turns beautiful, awe inspiring and thought provoking material on display. For me, possibly the most poignant items was also one of the smallest: This is the actual pistol that Gavrilo Princip used to kill Archduke Ferdinand, and thus fomented WW I. I am not given to embracing the supernatural, but it does have a certain air about it, when you see it in the flesh. Anyhoo. Back to the subject at hand... Stores and pylons are progressing and I'm pleased with how the teeth have come out on the nose gear doors... I'll admit to being slightly apprehensive about tackling the big, grinny parts as there's a really thin section that's going to be a right swine to get straight. Hopefully you can see that the really lumpy latches on the MATRA pod have been sanded back and the detail replaced with etch parts (actually from an Eduard Bf109 set). Sadly, the kit decals are badly out of register so any placard that involves black and white will not be present. I spent an age umming and ahhing about how to tackle the shell case ejector chutes. The kit parts are just blank nubs; I experimented with various brass and styrene tubes, however the things have subtle curves and the straight tubing replacements didn't look right. As there was no way I was going to use the blank-faced kit parts as-is, I decided there was nothing to lose; out came the David drill and I had a go at hollowing them out: Success! They're a wee bit long, I think, but not too shabby Next up, nav lights. The kit parts were an awful fit. I could have simply filled and sanded them, but as I'm definitely still in 'learning how to' mode, I thought this would be a good opportunity to have a go at making my own, and at the same time making the finished aircraft a wee bit different to the standard thing - it is, after all, supposed to be a locally-built copy, so nav light lenses to local requirements aren't too much of a reach, I think? I squared off the recess and used 2mm styrene board to fill from the back, and clear sprue off cut for the lenes. I then sanded the whole lot to shape. I'll polish everything out, but I'm not fussed about seeing grey plastic through them as they'll be completely tinted. I even managed to get the tip profiles to match! With that done it was, all of a sudden, time to join the wings and fuselage. The fit is really quite good, considering the size of the pieces involved and the age of the kit; any gap will only require a tiny amount of filler. I'll either live with the (probably operator induced) fit imperfections or sand them out - haven't decided which yet. I took a scriber to the inboard aileron edges as the lines on the kit are very faint. Take care if doing this, there's a wedge-shaped fillet just inboard of the aileron and the inboard edge of that is just begging to be scribed as the aileron edge. Ask me how I know... And so, on to the Oerlikon rockets. The kit priovides the rails, but no ordnance to hang on them. Fortunately, Buchon Models provide nice resin and etch examples. Nice, but fiddly. The rocket bodies come in two pieces which need to be aligned without any pins, pegs, lugs or tabs to help. There is, no doubt, an easy way to do this but I found a solution using the two sizes of mitre blocks that I have. When arranged like this, the gap is just big enough to accomodate the rocket body: A length of brass tubing supports the nose; the tube is placed to that the fin braces don't cause misalignment when the body is slid into place. The whole thing is a tight fit and locks into place with no need for straps etc. and, being slide fit, a second piece of tubing inside the first acts as an ejector rod Result! The rocket bodies are beautifully cast and feature slots which are an enormous help in aligning/fitting the fins, which are tiny. One down, seven to go. This may take a while... There will now be another lengthy gap, while I go and do two type rating recurrent/renewal courses back-to-back. I haven't sat in a Gulfstream for over a year, so that's going to be fun, lol. Hopefully I'll still be over the line before the cutoff date. Back in a bit! Sepp5 points
-

JetMads 1/32 Viggen
Phartycr0c and 4 others reacted to Stokey Pete for a topic
Wow! That looks seriously impressive. Jetmads appear to have hit a home run with this kit. Note to self, I must finish my 4 F-16s, I must finish my 4 F-16s. I must not pack them away to start my Viggen.5 points -

JetMads 1/32 Viggen
Phartycr0c and 4 others reacted to Eagle Driver for a topic
This kit is like a superbike 1000cc. Scary and fascinating in the same time. If you dare to drive it you might die, but if you don't life is somewhat boring.5 points -

JetMads 1/32 Viggen
Phartycr0c and 4 others reacted to Dennis7423 for a topic
Oh my... my pants just got a little tight. That's absolutely gorgeous! - Dennis S. Thornton, CO USA5 points -
It's model I've started a few years ago. It's 1:14 scale made of aluminium and I'm going to try to make it as close as possible as the real plane.4 points
-
Ok I have finished designing and printing the various parts of the wing. Several issues present themselves. The 3 most troublesome are getting everything lined up, overall strength of wing and how to get a strong and stable attachment to the fuselage. After pondering these issues I believe that I can solve the first 2 by gluing a plastic blank over the assembled wing. This will add strength to the whole unit and solve the issue of getting 3 separate 3d printed parts lined up correctly. I am quite certain it would have been easier to just build the wing out of plastic sheet but the experience of designing and printing will pay dividends in the future. I am solving problems as I go. Stay tuned, Dan4 points
-
Not yet, my Brother. There are a couple of builds ahead of this. Even tho I told myself I wouldn't start something new before I finished the old I'm currently working on finishing the weathering of a 1/25th Jeep, which seems to be taking longer than the build. Earlier others had asked if there had been any movement on a Bf109K-4 and a Rex build I'd been doing. The K-4 requires less work to finish so I've taken the Bf109K-4 found in my signature off of the shelf of doom and put that on my build desk to study. After that, the Rex, then this kit. It will be awhile before I get back to this. But I will. In the meantime, I've got this: Found here: as inspiration. Sincerely, Mark4 points
-
4 points
-
some progress, she's starting taking shape... engine is on finally, had some alignment issues since i chose to go with a fully opened cowling eduard admitted that indeed , the engine is designed for a full build in into the plastic, so it has to be a bit shorter to fit in. . . with all that resin the model has become too heavy.. i am afraid that is too much for the kit' s landing gear.. i think i have to order some replacement parts, maybe from eduard, since SOW hasn't any available,, thanks S4 points
-

SBD-3 VS-6 Midway
Nikola Topalov and 2 others reacted to Rod Bettencourt for a topic
This represents an SBD-3 from VS-6 USS Enterprise June 4th 1942 crewed by ENS Frank O’Flaherty and AMM1 Bruno Gaido. Both Gaido and O’Flaherty were captured by the IJN after ditching their aircraft. After both men were interrogated, they had weights attached to them and thrown overboard to drown. This the Trumpeter Midway “Clear Edition”. As many have stated over the years, this is a pretty good kit! I wouldn’t mind building another one. The only AM used was Yahu IP, my wife made the squadron decal ID numbers for me. I used AK Paints exclusively on this build. This piece was awarded the “Whizzer White Memorial” Navy/Marine Attack Aircraft at the 2021 Las Vegas Nationals. Photos were taken with my iphone. Thanks for looking. Rod3 points -
Howdy folks, I've just published the latest What's New update. Short but sweet - like me! Kev3 points
-
Kitty Hawk MH-60L Super 62 "Rude Dude"
CODY and 2 others reacted to Hawkwrench for a topic
I was able to get some time in today on Rude Dude before I start back to work tonight 3rd shift 12 hours. Following Pete's Instrument panel and console painting guide, I first painted the IP and center console Tamiya Rubber Black. Next up was multiple thin layers of Tamiya black panel line wash followed up by a light drybrush of Vallejo 70862-Black Grey. Honestly, I don't think the drybrush popped out the highlights like I wanted. Here's my progress so far. *Ordered some MM gunship gray for drybrushing & will try again.* Chow for now! Tim3 points -
This looks absolutely stunning...so much for the naysayers who didn't think it'd ever see the light of day and were convinced we'd all lose our money!3 points
-
ok guess which kit i have on order Hey Gazzas, i didnt go to QHME this year, looked like some very good entries. shame Tony from Modelnerds couldnt cross the border he usually has bargins3 points
-
3 points
-

Hasegwa Bf 109G-14/AS
scvrobeson and 2 others reacted to LSP_K2 for a topic
This totally figures. Not only did I not use any of this stuff, I had completely forgotten that I even had them. I stumbled upon them tonight, "hiding" in the basement. I'll toss them into my G-10 box, where I'll probably use at least some of it. I really need to get organized, big time.3 points -
OK. Another mini review on parts for the Revell 1/32 scale F-4E/F/G and RF-4C/E Phantom II kits. I have been seeking a set of resin intakes to remedy the well known intake issues with all current 1/32 scale kits. The Tamiya kits are not quite as bad as the Revell kits. At least Tamiya gave us some internal trunking we could work with right? To date the only sets I was aware of were the GT Resins set that has not been in stock at Sprue Brothers for quite some time or the Sierra Hotel set that it would seem is only available once a year at the IPMS National show. I just got a set of intakes from Real Model 2020 in the Czech Republic. These are the ones that eoyguy has mentioned on several threads. They look great. Sorry about the pictures, but I have a lighting problem due the storm shutters on the house. We are currently expecting some horizontal rain from Hurricane Ida tomorrow (not as bad as New Orleans) but being as we are close to the cone of error, we decided to put the Kevlar covers up just to be on the safe side. At any rate, these remind me of the Seamless Suckers intakes for the Tamiya kits back around 2002 or so. They are cream colored and have petite but crisp panel lines. The instructions indicate a pretty simple installation procedure with a minimum of cutting. The set comes with the splitter plates as well as two engine faces. Intake Tops: Intake Sides: Note the bottom one is faded out due to lighting issues. It is as well detailed as the top one. Intake Bottoms: Again the one on the left is faded out due to lighting issues. Engine Faces and Splitter Plates They even caught the differences on the two fairings on the bullet of the J-79 turbine face used by the USAF due the explosive cartridge engine starting system even though this will never be seen once they are installed. I also picked up their outer pylon set. These are done in gray resin with very sharp panel lines and very good details on the under side of the pylon. The website for Real Model 2020 is https://realmodel.cz/ I think they have a store on eBay as well. miloslav1956 I ordered my sets form their website with out any problems. It only took two weeks for the package to travel from Prauge Czech Republic to Pensacola Fl. 8 Days was waiting on a flight to New York City which I figure is pretty much standard any more. Hope this was of some help and have a great day. Mark.3 points
-
What a superb-looking kit! Thanks for posting those photos, Matt. May I add some of them to our Kit Database? Kev3 points
-
.thumb.png.84c5d3a464f2dd83f0ac37a5aac81ec8.png)
P-47D Razorback "Vulneratus non victus"
Gazzas and 2 others reacted to Antonio Argudo for a topic
Thanks Duke, I appreciate it, cheers Thanks bro, this build has many credit to your amazing masks designs skills, a game changer cheers thanks mate!! glued down the struts and adjusting the height on the wheels, hate vinnil tires but have to deal with it , cheers thanks for watching, cheers Antonio3 points -

Tamiya F-4B Phantom Conversion (Finished! 25 Sep)
Starfighter and 2 others reacted to easixpedro for a topic
Well...sometimes I'm about as sharp as wet leather. Got the 2s off and put them back on. No kidding. Was standing back admiring my work and realized what I'd done. Was able to re-wet them and do it right. Third times a charm I guess... Also got the bottom decals on. Semi-gloss is drying now. Have already started some washes on the top side....lots more to do before I move onto the ordnance and gear. -Peter3 points -
finally I made some progress on Whirlwind Didn't make many pics painting done, I still need to finish the weathering and some small parts ready for final assembly thanks for looking jan3 points
-
Amazing Film Footage - Bridges at Toko-Ri
Pete Fleischmann and one other reacted to John1 for a topic
I forgot how incredible this movie was. Awesome to see those carrier ops in full color. I wonder if the jet that took the barrier was planned or the film crew just happened to be in the right place at the right time? That being said, when the heck are we going to get a decent F4U-4?2 points -

Perhaps the goofiest question ever asked here...
JayBee and one other reacted to James Rademaker for a topic
One question? Are you married and if so, do you still want to stay married. I’m assuming that if married it’s your wife’s kitchen and she gets the final decision on your query. Signed, Jim (a happily married man)2 points -
100% Dan. This time will pay off in the future for sure.2 points
-
About AH-1Z kittyhawk
Out2gtcha and one other reacted to Dave Williams for a topic
The Kittyhawk AH-1Z is 1/48 scale.2 points -

Alan Clark's beautiful large scale scratch built models
wunwinglow and one other reacted to airscale for a topic
Hi Jo & welcome! to casually mention you not only know, but may bring onto LSP my all time modelling hero and source of my inspiration to skin models in metal the one and only Alan Clark is about the most exciting news I could want to hear Alan is quite rightly a legend around here and his models are quite literally the benchmark we all aspire to I can't wait to hear more! Peter2 points -

Hasegwa Bf 109G-14/AS
Citadelgrad and one other reacted to MikeMaben for a topic
Join the club buddy ...2 points -
Early results are in. 91 ISO is WAY too hot, it tore through everything thats one moist q tip. ammonia was far milder and did eat the clear without disturbing the lacquer underneath, even with repeated exposure and scrubbing with a q tip It took a lot of elbow grease, but i got the aqua gloss off the other wing. This is a mid work shot, there is still come clear on the control surface. I sprayed the newly flat wing with alclads klear kote. much easier to spray for me. i also sprayed over the prior unstripped aqua gloss, to see if i can skip the stripping step Much glossier than any other iteration, probably because there are 2 clear coats. Im going to let this sit for a day to see if there is any cracking or crazing with the lacquer over acrylic. this would save me the step of stripping the jug. more later.2 points
-

JetMads 1/32 Viggen
IvanVasili and one other reacted to Violator1991 for a topic
I was expecting something good, but this is way better than good! Absolutely Champions League stuff.2 points -
So, I've got the basic colors in place. This is in record time (by my standards). I have to admit, it's somewhat refreshing to build a kit that doesn't take the better part of a year to complete. I've added additional shading to the base OD, opting for some highlights using lighter / more yellowish shades. Next up is the "Fresh OD". In researching this aircraft, it appears that it was previously assigned to the Brazilian AF which did some truly amazing work in Italy. For some reason, it was then transferred back to the USAAC. First order of business would have been to paint out the Brazilian national and unit markings. These include the national colors on the rudder, the national insignia that was added on the upper right wing (minus the "bars" that were part of the original, factory-applied US markings) and the large patches on the fuselage which I'm guess were the location of the unit codes some other large insignia. In picture below, you can easily see the over-painted rudder, right wing national insignia and the large fuselage patches. You can also see some darkish color on other areas of both wings. The Eagle-Cals decals instructions don't catch any of this, simply stating that the aircraft was RAF Green with fuselage overpainted in OD. Nothing is mentioned about the rudder or wing. Kinda surprised they missed this, since it's quite apparent in the pictures of this aircraft (for some reason, Little Bunny appeared in a good number of pictures). Also in the picture above, I think I see some "Light Fresh OD" (like how I'm making up names for these shades?) on the lower sides of the cowling and on the inboard section of the right wing. So anyway, I started by adding some additional brownish-yellow highlights to the base paintjob. Just a few random, lightly applied areas on the upper surfaces to replicate additional weathering of the base OD paint. Next up was the "Fresh OD", which was applied as referenced above. This was a mix of Modelmasters OD with some dark brown added. The pictures show the large patch on the fuselage to be a bit mottled, I did my best to replicate this look. Note, in these pictures, the cowling is just press-fitted in place. Next up will be adding a bit of further shading to the rudder (just a couple of darker patches, which I think I can make out in the pics) and then on to the red cowling and yellow ID stripes. Thanks for looking folks!2 points
-

1/32 DH Beaver ANARE/RAAF - Scratch build
rhamilton007 and one other reacted to tigger for a topic
Nice Beaver!2 points -
Some printing on the wings. First a test print to see if I know what I am doing. The jury is still out. Prints will be limited to my skill level in designing the parts and the size of the printer. And the "wing hump". Still need to design and print the outermost wing panel and the control surfaces. Should be fun. Dan2 points
-
Thank you! Well... I bought an impressive amount of AM for it. Like 3X what I paid for the kit. And it still wasn't enough. It's very inaccurate. Here is my list: 1. Spinner wrong. Replaced with AM. I'm satisfied. 2. Propeller blades wrong with generic shape. Replaced with AM. I'm satisfied. 3. Fuselage bumps over MG 131 breeches wrong. Replaced with AM. I'm satisfied. 4. MG 131 troughs too close together. Replaced with AM. I'm satisfied. 5. Hugely thick raised detail on all control surfaces. Sanded smooth and added small stitch detail. OK with it. 6. Wing bulges raised toward the outside instead of inside. Bought the AM, but the AM was out of profile on the starboard wing, and two corners of the port wing didn't meet up with the kit wings. Reshaped them with CA and prodigious amounts of sanding. 7. Flaps too narrow. Widened with card. Still not totally happy with fit. Alteration of wing parts required. 8. Huge raised detail where wingtips fit to wings. Sanded it off. 9. The killer. The forward lower wing profile is hugely inaccurate. It sweeps up too quickly. Here is the G4 at Speyer: Note the smooth transition from wing to fuselage and on to the other wing. Now, here is my WIP: I used light from one side only, allowing shadows and shapes to be seen. Now this.... I just don't have the will to fix. I'm not sure if it's all wing, part wing, part fuselage, or how far I would have to go to make it a seamless fix. Honestly... I get so sick of hearing: "We don't need another 109". We do... because what we have is wrong.2 points
-
Thank you Uncarina. While I've built models for almost 60 years, this was my first bi-plane so I can't compare with other ways for rigging. I can, however, say that I found the Aims photo etch braces very easy to install. With the exception of two braces (the same outer one on each side that were too short), they all fitted perfectly. The two defficient braces proved not to be an issue as I simply used two of the longer spare braces (yes, there is a spare brace for each pair) provided and cut them to the required length. I suspect the key is the correct placement of the upper wing. Towards that end, I drilled all the holes specified in the Aims instructions, dry installed the upper wing, glued the struts to the upper wing, painted the model and then glued the upper wing with struts to the lower wing and fuselage. It worked for me.2 points


