Leaderboard
Popular Content
Showing content with the highest reputation on 07/03/2021 in all areas
-
Tamiya 1/32 F-4C 54th TFTW 1976 Bicentennial DONE
Marcel111 and 11 others reacted to oppenheimer for a topic
i think i am ready to start the decaling process, here is a general look of how it looks at this moment i tested some of the decals on one side of the tail, and they look great, and added the two probes on the tail fin the cockpit starts to look bussy, seats will go in at the last moment12 points -
HI everyone, here is my recent completed model - WnW 1/32 Fokker E.II, Max Immelmann edition. The model was built mostly OOB, I was focused mostly on painting and adding a weathering effects. As usual WnW kit is a great one, no complains about its quality at all, I wish they didn't close.... Hope you will enjoy this model and, please, subscribe to my youtube channel to see the video about this build. Thanks for watching. https://www.youtube.com/c/FlyingCircusModels10 points
-

A little departure for me…. Figures
Phantom2 and 8 others reacted to Phartycr0c for a topic
Just finished the wonderful 1/16 ATA girl figurine, Maureen Dunlop. A first for me as I’ve never really painted a large scale figure. Simple well sculpted with crisp detail a pleasure to work with and a mojo restorer.9 points -
Hi all, This is my Lancaster nose section. Straight out of the box, only the Eduard P/E for the cockpit and dials is used (because they were not included on the decal sheet!) It was a nice build, but the lack of knowledge about WWII bombers (or planes in general) stopped me with putting in extra details. But they are hard to see anyway. I hope you like it! With regards, Rob P.S. the fingerprint (which is probably my thumb) isn't really visible in real life!9 points
-

Kittyhawk A/T 28 B/D Trojan finished, addendum
Rockie Yarwood and 6 others reacted to chrish for a topic
Thanks for the encouragement! I spent the day in the hobby room hiding out from record breaking heat wave (40°C) Some of you are used to it, may even think that's mild but that's hot for Saskatoon. Thank goodness for A/C I spent some time detailing painting and sticking weapons and landing gear together. Thanks for looking7 points -
MH-60L, Super 68 "Operation Irene" Kitty Hawk 1:35
Hartmann352 and 5 others reacted to kike_gt for a topic
First time posting a build here but I've been a long time lurker, I live in Guatemala and this is my 3rd helo and first one in this scale, first two where a Zulu and a Venom from KH too but in 1:48th. Anyway I'm by no means at level of the things you see here but I decided to post since this is the place where I most learned and where I've seen some insane modeling threads I use to inspire, sometimes discourage, but I'm willing to learn and improve. I'm way beyond this point but comments will be appreciated, some things are gonna be hard to change since I'm further away. And I'm not going after 100% accuracy but mostly general looks. I cut the kit in various assemblies and this is some of the things I've done along the way The tires have no thread so I tried to scrive it, only to realize I wasn't doing a good job, so I decided to paint the threads and from where I see them, they look good enough. rear rotor ready to install, and maybe waitting for more weathering later on Front IP and center console, painted and detailed with brush, the front IP is painted and only used the dials of the decal to avoid any kind of trouble with decals conforming over all that detail, Amo boxes. The big one was very hard to do since I had never seen one. H pilar with crane control detail Seats ready, damn I hate photoetched parts! I just can't make it to work Roof and floor before assembly, since i really suck at PE I'm toying with the idea of using the Academy tank and calling it done! might give it another try tho and one interior shot to see how things look6 points -
A-6E Intruder Trumpeter 1:32
Michael931080 and 5 others reacted to Koralik for a topic
One of my favorite jets this time. A-6E Intruder Trumpeter 1:32. The model, as always, is made straight from the box without any additional resins. The model is quite difficult to make, but it is still one of the best Trumpeter models in 1:32 scale6 points -
Reedoak new Tomcat crew
Model_Monkey and 4 others reacted to norbert for a topic
Hello, Our next figures are a US Navy pilot and RIO for the colourfull 81-89 era, with HGU-33 helmets and MBU-14 mask... they are equipped to fit a F-14, partialy an intruder (pilote only) or a corsair II if we do not look to close to the leg garters. We did 2 versions of each, visor up or down : and here is how they look in the Tamiya F-14 in 1/48 scale: Cheers Norbert5 points -
I've been waiting for this kit. Glad to see it will soon be released. I'm looking forward to a good 1/32 P-51D (with fillet) that doesn't break the bank and does not have 550 parts (from FineScale Modeler). I picked up the Tamiya kit for $100 last year when Tamiya USA had a direct sale, but haven't even opened it. For the same reason as I haven't built my Trumpeter kits, every time I look at the huge parts count and the inordinate amount of time required just to assemble, the fact much of the details will be hidden forever once built, I am not sure I'd every finish it. I am likely odd in my manner of building in that I like to build and display most my kits in a very clean manner with no open cowling, doors, canopies, bombs, rockets, drop tanks, etc. I have high hope this kit will fill the bill for lower price point, ease of assembly and look good. It will be time to get rid of all the old Hasegawa P-51s in my stash.5 points
-
What ever happened to.......
kalashnikov-47 and 4 others reacted to Robthepom for a topic
Leon Trotsky (surly someone will understand me, it was the first thing that popped into my head when i saw the title thread)5 points -
I'm not very much into props and here's one I had finished about two years ago. Masking and painting the underside was a bit exhausting but it came out better than I expected... Famous (or notorious?) Dora here, in 32nd scale from Hasegawa. The kit needs no introduction but the aircraft does I think. The entire squadron JV44 have their aircraft painted red with white stripes underside, and it is really amazing to have spared the time and effort for that in 1944-45. This is Red 1 flown by Leutnant Heinz "Heino" Sachsenberg in 1945. "Verkauft's mei Gwand, I fahr in Himmel" reads on the fuselage, which is a part of lyrics wrtitten to a Johann Strauss melody. All-black Luftwaffe crosses underside are also of note... Painting figures is not where I am strongest at modeling. I could not find a proper (or even improper) Mr.Sachsenbeng in 1:32 and this pilot here is just visiting Cheers, Frank4 points
-

Me 262 'White 17' (photos now showing)
Supersonic and 3 others reacted to IJ001 for a topic
Kit - Revell Paint - All Tamiya acrylics. Decals - Kit & HAD Extras - Yahu pre-painted IP, Eduard pre-painted harness. Various wiring, junction boxes etc from scratch. Been a couple of years since my last 1:32 build (a Trumpeter 109E), no particular reason just other shiny things grabbed my attention. Not going in to any detail at all about the history of this particular machine, it's very well documented, as for the build, well it's a 'curates egg' of a kit - good points: well the undercarriage bays and gear detail are superb enough to keep most folks happy, but I added all sorts of wiring and junction boxes up inside which may never be seen but I know they're there. The cockpit is very good and didn't really need the Yahu IP that I added, purely because sausage fingers and middle-aged eyesight mean I can't get that sharpness that I once did by hand-painting. I expected the fit of the engine nacelles to be utterly horrid but I'm pleased to report that on my kit at least they were pretty close to perfect. KIt decals were put to one side except for all the stencils which worked fine for me. I'm not a fan of RoG Instructions but these were OK with only the one blunder which most builders will have heard about so not going to repeat it here. Bad points:- It may have been just my kit but I spent a shed-load of time, effort and putty blending the various nose sections together, the fit was very '1980's' if you get what I mean, most of the reviews out there don't mention this, but then most are of the earlier two-seater kit so maybe there's a difference in QC. The underside join between the front of the lower wing and forward fuselage still isn't right to my eye, but I was running out of patience at that point - so I admit to getting it to 'that'll do' as opposed to 'yeah that's spot-on'. Paint is all Tamiya acrylics mixed using the Mk.I eyeball method, aircraft specific decals are HAD, first time using this company and the quality, opacity and adhesion is simply astonishing. So that's it, there's a few 'user errors' in the build including having to scratch-build a new slat as the carpet monster got a hold of one, also I thinned the undercarriage pegs a little too much so it's prone to wobbling on it's legs, but I really like it, and it has a shed-load of presence sitting in my cabinet. Please feel free to ask any questions, make any comments or criticism. All the best from NZ. Ian. (edited - hopefully the photos show now)4 points -

Revell Spitfire FRIXc MK915 pink recon
Brett M and 3 others reacted to Wackyracer for a topic
Here's my build4 points -

Sopwith Camel USAS- 1/32 WnW
MikeC and 3 others reacted to scvrobeson for a topic
Construction now turns towards the Gnome engine. Painted in various metallic Alclad and MRP shades, then hit with a few washes from Ammo. Spark plug lines were added with Infini rigging line, but will only be slightly visible from underneath. Just need to finish the firewall weathering before I'm happy with it. Also went through and fixed the woodgrain on the cabane struts so the grain runs in the correct direction. Let me know what you think, The slight mold-seams really won't be visible in the end. Matt4 points -
Mig-29C Ukraine "55"
The Madhatter and 2 others reacted to Marcel111 for a topic
Hi guys, I finally put the final touches on this... well almost, I noticed as I was taking these pics that the little armament door on the left intake is still missing. I'm mostly really pleased with how this turned out. The model has a slight right side droop which I only noticed right at the end of the build, which I think is due to the plastic being slightly deformed. I'll address that with a somewhat uneven base, not much more I can do about it now. Something to look out for in case you guys build this kit. Cheers, Marcel3 points -
This is a 1/48 Caudron C.450 racer built in the mid-1930s. This one and other similar Caudrons won numerous races then, including the 1936 Thompson Trophy and the Greve Trophy. This resin kit is by SBS Models. A simple but high quality resin kit which includes photoetch parts. Comments welcome!3 points
-

Bf 109G-14 Gefr. Alfred Michel, 16./JG 53
Nikola Topalov and 2 others reacted to Miloslav1956 for a topic
Bf 109 number 15. in this year finished 1/32 Hasegawa model, Aires cockpit, exhaust & wheels, HGW wet transfers stencils, Painting mask homemade & Propeller 77, All colours MRP3 points -
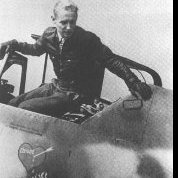
FW-190D-9, Hasegawa 1/32, Gerd Barkhorn
Kagemusha and 2 others reacted to Hartmann52 for a topic
Gerhard alles...3 points -
Here is the fuselage about 90% painted. I have used 4 basic colors from the Alclad line. Airframe Aluminum, White Aluminum, Magnesium, and Stainless Steel. As these colors come out of the bottle they produce very stark contrasts between panels. I have painted different panels different colors and then have gone over everything with a mist coat of White Aluminum to diminish the contrast and blend everything together. I normally use Post-it notes to mask off different panels, however regular masking tape can be used as well, except over the Airframe Aluminum. This shiny color does not like to be masked over. I have , of course, found many blemishes after applying the metal paints. These areas were re-puttied, sanded, and given another base coat of gloss black before the final coat of Alclad. I have yet to rivet the fuselage. Why? I didn't want to do it before the gloss black paint because I thought I might then make the rivets disappear. I didn't want to rivet the black coat because I wouldn't be able to see what I was doing. So now that I am happy with the metal finish I will proceed with riveting. 7 weeks till Vegas....I just might have it done by then. Dan3 points
-

1/32 Matchbox PK-505 Tiger Moth Floatplane G-AIVW
chrish and 2 others reacted to Archimedes for a topic
Sorry for the hiatus all; the day job tends to get in the way of the workflow! First a big thank you to Sandbagger (Mike) who gave me some gold dust tips on soldering techniques which may come in rather handy for my next project. But for now we are still focusing on this Tiger Moth. So; now that the float assembly is primed and ready for paint I turned my attention to the instrument panels and the rest of the cockpit: Of all of the parts of what is a pretty reasonable kit, the cockpit is the least impressive with its blob-like approximation of the Tiger Moth instrument panel's compass and work-of-fiction front seat. So, what to do? I used the kit instrument panels as template shapes to get the outline which was cut out of some 0.2 mm styrene sheet. I then sent the offending kit parts to the spares box. I had ordered some Airscale instrument bezels and decals (as an aside; Holy Canoli have you seen Peter's 1/18 Hawker Fury? ). I added some HGW wood decals to the freshly minted styrene instrument panels. After perusing a great many pictures of Tiger Moth panels I added the right instrument decals. I pre painted the instrument bezels and attached them using simple PVA. Finally I represented the glass for each instrument by using Krystal Kleer. Apologies for the phone camera picture below being out of focus. Not the neatest job but I wasn't done yet with these (and yes; the rev counter at top right on each panel is meant to be turned anti clockwise just like on the real thing). Next was the compass platform which is very distinctive on the Tiger Moth. I broke out some sheet brass and fashioned what looks something like metal platform the compass sits on. Next I went back to my lathe and turned down a piece of aluminium bar to represent the compass. I painted the circumference in a light blue-grey, a band of satin black around the top circumference and put a compass instrument decal on top, rounding off the whole thing with a brass bezel which I left au naturelle: The result is 90% there. I think I need to redo the compass platform so that the compass sits more into the panel. The panel also needs to have some warning placards so I will order those from Airscale. That is the current state of affairs! Not perfect but a long way from where the kit panel is. Kind regards, Paul3 points -
2 points
-

Revell late Mustang
kalashnikov-47 and one other reacted to Cheetah11 for a topic
Better late than never. This should please a few.2 points -
For me it was The Likely Lads.2 points
-

FW-190D-9, Hasegawa 1/32, Gerhard Barkhorn. JG-6
Rocat and one other reacted to Hartmann52 for a topic
2 points -

FW-190D-9, Hasegawa 1/32, Gerhard Barkhorn. JG-6
coogrfan and one other reacted to Hartmann52 for a topic
2 points -
Details forever hidden once built...The 32nd scale Trumpeter P-47 immediately springs to mind! . I am sure there are many more! Mark Proulx2 points
-

1:32nd scale Mosca-Bystritsky MB bis fighter
Iain and one other reacted to sandbagger for a topic
Hi all, The last strut work is now finished. This is the mounting frame for the machine gun. One version of this aircraft carried a Colt machine gun, fixed to the forward fuselage and fired through the propeller arc. The propeller was protected by Nieuport type deflector plates. The version for this model had a early Lewis type machine gun that was fixed at an upward firing position of an inverted V frame. This fired the weapon over the arc of the propeller. This mounting was made from 0.7 mm diameter tube with 0.3 mm diameter internal and wrap around rod. The replacement 'GasPatch' machine gun had it shoulder stock removed, as the weapon was most likely fired by operating a cable from inside the cockpit. Now at last I can think about actually building this model!! Mike2 points -
LOL, classic response. Now I'm off to YouTube to find a video and save for inclusion in my late night music video viewing list. Thanks for the reminder.2 points
-
What ever happened to.......
kalashnikov-47 and one other reacted to Adrian for a topic
He got an Ice pick, that made his ears burn....2 points -
It's just a picture but hey if it has rockets who's complaining. From the -15 you should be able to get to any of the Ds without alot of effort. Whoooee ... the red Mustang. Woulda been cool tho2 points
-
What ever happened to.......
kalashnikov-47 and one other reacted to MikeC for a topic
Took me a minute, I was busy walking on the beaches, looking at the peaches.2 points -
New "Ranks and Reputations System"
Adrian and one other reacted to Dpgsbody55 for a topic
Thanks Kevin. I voted no early on in the piece, as we're all here because of one interest. I don't feel the need to have some higher or lower ranking than other forum members. To me, that's childish and divisive and there's plenty enough of that in the world as it is. Cheers, Michael2 points -
Apreciated. Glad you like it so far!! Your Pave hawk made me pause this build for a while and learn something about your way of building! I just have to say that I saw alot of things I wanted to replicate, just to realize it wasn't as easy as you made it look! thnx for all the leassons!! I really appreciate your comments! thank you very much. I'm not sure about Somalia but I'm including it into my build cause I'm going after the looks of Super 68 as she sits today at a museum, with a modern configuration which in my opinnion looks a lot cooler!2 points
-
2 points
-
This master modeler wasted no time in converting his Tamiya Bravo into a USAF F-4C. Click here2 points
-

A little departure for me…. Figures
Phartycr0c and one other reacted to scvrobeson for a topic
Looks excellent! You really made it come to life Matt2 points -
Excellent 262! The painting, especially the mottling is great! I built the 2-seater just a while ago and pretty much echo the same comments you made... fit of the nose panels in closed position was disappointing but good detail in the cockpit and wheel wells. I would like to point out that using the kit-supplied components for the instrument panel will yield a very nice result and does not require any detail painting since decals for the instrument gauges are provided. I liked the result more than the Eduard alternative but I did not have the Yahu panel to compare...2 points
-
2 points
-
Thank you. I hated seeing "collaborator" by my name.2 points
-

Kittyhawk A/T 28 B/D Trojan finished, addendum
themongoose and one other reacted to chrish for a topic
I've been splashing some paint here and there; All paints are Tamiya acrylics over Alclad lacquers (just for the weathering) Thanks for looking2 points -
Very nice work, Paul! Tiger Moth instrument panels seemed to vary wildly across the ages and according to application, so there's certainly some wiggle room for your own interpretation if required. Kev2 points
-
A little more progress on the RH side cockpit. It's getting busy!! There is some radio equipment represented. But the big stuff is still to come (to occupy the spaced called "Alot of stuff goes here"). You should see some similarity to this picture: Clearly, it's going to get busier still! What a mess!! That picture directly above is all I can find showing a middle run F4U-1A radio configuration. From what I can tell, and this is a bit oversimplified, there are three primary radio configurations for the F4U-1 series, and that doesn't include the Royal Navy variants. My aircraft gets the middle configuration, which is oddly missing from the parts catalogue. The drawing that defines it is available from Air Corps Library, but sadly is so faint as to be unreadable. Maddeningly I can get good info on the early birdcage radio's, and the -1D radio's. So there is going to be some guesswork involved in my radios. What is better than the wheel/tire/strut I showed last time? Why two of them: Chuck should be pleased that I have applied some "oil stain" Tamiya paste per his recommendation. I might do more. As is often my custom, I show the original 21CT part that is to be replaced. Haha! Next post I will either have the radio stuff done, or I will have digital modelled the landing gear upper strut fittings, drag struts and actuators so that they can be 3D printed! Stay tuned.2 points
-
New "Ranks and Reputations System"
Alain Gadbois and one other reacted to Panzerwomble for a topic
Is it time yet to veer this thread more towards "what will Tamiya's next 1/32 Aircraft be ......???" I'll have a Blackburn Bungalow MkII please .2 points -
Henschel Hs-129B-2/RIII - Finished
Paul in Napier and one other reacted to Dpgsbody55 for a topic
Thanks Tom. I now agree, this being my first ZM kit, that all the extra interior detail provided does help in bringing a little more life to a model. I only have one other in my stash so I'm looking forward to the day i start on that one. Also awaiting their Messerschmitt and Focke Wulf models. We're in another (hopefully short) Covid 19 lockdown at the moment, so I've used up some of that time at my modelling bench. Looking at my last update, it occurs to me that I should have shown a picture of the underside of the model, so here's that pic. The next step involves fuel tanks and the two machine guns, plus the ammo boxes to fees the guns. The forward nose of the inner wing leading edge has to go in first, so these were added, followed by the MG-131 machine guns. Next to be added were the ammo boxes that feed them, plus the ammo boxes for the MG-151 20mm cannons, not yet fitted. Some of these ammo boxes will be visible through access panels, so they were painted up. I put them together on the sprue and airbrushed them with Model Master RLM02 Grau, although the forward boxes had the tops added after as they go around top and bottom of the guns. Next, the fuel tanks were added. These are molded in two halves, top and bottom, and each half is fed in through the respective side and held in place with tabs molded onto the wing spars. Test fitting the wing tops and bottoms showed that nothing of these would be visible unless you were to build the model without the outer skins, which would be an interesting display, but I decided against that. There is, however, two vents on the outer tanks that poke through the lower wing skin, so I sploshed some flat black around that area. Now it's time to add the lower wing skins, together with the lower fuselage skin that covers the ammo bays behind the wing. I knew that the undercarriage area would need painting with RLM02 Grau, so these were duly sprayed when I did the wing innards, ammo boxes, firewalls and undercarriage, etc. What I wasn't sure of was what needed painting on the inside of the wing skin and since I wanted to glue the inner surface of the wing skin to the wing innards, I brush painted what I needed bit by bit. Some of it is still drying, hence the tone differences. I'd also airbrushed RLM02 on the insides of the fuselage where the spent cannon ammunition is mounted. However, part of that piece also needs to be aluminium, to match the fuselage insides. This was also brush painted and immediately test fitted to the fuselage, but didn't fit. You can see a mark in the silver where it fowls against one of the ribs inside the fuselage. The rib in question is part L4, which is a half fuselage height rib. It fits in the bottom half of the fuselage which makes location of that part a little less definite than all the other ribs. In my case, the lower fuselage skin was protruding by about half the thickness of the plastic, so that rib was duly filed back by that amount, and the part fits snugly now. I also opened up the hole for the crew ladder that you can see at lower right. The instructions say to fit the ladder at this point, but we all know the chances of it's survival if I were to do so now. One other comment here, in reference to the picture above is to the painting of the RLM02 airbrushed onto this part. The baby poo brown colour of the plastic in this kit is horrible, and I'm finding that everything needs two coats to give decent coverage. This bit got missed when I did the second coat. Hope the outsides go a bit better. So here is those two parts in place, glued to everything I could clean off to give good adhesion. I used the wing top surfaces to ensure proper fitment. Then did the same with the lower outer wing skin fitment. Here's the result. The next stage is to fit the undercarriage main legs. These are held in place by a bracket placed each side and glued to the wing leading edge. These brackets also form the mount for the engine firewall and engine. The undercarriage legs are held in place with a pin each side that go into the brackets. Even though the undercarriage legs are pretty substantial, the pins are not quite as substantial at 1.5mm diameter, so I cut them off, drilled through the leg pivots and slid brass tube through to give a much stronger mount. Here's the leg and those mounting brackets ready for installation. There is also a hydraulic operating ram to go in, which attaches to the back wall of the wheel well bay. Here it all is in position, with the brake lines and oleo scissors attached. You'll notice that I've added one of the engine firewalls too. With most models, I would not have added those brake pipes at this stage, but as the top locating pin is behind this wall, and will be covered by engine nacelle later, I've added them now, and crossed my fingers that they'll still be there when the model is finished. They'll make undercarriage masking painful, and that masking is the reason why I've not added the wheels yet. Here's a couple of pictures of the model now on it's feet. This is where the model is now. The next stage is to add the cannons, then the upper wing skins and forward fuselage skins, followed by the engine nacelles, radiators and maybe even the engines. That's for next time. Stay well, Cheers, Michael2 points -
Oh dear gorgeous - it's been half a year.. Since I didn't have any succes with scratch building the type 25 camera mount 3D printing was the logical choice - at least for me. The firs set of parts were printed on a friend's LCD printer and they turned out better than I hoped! A second batch with the camera mount rotated to the side is on its way. Another thing I tried to do was the camera bay door and I was about 80% there when Pastor John announced his PE parts for the recon Spit. I'm going to wait for them since they will be superior to my efforts with replicating a thin piece with rivets and braces.2 points
-
I guess a little (right!) challenge won’t hurt. I will be attempting to upgrade this Trumpy -10A Hog into a -10C version. The much needed goodies.1 point
-
1 point
-

Revell Bf 109G6/R6 1/32 Pilot Gottfried Weiroster
Dpgsbody55 reacted to Gazzas for a topic
Thank you for the kind responses and likes. I'm still waiting on AM, and feeling like a cold is coming on. But I strove to get something done besides watching youtube videos on my day off. First thing I did was check the fit of the assembled cockpit tub in the fuselage. I couldn't live with the surface detail on the control surfaces. So I sanded it all off and used masking tape and Tamiya paint to impart some fine stitching lines. When I first bought this kit a couple years ago, I bought a lot of AM to go with it... like these Brassin LG legs with resin wheel well covers. I've also got some SOW lg legs for my other Revell 109. I removed the pouring blocks from the Brassin weighted wheels And exhaust stubbs... Then I dry fitted some parts to check the stance. So... I haven't really accomplished a lot. These Revell kits... I imagine I'm going to have to make a big investment with the G10, too. Happy modelling!1 point -

1:32nd scale Hansa-Brandenburg W.20
olgerd83 reacted to sandbagger for a topic
Hi all, Now the fun begins, Mike1 point -
Two new toys arrived today and after not even an hour of use I can't imagine working without them: I used these sweet tools to punch all the decals for the IP and here's the result: The rate of climb dial (upper right on the blind flying panel) recieved a punched piece of acetate for its glass, Even though it's not fixed to its final position, it looks a lot better than the drop of gloss coat I used to apply - at least to my eye. Another gloss coat over everything and I can apply the pin wash.1 point

