Leaderboard
Popular Content
Showing content with the highest reputation on 06/05/2021 in all areas
-
I am pleased to present the WingNut Wings Albatros D.V representing a Jasta 5 aircraft flown by Ltn Wolf. Typical WnW great quality and precise engineering. The decals are from the Jasta 5 Trilogy although the kit is the D.Va single kit as shown. I ordered the Pheon decals for this aircraft and had painted the fuselage grey in preparation, but when they arrived, the white squares were transparent which required a careful masking and repaint and possibly an aircraft scheme change. A quick help message on LSP and a kind modeller in England sent me his left over Bavarian decals, allowing me to preserve my own Trilogy set for another day. The Pheon decals are very nice so no issues there. As you can see from the WIP section the engine and cockpit have been detailed appropriately. I made the valve springs from fuse wire and added Taurus spark plugs and E Z Line plug leads, not that you can see them all with the cowls in place. I added the Proper Plane propeller and turnbuckle attachment at the wing roots. Gaspatch turnbuckles were added to those and Bob's Buckles' eyelets for other rigging points. E Z Line was stretched the attachment points and then a three turn wrap around painted in brass represents those turnbuckles. I think the Gaspatch ones are a little large and the eyelets allow a slightly more scale appearance. I also wrapped the kit inlet manifolds with gauze and weathered those a bit. I have the Barracuda resin ones but I think the tape gives it a nice look. The kit decals are fantastic. It looks daunting at first but they went on very nicely and fit perfectly. Paints were from Gunze, SMS and MRP. I've left it glossy at the moment because I think these aircraft were polished and kept in good order by their ground crews as a source of pride in their jobs and their pilots. I've added some oils for some grime but after seeing the photos might rub some of it back in places. Cockpit woodgrain was achieved using Tamiya acrylics and clear yellow and orange overcoats to the streaking effect. The main struts between the wheels and the wing roots for the lower wing have an Uschi woodgrain decal over Dark Yellow. The red outline on the tail was masked and brush painted and the camouflage on the wings airbrushed freehand. Enjoy - I did.12 points
-
I will join this GB with Trumpeter Mig-29 SMT. I will try for a simple build with limited amount of AM: Quinta studio cockpit details, Aires burner cans and Reskit wheels. I did not find any aftermarket decals for this kit but I have enough spare bort numbers and russian stars from Linden Hill decals that I should not have to rely on the kit's decals. I may also use the begemot Mig-29 stencils but we'll see because I am not sure whether they are appropriate for a SMT. Box shot: The top part is an impressive piece of molding, the airvents are separate parts but the fit is very good: Quinta studio set Resin AM has been given a bath of diluted bleach and resin plugs have been cut, need to prep the parts for primer. The Aires can are not meant for the SMT, so I am not sure how they fit the kit but I will give it a try. I wish there would be more resin ordnances for modern russian jets. Reskit has started come up with a nice range but mostly smaller dumb bombs and rocket pods. I will probably go with some of the kit's ordnance. Cheers, David9 points
-
Well...speaking as a model designer who worked with model companies from Asia, model manufacturers are constantly baffled by the fact that no matter what they do, it is "wrong" and "not the stuff we wanted". Other types of models in any other scales are met with pleasure and sometimes even joy. New models in scale 1/32 are constantly attacked. I do not know what it is that makes people (who are supposedly "into LSP") complain so much about new releases, but that kind of feedback filters back to the boardroom. There comes a point where a manufacturer decides that it is no longer worth their time, effort and expense. The first to abandon 1/32 were Trumpeter, who continue to be just as prolific in other scales and types of models. I know of one other manufacturer that decided to stop doing 1/32 and I was told by the boss of the company that the reason was the constant "bad feedback" about new releases. I was told that in 2019 and so far it seems that he was not exaggerating. We need to support manufacturers. You don't like what they do? Fine! Keep that to yourself, no one cares. Radu9 points
-

Ukrainian Mania - The digital ‘Flanker’ - time to call it done, I think.
Greg W and 8 others reacted to Stokey Pete for a topic
Well, I spent a bit of time (many many hours) working on the repairs and minor touchups. I’m at the point now where if I carry on touching up tiny bits here and there, I’ll be touching up the touchups, taking me in circles. So here we have the before... ...and this is the after. Not a bad blank canvas on which to begin weathering and decals. It did cost me the price of a new set of masks so I could complete the camouflage lines. I’ve made a tiny mask that will allow me to spray the metals for the flare dispensers, which I tested out (successfully). Now it’s time to put some shade variations in to start bringing the paint scheme to life.9 points -

Kitty Hawk models is going out of business
Daniel Leduc and 7 others reacted to thierry laurent for a topic
I loved KH as they selected topics totally ignored by others. Congratulations to them for that.8 points -
As they say at the footy: "It's all over bar the shouting." Rigged with E Z Line, a few Gaspatch turnbuckles and Bob's Buckles eyelets, the WnW Albatros D.V is about to go into the cabinet. I might make up a base with some grass matt to put her on but she has turned up mighty pretty. Kit decals from my Jasta 5 Trilogy set, Gunze, SMS and MRP paints and some oils for a bit of dirt. I might rub back some of the oil to reduce the staining a bit though. Check out the rest of the pics in the RFI area.8 points
-

Mig-29SMT
Supersonic and 6 others reacted to Dukie99 for a topic
I made some good progress today, working on the cockpit. I had used Quinta set for a Su-57 Felon build in 1/48 and had been impressed by the quality of the product, but the Mig-29SMT set in 1/32 is even better. The fit is perfect, the resin is flexible enough to conform well to the plastic. I used Mig Ultra glue and it works really well. See for yourself: Looking at it straight on the panel is flat, at an angle the screens and dials have a glassy look which is great and now the rest of the pit and seat I highly recommend this set and looking at reference pictures in the Yefim Gordon book, it is also a very accurate representation of the real thing. More progress soon. Cheers, David7 points -
P-400 from Kitty Hawk Airacobra kit
Paul in Napier and 6 others reacted to Phantom2 for a topic
Hi! If you get this boxing, you can build almost all versions of the Cobra; You´ll get six or twelve stub exhausts, different guns, instrument panels, props and much more! My kit turned out quite well; Cheers! Stefan7 points -
Following the news of Kitty Hawk closing up, I unearthed these photos of the 1/48 F-9F Cougar build I made some years ago. It was done without any after-market stuff. I just added some home-grown tweaks like cockpit and seat details, two sliding rails to open up the gun compartment, plastic card wing fences and replacing the landing gear with Monogram Panther’s own. As an aside, this kit has been called ‘unbuildable’ at its release by a well-known veteran reviewer who literally threw it in his trash can in an internet article. Pity I don’t know the exact location of the trash can because I’m desperately in need of a second kit to build a gull grey version. Cheers, Quang6 points
-
Closeup shot. Still a lot of work to do in detail painting. I am not convinced that Eduard got the color right, but it provides a nice contrast. The electrical lines turned out well and look the part under paint. Mark XIV Bombing Computer before painting. I used some soldering wire to make the framing around it. The IP with Eduard's AM, it looks very good indeed. I still have to add all the bits and bobs and will do so once I have installed the IP to avoid knocking off a bunch of tiny PE parts. Finally the T1154 Wireless Transmitter (upper) and T1155 Wireless Receiver(lower) I used to the two Eduard PE parts on the receiver, but I wanted to keep the 3D look of the Transmitter. I used a combination of painting, decals that I cut up to closely replicate the actual item, and punching five very small disks for knobs or buttons (I'm not sure what those are on the real thing. Hope you guys are enjoying the thread! Ernest6 points
-
I firmly believe that some of these manufacturers are actually the one's to blame. In several instances, many modelers have pointed out issues with CAD and provided input only to be ignored. Several years ago a Rep from Trumpeter reached out to me regarding the AV-8B. I spent hours and a few weekends taking hundreds of photos, measurements and notes. After all was said and done, I was told 'never mind, we're just going with what we have'. Seriously? All that work and time spent and you just blow it off? Hell, one of the members of the R&D team that helped with the Kittyhawk H-60 kits just mentioned a similar experience. They provided input that was ignored at the end. It's happened over and over. The forums are filled with SME's that have either worked on, flew or studied ad nauseum countless aircraft. Collectively we have provided almost everything a model manufacturer could possibly need to produce an accurate representation of most aircraft. However, the vast majority of the time we were ignored. Is it any wonder they received bad feedback? You know, while not LSP related, Kinetic actually listens to modelers and takes our feedback to heart. Their postponed Gina is a perfect example, as well as their continual improvement from release to release. Maybe other manufacturers should follow Raymond's lead and actually listen to those that know the subjects. Kittyhawk had multiple opportunities to improve, but never really did. Yes, some of their later kits are nice, but still have issues. They were plagued with accuracy and quality issues, multiple issues with instruction sheets, and the perception among many is that they just didn't give a f--k. While I'm still far from perfect, I have come a long way over the years and it was due to 'bad feedback'. I never gave up, but worked harder to improve and listened to those that provided harsh criticism. Still do and they're the reason I still have a relatively successful small business going on year 21. If manufacturers want our support, listen to those of us that are trying to help instead of blowing us off.6 points
-
Howdy folks, I've just published the latest What's New update. Enjoy! Kev5 points
-
On to the port side. Here you can see a couple of hydraulic lines (the two silver things in the middle of the photo) and more electrical lines. From the aft portion of the fuselage this is what I scratched: Aft upper area: Flare pistol in holder and next to that the Signal Flare Firing Port. Directly below that is the Intercom Junction Box. Just above the window the small rectangular thing is the Crew Call/Light Box and below the window is a completely scratch built 1134A Amplifier. Moving forward one sees I blanked off the small window on this side as well. Finally, in the Bomb Aimer's compartment in the nose you can see a white frame like object. This is going to be the frame for the F.24 Bombing Camera, I will finish it once the camera is in place as I won't be able to fit it if I have built all the framing. Again, the wiring will end up either behind a piece of equipment or "plugged into one". Closer shots are blow. These look a bit rough, but once the priming and base painting is on they start to come to life.5 points
-
Kitty Hawk models is going out of business
Anthony in NZ and 4 others reacted to DonH for a topic
This must be gut-wrenching for the people involved with Kitty Hawk and I feel for them. I always assumed there were enough modellers in the world who could manage to build great models from their kits (I am not one of those) but apparently not. A real shame as I think their helicopter kits look fantastic. Sad news, I wish them well for the future.5 points -
I've just done a little house cleaning. Lets keep this on topic Jennings, you can take the adult arguments as you call them somewhere else.5 points
-
Kitty Hawk models is going out of business
jgrease and 4 others reacted to Hawkwrench for a topic
I don't know how well they sold either and frankly, I was kinda surprised that they released that many Navy birds back to back. I thought maybe they would mix it up, but it wasn't the case. At least our team got a free model of every H-60 for helping out before they decided to pull the plug. I've got every Navy helo laying beside me in a box. Can you say collectable stash??? Tim5 points -
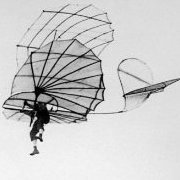
DFW C.I
scvrobeson and 3 others reacted to RLWP for a topic
Well, here goes. DFW Built the C.I in 1914, so she fits in right at the beginning of close air support. These were the aeroplanes, together with Rumplers and Halberstadts that started to work out what it was all about. So far, I've ordered an engine: A Lukgraph Benz Bz.III. It's a start! I'd be interested to know about books that cover this early two seater, so if you know of one - shout out! Richard4 points -
4 points
-
Just finished my last build, a Wingnut Wings LVG C.VI from the 'Duelists' kit. This one took quite a while. Added; scratchbuilt gunners seat as the kit offering was quite inaccurate, added pipes, levers, control rigging & Kits World seat belts to the cockpit. Added spark plug wiring & wiring manifolds to the engine. Added Gaspatch Parabellum rear machine gun. Added gas cap to upper wing. Used Aviattic lozenge decals & Uschi wood grain decals for the fuselage. Adding the rib tapes to the trailing edges was a pain. Added rigging & used micro brass tubing for the turnbuckles. Used oils for the wood finish inside the cockpit. Used oils & pastels for weathering, highlights, etc. Thanks for looking & all comment welcome. Larry4 points
-
And the paint is on. I read that earlier production Lancs had a very dark grey cockpit area from the Bomb Aimer's compartment in the nose to the area where the canopy ends at the fuselage body. From there the color is RAF Interior Green. I thought the contrast was pleasing to the eye and I went with that. One thing I forgot to mention is the previous two posts was that the scratch built equipment is not 100% accurate - I did my best to get as close to that goal as possible, but some things just can't be replicated in 1/32 scale (Again, at least I can't!). I primed the fuselage halves in black and then sprayed MRP Interior Green on the rear portion in light coats so that a small bit of the black faintly shows through to provide some depth. The front portion was sprayed Tamiya NATO Black and it blended nicely with the black primer giving some depth. Looking better - except I have to blow some dust off the black! The Eduard AM is in place, but I have not done any detail painting yet. I'll have to show the port side later as I stupidly forgot to take a picture of it after painting. This photo shows the Flight Engineer's Panel, again an Eduard AM part. Eduard reversed the yellow and blue colors; fortunately I noticed that before assembling the panel and repainted them. The upper yellow outlined gauges are to monitor the engine oil temperature - one for each engine. The light blue row below that monitor engine coolant. The protruding things on the left side are electrical connectors that I installed after building a small bulkhead. Darn dust again! A little closer look at those electrical connectors, these are made by Reedoak.4 points
-
Kitty Hawk models is going out of business
jgrease and 3 others reacted to Rick Griewski for a topic
IIRC there was a large bru-ha ha here about the rough build ability of these kits on this site. The Kingfisher kit was at the center of the controversy. It was hard to build for some people. Fur was flying. People left this site for this and other head scratcher reasons (I do not understand). I will miss this company even after cursing their Kingfisher kit. Most “crappy” kits can be built. They take more time and are more challenging.4 points -

Kitty Hawk models is going out of business
jgrease and 3 others reacted to Hawkwrench for a topic
As a member of the R&D team under Floyd, we (former crew chiefs/pilots) made EVERY effort to make the H-60 as accurate as possible. Hours were poured into our research and proofing of the CAD's before they got it right. In the end, KH still ignored some of what we told them to change. I personally hope that these molds are picked up by someone and rereleased. Speaking for myself, I invested alot of time helping R&Ding hopefully not for naught. The H-60 kits were accurate. If the molds aren't picked up, then we as a modeling community have to revert back to building the crappy Academy H-60 kits. Tim4 points -

USMC AH-1Z ... NOT a shark mouth ;-) FINISHED
RALPHY ROCHA and 3 others reacted to themongoose for a topic
She is all done and looking like she threw down some ordnance! I used the Flying Leathernecks decals, so many to choose from. I decided on the Red Skeleton Jolly Roger of VMM-163. I picked up the Werner Wings decal for all the stencils. And of course you have to use some of the kit decals as well. I will say they go on swell and were thin and easy to apply. I ended up buying Eduard seatbelts to really match everything else done in the cockpit. Since i was spending money on shipping why not get more right, so i picked up DefModels 20mm gun barrels as well :-) And with my jolly roger choice I needed some full motion video which I got from Shapeways. The cockpit additions are all scratch built. My favorite add is the tiny wound cable behind the gunner’s seat. Lot’s to see in this one. All the plastic behind the PE vents was cut away and wiring and components were added. Hard to see with my camera skills tho but I did my best to show something ;-) The 4 sensors(i assume) on the corners are hand painted and filled with testors window maker to try and simulate the glass. The pitot is brass tubing bent and sanded to shape. The seal where the stub wing meets the fuselage was painted and then coated wi5 mask solution so upon final painting it could be uncovered for a little added detail. And lastly some inspiration from a local buddy of mine, goes by Bradley25mm over on the IPMS forum - fine detailing the tail rotor gear assembly with wiring, sensors, and wire clips. His looks awesome and he gave me lots of pointers on this build. Paint was my usual mix with 1 addition this time. Thanks to Starfighter for the recommendation on color choices for the upper bluish gray on these birds. I ended up with Mission Models as they were available locally. Primer is Citadel Chaos Black (satin). Color coats are Mission Model and MCW acrylic lacquer. Cockpit is all done in Vallejo colors. Weathering is all Flory Models washes. And the final flat clear is MCW to close it out. I’ve been looking forward to this model for some time and am excited to show these pics. Once I have the base done she’ll make her way over to the RFI section Edit, can you believe I forgot one of the belly?4 points -
Finding some mojo on this project. I rushed a lot of matchbox kits together when I was a kid glue marks everywhere from the Airfix tube, never heard of filling gaps in the rush to paint them and hang them from the ceiling in dogfights , now trying to do a little better. This would be my second 1/32 after that long hiatus. I'll admit to be a bit intimidated by the level on workmanship on display here, It truly is awe inspiring but challenges me to do better. So wanted to build battle of Britain. The and when I started this some years back the PCM was the option for the hurricane and bonus I saw it at the Melbourne model expo market. Research told me it was going to be a challenge but decided to take the plunge. Over a few months It was a serious arm wrestle getting the kit together. I didn't have any problems with the wing roots thanks to the advice here, experienced resin for the first time and painted the insignias using masks. The model was sitting on top of my bookcase not fully complete, I don't recall what hurdle I was contemplating, when a sudden weather change(irony noted to namesake) caused the blinds to send it and the nearly completed FW190 smashing to the floor. The FW was only minorly damaged, unfortunately the Hurricane suffered extensive damage with the wings being torn off, the fuselage split and a few parts never to be seen again. There is an annoying rattle inside, not sure what has come loose but its not coming out whatever it is. I was devastated, but not giving up after so much effort had been made to get it together. Coming back to it after some time I used oven cleaner to remove all the paint and begin the process of restoration. Over the past two years on and off again wrestling with this kit (it's certainly no Tamiya)its getting closer to painting. I was inspired to post as I wanted to share my joy at successfully extracted the smallest resin part to date of my model assembly career, a small but significant win in the battle with this Kit. Its pictured next to the spinner to indicate its size. I added a couple of other pictures for interests sake. For some reason the Flickr links are being rejected.3 points
-
I agree that many of the 'accuracy' minded modelers that frequent the forums are probably less than 1% of the modeling community as a whole. A quick search of the various modelers on YouTube and Facebook prove that. However, I am referring to the instances when a company puts CAD work out there and/or solicits help from the community, then ignores the input given. I'll bring up Kittyhawk again. On more than one occasion, the very team they put together to provide SME input was subsequently ignored. How do you ask for help, ignore the help given, then be upset when the final product is criticized? Once again I'll refer to Kinetic doing things right. On their first couple releases of the F/A-18, the vertical tails were too flat on top. It was pointed out and they corrected them. The first few releases also had a couple small missing parts and the windscreen didn't fit properly. They listened and added the missing parts, as well as retooled the windscreen. Again, each kit they've released has been better than the previous kit because they listen to their customers and those of us that provide input on the subjects we know. It's about getting the basics right, not 100% accuracy down to the correct number of rivets on a bulkhead inside the wheel well.3 points
-
Well, that is the crux of the situation. If a boardroom team goes ahead with a faulty product, should they be surprised at negative comments? To my mind no, esp. when other releases in the same scale are markedly better. The "A" "B" and "C" team analogy comes to mind. If a group goes ahead with a faulty product they ought not be so thin- skinned when flaws are pointed out.3 points
-
Even if I haven’t finished the build of my Airacobra, I never found a reason to call it ‘crap’. It’s like a rollercoaster ride, bumpy and eventful but never a dull moment!3 points
-
Electra nose fix, Round Two: I did my best to neaten everything up with some Xtracolour Qantas Red, but I made the mix too thin, so coverage was barely adequate. At the least the colour is a decent match. Once the black anti-glare decal goes down, and it gets a couple of clear coats, it should be good enough given my failing interest in this project. Kev3 points
-
Without KH I would never have two NA Harvard Mk IIs included in my collection, so for that alone I thank them. Like their other kits they were far from perfect in both fit and detail but they provided me with the opportunity to make and improve them, and I loved doing them both. I’m so tempted to buy another just in case I ever get around to making/converting a Mk I. Once they’re gone, they’re gone but Hannants have stock at the moment. Hmmmm.3 points
-

New UK army Ajax looks like it's not that good
thierry laurent and 2 others reacted to DonH for a topic
Don't believe everything you read. This is a smokescreen to lull our enemies into a false sense of security so they will attack us and then we can kick their asses. I think there is a flaw in that argument somewhere but can't quite spot it.3 points -

Kitty Hawk models is going out of business
Phartycr0c and 2 others reacted to kalashnikov-47 for a topic
I would not go so far as to call them "crap." I have successfully finished every one I have started. Definitely buildable. I prefer to call them "quirky."3 points -

Kitty Hawk models is going out of business
Daniel Leduc and 2 others reacted to Stokey Pete for a topic
I really enjoyed the Mirage 2000C, and like how it’s turned out for me. Maybe not hugely accurate, a head scratcher at times with its instructions, but looks mighty fine among the rest of my build collection. I’ve got a Blackhawk, with a bunch of Live Resin figures, and some Reskit rotor mechanicals sat at the back of my stash. Looking forward to getting into it. Sad to see any manufacturer disappear. Now I’m off to try and find me an F-5 to put in the pile.3 points -

1:32nd scale Ponnier M.1
R Palimaka and 2 others reacted to sandbagger for a topic
Hi all, I've applied the decals. The Clear Doped Linen are the '‘Aviattic’ CDL aged varnish (ATT32094), The plywood fuselage are the ‘Lukgraph’ Dark Plywood (DEC004) - from their Friedrichshafen FF.33L kit (32-30). I still have to finish weathering and maybe darken the wood decals, Mike3 points -
Hi all, I finished the armor plates, primed them and applied a coat of red oxide primer. Then added some screws. For glueing the pates to the seat rails I added angles to the MDF jig that allow for a precise placement of the plates. And then the inevitably dry fitting .... Bye for now, Bernd.3 points
-
Right - off we jolly well go. Plan A for the teeth is mask and spray, with decals being plan B. As I have to draw the whole thing first anyway, I've started with B. Making masks from the drawing should not (ha!) pose too much of a problem. My first thought was to copy the mouth from the scheme sketch and make up pieces for the centre which I could mod as required to get the mouth to fit the fuselage. and boy, was that a mistake A right royal pita to fiddle with, so I fell back on what I should have done to start - extend the mouth to the centreline, and copy it. The first try was way too narrow. The second was waaay too wide. And the third.... (three bears moment) ooh, hello, looks like we might have a winner Yep. That'll do - a tiny bit of work to adjust the teeth, but I'm happy. The resulting decal sits nicely with no wrinkling, even though it's quite large. It looks like it might even be persuaded to conform to the gun troughs. If not, I can always slit the decal as the troughs will be painted some metallic shade, anyway. Excellent... tomorrow: fettling and mask making, but it's a lovely evening here so I hereby declare it to be pub o'clock. Cheers! Sepp, out.3 points
-

Ukrainian Mania - The digital ‘Flanker’ - time to call it done, I think.
Greg W and 2 others reacted to Stokey Pete for a topic
Last update for a bit. I managed to get a bit of paint onto the nose area. There’s a couple of overspray and peels to repair, easy enough. Also, a bit of blending where it appears I have two different batches of the lighter blue. Again, an easy fix, making it look like a paint shops touch up mid service. All good fun, I think.3 points -
A few years ago, I bought the Revell kit and scads of AM for it. Sadly, I'm realizing that after spending twice what the kit cost on AM, I'm still a few pieces short. Anyway... I'll do what I can and see how we end up. Gottfried Weiroster served in Jagdgruppe Süd, Jagdgruppe 50 and finally JG 11, claiming six kills. A couple photos of the man and machine: In a book it is said that the aircraft numeral is in green. But I really don't trust the use of green, brown, or blue. What is interesting is that the numeral comes after the fuselage cross. The materials I have so far: I have a new spinner on order and am hoping to find someone with the Barracuda part for the fuselage gun troughs... in the very near future. It's the week of my Granddaughter's birthday so between work and preparing for the party on Saturday all I've managed to do is check the general fit of the largest parts. Happy modelling!2 points
-
Williams Bros. 1/48 Flivver....the Model T of the air. Sort of..
LSP_K2 and one other reacted to Cap'n Wannabe for a topic
So, in an attempt to restore my mojo - which has been gone for a loooooong time! - I decided to bite the bullet and build one of my Williams Bros. Ford Flivvers. I have plans for the second one as a WIF, and those in Australia *might* be able to guess what I have in store for it... Anyhoo, this is my progress so far - painting and decalling the wings and horizontal stabilizer. Unfortunately some of the decals cracked while drying, but it'll never be in a competition, so I'm not *really* worried about it.2 points -

Quinta Studio's 1/32 FW 190A-5 interior for Hasegawa kit
Hartmann352 and one other reacted to Quinta Studio for a topic
Hello! Here's the new one 1/32 scale release: 1/32 FW 190A-5 3D-Printed & coloured Interior on decal paper (for Hasegawa kit) Article: QD32055 Price: 16€ Available to buy: https://quinta-studio.com/en/product/316/ https://www.ebay.com/itm/164892035950 https://www.etsy.com/listing/10147268342 points -

Kitty Hawk models is going out of business
jgrease and one other reacted to thierry laurent for a topic
I just realized that for the last two years I purchased more LSP kits from them than from any other company. It looks this was actually a good idea...2 points -

Colo(u)r of Voss’s Fokker F.1 cowl....
Gary Needham and one other reacted to vince14 for a topic
There's no evidence whatsoever to suggest the cowl was yellow. Alex Imrie did an interview with Karl Timm, who was Voss's mechanic, in 1961 and showed him a few photos of F.I 102/17; "Herr TIMM states that this aircraft was colored grey, the foward part of the fuselage and the engine cowling were a very dark grey, to use TIMM"S own words an "earth grey", while the shade used aft of the cockpit and on the tail unit was "silver grey", all under surfaces were coloured light sky blue, and the top surfaces of the main planes were streaked in dark and light areas with various shades of grey. Herr TIMM has no recollection of doing any additional painting on this machine, he maintains that it was flown as delivered.". On top of that, the Jasta 10 colours at the time were yellow noses and tail. However, in all of the photos of 102/17 the rudder is clearly white. If the cowl was painted yellow, as per Jasta colours, then why wasn't the rudder and tailplane also painted yellow? If there was time to paint the cowl, then there was time to paint the rudder. Also, the three F.Is were effectively prototypes - only two were sent to the front to be evaluated by Voss and von Richthofen. There was never the intention that they would remain there, so there would seem little point in painting them in Jasta colours as they would be returned back to Fokker after the short evaluation. As it turned out, both had been shot down within a month of arriving at the front. Finally, the 56 Squadron Combat Reports from Voss's final flight make no mention of a yellow cowling, but do mention that the Fokker was 'silvery grey'.2 points -
I completely agree. I also have stories of good advice ignored by manufacturers. I also completely agree that when manufacturers get it wrong they should hear about it. But the "I wanted precisely anything else" automatic response to every new release is on us. Radu2 points
-

What's New - 5 June 2021
Kagemusha and one other reacted to thierry laurent for a topic
Kevin, I'm hating you! Because of such news I just made two new orders!!! Now I will have again to explain to my wife I'm just a poor victim of a global modellers brain remote control malicious operation... Unfortunately she never believes me...2 points -
www.hobbynutmodels.com2 points
-
Woody, Thank you for taking the time for posting. I had no idea about the Dzus fasteners, so I learned something new which is really cool and I will know for next time. Cheers, David2 points
-
Speaking of KH xH-60 helicopter kits...
Pete Fleischmann and one other reacted to zerosystem for a topic
Werner's Wings is still planning on a limited MH-60T (HH-60J) Jayhawk conversion for the HH-60H kit.2 points -

Kitty Hawk models is going out of business
Troy Molitor and one other reacted to Out2gtcha for a topic
I think was exactly the issue on more than one occasion Tim, where they ignored the obvious, or SME information, or just blatantly did not pay attention or care about some of the little details.2 points -
JUST A SMALL UPDATE TODAY Gloss coat and a pin wash on the panel lines which run the gamut from almost not there to razor sharp to trenches. I was hoping to get the hairspray chipping done before the gloss coat, but despite some pretty aggressive scrubbing, I got nothing. I didn’t have any difficulties on the interior but that chipping seemed to result in larger chunks of paint coming off so I used less hairspray on the exterior and I think that’s where I messed up. So now I’ll have to paint the chips on, something I’m not very good at. Now that this out of the way the real weathering can begin.2 points
-
So a quick update... Naturally, I just had to see if the wing would fit. The bulk head was cleaned up(shape)because it wasnt allowint the wing mounting tabs to enter the fuselage deep enough. I still need to do the number three bulkhead which has the other pair of mounting tabs but I just had to see how things would fit. This by the way is a new wing and still .500" to long. Looks like number two bulkhead fits. The wing is straight, the wing tab is holding the dihedral...all seems good up to this poing. Ill be back... Hope everyone is well. Be safe Best Geoff2 points
-

P-38G Lightning: Operation Vengeance - FINISHED
Anthony in NZ and one other reacted to Dukie99 for a topic
I call this one done. It is by no means perfect and it is more an approximation of a P-38G than an exact replica but I think it looks the part and given that GMF conversion is no walk in the parc, I am really happy with the end result. I hope you enjoy. This is a beautiful airframe and if Tamiya had the good idea of doing a P-38 in 1/32 scale, I would certainly buy one or two copy. Cheers, David2 points


