Leaderboard
Popular Content
Showing content with the highest reputation on 06/03/2021 in all areas
-
Cut him some slack Jennings, it’s entirely possible he may not exactly be in the mood to share more details if he’s just found this out himself and no longer has the job6 points
-
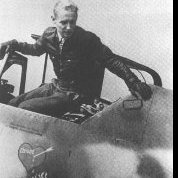
Bf-109G-6/AS, 1:32, Hasegawa. Walter Oesau, JG-1
daHeld and 5 others reacted to Hartmann52 for a topic
6 points -
thanks chaps just a quick one to say wing painting is done without issue thank goodness used radu's masks for the roundels and then started to lay out the top wing squadron marks - i also had some round blanks to cover the roundels in the masks I made, the rest was tamiya tape.. ..getting there.. ..mixed up a match to the fuselage paint & airbrushed.. ..and job done ..lots more details on the wing still to go, but I am so relieved that is out of the way.. TTFN Peter6 points
-
5 points
-
One thing I'll need to sort out is armament. The kit provides a bomb and mounting hardware/sway brackets, but it's a US 500-lb bomb, which in is obviously much larger than the Soviet FAB-50. What I'm going to do it get one of these Eduard 1:48 resin sets of the same US 500-lb bomb: In quarter-scale the US 500-pounder will be only 0.4 mm too large in diameter to be a 1:32 FAB-50, which is a discrepancy I can live with. Since the fins on this one are resin, rather than the brass PE you sometimes get, I think I should be able to modify them (and the bomb casing) to produce something closer to this: It won't be exact, but I think it will get the idea across. Better than anything I could try to make completely from scratch. And the Eduard set includes two bombs, so I'll have a backup after I screw up the first one. I'll definitely need to make the mounting hardware completely from scratch, but that shouldn't be hard.5 points
-
So despite having read the cautionary tales penned by several folks (including Kevin Futter) about this kit, I'm going to attempt one of these: For "Target for Today". But WAIT, you say, everyone knows it's a myth that the Soviets used Lend/Lease Airacobras as ground attack planes! And yes, there was definitely at one time a misperception that, owing to the poor high-altitude performance of the single-stage-supercharged Allison V-12 that these planes got stuck with, the Red Army Air Force relegated them exclusively to ground attack missions where high altitude performance wouldn't matter. In fact, the Soviets used the P-39 as a legit air superiority fighter, especially in the early phases of the war on the Eastern Front. The key aspect of this was that they needed to establish air superiority to interdict German ground attack sorties against their armor and infantry columns, supply trucking, etc, not against high-altitude bombing missions. So it was a low-altitude affair where the P-39's poor performance above 15,000 feet didn't really matter, while its agility (in the hands of a skilled pilot) and fairly over-the-top armament (the original flying gun platform) mattered a lot. However, Soviet Airacobra pilots (operating at low altitudes) would certainly take opportunities for strafing attacks when they presented themselves. And, once the tide began to turn on the Eastern Front, and the Red Army began its drive towards eventual victory over the Nazis in Berlin, VVS units were increasingly tasked with dedicated ground-attack sorties against German locomotives, airfields, supply convoys, etc. For these missions they were often equipped with general-purpose bombs like the FAB-50SCh, which is probably the bomb that we see this ground crewman mounting: That photo is from this excellent book: And if you want to read about the munitions used by the VVS in the Great Patriotic War, this website (sadly no longer under development, but at least it's still on line) has some good stuff: http://vvs.hobbyvista.com/Research/Ordnance/FAB50/index.php So to make sure I toe the line for this GB, I'm doing a late-model (P-39Q) Airacobra from a VVS squadron operating in Germany in 1945, and it will carry that FAB-50 bomb (which despite its name actually weighed 65 kilos by the time it got to the late version I will represent).4 points
-
Revell Hawker Typhoon 193 Sdn
coogrfan and 3 others reacted to Panzerwomble for a topic
Ok I'm in ..... I'm going to take one of these ... And add bits from one of these .... To create a model of one of these4 points -

Bf-109G-6/AS, 1:32, Hasegawa. Walter Oesau, JG-1
daHeld and 3 others reacted to Hartmann52 for a topic
Good day, comrades! I would like to present you one more work of mine. For inspiration, she is done in parallel with Dora, because:4 points -
Little Bunny - Italian Front Thunderbolt
Rockie Yarwood and 3 others reacted to John1 for a topic
So I'm still plugging away with the cockpit interior. It's a labor of love detailing those awesome MDC parts. Here is the cockpit floor again, I did some touchups, added the stick and a small PE bit, also touched up some hydraulic and electrical lines. The heater duct was painted GZC, still have to add the outlet, just trying to figure out how it gets installed. Port sidewall. Added aftermarket placards, still need to add some small PE bits and wiring. Last step will be to tweak the Flory wash and once assembled, add a bit of pastel to replicate the Italian dust that ended up everywhere.4 points -

Kitty Hawk models is going out of business
Stevepd and 3 others reacted to D.B. Andrus for a topic
Well, this got me to buy the OS2U Kingfisher that had been put off for way too long. Still at a good price. As Scotsman said, the prices will be going up while availability goes down. Sorry to lose Kittyhawk - always a sad day to lose a manufacturer. Damian4 points -
I had a package arrive today with two new 3D printed models. First one is a 1/18 Scale Pitts S1C (though with four ailerons like S1D or S1S) with a 12" (304.8m) wingspan. The other is a Piper J-3 Cub also with a 12" wingspan which scales it to be approximately 1/35 scale. Both are printed in a white plastic which the manufacturers reported as the best choice if one wishes to paint them. They have no interiors nor clear "glass" or plexiglass. Each was 14.90 Euros plus about the same amount for shipping. Here is the Pitts model. It is large, even for such a small airplane. I quickly sat down and began checking it out. In short order, I had all but about six small parts assembled and taped, where needed. It is engineered with large tabs which fit inside slots in opposing piece. Both upper and lower wings have this feature which provides for very strong joint and a very close fit. All the pieces fit together quite well. Though there isn't a great deal of detail...they will both be an excellent blank canvas on which to build and detail to whatever extent one might choose. There are but two pieces of blue masking tape holding the kit together in these pictures. Everything is a tab in slot design. Now for the bad news... The company is no longer taking orders and ceasing producing models due to issues with PayPal. UPDATE: Dimville has just implemented payment via Stripe. You can order using most credit cards. /UPDATE. I ordered my two kits May 17 and received them from today. Printed/produced, shipped and received from France to USA (Tennessee...Memphis home of Elvis Presley) in two weeks and two days. I received update from seller almost daily during production. The model shipped May 25. I cannot complain and felt their customer service was first class. PayPal however cancelled their services and refunded my payment, despite the fact the kits had already shipped. I'm trying to reach them to reimburse them directly as I am excited by the kits and the affordable price. They have a bunch of kits already designed, including a Zivko Edge 540, an Extra and several other unique civilian aerobatic a/c. They don't have a standard scale, rather all kits were produced with 12" (304.8mm) wingspans. Additionally, they had civilian helos and motorcycles as well. EDIT: The Cub has slightly over a 17” wingspan making it approximately 1/25th scale. I had requested it be printed at 1/32 rather than 12” standard. I supposed someone got the math wrong. Still, it will be a BIG model…I’ll paint it like my own J-3. I hope they get their payment plan corrected and resume producing kits as they look like the basis for some outstanding large scale super detailing. The link to their main page is (language warning on opening page as they note their disgust with PayPal): https://dimvillefactory.com/poutine/ Their explanation of the situation, which while I realize is simply their side, is still somewhat disheartening. (Again F-bomb alert): https://dimvillefactory.com/poutine/the-end-is-coming/ Below are quick snaps of the Pitts after about five minutes of having it in my hands...I'm already planning my paint scheme and want at least 2-3 more of these Pitts.4 points
-
One of my GB goals for this year was to, as much as possible, burn down my stash rather than buying new kits to fit the themes. I've had this kit for a couple of years, and upon opening the box I found that I has accumulated quite a bit of AM for it: Per usual, I anticipate picking and choosing from the Eduard exterior sets based on which parts of the kit really seem to need enhancement. The rest of the stuff I'll definitely use (except for the seatbelts, which I bought before I had discovered good AM seatbelts).4 points
-

Revell Hawker Typhoon 193 Sdn
coogrfan and 3 others reacted to Panzerwomble for a topic
Continuing my own very private obsession with RAF Harrowbeer near Plymouth , I'm going to try to recreate one of 193 Squadrons aircraft as shown in the publicity shot at that airfield on October 16th 1943 above. The Squadron was part of what was known as the Brotherhood of the Bellows , where South American countries raised funds to supply the RAF with aircraft, in this case all the Typhoons in the shot . The pic was taken to feedback what the money had been spent on to the donors . Below is Sdn Leader Petre's Typhoon JP784, DP-X with the Brazilian flag on the day of the ceremony. On the door it bears the symbol of the Fraternity and the words "Bellows Brazil I". I am indebted to the Brazilian website dedicated to this initiative Link Here ( you'll need Google to translate it ) And also the RAF Harrowbeer Association Website4 points -

Kitty Hawk models is going out of business
scvrobeson and 2 others reacted to LSP_K2 for a topic
What a shame; cool kits, and I thought they'd be around for years.3 points -
Little Bunny - Italian Front Thunderbolt
Rockie Yarwood and 2 others reacted to John1 for a topic
I've been plugging along with the MDC cockpit but first off, some notes on the real deal. World War II Gallery Cockpits (nmusafvirtualtour.com) The above link should get you into a virtual P-47 cockpit. It's missing a few bits and the Interior Green color is not applicable to any P-47D but I don't believe it's restored and is a great resource for zooming in to see the fine details of the Thunderbolt's "office" as well as the somewhat ratty appearance of the various fittings and instruments. Regarding interior color, plenty of threads on that subject, as I found out when I started this job. Suffice to say, Republic Jugs had their cockpits painted in a somewhat unique shade called Dark Dull Green. I went with Colorcoats version. They put a great deal of research into their paint and it sprays wonderfully. Here is a nice picture (courtesy of DB Andrus) that shows the color nicely. So that's it for background info. The MDC cockpit set is awesomely detailed but I can still add some extras. On the starboard sidewall, I added a cockpit light and some additional wiring. I also added some warning labels and placards. To me, these really add some nice realism to a cockpit, especially a large scale one. I got spoiled by having access to Barracuda's excellent cockpit decal sets for my last three builds (F4U-1D, F-51D and Mosquito). This time around there is nothing specific to the P-47 out there, so I've been going the generic route. Still a work in progress. I also plan on heavily weathering the cockpit. Italy was known for either being hot and dusty or cold and muddy. These aircraft flew multiple missions each day (certainly a higher tempo than 8th AF aircraft based in the UK) and I highly doubt the ground crews had much time to clean the interior between flights. I've been using a combo of "hairspray technique" for the floorboards, chipping using a silver artist's pencil and a few shades of Flory Washes. That's enough typing, here are the two bits of the cockpit that I've got (somewhat) complete so far: All that text for two little pictures! Still a work in progress but thanks for looking.3 points -
Hi again everyone as I always say - thank you so much for all the kind things you say - I just like doing my thing and it is very humbling to read the comments left here I cracked on with the upper wing - same format as the lower wing in using very thin plastic card, embossed with a ballpoint to simulate the ribs / catenary and then carefully using impact adhesive to fix the skins to the wing structure.. ..the tips were again a problem as the plastic doesn't like the compound curves, but I think I sorted it out in the end.. ..by the time I took this pic, both wings and the middle section were skinned, primed and sorted. I made the whole wing so I could cut the ailerons out and they would conform properly - here I am using a printed part of my wing plan to match the aileron to the mini forward spar underneath the skin.. ..the ailerons were cut out with sharp blades, mini saw blade and a few cuts with a slitting disc.. the profile is different on the top to the bottom, but I had no drawings so all I knew was the outlines.. ..with the ailerons removed some of the structural details can be added - there are two teardrop shaped recessed into the wing that make space for big balance weights sticking out of the front of the ailerons - these were made by plunge moulding the recesses and letting them into the bottom wing skin... ..here insulating tape is used to protect the embossed rib detail while I fill and fair in the recesses.. ..once the structural bits were done it was time for rib tapes, many, many rib tapes.. ..as before, the tapes and any linen patches are made from decal film - there is a lot of it... ..the circular hole on the lower surfaces is where there is a disc shaped bellcrank to control the aileron ..with everything done, it was time for paint - alclad white aluminium.. ..the rib tapes are quite subtle and I think worth the hours of work.. ..another look at the underside and the details.. ..the ailerons were also completed - an interesting detail top right is a small glass inspection window which seems to have a white notice with red writing inside it - made that using an airscale decal ..the internal shape where it meets the wing will be all wrong, but this can't be seen so it is what it is.. ..complete topside - the gaps between the sections is fine - in fact I would say mine is tighter than the real one ..and the underside.. ..probably get all the markings on the wing topside next.. I am NOT looking forward to that... TTFN Peter3 points
-
Thanks for the info Antonio, you are a gold mine of good details! So here is the obligatory starting shot: One thing that was missing when I took this picture is the MDC cockpit set. This set is amazing, some of the best resin I've seen, plus copious amounts of PE. Here are some general pics I grabbed from Google: In my very humble opinion, this set is mandatory for anyone building the Hase P-47D. Very reasonably priced as well. That's it for now, I'll be back later with a small progress report.3 points
-
So I guess I'm ready to start another build. That last year long build of Tamiya's amazing 1/32nd Mosquito FB.VI wore me out. After a long term build, I typically lose my modeling mojo for a few months. This time it was longer. Once I get it back, I then need to find something that inspires me to start another project. I purchased the Tamiya Spitfire IX and a boatload of aftermarket gear but for some reason, I couldn't find a subject that leapt out at me. I'll build this kit, it's too nice to leave on a shelf, but it will have to wait a bit. My problem is that I like to build somewhat unique subjects (you won't see me building Duke Cunningham's F-4, Galland's -109E or any other "trendy" aircraft). My list of builds includes an AH-6C Littlebird, a very late Vietnam war US Army Huey, a US-2B Tracker that crashed near where I live back in the 70's, a Korean War F-51D, and a somewhat uniquely finished Coastal Command Mosquito. Aside from the Littlebird and Tracker, which were both true labors of love, the F-51D was the other kit that I really dove into. From the "Forgotten War", the F-51D was no longer a pristine thoroughbred. It was just a neglected, expendable, beaten-up bomb truck. My kind of aircraft! As such, I started to be drawn to late war Thunderbolts flown by the USAAF in Italy. Like Korea, the Italian Front was also somewhat of a "Forgotten War" (except by those who fought and died there). The US public's attention quickly focused on the war in France and Germany, post-Normandy. The troops in Italy kept fighting against very fierce resistance up until the end of the war, often in absolutely horrible weather conditions. By 1945, P-47's were flying mostly air to ground missions, where the always deadly German light Flak took a heavy toll of them. So, the next step was to find a suitably unique subject. Lots of decals out there for MTO Jugs. While perusing online, I saw this sheet: The bottom one jumped out at me. Has some interesting color to it, plus the two tone paint scheme was usual, which is also a plus. The EagleCal instructions state that it's painted OD and camouflaged with British Dark Green. Some questions posted here and over on Brit Modeler lead me to believe that "Little Bunny" was actual just a very weathered Jug that was touched up in multiple places with various shades of fresh OD paint. Here are a few pictures of the real thing, judge for yourself: You guys can judge for yourself but I'm going with fresh OD over old OD! Speaking of OD, one could probably write an entire book on this paint and how it rapidly weathers. Coincidentally, someone has. LSP's own Dana Bell and I highly recommend it: I'll dive into OD paint later but here is a picture that gives you an idea of how badly this paint weathered and what fresh OD touchups look like. This is "somewhat" what Little Bunny will end up looking like. That's it for now, I'll be along at some point with the start of the actual build. Thanks for looking and for those folks in the US - Please remember that this Monday (Memorial Day) is more than just a reason to have cookouts and drink some cold ones. John2 points
-
Good morning. I am a new member of this community. My name is Francesco (Cicciuzzo for friends ) and I write from Italy (Siracusa - Sicily) and I am a jet enthusiast. I want to start with my wip from the 1/32 tamiya F-4J kit. You already know the box with its strengths and weaknesses. I will try to do a good job but in the meantime I present to you the subject I would like to create and the work done so far. Let's start from the subject I would like to represent: These are the accessories. You see that the resin air intakes are missing because I'm going to modify those of the kit as I saw another model maker do: The first intervention concerns the modification of the air intakes (I used a method made by a web modeler): 1st step Semiconductors glued and grouted 2nd step In the second modification, the intent is to glue the first part of the duct to the internal air intake. First I "recorded" the right joints from the outside and then a small cast of cyanoacrylate to attach the first two pieces 3rd step After gluing the first part of the duct to the air intake, now you have to cut the other upper part of the duct which is all one piece with the fuselage and glue it perfectly inside the air intake. Cutting the upper part of the duct Overall view of the three pieces 4th step Upper part of the duct glued inside the air intake 5th step Plasticard and putty for the entire internal part of the air intake Completed. In your opinion, I have saved 40 euros to buy the resin vents? final effect this picture shows what the vents are like without modification Well young people, finished with the air vents, I dedicated myself to eliminating all the embossed panels present on the entire fuselage of the kit and re-engraved; i also modified the two rear grilles. I don't know in which specimen Tamiya saw them ... I then glued the vents together using cyanoacrylate glue to fill the gaps in the joints. Here are some phone photos of the glued air vents The 1/32 scale is really beautiful both for the quality of the details but also because it makes you discover details that would otherwise go unnoticed. Leafing through images after images I noticed several details regarding the vent tubes along the entire fuselage. In the J / S version (and I think also in others) there are two small exhausts on the sides of the fuselage in the rear part of the air intakes and another in the metal part of the exhaust area wikimedia.org primeportal.net I also spotted other exhausts at the bottom of the fuselage. In this step I changed the tail plans. The kit includes assembly with the fuselage closed but if you want to glue the metal part of the engine area first then you need to separate them to mount them later. Here is my little change: cut piece here I cut the edge for insertion gap filled with plasticard try inserting tailerons Well, finished the first works, now it's time for the exhaust nozzle. After viewing many pictures of the GE J79s, I used this personal method to paint the exhaust petals: first I colored in Alclad Aluminum then I added clear yellow and clear blue. I sprayed XF-1 opaque black and with a cotton swab soaked in thinner I slowly removed the black until the underlying aluminum color showed through. Here is the result and I hope you like the effect and above all I ask you if this effect is realistic for an F-4 Phantom or is it exaggerated? What do you think? well modeller, here's the job done so far. I hope it is to your liking and so are the comments and criticisms that are always well accepted. Thanks and to the next step. PS: sorry if my English is not perfect because I help myself with the translator.2 points
-
Big thumbs up GT Resin and Sprue Brothers
Isar 30/07 and one other reacted to Ayovan for a topic
I had purchased a set of GT Resins F-4J seemless intakes a few weeks ago from Sprue Bothers. When I opened the package the other day I noticed one of the splitter plates was broken. I contacted SB, and they contacted GT. Gary at GT contacted me via email today and said he will have parts made and sent to me this week. I wanted to share with the forum the excellent service I have received from both Sprue Brothers, and GT Resin. Both companies have provided outstanding customer service. Thank you, both Andy2 points -
My least favorite cold war jet of the US... I simply don't like it and I don't know why! Intakes, empennage or the nozzle?? Even the SEA camouflage does not make me like it and I don't even know why I built it in the first place... maybe just hoping that it would reverse my feelings but... nope... Kit's your everyday Trumpeter, with highs and lows. Surface details ok, poor cockpit detail with nothing to mention of, ejection seats in particular, hence the closed canopies which is uncommon for my modeling taste. Not a gem for me in my 1:32nd scale collection but anyway, here it is for your views and comments... Fire at will2 points
-

Kitty Hawk models is going out of business
Derek B and one other reacted to Phartycr0c for a topic
Like them or hate them the closure of KH will be exactly that, a sad loss. I did think that their QC was a little shabby but then if we were just to glue plastic together without the application of some modelling skills then the hobby would be really boring. The subject matter KH chose was a little unusual in the case of Trojan and possibly the Kingfisher, but the Mirage, Broncos and F5's? these will be greatly missed IMHO.2 points -
I've built nearly all the 1/32 kits Kitty Hawk released. Still have the Mirage 2000 to do, but these kits always were impressive when finished. Bronco, T-6, Sabre Dog, Kingfisher, Trojan, Mirage 2000 - good luck hoping another brand will release kits of these in 1/32. For me, a true loss. I enjoyed their F-5 immensely and still have a two-seater to do. A really pity.2 points
-
So a quick update... Naturally, I just had to see if the wing would fit. The bulk head was cleaned up(shape)because it wasnt allowint the wing mounting tabs to enter the fuselage deep enough. I still need to do the number three bulkhead which has the other pair of mounting tabs but I just had to see how things would fit. This by the way is a new wing and still .500" to long. Looks like number two bulkhead fits. The wing is straight, the wing tab is holding the dihedral...all seems good up to this poing. Ill be back... Hope everyone is well. Be safe Best Geoff2 points
-
Then again, it's a private business and neither you or anyone else outside of the company is entitled to an explanation.2 points
-
Took me a second to realize what happened! I know we posted our respective posts within minutes of each other, but this will be easier to follow. Thanks2 points
-

Kitty Hawk models is going out of business
D.B. Andrus and one other reacted to LSP_Ron for a topic
I just merged both threads on this topic2 points -
My set arrived this afternoon, and they look superb , Tim also includes metal pins to anchor the pylons , a very nice surprise , so those of us building a modern Tornado , this is a must have set2 points
-
Squadron Back
Rick Griewski and one other reacted to Dave Roof for a topic
My friend John and I visited the new Squadron office/warehouse yesterday (they're only 30 minutes away from my house). It is obviously not my place to divulge what I learned during our conversation with Chris, but I can assure you he is working really hard on making the 'new' Squadron a really great shopping experience for modelers. There are still quite a few 'behind the scenes' issues that need to be addressed and he is still building stock. Plans to move into a larger warehouse this fall are also in work. If you'd like to support him now, you can purchase from their current stock via Amazon from seller Knotmodels until there new web site goes live. Reading many of the comments and concerns throughout the interwebs over the past several days, I am confidant based on our talk that Chris will rebuild the Squadron name.2 points -

Friedrichshafen FF.33 L - German Navy Zeebrügge
Starfighter and one other reacted to kkarlsen for a topic
Progress on the Friedrichshafen built: The fuselage is assembled, putty'ed and sanded some. I've rebuilt the observers coaming to fit the ring from the HB W.29. (Shrunken a bit, to look the part) The wings have been painted in a base color, top white and bottom Gunze Sail color. Wholes for rigging has been drilled and they are now ready for masking. Thanks for looking: Kent2 points -
KopeckyScaleModels
Pete Fleischmann and one other reacted to CruZz for a topic
Thank you Michael! Master- parts are in progress. So soon be ready LAU-129 for falcon family...2 points -
hello, i scratch the tail fillet , I can't wait for Revell to finally release this version, it's incomprehensible that it hasn't happened yet2 points
-
Well, all of a sudden, and pretty much out of nowhere, we have a Qantas Electra! I'm at about the 90% mark now. Long fuselage cheat decals are the bane of my modelling existence, and getting one on straight and in the right place is a minor miracle, let alone two! In the photo above, there's a small but noticeable hump over the wing where the decal shifted and then stuck fast while I was trying to squeegee the water out from under it. Since I've mostly given up on this build at this point, I just moved on, hoping it wouldn't look too bad. The other side is better, even though it's hard to tell from this angle: The wing panels come from the kit sheet, the windscreen is from the Authentic Airliners Decals windows set, and the rest of the decals are from the Hawkeye livery set. The nose is a bit of a mess, however: I have a cunning plan to address this; I just need to summon up the courage to try it. In hindsight, I should have applied and aligned the cheat decals before the windscreen, and then applied that in relation to the cheat decals. Oh well - live and learn! I had originally planned to mask and paint up all the different metal finishes on the engine nacelles, but as I noted above, I've pretty much given up trying with this kit, and don't mind if it looks like a diecast toy. I'll just be happy when it's done, and I can move on to something more enjoyable. Speaking of which, I've just learned that mine is one of the first 4 3D-printed 1/72 Electra kits shipping out by OneManModel, which has me very excited! It's coming by sea from Japan, so I won't see it for up to 3 months, but I'm planning to replicate this livery on that kit, and put much more effort into it! Kev2 points
-
I'll try this...If I can light a fire in my trash can of mojo; in these colors;2 points
-
The kit provides four BIG sprues of tan plastic parts. There's plenty of surface detail, and some of it is not too over-scale, but there's also LOTS of flash and lots of big towers of plastic on the backs of the parts associated with the ejector pin locations. In the little bit of work I did today it became obvious that there was going to be a lot of parts-prep to do. Some (many) of the locator pin holes are undersized and need to be drilled out. Overall impression is if a small short-run shop like A-Model decided on a real stretch goal and tried to make a Tamiya-complexity kit.2 points
-
That looks like a Hunn that was parked overnight in a few neighborhoods here.2 points
-
Here's a little discovery I made while at the rear of the vehicle.... This piece does not belong in a Panther, any version as far as I can tell. The instructions have you place it in the cylindrical opening in the header fuel tank (see last photo in the previous post) but in all the photos I can find of Panther D's, A's and G's, this is nowhere to be found. Below is the instruction shot of the offending piece. If you're building this model (either version I believe), you can omit this trunk. I originally thought it might have been a leftover part of the submersible system from early Panthers (if they had one...not sure on that) but from what I can find, not even the earliest ones had anything resembling this and by the time the Panther G rolled around, it would've been long dropped anyway. The "Y" trunking leads to no place...it just hangs out under the two tanks. I then thought it might be a duct for air so I rather naively added rubber tubing connectors and clamp details as you can see above...all for naught. What I concluded is that Trumpeter has a copy of David Parker's King Tiger book and while they were designing and tooling the engine parts for the Panthers, they included this trunking which IS on the Tiger II (and connects at the "Y" to the sirocco fan at the back of the engine) but the Panther does not. So, after spending time assembling, filling seams, priming, painting, detailing, installing it, I discovered it wasn't needed at all. The single tab at the top is the only physical mounting location for this trunking assembly so it wasn't hard to remove. The thing which is too late for me to do anything about is on part P18 which has the notch for this trunking in it. This didn't exist on the Panther either but since I've already installed it, there's no way I can go back and fill it in now. Oh well, this will be one of those "Ooops, lesson learned" opportunities. If any of you are building this kit or are contemplating building one, leave this trunk out and correct the divot in piece P18 (it should be flat).2 points
-

Revell Hawker Typhoon 193 Sdn
MikeC and one other reacted to Panzerwomble for a topic
So two kits , one goal and childhood interest in the local old airfield . What could possibly go wrong ? The kit bashing of the two doesn't worry me per se...........the raised 1973 lines and re scribing .......will be a challenge . I need to buy a scribing tool as you don't often do that weird scraping malarkey on muddy things. Ho hum .2 points -

F-86 Sabre in Korea (SAAF)
Model_Monkey and one other reacted to Madmax for a topic
Thanks Jens. I agree with you - the deeper leading edge of the 6-3 extension necessitated a different airfoil section. This had a notable impact on the handling of the aircraft (particularly the initial hard wing). Here is a good reference for Sabre fans: https://finescale.com/~/media/files/pdf/online-extras/sabre/sabretable.pdf In the table I found the answer I was looking for, at least for a Korea F-30. So, the SAAF's Sabres had a late A-5 wing with new inner hardpoints! The important thing for me is that it had the same slat tracks as the F-86A. This is what they look like... This means that the slat tracks I ordered are wrong. That was bugging me - a lot, so I ordered some new ones. Pricey hobby! It's not often one gets to see this leading edge without the slat attached. I was surprised at how sharp it is, certainly compared to the truncated representation in the kit. I risked sanding it to the same fine edge, but there just wasn't enough plastic to pull it off. I then resorted to shoving styrene into the compromised sections - not very tidy but it has saved the project from the bin for now... It looks a bit better after initial shaping. Enough of that. I was wondering about the incredible complexity of the various modification states of North American Aviation products in the 1950's, and the staff required just to do the admin! Maybe this is how it was? I messed with the photo - just having some fun.2 points -
Tamiya 1/32 F-4C 54th TFTW 1976 Bicentennial DONE
Kagemusha and one other reacted to oppenheimer for a topic
i started on blending all the paint to see how it looks, this Phantom will have a subtle weathered paint because i am going after a Bicentennial scheme on this one, sothey are most of the time in pristine conditions. this is the scheme i am trying to replicate2 points -
1/32 Revell Fw 190 F-8 & A-8: Working on the wheel wells!
N.H.71 and one other reacted to VintageEagle for a topic
After a loooooooong time an update: when I read that Zoukei Mura will bring a new Fw 190 at the end of the year, I thought I needed to complete my Revell Fw 190 now or never. The build stalled in January when I tried to install some wires inside the wheel bay. I lost patience with these small parts, but didn't want to continue without the wires installed. I finally found the motivation to give it another go and I think I succeeded (at least so that I can finally continue). Next I will install the MG 151s. and then I can attach the wings to the fuselage.2 points -
Yup, that's where I have been - probably still am. The Hasegawa wing isn't ideally suited for conversion to a narrow-chord slatted one, but it will have to do. I really don't like the way the slat tracks are represented in the kit, so this was one of my first considerations. Based on a multitude of photos of slat tracks, and the structure of the model wing - I came up with this idea (this is just a styrene prototype of what I would like done in etched brass). This requires a roller of sorts inside the leading edge, and here is my solution. With that in place, it was time to join the wing halves. You will notice that there is no structure inside the wing to maintain the airfoil apart from the leading and trailing edge joins. Because of this I opted to first join the wings, and then perform the next major surgery, which is to remove the 6-3 leading edge extension. The slat track openings on the kit wings run very far back, and I was concerned that due to the lack of structure the leading edges would not survive the surgery. At this point I added styrene fillers to the overstated slat recesses in the hopes of propping up an otherwise wobbly affair. Now to remove the 6-3 extension... Job done, but to my surprise, the kits upper and lower separation lines for the leading edge don't match up. I was hoping to sand the opened leading edge joins flat, and emulate the attachment of a non-extended leading edge as it was on the real Sabre. No such luck. Pity, but in order to retain the airfoil shape, I joined the leading edges as cut. Then came the job of scribing the detail on top of the wing. although I followed a lot of Hasegawa's detail on the fuselage, it would be wise to look carefully at the wings. Understandably, a kit from the 1970's was predicated on drawings from that era. Many of the panels on a wing are based on the line from which it is squared on. On a tapered swept wing it is hard to guess what the datum is, so detailed photographs (or the real thing) are a must! This one, is anyones guess... I'll leave you with that thought for now, and on the next instalment, explain what has happened in the rabbit hole so far. Cheers, Sean2 points
-
mojo noun informal a quality that makes you successful and full of energy: · He's definitely lost his mojo. · He needs to get his mojo working if he's going to finish that model Well, I lost mine over the last few months in a big way. For many reasons I just lost interest in my Fw190 and so it has been shelved for now. It's one of those inexplicable things, those that remember the 1/24 Tigercat maybe know I have form in this area .. Instead, I have found a new source of mojo which has seen me back at the bench, enjoying my modelling which is what it is all about right? This is new for me, I don’t think I have ever built a biplane, certainly not scratchbuilt so it will be a journey of discovery I hope to share The Hawker Fury needs no introduction from me, all I can do is show you the picture that set me thinking and ultimately on this path… ..look at that beautiful form, the polished metal nose panels, the state of the art in it’s day. I don’t know yet which airframe I will model, but likely it will be a Tangmere bird as that was but a few miles from my childhood home. I gained the confidence to take the plunge from John Alcorn’s books ‘Scratchbuilt’ where various masters show how they achieve the impossible in relation to fabric covered structures such as those shown below – if you don’t have the books, get them, they are superb.. Need fuselage stringers? A few methods are shown.. Wings? Just like the originals.. I started with the Westburg plans, four sheets sourced from a 1970’s RC Model magazine I found as a PDF that my printer scaled for me.. ..these are widely acknowledged as the most accurate out there.. ..and so onto building & making a start.. ..the first element I thought would be a rigid structure that supports both the landing gear and the cabane struts atop the fuselage. This would need to be very strong and so was made of brass parts.. The very first of which is here – the main gear mount.. ..then the transverse rods that link to the main gear trailing arms and the mounts for those mounted on the mainspar tube.. I used (badly) my new Proxxon mini milling machine for those.. ..all the parts were made up over the plans and ultimately soldered together, including spigots for the cabane strut mounts.. ..the firewall looking square is to add rigidity and the hole is the prop datum that will carry forwards into the nose.. ..more of the fuselage framework was constructed of carbon fibre rod – this stuff is super stiff and easy to work with – I used an RC modeller trick in pinning the rods to a scaled plan to get everything lined up.. ..soon I had both halves (at least the bits that can be seen) which will dovetail into the brass frontal assembly.. ..the real airframe is bolted together with some quite rudimentary brackets – that’s good, I can do rudimentary.. ..I should have made these from PE, but such was my renewed enthusiasm I made them by hand with the resultant rudimentary outcome.. ..the structures were primed and painted with black MRP enamel and the assembly plates added.. ..whilst I didn’t take any construction pictures, I did make up the seat based on the few pictures I have (that’s a problem I will come onto later..) …essentially I drew parts as templates and cut them from litho, annealing & shaping them and bordering with fine solder wire.. ..to finish up for now, the work to date dry fitted together… ..now for the appeal – I have zero drawings apart from the plans, I have the one Mushroom book I could find and that is 80% about the Nimrod, not the Fury and about 5 cockpit pictures all from the same angle from the internet.. I have written to both operators of existing Furies in the hope they have drawings they can share, but if anyone out there knows of any good reference, please let me know – drop links in here or PM me perhaps So that’s it – a change in direction, for me the main thing is being motivated to pull up to my bench and enjoy myself and that I am now doing ..hopefully this one will see a competition table in a few years TTFN Peter1 point
-
AIMS NEWS - Future Ju 88 product
Rick Griewski reacted to Pastor John for a topic
Future products 32D028 Ju 88 External/visible Placards1 point -
F-4E Phantom II Tamiya 1/32
Nikola Topalov reacted to CZPetrP for a topic
F-4E 67-0288 Block 35 388 TFW, 34 TFS Korat AB, Thailand, 1969 Col. Grady Morris, WSO Capt. Kawamoto Kit: Tamiya 1/32 Avionix: kokpit Eduard Brassin: engines, wheels, MER and TER, bombs Mk.82, missiles Sparow Eduard plechy: exterior, interior Real model: outer pylons, intakes Master: pitot tube CMK: body Vulcanu QMT: suction to engines HGW: Remove Before Fleight ZOTT: decals Isra decal: stencils Paint: Gunze C, Alclad II, Agama acryl WASH: AK Interactive Thanks to my friend Miloslav for the photos.1 point -

Kitty Hawk models is going out of business
Jack reacted to thierry laurent for a topic
I just ordered the MH-60R as I'm afraid some kits will soon become very difficult to get and this was the last kit I still did not have in the large scale helos I was interested in. Too bad. This kills the Jaguar and F-84 projects as well. A pity...1 point -
Collective thoughts on the Trumpeter Swordfish
Bill M. reacted to Darren Howie for a topic
Except one us in 48th and one 32nd and as has been very clearly learned simply blowing something up to a larger scale is a far more complex undertaking than just copying. All panel lines, raised detail etc will be far far overscale and look horrendous if simply copied. Besides that a cursory glance at both the kits gives immediate huge differences in the look of the two kits. About the only similarity is they both look like Fairy Swordfish. Different fuselage designs, completely different style wings with completely different canvas effects. Not only are they not copies a quick look side by side shows they are not even distant cousins. I have even after sitting them side by side for under 2 minutes no idea how anyone could think one is a copy of the other.1 point -

Im back!
Granger Davis reacted to Out2gtcha for a topic
Indeed, Cave in the Rock state park was a great little park, and taking the Jeep & trailer on the ferry across the Ohio was a super cool experience.1 point -
Thanks gents! There are. Its just with the Uschi rigging for the thinner control lines the top ones are hard to see against the white cross fields.1 point
-

Attitude Aviation Buchon Conversion
Chris Wimmer reacted to kkarlsen for a topic
Looking forward to this Kevin, although the 'Battle of Britain' Me 109's always annoyed me, they are somehow a part of our 'dna' too. Cheers: Kent1 point


