Leaderboard

Popular Content
Showing content with the highest reputation on 01/27/2021 in all areas
-

1/32 Revell Me 262B-1/U1 Nachtjager
Pastor John and 13 others reacted to Thunnus for a topic
The glue securing the landing gear legs have been given a couple of days to cure so I can now put the wheels on. Since I have sanded flat spots on the tires to depict weight compressing the rubber, I have to make sure that the tires are rotated to put the flat spots in the right position. A quick-setting two-part epoxy such as JB Kwik Weld works well for situations like this as they give me a 2-5 minutes to make adjustments before the glue starts to harden. Mixing equal parts of the light and dark colored components yields a dark brown goop with the consistency of toothpaste. With the wheels attached with JB Kwik Weld, I alternate the model between the jig and a flat tabletop to ensure that the tires' flat spots are in the right place. And now the model can sit on its own legs for the first time!14 points -

Italeri CF-104 Starfighter "Kicked up a Notch": KLP Publishing eBook now Available!
KiwiZac and 8 others reacted to chuck540z3 for a topic
Some good news for me, since my F-5E build is now in the upcoming March issue of FineScale Modeler, with a kind of crappy screen shot below which is the best I can do. It was probably one of the worst kits I've ever built, so if I can get it looking fairly decent, this build should look pretty good as well when finished. Through lots of trial and error, I think I learned a lot about spraying a clean blemish free coat of gloss black lacquer on this Tiger, which I will need as a base coat for several different shades of Alclad metallic lacquers on this CF-104. Time will tell if I can match or improve this finish. Cheers, Chuck9 points -
Well some progress on basic airframe construction today. Sometimes after pondering for a few days I just decide to cut plastic. Today was one of those days. One of the biggest hurdles was how am I going to attach the wings? They need to be level and well attached. I decided to use wooden paint stirring sticks from the hardware store. They are straight, rigid and lightweight. I determined where the wing should sit, red dashed line, and then cut some openings that would accept the sticks. Everything is just dry fitted for now but you can get a sense of what the final shape will be. I really need to finish my other projects so I have room to work on this beastie on my desk. Dan9 points
-

First project on here (Kinetic 1/32 F/A-18C)
Anthony in NZ and 6 others reacted to Crew Dog for a topic
More work has been done on final assemblies, and she is very near completion. I started by detailing the anchor points that will sit on the main gears using a pencil to simulate the paint flecking off due to the chains being attached when underway Trust me when I say those struts are far dirtier than they appear! The next step I undertook was to paint the canopy jettison bottles in white, followed by chrome silver for the wiring coming off of them Lastly, I finally attached the ejection seat to the cockpit. This has been an absolute joy to build, and hopefully the next time I post will be in the RFI section! As always, thanks for stopping by the hangar!7 points -

TA-7C / EA-7L "Twosair" - Trumpeter conversion
chukw and 5 others reacted to Starfighter for a topic
I am weak. Very weak. Whilst waiting for the aftermarket canopies for Scooby (more on that very soon!), a very old itch became too intense not to scratch it (see what I did there? :D). Just as a little introduction to this project - Belgian master modeller and friend of mine Patrick Bouclans built a stunning 1/32nd scale EA-7L many moons ago - must have been around 2005 or 2006, shortly after the Trumpeter A-7 hit the market. This model was and still is an absolute gem and it was clear for me ever since that, I wanted to build a Twosair myself one day. Patrick's EA-7L - mindboggingly beautiful. A classic scratchbuilt conversion. Similarly to most of my other "one day I want to build" projects, I started collecting references, aftermarket parts and all kinds of materials I needed a few years ago. Last week, without any warning, it made "click" in my head and I had to build a Twosair. Not one day, but right now. Strange, but that's pretty much how my little scale modelling brain works... The initial plan was to use the Zcato conversion for the intake and windscreen and to build the fuselage from scratch, but it seems all that fiddling around with 3D printing makes you lazy... me at least. So I went looking for a suitable 3D model of a Twosader and actually found one - a rather good looking Flight Simulator model. The price was reduced, so I bought it to find out what could be done with it. Long story short, I was able to convert the file, make it printable and to print the parts required for the conversion. A few cuts and a bit of sanding later, and the fuselage looked like this: Note the "excellent" fit of the Aires wheel bays and avionics bays... they are just a tad short. Well.. at least they are nicely detailed. I'll deal with the gaps later. Here's how the entire fuselage looks like. The fuselage extension was drawn by myself. As 3D files intended for games are low poly files, the surface finish is very rough and needs a lot of sanding. The nose area fits the Trumpeter fuselage pretty well, but the 3D fuselage was too narrow at the rear. I have split it and will modify the shape by hand. No Zacto intake needed - just a bit of sanding. I am currently waiting for two Avionix cockpits; once they have been modified to fit the fuselage, I can ho ahead with sanding, filling and scribing. Then I'll have to decide whether I'm going to build a VAQ-34 EA-7L or a VAQ-33 TA-7C. The EA-7L offers more interesting loadouts and a nice red star on the fin whilst the TA-7C would be a cool addition to my VAQ-33 history project... and they were beautifully weathered. We will see! As usual, don't expect this to be a "quick" project. I may switch forth and back between my ongoing builds; my current priority is to finish the QF-4S first and I have to wait for the Corsair cockpits anyway. Stay tuned!6 points -

Sukhoi Su-47 Berkut 1/32
Serkan Sen and 5 others reacted to Bekim for a topic
this area was very tricky...... So , this is the Status Jannuary 2021 Cheers Bekim6 points -
the lower side , will open the Weapon Bay.....still not done...6 points
-
I first started this in 2015-2016. I am now retired but work then was very draining and stressful( general surgeon working as a surgicalist in a hospital) So the ac got put away. It did not help that the fluorescent light in my diy spray booth fell off and knocked one of the engine nacelles off ocuh. I retired in 2017 but lost the drive to build along with many other life events(grandpa) I still participated here and meant to get back to it eventually. I took up the mantel and got back on the horse and finished it up. Thanks to Thunnus for inspiration David Brown for info on this particular ac and Michael swinburn for sourcing the D/L antenna which took a flight into the wild blue. Yellow 3 was an early build so it had the early scissor links on the nose wheel and you had to delete the pouches on the access doors of the cannons. It is also well worn the only picture of it is nose down in a dump after the war but you can see how worn the paint was. It was an interesting process to create the worn look. I did a partial wip on it but did not include the earlier paint work. It basically had a speckled irregular under coat thin main coat weathered with pastels and watercolors . The mask allowed me to weather the markings as well. Other than decals , masks, nano mold seatbelts(great thing they are) and barracuda wheels the ac is stock trumpeter. This ac aIso had the original wooden rudder and square tail light that was made by cutting off he part of tail and blending in a piece of clear plastic with uv glue. I love AM but it does complicate and slow and already slow process for me. One error was the wing walk silvered old decals and despite a glossy base under it. they are hard to cut as vinyl stencils on my cameo I think that hgw makes some wet dry decal or next time may use the dry transfers for that. The vehicles are a 21 century die cast the kettenkrad is a ZM I just built posted ready for inspection today5 points
-
Part 5: STRUTS! There are two procedures with making model biplanes which can be rather frightening - one is getting the top wing on so that it sits properly in all planes, and the other not unrelated one is rigging. The Revell Tiger Moth has been dogged by one particular issue for those who care about the correct "sit" of an aircraft, and that is the dihedral of the lower wing, which is too flat. This is primarily due to the way in which the wings are attached to the fuselage and the length of the struts. This is what the noted Moth expert John Adams has to say: "The problem is they are over scale with the result that the very characteristic different top and bottom wing dihedrals of the Tiger are thrown out which gives the wrong "sit" to the aeroplane. The front struts should be (in 1/32 scale) 44.5 mm long and the rear struts 45.25 mm long." This issue wouldn't have arisen if the design of the actual Moth hadn't needed to be changed! The original design of the line of aircraft that ultimately evolved into the DH82 Tiger Moth had the fuel tank directly above the pilot, this made an emergency exit by parachute very difficult indeed. It was found that moving the tank further forward adversely affected the centre of gravity, so to bring the plane back into balance the wings were swept back. This in turn caused problems with ground clearance at the wing tips, especially on rough grass airfields, and the answer to this was to shorten the inter-plane struts which lifted the lower wing at the tips. This of course increased the dihedral of the lower wing!! Given those issues, how do the struts compare? The fundamentally different ones are Silver Wings of course. Cast in resin, they use their traditional technique of having a wire core for strength. A small problem arises in that the wire that protrudes at either end is too long for the thickness of the wing and no guidance is given about the length that the wire should be cut, so it's trial and error. They do however give a very secure fix once in place. These struts are also noticeably thicker, more robust, than the other two. Whilst the pitot head is moulded fully on the ICM one, and well detailed, the moulded Revell one is rather crude and Silver Wings supply it as PE to be attached to the strut. Oops, upside down! Given what John Adams said about strut length, I measured the three with my trusted callipers. The slight difficulty of course in shortening the Revell struts is that you lose the locating spigots, drilling and inserting wire "a la Silver Wings" is the best solution. ICM obviously paid some attention to John's advice, though differing slightly in length. The shorter ones are the front ones. There are some minor differences in profile, so some actuals for comparison: I like the ICM ones very much. Moving onto the cabane struts, again Silver Wings differ with a two piece structure: It's another piece to hold when you might already be needing three hands, but no big deal. A nice detail from ICM's port cabane strut: (The cable running up the cabane strut carries the electrics for the navigation lights so won't be present on all Tiger Moths.) Measuring each leg of each cabane strut for the three kits revealed very little difference, only the rear leg varied by 1mm in each - 29mm for the Revell, 27mm for Silver Wings and 28mm for ICM. How do the instructions compare for this fiendish task? Revell's: but if you're doing the Canadian version, different inter-plane struts: Silver Wings......hmmmm.....: and ICM......though I was hoping for the same style they used on the Gladiator which was quite a large "seat" which helped alignment. Part 6, if you can wait, will be the empennage!5 points
-
This really is taking a while! The airbrake on the other side is finally done. Since the joining of fuselage halves is now imminent, I need to get the cockpit/intake/nose-wheel well in place. The intake is positioned according to the fit of the wheel well to the fuselage floor, and so that was my next point of focus. Having elected to use the old Hasegawa kit as the basis for 90% of the build, I had to assess how to correct the entire nose gear. Their nose-wheel leg (on the right) is a bit flimsy compared to the chunky Kinetic offering. Neither really capture the feel of the Sabre's distinctive nose-wheel assembly. Notice just how shallow the Kinetic wheel well is - probably due the thickness of their plastic mouldings. This made their gear leg a tad short, but I still prefer to use it as its thickness and basic components are better than the Hasegawa ones. After a whole lot of modifications, this is how the upper nose-wheel leg looks. A major part that I feel has to be represented is the complex casting of the hydraulic actuator that (I think) rotates the lower leg through 90 degrees during retraction - in order to get the nose wheel into the bay in a horizontal state. The lower half of the leg is also not well represented in plastic, so some 2mm brass rod bent to shape will hopefully do the trick. A bit of 1mm piano wire should strengthen the joints sufficiently to use superglue instead of soldering. The well itself was as basic as the Kinetic part. I separated the floor from the sides, and added some styrene sheet which was then sanded to look like the bottom of the air intake. I then proceeded to add a lot of stuff, and although not perfectly to scale, captures the feel of what I think happens down there. Of interest to the Tamiya engineers may be that the nose-wheel doesn't seem to be centred in the well. From what I have been able to surmise by reverse-engineering the components, it is offset to starboard when viewed from the cockpit. Maybe a Sabre boffin can explain this (if it is correct)? And finally, a look at the retraction/extension arm. Neither kit manufacturers appear to have looked at the real part, or even a photograph of it! Hopefully this attempt will look right when I finally get the whole lot assembled... See you in a couple of months! Cheers, Sean5 points
-
so i guess i better post some plastic up rather than tonka piccys anyway i think thas the stores done and are getting packed away now so i can acutaaly build the tornado5 points
-
it comes closer......5 points
-
Had some time to go on the black russian Berkut....5 points
-
Might not be a LSP, but it's certainly a large model... HPH 1/48 Dornier Do X - wingspan 100cm, length 83cm. Limited edition of just 20 kits... http://shop.hphmodels.cz/en/model-kits-in-scale-148/213-dornier-do-x.html4 points
-
Italeri CF-104 Starfighter "Kicked up a Notch": KLP Publishing eBook now Available!
jgrease and 3 others reacted to chuck540z3 for a topic
Thanks Alex. Like most print magazines, FineScale Modeler has undergone a lot of new changes lately and with the demise of Scale Auto magazine in October 2020, car subjects have now migrated over to FSM. With my focus on aircraft models and only aircraft, my interest in FSM has dwindled as more Star Wars subjects, Tanks, Figurines and now Cars fill the pages of the latest issues, including the March issue. Nothing wrong with this, since I believe most modelers are more well rounded in their modeling interests than me and FSM needs to cater to the widest range of modeling subjects in order to survive. FSM has been very good to me over the years and I wish them nothing but success in a very tough genre. This is why I have migrated my last two models (Kitty Hawk T-6/Harvard and Special Hobby Tempest Mk V) over to KLP Publishing instead. As an aircraft modeler and professional writer, LSP Kevin understands what we want to see and how to explain it clearly, so rather than sift through pages and pages of one of my typical build threads full of background noise, there will be an eBook guide that will be easy to follow and read. I'm really looking forward to the first one on the Tempest! Cheers, Chuck4 points -
That looks fantastic! Exactly what I'm trying to achieve, and i think yours probably looks more in scale than mine. Dust it off and get her across the line Thabks very much guys, I appreciate the support! This week has been a busy one, so not much bench time. A weekend visiting friends in Texas included some time spent aviating, backseating in this 1929 Curtiss Robin. Good Times! I got a few little things done on the G50, first up was a bit if tail surgery. The kit gives the option of long or short tail fairings, the machine im building had the short tail, so out with the saw. A rough cut, then filed to the appropriate panel line. Here are the two lengths compared The fit was surprisingly good. I started experimenting with the structure inside the cowling. Using metal tape, I ran a rivet tool along the tape and glued strips inside the cowl. With the engine in place, little will be seen. Thanks for watching!4 points
-

Price Changes
LSP_Kevin and 3 others reacted to D.B. Andrus for a topic
Due to an increase in shipping charges and material costs our prices on shipping and a few sets have changed. I've held back on doing this, but the bills must be paid. Shipping charge for U.S. customers has changed from $5.00 to $6.00 with quantity discount still in effect. Shipping charge for non-U.S. customers has changed from $15.00 to $17.00 with quantity discount still in effect. Prices for the majority of our l/g sets remains the same. For those that have changed please consult the Current Catalog thread. Changes effective 1/27/2021. (Orders placed before this date will still be at the old prices.) Thank You, Damian4 points -
Progress on civilian DAKOTA: https://www.modelforum.cz/viewtopic.php?f=57&t=133962&p=2394052#p23940524 points
-
Have to say, you've just described how Hasegawa does/did kits. I have the Corsair/Mustang/Mosquito in the stash, i open the box and am intimidated by the kit, mostly by the sheer part count and stuff that i know i will leave in the spares box when/if i build them. I do like the idea of a "hollow" Mossie, engines/bombay details/gun details will all be left out on my build, but that's just me... Don4 points
-

1/48 Tamiya F-4B
BloorwestSiR and 3 others reacted to LSP_Ron for a topic
I suspect the Mossie was a failure. I don't think it sold well. My LHS brought in several. I bought one of them but the others just sat and sat. I started my build with great excitement and have it about 80% done but it's now sat on the shelf of doom for at least 18 months or longer. I burnt out on it. I think Wolf Buddee did two. I don't think his is finished yet either and about the same time period.4 points -

Takom SS100 Hanomag (for V2)
scvrobeson and 3 others reacted to LSP_K2 for a topic
Wheels arrived today from BNA. Much to my surprise, all seven wheels are included, so the spare is provided as well, should I opt to go that route.4 points -

TA-7C / EA-7L "Twosair" - Trumpeter conversion
Pete Fleischmann and 3 others reacted to reconspit for a topic
Oh boy..., terrific work..., i‘m absolutely amazed.... Any chance of buying a „print“ of these parts...? Great work!!!!4 points -
Brilliant Ben, I love it! I shall following for sure. Here is one that I want to make: Derek4 points
-
1/32 Revell Me 262B-1/U1 Nachtjager
Pastor John and 3 others reacted to Thunnus for a topic
Thanks for checking in guys! Compared to the prior steps, especially the sculpting required around the nose, the painting portion just flew by, didn't it? The flat coat has been applied to the Nachtjager. I've been using Model Master Acryl Flat after trying many different clear flat products. It's not perfect but a dependable flat coat can be difficult to find. You may notice the very light post-shading that was performed. A VERY thin mix of black/brown is sprayed along joints and panel lines. I like this to be BARELY noticeable. The bottom was given a flat coat too. Post-shading was done using a light tan color and instead of running along panel lines, I used it to create random streaks, front to back. I decided to install the landing gear at this point. The last bits of hydraulic lines in the wells have finally been connected. I'm going to let the landing gear cure overnight. I want them solid before attaching the wheels.4 points -

Swiss F/A-18C J-5011 2012 FINISHED
Starfighter and 2 others reacted to Dukie99 for a topic
I will join this GB with another Academy F/A-18C. The F/A-18+ I built for the Training Day GB was a very enjoyable experience, so I thought I would build another one. I have decals for Swiss Air Force J-5011 in a 2014 Tigermeet marking. I have a fair amount of aftermarket for this one as well: Aires cockpit, Res-kit exhausts, 4dable model chaff/flare launchers, rhino seamless intakes and g-factor brass legs. I will load this bird with two sidewinders and two Amraams from Zactomodels which are their way. I have another F/A-18D in the stash and I may tackle it for the upcoming Navy GB, we'll see. Box shot and AM I have cut and prepped the resin and gave it a thorough cleaning More progress soon. Cheers, David3 points -
As I've (hopefully) figured out this evil machine and the required spells and potions to make it work, I thought I'd post two of my builds from about 5 years ago. The main motivation was when I started roaming the forums today and saw Denzil's G50 build, as well as Panzerwomble's about Pips and his mounts. Many moons ago, I had a pretty decent business building primarily armor dioramas for various US Army units at Ft. Bragg depicting aspects of the unit history for the commanders to place in the HQ conference rooms. In between builds, I'd do a few 1/32 aircraft mini-dios to keep my skills honed and develop new techniques. A majority of them were given away to friends these 2 included, but I took pictures, and here's the few I was able to salvage from Photobucket before they annoyed me to the point I deleted it. At some point, I'll post a few of my other aircraft here and possibly some armor in the Non-LSP thread. Anyway, without further doo-doo,3 points
-

41sqn Tornado - One Giant leap!
scvrobeson and 2 others reacted to Mark M for a topic
ok just had a reply from kits world, apparently im missing 2 bits, 1 the second part of the decal sheet and 2 the instructions they emailed the instructions and are sending out a replacment sheet, so anyone buying this please check the contence when they arrive3 points -

Italeri Model Kit Preview 2021
wunwinglow and 2 others reacted to thierry laurent for a topic
Yes but ask first for a Harrier first generation family...3 points -
I agree, if ever! I'm thinking of submitting a request to Italeri asking them to consider doing a Fiat G91 (early and late versions) and adding it to their 1/32 range. Being entirely Italian and a lovely aircraft to boot, I'm hoping it could become a reality. I wonder if I should?3 points
-

1/32 Revell Me 262B-1/U1 Nachtjager
scvrobeson and 2 others reacted to dodgem37 for a topic
John, you are just too good. You make the most sublime models. Thank you for sharing. Sincerely, Mark3 points -

Thunderbirds
Derek B and 2 others reacted to Stokey Pete for a topic
This is my favourite image taken of a T’bird aeroplane. Made all the more dramatic thanks to weather conditions at the time.3 points -
It's pointless if the its go unbuilt. I won't get through the Mossie so why buy it? We here are not casual buyers. Casual buyers out number us. Tamiya may have paid too much attention to folks like us. It's business.3 points
-
Here is a CF-104 with the nuke flash screens : also note RCAF still can be seen behind the 893. Jari3 points
-
I can't help but think the Mosquito with no engines and a 50% price reduction would have done much better sales wise. Revell were knocking out basic Beaufighters and Mosquitoes for decades. A quality, unsophisticated basic Tamiya update could have done the same I feel.3 points
-

TA-7C / EA-7L "Twosair" - Trumpeter conversion
daveculp and 2 others reacted to Oldbaldguy for a topic
And just when we thought it was safe..........3 points -

1:32 scale Ansaldo A.1 'Balilla'
Harrison90 and 2 others reacted to sandbagger for a topic
Hi all, My last model was the Nieuport 28C.1, which has twin flying wires fitted with full length inserts. On that model I was able to represent the inserts strips between the flying wires with plastic card strips, decaled and secured between the pairs of wires. However on this build, the length and spread of the flying and landing wires meant that I wasn't able to hold the strips in position, as the lines were too flexible. Therefore I'm cutting the full length insert strips, cut from 0.2 mm thick plastic card, in half and using 1.0 mm wide strips of kitchen baking foil to suspend the insert on the wires. In this way I'm able to pinch the suspended insert between the two wires (using flat ended tweezers) and apply thin CA adhesive to track along and secure it between the wires. The foil strips are then folded around the wires/insert and secured in position using the CA adhesive, as these will be the base for the linen wrappings. Later I'll paint the foil strips to blend with the inserts then use thin white decal strips over the foils to represent the linen wrappings. I think this is going to take a while as there are 16 half insert strips to fit, Mike3 points -

1/32 Avro 504 scratchbuild
John Everett and 2 others reacted to kensar for a topic
Thanks, goose. I finally got more paint and went at the wings. Got them and the fuselage detailed and put together. It's coming together now, with the larger assemblies being joined.3 points -
1/32 Revell Me 262B-1/U1 Nachtjager
Paul in Napier and 2 others reacted to Thunnus for a topic
Thanks guys, I truly appreciate the positive feedback! Now that the landing gear legs have been solidly glued into place, I can check to see if I've added enough weight to the nose to keep the model from tail-sitting... looks ok, thankfully! It's probably easier to mount the landing gear doors without the wheels in the way so that's what I've done next.3 points -
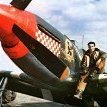
Finally, some shots of the pilot figure which turned out pretty good. It is one of the rare figures I do that I am completely satisfied with. The face and hands were painted using artist oils and the uniform was first airbrushed with acrylic colors and the highlights and shadows were added using the same colors, lightened or darkened as appropriate, using a "wet pallet" hand brushing technique. Ernest Same angle/distance with softer lighting. Extreme macro showing some of the detail painting. You can also now see the sharp (at macro range) delineation of the flesh tones. At 1/32 scale they have to be pretty defined, because the light and shadow effect will disappear at normal viewing range if they are too subtle.3 points
-

First Build of the Year FW190 A-6
F-4Phanwell and 2 others reacted to Greif8 for a topic
Now some mid-distance and close up shots. Ernest3 points -
Interior now given a base coat of Tamiya XF-63, as well as the seats receiving some XF-10. Still a wee bit of painting left, then I can start assembling the cab, a step that I’m really looking forward to.3 points
-

Bf 109K-4 6./KG(J) 6, Klecany 1945
Pastor John and one other reacted to Miloslav1956 for a topic
model Revell/Hasegawa 1/32, RB product PE wheel bay, Eduard wheels, HGW seat belts & wet transfers stencils Aires cockpit, Yahu instrument panel, Painting mask homemade, Propeller 77 All colours MRP. Reference JaPo book KG(J) 62 points -
I completed this year's first build last night, Hasegawa's very nice FW 190 A-6 kit. I built the kit as a JG1 aircraft, mostly because I really liked the yellow and black checkerboard pattern on the cowling and the partial stylized eagle on both sides of the forward fuselage. As JG1 generally flew out of airbases with asphalt or concrete hardstands and runways; and because the service life of aircraft were almost always pretty short from late 43 onwards, I kept weathering to a minimum - with the noticeable exception of the drop tank. I only used three AM items on the build. An HGW seatbelt, Master barrels and pitot tube, and a set of Damian's outstanding landing gear (I'll using more of these excellent sets on future builds. They are that good.). I also only did some simple and minor scratch building adding brake and electrical lines to the landing gear, flap and landing gear position indicators, an antenna line, and a throttle handle and circuit breaker panel in the cockpit. I also scratched the base by scribing some evergreen stuff and then painting and weathering it. I added the rain puddles because I thought the base looked a bit "boring" after I painted it. Those puddles is one area that I wish had turned out better, but they do the job I suppose. First up are some overall shots. Ernest I mostly closed the canopy hoping that it would lead the viewer to think that the weather is still threatening rain. I toyed with the idea of adding wet areas to the aircraft as well, but decided that had too high of a potential for disaster. So I opted to show the bird dry - perhaps it has just been pushed out of the hanger.2 points
-
A belly view of the F-4E: and the F-105B: Jari2 points
-
Battle of Britain Hurricane camouflage demarcation, hard or soft? 2 photos.
mpk and one other reacted to thierry laurent for a topic
To be honest as well I did not look in my books as I know I saw it on the web and thought I had saved it. With regard to the printed references, I'm in the same situation than you ! I've thousands of them.2 points -
Agreed Jens, but like Kev (2), I also recall seeing (probably) the same image of an aircraft wing (possibly from a fighter aircraft, in a vertical trestle) being sprayed by one or two people with template mats draped over the leading edges of the wing, unless we are both mistaken! (and not the often shown P-40 wing either). Cheers Derek2 points
-
ICM, drop the nuke..... 1/32 Foxbat Will be happy with a Mig-15 series though.2 points
-
41sqn Tornado - One Giant leap!
RichG and one other reacted to Stokey Pete for a topic
May as well chuck an image in, from my days out (remember those) vault.2 points -

F117 Nighthawk
themongoose and one other reacted to panzerrob for a topic
Hi all, Here are a few photo's of my current build, the Revell F117. I didn't realize it was such a big airplane, I will have problems putting it somewhere. So most likely I will hang it somewhere, so it has it's wheels retracted. Extra bonus: this shows the weird lines of the plane clearly I didn't spend a lot of time on the cockpit, as I expected there wasn't much visible with the cockpit and pilot installed. I was right, nothing is visible. The pilot as a modified Academy offering, with amputated neck, and lowered bang seat so he was able to look out the canopy! The absolute grat things about looking at your work online, is that you see f*ck *p's: I forgot the airhose on the pilot's mask! With regards, Rob2 points -
Well my Tamiya XF-63 arrived from Scale Hobbyist a couple of days ago, now I can finish off this and a 1:35 Flak 38 that I'm currently working on. Yay! (I'll absolutely be ordering more from Scale Hobbyist, as many of their prices are considerably better than Sprue.)2 points


.thumb.jpg.5da8bff9741de420eb2e87addd8f2cf6.jpg)