Leaderboard

Popular Content
Showing content with the highest reputation on 01/05/2021 in all areas
-
 Thanks John! Almost done. Bombs are on, antenna's on (tail blade replaced) and navigation lights are all on. Just need to string the antenna wire and add the pitot tube and then off to RFI this goes. Just have to focus.....stop playing Cyberpunk.....first video game I've enjoyed in over a decade! Click the picture to open it at Flickr, then you can really see the rivets pop.12 points
 -
renders posted on scalemodels.ru http://scalemodels.ru/news/15047-anons-Great-Wall-Hobby-1-32-Curtiss-P-40B-Tomahawk---rendery.html9 points
-
The Kingfisher’s wash is drying, all that remains is buff it up and mate all sub-assemblies. This got me thinking on what to do next: start on the Focke-Wulf Kanguru conversion, or beat the F-84G in to submission that has been sitting on the floor for ages. I decided to do the latter, so here goes. I don’t remember exactly why I lost interest, but a few thing come to mind. 1. I had lot’s of trouble to get this part to sit and stay put in the cockpit. It’s Eduard PE plus kit parts. It kept breaking off. I added fictions bracing plates to give it more stability. I just put it back in without glue and then I remembered: the windscreen will not fit when the part is installed. I will have to come up with a fix. Then there was this seam between the fuselage and the gun-cover. Sorted now. The cockpit looks okay with the Eduard parts. Still needs some wash and Matt-coat, and I have to install the hiney-parts. . I am open to suggestions on what colors to finish the F-84G in. There is an Iranian one that looks appealing in Asia Minor cammo, but I can’t find proof of operational use so I guess it’s out of the question.7 points
-
based on Hannants future releases big suprise for me! no interwar biplane Bell AH-1G Cobra (early production), US Attack Helicopter (100% new molds) NEW - II quarter https://www.hannants.co.uk/product/ICM32060?result-token=sS5iu Bell AH-1G Cobra (late production), US Attack Helicopter NEW - IV quarter (Expect to see an Xtradecal for this kit!) https://www.hannants.co.uk/product/ICM32061?result-token=sS5iu Bell AH-1G Cobra with Vietnam War US Helicopter Pilots NEW - III quarter https://www.hannants.co.uk/product/ICM32062?result-token=sS5iu5 points
-

A-4E Skyhawk Aggressor (Trumpeter A-4F kit - 1/32)
Marcel111 and 4 others reacted to alaninaustria for a topic
Seat...5 points -
A-4E Skyhawk Aggressor (Trumpeter A-4F kit - 1/32)
Marcel111 and 4 others reacted to alaninaustria for a topic
Full front office -5 points -
A-4E Skyhawk Aggressor (Trumpeter A-4F kit - 1/32)
Marcel111 and 4 others reacted to alaninaustria for a topic
Sidewalls are done.5 points -

Tamiya 1/24 Porsche 934 Completed
LSP_K2 and 4 others reacted to machine_marty for a topic
Hi, this is my recently completed Tamiya Porsche 934. Lovely kit, built out of the box with Zero paint and a 2K clear coat. Not overly happy with the 2K - think I need a bigger nozzle on the airbrush to get the volume of paint required to prevent orange peel. Apologies for the poor iPhone pics5 points -
George... a less charitable person might think you were trolling at this stage.5 points
-
Thanks John, high praise indeed! So, it's time to get the cockpit into the fuselage. Tamiya would have you insert the cockpit into the already joined fuselage from below, but it quickly became apparent that this would not be possible without breaking off detail I have added aft of the cockpit due to it contacting the moulded ribs or other detail and plumbing on the fuselage sides as the cockpit is slid up. The only option, therefore, is to go the traditional route of fitting the cockpit prior to joining the fuselage halves. This approach came with its own problems however as there was still interference between some of the added detail and moulded kit parts. As is often seen with Tamiya's kits, their engineering tolerances are so fine that once you start adding modifications you run the risk of causing knock-on effects elsewhere. That is certainly the case here and something I would warn others building this kit about. In the end, it was necessary to do a bit of selective grinding to make sure the fuselage halves and later the lower wing would fit together properly. For example, sections of a couple of the moulded ribs had to be removed from the lower wing to accomodate the PE oxygen bottle platform. My David Union rotary tool came in very handy here for precise removal of elements without wrecking the whole area and having to sand and repaint. It's a good example of the importance of test-fitting, test fitting, and test-fitting again since if this issue had not been identified now it would have resulted in poor fit of the lower wing later in the build and me probably breaking off the whole oxygen bottle assembly as I tried to wrestle it into position! Speaking of test fitting, here is a last look at the fuselage interior with the radio transmitter/receiver now installed before it is obscured by the cockpit. The cockpit was inserted into place held just by tape at this stage and the fuselage halves joined. I did not glue the cockpit to one half as you normally might do as I wanted to be able to fine tune the cockpit position once the fuselage halves had dried as per Tamiya's original intention. Lastly, a couple of questions for Ryan @A6M or anybody else that might have detailed knowledge of the A6M5. What is that rectangular gap immediately behind the rollover pylon and should it be there (probably something I should have figured out before joining the fuselage halves!)? Also, immediately aft of that is the position for the RDF loop antenna. The RDF system has been removed from this aircraft so would the loop antenna have also been removed and should there just be a round hole remaining? Cheers, Kirby5 points
-
Just a short update from Aerocraft Models. Well firstly to all my loyal customers, and followers thank you for all the support through last year. I like many do hope that 2021 will be a better year for all of us in many ways, even though the start of 2021 already looks to bringing even new challenges. Over the Christmas holiday period both my wife and I tested positive for Covid, I think I may have brought it from work as far back as the 18th of December. One way or another I have had to isolate from the 20th through to the 12th, boy it is a long time.......It gets really complicated as I did not have any of the major symptoms, but had headaches which I am still getting but not nearly as bad, and a strange dry mouth. My wife on the other hand lost her sense of taste and just generally did not feel well. The good news is neither of us were to badly affected, but just did not feel great, however we are well on the road to recovery now. All has not been bad though as I have been learning my 3D cad package and trialling new sets, and trying to get to grips with the 3D printer. Although lots of frustration in many areas I have learnt a great deal and progress is being made. I know and realise that many sets that I am working on and have promised for quite a while have not materialised as yet, but I can assure you many are being worked on and hope some will see the light of day fairly soon. Currently there are 4 new brass sets at the brass casting company and all being well I hope to announce those in the next few weeks. All being well there will be some new resin sets in the not too distant future. Currently there is new project under development, this is being designed with 3D software, the main components will then be developed into master patterns from 3D prints. It will be a multi-media kit, predominantly it will comprise of resin cast main parts and 3D printed detail parts, it will have brass undercarriage, decals and possibly some other component types. This will be the first complete aircraft kit under the Aerocraft Models banner and it will be in 1/32 scale. I promise that there will be items coming through that will hopefully interest many of you, in the three main scales, 72, 48 and 32, and I have a few more in 24, that may well happen. Keep an eye out for new sets and news updates in the coming weeks.4 points
-
Happy New Year my friends! I hope you are all safe & healthy! Here some pics of the models in 1/32nd scale that I have started and finished in the orrible-2020... AMI Tornado IDS - Revell Czech AF MiG-23BN - Trumpeter + HPH conversion USN F/A-18C Hornet - Academy CIAO! Piero4 points
-
Hello friends, At the end of the year, I managed to finish a plane that I love. It was a birthday present from a dear friend, whom I thank once again for the gift. This is my vision for this aircraft. Except for the data stencils, everything is painted! Fully painted with MRP. HAPPY NEW YEAR! L-29 DELFIN, Romania, around 19684 points
-

Academy 2021 new Products
Rockie Yarwood and 3 others reacted to Scotsman for a topic
I've just seen this over on Britmodeller - ok start speculation in 3...2...1 My guess is Revell with add on pieces , but I'd loved to be proven wrong!4 points -
So...thanks to your opinions...Veltro was painted today Real Colors from AK Interactive are THE BEST paints I've ever used4 points
-
.thumb.jpg.5da8bff9741de420eb2e87addd8f2cf6.jpg)
Make the others jealous
mambodan72 and 3 others reacted to RadBaron for a topic
Holy-grail kit for me!!4 points -

2020 what a year...
Loach Driver and 3 others reacted to kkarlsen for a topic
2020 was a rollercoaster ride with great up's and subsequent declines... All at the same time. The worst and the best year in large scale modeling. 2020 started out very good with the finished Aeromarine 75 build and the Hydro Monoplane I around February first. Then the Corona virus hit and Wingnut Wings crashed. At this point the stock was pretty thin regarding WNW's kits, only 3-4 in the stash. So I started 'collecting' what I could get my hands on without having to pay extra. I finally managed to finish the Fokker Dr. I Jasta 11 Roden triple diorama in April. Then I had to make up my mind where to go next.... This ended up becoming quite the struggle. And a lot of new builds were started F-16, Thuling G etc. At the end of June the KLP Arado build was ready to go... By now the WNW's stash was swollen to 12 + 2 duellists kits, I almost had every WNW kit I ever wanted. In the end, a second Felixstowe was the last one to be added to the stash. By the end of summer I was now working on 3-4 builds simultaneously, building in every direction possible... I finally settled on doing a build that I would be able to finish. Rodens Albatros D.III with Aviattic/Pheon decals. This helped me to begin focus on what I wanted to do next and the Rumpler 6B.1 Seaplane conversion was started... One of the great news this year were the resin kits from Lukgraph. The De Havilland DH.89 is one of my all time favorite's. And it was just what I needed and I managed to finish it in the dying days of this horrible year. On a positive note, in 2020 we finally got our Mengnut Fokker Dr. I and who knows, a shimmer of light at the end of the tunnel regarding WNW's? Roden announced they would begin producing WWI large scale models again, SPAD XIII, Avro 504 & Sopwith 1½ Strutter are in the pipeline. Lukgraph is on a roll (please support) the highlight for me being the upcoming Friedrichshafen FF33L. Some very nice new kits are coming from ICM too. Copper State has announced the Caudron. I hope to be able to finish the Rumpler 6B.1 sometime soon and the T-33A after that. I will try my best not to run around like a headless chicken in 2021! Cheers: Kent4 points -

sailing ships
Tnarg and 3 others reacted to Rockie Yarwood for a topic
Love sailing ships! The Revell Cutty Sark kit is hiding under my bed (yeah, I'm a 62 yr old kid). I built many of the Revell and Heller ship kits as a youngster. I really enjoyed the Revell Golden Hinde and and HMS Beagle, and the Heller Viking ship and Columbus's three ships. In wood, I've done a couple of model shipways solid hull kits. I also have a closet-full of ship plans and modeling books by Harold Underhill and other draftsmen. (Hope I live long enough to tackle a scratch-build some day!) I have an original release of the Revell Beagle in my stash - just for sentimentality. I built the kit when I was about 13, It was the first time I fully rigged a model ship. I was pretty proud of the result, and wanted to show it off to one of my mother's friends (to me she was Aunt Edna). After, I left the model on the arm of our couch. As Aunt Edna got up to leave she put her sweater on, swinging it over her shoulders, and it snagged the model sending it sailing into the kitchen where it smashed against the refrigerator! I think she was more horrified than I was! Cheers, Rockie4 points -
I would just like to say: You guys are giving me a headache.4 points
-

Modelling and art. Is art possible in modelling?
Landrotten Highlander and 3 others reacted to LSP_K2 for a topic
I certainly believe that modeling can be art, but I don't believe that it necessarily always is art.4 points -
I build these two many years ago. Both plank on frame The HMS Caroline And the Harvey4 points
-
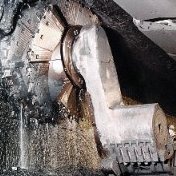
OK, I actually started cutting some plastic (and wire) today. I'm planning to assemble, detail, and paint the engine in 3 or 4 sections, then put those together after preparing for the connections amongst them. I also need to clean up the cockpit floor and fuselage parts so I can dry fit them and get a sanity check regarding how much space there isn't for detail around the engine. Started by drilling the cylinder banks for spark plugs and return hoses from these coolant manifolds. Making notes on the instructions about what I do and which size wire or tube I drilled to fit. Here's some plumbing detail for the oil distribution system on the assembled long block. That's as far as I got tonight, and probably much of what I'll do on this section before painting. I intend to build the ignition harnesses after I have the section with the supercharger and magnetos built. Also think I will try to assemble and paint the intake manifold separately. This is going to be fun.4 points
-

P-38 J Lightning Revell 1:32
Martinnfb and 2 others reacted to Martin Kubis for a topic
Hello, As I like this old school Revell 1:32 kits I went for the real vintage from 1970 (plastic was still in great condition as well as decals) Model from the box with all raised panel lines (I just made "Titanic" rivets bit smaller by sanding) and the scheme is from the box too. Only aftermarket are wheels, interior and guns (all was defigned for the Trumpeter kit but it fits this old Revell wery well without any issuses). Airbrushed with Revell and Humrol enamels and aquacolor for the details. Weathered with Revell pigments. I know these days there are on the market more accurate models of this aircraft, but this was nice memory to build it again after 30 yeas when I found this model as a teenager under christmas tree. Martin3 points -
As some of you know I was the UK source for GSI products for a few years basically picking up Mr S at a Nuernberg back in the 80's and been in love with it ever since. How I became UK distributor is another tale!! As you know Mr S can be removed without sanding with IPA (isopropyl alcohol) or Mr Color Thinners, just a tip I have been using , try optical lens cleaners the thin tissue wipes in the little packet the paper is slightly abrasive and removes the filler well the original tissue come with a mild alcohol base but can be easily re-hydrated with the solvent of your choice. My brand of choice is Zeiss as for some reason I get them offered as an add-on with Amazon I paid just under £2.00 for a box of 100 tablet wipes same as the spec wipes but bigger3 points
-
A-4E Skyhawk Aggressor (Trumpeter A-4F kit - 1/32)
Marcel111 and 2 others reacted to alaninaustria for a topic
I have a few updates for this build.... stnby! Cockpit is finished!3 points -
The stash grows slowly but steadily The Junkers and the Gladiator were christmas presents to myself and the Stieglitz will be my first ever all resin build (thanks to @EvilCarrot). Cheers Joachim3 points
-

Great Wall Hobby P-40B Tomahawk in 1/32
esarmstrong and 2 others reacted to cbk57 for a topic
I see one thing that matters, cockpit floor is the wing, so we should not have the short cockpit problem. I like the engine detail, i see all the detail in the fuselage, that will be nice for a few people, I would not personally use any of it other than the fuel tank and maybe the frame formers just to help it all go together. I hope they get this on the market soon, I have been wanting this for a long time. P-40b is a personal favorite. I like the comprehensive engine detail, however if the cowlings are not removable I would not be using it. To me I only want a detailed engine if I can take off or remove the cowlings. I don:t like building permanent open cowling.3 points -
Allright then - option 4 it is I have to do some touch ups but I think weathering will start tomorrow. Curently I'm planning: washing, but only slightly darker than the underlying colours - no need to overemphasize the trenches eh panel lines some sort of filter, haven't used any pre mixed so far, so most likely oils (maybe a dark green hue for the top and a light grey for the bottom) big maybe: salt fading for the upper surfaces3 points
-
Never hesitate to offer help George. Most of us likely already know but if you help at least one person, it's worth the effort.3 points
-
Thank you for the reference list, Abbadur! That is very helpful and has reminded me of some references that I forgot I had (Aero Detail and Squadron Walk Around). Do these covers for the outboard gun positions need to be filled? I thought that I had read that somewhere but can't seem to recall where.3 points
-
Me too! In all its 1/48 glory: https://victoryshipmodels.com/ship-model-surprise-wooden-static-kit-artesania-latina-master-commander.html Although it may be out of production sadly. Thanks for the compliment about the Bluenose. It was built just after college, and I hired a seamstress for the sails. Cheers, Tom3 points
-
Art in and of itself, is subjective. Just look at the art exhibits in some of the worlds largest galleries; "art" that was just made recently by some well known artist, considered the new Rembrandt goes for millions of dollars, and if you count the actual time and materials put into some, it's nearly NIL. The value comes from the people who put that value on that object. Accepting something like that as a "great work of the modern world" is really no more farfetched than calling a really well done model art. Again, Modeling and art do have that in common, they are both highly subjective by the observers eye. What is a great work to one person may be a dirty piece paper floating in the wind to another.3 points
-

Colorized period photos
phasephantomphixer and 2 others reacted to LSP_Ray for a topic
Also, scale plays into it. Looking at a scale model is the equivalent of looking at the full scale item at a distance, so the colors appear lighter.3 points -
Thanks guys I appreciate that... I do apologize for not being more detailed in my subject title... Mike3 points
-

wow shipping from europe is more ridiculous every day
phasephantomphixer and 2 others reacted to Jack for a topic
Well, we all agree by now that, specifically across the big pond, postage is getting really out of hand, and the fact that we are all subject to government's whimps at this time, we can do little to change this condition, but that shouldn't have us consider not sending packages to and fro, but then again i had to change my christmas donation to a LSP member to Australia/New Zealand into a monetary gift just due to these outrageous postage costs, which is very frustrating.........3 points -

Color: Science, Research, Systems, and Standards
Rockie Yarwood and 2 others reacted to vince14 for a topic
I'm just pipping you - 81 WNW kits in the stash here.3 points -

F6F Hellcat first flight - available markings in 32nd?
Rockie Yarwood and 2 others reacted to Kagemusha for a topic
Sorry I moved it, thought it was just about the 1/1 plane, didn't read the decal part, was doing a couple of other things at the same time. Regards the decals, Aerocraft produce a set in 1/24, review, they also make some other Hellcat items; brass undercarriage, resin wheels. Not aware of anyone doing them in 1/32.3 points -

sailing ships
Rick Griewski and 2 others reacted to Tnarg for a topic
"Real Men" make plank on frame kits with built up frames... no stinkin' laser cut bulkheads, and by the way, they hand nail every copper plate and fully detail the interior (mostly invisible) decks. I guess I never really qualified, but I understand the attraction completely (just like those nearly invisible inside rivets on a 1/32 bomber fuselage). I admire the Harvey and Caroline immensely. I only did the carved hull Dapper Tom kit decades ago, and it is still together. Maybe this suggests that wood is a better medium than plastic for longevity? Tnarg3 points -

Matchbox Tiger Moth RAAF Air Ambulance
VW Chris 1969 and 2 others reacted to LSP_Kevin for a topic
I've walked this one around the block a few times in my head with regard to how I was going to tackle the rigging, as it's not something I've done since I was a kid. Back then, I used stretched sprue on 1/72 scale builds, but times have obviously changed quite dramatically since those days. What I've decided to do is take a leaf out of Eric's book and use a modified version of the approach he used to rig his Tiger Moth. I'll be using the same Gaspatch metal turnbuckles that he did, but rather than use heat to embed them into the plastic, I'm just going to bend and glue the tangs in place after painting, just as Eric did with some of his. I think they look quite convincing like this, and it seems a good compromise solution to me. I also realised that the only rigging material I have is from Uschi, which is far too thin for scale, so I've ordered some EZ-Line and some Prym elastic thread, both of which will take some time to get to me. This means that I'll be doing most of the rigging once the painting is complete, so I can start on the paint job as my next step. I'll be creating my own masks using the decals in the Uncle Les conversion as a template. Throwing forward a bit, I'm contemplating a small base for this build, depicting a grassy field. I had a passing thought about including a standing pilot or crew figure to add life to the presentation, but I'm not actually aware of any RAAF figures in 1/32 scale. Do you guys know of any? Kev3 points -
Since I've been working with a lot of photo-etch lately, mine would have to be "Supergluius Fingerus"3 points
-

Something Different.......The Lament Configuation
themongoose and 2 others reacted to Out2gtcha for a topic
Thanks again all. I actually finished all the gold gilding with a majority of success. The only area Im not happy with is the large upper circle on top of each half of the box. The real prop is quiet smooth, and with all the area on those circles to be painted, the marks from the marker tip are quite evident. Other than the two large top circle parts Im quite happy with how it came out, but need to let things cure. My plan is to see if I can sand down the marks on the top circles with some 4000 grit, then see about thinning the gold from the marker (it says "oil based" so Ill do some experimenting, but pretty sure its going to be thinned with mineral spirits/enamel) and shoot a tiny bit through the air brush to make that area smooth (after I mask the black depressions off of course), then shoot a clear over everything. Pics soon!3 points -
“‘Anyone for S-Sugar?’ the driver shouted, as she had on the occasion of our first raid together. So it was beginning again. We were first of the ten into the air. The murk at low level had thinned somewhat. One might have expected some weak sunshine and a suggestion of blue sky to develop. But we rose into greyness that still obtained at 8,000 ft over Woodbridge where we had been due to rendezvous with our nominated G-H leader, a Waterbeach kite. By the time the Dutch coastline appeared on Bill’s H2S set conditions were deteriorating fast. We were being tossed around like the proverbial cork on the ocean, and formating was less of a concern than the fear of collision. Everyone but Bill and Mac was on watch, straining to make out the first, vague outline hardening to black and giving us perhaps two or three seconds in which to react.” — Luck and a Lancaster: Chance and Survival in World War II (Airlife Classics) by Harry Yates https://a.co/5RrSJpy It's been a few weeks since my last update, but between the holiday festivities I've been steadily working on the less glamorous but necessary task of joining the fuselage, hiding the seams, rescribing the panel lines and rivets, covering the original turret position, and focusing on the Martin turret position. Here you can see one of the scab plates added on each side of the fuselage, as well as the turret fairing. I thought long and hard about how I could replicate it. Styrene? Sheet aluminum or brass? In the end I went with Apoxy Sculpt, and am now in the process of carving, sanding, and blending. Almost forgot, I've also faired in most of the windows: As you can see I have a bit more work to do with the turret and window blending, but not too much. Then the engines! Cheers, Tom P.S., a few more of my Uncle Ivan's photos:3 points
-

What is your Monty Python style Latin modelling name?
lawman56 and 2 others reacted to Panzerwomble for a topic
Glutino et facient ea (be careful with superglue ...)3 points -
The base coat and airbrushed main markings are on. Had a blast masking, removing, and remasking to get things done, especially the type C1 fuselage roundels, but they sure are nice this way. Colors used were MRP marking yellow, red, and blue. I think they are a very good match, much more so than the kit decals but that is not surprising.3 points
-

sailing ships
Rick Griewski and 2 others reacted to chrish for a topic
My dear old departed dad used to buy ship plans and build wood model sailing ships plank on frame type models, (we’re Newfie’s) he frowned on my interest in plastic “toys” as they required no skill or imagination to build. He was a true master at building those wood sailboats and 20 years later when I finally started building models I wasn’t ashamed of having seen he was quite amazed at the detail and work involved in actually building a plastic “toy model” Ive kept all the ships I could after his passing and they always get more attention and praise than my models and that makes me proud of dad... best wishes to anyone who builds these ships3 points -
sailing ships
Rick Griewski and 2 others reacted to LSP_K2 for a topic
Yes, to a degree. I have this (who doesn't?), but would also eventually like the Cutty Sark, and perhaps the Heller Victory.3 points -
Thanks Spyros and Jamme, appreciate it! Thanks John, the belts really were fiddly construction and a lot of bending, breaking, and reassembling parts so I don't think I'd do it again! Thanks Kev and Brian. Yes, the pit has been a little model unto itself - certainly took me long enough! So, it is at long last time to put it together into the tub structure that will be fitted into the fuselage halves. First though, the engine firewall and oil tank were painted and weathered. Eduard provide some detailing for this area in the BigEd kit but, as I've decided to leave this area buttoned up in the finished model, I've kept it fairly basic. The Type 97 machine guns were painted flat black and dry-brushed with gunmetal enamel. With Tamiya's usual precise engineering the cockpit tub went together perfectly, I made a few tweaks to the IP to take into account Ryan's suggestions, including adding markings to the magneto switch with a sharpened toothpick. Here's a look at the tub before it is entombed in the fuselage. It feels good to have this completed and be ready to move on with the build...3 points
-
Hi folks, here are my completions for the year of 2020. a fair bit of variety, with mostly 1/32 scale but a 1/8 engine, a couple of 1/4 panels, some 1/72 rockets and an odd scale figure thrown in for good measure. I am yet to get some of them in the studio for proper pics but that will come soon enough.2 points
-
And the membership of this forum collectively own about half their total production Richard2 points
-
Matchbox Tiger Moth RAAF Air Ambulance
VW Chris 1969 and one other reacted to LSP_Kevin for a topic
Much better! It's definitely overscale, but looks much better, even though the shape isn't completely correct, and the two sides of the fin are a bit uneven. I'm going with it. Kev2 points


.thumb.png.64af68ce3763f9af8a91e71374ce741e.png)