Leaderboard
Popular Content
Showing content with the highest reputation on 12/22/2020 in all areas
-
Thanks guys! Spent the weekend up in San Francisco so no updates in the past few days. I've finally wrapped up the putty work on the nose. The wash will be cleaned off from the rivets and panel lines as much as possible as I move toward more assembly. The wheel well walls have been glued into the wing bottom.11 points
-
1/32 Revell Me 262B-1/U1 Nachtjager
Paul in Napier and 8 others reacted to johnie hopper for a topic
Hope that not too late again :-( Me-262 radar versions has different type of construction of the front cone (using paywood) - probably not to shield radar rays. That's why you will not find any rivet on the top of this cone in any original pic and Red 8 and no opening on the sight (which is normally used for access to gun camera). I'm sorry that I always realise not before it is done9 points -
I started off by finishing the final sanding and adding of the nacelle bulkhead frames, as well as drilling the hole for the MLG through the provided block previously attached with JB Weld. This was a curiosity as well, since I was wondering why the heck the build that HpH was showing in the instructions showed a hole for the MLG drilled on the OUTSIDE of the nacelle................. Now I know. With the MLG block installed, there is NO WAY to get a drill bit into the hole from the inside! So I measured where it should be, and drilled it from the outside. Will need to fill that later for sure. I did manage to get some MRP interior green sprayed on the necessary parts of the nacelles however, including the upper ceilings of the wheel wells: Before the rest of the detailing and weathering of the nacelles/wheel wells could take place, I had to make sure that the engine bearers would fit precisely into the firewall openings above. That meant that next up had to be the engine bearers. As said above, the engine bearers are in place and all glued up in the final resting positions all the parts need to be in. I have to look at it like they are actually where they need to be, because if I concentrate on how they look atm, I'm highly disappointed. I ended up doing it the old fashioned way (AKA my normal MO) and just went for it by the seat of my pants. Lots and lots of finishing work to go on these engine bearers but they are finally in place! Some sections of the engine bearers look like a badly set broken leg, but I think I can remedy most of it with finishing work, filler, Mr Surfacer and some hard core determination. I didnt take any super macro shots, as I know how they look up close I ended up taking a flat sanding stick, and sanding the front faces of the engine bearer rings flat to even things out so as to get it even with the nacelle firewall. This did work out in the end, and while not perfect, they are good enough to fit where they need to and fairly center the engine once its actually glued in You can see how flat the outer side of the front engine bearer rings are: Tight squeeze for sure: After sanding on the front engine bearer rings to get them flush, I quickly figured out that it had made the bearer rings VERY thin and extra fragile (they already were very fragile to begin with, as Id broken each several times already). I also quickly figured out I needed the engine bearer ring to not quite be flush with the firewall, but instead stick proud of it just a mm or two. So that set in motion a solution of brass for strength as well as to get the bearer in the correct final position. Per previous technique of heating brass rod up with a torch, then wrapping it around a wrench socket was used. I figured out what diameter I needed, match to the correct socket, soldered the rings together, then I put the two rings around that same socket and used it to "roll" the rings more symmetrically round on a cutting board. Since the rings themselves were now quite thin, and prone to flexing out of round, not only would the brass rings add strength and get the ring in the position it needed to be in, but it also will keep the front ring from distorting shape, and keep it perfectly round to accept the rear of the R2800: Ill be using some JB Weld here for the rings, as it will not only add a lot of strength, but JBW is very sandable, and will fill in some areas that needed more material. Im back on the big cat tonight!9 points
-

1/32 Ju-87D
Trak-Tor and 7 others reacted to David Mooney for a topic
Hello all, keep in safe I hope. Well this Ju-87 was started at the same time as my 109 (1/32 Bf109E White 13 'Another sortie done' - Ready for Inspection - Large Scale Planes) due to the hope that I would be getting some nice wintery weather as a back drop for the photos........but sadly like 2020 its self, it didnt work out! So, onto the plane, it went together very well without any fit issues at all and painted with Gunze paints. No after market pieces except some homemade seat belts and then weathered with oils. Ok, some might reckon its over done but this was an effect I was after on this one :-)8 points -
8 points
-
Finally got some real paint on the Hurricane - the underside Sky. Has had a night on top of the boiler in the airing cupboard - so should be ready for some masking and Dark Earth later today... Tally Ho! Iain8 points
-

HK Models Avro Lancaster Mk.I WIP: Canopy Attached 3/31/2021
Greg W and 6 others reacted to Dennis7423 for a topic
All- Milestone day! I was able to get the fuselage sealed this past weekend. Even with the mods and scratch building, most everything fit like a glove. Some parts needed a little coaxing, but that was all my fault. Had I not added a bunch to it, it likely would have sealed up just fine. However, I am very happy with the progress! Next up, working on the wings, while picking away at the remaining fuselage bits and bobs. Trying to sort out exactly how to fix the landing light issue, as I had already begun some wing construction prior to learning about the faux-pa HK did with the landing lights. - Dennis S. Thornton, CO USA7 points -
ICM Gloster Gladiator Mk.II
Peter and 6 others reacted to Dennis7423 for a topic
Progress! I was able to get the cockpit completed and the fuselage sealed up yesterday. I used the Eduard set, and a Yahu instrument panel. At the time I retrieved aftermarket for the kit, Eduard hadn't released anything that covered the instrument panel layout of the Mk.II; only the Mk.I. Yahu to the rescue! They sure do make some nice stuff. Everything nestled in nicely, and the rest of the kit should go fairly quickly! Man, these ICM kits sure are a treat. Comments and critiques are always welcome! - Dennis S. Thornton, CO USA7 points -

HH-60G Pavehawk Kitty Hawk 1/35 DONE!!
Greg W and 5 others reacted to Pete Fleischmann for a topic
Got the Resicast unweighted wheels up- cheers Pete6 points -
I use a piece of square brass rod inserted in a square recess (square Evergreen tube) in the belly of the model. The square brass rod is similarly anchored in a thick base (2-3 cm thick to provide support for the brass rod).6 points
-
Welcome to the Forum. Simple: wooden stand, rod of perspex, prop-blur!6 points
-

B52 flies again after 10 years in desert storage
Bob MDC and 4 others reacted to Panzerwomble for a topic
Not quite back from the "shelf of doom" but an amazing engineering feat none the less. I think from the seriel this was built in 1960 . https://theaviationist.com/2020/12/17/wise-guy-is-back-regenerated-after-10-years-at-the-boneyard-b-52h-flies-again-after-pdm-at-tinker-afb/5 points -
Yep! Jay, it is by far and away THE best epoxy on the market as far as I'm concerned. In reality, my brother used it to "temporarily" fix a crack in the block of his 1940 Ford sedan...............That was 8 years ago, and he sold the car a year or so ago and the JB Weld was STILL holding on the engine block when he sold it (he let the new buyer know of course!) Its really WAY different than the normal 5 min epoxy we all know. The working time is about 5 min, but cure time is overnight. Not brittle or prone to cracks like normal epoxy can me. But yes, its super duper DUPER strong stuff, but amazingly it sands well, about like resin, and there is no brittleness at all. It does in fact stick to ANYTHING, plastic, resin, glass, metal, wood you name it. Tough as nails. Just one thing..........just make ABSOLUTELY sure whatever part you are gluing is exactly where you want it before gluing with JB Weld. Once glued, I've had much better luck breaking the actual part I tried to glue VS trying to break the JB Weld bond. Get yourself some, you wont be sorry!5 points
-

B52 flies again after 10 years in desert storage
Scale32 and 4 others reacted to easixpedro for a topic
^^^This! When I flew Prowlers, there were airframes I was flying that were built before I was born. I still can't figure out how we then replaced them w/ the EA-18G, but used the same weapons system (the original jamming pods, circa 1968). It's like buying a 2015 Mustang and insisting that Ford put in an 8-Track cassette tape...5 points -
posted on britmodeller, nice progress with Gigant with wingspan 1,72m it's too big for me. While I like the idea and the internal details included I would still prefer to get different big german plane e.g. Fw-200, He-177, Ju-290 or Do-245 points
-

B52 flies again after 10 years in desert storage
easixpedro and 3 others reacted to aircommando130 for a topic
The old 135 is still getting the job done! The KC-46 isn't authorized to fuel our MC/HC-130J's yet. So we use the 135 guys from Tinker, Phoenix and Salt Lake City for our air refueling requirements. My 88 mustang GT still has the cassette player...but is powered by a 400 hp supercharged 5.0! Cheers...Ron4 points -
The frontend: Looks very busy. Lots of dials, circuit brakers, handles. Very russian. Enjoy - dutik4 points
-
I made a mask set for the DC-4. It won't completely replace the decal sheet, but it should make it easier (than tape) to paint the black and orange edges fore and aft on the wings and empennage. Also lets you paint the larger registration numbers. The bottle of Vallejo Model Air 71.083 that's on my shelf seems to match the orange of the decal sheet pretty well. Once I've had a chance to use the masks and verify that they work OK I'll post them to the Scale Model Paint Masks site...4 points
-

PCM Hawker Hurricane MK.1
Rockie Yarwood and 3 others reacted to Mr Creosote for a topic
So. Picking up on this project I re-did the Sutton Harness in order to make it a bit more accurate. The windscreen has been added and faired in. The framing on the inside of the windscreen was masked and painted prior to fitting. Another view. Not the greatest pictures but I think you'll the general idea. The tail planes have been added. They are held firmly on by use of brass tubing "spars" with matching holes drilled through the tail planes. There were gaps between them and fuselage. These were not too bad and easily filled and finished. The wing prior to mounting. Black sprayed in the center section to block visibility into the lower section of the cockpit. The black on the landing light sections as a check on landing light cover fill and fit. I am coming in to the short rows as far as assembly is concerned and then its on to paint. Thanks for taking a look. RD4 points -
I started with the DC-4. It only took a few hours to get to an airframe and all of the ancillary bits ready for painting. The overall fit on this one is better than some other Minicraft kits I've done. This, BTW is the bees' knees: I've had the little rotary tool for quite a while - what I just got is the felt polishing bobs. Along with them I ordered a block of the one compound that the manufacturer said was "for plastic". Couldn't be easier - just run the bob against the block for a moment to pick up some compound, then polish away. It won't remove material - I had already sanded the seams through 1000-2500-6000 grit as I often do, but in seconds this thing brought the dull, smooth sanded finish up to a bright shine like untouched plastic. Also revealed a few little spots that needed attention. Anyway, I'm hopeful that this will help out in getting a really glossy base ready to spray Alclad on.4 points
-

1/32 Revell Me 262B-1/U1 Nachtjager
Starfighter Jock and 3 others reacted to Thunnus for a topic
Here's my tire repair approach to the hole I've created. With the repair work constrained to a small area, I thought I'd go ahead and add the nose cap on at this time. First I loaded it up with a few more lead weights... just in case! After the sprue patch was sanded down, I coated the area with sprue goo. A quick check to make sure the radar antenna posts can be inserted without issue. The hole repair after sanding down the layer of Mr Surfacer 1000 that was placed after the sprue goo. It looks messy but I think we are good here and I'm going to move on to the nose cap, which has also been given a dose of sprue goo.4 points -
Last week I started this 1:350 Academy kit to kill the covid boredom during this lock down. Just finished the decks last night using scaledecks decking https://scaledecks.com/ They are nice but take a little work to fit as they are not a perfect drop in item likely due to them being thin wood and change with humidity. They don't come with pre-applied sticky glue either, you have to brush wood glue on them first. I had to cut the forward deck into three pieces as it was far too big of a section to do in one go.3 points
-

F3H-2 Demon
Starfighter and 2 others reacted to Lee White for a topic
A little progress! Wooden keel set, with spar cutout and afterburner area removed to make room for an afterburner yet to be sourced. And, fuselage halves ready for gluing3 points -
Just a small update. I had little time due to work and holiday preparations. The bomb racks are really nice. I dirtied-up the bombs a bit with mascara powder and then weathered and sealed the racks. In this magnification every flaw is visible, but in normal view they look pretty okay. Bombs are not glued yet, that would impede safe mounting under the wings of these fragile assemblies. I took the outer scrap mask of the Eduard set for the windscreen, scanned it and then traced it in the Silhouette software, and cut them with the cutter. This way I can mask both inside and outside. The canopy parts are extremely thin, which eases the process because one doesn’t have to account for the difference in inner and outer radii. Happy holidays folks!3 points
-
PCM Hawker Hurricane MK.1
Rockie Yarwood and 2 others reacted to Mr Creosote for a topic
The wing and fuselage joined up. The fit up was better than I expected. Cleaning it up shouldn't be too bad. RD3 points -

Test Build: 1:32 Flying Start Models Tornado F Mk.3 Conversion (Revell base)
GMK and 2 others reacted to wunwinglow for a topic
Pete, you are a modeller so halfway there already. Try the intro tutorials for something like www.tinkercad.com, just to see the basics. I think you will surprise yourself. Start simple.... You can move onto more capable programs later. Give it a go.3 points -

B52 flies again after 10 years in desert storage
John1 and 2 others reacted to Oldbaldguy for a topic
Practically everyone in America drives a car that is no more than five years old while young USAF crews are flying the same Buff tail numbers their grandfathers flew. Our replacement T-38s come from countries that no longer want or need theirs and we are happy to get them. And then we buy new stuff like the KC -46 for untold billions and it doesn’t work. The mind boggles.3 points -
One more to pig-pile on from my most recent deal with LSP_Ray; the delightful Tamiya Rhino. And also with some ready-to-go AM included, but I'll definitely be adding more. In fact, I already have a nice batch leftover from my never gotten to big Rhino projects from before. (I suspect I could easily spend more on AM for the kit, than the kit itself cost to begin with.)3 points
-
1/32 Revell Me 262B-1/U1 Nachtjager
Paul in Napier and 2 others reacted to Thunnus for a topic
I finally made some progress on the nose of the 262. After the joint pop, I gouged out the seam a little bit and applied plastic sprue goop to (a) establish a better bond and (b) give me a more consistent base for re-scribing. I let that dry for a couple of days before sanding. After that repaired joint was re-scribed, I was just about ready to call the clean-up work finished. Far from perfect, the panel lines have some unevenness due to the scriber having trouble going through hard CA glue and soft putty with the same consistency. But I'm ready to apply the rivets. A plastic straight edge, even a flexible one, is pretty useless when applied to his much curvature. And Dymo tape is too stiff. White Tamiya flexible tape fills the gap between the two very nicely, especially for the concentric rows of rivets around the cross-section. Cognizant of possible weak joints between the nose cowlings, I riveted very carefully but still heard some joints pop open. In particular, the joint between the gun barrel openings and the removable gun cowling came loose but the results weren't too visible. The pencil marks were wiped off using Windex and the nose area was sanded down to remove the raised dimples around all of the new rivets. The nose was then given a temporary brown pastel wash to check the scribing and riveting work. I was generally pleased with the result. Lines that didn't hold the wash were lightly re-scribed and some missing fasteners and larger rivets were added. Things were going smoothly until I started to replace the larger rivets along the newly-popped joint. I knew the edges of this part were very thin and I had originally applied the rivets set back from the edge to avoid the thinner plastic. The sanding to fair this panel into the nose eradicated these rivets and they had to be re-applied. I skirted too close to the edge where the plastic was thin AND where the joint was compromised... and I punched a hole right through! Other than that hole, I like how the nose looks overall. The stress of riveting is over so I used some Tamiya Extra Thin cement to re-establish the glue join and stuck a piece of sprue into the hole, welded into place with more Tamiya Extra Thin.3 points -

1/32 SH Hawker Tempest Mk V, "Kicked Up A Notch" New eBook!
Seversky and one other reacted to chuck540z3 for a topic
November 24/20 After 7 months I have finally finished the 1/32 Special Hobby “High Tech” Tempest Mk V, kit number 32052. This kit has some really nice additions in the box already, like several resin parts, photo-etch parts and even some fabric seat belts, so you don’t need too much for aftermarket accessories if you want to “Kick It Up A Notch”, like I always try to do. Still, I did add the following: #32234 Barracuda Nose Correction Set with Props #32141 Barracuda Intake Ring #32239 CMK Exhaust Set #32122 Maketar Paint Masks for all insignias and other markings #232016 HGW Wet Transfer Decals, which appear to be currently out of production The subject for my Tempest is one that French Fighter ace Pierre Clostermann flew, and there is a good article on him at the Hawker Tempest Page website here, where I derived most of my references for this build. Pierre Clostermann's JF-E Aircraft In this article is a pic of Clostermann standing on the wing of NV724, which has the Cross of Lorraine on the chin and the 3 Squadron “Cockatrice” at the top of the tail which were applied after the war, along with a kill scoresheet next to him. To weather this model I tried to show that while most of the aircraft had been heavily used in battle, these items were left relatively clean. And here is my attempt at more or less the same, which went by kit instructions rather than try to match this one side exactly. While the kit can create an impressive Tempest, there are many challenges that I tried to document in a long build article that goes through every step of the model, including detailed instructions here: SH Hawker Tempest Mk V, "Kicked Up A Notch" I tried many things in this build that were new to me, like liquid mask on a sponge to create paint chipping, MRP acrylic lacquer paints and Metal Liner metallic accent wash to enhance the rivet and panel lines with a metallic color, rather than the traditional dark washes that usually look really good, but often don’t look realistic. Now the pics, taken from just about every angle- so sorry there's so many! Note: Tempest landing gear and wheels toe outwards a few degrees. Cheers, Chuck2 points -
To give myself some more practice (and some hoped-for redemption) at natural-aluminum finishes before starting into my Tamiya Mustang, I decided to quickly build a couple of prop liner kits that had been collecting dust on the shelf for a while. This Minicraft DC-4 is boxed with a 1945-46 era American Airlines scheme. It's almost entirely bare metal, so ideal practice. The subject plane, "Flagship Monterrey", is a sister ship to the first land-based plane to make a commercial transatlantic flight, this plane: Although some sources say that it was re-branded "Flagship London" for the flight. That was on October 23, 1945 (article in Smithsonian Air and Space is where I'm getting this). The first commercial crossing by a land-based plane bit is important because of course the Boeing clippers (flying boats) had started doing this before WW2. My other subject is a Roden DC-7C in JAL livery. It's white over natural metal in a more modern-looking airliner scheme, albeit from only about 10 years after the DC-4. The box art would not pass muster as acceptably PC today, but it does evoke some serious 60s nostalgia for me. I don't often save the boxes that kits come in, but I may hang on to this one.2 points
-
A long long time ago on a continent far, far away I built the old 1/48 Monogram Black Widow. I remember even now what a mess it was once finished. It made me decide never to do another all-black aircraft until I had enough knowledge to make it look more real. So, here is my second attempt. I tried to use some light-effect-theory to guide my processes. Despite the fact that I used a jet black pin wash, many of the panel lines that show, show up lighter than the surrounding surfaces which are very much diluted black. This was opposite of my intentions. After reading many arguments over panel lines, it is my belief that sometimes they show... and sometimes they don't. I try to make this occur on each of my aircraft models. The MG 15 barrel with ring sites and MG 17 Barrel tips are by Master Barrels. The MG 151 barrel is copper tube and the aerials of the lower fuselage are scratch built. The wingtip lights are by 5-second-fix and the landing light backing is Molotow chrome pen. The escape hatch is scratch built from Aluminum sheet, brass rod, sprue, and styrene sheet. Brake lines are copper wire, and finally the seatbelts are Tamiya tape. A few more to go.....2 points
-
This is best I can do by now:2 points
-
Test Build: 1:32 Flying Start Models Tornado F Mk.3 Conversion (Revell base)
Iain and one other reacted to wunwinglow for a topic
Printing is the easy bit!!! CAD is where it's at.... Practise, practise, practise!2 points -

Displaying your Beautiful Planes
mozart and one other reacted to alaninaustria for a topic
Max, that’s an outstanding Harvard! Very nice! Cheers Alan2 points -
That nose is fantastic. Really, superb job on this. I am impressed by the fact that after all the surgery, the result is so clean, even and straight. Even the primer looks good! Greg2 points
-

FW 190 A 5 hasegawa 1/32
D.B. Andrus and one other reacted to red baron for a topic
another assembly for 2020:2 points -
Chipping inside wheel wells?
MikeC and one other reacted to aircommando130 for a topic
We would take the MC-130 over to Ie Shima and land there on the coral runway and in addition to all the coral dust inside the airplane there would be chunks of coral stuck in the main gear wells. On touchdown it would sound like someone was beating the bottom of the airplane with a hammer. We had rubber taped around the antennas on the bottom to protect them. When the night was done me and my other loadmaster looked like a dump truck had dumped sand on us. Maintenance would do a wheel well inspection to pick the pieces out from between the struts and hydraulic lines. Was a mess but really fun! Cheers...Ron2 points -
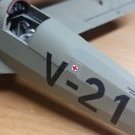
As always: First step is the cockpit Nice fit here, except for the seat brackets. Had to add som styrene below the seat to kep them upright and in place. Anything else was fine. Glued it into the lower hull: There are no colors given for the interior. I went with the common soviet light bluish grey I am familar with from my service back then during Cold war. White should be the other option here. Trumpeter provides some decals for the dashboard and the paneel to the drivers side. I've added some generic decals from Airscale and Anyz to add something to see. No need to go overboard - cab windows are not as large as an aircraft cockpit. Enjoy! - dutik2 points
-

Hellenic Air Force F-16C Block 30 - "Iason"
monthebiff and one other reacted to Stokey Pete for a topic
A little Greek inspiration for you. I look forward to seeing another Hellenic special being built.2 points -

Hasegawa F-4EJ Eggplane
Starfighter and one other reacted to Greg W for a topic
Right, canopy polished. The frames evaporated during the process but no fractures. Happy camper. The splitter plates and compressor blades received some paint too and the HUD is now permanently attached to the instrument panel.2 points -
It took quite a while to get any kind of a uniform yellow-orange base coat on this thing. Yellow is incredibly tough to make opaque. I keep telling myself that we're aiming for a weathered look eventually, so variation is OK... The yellow is intentionally thin or missing on top and on the engine nacelles and leading edges, as these will end up blue. Once I tape these areas off I will re-spray them white before applying the blue so as to hopefully avoid green... It's sitting in my newly-expanded 2X bigger and better lit spray booth, which I'm really liking. It's kind of a lash-up, but a huge improvement in terms of elbow room to work.2 points
-
Now here's something completely different, at least for me. Just received this afternoon (pretty cheap too, which is a very good thing).2 points
-

1/32 Revell-Hasegawa Spitfire Mk.1a "K9906"..... Finished.!!
mpk and one other reacted to Tolga ULGUR for a topic
Early style pitot tube is made by scratchbuilt. After installation of pitot tube K9906 is finished. More pictures will be posted in RFI section later Hope you like them.2 points -
Thanks Jay, high praise indeed coming from you, as your 1/18th projects are way above what Im doing here. This is just basically survival! AKA, just finishing the damn thing. In this case, I did actually get some paint (MPR interior green) shot on the interior of the nacelles, as well as some on the firewalls. I have also finally gotten both of the engine bearers on and all glued together. That is the good news, they are in the final position they need to be in (I think)......but the bad news is it didn't quite go like I planned. I probably broke, re-broke and glued parts of each 5 or 6 times. They are in the right place, but they look like a monkey Dr. set a broken leg. Its a tad embarrassing actually, but I've slathered the worse in Mr Surfacer 500, and now that interior of the nacelles is painted, I can get on with a wash there, and then will start to proceed on some detailing and wiring.2 points
-
Brian - it's somehow gratifying to read of your difficulties and challenges on this effort. This is not a Tamiya build!! Many of us can relate. Most of the builds I have done the last few years (all the 1/18 ones) have been one big challenge after another. I have to force myself, sometimes, to turn my mind away from it lest I lose sleep or tick off my mate! But you know - the mind needs exercise, especially old ones like mine. And this hobby of ours helps with that, I am convinced. Your solutions, and execution of same, are commendable. I can only hope to come close.2 points
-
1/24 F6F-5 Hellcat--In Flight
JayW and one other reacted to easixpedro for a topic
Have spent the last few days trying desperately to get the panels on the cowling all situated. Have some lessons learnt for anyone else willing to try the kit. (hint, dry fit, dry fit, dry fit!) First up, if you're buttoning everything up, you don't need to add all the wonderful detail Airfix provides you. There's a lot of pieces and they all keep adding up to the point that sooner or later 1 little thing will be out of alignment and then everything else that gets added after will be outta whack. There's even a caution in the instructions that a piece can cause mis-alignment. Look at step 200 here--it did this exact thing to me. I ripped it all out as it wasn't visible and things fit much better. If you have the panels off, you'll need that detail, but not on this build... The engineering on this kit is good--everything fits as it should, so take your time. Otherwise, you'll end up taking wood clamps from the workshop to ensure the cowl ring fits and the panels fit snuggly. When all was said and done, I beat it into submission. If I'd been more careful and scraped paint/sanded and dry fit, it would have gone smoother! As it is, I'm happy to show you that Hellcat Smile! (it makes me smile...have been waiting for this moment!) Will need to wipe some putty through the more glaring panel lines. Plus side is that if you look at wartime photos, they were pretty beat up. I'd imagine so, as they were constantly removed to do any maintenance on the engine. Also...total pet peeve of mine: I used the closed cowl flaps--it's inflight and cowl flaps are used primarily on deck to aid with cooling air flow over the cylinders. I know manufacturers usually provide them open, but it just looks odd to me to see an a/c modeled in-flight with open cowl flaps. Lastly, here's some teaser pics of it on the stand. Photographing something this large isn't easy--I don't have anything big enough to provide a clean background (I usually use a sheet of white foamboard). Kind of digging the nose down attitude it rests at. Looks like our intrepid aviator is pulling up after diving down on the Zero...! Next post, should be a bit about the markings. Have several from VF-12 on USS Randolph in mind. Also a bit of historical discussion that I wasn't aware of till last week as I was doing a bit of research. Till then! -Peter2 points -

Freedom's 1/35 Nike Hercules kit 15106
Daniel Leduc and one other reacted to Grunticus for a topic
Main missile is up. As you can see all wings leave large gaps where they meet the missile body, that should not be there. Some work to do. Masking Filling Sanding I wonder why they engineered it this way. Lots of extra work.2 points -
Freedom's 1/35 Nike Hercules kit 15106
Daniel Leduc and one other reacted to Grunticus for a topic
A little bit of progress. For some reason, because this will be a gift, I am taking extra care. I smoothed out the seams in the boosters, they look pretty good for a first pass. Surfacer 1200 revealed a few minor spots that nee a little touch-up. Fit so far has been good. The main missile halves were quite warped, but glueing them with Tamiya extra thin one inch at a time worked out. The seam was given a bit of Surfacer 500, and it needs to dry thoroughly for a round of sanding. The top booster assembly was a many-part affair. Fit was quite good, but a few seams need more work. I am quite liking this model so far.2 points


