Leaderboard
Popular Content
Showing content with the highest reputation on 12/21/2020 in all areas
-
1/32 Ju-87D
Trak-Tor and 10 others reacted to David Mooney for a topic
Hello all, keep in safe I hope. Well this Ju-87 was started at the same time as my 109 (1/32 Bf109E White 13 'Another sortie done' - Ready for Inspection - Large Scale Planes) due to the hope that I would be getting some nice wintery weather as a back drop for the photos........but sadly like 2020 its self, it didnt work out! So, onto the plane, it went together very well without any fit issues at all and painted with Gunze paints. No after market pieces except some homemade seat belts and then weathered with oils. Ok, some might reckon its over done but this was an effect I was after on this one :-)11 points -
BAe Hawk - Swiss Air Force - Revell 1/32
themongoose and 10 others reacted to Warbird for a topic
Hi Guys, Slowly but surely progressing. The Aires MK10 tornado seats have been "pimped" to better match the Hawk version. Plastic card, wires, and the sides from the kit seats and I called it a day. With a coat of Mr Hobby black surfacer I spare you the struggle to get a smooth intake duct. I decided to close the fuselage before painting the cockpit - It is wide enough to allow it. I have added parts form the eduard interior set and a few plastic bits. I made masks with the Silhouette for the instrument panels... And sprayed some Tamiya ocean grey - a good match for the "admiralty grey" of the real one (considering the scale effect). Wing fences - specific to the Mk60 series. Those are paper prototypes cut with the Silhouette. Each is unique as the wing profile is slightly different.. Most of the work was required for the mid and aft section of the fuselage. All 3 small sircular windows we re-made - the original inserts are terrible. Duct were added for every openings, some panel lines filled, etc. Rivets were added individually using a beading tool. I know that the originals are raised on the aft section but I find the Archers out of scale. Mine are discrete enough to make illusion. Flaps were also cut out. Brake parachute box reshaped. And all suraces were sanded smooth as the platic is grainy... Fit of the nav lights was bad. I filled the gap with streatched sprue and re-scribed. Overall fit is quite good. CMK flaps are pretty bad- being copies of the original parts they don't fit when dropped. I had to cut and shorten the 3 pieces holding the thing.11 points -
posted by Heinz on britmodeller https://www.britmodeller.com/forums/index.php?/topic/235084554-132-blohmvoss-bv-138-resin-kit-by-hph/ looks superb10 points
-
8 points
-
Last decals on - and a start on the aluminium sections: Have fun! Iain8 points
-
A long long time ago on a continent far, far away I built the old 1/48 Monogram Black Widow. I remember even now what a mess it was once finished. It made me decide never to do another all-black aircraft until I had enough knowledge to make it look more real. So, here is my second attempt. I tried to use some light-effect-theory to guide my processes. Despite the fact that I used a jet black pin wash, many of the panel lines that show, show up lighter than the surrounding surfaces which are very much diluted black. This was opposite of my intentions. After reading many arguments over panel lines, it is my belief that sometimes they show... and sometimes they don't. I try to make this occur on each of my aircraft models. The MG 15 barrel with ring sites and MG 17 Barrel tips are by Master Barrels. The MG 151 barrel is copper tube and the aerials of the lower fuselage are scratch built. The wingtip lights are by 5-second-fix and the landing light backing is Molotow chrome pen. The escape hatch is scratch built from Aluminum sheet, brass rod, sprue, and styrene sheet. Brake lines are copper wire, and finally the seatbelts are Tamiya tape. A few more to go.....7 points
-

HH-60G Pavehawk Kitty Hawk 1/35 DONE!!
Greg W and 6 others reacted to Pete Fleischmann for a topic
Hey All- upper deck got a gloss coat, a few decals, and an oil wash. just set n place here- flat coat and more weathering to follow cheers Pete7 points -
New tail extension parts - in glorious 'Kermit Green'. With the wings, tail and tailerons assembled it was time to do a full test fit: And, finally, with Tim's own test mule: Blue skies! Iain7 points
-
This aircraft is more of a representative of the type than any actual machine. Though a machine with these codes did fly intruder missions over the Eastern UK. Some had white fuselage bands. Some had white stripes under the wings. And some had the Nachjagdverband shield under the canopy. But others did not. My main goal was to work with the black and not be distracted by white and other colors. Speaking of the white markings... these are actually 50/50 Tamiya IJA Gray and Tamiya White. The markings were cut on my Silhouette Portrait. I hope you like it! Thanks for looking! Gaz7 points
-
Please enter me as giver and receiver. I am looking at light goods to send overseas. Here is a small batch of 109 AM. I will see if I can spare more.6 points
-
6 points
-
6 points
-
F3H-2 Demon
Daniel Leduc and 4 others reacted to Lee White for a topic
Hi, i want to join with a new project I made, a 1/32 F3H-2 Demon. I originally was going to do a Javelin, but not long after I stared that, I got confirmation that it was for single seaters, only, no family wagons. So, back into the shoebox went the Jav, and I cranked out the molds in about a week. It is a very basic shape, no really complex shapes, aside from the intakes, which will need careful assembly to avoid one being bigger than the other. Here is a US Navy photo of the demon for those unfamiliar with the plane- And here are the molds used-5 points -

HK B-17 & B-25 landing gear
Dennis7423 and 4 others reacted to D.B. Andrus for a topic
The HK B-17 (1/32 and 1/48) and B-25 will be added to S.O.W. Future Products list. Thanks, Damian5 points -

PCM Hawker Hurricane MK.1
Rockie Yarwood and 4 others reacted to Mr Creosote for a topic
So. Picking up on this project I re-did the Sutton Harness in order to make it a bit more accurate. The windscreen has been added and faired in. The framing on the inside of the windscreen was masked and painted prior to fitting. Another view. Not the greatest pictures but I think you'll the general idea. The tail planes have been added. They are held firmly on by use of brass tubing "spars" with matching holes drilled through the tail planes. There were gaps between them and fuselage. These were not too bad and easily filled and finished. The wing prior to mounting. Black sprayed in the center section to block visibility into the lower section of the cockpit. The black on the landing light sections as a check on landing light cover fill and fit. I am coming in to the short rows as far as assembly is concerned and then its on to paint. Thanks for taking a look. RD5 points -
5 points
-
the cables will be added later , that looks more realistic...5 points
-
Hi all, I‘d also like to participate in the raffle, as a recipient and as a donor: If both sets can be used on 1 model, (F16C/F16CG/CJ) then keep them together, if they can't be used together then as separate items! With regards, Rob5 points
-
posted on britmodeller, nice progress with Gigant with wingspan 1,72m it's too big for me. While I like the idea and the internal details included I would still prefer to get different big german plane e.g. Fw-200, He-177, Ju-290 or Do-245 points
-
Rear section cut from upper fuselage - ready for fitment of tail extension. Follows panel lines that were extended from side to side and cut apart using a fresh No 11 Scalpel blade: And lower fuselage - same process - plus another cut-out at the front to accept the new, 3D Printed, forward fuselage undertray: One weakness of the Revell 1:32 Tornado kits is, well, their weakness! And it gets worse when you start cutting it up to make an F. Mk. 3... Tim's set includes a new bulkhead that fits where the kit one goes, but is a lot more substantial. A few cuts to remove sections of moulded location strip and in she drops. Note two things: I got it the wrong way around at first fitting - and Tim recommends this is bonded to the intake trunking before fitting in situ. I deviated as I wanted everything as stiff as possible, with the gear bays in place, for me to do final fitting of the front end. The intake trunking placed in situ (no engine faces - yet: There are 'layering' marks internally from the printing process - I've made a first pass with a flat brush loaded with solvent for initial smoothing - but more to go. As you can, hopefully, see - the design work Tim has done is quite exceptional - and the fit of the new 3D printed parts with the existing kit is quite superlative. Far better than any resin conversion could be, with the bonus that the new parts are Polystyrene - just like the kit parts! Iain5 points
-
Sukhoi Su-47 Berkut 1/32
Serkan Sen and 3 others reacted to Bekim for a topic
So, worked on the front Whell Whell....4 points -
posted on britmodeller https://www.britmodeller.com/forums/index.php?/topic/235080581-132-let-l-13-blaník-by-infinity-models-box-art3d-renders/4 points
-

Hasegawa F-4EJ Eggplane
Starfighter and 3 others reacted to Greg W for a topic
Right, canopy polished. The frames evaporated during the process but no fractures. Happy camper. The splitter plates and compressor blades received some paint too and the HUD is now permanently attached to the instrument panel.4 points -
...so like i said, i‘d like to enter as a recipient and a donor... i‘m in with a Revell He 162A Salamander...4 points
-
Thanks for the comments guys. A small update. Whilst work progresses on the model, I am taking care of the small details. The propeller spinner is very poorly defined and is in need of refinement. I had considered cutting it off and replacing it with some turned material of the same shape, but was able to cut the spinner edges with a no.11 blade and then deepen the line with my razor saw to clearly define it as a seperate part.4 points
-
Well; I scratch built an F-3 in 32nd about 10 years ago and nothing appeared then!4 points
-
The cockpit is finished and fitted. The fitting to the fuselage was very easy. It was just a matter of removing the ribs from the inside of the fuselage sides and it closes right up. When you hear people say that these newer Tamiya kits are the best they have ever build you can believe them. The detail and fit are amazing. Here are the latest pictures.4 points
-
Here you go...I'm not sure which is more correct. Note: for this picture, the part halves were matched up along the lower fuselage edge, with the NLG bays aligned.4 points
-
The Trojan sisters: T-28B+C
Greg W and 2 others reacted to FreightDog for a topic
Project started in Spring lockdown, stalled all summer & autumn but completed in a flurry of activity in the last couple of weeks. Bare-bones w.i.p thread: T-28 Trojan Kitty Hawk 1/32 - Page 2 - Works in Progress - Large Scale Planes I'm not very good at knowing when to stop and take pictures but I'll try better next time! Extras used: Aero Bonus pilots, Airies Cockpit (in the yellow C), Aero bonus propeller sets x2 but used the lovely one-piece hubs only with the nice kit blades as I find two-piece hub assemblies don't clean up well. Magic Scale modelling light & sound kit in the B (turn the sound on if you watch the video). Kit decals. Thank you for looking and any critique is welcome.3 points -
Deal Alet! KH 1/35 HH-60G at Sprue Brothers
scvrobeson and 2 others reacted to Dave Williams for a topic
$85 for Deal of the Day 12/21. Also KH 1/32 F-5E for $65.3 points -
Chipping inside wheel wells?
MikeC and 2 others reacted to Oldbaldguy for a topic
Like everyone above says, for the most part, no. Spinning tires may throw some crud and muddy goo every now and then if the pilot forgets to tap the brakes just after takeoff. Some airplanes have mud guards inside the wells for that very reason. However, I have seen some pretty grim wheel wells late in an airplane’s life cycle after it has seen too many overhauls by people either in a hurry or who didn’t care. They didn’t bother to clean the surfaces well or at all and just sprayed a color coat right over whatever was there - dirt, oil, hydraulic fluid, connectors, wiring, fluid lines, whatever. Of course, the new paint started flaking and peeling right away, with patches of the previous color showing through. Mostly white on white, sometimes red over white or vice versa, occasionally white over chromate. You often seen this happen on older poorly prepped/poorly maintained static display airframes parked outside. Very scruffy looking and nothing like the abrasion wear usually seen elsewhere. The look is fun to try to replicate (and actually can look pretty cool), but your modeling time would almost certainly be better spent elsewhere.3 points -
The engine needs some work too : i cut the cylinders with a Czech razor3 points
-
Chipping inside wheel wells?
D.B. Andrus and 2 others reacted to Juggernut for a topic
aircraft with retractable landing gear have something called an uplock that prevents those things you outline from happening. If there is any chipping and/or paint loss inside the wheel wells it will come from environmental sources (i.e., sand blowing into the wells from tire rotation), or chemical (i.e, hydraulic fluid leakage).3 points -
Kev I know it's not much but i can offer a 1/32 Eduard Fw190 F8 interior set (32842) for a prize if that is ok? Regards Al3 points
-
OOF, that hurts!! I've seen the aftermath of many a fire, and the clean up is a long and daunting task. It makes the actual firefighting look easy! Good luck to you! Tim3 points
-
Trumpeter versus Hasegawa Skyhawk (outline) shapes (for decals)
jeroen_R90S and 2 others reacted to Oldbaldguy for a topic
Seems to me if we can make resin seats, cockpits and such that are made for the trumpeter kit fit the hasegawa kit with minimum fuss and bother, (something I’ve done several times going so far as to replace entire noses and intakes), then using decals intended for one kit on the other should be a breeze. Nearly all the universal markings on 1:1 Navy jets are standard sizes called out in one milspec document or another and decal makers know this, so 99.9% of these will handily fit either model. Squadron markings vary, of course, and decal makers know this as well. Most any discrepancy would be small and almost always something you can fix with a little ingenuity, imagination and effort. Personally, I really like the hasegawa kit. I’d say build the kit, buy the decals you want and stop worrying about whether they will fit because that’s what they make scissors and decal chemicals for.3 points -
Infinity Models de Havilland DH.100 Vampire - first test shots
Landrotten Highlander and 2 others reacted to Jan_G for a topic
new pics posted by Heinz over on britmodeller https://www.britmodeller.com/forums/index.php?/topic/235068939-132-de-havilland-dh100-vampire-fb35-by-infinity-models-test-modelbox-artschemes/page/2/#comments3 points -
I picked this up to go with my ProfiPack. I love the scheme in the box art of the weekend. I ordered the undercarriage, L°°k I.P. and mask. I'll build the box art on the weekend along with the JG51 winter version 8n the Profi kit. I also ordered 1/48 P-51 Mustang-5, P-51 wheels, P-51D exhaust, Spitfire Mk.1 exhaust, Mk.XIV wheels, mask, and Revell 1/32 Mk.II wheels. Model budget blown. It's gonna be a quiet Xmas. Lots of ice cold orange juice, air conditioning and modelling while isolating.3 points
-
It's from a different time, for sure. Can you imagine the outrage if manufacturers pulled something like this on a current kit? To me, this kit is almost the pinnacle of fun model kits. Great detail and surface finish. Bang-on accuracy, simple construction and an interesting subject with a lifetimes worth of variations and paint schemes. It's almost a deserted island kit. Speaking of detail, after a cleanup, a coat of paint, some Airscale placard decals and etched seatbelts, cockpit is just about ready for close up. This 40 year old kit still puts many modern kits to shame! A happy afternoon's progress.3 points
-
Trumpeter versus Hasegawa Skyhawk (outline) shapes (for decals)
jeroen_R90S and 2 others reacted to oyoy5 for a topic
Amazing how good Hasegawa got the Hellcat, Storch and Skyhawk 50 years ago or more .3 points -
Jay: I reached out to Jack Cook and he replied (enthusiastically) that if you are active on Facebook, or could become active, send Jack a friend request and also request to join his 354 FG page...I think we all are anxious to hear where this might lead for you. Jack’s profile here: https://www.facebook.com/jack.cook.589 Good Hunting!!3 points
-
OK - more progress at last... Nose cone prepped and primed: Base colour on cockpit tub - and nose dry fitted together. A little tweaking needed to area around nose-gear bay for a perfect fit: Back in a mo... Iain3 points
-
Spitfire Mk VIII
VW Chris 1969 and 2 others reacted to Dpgsbody55 for a topic
Just a quick update as I'll be putting this aside for a few days while I return to another build. The pilot's seat frame is now finished. I've not added the volt regulator visible at the top of the seat frame as it was not positioned here on the MkVIII. That leaves only one other part, the altitude switch which was painted before assembly and "wired" up. The rear frame was then glued into place on the floor (or what passes for such on the Spitfire ), along with the seat frame and joining brace at the top, as was the completed instrument panel/controls assembly. This was placed into the fuselage and both fuselage halves taped together to act as a jig. Here's the result once dry. This is what it looks like in the right fuselage half. The pictures are just for effect. As you can see, I've also started the "plumbing" of the cockpit, but more will be added later. So far, I'm happy with this model, despite Tamiya not providing the cockpit parts for a MkVIII. That's it for the moment. I'll be putting this aside for a few days while I get back to what I hope will be a fix for the windscreen issue encountered on my P-40B build, but I think I'll be back at the cockpit plumbing on this within a week. Cheers, Michael3 points -
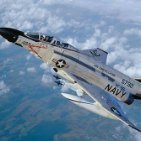
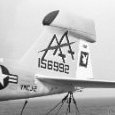
Hi Jeroen, As Thierry indicated, the style and placement of the tail markings will determine whether decals can be cross utilized, particularly those covering the rudder and associated ribbing. Here are some comparison shots. The Hasegawa plastic is actually from a TA-4J kit, but I've confirmed that the tail area is identical to their A-4E/F. HTH's, Rich3 points
-

Trumpeter versus Hasegawa Skyhawk (outline) shapes (for decals)
mpk and 2 others reacted to thierry laurent for a topic
I think that the only items that cannot be easily used are rudder markings or fuselage stripes if you have them in the chosen scheme. All other decals should not create any problem. I made that comparison years ago.3 points -
Trumpeter versus Hasegawa Skyhawk (outline) shapes (for decals)
mpk and 2 others reacted to Anthony in NZ for a topic
Hi Jeroen Now this is a really interesting subject, and one I have often wondered about myself. First up I am not familiar with the scheme you are referring to. However they will probably fit with a little tweaking to the Hasegawa kit. To me the Hasegawa A-4 has always looked a little 'chunky' not much but when compared to photo's it does to me. The cross section isnt quite right at the mid fuse break-point whereas the Trumpeter one seems very nice in cross section. However I dont have any hard facts to prove it. Not like I do with the Tamiya Phantom shapes now. To me the Trumpeter kit looks really nice in its overall finished appearance. But something bugs me about the nose forward of the windscreen, and I dont have decent drawings or skills to figure it out. To me it looks a little pinched, whereas the Hasegawa TA-4 looks really good, in fact the fuse cross section is slightly different to their single seater. It is like the revisited the fuselage shape when they re-tooled for the TA and got the shape right. The 'sit of the Trumpeter one is not right either and @D.B. Andrus and I spent a lot of time studying and measuring Skyhawk legs to find the issues there. Damian will have full correction sets for both kits to correct their 'stance' as Hasegawa needs tweaking too. They really do have a characteristic look to them. My money is on the Trumpeter kit overall. And graft the TA nose onto the Trumpeter kit for a nice T Bird. Oh, and as an FYI the new NZ Kahu cockpit master revision for the Trumpeter kit looks amazing....stay tuned These a just my ramblings on the 2 kits as the A-4 is one of my favorite aircraft Cheers Anthony3 points -
Back on the Tornado this evening, after getting sidetracked again with a few other projects - more in a separate post later! A little progress on front and rear front panels - but it's dawned on me these can go in later from above - after the fuselage is buttones up: And the 3D Printed nose smoothed and primered - the advantage of HIPS (High Impact Polystyrene) is that it is the same as injection moulded plastic - so bonds to the kit parts with normal plastic glues, and behaves in exactly the same way when sanded. The downside is that it can be tricky to print and needs higher temperatures on the printer - something Tim has been playing with for some time - and that expertise shows! Off to do some tweaks to the tub later... Have FUN! Iain3 points
-
Most of the stickers now in place: Off to play at the other extreme now, the Tornado... Iain3 points







.thumb.jpg.5da8bff9741de420eb2e87addd8f2cf6.jpg)
