Leaderboard
Popular Content
Showing content with the highest reputation on 11/25/2020 in all areas
-

SH Tempest Mk V "Kicked Up A Notch". January 14/21 New eBook!
Elftone and 20 others reacted to chuck540z3 for a topic
November 24/20 I’m DONE!! After fighting with all the landing gear doors, hinges and other little bits over the last few days, this Tempest is finally finished. There are lots of challenges to attaching these parts and I was going to document a few of them, but in the end, I decided I’ve had enough of this model and I just want it over with, so I focused on completion instead. I started this project on April 28th, so 7 months later, I can slip this in my display cabinet and start another model, which after 2 prop builds in a row, will be an Italeri CF-104 Starfighter in mostly a bare metal finish. Time to turn and burn back to my jet building roots! One closing thought is that I gave up on adding fuel tanks, which Tempests usually have, for 2 reasons. The first is that the tank pylons are made from clear plastic parts that are not well molded, they are hard to glue together without making a mess and the metallic braces are nothing but decals like the pic below. I think this is a clear case of “less is more”, because they will detract from the overall build, rather than enhance it. The second reason is that I have been trying to more or less replicate this pic I have shown many times, with Pierre Clostermann standing on the wing. It doesn’t look like this Tempest has drop tanks, so I’m off the hook for accuracy! And here is a black and white pic of my model similar to the above, followed by a few more that I will post over at the Ready for Inspection Forum. “See” you over there, and thank you all for your kind comments and encouragement along the way. Finished Model Pics Cheers, Chuck21 points -
1/32 SH Hawker Tempest Mk V, "Kicked Up A Notch" New eBook!
Seversky and 14 others reacted to chuck540z3 for a topic
November 24/20 After 7 months I have finally finished the 1/32 Special Hobby “High Tech” Tempest Mk V, kit number 32052. This kit has some really nice additions in the box already, like several resin parts, photo-etch parts and even some fabric seat belts, so you don’t need too much for aftermarket accessories if you want to “Kick It Up A Notch”, like I always try to do. Still, I did add the following: #32234 Barracuda Nose Correction Set with Props #32141 Barracuda Intake Ring #32239 CMK Exhaust Set #32122 Maketar Paint Masks for all insignias and other markings #232016 HGW Wet Transfer Decals, which appear to be currently out of production The subject for my Tempest is one that French Fighter ace Pierre Clostermann flew, and there is a good article on him at the Hawker Tempest Page website here, where I derived most of my references for this build. Pierre Clostermann's JF-E Aircraft In this article is a pic of Clostermann standing on the wing of NV724, which has the Cross of Lorraine on the chin and the 3 Squadron “Cockatrice” at the top of the tail which were applied after the war, along with a kill scoresheet next to him. To weather this model I tried to show that while most of the aircraft had been heavily used in battle, these items were left relatively clean. And here is my attempt at more or less the same, which went by kit instructions rather than try to match this one side exactly. While the kit can create an impressive Tempest, there are many challenges that I tried to document in a long build article that goes through every step of the model, including detailed instructions here: SH Hawker Tempest Mk V, "Kicked Up A Notch" I tried many things in this build that were new to me, like liquid mask on a sponge to create paint chipping, MRP acrylic lacquer paints and Metal Liner metallic accent wash to enhance the rivet and panel lines with a metallic color, rather than the traditional dark washes that usually look really good, but often don’t look realistic. Now the pics, taken from just about every angle- so sorry there's so many! Note: Tempest landing gear and wheels toe outwards a few degrees. Cheers, Chuck15 points -
Thanks guys! It has been a few days and I HAVE been working on the 262 but it has been slow progress. It's taken me about three evenings now, applying the decals to the cockpit parts. I've been evaluating each section, determining where the decal fits, where to divide the decals to get a better fit, and substituting PE replacements or hand-painting where appropriate. Walters Solvaset has been working very well to literally melt the decal pieces into place over all of the raised detail. I've gotten more adept at centering the decals over the appropriate details and even daring to CAREFULLY touch and prod the decal as it softens. It's been a slog and I'm not finished yet but I'm able to post some progress shots at least. Rear cockpit side panels... Rear cockpit instrument panel... I still need to add clear lenses to all of the instruments as well the shroud on the radar display. Radar unit.... Front cockpit starboard side panel. Still working on the port side panel as it houses the throttle quadrant. All of these components will get a bit of weathering but I'm not going to sweat that too much since it will be difficult to see inside the cockpit with all those canopy frames in the way. And speaking of... while waiting for decal solution to dry, I've performed a dry fit of the clear canopy parts to the fuselage. The majority of the canopy rests on the separate cockpit sill part which I needed to verify for the painting process.11 points
-

MikroMir Miles Magister RAAF Finished.
Paul in Napier and 7 others reacted to ericg for a topic
Thanks for the info Alain. Since my last update, I had noticed the shorter rudder. Interestingly, I found a uncropped verion of one of the photos that I posted earlier, Which shows the same aircraft with a taller rudder as featured in the kit. I am unsure of the timeline history of this aircraft during its short RAAF service but it looks like it is parked next to a couple of Avro Kadets in this picture. Some more work. The kit includes photo etch instrument panels but I decided to use the plastic ones instead. I felt that they would be easier to attach inside the fuselage whilst not being any less detailed. I used the kit supplied decal instruments cut out to fit inside the instrument faces. The rudder pedals were enhanced with some Tamiya tape to depict the foot restraint straps. The kit cockpit is fairly spartan, so I added some silver wire to the the throttle and other lever linkages.Missing here is the right side rear cockpit fairing that holds some sort of cylinder. I will add the seats later.8 points -

QF-4S Phantom "VX-30" - Tamiya/Cutting Edge, 1/32
Paul in Napier and 7 others reacted to Starfighter for a topic
Scooby had a distinctive, heavily worn antenna cover below its nose. To simulate this kind of effect, liquid mask was used again. A light coat of zinchromate from MRP leads to this result. I'll play around with oils later today to add more different shades as on the real a/c. More "micro painting" adds a lot of interest and realism to small parts such as this dielectric panel on the fuselage side. The photo also shows that I need to rework the washes on the fuselage. I also corrected the initially incorrectly masked hot section at the rear fuselage by painting the two rear panels besides the fin FS36320. Note the red sealant in on the hot section. Bonus: the landing gears are nearing completion. The oleos were made with bare metal foil.8 points -

1/32 Revell-Hasegawa Spitfire Mk.1a "K9906"..... Finished.!!
mpk and 6 others reacted to Tolga ULGUR for a topic
And decalling Decalling terminated except for the M sea grey fuselage letters (FZ-L) I am waiting for their masks from UK. Roundels are from my spare box. I have used Xtradecal decals for the underwing K9906 codes.7 points -
Assembly nearly completed and almost ready for paintwork... Surface with riveting. Reverse side of the flaps. Some added detailing to the wheel wells. Cheers: Kent7 points
-
 A few more up to date pictures after some touch ups. UPS also just showed up with my latest Sprue Brothers order of MRP.....now I have the right Insignia Red and can get the interior of the flaps done. For those reading ( @Anthony in NZ maybe?), do you know the blue used for the New Zealand roundels? I did a bit of browsing on the ol' Google and came back with FS 25026 (aka, Blue) for new paint or FS 35109 (International Blue) for a faded paint during World War 2. Does that sound right to you all? There also is a yellow stripe around the fuselage roundel, suggestions on color? RAF Marking Yellow? Or can I get away with MRP Orange Yellow? (Montex, unfortunately, does not call out the marking colors with their masks) Anyway, pics.....enjoy while I go paint some red. My MRP collection is growing.......6 points
 -
She's on her legs! I hope to get the rest of the main wheel well covers on today, but I'm not at all happy with the rear front wheel well cover, it's far too near the vertical, so that's all coming off so I can have another go. I really, really, really hate the Revell "instruction" sheets, about as much use as a chocolate fire screen....6 points
-

Revell/ AIMS Mistel S3C Wk Nr 460066 Bernburg 1945
Greg W and 5 others reacted to monthebiff for a topic
Been working on completing the tail wheel bay and trying to get near the greeny/ yellow anodised finish so started with a coat of aluminium followed by Tamiya XF71 cockpit green and then clear yellow followed by a wash and some dry brushing. Reasonably happy with the outcome and next I've decided to complete the tail section empennage and all so when I re-aquant and glue the nose and tail sections I will be able to get everything square with no nasty surprises later, well thats the theory! Regards. Andy6 points -
1/32 Hasegawa P-40M Kittyhawk Mk.III
mywifehatesmodels and 4 others reacted to Tolga ULGUR for a topic
Hello everyone, This is my recently finished 1/32 Hasegawa P-40 (M) Kittyhawk Mk.III with the markings of GA M FR864 from RAF 112 Sqn North Africa 1943. Cockpit modified by Eduard PE set. I have used Eduard s exhausts and Wheel sets. Paints : Gunze and Tamiya acrylics. Sharkmouth painted by using "DN models" customized masks. Happy modelling5 points -

Malvinas Pucará FINISHED
Iain and 4 others reacted to blackbetty for a topic
the new master5 points -
Well Bruno, the Silver Wings kit is definitely the better one in every respect except (in my opinion) the wheels. I like the fact that the Matchbox wheels don’t have the covers on them. I AM concerned about how robust the tiny parts are, all the control horns in resin will be extremely fragile I think and easily damaged, so I’m pleased that I made mine out of brass. I’ve been trying to find the best way of doing the windshields, a one-piece “glazing” doesn’t work that well when the windshield sides are folded back so I’m trying individual pieces but the area to glue these is tiny. I’ve tried Kristal Klear but it’s not clear enough. More work today! Now the Kristal Klear one has fully dried it's not too bad, given that this image is of course many times bigger than the real one. Hmmm5 points
-
I’m happy today as it’s our 31st wedding Anniversary. As with most things in life it’s flown by. Secondly having been made redundant, I’ve got another job starting on Tuesday. So I’m very lucky in finishing one day & starting the next!.5 points
-
I was building a Tamiya Mk VIII, and decided I wanted to do a "Churchill Wing" aircraft from 54 Sqn RAF. This was interesting and ticks my "unusual subject" box because it's RAF, despite having Australian markings and an "A58-" serial number, A58-360 (it was originally allocated JG376). It was also in an unusual camouflage: some Mk VIIIs delivered in the Ocean grey/Dark Green scheme had the grey areas overpainted with RAAF Foliage Green to produce a very low contrast finish. I managed to persuade a friend from my IPMS branch to cut some masks for me - thanks JD - and here's the result. The basic kit was enhanced with various Barracuda bits, including wheels, rocker covers with "RR" logo, and some cockpit parts, and I also used a Yahu instrument panel. The masks (made from Oramask I believe) worked very well, even the rather small serial. I've never liked large decals, and I'm now rather hooked on masks, despite rather enjoying the process of decalling. To start with, a pic of the subject. (If this infringes your copyright, please advise and I'll remove it) Thanks for looking.5 points
-

Kitty Hawk Mirage 2000C
Anthony in NZ and 4 others reacted to Cheetah11 for a topic
Thanks for all the compliments gents. Alain you are a good detective Thanks for the info Viperfixer. You are right about the functions of the cables Being inside the flexible loom in stead of outside makes for a bit of a challenge to get a realistic result on a model. The very bottom cable is for the SPAD braking system and it transmits nose wheel speed. Paint on. Tomorrow I will try and figure how to get the edges on the lights which Kitty Hawk has omitted. Alain I wish I had your painting skill when doing small work. Cheers Nick5 points -
The cockpit has begun. This is going to be the fourth full blown cockpit I have done done in 1/18 scale, and it will be by far the most difficult. For two reasons - one is that the wing center section itself comprises the lower portion of the cockpit, making the pit three pieces instead of two. With many components bridging between two parts. And two - there is no floor, so lots and lotsa stuff in the "bilge" is fully visible, stuff that one would not have to model were a floor in there. Like hydraulic lines, fuel hoses, control cables, and a torque shaft used for aileron and elevator controls. I have no good plan. So am nibbling around the edges so to speak, doing things I know I can do without boxing myself into a corner. Already I have thought of things in the pit that I just don't know how I am going to do. We'll see.... So the Corsair is largely regarded as one of the best performing WW2 fighters ever. It was no dog. It had a really great high level design. But the devil is in the details. I can tell looking at drawings - this aircraft was chock full of poorly designed details and poor integration. As opposed to say the P-47 which far as I can tell was a marvel of detail design, with every part seeming elegant in its own way. The Corsair has one rube-goldberg contraption after another, one afterthought after another. If I could bring back a mechanic from those days, I would ask if he agreed. That's OK though - it is what it is, and I will model the things that can be seen. For the cockpit I am going to start forward and move aft as I go, for the most part. There is a complex bulkhead forward of the rudder pedals that separates the pit from the fuselage fuel tank bay. That is my first project. I have dubbed it the "zig-zag" bulkhead: It is a heavily stiffened frame, and is literally grand central station for hydraulic equipment. Part count is enormous, and tell the truth I am not sure at all how much of it will be visible. Here she is in all her ugliness: The mass of hydraulic lines on the bottom are for various wing stuff, like wing fold actuators, LG actuators, and flap actuators. They will be somewhat visible (with a flashlight). I plumbed the remainder as best I could. I skipped some lines up top, as they will definitely not be seen. The drawings are really hard to read, and there were multiple configurations. What you see is not accurate, but sort of a combination of original F4U-1 lines and later F4U-1A lines. Only you and I will know. The yellow thing in the middle is a ventilator air outlet and its black flex hose. It will be visible. The hose, BTW, is a piece of .050 inch diameter solder wrapped a million times with .015 inch diameter solder. If you look closely, you will also see two pulley brackets and a rudder control cable with unattached ends. Temp installed: This looks awful right now. But I promise it will look fine after it's done. That is, as fine as it can. The Corsair cockpit is not a pretty place! As I said earlier, the wing comprises part of the pit. Here is what I mean: To complete the cockpit means the wing center section must be joined to the fuselage eventually. And that means the wing inboard of the fold must be completed. Soooo, before the cockpit is completed, the landing gear bays, rear beam segment, and flap support structure, at a minimum, must be completed. I also must decide once and for all if I am really going to attempt a functioning fold - a helluva challenge that I might give up on. So at some point in the cockpit build I am going to have to put it away and begin on the wing stuff. Til later folks. Happy Thanksgiving to all those who celebrate it!4 points
-

Zvezda Star Destroyer - a new detailing project
LSP_K2 and 3 others reacted to The Madhatter for a topic
Thanks very much guys! Sorry for the very late reply I am happy to say that I have added all the detail I'm going to, to the bottom hull plate. I do have some stuff to add to the upper lips where the sidewalls meet the hull but that won't take long. All that's left to add detail too are the sidewalls themselves. I won't be going to mental there as the space is pretty short but enough to make it more interesting, and then it'll be the joyous task of adding the fibers. Anyway, that's it for now. I'm still casting pieces for the base and that is taking up a fair whack of time but the ship detailing is nearly finished! Sorry for the not-so-great pictures, I couldn't be bothered getting the photo tent out etc thanks as looking! Si4 points -
Hi @mpk, here are some photos of the undercarriage. Matt4 points
-

1:32 scale - Nieuport N.28C1
mgbooyv8 and 3 others reacted to sandbagger for a topic
Hi all, Just a few tweaks to the fuselage and weapons. The engine cowl was secured to the fuselage with a metal strap around the rear edge of the cowl. To represent this strap, I used a strip of ‘Bare-Metal’ Matte Aluminium self-adhesive foil. This was then covered with 'Flory Models' Dark Dirt clay wash, to dirty it up, then sealed with 'Alclad' Light Sheen lacquer (AL-311). In-flight the main fuel tank was pressurised by a 'Baden' type venturi, which was connected to the tank by an air pipe. This was represented by drilling into the venturi and fuselage and adding 0.3 mm 'PlusModels' lead wire. The wire inside the venturi was painted Brass and the rest with 'Tamiya' Rubber Black (XF85). Both machine guns had elliptical blast deflectors, fitted below the muzzles and these are not represented on the replacement ’GasPatch’ weapons. The two machine guns were fixed to a mounting under the breach block and also supported at the fuselage by clamping rings around the front of their cooling jackets. The blast deflectors were cut and shaped from 0.2 mm thick plastic card and CA glued to the weapons. The rear gun mounts were made from 0.4 mm and 0.2 mm diameter Nickel-Silver tubes. The front mounts were also pinned to the fuselage with 0.3 mm tube. The front clamping rings were cut from 0.2 mm thick plastic card and CA glued to the cooling jackets. Mike4 points -
QF-4S Phantom "VX-30" - Tamiya/Cutting Edge, 1/32
Cicciuzzo and 3 others reacted to Starfighter for a topic
The small bits towards the end of a build always seem to take much more time than the big ones... but at least I managed to paint the nozzles and afterburner cans. The nozzles needed a bit of extra attention; they are 3D printed (not by me though!) and needed some careful sanding to obtain a smooth surface. The upper parts of the Aires afterburner cans hat to be reduced in diameter in order to fit the nozzles. All parts were first painted with Mr Metal Color Iron. Great stuff! The paint was not yet polished when the photo was taken. After polishing, liquid mask was applied with a sponge in order to obtain a slightly splotchy look. The recessed triangular areas between the feathers were tediously masked... And the feathers were painted with dark steel from Humbrol Metal Cote. Note how dark the paint looks before polishing. After polishing, I dabbed on some Mr Metal Color iron with a sponge. A dark wash reduces contrast and adds volume to the recessed areas. The afterburner cans are more difficult to photograph than to paint... The cans are green and buff on the inside, followed by a dark wash. The flame holders are PE parts which I heated with a lighter - what looks more like heated metal than heated metal? They look quite convincing once in plate. They will be barely visible at the end, though. Nozzles in situ. Their diameter is significantly than the Aires parts and definitely improve the overall look of the model.4 points -
SH Tempest Mk V "Kicked Up A Notch". January 14/21 New eBook!
Tolga ULGUR and 3 others reacted to chuck540z3 for a topic
November 20/20 Step 37: Landing gear! If there’s one thing that causes me a lot of stress in modeling, it’s the building, painting and installation of landing gear. Tiny landing gear parts always seem to have big seam lines on every single part that are hard to remove, painting is picky work- which often reveals flaws- and getting the gear and wheels installed correctly and straight can be a real challenge. Flawed landing gear alignment is a very common deduction at model contests, because it’s so common (ask me how I know!), so I try everything to avoid it. On my last model of the Harvard/Texan, I got the landing gear alignment perfect while the model was on it’s back, only to have one of the legs toe out when under its own weight. Crap!, which is another lesson learned. Only glue on the wheels permanently with the model standing on them. This kit has really nicely detailed landing gear with LOTS of seam lines, but the biggest challenge is getting the leg alignment correct. Thanks to MikeMaben, he posted the schematic diagram below to help me with same. To give credit where credit is due, it came from this build thread of a 1/48 Airfix Hawker Sea Fury here: 1/48 Airfix Sea Fury Build Note how both the gear legs angle outwards, including the wheels. Without this pic, I might have made the legs straighter and the wheels for sure, which is technically wrong, but maybe “correct” at a model contest? The main problem with the landing gear is that there is no real solid anchor point to attach them to. Likely for accuracy, the top of each gear leg is a rounded egg-like shape that fits into a shallow recess, which can be moved all over the place in every direction. Very confusing and problematic to many modelers, so after thinking about it at 3 AM while I should be sleeping (as usual!), I found a simple solution. After drilling a small hole in the bottom of the gear leg and recess it fits into, I glued a short piece of copper wire into the leg as an anchor point that is stiff, but still flexible. That way I can insert the leg and move it around, but the leg remains stationery. Note that I have already added the main hydraulic brake line, more or less according to references. The next main part of the gear assembly is parts H22/ H23, which have an actuator that I already cut off, so that I could install a steel pin into it later. Carefully dry fitting this part and the gear leg, you get an idea of where the parts should fit before gluing them permanently. Here they are dry fit, thanks to the copper pin in the main leg, which you could never do without it. As I searched around for the correct alignment of these parts, I looked at pics of the real deal, but also other builds of this kit. Alignment of landing gear on models was hard to find (maybe for a reason?), so right or wrong, this is how I did it, so I will show several pics of same. First, the forward angle which is quite pronounced. Once I figured out what all the angles should be, I used extra thick CA glue at the top of the gear legs, which gave me a good 10 minutes to move things around a bit as required, before they were solid. After the glue had set, I added the rest of the landing gear parts, one by one. While some of them had to be trimmed a bit, I was surprised at how good the fit really was. While I was at it, I cemented in the tail wheel assembly, which fit really nice into its recess. When the main gear was installed, I darkened the gear bays with “The Detailer” wash of 50/50 Brown and Black. What’s great about this wash is that it’s water soluble and if you don’t like what you done, just add more water to change or remove it. I also added some staining to the bottom of the wings and fuselage with pastels, but tried not to overdo it. All of the bright aluminum parts were then sprayed with dull coat to knock down the unrealistic shine. This is hard to photograph from any distance, so here's a super close-up.... and a bit further out.... Then I glued on the CMK resin wheels/tires that came with the kit, which are perfect. The wheels on my aircraft are the later 4 spoke type and I again used thick CA glue that gave me time to align them according to references- with the model putting weight on them this time!. Here’s a view that you will rarely see with this kit, because both the top and bottom of the inner wing should be flat and no 1/32 models are. While I could not fix the upper portion of the wing, I got the bottom of the wing about 90% correct. And a detailed pic of the leg alignment, which I think matches the schematic above pretty good. Now a bit of a walkaround for future modelers of this kit who want to see some details. I think I got everything as correct as possible. “I’m running out of parts!”. I say that at the end of every build, which is both a happy thought, but also a bit sad. While I look forward to my future CF-104 build, I think this kit hit the right spot of quality vs challenges to keep me motivated and still have some fun. I have lots of little things to do yet, like landing gear doors, etc., so my next post will be the finished model in maybe a week or so? Stay tuned, and thank you for your continued interest in this model. I hope this build log will help many of you with this kit in the future and I had a lot of fun creating both! Cheers, Chuck4 points -
I have been a bit quite on the forums lately. I used to do all of my updates whilst I was on overnights at work as it was a very useful way of spending my time in an outport. Due to the airline industry being completely turned upside down with COVID, after my 4 months of stand down, once I was back at work I have found myself doing far less overnights. When I am at home, the three kids keep us very busy, so any spare time where I can sneak off to the man cave without anyone noticing is spent frantically building, usually in short spurts before invariably being interrupted to perform any number of the numerous jobs required of being a Dad, in keeping 3 young boys from doing harm to the house, themselves or each other! Anyway, enough of the excuses. I have a heavily modified WNW S.E.5a and also the new Eduard BF-108 on the verge of being finished. I felt that it would be good to put them aside for a while and come back to both of them with fresh eyes for the finishing touches. I always like to keep numerous models in various stages of completion and decided to start the brand new MikroMir kit. This one is a fairly obscure RAAF type, with only one airframe taken on charge. This was used to compare its characteristics with the Tiger Moth and it was acquired in 1938. It never progressed further than flight trials and was transferred to No.1 FTS at Point Cook during 1940, where it was the shortly after converted to components at the engineering school. Only a few photos of the airframe exist, and after some research and consultation with Gary Byk from Red Roo Models, I have decided that it will be painted all over Hugh Speed silver, with polished metal cowl. Some of the pics: The Hawker Demon in the background of this photo makes for a useful comparison of the colour. On to the kit. This will be as out of the box as I can make it as I don’t want to be too tied up with a complex project. The side walls of the cockpit are nice and crisp and well detailed, with the wing spars extending either side of the floor. These will come in handy later on to make the model quite strong, although I am anticipating a bit of difficulty with the fit of the wings. These parts have been primed and are ready for paint. There are no locating pins for the fuselage halves. One thing that is noticeable with the kit is that there is a fair bit of flash on quite a lot of parts. To be honest, I actually enjoy cleaning up parts and ‘blueprinting’ them on short run kits like these, it keeps the building skills sharp. Here is an example of a large piece of flash that I found on the trailing edge of the wing. The right side wing root had a short shot on its upper half with a fair sized portion of the fairing missing. This will be an easy fix and will be dealt with later. I found a small error in the instructions whilst assembling the wings and amended them as can be seen here. None of the parts are numbered on the sprues, so reference needs to be made to the parts map in the instructions.3 points
-
How accurate is the scheme depicted here in Special Hobby's instructions? Is there any photographic proof of it, and if so, are there any pictures clear enough to discern how feathered the colour demarcation are? Looks like a lot of fun to paint if it's legit3 points
-
It’s been fun boys, thanks for your interest, advice and encouragement! I appreciate the close up of the Tiger Moth Alain, very attractive and had my attention straight away.3 points
-
I have the strong feeling that a Pe-2 is more in the range of Infinity from Czech, the injection moulding arm of HPH. They are familiar with multiseat prop twins and able to make moulds for injection molding kits the size of a Pe-2. The Pe-2 was also used by Czech during and after WW2. While talking about soviet multiseat twins: Il-28. I've asked Kitty hawk about this some years ago. The answer was: doable, but they told me that there was a line of other kits (about 10 different types) to be released before ta this time and in near future. No, they didn't specify which types, so don't ask If I am counting right they released 4 or 5 LSP types since that talk. Still holding my fingers crossed A Su-15TM would be tempting. Large, but doable for LEM, given the Su-22 and Mig-27. Guess it depends on buyers interest. Me? Beside of a Mig-13 I am also interested in a Mig-25. Not much larger than a Su-15, surprisingly few and simple surface details, even inside intakes, exhausts and canopy. Only detailwise really challenging area are the main UCs and the main UC bays with the common collection of a large number of hydraulic lines. The kit line could also easily extended into subvariants like the recce/bomber and the ELINT configuration. Different marking and color options: Soviet, Syria, Iraq, Libya, India, Bulgaria, Algeria, and the post-soviet countries. Just dreaming... Regards - dutik3 points
-
small progress : http://www.infinitymodels.cz/en/aichi-d3a-val-1-32/3 points
-

New, Incredible, Beautiful Tamiya Release Coming Soon; Anyone Know What it is?
scvrobeson and 2 others reacted to MikeMaben for a topic
I break mine down into pennies per month.3 points -
The scheme was employed on Macchi Mc 200 and 202s for sure. Check out Stormo! (a webzine devoted to the Regia Aeronatica). Here is a link to their page on RA colors and camouflage.3 points
-
Thanks again one and all! It really does keep me motivated on a complex and occasionally MoJo debilitating build like this. I have actually in fact found a viable solution to the problem of the ignition wires being too bright and new however! I experimented with a bunch of trials with the braided cord. Trial #1 was adding a straight wash to them with no clear (trying both clay based and enamel based washes) and just as I had suspected, the washes climbed right up the braided material, and really made mess of things. Especially the clay wash, as it just left chunks of black or brown behind with 0 opportunity to wipe any of the excess away. Trial #2 came when I did some experimentation with Johns idea of adding a clear to them to make them less absorbent. This actually worked! What I found however is even though the clear did prevent much of the wash from getting on them, the clear made the braided material very stiff in the end when enough clear was added to fully protect the lines, and they no longer looked as realistic. And on top of that, if you missed coating even one single place on them, capillary action would wick the wash into that little spot, and then inside the lines so it leaked to the outside of the lines underneath the clear. Again, a pretty big mess, especially if I had to had paint or spray 72 individual lines. Trial #3 was when I had a breakthrough after the wash experiment. I was sort of dejected as to how to weather the material, thinking that all the stuff I was experimenting and all the stuff I generally used to weather things like this was wet, AKA washes. I was thinking to myself how nice it would be if I somehow had a "dry" wash to add to them......................then lightning struck! I DO have what equates to a dry wash, Tamiya weathering pallets! So I quickly busted out my Tamiya weathering pallet of "soot" and started experimenting with the braided material...... BINGO! That was the solution. The dry powdered soot clung to the material in a realistic way, but because it was powder only, it never crept or went anywhere but where I generally placed it with a soft but thin brush. After 45 min or an hour of very gingerly placing the powdered material on the ignition cords, then carefully blowing the excess off, I had one engine weathered. I also got both front trans units glue on to the engines as well. It doesnt take much to see which one I weathered and which one I didnt: The lines are actually even dirtier than the pics lead on, as the light still seems to make them appear shinier and brighter than they actually are, but Im very pleased with the results. The weathering pallets took all the super bright/new look off of the ignition lines and blended them with the rest of the engine weathering very nicely. After another careful 45 min or so I had both engines lines weathered. Much better Once again, my bench lights make things look a bit more uneven than they are IRL, as one of my original lights burned out, and had to replace it with a different type, so the left one appears a bit brighter, which it actually isnt. With that task completed and can now move onto the main finishing areas of the R2800s, which are the 2 magnetos and 4 distributor housing covers. All 6 of those pieces will have additional wire to them, as well as the front trans cover will have additional wire added to it as well. Cheers!3 points
-
Actually, I do. I started my Mosquito last winter and am currently about 90% completed. Best money I ever spent on a kit, worth every penny.3 points
-
Well, it's been almost a month since the last post!! It's been really busy at work with winter and possible lockdown coming, could work on the build intermittently. I have paint on everything but the prop, will paint it....soon...everything else has been gloss coated, will apply decals soon...This is a simple build, should be easier to finish.3 points
-

Mig-17 Mali
Paul in Napier and 2 others reacted to Kosh for a topic
Hi Thank you very much for your comments. The MIG-17 is still moving slowly but I had a lot of work on it. The following in pictures. A few small occasions to do that appear better in the photo but it is progressing. It should subside with the paint anyway a bit. To begin with, I finally succeeded in drawing the riveting of a wing, tomorrow I will attack the second but the drawing takes a long time. On the other hand, we feel the old age of the kit and the beginnings of Trumpeter. The adjustments are all to be resumed and will have to take out the sealant. I used cyano black to harden the bonding between the large parts and to make a first joint. I finished my drawing part and started riveting. As a result, I had not yet incorporated the PE of the hatches in the model. So first a hole with a drill of different Ø then using diamond files' Thanks to friend Eric and I redo the recess. You can see the recess made with a file I place the blank trap This one is included at the edge of the sheet You can see the difference with the three big ones included and the three small ones not yet included. Sanding of my glue joint which required work but on the other hand its function of reinforcing the structure is great Suite à cela, un peu de gravure et rivets. and the barrel bay of which I still have the riveting and the installation of the outgrowths of the latter. and a wing of finished at the level of the increments of the PE A view of Canon Bay The Trumpeter working base. We start by adding the two lead sheet parts in the continuity of the air inlet. As we can see the gun arises without any problems .... A joint is made of wire drawn with Tamiya glue. Then we recovered the bulk of the plastic card form. A little engraving around this hole. Sanding the plastic card and finished with cyano black. We finally get the shape of the barrel. we wind a piece of copper on a strip this plastic card. Realization of the shape and the impression. We dig the ejection window. The machine guns are installed but there is still the seal and rivets to put in place to finish this part. An antenna support is also added, we finally arrive at a convincing result. End of the installation of the two machine guns, seal and riveting. Engraving of the lower surface of the wings. Realization of the lighthouse with lead foil to make the reflector of the lamp. I give the shape with a ball. a little bit of sanding to put it flat and the PE contour. remains to paint the interior in chrome, add the bulb and close with a rodoid glass to finalize. In the end, the cross is fast approaching That's it for the moment, to follow the end of the assembly and the painting.3 points -

Something to raise a smile - What’s your reason to be cheerful?
Alain Gadbois and 2 others reacted to mpk for a topic
My reason to be cheerful is this. It looks like I won't have my foot amputated. Such a relief. One more operation in 3 weeks and it should be sweet.3 points -
Here you go Mike , in case you don't already have one... I had mine laminated, they're valid forever3 points
-

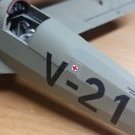
F-14A Tomcat VF-21 Freelancers Trumpeter 1:32
Loach Driver and one other reacted to Koralik for a topic
This time the F-14A Tomcat VF-21 Freelancers. Model, as always, made straight from the box + decals from CAMDECALS. The Trumpeter model is probably well known to you so there is nothing to write about this set. Maybe I will write that it is quite easy to assemble or maybe I already have experience with this set.2 points -

Something to raise a smile - What’s your reason to be cheerful?
Trak-Tor and one other reacted to Stokey Pete for a topic
Over the last few weeks, our daughter has started to recognise lots of things (she’s 2.5 yrs old). Chief among them is the babbled word “airbopwane” while pointing at my model display shelves. This has me fearing for my built stash’s future while simultaneously smiling inwardly as she shouts. Solution? Give her one to play with. I have a new one in the stash to build, that I intended to replace this with. It lasted approx’ 10 min’s before being reduced to a pile of plastic bits. She’s enjoying herself with it though. I have the perfect excuse to break open the new Tamiya now. I thought this image would give people a smile or a giggle.2 points -
1/32 Revell Me 262B-1/U1 Nachtjager
Mattcom and one other reacted to johnie hopper for a topic
At the first I have to simply say "I don't know how you do it". Nice work! I would like to say few notice (most of them are not so important, because they will not be seen through closed canopy). Hope that I will not annoy you. 1) The ventil in the left rear panel should be bright blue (as whole oxygen system) and both instruments were used (it is Revell's fault probably) 2) There were a push button and the switch on the top of the right low box on the operator's instrument panel (again it is Revell's fault probably) - it could be visible. And some ring around the radar tube could look fine. 3) right front panel - the biggest Revell's mistake is that they used the same panel as for A-1 version, but it wasn't the same. The radiostation FuG16ZY was mounted and operated manualy from the rear cockpit and there was no need to use devices for its "remote control" (used in A-1/A-2 version). It should look like this (there were lever switches in two rectangle holes and usual push button in round holes). 4) and one more "don't forget" - wear off the spray pipe in front of windshield2 points -
SH Tempest Mk V "Kicked Up A Notch". January 14/21 New eBook!
Marcel111 and one other reacted to chuck540z3 for a topic
Thanks Guys! Thanks John! Kevin has correctly identified that some of this to HDR (High Dynamic Range) lighting, which I use all the time. The reason I like it is that for close-ups and strong lighting, the camera smooths out the high lighting contrasts to create a more balanced photo of my subject. My Nikon camera effectively takes a picture that's exposed properly for very bright areas, takes another that's exposed properly for the dark areas, then stitches them together into one photo- all on a timer and tri-pod to avoid camera shake. When I'm taking all of my pics of In Progress shots against a strong blue background, the lighting contrasts are not that big, so when I adjust my photos for lighting afterwards, the halo effect is usually not that pronounced, if at all. On this very light background, however, I have big lighting contrasts, so as I correct and tweak the lighting of my model, the background sort of blows up creating the halo, which I can also use to my advantage to eliminate background noise like folds in the fabric and the edges of my light box. For a diorama this would not be very good for obvious reasons. My goal in these photographs is to show the model and only the model, so I really don't care about halos and other artifacts of HDR. As a matter of fact, I think they look kind of neat, like this pic, which makes the edges of the model really sharp. Cheers, Chuck2 points -

LEM Kits Donation for a new model
Troy Molitor and one other reacted to ninjrk for a topic
Oh I won't argue that the Kikka would be a more universal choice I just like the Karyu in a display with an Me-262 and Su-9.2 points -
1/32 Hasegawa P-40M Kittyhawk Mk.III
Rockie Yarwood and one other reacted to Tolga ULGUR for a topic
This is my 8th Hasegawa s Warhawk . And the next one is a long tail P-40F rolling to the painting process.2 points -

Scratchbuilt Bushmaster PMV 4x4: now with paint!
Rockie Yarwood and one other reacted to GMK for a topic
Well, we haven’t seen the left side of the truck for a while, so here it is: Some of the stowage, including the bin for the ECM at the rear. Speaking of ECM, here’s a front view with one of the DUKE antennas test fitted (in pink). A second one will be on the opposite side.2 points -

Something to raise a smile - What’s your reason to be cheerful?
Rick Griewski and one other reacted to mozart for a topic
Well done Steve, that’s great news all round, many congratulations.2 points -
Hobby Search is a common one: https://www.1999.co.jp/eng/list/115/0/1 Kev2 points
-
It certainly is old Brit slang as Vince states and explains the definition, but unless someone decides to graphically portray (strongly discouraged!) it then it really hasn't broken any rules.2 points
-
control build result, Lemkits 1/32 Ilyushin Il-10 " Beast " & La-11 "Fang"2 points
-

HH-60G Pavehawk Kitty Hawk 1/35 DONE!!
F`s are my favs and one other reacted to Pete Fleischmann for a topic
Hey all- heres a look at the progress on the dust application on the belly- tough to photograph, and the flash washes it out a bit.. what will visually tie the figures to the helo is the dust. It is important that the dust on the bottom of their pant legs and boots matches the dust on the aircraft, and in the cabin- getting there- cheers Pete2 points -
1:32 scale - Nieuport N.28C1
mgbooyv8 and one other reacted to sandbagger for a topic
Hi all, Apart from the propeller, all of the decals have now been applied. Undersides using ‘Aviattic’ aged varnish CDL (ATT32094) over base colours. Top surfaces 'Aviattic' Linen Weave Effect (ATT32236) over base colours. Individual marking from the ‘SuperScale’ WW1 Nieuport 28C-1 (MS320243) set. Final sealing coat of 'Alclad' Light Sheen (ALC-311) lacquer. Now I'll need apply weathering before adding details, such as the retaining strap for the engine cowl and ring supports for the front of the machine gun cooling jackets. Then it'll be pre-rigging and start the construction, Mike2 points -
Thanks Jennings! With round one of the panel lines washes done, I also made a start on the exhaust stain... I'm also pleased to report that my method of attaching the undercarriage seems to have worked! Please note that the spinner is still unpainted and the visible grey patch under the access door is intentional to allow me to attach it once I've painted it! Matt2 points
-

Lockheed T-33A-1-LO 'T-Bird' RDAF
Paul in Napier and one other reacted to kkarlsen for a topic
I'm not sure what you mean, there's some cleanup and micro fitting but other than that I think it looks OK? I guess I will be the wiser when I begin to glue the parts together... Started on rivetting the wings to add some more texture to the surfaces... Kent2 points


.thumb.jpg.5da8bff9741de420eb2e87addd8f2cf6.jpg)


.thumb.jpg.cd22b958c9e88a898a21e18b862c523e.jpg)