Leaderboard
Popular Content
Showing content with the highest reputation on 06/06/2020 in all areas
-
This model was built to depict the F-100D flown by Captain Ronald Swanson during a ground support mission in 1968 whilst under the direction of Forward Air Controller, Flying Officer Macaulay Cottrell RAAF. It was whilst I was building Mac's O-1 Bird Dog that I had the idea to try and track down either of the F-100 pilots mentioned in the combat report written by the BLADE flight, and was successful in contacting Ronald. He agreed to be my subject pilot and this is the result. Additions: Aires Cockpit. Aires Wheel Bays. Aires Exhaust. Zactomodels Nose Cone Armoury Wheels. Videoaviation BLU-27 Napalm bombs Eduard MK-82 Snakeyes Eduard photo etch slats Aerobonus helmet Master Pitot Tube Modifications. Scratch built seatbelts. Scratch built pylon sway braces Canopy hinge point moved 5 mm rearward Main undercarriage legs shortened 3 mm Cannon access panels moved 2 mm rearward Various panels re scribed Pitot tube attachment fairing rebuilt Drop tank hard points moved 3 mm outboard Scratchbuilt landing lights. 23mm plug to lengthen each drop tank Other small tweaks. Paint and Markings MRP paints with painted markings.16 points
-

1/32 ERA-3B Skywarrior - 3D printed / scratchbuilt
daveculp and 8 others reacted to Starfighter for a topic
Steve, it definitely makes life much easier. I did most of this kind of stuff by hand before the Viking, now everything is quicker and more precise. Marco, thanks for your kind words! I don't think the Photon can handle Antialiasing, if I am not mistaken only the Photon S can do that. The fuselage was not printed with groove lines because they were not included in the CAD files. The Skywarrior is based on a file I have bought, I only made it printable and used it as a base for my model. the parts I have drawn myself do have groove lines and surface detail. A NURBS based progream would certainly be better suited for this kind of task, but I neither have the software nor the knowledge to use it, so I have to work with what I have! In the meantime, I have done some more "classic" modelling. The rear portion of the refuelling probe is a mix of 3D printed parts and slide fit tube from Albion Alloys. The forward portion will be fitted at the very end to avoid damage - very easy thanks to the perfectly fitting tubes.9 points -

Fw 190D-13 Pilsen - Bory, Czechoslovakia 1945
J.J. and 7 others reacted to Miloslav1956 for a topic
1/32 Hasegawa Real Model 2020 conversion set Eagle Cockpit set & wooden flaps Barracuda Wheels HGW riveting set, wet transfers, seat belts All colours MRP All painting mask homemade8 points -
8 points
-

F-15C 32nd TFS AFB Soesterberg 1986
Loach Driver and 6 others reacted to Cheetah11 for a topic
During the Cold War USAAFE kept units in Europe for air superiority and interception of Eastern Block intruders. When the Mig 25 Foxbat was introduced by the Eastern Block , the F-4 units were promptly replaced by the F-15A and later by the F-15C. These were stationed at Bitburg and Spangdahlem in Germany and Soesterberg in the Netherlands. The 32nd TFS was the unit stationed at Soesterberg and at the time the only F-15 unit to carry a bit of nose art in the form of a Wolfhound on the left side of the cockpit. It was also the only USAAF unit to be under the control of another air force, in this case the Netherlands Air Force. The Tamiya model was build pretty much OOB. A few small details was added in the cockpit and the fuel tank modified from a Sufa tank to give a better representation of the belly tank. The afterburner nozzles were also shortened. This kit is relatively old but is still a pleasure to build and because of its size has a great presence. A pity Tamiya has not updated this like the F-14. One sprue with modern weapons, a tank and new nozzles would fix the most of the inaccuracies and make it easy to do a more modern Eagle. Here is the model( part of the Cold War Jets) group build. And now off to the display case. Nick7 points -
I mentioned earlier about using MEK to smooth the surface of the prints - this was a test I did earlier, flooding the area over and around the port rear door jump lights using a brush and allowing to try off. This was also done to the recessed square section to the right of the lights. Smooths the surface quite well - not perfect - but certainly a better start in hard to sand areas. At this stage all window edges have also been gone around with a brush loaded with MEK. The fuselage sections have ledges printed in situ on which to bond the cargo bay floor - these have been dressed off with the T Bar and 280 grit wet and dry to ensure the floor has good, flat and aligned areas to bond to when fitted: There may be some more shortly... Iain7 points
-
Me262 A-1a Yellow 3
LSP_Kevin and 5 others reacted to David Mooney for a topic
Hello all, I hope everyone is keeping safe in these crazy times. While I have been off due to this enforced lockdown I started the Trumpeter ME262 A-1a heavy armament kit and wanted to do it in the colours of yellow 3 from KG(J)54. The kit decals seemed a big 'off' so I invested in Eagalcals #95-32 sheet and the colours seemed much better than the kit originals. I have been my best to get the scheme right, but even I will admit that its not quite right, but I think it looks pretty good, certainly a good learning session for sure. Painted with Gunze Sanyo (best paints EVER in my opinion) and weathered with oils. I'd like to add that the markings aren't symmetrical as that's the way they are on the original aircraft (very odd that) All comments welcome6 points -
After sweeping the Kinetic F-86 off the bench in defeat I thought I'd try another F-18...anyone can build one of these so maybe I'll get through this one. This will be 60 years of NORAD CF 188...F/A 18 A to everybody else The LEM's decals package is like a book. the Dmold resin is significantly larger ID than the Academy parts, nice improvement. the "Black Box" office, still a nice set years later. The Canadian seat on the right wish me luck Thanks for looking6 points
-

D-Day. 76 years ago today....
JerseyChris and 5 others reacted to Mark P for a topic
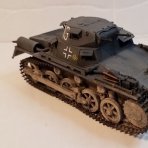
Today marks the 76th anniversary of D-Day. With everything going on in the world today it is easy to overlook this milestone. Today, take a few moment to pause and reflect... Mark Proulx6 points -
The tail was then primed again and off to the airing cupboard to harden off. Attention was moved to the plastic 'infill' sections on the front and rear port-side fuselage doors. These are printed in with the main prints to act as supports during the print process and need to be removed. This was achieved using a fresh 10A Scalpel blade - scoring along the surface about 1mm in from the frame edge - multiple passes and a little patience required here, it does take a while to cut all the way through! After removal the cut edges where filed back to the frame edges and a quantity of MEK applied around the frames to consolidate the surface: And port rear: And both sections placed together - quite a size! Have fun! Iain6 points
-
Have been continuing work on my modified tail section - removing further flaws/joints/panel lines - and the incorrectly shaped beacon failring at the top of the fin - to be replaced later. In addition the hinge sections on the fin have been boxed in top and bottom, then filled with casting resin from behind, which was then cut/filed to the correct shape: On the starboard side I hadn't quite got the surface shape right when I filled/sanded the cut out area - so a little more Milliput and sanding: And with the rudder dry fitted again to ensure we're heading in the right direction: Also made a start on sanding/neatening the internal structure. First I went through with a 10A Scalpel blade - removing and loose 'threads' of ABS - of which there were quite a few. Then the flat areas at the top were given a light sanding, before painting all surfaces with MEK solvent, using a flat brush - as I've found this helps smooth the surface in areas that are hard to get at. Looks rough at this stage - but it is an improvement. A coat of primer next. There's going to be an awful lot of priming and sanding on this project! Iain6 points
-
Just got this email if anyone's interested in the subject kit. $99 and free shipping is almost a steal! I couldn't help it, I snagged one as soon as I saw the email in my inbox. https://www.tamiyausa.com/shop/132-aircraft/north-american-p-51dk-mustang/pacific-theater/ They also have the Spitfire Mk. VIII and XVIe on sale for the same price. https://www.tamiyausa.com/shop/132-aircraft/supermarine-spitfire-mkviii/none/ https://www.tamiyausa.com/shop/132-aircraft/supermarine-spitfire-mkxvie/none/ Not sure if the free shipping applies to outside the Continental US or not but I'd imagine not. Only way to find out is to ask.5 points
-

HK B-17...C 5/4 sweating the metal
Greg W and 4 others reacted to brahman104 for a topic
Thanks Jay! I'm pretty happy with how they came out; still a bit of work to do on them but for now, they need something to mount them on... As you may recall a while ago I attempted to correct the outboard nacelles being too high on the wing. My first iteration was to cut the whole nacelle out and mount it lower, which was okay, but still required a lot of reshaping and work and was not repeatable for the at least two more B-17 projects I'd like to undertake in the future. I then hit on the idea of cutting out a whole section of wing which could then be cast and replace the existing nacelle in its entirety. I spent an exorbatent amount of time and effort replicating the turbocharger recesses into a redrawn nacelle in the correct position on the wing, and while the trial print worked perfectly well in ABS on the FDM machine, it took 10 attempts on the photo to get something that looked good enough to work with. I also made the assumption that because they were on different sides, the turbochargers must be left and right as well? Turns out that was a poor assumption - they are exactly the same both sides.... which meant my tenth attempt at the print was also no good How it's supposed to look: How mine turned out: After much head scratching, I hit on the idea of using a mix of the kit parts and the redesigned nacelles, as THEN I could be sure the turbochargers would fit! Unfortunately, that meant a whole lot of grinding resin, which is most unpleasant due to the powder but also to my surprise, when I cut into the piece it was STILL filled with uncured resin What a mess! I can see now why some people put drain holes in their prints. Funny thing is, this only happened on one side, not the other. Same drawing too.... weird! Eventually I had it ground down to the point where I could graft the kit ones in. Unfortunately that was not the end of my troubles. Another nasty little surprise was waiting for me in that due to the way the prints turned out, there was no way I could ascertain a reliable flat and square reference point when attaching the nacelles back into the wing! Yep, winning all round!!!! I finally resigned to the fact that despite the effort I'd gone through to make the resin prints work (even with alignment holes) the whole lot was a massive failure and needed to be binned. Happily though, remember how I said the ABS prints worked perfectly? Well after digging them out of the draw (lucky I kept them) and doing exactly the same thing, I finally arrived at what I'd been trying to do. Still a long way from being finished, but I'm finally back on track after a lot of setbacks. Once these are ready, I'll be casting them in reliable silicone rubber moulds the old fashioned way!!!!!! Cheers, Craig5 points -

1:32 Hawker Siddeley Andover E.Mk 3A - 3D Print
Starfighter and 4 others reacted to Iain for a topic
Revised tail section part: Meanwhile, have been working on a few areas today - back shortly... Iain5 points -

1:32nd F6U Pirate
Starfighter and 4 others reacted to Dandiego for a topic
Ok. Some work on the windscreen. After about 8 attempts to form a windscreen by heat shrinking a plastic soda bottle I got one that actually was pretty good. So it has been cut to size and epoxied into place. Next is an application, or 2, of Bondo. Much sanding in my future. I have also added a rear deck to the cockpit. It will be sanded to size. Here is the completed fuel bay on top of the fuselage. Dan5 points -
Taifun
Sharkmouth and 3 others reacted to Bruce_Crosby for a topic
Hi Guys, I forgot to say I got a lot more info about the Trop tank fit and decided as the cockpit was already assembled there wasn't any room to add the details. So I've ripped out the tanks and fitted the seat. I didn't want to take out the half seat squab to fit the full width version as the belts were already superglued down and the chances were they would get damaged so I fitted the half seat squab from the second kit. So now I'm back to two four seaters. Rest assured I have another kit started to do a detailed Trop with tanks version. No details so had to go! Changes by Bruce Crosby, on Flickr And a few minutes later...…. Changes by Bruce Crosby, on Flickr Test fit of the half seat squab from the second kit. Yes, that'll do. Changes by Bruce Crosby, on Flickr And some paint.... Latest by Bruce Crosby, on Flickr Latest by Bruce Crosby, on Flickr I'm left with a couple of holes in the floor where the oil tank went but there's going to be a judiciously placed briefcase, small luggage case or similar there eventually. Regards, Bruce Crosby4 points -
4 points
-
Slowly getting there...just the details now..Thanks for looking in4 points
-
It almost looks so good in box with all that foam surrounding things so snuggly, that my OCD is lightly whispering to me to keep it pristine in the box, and just take it out to look at it every once in awhile. The voice inside me telling how cool a 1/32nd Viggen would be on a contest table and how much attention it would grab, is nearly deafening fortunately.4 points
-
Weathering begins with a dark wash on the underside. We can see the added value of having riveted the area. Next step will be the addition of the exhaust staining, using the below pic as reference. Further work on the walking areas, scrubing the surface and adding color variations with watercolor pencils. This will be toned down a bit, in particualr the rivet exposure. I took some inspiration from this pic for the forward wing upper surface.4 points
-
one off the 3 is comming out Mark4 points
-
Wings rigged. Still need to rig tail...four wires with good access should go quickly. But this session is over!4 points
-
Excellent looking Hun, perhaps the best I've yet seen.4 points
-
OK, I am firmly in the camp of wanting a Draken as well, but got my Viggen reserved. One of the few jets to draw me away from WWI.4 points
-
1/32 Hasegawa P-47 "Oh Johnnie"
Tolga ULGUR and 3 others reacted to JefH for a topic
Hi again. Made a little more (slow) progress on the P-47. Did a little oil dot filtering, which isn't really showing up in the photos to well and a panel line wash before hitting the model with some Alclad flat clear. I think I will devote some attention to the smaller items while I let the clear set up for a couple days. Then I can hit it with some further weathering. The windscreen and canopy are just being held on by gravity. The gaps will disappear when they're fixed in place. It kind of a tricky model to weather I've realized mixing a well used fuselage with replacement wings. I'm running the risk of it looking like I forgot to weather the wings when I'm done. Thanks again for looking. Jeff4 points -
So, I'm hitting a bit of a creative wall with the Yak and U-2. I'm getting burnt out engineering and making parts, and my machine has been acting up, so, I decided to just try something OOB, more or less. Here are some pics of my almost box-stock Thud's cockpit, the only changes were the cutting down of the back cushion, and homemade seat belts (not yet installed on the backrest)3 points
-

The antique BoB Revell Spitfire Mk.I
Archimedes and 2 others reacted to thierry laurent for a topic
Hi gents, When I started building my MiG-27, I was already working on this oldtimer. However, as nothing is painted, nor closed, I'm sure there is no problem to add this kit in that group build. Useless to say I'm probably the worst modeller on earth regarding compliance with deadlines (too many ones in my job I guess!) but I don't care. Indeed, I'm sure this thread will be useful as I made a kind of basic tweak list describing all the modifications to make! I already made some of them and will show that in pictures. Obviously as I have to split my time between the two builds, this will not help but if you don't dare, you never win! The kit has a quite nice surface treatment. To me this is really one of the best ever done. Moreover, no thick plastic here but this can become a drawback in some circumstances. However, this is not all rosy! The adjustment of most parts is a nightmare and the level of inside details and most small parts is very bad. So, this is not the kind of kit you can easily build OOTB to get something correct...alas! I'm using the 1990 re-edition for this build but I have one or two older boxes stored somewhere! The scheme will be one of two late Mk.Is used by the "City of Chester" 610th Squadron. I still do not know if I will replicate DW-Q or DW-K as I have decals for both. Unfortunately, getting information regarding the early Spits is a minefield. After some hours of research in my notes and at least a dozen of books, here's the list of modifications I have already identified to improve my kit: - Replace the propeller with a De Havilland one from the Revell 2014 kit, correct its tip shape and add the screws on the propeller edge (generally absent on kits) - Replace the canopy with an Hasegawa Mk.II spare one - Enlarge the nose a little bit to be compatible with the propeller diameter - Reinforce all the seams between the fuselage halves with strips of plastic - Fill all the huge gaps and add the missing material on the nose panels - Replace the horrid exhausts (I will finally use the Model Monkey 3d printed ones) - Add the tank plug in front of the windscreen (and the two small holes located close to it) - Add the small bumps on the top of the nose - Add the typical early mirror on top of the windscreen - Remove all cockpit related tabs or features on the fuselage sides - Replace all the cockpit components. I will finally use a modified Aires Mk.V pit with an Eduard Mk.II IP, a converted Barracuda seat, some Barracuda parts (essentially the radio ones on the port side), some modified items from the kit and some scratchbuilt parts (such as the radiator lever on the port side of the seat and the armor plate behind it). The seat must be changed to a metal one with the round recess rather than the lozange-shaped one. Finally, I will add the Sutton belts and their rear fixing mechanism. - If possible recreate a Mk.I IP (no aftermarket available) or use a Mk.II one - Add the red-painted tank behind the IP as well as the connection hose (they were partly visible on the Mk.I as there was no bulkhead behind the IP) - Create the early bell-shaped voltage regulator, its support plate and its cabling - Add the canopy ejection system (Barracuda) - Add the structure of internal bulkheads and strengtheners in the fuselage, behind the cockpit (at least what will be more or less visible because that section is painted silver) - Add the flare launcher (basic shape) - Add the TR radio box and its supports (basic shape) - Replace the cockpit door and remove the crowbar supports as the Mk.I did not have it initially (it appeared later and was retrofitted) - Correct the mast profile (the kit one is too squared) - Drill the small oxygen hole in the fuselage close to the canopy rail - Fill most of the heigth of the canopy rail trenches without damaging the fuselage rivets - Drill and thin the belly intake lips - Replace the wheels (I will use the Brassin ones on that kit) - Correct the LG bay doors (thin them, correct the perimeter shape, add the internal side and lengthen them before adding some rivet lines and the four large screws on the external face) - Remove the brake drums from the LG legs, correct and add many small details on them (including the brake lines) - Add LG bays (I started from Aires Mk.V ones but removed the strengtheners to add early ones made in plastic). A bean-shaped hole should be added to simulate the embossed wing area intended to give room to the wheels. - Add the gun camera hole in the port wing leading edge as well as its oblong access panel in the wing fairing front - Fill the power plug hatch in the rear of the port wing fairing - Add the small oval bump close to each wing root - Add the bean-shaped LG well bump on each wing (I made them out of leftover Hasegawa 109 bumps!) and add the missing rivets on the wings (over the LG bays) - Add the two fairings protecting the exhaust holes of the wing heating system under each wing tip. - Correct the location of the MG holes in the wing leading edge - Rebuild all the internal components of the radiator (mix of plastic card, tubes and spare Eduard and RB photoetched radiator parts) - Rebuild the oil cooler (thin the edges, add a tube inside with Eduard spare round photoetched parts) - Thin the internal side of the wing trailing edge - Recreate more accurate wingtip lights - Sand cautiously the gull wing shape at the fuselage and wing junction - Drill drain holes - Drill the landing light, recreate it - Fill all the huge gaps or add the missing material on the elevators, rudder, and ailerons (remove all the hinges first) - Add the rudder actuator arm on the side and the visible hinge parts of the elevators if they are positioned down - Reshape the tail wheel leg, add all the large screws and replace the wheel This is a quite important amount of work but there is currently no easy strategy to get a Mk.I as the thread in the Discussion forum showed it. I'm confident the kit will look OK in spite of the shape issues I will not correct (mainly the wing span). Wait and see!3 points -
ICM 1/32 Polikarpov I-16 type 28
Alain Gadbois and 2 others reacted to Warbird for a topic
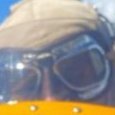
Hi All, Starting this tiny Soviet fighter as I needed an easy and no brainer build after my Monogram F-102 (that the theory - never lasts long). In practice, the fit is excellent but the kit really needs some improvements as many pieces are on the thick side and the cockpit lacks details for the scale. I decided to close the cowling flaps in order to hide an oversimplified engine that is placed too much aft and much too thick cowling openings and flaps. I sanded down the cowling to scale thickness. Anyway, this is the configuration that is the most common on a parked aircraft. A few levers and cables in the cockpit... Rivets were added and thickness of the access panels and reinforcement plates was reduced.3 points -
Taifun
Sharkmouth and 2 others reacted to Bruce_Crosby for a topic
Hi Guys, Some progress: Filling and sanding. Lots of it. More inside by Bruce Crosby, on Flickr There's a small drain pipe under the motor, Made from Albion Alloys 0.6mm Brass Tube. Son by Bruce Crosby, on Flickr There are tiny little hinge brackets for the flaps and ailerons.. Mine did a few dives on the carpet so I had to hack up a few bits of plastic rod and strip. Son by Bruce Crosby, on Flickr The undersides of the slats needed some strip. I contemplated curving the plastic but thought better of it - not exactly if anyone's going to physically see the model for the foreseeable future, is it? Son by Bruce Crosby, on Flickr Tailplanes added. Son by Bruce Crosby, on Flickr Son by Bruce Crosby, on Flickr Regards, Bruce Crosby3 points -
D-Day. 76 years ago today....
Alain Gadbois and 2 others reacted to CATCplSlade for a topic
I was a ground zero eyewitness to 9/11. I can understand not wanting to talk about things you see during such times; my grandfather never spoke to me about his time in the PTO, and he was a Marine Air Corps pilot so not even on the front down in the dirt. I don't enjoy telling people I watched helplessly as office workers tumbled from windows. But I tell my story every 9/11 to my students so it won't be forgotten (by some at least) and to let off some of the pressure the memories build inside me.3 points -
I can't envisage anyone improving on the opening scenes of Saving Private Ryan for giving a more visceral impression of those first landings.3 points
-

EE Lightning - Echelon vacuform
Anthony in NZ and 2 others reacted to mozart for a topic
The Aires pipes are much narrower than the holes cut in the framework so there's a danger of them waggling around rather a lot: so I used the outer tubes supplied with the Echelon kit, though I'm pretty sure this isn't how Frank Brown envisaged them being fitted! But it works well enough:3 points -

1:32 scale - Siemens-Schuckert D.III
Lothar and 2 others reacted to sandbagger for a topic
Hi all, The upper wing, as supplied in the basic kit, has a pronounced bow across the thicker, centre section of the wing. As the underside of the wing in that area has a glossy finish, I can only assume the bow was caused during the injection process. Unlike resin parts, polystyrene seems to retain a shape 'memory' once moulded, so it can be more difficult to correct distortions without introducing white 'stress' marks in the part. However I applied heat on both sides of the wing centre section from a hair dryer (on high setting). The heat was maintained for a few minutes Then the wing was flexed and held in position whilst cooling. Mike3 points -
Any Revell 1/32 Me 262 resin detail set available?
Lothar and 2 others reacted to ade rowlands for a topic
With their Löök series of panels I have to say Eduard got their colour matching a lot better. By the time you add a bit of weathering and matt coats it all looks quite good. Much better than the etch stuff. Yahu are also very nice and often come with holes pre drilled for you to add switched and knobs, which is great as I lost many a drill bit to attempting that with Eduard panels. The only thing with the Löök panels is that the dial details are fairly generic for the most part, not the specific dial type, just a series of dashes circles and lines that don’t really represent anything. Buuuuuut I am lazy so I use them where available, Löök and Yahu both.3 points -

My first double build - Calling them DONE - Pic’s in RFI
Piero and 2 others reacted to Stokey Pete for a topic
I’ve got a few touch ups to make with the white where blue has bled under the masks, but how good does this look? I’m absolutely stoked by how smart it’s turned out. I used Gunze Aqueous H25 Sky Blue, for highlights I added a drop of white, for the shadows I added a drop of black. I think it’s created a quite realistic and subtle rippling effect. What d’ya think?3 points -
Another small update, but from a good bit of work. The side walls are now on, and my estimation of expanding the rear fuselage worked! The flap fairings on the side walls did need a bit of convincing, as did the forward section between the countermeasure buckets and cowlings. Additionally, the standoffs have been attached to the cowling flaps. Next step: seat the intakes (I can already see the cowling to body fairings are going to need putty) and attach the forward fuselage. Y'all enjoy your weekend, and thanks for stopping by the hangar!3 points
-
If there's going to be an AJ-37 or AJS-37 that would free up the JA-37 to be in the grey scheme with the giant day-glo numbers. I'm pretty sure by the time I get to that stage, JetMADS plans will be clearer. The only thing I'm concerned with are the intakes as illustrated in the digital rendering, though I accept that may be a simplified 3-D model For fixed intakes, they're not that simple.3 points
-
Hasegawa 2020 (re) releases
phasephantomphixer and 2 others reacted to LSP_Mike for a topic
They had a good run there for a while with Japanese subjects. Love to see them do a Pete, Kate or Val.3 points -
WOW! That seems pretty incredible to me, but then again Im stupid. I wholeheartedly agree Don, Ive got to get the wife a car, and fix the house up to sell, but you dam well better believe a Saab 37 stuck in there!! I know its a SK37, but there here is some pretty cool motivation to get you amped up.............3 points
-

Hasegawa 2020 (re) releases
esarmstrong and 2 others reacted to MikeMaben for a topic
Wonder when they'll do something they haven't done before ??3 points -
It fits supremely well Iain, so that's a job masterfully done (pun intended! ). I trimmed the internal sheath off the other one that you sent just incase this way didn't work, but of course I needed to have no worries! And Yes, I can wait for a canopy! And suddenly............. It looks like a Lightning! Woohoo! Couldn't resist it:3 points
-
I am going to use the ICM Gladiator, Max, as I think it is the easiest route. Shortening the fuselage, modifying the wings to serve as hulks for new skins à la Woodman and using the (modified) kits' engine. I think I will start an "in progress" in a few weeks time after I have completed another project. As you said, it is such a handsome aeroplane.2 points
-
2 points
-

D-Day. 76 years ago today....
Rick Griewski and one other reacted to Radub for a topic
Actually, the problem is precisely that many remember history very well and want to repeat it. Radu2 points -
This thread provides the best info Tnarg. When I was making my Gladiator I managed to melt a tailplane so contacted ICM who sent me the whole sprue, which conveniently included an upper wing. The Gauntlet upper wing is longer than the Gladiator’s so it should be a fairly straightforward job to insert a couple of sections. Other bits of the conversion, undercarriage, fuselage etc are another matter! https://www.britmodeller.com/forums/index.php?/topic/235064146-gladiators-into-gauntlets/2 points
-
Waouhhhh! Excellent job! Your F-100 is amazing, what a beautiful work!2 points
-
thank you! I know regarding the wood surfaces but my references say that this wood was covered by a yellowish and/or aluminium paint primer. My guess is that is what we can see on this picture.2 points
-
The most realistic worn SEA finish I have seen! Can I post this one on the site, too? Just beautiful!2 points
-
How nice to see an Eagle dressed up as a 32nd bird. A little bit of additional information: The 32nd has always been a very special USAFE unit due to the fact that it used to be fully (!!!) integrated into the Royal Netherlands Air Force Air Defense. In contrast to other USAF-units based in Europe, the 32nd carried out national (Dutch) QRA-duties during which she was under direct control of our national Command & Control station (CRC "BANDBOX"). Out of gratitude she was awarded the Royal Crest which proudly adorned her squadron-badge, carried on the left intake of the 32nd F-15's (unfortunately not seen in any of your pictures...). The 32nd received the Royal Crest, back in the days when they were flying the F-102 Delta Dagger. These birds soon sported a beautiful red, white & blue fin-flash which are often mistaken as the USA-colors but in fact were a "tribute" to our (Dutch) national flag. The wing-fences of the 1-0-2's were painted orange, referring to the color of our Royal family. When they received the F-4E Phantom, the red, white & blue "fin-flash" (sadly) disappeared. However, the orange "fin-flash" was retained. As seen in your pictures, the F-15's also retained this orange "fin-flash", with the edition of a small Royal crown. Due to her "special status" the 32nd was often referred to as "The Queen's Own" or "Her Majesty's Finest", making her the only Royal squadron in service with the USAF(E)...!!! Kind regards, Rudy. P.S.: Isn't "USAAF" an acronym for United States Army Air Force...??? If so, you surely mean USAFE (United States Air Force Europe)...2 points
-

1/24 EA-6B Prowler
Bil and one other reacted to easixpedro for a topic
Don't have many. Started this build 15 years ago and finally finished around 2009, and I didn't take too many pics while building. It's now on display in the Tailhook Association's HQ. A friend from San Diego took these pics in their library a few years back, and these are all I have.2 points


