Leaderboard
Popular Content
Showing content with the highest reputation on 05/13/2020 in all areas
-
I'm going with 82/83/76. I left the supercharger intake off to make painting easier and the hole has been left empty. I really don't care if any overspray gets in there because I'm gluing the supercharger intake on top of it after painting. Applying the RLM 76... here we go! I'm using AK Real Colors for this shade. I really like how this color goes on. Thinned at 2:1 with Tamiya Lacquer Thinner, it goes on very smoothly with enough transparency to dial in the pre-shading effect. I had the bright idea of using Mr Hobby Aqueous RLM 76 to provide a slight contrast to some panels. To fully utilize the pre-shading, I paint panel by panel, trying to build up the most paint in the middle of the panel and to leave the edges just a little bit darker. It's ok to be inconsistent and not too uniform so as not create an obvious grid pattern with the panel lines. Panel by panel, I start covering the bottom. It's also a final check to see if my re-surfacing work turned out ok and the rivet holes register under this coat of paint. I'm pretty happy with how this troublesome area looks under a coat of paint. Ok... the bottom is done. The pre-shade effect is very subtle and usually doesn't register visually until you get closer to the model. There will other layers of weathering that will add some depth to the model later so we don't have to accomplish everything with the pre-shade. It's also important to go back to an area that you think you've finished as the Tamiya Lacquer Thinner can "bite" into the darker mottle and bring it to the surface as the paint dries. We continue the RLM 76 up the sides of the fuselage. Compared to the pre-shading, the application of the RLM 76, even with the highly-thinned mix, goes pretty quickly. For whatever reason, I don't like the contrast between the two RLM 76 shades on the topside. I think it'll get knocked back quite a bit by the application of the topside green colors but it is bugging me. I like how the bottom turned out. The contrast here seems to work better and adds a bit of visual interest to an otherwise boring landscape. First stage of painting is complete. I now must gather my references as there are some things I need to note about the topside camo like how high the demarcation line is, the mottle pattern and how to go about doing that sawtooth pattern on the leading wing edge.15 points
-

1/32 ERA-3B Skywarrior - 3D printed / scratchbuilt
GMK and 12 others reacted to Starfighter for a topic
The fuselage looks like a Whale again - time for a beer! Now comes the interesting yet annoying part - adding surface detail. That's when a model comes to life. The firt panels were scribed and raised details were added. My Silhouette Protrait was very helpful to cut scribing templates and raised details. Some of the raised details will be replaced with plastic sheet whilst some will remain vinyl, such as the strengthening plates at the tail extension. I will now cut holes into the fuselage again to add some NACA ducts and vents. Then, I will add the closed camera bulges.13 points -

HH-60G Pavehawk Kitty Hawk 1/35 DONE!!
Michael931080 and 10 others reacted to Pete Fleischmann for a topic
Hey all- started with the cockpit stuff. first I shot some primer yellow (Tamiya XF-4 yellow green) on those spots I was going to chip. When dry, this was shot with a barrier coat of flat lacquer. (You can skip the lacquer if your primer color is enamel) once dry, shoot it with aerosol hair spray right out of the can. Let that dry. A hairdryer will do the trick in a minute or two. When the hairspray is dry, airbrush Tamiya Rubber black over that. Clean your airbrush. By the time you have your airbrush put away, you can start on the next step. grab a short bristled brush and some water. Wet the area you want to chip. Let it sit for a minute, then start working the chipping with your brush. Clean the black off of your brush periodically as you go- when all that dries, dry brush with MM Gunship Grey enamel. The instrument panel went a little differently. First, I shot it with Tamiya Rubber black. When dry, I dry brushed the whole affair with MM Gunship Grey. To get the contrast I wanted between the raised instruments and flat panel, dry brushing wasn’t enough.. there needs to be two distinct blacks..a noticeable but subtle difference between the instrument bezels and flat panel. To achieve this, I used an old-school technique- I carefully applied a jet black wash with a long bristled thin brush..carefully flowing the wash in between the raised instruments. This was built up slowly in thin layers. You need to put this on thin to get it to flow. Capillary action is your friend. from here I can start the detail painting, etc- cheers Pete11 points -
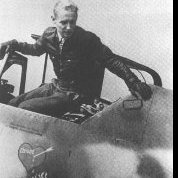
Ju-87B-2, 1:32, Trumpeter
Hartmann352 and 9 others reacted to Hartmann52 for a topic
Ju-87B-2, kommander III./St.G. - 77 hauptmann Helmuth Bode, Kharkov, may 1942. Trumpeter + BigEd, Hataka paints. SD-500 bomb is Revell Geschwader code and emblems - its handmade.10 points -
Hi, added the wet transfers from HGW and a few dry transfers. Started weathering of the inner upper wings and forward fuselage sections ... Have a nice day!10 points
-
Hello, a couple of pics of the completed cockpit area. Also you can see the work done to align the fuselage parts of the conversion with the kit parts. Clear resin windshield has been polished with Tamiya paste and wax and airbrush painted from the inside. Fitted and glued to the fuselage the result is not too bad. The canopy sealing strip has been applied to the windshield too. Masking tape is applied. Brown-orange paint is airbrushed to simulate the sealant putty around the glass frame... I spayed the some color here and there to check the filling and rescribing job done. ...10 points
-
Hi there everyone I hope everyone is safe and healthy and coping with this lock down business! Time for an update! So I have made some progress on the tail unit but before showing you the photos I thought I would share the other problem that I have with this project!....always problems! ....serves me right for starting this journey! If you didn't know ...I live in S.E Bulgaria and I will eventually need to transport this finished B17 across to UK first and then eventually ship it across to California in the States where I am pleased to say that I have had interest from the The Miniature Engineering Craftsmanship Museum in Carlsbad (not far from L.A) and have decided to donate it to them. This in turn will of course cause a few headaches! This is a very large and extremely delicate B17G I am building and it will need careful consideration on how to ship it.I used to do commissions for people and have shipped models to Europe by shipping companies...I would pack the model and hand it over to them and they would charge the earth with no guarantees that it would arrive safely!.... So this time I am going to try another way of shipping. I am going to try and put it on a flight with me and because it is too big to go as hand luggage , I had to think of it going in the hold in a large suitcase!....which then set the alarm bells going off as I imagined the baggage handlers tossing the case all over the shop!.....and so I did an experiment. I took the front section which as you know is complete and measured the length and height and chose a large enough suit case to use. I then built a MDF box and suspended the model in the box using polystyrene ...screwed the lid on and placed the box inside the suitcase. I then took it out in my garden and threw the case all over the lawn....kicked it and dropped it from a height as if I was a baggage handler! .............let me tell you that after 7 years of building the front section it was a very difficult thing to do! I eventually opened the box ( with a hang mans noose at the ready ) to see what damaged was caused!........absolutely no damage at all!....phew! what a relief! ......I will be trying that experiment again at a later date ...this time being even more brutal! Here is the box with the front section packed in....with the lid off of course....... If the model arrives safely in the UK then I will be happy for the next trip to USA a little later! So on with the progress I have made with the tail section.....here is part of the tail..... ....and the next part added up to the rudder position.... So this tail section will have to be designed so that it can be taken on and off as it will be far too big to fit into the built box for the suitcase.....so to that end here is a photo of the location holes I have designed for some pegs that will slot into them to hold the tail in place...... ...and here are the pegs on the tail unit that will slot in..... and here I am slotting the unit in place. Once again I have joined the two halves together to see if all looks ok........ I have to say that I am finding this tail unit very challenging and it's coming together at a snails pace! Next up will be the Rudder construction.... so until then ..look after yourselves and happy modelling! Cheers Fozzy9 points
-
Thanks guys! It took a lot of work to get to this point but I'm finally here, with all of the fit and clean-up issues behind me. It's time to start painting on the Ta152H-0. Most of my usual bag of tricks will be employed. Starting with a panel line pre-shade. When I got to the top, I realized that I wanted to do some wing root chipping with hairspray so I had to stop the pre-shading and get some metal color (Tamiya AS-12) on, followed by hairspray. I let that dry a full day before I finished the panel line pre-shading. I like to apply an irregular mottled base underneath my camo colors to add a touch of depth to the model. I used to just freehand a mottle pattern but have started to use different masks to create some edge variation. The majority of mottle is created spraying through a piece of green scrubbing pad. This is then augmented in different areas with a cardboard random pattern template designed for airbrush artists. Pre-shading done, I can move on to the first color... the light blue RLM 76 on the undersides.9 points
-

Trumpygawa Hellcat x 2
Model_Monkey and 7 others reacted to williamj for a topic
Well ....getting close to painting managed to mate the whole of the Trumpeter lower and upper wing to the Has. Fuselage. Re-scribed the upper Trump wing ..they missed a bit of it. Reworked the Has Prop hub as well. Anyway..getting there. Cheers fer now. Have to subdue a lot of overdone rivets.8 points -
Special Hobby Westland Whirlwind Mk 1
VW Chris 1969 and 7 others reacted to Jan_G for a topic
test sprues posted on special hobby site http://www.specialhobby.net/2020/05/sh32047-westland-whirlwind-mki-test.html8 points -
The latest Nieuport's from CSM are out...8 points
-
I just wasted 5 minutes of my life reading posts about whether the thread should be closed. I came here to read idle speculation, groundless conspiracy theories and wild, uninformed rumors about WNW. Can we please get back on topic?8 points
-

Unique opportunity 1/32 Andover C1
Landrotten Highlander and 6 others reacted to Iain for a topic
A strange parcel has just arrived from some bloke in Japan... I wonder what it could be? Iain7 points -
I've managed to finish most of the airframe, with just the light fittings adjacent to the intake to modify. The CFT's fit well with clamping, and I used stretched sprue and Apoxy Sculpt for the liner. I added the carbon fiber decals to the exhaust, but haven't yet weathered this area. Paint soon! Cheers, Tom7 points
-

Making Custom Airbrush Masks
scvrobeson and 5 others reacted to turboprop4 for a topic
Just sharing a quick video I put together showing how I use my Silhouette Cameo cutter to make custom model masks. Currently using them to create markings for my 1/32 P-47D. I also show the results of ones I've made for my 1/32 Dauntless, Skyhawk, and HpH P-63. Let me know if you have any questions or comments about making custom airbrush masks. Hope it helps! Chad6 points -
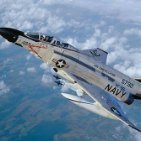
Eduard Mig-21 SMT 1/48 Weekend Edition
Alain Gadbois and 5 others reacted to AlbertD for a topic
I wanted a quick build to practice some techniques and decided on this Eduard kit. The kit is vert nice and goes together well. The instructions are clear for the most part and easy to follow. I used Mr. Paint lacquer as called out in the instructions. The weakest part of this kit is the flimsy landing gear, especially the front. I ended up pinning it the best I could with some brass rod but it's still fragile to say the least. And whoever decided to call this kit a Weekend Edition never built a model in their life. It took the better part of 3 weeks and I get 3 or 4 hours of build time most days. I did add the Eduard Brassin cockpit and it fit perfectly. I'm still learning this craft so please feel free to point out anything that I need to improve on.6 points -
let's proceed - I made plywood pieces for a fuselage using sheet plastic, painted it in wood with oil paints - for seat-belts decided to use HGW once for Pfalz D.III, yes plane are not same but seat-belts are similar - painted inner sides of fuselage in light blue, after that added camo with olive oil paint using a dry brush, when oil dried (after 3 days) I covered it again with main very thin paint. In doing so, we can see outside camo inside the cockpit. - glued "plywood" parts - cut a lot a pieces of medical needle 0.6mm diameter - put almost all fuselage parts together To be continued ...6 points
-
some more details6 points
-
Just received an email from Rachelle at WNW"s...My kits will be shipped in 2 to 3 weeks. Whohoo!6 points
-
The R-2800, like all radials, has intake pipes for all the cylinders. The R-2800's looks like this: The finger-like pipes with the 90 deg elbow bends, just aft of the cylinder rows, are the parts in question. Note two pipes emanate from a single hole in the engine blower unit, splitting off like tree branches. One branch goes directly to an aft row cylinder head port. The other connects to an "s" shaped pipe between aft row cylinders, and that pipe goes to a front row cylinder. And there are nine of these pairs. My intake pipes, as mentioned in a previous post, are made from .125 inch thick solder - fairly easily bent and formed and ground to the right shape. Here is a simple tool I used to form the 90 deg bend, and trim the ends of each piece: That gives me a consistent .125 inch radius (bending it around a .25 inch tube). It takes a goodly amount of force to make that bend. After forming and trimming, these parts can be made into a pair and mated up back-to-back and inserted into a thin tube on the blower section: The black short tubes on the table on the right are the connectors for the forward row "s" shaped pipe. Finished up it looks like this: With that milestone passed, the next step is inter-ear deflectors and the deflector ring. This job will be more complicated than the intake pipes, which were actually quite straight forward. I'll post when I can show good progress. Thanks for looking in!5 points
-
And that is the only sane way to get true information about WNW. I do not believe anything coming from the guys who told us that "WNW will never do a Dr.1" and preface their inane dogma with "Richard said..." Radu5 points
-
5 points
-
Thanks guys! Those hatches pointed out by Vincent have been filled. Otherwise, just some minor progress on the G-14 as the painting on the Tank fighter goes into full swing. The wing spars are glued into the fuselage bottom. The MDC ammo chutes have also been glued into place. Previous to mounting, I've sprayed the interior of the chutes black. A look at the bottom piece from the outside. The fuselage bottom is glued into place. A little bit of joint work is needed here. But when that is completed, I may have to set this build aside. I have some aftermarket pieces coming in from Australia and it looks like the shipment has been delayed. This includes the RB Productions Bf109G wheel well set. I really can't move forward without getting the wings done so I may have to go into wait mode on the G-14 for a while.5 points
-
Mine arrived today, yeah. Really nice little aircraft which looks fun to build. I bought all the extra's with the kit just because, but except for the wheels, the other after market stuff isn't really necessary. Couldn't help myself cutting the big parts from the runners and tape them together. Fit is good and with careful building filler isn't really needed. The only place where some filler is needed is the join between the wing underside and back of the fuselage. Personally I can't wait to really start on this one!5 points
-
The exhausts are in and she's very much standing on her own legs: The position lights made from red or blue acrylic sheet turned out quite nice: Targeting pod: The True Details wheels are outstanding: This is by far the most challenging build I have done and even though I get gratification from the result, I am borderline not enjoying building anymore since every single step of the process is painful. Hardly anything fits, I guess Aires just threw in the towel on fit also, the front door hinges in no way match the Aires gear well. Can't wait to get her done! Cheers, Marcel5 points
-

Unique opportunity 1/32 Andover C1
scvrobeson and 3 others reacted to Iain for a topic
I'll get some more posted as soon as I can Anthony - unfortunately the kitchen table is piled up with school work at the moment - and it's the only space that I can lay everything out that's big enough here at home. I couldn't resist the comparison with HK Models B-17: all very well seeing the 3D model, and Toshihiko's photos - but putting it next to the Fortress gives a proper sense of size! I'm going to put together a proper review for the site - partly for the use of 3D print technology, rather than just subject. Iain4 points -

Unique opportunity 1/32 Andover C1
scvrobeson and 3 others reacted to Iain for a topic
Well, whatever it is - it's larger than a B-17! Seriously though - I've only had a chance for a quick look through so far - some areas a lot better than I expected, some not as good. Some problems with the build that I expected won't be the problem I thought - but I've found other things that will need to be worked on. Some parts I expected to replace anyway, need to be replaced, others are way better than I expected. Let me gather some thoughts - and some proper photos - and I'll share accordingly. But I can answer the gazzilion dollar question - do I think it was worth it at this stage? A very solid yes - and it's going to be one 'ell of a canvas IMHO. Thank you for arranging Anthony! Iain4 points -
Hmmm.... Parts? Parts you say? Not sure what you mean Tim? Plastic ones? Printed, Mk. 1, for the use of, type parts? You're being far too vague... Found this though - intriguingly marked 'test piece': Would it be that kind of thing you're looking for Tim? Iain4 points
-
From my personal perspective, Ive got everything I need from Sir Peter with the exception of the WnW DR.1. It seemed so far long in production that it would be a true shame if it never came to light, but I still hold out hope it may come to light until some official word from them tells me differently.4 points
-
ASR Spitfire MK.IIc
Pete Roberts and 3 others reacted to RLWP for a topic
The fuselage is now sealed up and the cockpit is in Richard4 points -
Please allow me to summarise the WNW threads: "those who know don't speak and those who speak don't know". All discussions about WNW drift away because it is hard to stay focused when reading the same BS over and over again. Radu4 points
-

Are there any 1/32 modern US Navy paint masks?
coogrfan and 3 others reacted to BloorwestSiR for a topic
I've used the Eduard ones on a couple F-4 builds. They work but do require more care. You also have to do them in batches. Carl4 points -
I made out in the back of a Fiord once....in Norway. Still get nostalgia every time I hear McCartney sing Norwegian wood.4 points
-
It is a nice theory, although if I'm completely honest, it was simply thread drift on my part because I like cars. For us there really is no intentional drifting here, & for me personally it could have happened in any thread. The lack of knowledge on our parts as modelers re: WnW is evident in all these threads really, it's just one speculative thread after another. I want to know what's really up with Sir Peter and crew as much as anyone, but all the threads about what's going on with them pretty much end up the same way, not due to any of our interventions, but due to the fact that no one actually knows anything.4 points
-

1/32nd scale Avro Shackleton - scratchbuild project
KiwiZac and 3 others reacted to tomprobert for a topic
Evening guys and gals, I've now painted the seats and control columns: Untitled by Thomas Probert, on Flickr Seatbelts are some left over etch from something or other - not sure what but they're 1/32nd scale and do the job. This gives some idea of the position in the cockpit: Untitled by Thomas Probert, on Flickr And now the pilots' seats and control columns go into the box of tricks with the other interior parts already made ready for proper installation when the time comes: Untitled by Thomas Probert, on Flickr Only the throttle boxes and overhead panel to go now. Happy days. Night all, Tom4 points -
evening folks a bit more done over the bank holiday... I started to work on the left hand side console as seen below - I don't have a drawing of this side so I made one from scaling multiple pictures, made tricky by the oblique nature of the photographs - note also the oval pressing shapes which would need reproducing... ..I made up a female shape as I did with the first side, but I couldn't get happy with the results - the metal curves into the hole rather than the sharp lines seen in the photo - I tried annealed (left) and non-annealed metal, but both were a fail.. so I used the drawing I made to generate it in 3D and will just add a metal side plate and fair in the join - here is the pre print image Tim sent me.. you can see the console on the left and the other bits are the artificial horizon as thats quite an iconic part (& cannot be done in etch) and the Ausgleichsgefäss that sits unfer the main panel in the one cockpit photo I have.. ..so while that gets printed I moved on to sorting the fuselage around the cockpit.. ..I scaled the Bentley drawings and marked the key lines of the rear bulkhead & floor.. ..then I cut out the sides and added scaled templates again from drawings to make sure the bulkhead shapes were correct - they were out quite a lot - the rear especially was flat sided and too narrow compared to the template so the first round of P38 filler was added to start to bulk it out.. ..once that was done, the canopy area was checked, again this was a bit out with the angle being wrong (too tall at the back), too low, and the 'footprint' shape being too fat at the rear - I started by correcting the angle to the right one.. ..then a scaled template added to make up the height and give the correct shape - I added a brass sheet tip so I didn't sand away the right shape... ..another set of templates added and the whole lot filled with P38... ..and after shaping & priming, I know this bit is right... ..also made double sure the front was right.. ..I also added the nose bit (not the cowl) and tried to replicate the unique top cowling area the V18 had - it is not the same as any A or D model so all I can do is work from photo's - it's not finished, but it's closer than it was.. ..I now had made enough changes to start to set out where things go by using the drawings to give me a scale skeleton of major reference points.. ..I will start with the sidewalls, so I cut some litho sheet that overlaps slightly front and back and made a jig for the sheet to sit in - this is both sides, on the right is the carrier, a sheet that the actual sidewall will sit in that matches all the cross section drawings and on the left a sidewall is sat on it's carrier with the areas that will overlap the fusealge taped up so I know the boundaries of the space to work in.. ..it's this sort of principle - I can keep taking the sidewalls out of the jig to align with parts etc and build up the detail until at some point they get mounted - I can then just skin over them.. TTFN Peter4 points
-
Hi everyone, would like to share my current build with you guys. I'm building an old Roden's Fokker Dr.1 kit, decided to make 477/17. Started from engine (as usual): - removed plastic spark plugs, cut 0.6mm diameter medical needles and put a small piece of wire Then painted engine in black, and silver, spark plugs in white Used a brown/black oil wash to show a used engine efect Added wires to spark plugs and engine is complete3 points
-
My kits arrived today. Looks good. First aftermarket part needed is a metal McCauley ground adjustable prop. Despite box cover depicting one, the kit only has the wood Sensenich prop included that I could find. Still, I am tickled to have them! I’ll have to do a quick comparison to Silver Wings beautiful kit later.3 points
-
Mine has arrived too! Florin3 points
-

F-117A • Nighthawk
GROWLER 96 and 2 others reacted to F`s are my favs for a topic
PS: it looks like the seamlines have gaps here and there but that's because of of the trasnparent glue which is almsot polished... all the facets are sanded with 1500 and 2000 grit sandpaper. The leading/trailing edges are nicely straight:3 points -
Found these in there too... Clever bit of drainage pipe perhaps? Iain3 points
-
Ok I will confess...I visit the WNW site everyday in hopes of an official update.3 points
-
This whole thread and all threads about WNW are a form of "drift". There is no official update from WNW. Everything said about WNW in these threads is made up stuff, some credible, some fanciful and some crazy. WNW stuff said on forums may seem to be "on topic" but it is still made up. There is a mountain of BS built on an anthill of information. Drift about cars is not taking anyone "away from the truth". Radu3 points
-
Why aircraft? I love everything that flies and has wings. I love the sky and I have to be carefull not running against a light pole gazing at the clouds every once in a while. I always say, the sky is one of gods most beautiful canvases. It sounds childish but I would wish once I die and god has mercy and accepts me in his kingdome he would give me wings and the ability to fly. It's an amazing concept. Why modelling? Quite frankly and soberingly because very often it is - along photographs - the only thing that remains as a memory long after the original has gone the way of all things earthly. Models are like threedimensional images for me to ponder and reminisce about the sadly all too often long gone original. Why do I model what I do the way I do it or better what do I model at the moment? Currently I concentrate on everything I have some sort of special relation to or fond memory of. I like building things like the first or last of a certain type I saw, touched, I once sat in, I finally could see life for the first time or could say goodbye too. I currently build the first live F-14D I ever saw, I hope to get around building a 1/32 rendition of The Ghost Tiger Typhoon and me because it was my design, I hope I can build the Persian Tomcat I was able to feel and touch and get myself photographed with two years ago, simply because as things are sadly at the moement it will most likely be the last ever Tomcat I will have been able to touch and feel. I like recreating moments. To me models are like 3D-photographs that you can look upon every once in a while you pass by the case and reminisce about the good ol' times or that one initimate moment or that you can tell others about when they visit and pass by and just in case they show interest. To me, my models are usually connected to a heartfelt moment.3 points
-
Brilliant recovery - and absolutely love watching this project come together - hugely inspirational... Iain3 points
-
Not I, but the post I replied to. My point was that I trust the admins to control how a thread runs. Off topic, on topic, or anything in between. This is one of the few sites I returned to after a long hiatus strictly because the admins do a great job.3 points
-
HKM new rebox B-25J MTO
Out2gtcha and 2 others reacted to FreightDog for a topic
Just finished my motorised glass nose (original boxing) and agree with everyone who recommends building this... the wing join design is absolutely amazing and seems to be a HKM thing. The ONLY thing I disliked (hated actually) about this kit was the engine; the implementation of the engine wiring harness which involved each individual cable, and the rocker covers which despite following the instructions to the letter just didn't fit. As I was always going to display it ready to taxy it wasn't the end of the world but it'd be great if they've fixed that in this version.3 points -
Wow... WNW gone....
Out2gtcha and 2 others reacted to esarmstrong for a topic
Great day to wash a Pontiac Firebird. Have I showed you a picture of it? Got it from my grandad Think Peter Jackson might revive WNW as a modeller of vintage auto mobiles. Does Ronny Bar do car profiles?3 points -
That's great news Bill, wonder if I'll be getting the Lanc I pre-ordered..? Back to the serious stuff, one of my uncles had a Pontiac Firebird, I think it was red...3 points
-
Wow... WNW gone....
MikeC and 2 others reacted to esarmstrong for a topic
Thread drift has reached an all new level in here...3 points



.thumb.jpg.cd22b958c9e88a898a21e18b862c523e.jpg)


