Leaderboard
Popular Content
Showing content with the highest reputation on 05/02/2020 in all areas
-
This’ll be a very long term project that I will likely work on in between other things. An HK Lancaster with parts I’m designing and printing at home to convert the plane to a Lincoln. This is one BIG model! The conversion adds roughly 3 inches to the length and 6 3/4 inches to the wingspan of the Lancaster and calls for a totally new nose, new wingtips, engine nacelles, longer ailerons and landing flaps, tail modifications, new wheels, and new nose turret and dorsal turrets. Probably other changes too but those are the main ones. It’s a project I started last summer and it took me until last week to finally get the nose drawn up where the contours look halfway decent. Prototypes of the new nose and fuselage extension were printed on my new FDM printer over the last two days and the wingtip extension printed last summer on my resin printer. The nose print failed at 99%; more than enough to confirm the shapes. A bit of tweaking needed but nothing major. A full section of the rear fuselage has been removed and replaced by a longer printer part. Simply cutting and adding a plug doesn’t work as the contour of the belly is uniform, and this way it means the farther-forward turret position of the Lincoln is also captured in one piece. This multi-colored extension section is one piece; ran out of filament part way through and had to use what I had on hand18 points
-
Long time since the last update. I put this kit aside to concentrate on getting both my OV-10A and F-100D finished. Now that they were done, I have done some more work. I remastered the intake bungs and added a lot more depth to them, also designing a small paint mask to enable me to paint the 3 SQN logo on them. I am not usually a fan of intake/exhaust covers but in this case, with a relatively boring paint scheme, they are essential to make the model pop. The ejection seat was the next area that I wanted to change. The kit one is OK, but differed from the excellent walk around photos of a seat that my good mate Peter took. I removed the back rest and made a new one from plastic card that I shaped and installed along with some Tamiya two part putty to make the large fairing behind it. I stippled Mr Surfacer over all of the cushion surfaces to give them texture, and then ditched the kit photo etch belts, cutting off the buckles and combining them with thin aluminium strip. I dressed the shoulder straps, hanging them behind the head rest as per some reference photos that I found. The painted seat. Still have a few small placards to do. The black strips of the pull handle were done with the thin strip decal stripe that separates schemes on most Wingnut Wings kits. I painted the cushions with a Tamiya NATO black. How it looks now. Sorta want to get this off my bench!13 points
-

1/32 ERA-3B Skywarrior - 3D printed / scratchbuilt
Coneheadff and 11 others reacted to Starfighter for a topic
Progress! I think I have managed to get rid of the reappearing cracks. After finishing the basic cockpit construction, the main landing gear bay was next. As usual, drawn with Inventor and printed on my Photon. My favourite task: cutting into models once the surface looks OK... 3D printed inner landing gear bay walls. The forward portion will be cut away as one can see through the entire fuselage when looking inside the MLG bay of a Skywarrior. Parts in situ. The lower fuselage skin including the interior details of the MLG bay were drawn and printed as well. Tail fin top radome and MLG bay bulkhead ready to have their supports removed. And another "favourite" task of mine: playing around with automotive putty to get things symmetric and straight.12 points -
Thanks guys! Moving forward just a little bit, I've glued the mount to the annular radiator to the front of the fuselage. It took quite a bit of sustained force to get it into place. View from the rear shows a significant step that will need to be corrected before I mount the radiator and flaps and front nose ring. Does the fun never stop on this one??? The actual radiator has been painted. Only the inside even though the outside of the ring is fully detailed as well. You'll only see a portion of the inside.9 points
-
AIMS 1/32 Bf 110 C-6
Uncarina and 7 others reacted to Pastor John for a topic
Hi folks, I was trying to keep this a secret and surprise you all haha but a few months back I started work on a 1/32 bf 110 C-6 conversion for the Dragon kits. Here are the profiles for the decal options offering a nice variety of paint schemes. The pod is nearly finished. Anyway I will post as and when I have something to show you all. Thanks for looking, J8 points -
P.11c -142 Fighter Sqdn, pilot Stanisław Skalski.8 points
-

How dirty does an operational A-10...
Troy Molitor and 7 others reacted to Martinnfb for a topic
I love the smell of depleted uranium in the morning8 points -

How dirty does an operational A-10...
adameliclem and 6 others reacted to D.B. Andrus for a topic
...get? Interesting loadout, too.7 points -

Ki-61-I-Hei Capt.T.Kobayashi 1/32 Hasegawa
Trak-Tor and 6 others reacted to Miloslav1956 for a topic
Hi all, my second Hien/Tony finished: Ki-61-I-Hei #3295 Capt. Teruhiko Kobayashi, Chofu AB January 1945 1/32 Hasegawa kit Wolpack cockpit & exhaust Dead Design Models painting mask All colours MRP7 points -

1/32 ERA-3B Skywarrior - 3D printed / scratchbuilt
109 and 6 others reacted to Starfighter for a topic
Giving up is not an option.7 points -
Some more progress. I finished adding backing pieces behind where the exhaust outlets are, and added two rings to extend the fuselage: I took the nose cap off of a F4f-3 and reduced the depth to a more reasonable dimension, capped the hole and filled all the holes: I then put some Milliput in the areas of the exhaust outlets as backing: Now, I lined up my reference lines to try and keep the engine on the thrust line as close as possible and added it to the fuselage: Now time for filing, sanding and carving!7 points
-
F-4J Phantom II VF-151 Tamiya 1:32
themongoose and 5 others reacted to Koralik for a topic
This time one of the most beautiful jets in the world. F-4J Phantom II VF-151 Tamiya 1:32 I made this model as always straight from the box, taking this model to the workshop you will not have any problems. Everything here fits together perfectly.6 points -
DSCN1776 by Rick Martens, on Flickr One whole day om the bench!! So lets get started DSCN1777 by Rick Martens, on Flickr Sprayed aluminum and after that some hairspray to create the worn look. Never tried this before but I have seen some very convincing results with this methode. After it dried black paint. DSCN1779 by Rick Martens, on Flickr DSCN1780 by Rick Martens, on Flickr This happened, all over the plane. What went wrong? Maybe the hairspray was not that good because it was an old can. Anyway it sucks so I had to start all over again. First get everything off as much as possible. DSCN1788 by Rick Martens, on Flickr In the progress the left horizontal stabilizer came of and I managed to break the tailwheel.....but it is fun right? I must admit I came very close to tossing this one in the bin. Again applied alupaint and borrowed another can hairspray because when I removed the paint I got the effect I wanted. But I was warned so I started with a small piece of wing. And the result was the same. I don't know what went wrong but that is the end of the hairsprayway on this one. I cleand the wing up and started with the black again. DSCN1792 by Rick Martens, on Flickr DSCN1793 - kopie by Rick Martens, on Flickr Now the black is very black. So I lightened the panels with a mix from blackgray and black and when I was done with all the panels I spayed some very dilluted black paint over it to blend everything. DSCN1801 by Rick Martens, on Flickr DSCN1804 by Rick Martens, on Flickr DSCN1806 by Rick Martens, on Flickr The black is not so black now. I have to wait till daylight to see how it came out. Rick6 points
-
The exhausts are in and she's very much standing on her own legs: The position lights made from red or blue acrylic sheet turned out quite nice: Targeting pod: The True Details wheels are outstanding: This is by far the most challenging build I have done and even though I get gratification from the result, I am borderline not enjoying building anymore since every single step of the process is painful. Hardly anything fits, I guess Aires just threw in the towel on fit also, the front door hinges in no way match the Aires gear well. Can't wait to get her done! Cheers, Marcel6 points
-
75 Sqn RNZAF Mosquito Detailed Build
Greg W and 5 others reacted to Anthony in NZ for a topic
Nose lamp wired in, gun adjuster tubes added etc, now painted, clear coated ready to glue on once the machine gunbay is finished and painted. Unfortunately you can hardly see any of this interior Thanks for looking6 points -
Thanks for the comment guys. A bit more work on the G-14 as well... Can't really tell from the pics but the fuselage has been riveted. Before I glued the port sidewall into place, I painted a few of the wires in yellow to kick up the visual interest per Vincent's suggestion. I also put the seat belts on. The attachment still needs to be worked out later so I've chosen glue spots somewhat below so I can move the belts out of the way when I have to smooth out the rear deck of the cockpit. Since the riveting is done, I've glued the fuselage sides together. Kinda cool doing this now with nothing else in inside of the fuselage. I'll attend to the center seam before moving on.6 points
-
Matchbox 1/32 Bf109E-3 Resurrection
Paul in Napier and 4 others reacted to turbo for a topic
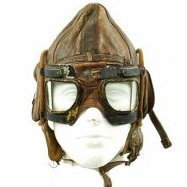
Small update. A bit of post-shading around structural elements such as slats and control surface ribs with Tamiya Smoke to start building depth. Be back with the first weathering steps shortly...5 points -
As usual, I glue everything that´s possible before having to paint. ”Mini-builds” as the cockpit, bang-seat (which I will not use) wheels, landing gears, wheel wells, weapons, and all those small subassemblies in a kit. The seat in the kit is… OK, but I always prefer a resin seat with molded seatbelts. The only M.B. Mk.4 I could find was a seat from Isra-Cast, but did Israel use the same seat as France? Anyway, Isracast´s seat is miles ahead of the original…. The wheels did i find in Eduard´s Brassin range, as usual very nice and just enough weighted. The wheel wells are nicely detailed… The seat and wheel hubs painted with Alclad Black Microfiller Primer (ABMP)…. The detail in the wheel wells really pops out under the ABMP…. ....and in the nose wheel well…. …and the cockpit… The detail are OK, but it could have been better…. More to come... Cheers, Stefan5 points
-
5 points
-

Double scratch build: 2x 1/32 SAAB MFI-9B Junior aircraft
Starfighter and 3 others reacted to Derek B for a topic
To keep my motivation going, I have decided to dabble in a little scratch building in between a demanding model project. As my modelling passion is themed on Greek and Swedish aircraft, I needed something small and (relatively) simple to scratch build. Also, as I have only limited availability to my modelling materials and tools at present, I need to use what is at hand - so I am going to turn a pile of scrap vacform kit backing plastic into two 1/32 scale MFI-9B aircraft. Derek4 points -
Spitfire Mk.V.C RAAF 457 Sqn. F/O ‘Bush’ Hamilton
Lud13 and 3 others reacted to corsairlada for a topic
Spitfire Mk.V.C RAAF 457 Sqn. F/O ‘Bush’ Hamilton Revell Mk.II 1/32 conversion set Mk V.C. Real Model /here in the forum Miloslav 1956/ Montex mask, wheels Eduard, exhausts Quickboost filter Vokes Spitfire Hasegawa, colors Gunze C Guns barrels RB Production4 points -

Italeri TF-104G Marineflieger - final struggle
F`s are my favs and 3 others reacted to Fanes for a topic
Thanks Carl, that makes sense - I guess? Well I've been busy at work and the good wheater in combination with low motivation lead to some stall. But here's some colour! Ok, black is technically not a colour I used Alclad black primer and microfiller straight from the bottle and it went down nicely with a slight sheen. With the third order in the lasts months I finally didn't forget to get some dark gull grey. It is my first attempt with AK real colors and well they're okayish. Coverage wasn't as good as MRP and Mr.Color, more comparable to acrylic paints. After a lot of masking the black areas of the cockpit recieved a mixture of Tamiya NATO black and semi gloss black. I was too lazy to mask of all the instruments. Guess who's already in regret? I've spent most of the afternoon brush painting the small stuff. No pictures so far since I'm not happy with my "perfect circles". Cheers Joachim4 points -
We all know the answer is 42.4 points
-
Hi guys, in addition to dedicating a fair amount of bench time to WWI aircraft this year, I also wanted to work on some naval subjects. As I have a lot more bench time - in addition to yard work time - on my hands right now then normal I opted to try my hand at a new technique for me; a ship set in a dynamic seascape. Previously I have only built one water scene; a Type IIA Uboot taking on supplies at a pier in Kiel. Though I modeled the water, it was a static harbor scene and simulating the rippled surface was not that hard. I researched the topic of wave motion caused by a ship underway and that turned out to be very complex topic indeed. I learned a lot and attempted to use what I learned on this build. The ship is Trumpeter's 1/350 scale USS San Francisco as she looked in 1942. I built the ship OOB and the only change I made to it was to simulate the damage the San Francisco suffered when she was struck by a burning Betty bomber on the afternoon of 12 November 1942. I also did not weather the ship as the scene I wanted to simulate shows the San Francisco during the First Naval Battle of Guadalcanal during the early morning hours of 13 November 1942. The diorama captures the moment just before she opened fire on the IJN Hiei that was sailing on an opposite course off her starboard bow some 2200-2400 yards away - pointblank range for the big guns of heavy cruisers and battleships - and just as she was illuminated by the searchlights of the Hiei. The San Francisco was the Task Force Commander's, Rear Admiral Daniel Callaghan, flagship and the thread title comes from part of the last command he gave; right before the San Francisco was hit by the first fusillade of what were eventually 46 hits of various calibers. Rear Admiral Callaghan and his staff were killed only moments after he gave the command to "Get The Big One First!" when the flag bridge was struck by two 6" shells. In addition to the technical challenge of simulating ocean waters - enclosed as the were in Iron Bottom Sound - with a ship underway on their surface, I had to come up with a way to simulate a ship at night being illuminated by a searchlight. I used a technique I saw the excellent German modeller, Guido Hopp, use to simulate the water. It turned out alright for a first time though I think I could have done a better job on the bow and transverse waves, as well as the wake. But overall I am satisfied for a first run through. I did not make the water super glossy as the scene is set at night. As you can see in the photos, there are two distinct shades to the water. The port side of the ship is darker, while most of the starboard side is lighter to simulate the reflection of the searchlight. Overall, the effect turned out ok and looks the part. The ship itself is also two distinct shades for the same reason. I mentioned above that I did not do any weathering, or varied the tone of the paint on the ship. Though I have never seen a warship illuminated by a searchlight I have seen my share of terrain under flares during my career in the U.S. Army. Direct lighting like flares, and I am sure searchlights as well, create stark contrasts between lights and shadows, and the harsh light leeches small details from the object being illuminated. The transition between light and darkness is also very abrupt. So I used different shades of paint to attempt to show a nighttime scene in broad daylight - as it would have looked at night. I'll let you all decide how successful I was at that! To begin, some overall photos: And now some close ups: This last close up shows where the Betty hit the San Francisco during the afternoon of 12 Nov. The impact damaged Battle II, the aft 8" director, destroyed two 20mm AA guns and some of the light armor around the platform. It also killed 22 sailors and wounded 22 more. Most of the damage to Battle II and the aft director was repaired before the battle. I did my best to accurately replicate the damage from the Betty using photos. Below is my attempt to use some lighting tricks while photographing to better simulate the San Francisco caught in the glare of the Hiei's searchlights. I hope you have enjoyed the photos, and please feel free to critique! Ernest4 points
-
Avro Lincoln - the Lancaster is too small!
Alburymodeler and 3 others reacted to seiran01 for a topic
Transport joint? I’ll be building this in the grey over black scheme with massive white fuselage codes but as I do have extra nose halves I’m toying with an RAAF mk.31 forward fuselage as well. thanks folks :-)4 points -
I remember how grubby the Wyton Canberra fleet used to get with their cartridge start systems throwing black smoke over the fuselage ahead of the wing and around the exhaust ports on the engine nacelles. The example below is actually quite clean. Speaking of which I still have some of the litre tin of MEK that was used to clean airframes given me by a Wyton liney in the early '90s left. A bit like Tamiya extra thin cement, but evaporates much faster, especially if the cap of the can isn't replaced immediately after refilling a 20 year old Humbrol bottle. Gotta love the guy's hand casually hanging out of the DV port.4 points
-
Polikarpov I-153 ”Chaika” ICM 1/32
Paul in Napier and 3 others reacted to Phantom2 for a topic
Hi all! I couldn´t get any HGW belts, so Eduard´s will have to do… But they look really good when in place and I have begun the painting the details in the cockpit…. A black-Brown wash (made up with white spirit and some artists oil paint), some scratch marks and wear and tear later I call it done…. More to come soon! Cheers! Stefan4 points -

PR.XI & Mk.Vc - Revell Mk.IXc & Mk.IIa kits
VW Chris 1969 and 3 others reacted to Wackyracer for a topic
PRU Blue, after much more sanding, polishing and refining finally time for some paint! Used white and buff through a texture mask and also some brillo pad to get some texture under the surface. As with most cameras and the associated jpeg files its difficult to see the variation, but in real life its there abet subtle4 points -
1/32 Trumpeter F-14A Tomcat
Greg W and 3 others reacted to Mark Jackson for a topic
I have been modelling, honest.4 points -
it took me around one year, then could not get enough of it so decided to add a piece of carrier deck, but in the end completed it last week. please find below my interpretation of Revells F/A-18E with the best of my modeling skills and patience. Added aftermarket ejection seat, pilot, cockpit interior, wheels and decals and did quite some adjustments on the inner structure to make all parts fit. the Maverick missile came from Academy. The build thread can be found in the works in progress section. Thank for looking!3 points
-
Hi all, I took my sweet time, but finally finished another build. This time the Revell Me262B-1 nightfighter. I wanted to do another wheels up build. Luckily I had some pilots from my ZM He219 lying around waiting to get in the air. So I did a pretty quick build of the cockpit because not much will be seen with the pilots in them and the canopy closed. All in all it was a pretty tight fit. The rest of the build is pretty straightforward although I had some trouble closing up the gundeck. There are some pretty large gaps and steps to be filled and sanded. The same with engine covers. Just another example where the kit is designed to be build with panels open instead of closed. Anyway with that all sorted I had to make a choice for the color scheme. I really liked the one of Red 8, so went with that one. I found an excellent thread from Mark aka 'Madmax' here on LSP: Link. He did some research on this particular ac which helped me a lot. So all in all I'm pleased with the result. It's not my best build (had some trouble with the canopy as is evident in the pictures), but it looks pretty cool in my opinion. I've left off the external fuel tanks, because I don't like how they disrupt the lines of the aircraft. My guess is that the pilot dropped them before getting in action. Or call it artistic freedom. Products used: - Revell Me262B-1 - AIMS decal 32D007 - Master model FuG 218 antenna - Mr. Paint - Pilots - Zoukei Mura He219 - model stand of unknown brand3 points
-
Cold War Dragon Lady
Daniel Leduc and 2 others reacted to Lee White for a topic
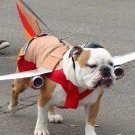
Well, I've gotten bogged down a little on the Firebar, and want to work on something else for a bit, but still stay topical. So, on the 60th anniversary of FGP's fateful trip over the USSR, I dug out my ID U-2. It's already cut out and sanded, so, I don't have to worry about that. Pics to follow. I'm going to cheat a little (again) and try and steal the cockpit tub and seat, suitably modified, from a surplus-to-requirements Hasegawa F-104. Also, no decals!! Woot!3 points -
Unique opportunity 1/32 Andover C1
thierry laurent and 2 others reacted to Anthony in NZ for a topic
Aparently according to the news last night, Air NZ is setting up freight only flights around Asia Pacific and USA. So there is hope on the horizon. Mines in the printer now.... Sorry mate, missed that comment. This is the Euro 1 / Lizard scheme I am planning. With the back doors open and the u/c 'kneeling' Cheers Anthony3 points -
Very brief update. Here is the starboard cockpit wall, I added a few more wires and some color to the fuseblocks (see above). Still need to add additional wiring (some of this will need to go in after the cockpit is fully assembled) and do some touch-up painting. Also still trying to find a picture of the Nav's intercom panel so I can scratch build that. Aside from those items, this assembly is pretty close to complete. Now moving onto the port sidewall. Here's the real thing, as with the opposite side, there are a lot of wires and small fittings present. And here is the stock Tamiya assembly. Only thing I've added are some placards from the Barracuda set and I did a small bit of work on the throttle quadrant. Tamiya really went easy on this assembly. As you can see, I've got a lot of work to do. The picture also highlights some flaws to my painting so I'll be correcting those as well. BTW, if I didn't mention it previously, those raised circles on the sidewalls aren't ejector pin marks, they are accurate representations of the wood reinforced mounting points on the side walls that could be used to screw in various fittings and fixtures. Otherwise, the wooden sidewalls were too thin for the screws. Anyway, that's it for now, thanks again for looking and have a great weekend!3 points
-
Another Felixstowe, (Just to keep the first one company).
MikeC and 2 others reacted to Bradleygolding for a topic
Hi Folks, Progress is slow due to all the masking and running out of paint. No one in Adelaide or on mail order seems to have any Taymia Flat Red or Flat White! I have enough to do the top I think then might have to change brands and deal with the colour changes. Steve3 points -
The world's gone all Spitfire-shaped Richard3 points
-
3 points
-
Hi Peter, I will check it out. I painted the model using MRP camouflage grey, then used the MRP Have Glass flat clear which has very small reflective chips in it. I then clear glossed the model using SMS clear and applied the decals. I used the Ronin graphics 3 SQN decal sheet for the tail eagles and the serial numbers but elected to use the kit stencil data and roundels as they were a bit larger and more lighter. I made up some intake bungs, and the small bung that goes into the small intake above the right side engine intake. I made some resin copies of these. I will make these available for purchase once I rework the intake bungs a bit more. A small rope will be added to the bung.3 points
-
Calling the cockpit done now - will post some photos later... Some bits to add to the fuselage and I can close it all up. This is taking waaaay longer than it probably should - but learning some new techniques fast - and subsequent builds are going to be a lot quicker I reckon. Some clever engineering - I think I can now understand why folks are getting hooked on these - if you have any WingNut Wings kits in the stash and have been putting off building them - dive in - the water's nice and warm! Iain2 points
-
Windows Key + Print Screen will also generate a screen shot, if you're a Windows user. Crap... Somehow, I missed all of this. Its probably because I've been working full time doing the teaching classes from home thing. I'm not complaining, I have a job, something that a lot of people don't have in these times. There were several WNW kits I wanted, like the ship's Camel and the postwar Bristol. Oh well... I have about 20 WNW kits in the stash and I'll survive. Trying to keep it all in perspective, while I am saddened by their closure, I'm more concerned about the workers and designers who are now out of work. We have them to thank, along with Sir Peter's cash, for the wonderful models. My hope is that someone who values what Wingnut made will buy the molds and continue producing these kits, perhaps reorganize the company and restart it in some form. You have to wonder what else was in the development line. We know about the Lanc and the Fokker Triplane but what else could we have had? Anyway, enjoy the kits while you can. Have fun building them and raise a glass to those who made it possible for us to have our fun. I will. Bob2 points
-
80 years since Battle of France and soon to be BoB.
Rick Griewski and one other reacted to dennismcc for a topic
I know the feeling well Max, there are so many kits that I want to build NOW, but I cannot build them all Cheers Dennis2 points -
Lt Stanisław Skalski when he served in the 142nd Fighter Squadron in Toruń (1938/39). Skalski during the WW2 became the top Polish fighter ace of the war and the first Allied fighter ace of the war.2 points
-

conversion Mirage III .....to Atlas Cheetah C
alain11 and one other reacted to Isar 30/07 for a topic
Alain, this is impressive, inspiring, motivating.... simply stunning! Cheers - Reimund2 points -
Wow! I’ve been under highway tractors that were cleaner than that! well, ok not really but still, that’s dirty!2 points
-

1/32 Messerschmitt Bf 108 'Taifun' by Eduard
scvrobeson and one other reacted to Iain for a topic
Looks like this kit will be with some of the UK retailers in the next week, or two. Just ordered one... Iain2 points -

Ford's Thunderbirds Mustang Tribute
Alex and one other reacted to themongoose for a topic
While I'm working from home I've got lots more time to build. Finally got this one out of the stash to complete the set. Thought I would post it here as it's related to my 1/32 LSP! So here's what I started with... here's what I was trying for... and here's what I got! Over on Finescale a couple car guys really turned it up a notch from my perspective! Not realizing how big of a picture window that rear hatch area would be without the stripes and headrest trim this would have been an ugly black hole... Went to put on the side mirrors. Do they look big to you? Also, there was no glass for them, just a big fat ejection pin mark :-) Added some 0.005" card and some NMF. Fixed :-) While I was waiting on paint to dry on the mufflers there was time to make a chin spoiler. Not sure where this got lost earlier on but it's on now! The big reveal to close it all out...and the reason why this car caught my attention early on, the skid plate [blns] This is also out of 0.005" sheet. This one now sits with my 6 Thunderbirds planes. Now maybe I'll start the Spitfire one...2 points -
USAF F-100D FINISHED!
Supersonic and one other reacted to ericg for a topic
Thank you very much for all of the kind comments. I was able to arrange a video call with Ron to show him his jet. We spent over an hour talking, and even though we were on opposite sides of the world (Texas/Queensland) it felt like we were in the same room. By far, my favourite part of the build. I got my son to take a pic of the event.2 points -
2 points
-
Well I do have more progress and details of some more "challenges", I masked off and airbrushed the red sections of the lightning flashes and was really pleased with the way it went and removed the masking. It looked great apart from some addition red bits which were a mistake but easy enough to fix. And the other side showing the extra unwanted red portions Then I twigged the obvious mistake which you have probably noticed already, I forgot to airbrush the anti dazzle panel, stupid boy. So more masking was called for Then the old airbrush was got out and the masking removed, this revealed that I had got it right, which was a big relief as the alternative was to start again and repaint the lightning flashes, note that when airbrushing the blue black the cowling was only fitted with masking tape and the engine was not fitted. With the engine fitted the cowling did not sit as far back as it did with no engine, so there was some green showing, so out with the masking tape and it was airbrushed blue black. . Then with everything corrected I could fit the engine and cowling permanently, this was not a very positive fit and careful aligning was necessary. So very close to the finish line now just got give it a matt coat and fit these bits and bobs. Cheers Dennis2 points


