Leaderboard
Popular Content
Showing content with the highest reputation on 04/07/2020 in all areas
-
As promised, final pictures of the Panther under a glorious sun. One of the best kits I ever built. I used the casted brass legs Paul produced two years ago and given the sheer weight of this aircraft, I don't regret the purchase. I encourage anyone who has this kit to build it, it is a serious treat. Cheers, David10 points
-
Thanks guys! Inching along with the markings. The port side decals have been completed. I had to use some heavy-handed techniques to get the Mickey Mouse decal to settle into the panel lines. Multiple applications of different decal solvents (MicroSol and Solvaset), physically cutting the decals along the panel lines and even running the rivet wheel across the decal.10 points
-
A little more to show. These are the 5 skins for the rear well. Total time to make about 90 minutes. Wiring to follow. Dan9 points
-

SYLDAVIAN P.11C. The final cut!
Starfighter and 7 others reacted to quang for a topic
While waiting for the paints I ordered to arrive in the mail it's time to deal with small details. The gun troughs are rarely convincing on models. The IBG kit is no exception. Before: Extension with milliput: Final result: The jettisonable fuel tank is another interesting feature in the PZL. IBG did a credible job in representing the tank but didn't provide the way to affix it. This is how I did it. The tank OOB: I put a small roll of milliput around the lower part of the tank: Then delicately lower the fuselage opening on the fresh milliput. Make sure the fuselage is level with the tank. Leave overnight and voilà. The tank in situ I also spiced up the stock radio transmitter with a bit of wire and tin foil. Unfortunately much cannot be seen once in situ. Ah well! Next step: the power egg. See ya then Signing off, Quang8 points -
It has arrived today. Actually, the cover is the first one. But what a book it is! And with a lot of goodies inside: Definitely worth the money. Now I need to dive into the french tongue... Or convince my daughter somehow to translate it for me. That would probably require buying a horse though... Ok. Now we need the model! Juraj8 points
-

Teutonic Starfighter
HerculesPA_2 and 6 others reacted to Madmax for a topic
The main wheel well was really bugging me, so I decided to start there. First thing was to scrape off the plastic spaghetti and get a feel for what goes where. No idea what that structure is in the forward part of the well, but it disappeared too. Then a pretty big challenge - I don't want to glue the main wheel strut in place at this early stage as I will almost certainly break something delicate off before the model is done. Some say it can't be done, but I think it can. Here you can see how I separated the cover from the keel structure, which opens a gap to slide the strut in at the end of the build. Afterwards one just glues the cover on top of the keel with some pins to help locate it. I hope it works ... Next I established the main fixed parts of the hydraulic architecture, including these complex castings that appear to be called "main landing gear selector solenoids". From here the piping can be connected to sensible things unlike the kit pasta approach. Using cut up hypodermic needles normally saves some time, but not in this case as I had to insert 0.3mm pins into 0.5 mm piping to connect these pipes . And this is as far as I got today. 3-D at last!7 points -
And work progresses... I completed the map storage locker. Underneath this was the storage area for the navigator's chest pack parachute (the pilot had a regular seat-type chute). Tamiya provides the chute molded into it's storage compartment. I doubt the chute would have been left in an empty plane but I'm too lazy to chisel it out. My thought is that the Nav put it in the aircraft and then jumped out for a last smoke before the mission. Still can't imagine having to bail out of this aircraft, at least the pilot was already physically attached to his chute! Only added detail was the carrying strap to the chute, which I made from scrap PE. I'm planning on going back and adding a folded map to this assembly as well. Here are a few pictures, note again that the pilot's armor assembly is just dry fitted in place. Still much more to add for detail bits and paintwork. Sorry for the crappy pictures, it was pretty overcast today.6 points
-

German F-86K, Neuburg AB.... FINISHED..Part 2
chrish and 5 others reacted to Daniel Leduc for a topic
So far, everything went pretty whell this week-end, my flat coat on the pit was done with no problem, first time with Mig product, not bad.à I gave a last shut on the intake and it paid off, the result is acceptable, so now I'll have to get myself a seated pilot from the '60s... So time to close that fuselage and do some patching/ sanding.. Main bay done with base oleo glued in place, found out from my previous built with the D that a little more stiffness will do good when time come to put the wings on... Enough weight in the nose to counteract the tail heavy.... Waiting for the strut to dry stiff, I'll prepare the seat fro the pilot. I'll have to check my references, I heard somewhere that those arm rest should be in down position until the pilot eject...? It's nice to see it on his wheels and weird with no wings, looks like a Go-Cart.... HI-Speeeed.....lol . I should be able to have the paint done this week, hope you like it ahd have fun. Dan.6 points -
Tamiya 1/32 F4U Corsair 1841 Sqdn Robert Hampton-Gray HMS Formidable
scvrobeson and 4 others reacted to ajaycad for a topic
Her is my representation of the aircraft flown by Lt Robert Hampton Gray VC when he attacked the Amakusa and was killed on 9th August 1945, the last Canadian VC of the war. There is much debate as to the markings and aircraft he used on that sortie, so here is my example. Thanks for looking Andy5 points -
Tamiya 1:32 P-51D Daddys Girl
Seversky and 4 others reacted to B1CrewChief for a topic
Here is my finished project. Tamiya 1:32 P-51D in the markings of Daddy's Girl This was an amazing kit to build and i have to say my best build yet. Hope you all enjoy. Some description of what i used. I replaced the kit instrument panel with a Eduard Look one. Also used HGW fabric seat belts and resin dingy. Painted with K kolors Aluminum, Tamiya mix for the bright green nose and MRP for everything else.5 points -

Airbus H 145 M RS Air Force
Loach Driver and 4 others reacted to ShelbyGT500 for a topic
Hello friends this is my next complete project - Airbus helicopter H 145 M, recently delivered for Republic of Serbia Air Force. The model is from Revel of Germany at 1/32 scale. There is no after-market for that model, so to convert the heli from police to army I have used a lot of scratch - photo-etched, plastic materials and also parts from spare box. I know that there is a military ver. at the market but I did not find it at local hobby stores, so I got the police one and re-worked it. The work at this model was a pleasure, because it is a new item - from 2016-2017 and all parts fits like a Lego So here she is: And I hope you will like this birdy Cheers guys and as always thank you for watching.5 points -
Two wings just about done, so onto the fuselage next......after the re-scribing! I HATE re-scribing, I said I wouldn't do it, but........5 points
-
.thumb.jpg.f0920d798d5d8600fb58b1d8a906ddff.jpg)
IBG PZL P.11C | Polish Beauty | 1:32
Alain Gadbois and 4 others reacted to shadowmare for a topic
I made movable elvator by drilling holes and gluing needles from syringe. I have strengthen landing gear for paintning process. There was a chink between horizontal and vertical stabilizer, unfortunately you need to grid a little bit to make this. Fuel tank had nothing to stick to from top, so i glued plastic bar5 points -
From left to right - Hasegawa/Belcher Bits CF-5A, Italeri CF-104, Hasegawa Sabre Mk.6. Paints used were Xtracolor enamels. Decals by Leading Edge.4 points
-

HK B-17...C 5/4 sweating the metal
Derek B and 3 others reacted to brahman104 for a topic
Thanks very much Anthony! I'm slowly working my way through your epic Mosquito build too; looks like we're both in a labour of love Hi Ben, thank you very much for the tips. What you're saying makes very good sense and I'm keen to try it. Knowing your experience in all things 3D printed I'm inclined to follow your advice over a lot of the other weird and wonderful "how to print parts perfect every time" tutorials I've seen lately! Thanks again Ben! I likewise am a huge fan of your builds. There's something very satisfying about building something unique, and you Sir, are the master at that! While the print work on the nacelles is annoying, it's not slowing down the rest of the build. I'm currently installing the windows in the nose and cockpit, so I can finish as much of the interior walls as possible prior to reattaching the sections to the rest of the fuselage. All of the sections have been made using 1mm acrylic sheet. If there's one thing I feel I'm getting better at from this build is working with transparencies. Even though I didn't vac form these to conform with the fuselage contours, by having the 1mm thickness I was able to file them back to flush prior to polishing them. It takes a long time, but it's starting to look good. The only problem is that it's hard to photo once they're done as you can't see them On the inside of the cockpit I've thinned the window ledge out to make room for the sliding window track. Still some refining to do, but this should work okay. This piece, being thinner, will allow the window to be posed open. In the meantime too I've been getting my machine tools set up and ready to have a go at the landing gear. The transport crates I made for the move are proving to be fantastic makeshift workbenches! And lastly, here's proof that NZ is taking this seriously..... Cheers, Craig4 points -
Well I do have more progress and details of some more "challenges", I masked off and airbrushed the red sections of the lightning flashes and was really pleased with the way it went and removed the masking. It looked great apart from some addition red bits which were a mistake but easy enough to fix. And the other side showing the extra unwanted red portions Then I twigged the obvious mistake which you have probably noticed already, I forgot to airbrush the anti dazzle panel, stupid boy. So more masking was called for Then the old airbrush was got out and the masking removed, this revealed that I had got it right, which was a big relief as the alternative was to start again and repaint the lightning flashes, note that when airbrushing the blue black the cowling was only fitted with masking tape and the engine was not fitted. With the engine fitted the cowling did not sit as far back as it did with no engine, so there was some green showing, so out with the masking tape and it was airbrushed blue black. . Then with everything corrected I could fit the engine and cowling permanently, this was not a very positive fit and careful aligning was necessary. So very close to the finish line now just got give it a matt coat and fit these bits and bobs. Cheers Dennis4 points
-
The one outlier is the Mosquito, which is without doubt, Tamiya’s best 32nd effort. The kit was designed so that a bomber version could easily be offered, along with various night fighter versions as well. So far nothing has be released except the FB.VI. To me, an F-86 makes the most sense for a new kit. Good connection to their home market, hundreds of colorful schemes to choose from and these jets were used by dozens of nations. I would think a Saber would sell very well.4 points
-

Any Tamiya 1/32 rumours?
R Palimaka and 2 others reacted to williamj for a topic
F-86 Sabre....Only because I really,really,really, want one.3 points -

Ferrari 312F1, Chris Amon, Monaco 1967. 1/12, MFH.
Dart_Schatten and 2 others reacted to pg265 for a topic
Hi, I can now call this one done. Thanks a lot for your support and all the kind comments along the WIP Pascal3 points -

Any Tamiya 1/32 rumours?
thierry laurent and 2 others reacted to Tony T for a topic
Why does the subject have to kill, kill or kill? You blood-bath lozenge-obsessed WW1 hunting obsessives rigging inbetween drycleaning your pinks. Horsey time anybody Tony the robot3 points -
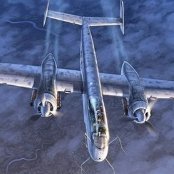
Hasegawa 1/32 N1K2 Shiden Kai (George)
dodgem37 and 2 others reacted to bdthoresen for a topic
Weathering of the cockpit now complete, I figured I would lay out all of the components for one last photo before final assembly and insertion into the fuselage. THOR3 points -
Started putting the wash on the smaller bits. I've also come across a problem: the propellor I used (Heine) doesn't fit inside the prop hub. I'm not sure if I'm going to carve the hub until it fits or display it disassembled.3 points
-
thank you all didt more work on the wheels still one more to go and a few details from the engine Mark now going for the last wheel3 points
-

HK Models B-17 E/F backdated to a B-17D
sandokan and 2 others reacted to patricksparks for a topic
a little progress, haven't been able to start ant new fuselage parts due to being confined at home, I use my computer at work to draw and don't have the capability at home(major software...) But anyway I sanded all the diamond tread off the HK tires, a lot of photos I've seen show the early B-17s with smooth tires. I also finished patching the cockpit roof and will do a cut-out in it for the commanders observation blister. Also I started putting the engines together, I am using Eduard photo-etched wiring harnesses on them and some Airscale decals for the data plates on the crank cases and also added AMS resin prop govenors.3 points -
Thanks for the kind word guys! I started putting decals on the model on Friday evening, I put the last ones on tonight...epic decal placement! I got the landing gear and sponsons on, washed the model with soapy water to remove the setting solution stains and should be able to satin coat next and finish assembly and wrap this up now. Thanks for looking!3 points
-
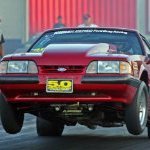
Jo-Han Maverick-Dyno Don's Ride-One Yr Project-Complete!!
Greg W and 2 others reacted to mustang1989 for a topic
After a weekend I've made some more progress on this bad boy. Then I robbed the foot pedal assemblies from an AMT Mustang kit and cut the grossly over scale swing levers from the back of each pedal. Then I formed up the levers and made some mounts on the back side of the dash in which to mount the swing pedals to..... I finished this part up this morning by painting the swing levers and pedals. I also darkened the steering wheel wooden ring just a tad.....3 points -

Interesting N.A.A. collection
MikeMaben and 2 others reacted to D.B. Andrus for a topic
https://www.aircorpsaviation.com/ken-jungeberg-collection/ Not affiliated with seller.3 points -
Saturday afternoon a package from Troy showed up on my doorstep. My first impression was the packaging of the product, once I figured how to remove the printed outer sleeve . The sander is packaged in a very sturdy slip top box that is a great storage case for the tool. The base, sanding inserts and electrical plug are in the bottom of the inner box and the sander itself is in a molded foam inner tray. The sanding inserts and 2 diamond tips are contained in a clear acrylic reusable box that would look great on the bench. Fit, form and function of the tool is of the highest standard and I could find nothing that would be considered a CON. I figured that like most starter sets for tools, there would be 1 piece of sandpaper in each grit and you would immediately either need to reorder from the manufacturer or find your own source. However I was very pleased to find not 1 but 10 sheets of each grit in the starter pack. I also had access to some foam sanding sheets so spent a couple hours putting the sander through it's paces and was very impressed. It's well built and feels like it will last a long time in the hands of a busy modeler. I am also a wood worker and have a large number of diamond sanding tips in various sizes and shapes as well as micro files that all fit the tool and are very versatile for working around a model. I know that Troy is hoping to carry both replacement sandpaper and sanding foam in the future. One thing I did ask him to research was the possibility of selling secondary sets of the sanding inserts so that the modeler would have the ability to modify them to custom shapes for that special need on a particular model part. I would highly recommend this tool and will be demonstrating it during our next virtual club meeting - my club held our meeting this past Saturday using a virtual product called ZOOM. There are a few hiccups to figure out before the first live meeting but we did 3 hours and I know everyone had a great time as we shared new tools and looked at what everyone was working on while trapped at home. Our club always has a couple video presentation each meeting and they can also be shown over the Zoom format. Give it a thought for your next club meeting, it will make the quarantine just that much easier. Jerry3 points
-
Hello, Here is my last kit finished in the last few days. This Panavia Tonado IDS is based on the Revell kit in 1/32nd scale. The Revell kit is old, with recessed panel lines but it is not up to the standard of these days. Many important details are missing, and some areas are not correct in size and shapes. This Tornado IDS was with the Italian Air Force (AMI) between the 1991 and the 1995 in charge of the 36 Stormo based at Gioia del Colle (south-est of Italy). The primary role of this squadron was anti-ship missions, thus the Kormoran missiles under the belly pylons. NATO dark sea grey-dark green with aluminum under-surface was the standard camouflage pattern for the italian’s strike fighters in those days. Some part as pylons and pods were still in Desert Sand temporary color applied for the first Desert Storm war. I hope you like like it… CIAO! Piero3 points
-

F-117A • Nighthawk
Dany Boy and 2 others reacted to F`s are my favs for a topic
Half way in the making: this is the overall decrease of the width of the exhausts - done on the portside, still the original on the starboard side. It is a small change but a big difference, it's way better now. Then I prepped the part with the vanes. I cut off the original ones and "redistributed" new slots according to the pattern of the real plane. This is... I took a pic with the plastic part just put over the screen of my laptop then by syncing the image below by taking the lower lip of the exhaust as a reference. I also shortened the slots for the vanes - the original ones took the entire width of the plastic part. This is, still not done, but just a test fit with some plastic pieces that I'll later use as vanes. Here is the difference between the arrangement of the vanes on the original kit part still not edited, and the new one. It's something like 2-3 out of 11 vanes to stay on their initial places where they were... all others needed a "relocation". Happy to do it justice. Of course this is just a bare test fit. I'll try to thin down the trailing edges, equalize the lengths, cant them slightly towards the centerline. And hopefully some airfoil profile... but I'm not quite optimistic on that.3 points -
Gloss coat applied (Alclad Aqua Gloss)... Port side decals about 75% done...3 points
-
Ok, some progress. Have a bunch of parts glued together, not much, but it's a start. Cockpits have always been my downfall. This one got basic paint, some minor detail painting. Have to admit, the colored knobs etc aren't exactly accurate. Still much to do, but with the pit done i can close up the fuselage. Don3 points
-
So on to some modeling updates. First off is the main cockpit floor assembly. The floor itself was plywood, with a brown primer to protect against fuel and hydraulic leaks from all the lines and fittings present in this area. To simulate wear and tear on the floor, I went with the "hairspray" technique. Still have a great deal of additional detail painting and weathering to do, keep that in mind. You can also make out the "sanitary container" under the pilot's seat area. Unlike the US who simply piped the pilot's relief tube to a port in the bottom of the fuselage, the Brits were considerate enough to have a container for this. No peeing over Nazi Germany for Mosquito pilots! Lastly, note the floor boards. I've seen a good number of models that replicate these as hardwood. From what I've read, they were actually made of a phenolic resin material called Bakelite (this is the same stuff used to make the seats on certain Spitfire variants). It was a pretty tough material, so I'll just add a few scuff marks / dirt and that will be it. Noted a bit of touchup painting needed in this area, I'll get that done prior to the next update. Next up is the Nav's back armor. I replaced the solid handle on the upper section but that was it for extra details. Note the awkward position of the fuel shutoff valves I mentioned in the post above. So much for ergonomics! I'll be adding some decals from the Barracuda cockpit set to this area as well. The upper part is clear, Tamiya thoughtfully provides masks for both sides of the Nav's "porthole". Underside of the pilot's seat: And lastly a few pics of the full assembly, just note that the pilot's back armor is simply pressed in place. Got some touchup needed around the crash axe holder I see. Anyway, that's it for now, thanks for looking!3 points
-

Dora Wings - Dewoitine D.500/501/510 in 1/32 scale
billwinkes and 2 others reacted to quang for a topic
I'm ready3 points -

Mig-17 Mali
Paul in Napier and one other reacted to Kosh for a topic
Hi I present to you the start of the assembly of my first plane at 1/32. No more getting used to building Russian equipment at 1/35, I am happy with this photo montage. Be forgiving this is my first plane in at least 30 years. As I like to work on photos, I started from this one, representing a Mig-17 F taking the sun at Bamako airport. The idea is to make the Mig-17 first and then the Mig-21 Bis behind on the same diorama. At the moment I'm stuck because I can't find a conversion to convert a Mig-21 MF to a bis. I might see to change later, the idea being to present the two planes at the same time. Compared to the photo, I opened and remade the entire interior of the cockpit to bring an interesting visual on the Mig-17 I also removed the seat and left holes in the instruments to accentuate the "parts store" side After painting and adding various cables As in the photo, I opened one of the inspection hatches and reproduced as I could the interior design. The wings have been refined, there will be rivets to redo The additional tanks and landing gear are ready. opening of inspection hatches Currently I'm redoing riveting at the Rosie This is where I am currently. I think there are a lot of mistakes to fix but this is my first plane in thirty, sorry. I'm more used to building tanks. I like to work on photo and I admit that I challenge myself although it is relatively big. Hope you like it. Hope you like it.2 points -
Lukgraph Westland Wapiti Mk. IIA - May release
scvrobeson and one other reacted to Jan_G for a topic
I think it deserves its own topic in LSP discussion boxart posted on Lukgraph FB page - superb choices Lukasz quto from FB post: The set will contain: - 3D printed in whole engine with manifold and exhaust pipes (Jupiter VIII) - Resin parts (over 120 pieces) - Photo etched parts - Decal - Colorful instructions Painting schemes: 30. Mosul squadron, Iraq 1932 60th squadron. Kohat, India 1932 https://sk-sk.facebook.com/lukgraph/ LSP topic jan2 points -
2 points
-
AIMS 1/32 32D024 Fw 190 Oleo leg markings
Lothar and one other reacted to Pastor John for a topic
Decals changed no problem with printers2 points -
Tamiya 1/32 F4U Corsair 1841 Sqdn Robert Hampton-Gray HMS Formidable
R Palimaka and one other reacted to ajaycad for a topic
Thanks Richard, No need to apologise for diverting the post, Its always an honour when there is a specific link from what your attempting to build and actual history and the people involved....much respect2 points -

Trumpygawa Hellcat x 2
Sakai and one other reacted to alaninaustria for a topic
Awesome project Bill! Can you please explain which cowls are from which kit? Looking forward to seeing more progress. Cheers Alan2 points -

KLP Publishing Building the WNW AEG G.IV Late in 1/32 Scale
D.B. Andrus and one other reacted to LSP_Kevin for a topic
Howdy folks, Ray has just reviewed our own Karim Bibi's eBook Build Guide for the Wingnut Wings AEG G.IV "late" kit: KLP Publishing Build Guide Series No. 1: Building the Wingnut Wings AEG G.IV Late in 1/32nd by Karim Bibi Disclaimer: KLP Publishing is my own company, though I had no involvement with this review. Enjoy! Kev2 points -
That's looking superb, John! Kev2 points
-
Started on the cockpit. I wasn't going to go mad and well, I ended up going mad. I've used a spare throttle and IP panel from an Academy Hornet to bring some detail to the front Pit. I'll be doing the same with the control stick as I don't rate the kit part. I'm working to limited resources on this one but I still haven't decided how I'm doing to pose the pit so I'm pretty happy. Some of the punched detail is a boss ready for some Anyz switches over the top when I get to that point.2 points
-
Hi All, Waiting for a good print of the dashboard cover (printer is going again its way off!), I come back to cockpit frame. As first sample was all right to fit model, I'll just post pics of my screen, about drawing in progress. Still a lot to do! Right board is on way because I need it to verify sizes of the whole stuff, also to get markers to create the floor frame.2 points
-
Beautiful slim shapes! I can say G-6/AS is almost graceful))2 points
-
Ok, back from the brink. I read new posts here and follow other’s build’s every day. i have finally started using my stay at home time to work toward finishing this first for me LSP. I realize that there is extreme talent on here, and i think it makes me a better builder. This engine, for example, is not the best engine, but its certainly the best one i have ever made. Its still got some detail painting to do, and the blow ups make every issue i need to fix so easy to see, but here is what i have come up with. i am really excited to continue, i need to shoot the cockpit interior green, maybe tomorrow. stay safe all! Thanks for any criticism, i dont expect to just get courtesy compliments. I am trying to grow, i still remember how hard i worked on figure painting a few years ago when i returned to the hobby.2 points
-

1/18 Focke-Wulf Fw190C V18 'Känguruh'
HerculesPA_2 and one other reacted to airscale for a topic
afternoon ladies thank you so much for the warm welcome on this build I am really excited about it even though it is as far as you can get from the well documented P51C with a full library of every drawing available to look up.. I will just have to domore 'interpretation' than usual! Thanks Roger & Alain - I am already in your debt, for the info you have already sent and am going to need wingmen like you to help me on this one Ah Wackyracer, you were pipped to the post by one, otherwise you would have been my very first Patron! I have really enjoyed making video blogs of the build to compliment WIP posts and think it really does bring another dimension to not only what I do, but sharing it with you good folks another video went up this morning, so do catch that one Hi Miamiangler- stay safe over there and can't wait to see a fellow build of this engimatic aircraft So where were we... breaking up the 21st Century Toys 'toy' into bits... The model is mainly made up from bits that are either screwed together, or have 'nubs' that pass through a hole and are then melted with what looks like a soldering iron, so by breaking out those nubs it came to pieces quite easily & quickly... ..the fuselage and all those bits... ..and the wings and all those bits... ..comparing to plans, the shapes are pretty good - the fuselage is a tad short at the tail, but that's no problem to correct later.. ..and the wings are fine.. ..the model is covered in deep panel lines which will be a problem when it comes to skinning, so the first step was to fill these with P40 filler... ..no this is not some late war camoflage, this is what it looks like after sanding the filler down... ..the recess for the airscoop was also filled.. ..then the fuselage & wings were shot with some high build primer - mainly so I have a unified looking set of parts to work with, but also to help visualisation.. ..have also started to gather what drawings I can find and start translating them into what will become a large photo-etch set, although the etcher's I use PPD have suspended trading due to covid so that will be a while yet ..and even while preparing that top instrument panel part, I learned thanks to forum contributors that this Fw190 would have had ancilliary instruments like this shot of a high altitude test aircraft - this is what I will copy I expect... so, we are on our way.... a million parts to go, but I think it is going to be a blast Don't forget, if you fancy it, video builds and articles are and will continue to be posted on Patreon TTFN Peter2 points -

SYLDAVIAN P.11C. The final cut!
Starfighter and one other reacted to quang for a topic
I was fiddling with the seat while waiting for the mail to arrive with the paints. I managed to botch the supplied PE seat belts so I made a new Sutton harness from tin foil. The seat also received a new leather cushion Good night everyone. Stay safe, Quang2 points -

HK B-17...C 5/4 sweating the metal
Derek B and one other reacted to brahman104 for a topic
Thanks Tom! I reckon I should've just built a real one..... I'd probably finish it quicker! Thanks very much mate! I'm really enjoying it. So, resin printing..... seems I've still got a lot to learn!!! Having just moved, I didn't have a huge amount of resin, and I wasn't too sure how good the stuff I did have was. In any case, it seems that orientation and supports are even more important than with FDM printing. This is how my nacelle turned out.... You can see a big line where for some reason it slipped or shifted during the print process, not terrible except for this..... This is what happens when you don't pay enough attention to the orientation and supports........ I took me about an hour to remove to the point of what you see here, and going to take a whole heap more time to clean this up! Want to see it get worse? I knew I was pushing my luck, but I tried to quickly set up the other side to print. I think this was definitely a case of the resin being no good.... Exactly the same drawing, just mirrored...... As I said, this is entirely operator error. It does go to show you how finicky resin printing is! Anyway there's more resin on the way now, so I'll have another go when it gets here. Luckily it's not going to hold up the build at this point. On a positive note, I've been steadily grinding away and test fitting the nose halves to the fuselage. Looking good!! In the last one you can see a significant "step" in the sides. I thought about trying to correct that but I think it will be easier and stronger in the long run to blend them later. There's definitely going to be some heavy filling and sanding once I permanently attach them, but that's life! Here's what I've had to grind away so far on the inside..... I'm trying to get as much of the messy grinding and fitting work done prior to attaching the sides back on now, including painting. I'm even considering the cockpit/nose glass at this point as it might become too difficult to fit later! Cheers, Craig2 points -

KH T-6/Harvard Kicked Up A Notch: Apr 14/20: Finished!
KUROK and one other reacted to chuck540z3 for a topic
Thanks again everyone! Very good question, which I've already been working on. My models typically take only 2 coats of paint, like my Spitfire and Eagle in my signature below, so about 95% of the detail I have before paint can still be seen. After spraying a white undercoat on this model, I was initially concerned and then later almost devastated at how many coats of paint I needed to cover, because much of the detail was being filled with paint. After about 5 coats I set the model aside and went away for a few days, complaining to a few modeling friends that I might have screwed up the model by using the wrong paint. Thankfully, upon my return and despite the fact that I was using fast drying lacquer, much of the detail came back as the paint dried and shrunk into the panel line and rivet recesses, leaving about 80% of the detail I had before. I then carefully re-punched a few rivets, re-scribed a few panel lines and just about all of the large fastener detail was restored with my Mega Tool, bringing another 10% back, for a total of maybe 90%. Two more things- and I fully admit I'm rationalizing because there's no turning back. Many of the panel lines that you can't see very well anymore, you can't see on the real deal unless you get up close. This is especially true of the fine detail above the wheel wells at the top. Many panel lines I scribed here can only be seen at 3 feet or less on the real aircraft, which is a bit over an inch away at 1/32 scale. I can still see them if I look for them, so I'm happy enough with that. The other thing that hides detail is the bright yellow that is so hard to photograph, unless you get up real close. For example, from this shot it looks like much of the detail is almost gone. It starts to show up a little closer... Zooming in on it more (which often reveals flaws), shows that most of the detail is still intact. Cheers, Chuck2 points


