Leaderboard
Popular Content
Showing content with the highest reputation on 03/24/2020 in all areas
-
Thanks for all the encouragement I've passed another milestone today, clear parts are in, paint touched up, details added...nearly there. I need to add the shredded fabric to the rudder and the rudder trim tab pushrod and that's about it...So while neither model seen here is technically finished or complete, you'll get the idea of where Iv'e been going with this from these images. In this picture I'm testing my ability to get a damged (destroyed) nose cone glazing; The (nearly) final result. Both models still need detail work but these pictures give the feeling I was looking for; The bomber has a fine thread nut CA'd and epoxied to the bottom of the floor with a steel rod threaded in to that and a press fit into the timber as the support. The 109 has a flat bar inserted into the belly with an aluminum rod placed over top to offer it continuity to the bomber Thanks for looking.25 points
-
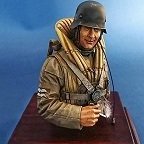
Revell Beaufighter 1/32 1F Nightfighter
Fanes and 15 others reacted to Suresh Nathan for a topic
Hi guys, Just want to highlight the Beaufighter that I started a few months ago. It has recently been uploaded to largescaleplanes.com. I see a lot of Beaufighters on the forums and its great to be a part of the club. https://www.largescaleplanes.com/articles/article.php?aid=3423 Wishing you all the best in this time of isolation, Suresh16 points -

1/32 Tamiya F4U-1 Corsair "Birdcage" - Reluctant Dragon - VMF-213
Loach Driver and 14 others reacted to Brett M for a topic
15 points -

1/32 Tamiya F4U-1 Corsair "Birdcage" - Reluctant Dragon - VMF-213
Loach Driver and 8 others reacted to Brett M for a topic
Here is my finished 1/32 Tamiya F4U-1 Corsair "Birdcage" as "Relucant Dragon". Beautiful kit and a joy to behold when complete with all of the detail that Tamiya sticks in it. Of course, I added more! I wasn't able to find any images of the actual aircraft, instead only finding artist interpretations of what it could have looked like. This plane was flown by 1st LT Alonzo Treffer of VMF-213, based in Guadalcanal from what I can find. https://www.aviationillustration.com/hikashop-menu-for-categories-listing/product/7467-13-f4u-1-corsair-buno-17675-no-1-reluctant-dragon-flown-by-1-lt-alonzo-b-treffer https://vmf-213.com/ The men of VMF-213 1. Vector resin cowling 2. Barracuda resin wheels and tires 3. HGW Fabric and photoetch harness 4. Barracuda cockpit stencils 5. Montex Masks and decals 7. HGW Wet Transfer Stencils Paints are a mix of MRP and AK Real Colors, with Tamiya Acrylics thrown in here and there. The build can be found here: The wings are permanently attached, which may prove troublesome later for space and transport. I also wish I had used the closed canopy spine pieces so I could have the canopy closed to prevent dust. 20/20 hindsight!9 points -
We Go On...
Kilroy Was Here and 8 others reacted to Bobs Buckles for a topic
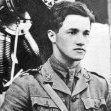
For as long as possible, should. I remain virus free Supply chain unbroken 8) Postal service operates. The Buckler is here to serve. Be safe my friends. von B9 points -

HK B-17...C 5/4 sweating the metal
Derek B and 8 others reacted to brahman104 for a topic
G'day mate, glad you're enjoying the (long) journey so far! About the black cat B-17...... yes I really wish we could, seeing as it's slowly decaying sitting out there on a hillside. Unfortunately, PNG only sees things like that now as revenue earners, even though they do absolutely nothing to preserve them. In fact, there was quite a bit of angst at a local airfield we landed at not long after as they thought that's what we were there to do! On the subject of selling resin nose corrections; it's something I'm still thinking over. As you'll see below it's not just as simple as filling up the vat, pressing print and all of a sudden you have ready made parts to drop fit onto the model. The way forward (eventually) would be to keep refining the shapes and then create masters to cast in normal resin, as the 3D prints can just be too unpredictable. Good for prototypes, but not production...... In any case, it will still be quite some time before I am ready to do that, especially considering what's going on in the world right now! Thanks Terry, guess what? I was thinking about the outboard engine corrections last night and I think I have a new plan. More on that later, but you won't be surprised to hear it involves more removal of original kit parts! So after another 15 and a half hours, the right hand side came out. As you can see, 3D printing (at least for an amateur like me) is still quite a hit and miss affair. I only drew one side in Rhino, then mirrored it, so theoretically they should print exactly the same right? Wrong. Even though I will still use this, the circled issues highlight exactly why this is not a straightforward process than I can make up sets to send to people at this point. Anyway, I now have the two halves that I can work with I'll continue to refine (especially around the nose cone) to make sure they're the same, and start dealing with the fitment around the #3 bulkhead. More to follow soon..... Cheers, Craig9 points -
For this Cold War Jets GB, I'll be building the ancient Revell MiG-21PF kit. I'm aware of the kit's shortcomings, and they are not a concern; I'm just going to build the kit as it is. I'll be using the Model Maker Decals MiG-21PF/PFM in Polish service (I haven't selected particular markings yet0, and I'll also use a Master pitot tube. I first built this kit 40+ years ago along with Revell's F-4E "Hey Jude" kit. The MiG-21 perished in a catastrophic explosion caused by firecrackers! The kit came with a Master Modelers Club application! For only a $1.00US, I'll get the following: tweezers, a dual bladed spatula, a cement applicator, a set of clamps, a wallet size membership card, a membership wall certificate, an iron-on patch, a Revell catalog featuring all the new kits, and a full year's subscription to the Master Modelers Club new letter! To get all that stuff, tempting..... Mike6 points
-
Now printing in 1:48 (with 1:72 for comparison) - looking good! Can't wait to see the 1:32 print for comparison! Iain5 points
-
as I am confined to the house, I have time to build kits:: voila voila5 points
-

Tamiya 1/32 F4U-1 Birdcage Corsair - Done!
VintageEagle and 4 others reacted to Brett M for a topic
Thanks everyone for reading and watching progress. It's done! RFI below the image.5 points -
Thanks Tom. The corona virus is giving me lots of time at the modeling table.5 points
-
Thanks all! painting work almost finished on the wings, final assembly right around the corner...usually when the ground falls out from below me! Here's where I am at the end of business tonight. Thanks for looking5 points
-
Thank you very much! I've never spent this much time on a build in at least 10 years! and never had a project go more than a couple of pages on a forum, this is a record for me! I mentioned earlier that I would be blending in the work, that has started. Once the pics are seen it'll begin to make sense...? An earlier pic with oil spray back; using the airbrush with thin OD in it like an eraser, I cleaned up behind the outflow vents where there should't really be any mess; Thanks for looking5 points
-

IL-2M3 Sturmovik FINISHED
shadowmare and 3 others reacted to Dukie99 for a topic
I finished this build over the week-end. Apologies for not updating the WIP, but there was too many things going on in the real life so posting took a back seat. Not my best effort but this is a great kit and the AM available is really good. The weathering is minimal and it actually looks better in real life than in pictures and now sits nicely next to the little ICM i-16 Polikarpov in my display cabinet. All markings have been painted using montex mask (also for the transparencies), which worked really well but patience is needed not to screw up the russian stars. I hope you like her. Cheers, David4 points -
1/35 KH MH-60L "Super 63"
themongoose and 3 others reacted to Hawkwrench for a topic
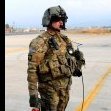
I'm calling the instrument panel done. Should I spray a flat coat on or not? Tim4 points -

Messerschmitt Bf109G-4 Jan Gerthofer, Slovakia's #3 ace
Bil and 2 others reacted to Thomas Lund for a topic
Hi Guys I haven't posted much lately because my camera is busted. For this one I managed to do some decent photo's with my phone, so here we go Hasegawa's (in a Revell box) Messerschmitt Bf109G-4 flown by Jan Gerthofer in 13(Slow)/JG52. These days I'm on a 'do one from every nation that participated in WWII' trip so this is Slovakia. Hungary and Denmark is in progress. Unusual camo on the cowl looks like a replacement, but as many (perhaps all) from that unit used it, I guess it's in purpose. The reason is however unknown to me. All markings except stencils painted on. BTW - yes, the bar behind the cross is supposed to sit so high - seen on pictures, but dont know why https://imgur.com/KplHrME3 points -

RCAF Spitfire's Mk XIVc, XIVe Tamiya conversions.
Loach Driver and 2 others reacted to williamj for a topic
Had promised to post pics...finally got around to doing that.. Full conversions on the Tam. Spit kits...Here's a link to show the process. RCAF SPITFIRES.. Mk XIVe..duel build. - Works in Progress - Large Scale Planes And thanks for all your support.Bill3 points -

Grumman A-6E Tram Intruder VA-75 AC504
Loach Driver and 2 others reacted to reconspit for a topic
Hey, after building several WWII birds, i finished my third A-6 Intruder.... I just used the Eduard Interior and the AOA decals for the VA-75 from the desert storm period. All colors used are from Vallejo.... I hope you like her....3 points -
And should be avoided, unless you're a masochist, then have at it.3 points
-

Ice Queen
Kagemusha and 2 others reacted to ShelbyGT500 for a topic
Hi friends, after a long process of masking and painting, she is done: Hope you will like her and thanks for watching as ever Cheers3 points -
When I look at my own stash, I think: I am the hobbyist version of a prepper Regards - dutik3 points
-

FW190-A3 by PCM - My Christmas Raffle Build- FINISHED
Martinnfb and 2 others reacted to themongoose for a topic
Oh yeah, I hope they didn’t make it just for this plane as it would never be seen if you didn’t do a maintenance scene. Nearly all the major assembly done so far. Got somewhat ahead of myself and threw on the primer before I realized I forgot to add the horizontal stabilizers...I’ve come to believe the value of a WIP is to discover what you left off after looking at a picture of your work These are out of the box seems3 points -
Make the others jealous
Rick Griewski and 2 others reacted to dutik for a topic
If all the hobby shops finally go out of business due to Covid we just know where to buy new kits! Regards - dutik3 points -
I agree about the tires but will point out that that should not be a deal breaker. I used them on my build and they are still fine after about 10 years now https://www.largescaleplanes.com/articles/article.php?aid=17562 points
-
aeroscale.kitmaker.net www.facebook.com/Kitty-hawk Not my cup of coffee, but it looks good. Juraj2 points
-

RCAF Spitfire's Mk XIVc, XIVe Tamiya conversions.
Loach Driver and one other reacted to williamj for a topic
And the Mk XIVc.2 points -
getting closer jan2 points
-
Kitty Hawk Mirage 2000D/N out now
blackbetty and one other reacted to discus for a topic
The D in its current version does not carry the Mica yet. It is planned for the life extension program that is under development (I suppose it will be only the IR version of the Mica if they "just" replace the Magic II). For the moment they carry only Magic II on the outer wing pylons. Under intake, right side: laser targeting pod. It's the first time I see the configuration (3 Mk82 + targeting pod) shown by Finn in his last post. But it makes sense, the N (originally developped for nuke) was turned in a conventional bomber carrying 4 mk82 so I guess a D with 4 Mk-82 is also possible (although I never seen it). At the end of its operational life the N could carry 4 GBU12/49 (2 center line and one under each air intake). The photo with the blue/grey 2000 with scalp and Mica is a demonstrator for a twin seater 2000-5 export version. Here is a view of the potential new 2000D config being tested (new targeting pod under the right air intake. Also the pod below the LR air intake is a 30mm gun:2 points -

Monogram '29 Ford Roadster Pickup
D.B. Andrus and one other reacted to LSP_K2 for a topic
And the oven cleaner does its magic.2 points -
F-86K RNoAF
F-4Phanwell and one other reacted to Winnie for a topic
Ok, some self isolation progress. Also been given an extra week home so better use it! You can tell that input the spacer in the wrong spot... It isn't mentioned at all in the instructions. As a matter of fact, many issues aren't mentioned... But we figures it out. Cheers Harald2 points -
Here is one with Mk-82s: Jari2 points
-

Ice Queen
Rick Griewski and one other reacted to BiggTim for a topic
Impressive work, but a mighty cold way to play hockey!2 points -
Kitty Hawk Mirage 2000D/N out now
kalashnikov-47 and one other reacted to Dave Williams for a topic
Weird FedEx tracking aside, my kits arrived today, as originally promised. Whats the situation with MICA on the 2000Ds with regards to the under intake and under fuselage pylons? TIA. Sweet! It came with 5 surgical masks in a ziplock bad as a bonus. Thanks KH!2 points -
This worked for me: MRP 122 RAF Yellow, MRP 183 Oxford Blue, MRP 123 RAF Red. I read (i forget the source) the MRP 124 RAF Blue is early war. Late war RAF blue is darker. The RAF "Brick" Red is also an early war. Not sure if my selection is accurate. I'll be happy to be corrected by anyone smarter than me, flood gates now open. I'm pleased with results. Model on...Rick ___________________________________________________ All national markings, ID bands will be painted. Using Maketar masks the 4 color roundel application begin. A base of MRP135 Insignia White is applied for roundels, fin flash and ID bands. I'm applying markings using this method as I want to keep paint build up to minimum. MRP122 RAF Marking Yellow is applied. This late war aircraft, flown by New Zealand ace Evan Mackie, will have C1 roundels in all 6 positions. After yellow cures masks are carefully positioned. MRP183 Oxford Blue is applied. I spend much time deliberating on the correct "blue" for late war RAF a/c. I took the FICE approach and I'm pleased with my decision. The blue has cured and more masks carefully placed. I applied liquid mask on all tape seams to insure no bleeding. MRP123 RAF Marking Red completes the national insignias. Masks removed. No bleeds, no lifting. Win, win.2 points
-
Alex, Hope the connection with Leighton proved fruitful. Have you seen these pics: https://www.nationalmuseum.af.mil/Visit/Museum-Exhibits/Fact-Sheets/Display/Article/196275/martin-b-26g-marauder/ Not Flak-Bait but another B-26. Good luck! Chris2 points
-

Any news on the Italeri Tornado GR4?
red Dog and one other reacted to Stokey Pete for a topic
Keep it, I built a lovely rendition from the revell kit. It’ll make a great comparison between the two when one considers the time that’s elapsed between the two releases. Here’s a snap of my finished build.2 points -
Brilliant, especially the camo fading/tonal variations and the chipping. Congrats2 points
-
From bicycle spoke nipple to lamp stand in one easy Unimat! Envisioning that the grey is anti-slip paint. Need to add the funnel strips. And repaint one part on the other side, masking tape pulled the paint off. Shocking.2 points
-
Looks better flying: Jari2 points
-
I have a build of the Frank in WIP. I forgot this model yesterday.2 points
-
Revell Bug
MikeC and one other reacted to Stalker6recon for a topic
Thanks! Let me also say that, without a doubt, these boards have changed my outlook of the internet forums, which were alien to me just two years ago. Every single board I have joined, has been nothing but a positive reception by the members (excluding one event in my early days, which I am mostly to blame). I am in awe of the craftsmanship and artistry of the hobby. In fact, calling it a hobby seems almost demeaning to the work I have seen. Never in my wildest dreams did I think the art, as I now call it, would be thriving in such a big way. Again, as a kit and young adult, I really thought the modeling world was in the last throws before fading away. Stores locally vanished, and this was long before the internet. I had to travel great distances to find what I needed, before life got in the way and I fell dormant for decades. I am back, but still trying to accumulate the tools and supplies required. I may never produce the fine art I see regularly on these forums, but as long as it's good enough for me, I will be happy. I culled my expectations for the early builds, as I am learning all over again, I fully expect to see a few kits become the victims of some well placed fireworks, I live in Asia, they are abundant here. Anyway, thanks for the warm greeting during these trying times, we will get past this together and be stronger on the other side of this pesky little virus. Big scale has always been my dream, and now, with patience and sound monetary skills, it is within my grasp, I can wait to dive into the thousands of RFI's for inspiration! Cheers, Anthony2 points -
My Groundhog Day build.........WnW Fokker D.VIIF.......Finished
S.Pelletier and one other reacted to monthebiff for a topic
Some more work done today after our lockdown Mothers day, enjoyed the girls helping me cook a nice meal meal together for their Mum and just and nice relaxing day. Chosen the scheme for this build now and will be Red Z of Jasta 26. Aviattuc decal application completed followed by a glaze with heavily thinned brown and after drying adding the rest of the decals. Apart from final detail painting and weathering that's the wings about done.. Regards. Andy2 points -
Make the others jealous
wunwinglow and one other reacted to LSP_Mike for a topic
Just reacquired a trumpy swordfish.2 points -

1:32 scale - Port Victoria P.V.7 'Grain Kitten'
Kagemusha and one other reacted to sandbagger for a topic
Hi all, I've modified the tail plane, fin and rudder in a similar manner to the other flight control surfaces, Mike2 points -
Hi again. Hopefully everyone is staying safe. Work has ground to nearly a standing halt so I'm hitting the bench to alleviate some stress Very minor progress but got the cockpit sealed up and ready for installation. Decided to wire behind the instrument panel because it's a visible area when completed. Also managed to get the infamous 4 piece cowl around the engine. Fit was ok, but I wonder what it'll look like under primer. I was surprised at the number of sinkmarks my copy had. Two on the cowl, two on the fuselage and 4 on the wings. Is that common to this kit or my typical luck? Just had to test fit it to see if it'd fit in my Ikea Detolf display case. It looks like it'll sneak in by literally MMs. Thanks for looking. Jeff2 points
-

1:32 scale - Port Victoria P.V.7 'Grain Kitten'
Kagemusha and one other reacted to sandbagger for a topic
Hi all, Thanks. In fact there were two aircraft built by Port Victoria for the Admiralty design. The P.V.7 'Grain Kitten', but also the P.V.8 'Eastchurch Kitten'. The P.V.8 was partially built at the RNAS Experimental Flight at Eastchurch and was design by the Chief Technical Officer, G.H. Millar. Later it was moved to the Isle of Grain to be completed. It was similar to the P.V.7 in size and performance and like the P.V.7 carried a single Lewis machine gun above the upper wing. The engine was intended to be the 45 hp (34kW) ABC Gnat engine, however like the 'P.V.7 it was first fitted with the less powerful 35 hp (26 kW) ABD Gnat engine. It first flew in September 1917 but found to be unstable in flight so was modified with a revised tail plane and elevators. It proved to be superior to the P.V.7 but also suffered similar engine reliability problems. Like the P.V.7 it was considered to be unsuitable for its intended roll. However it was packed ready to be shipped to the USA for evaluation in March 1918, although whether it was actually sent is uncertain. Mike2 points -
More small details: The exhaust were hollowed, painted in black, slighly drybrushed with dark aluminium, then washed with streaking rust effect and pigmented with conrete light grey The end is very close ....2 points
-
2 points
-

HH-60G Pavehawk Kitty Hawk 1/35 DONE!!
Madmax and one other reacted to Pete Fleischmann for a topic
Hey all- got to sling some paint last few days..I’m pretty happy with the armor plated floor. If you’ve ever watched Inside Combat Rescue on TV, you’ve seen how filthy and nasty these helicopters get downrange..I watched them literally hose down the cabin with a garden hose... cheers Pete2 points -
I have no "interest" per se in the Andover but I'm so pleased that some of you chaps are getting what you want.....God knows we need a bit of self-indulgence right now! Where's that Lukgraph Rapide??2 points


