Leaderboard
Popular Content
Showing content with the highest reputation on 02/19/2020 in all areas
-
Tamiya F-6D
Model_Monkey and 7 others reacted to SB20 for a topic
Heres my Tamiya F-6D. Nothing special, I just wanted to try Alclad and learn how to work with it for an upcoming build. I didn't forget the wing insignia, this aircraft didn't carry it.8 points -
Agreed, thanks for the advice. I sometimes grt too close to the work and cannot see the forest for the trees... I've gone with the good advise and using an R.B Products riveting wheel to make "tear along lines" I marked some .003" printing press tin and then scribed a line in it and tore it off, some PVA glue to attach it (I can put some Mr Surfacer on the seam later) I think it looks a little more prototypical now... or at least getting there.8 points
-
thanks gentlemen, your encouragement helps really to race towards the finish line! iPainted the Wheel struts and weathered them. Mounting them with all these actuating arms was not easy! then mounted the landing gear doors: now that the Rhino is 95% finished, I am thinking about a base for it to stand on...7 points
-

HH-60G Pavehawk Kitty Hawk 1/35 DONE!!
matt_1185 and 6 others reacted to Pete Fleischmann for a topic
Hey all- a little test-fit sanity check of the overhead panel. An oil wash coming up, and then this will be almost done..still sorting out the map lights position- circuit breaker panels, etc still to fit- cheers Pete7 points -
Completed the KH Mirage 2000C as a -5F. In my opinion this is KH's best effort to date. Assembly was good in spite of the usual bad instructions. I like the addition of the resin pilot and exhaust. The decals were thick and did not respond to setting solutions. In spite of decals for French, Greek, Brazilian and Taiwanese airframes, there are only French stencils. Also, no information is provided for the 4 different rudder tips and two noses, so check references before assembly. This wasn't my best work - I found a lot of things I would correct in a future build. Your observations and critiques are welcomed. John6 points
-
Here is my latest build to be completed The Kit is a Revell 1/32 Hawk T1 with xtradecal markings(they required a lot of water to move around on the model) Starting this one in december and wrapped it up today. paint is Humbrol gloss black, the clear coat is Alclad Aqua gloss, with a final coat of Model master Lacquer gloss prior to decal i polished the paint with Tamiya Corse and Fine polishing compound. After the final lacquer gloss i used the Tamiya finish to smooth it all out. in the picture the pitot is missing, saw that later on and it is now installed. build thread can be found here6 points
-
Leaving the lower flap origami issue aside, I've moved a little forward with the Tank build. I've decided to add the wing root fillets at this time. Why these need to be separate parts other than to create more messy seams is beyond me. I obviously do not reside in Z-M's target demographic. :wink: I've glued the rudder to the tail unit using 2-part epoxy glue. The molded ribs on the rudder have been sanded down to give a more subtle fabric effect. The molded spars in the upper flap area have been removed in order to accommodate the PE parts. I'll probably glue them in after the wing spars have been attached. This might be a good time to perform a dry-fit check of the wing parts to the fuselage.6 points
-
Thanks for the encouragement, it's always helpful!! I've used what I learned from the broken off horizontal stabilizer and put a little more and different work in on the rudder. Through images (and help from others) I've made up the internal structure and will add shredded "fabric" on the frames (flapping in the wind) from foil...eventually.6 points
-
Getting ready for masks: For the roundels I used a set in kabuki paper initially bought for the Typhoon in 1/24. There are enough masks to paint multiple aircraft. I checked the masks size against the airfix spitfire decals and they all matched except the top wing roundels being just a tad smaller. Something I can live with! First step is to find the correct spot for the masks Then I always prefer to base coat in white, I use straight XF-2 from Tamiya. I also always mark my masks accross all the different parts to ease up the alignement process often needed when removing and replacing masks: The red paint is a mix I made for the previous spitfire in 1/32. I made more than necessary knowing I have quite a few RAF subjects in the queue that may benefit the colour. Because of the scratching effect applied previously around the wing gun bay doors, I elected NOT to mask the blue part of the wing top roundels. The red part was sprayed in the centre and I had to find a way to ensure that the red mask was perfectly placed back in the centre. Usually I do that by aligning masks against each other, but here obviously I had no guide. I thus used the diagonals I always draw and by marking the edge of the circle on two strips of tamiya tape, I could ensure the mask was positioned back in the centre. To avoid the kabuki to be too sticky, I repeatedly stuck it on the desk, hoping that would be enough to prevent the paint from lifting upon mask removal I thought I had MRP marking blue but all I had was insigna blue, so I had to revert to H326 from Gunze with a bit of colour variation for the large blue area Removing the masks damaged the initial camouflage paint around the gun bays, which was expected. But I'm glad the paintwork for the masks wasn't damaged at all. Repairing the camouflage bits is a no brainer and will be done after fitting the tail which will need a lot of putty anyway Final result of the fuselage and tail work. IMHO it's always better than using decals, especially in this scale where these decals are so huge and hardly of good quality6 points
-
Good morning gentlemen, here I am: The end is near.....Cheers !6 points
-
Its all done !! since my last update i made a lot steps, i polished the entire model with tamiya coarse and fine, then washed it next up was decals, for the size they have they went on pretty well, i did not have any rips. BUT ive never seen decals that refused to slide like this, even the small ones and stencils !!! i used a water sprayer on drenged the model for all the ones bigger than a penny, that really saved me, then once in place, dabbed the water off and applied micro set then multiple coats of micro sol. Here is prior final clear since i had polished the kit i was afraid any kind of water based clear would not stick, so i pulled out my Model Master Lacquer gloss. this stuff stinks but its amazing. after letting it dry for a couples of days i polished it with tamiya finish, then to get rid of all the polish in the crack i rinsed the model under warm water and lightly brushed it with a toothbrush. and dried it with a hair dryer at the low setting. That left me with a problem, no matter what i did i always got water marks... Then i was thinking to myself i have to use soad but like i know from taking care of my car, dish soap removes wax, so kinda kill the point, then i had a brilliant idea! i went to my car care bucked and got some Meguiar's car shampoo with wax!! i mixed a small quantity, washed the plane again and back to the hair dryer! Voila! i'm using this trick again in the future!!! RFI here She is now in my display case Thanks for following! next up a 1/32 TBM-3 and for the curious this is the results i get with my car! (7h 3 step polish) on my 2012 GTI that drives in the canadian winters!5 points
-

Tamiya 1/32 F4U-1 Birdcage Corsair - Done!
Starfighter and 4 others reacted to Brett M for a topic
Thanks everyone, definitely appreciate it. More progress over the weekend. The engine cowling and flaps are done and painted. In the picture, then engine module is just stuck on, not glued in place yet so a slight gap at the top. I've also painted the white sealing tape stripes on the wings, as well as the walkways on the upper wings using Maketar's masks and Tamiya tape. I'm hoping to get a clear coat laid down in the next few days, then move onto the HGW wet transfers (lots of those!). Hoping...…. Comments, critiques, suggestions...….lay it on me. Thanks for looking. That's a big nose..... Bye bye engine work!5 points -
A bit more work this past weekend, this time on the cowl radiator flaps. The kit part is quite thick, and the D-13 had ALL of the flaps operable, including the one left closed on the kit part (a detail often missed on many of the builds I've seen online). I considered using the kit part with them closed, but in every photo I can find of the plane parked, they are open. Apparently they were mostly closed when the plane was airborne. With that idea shot down (pun intended), I cut all of the flaps off and made new ones out of brass sheet. I installed the actuator arms from the Eduard exterior detail set, which don't look too bad, despite being incredibly thin and fiddly, and will bend if you breath on them. More later, after I get it installed. Tim5 points
-
I'm packing my paints and tools and moving to a new home Hoping to be back among ya all very soon, after the dust settles. Cheers, Quang4 points
-
.thumb.png.84c5d3a464f2dd83f0ac37a5aac81ec8.png)
1/32 Revell Bf109G-6/AS Hohenjager
daHeld and 3 others reacted to Antonio Argudo for a topic
looking cool John, checking some ref pictures, looks to me that the wheels angle could be slightly more pronounced cheers4 points -
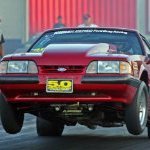
Jo-Han Maverick-Dyno Don's Ride-One Yr Project-Complete!!
Greg W and 3 others reacted to mustang1989 for a topic
Thanks fellas. Another thing that this kit is totally lacking in is the proper engine bay. I turned to the 67 Mustang kit for this since it's a fairly close match. On the right is an OOB engine bay in my other Maverick. After some mods and some trimming I've got the initial fit obtained. It's workable and looks like it should do the trick after some more fancy footwork.4 points -
Well, I managed to cobble something tgether. It's agricultural and only its mother could love it but once it's under paint and hidden under the wing, at night and with the lights off it'll look OK U brackets are strip scavenged from the frame of a previously used etch set, bent round the end of a steel rule. The top rods are cut down spare wing hinge pins. I used 0.7mm brass tube for the, er, tube and the discs were punched from styrene sheet of various thicknesses. Other renditions I've seen all terminate the actuator on the cowl body itself but this would put the rod that connects them (either to the lever on the left of the pilot's seat, which my build has, or the later wiggly amp controller) outside the wing - so mine extend just shy of 2mm above the body and so terminate just below the roof of the radiator housing, and inside the wing: I'll hold my hands up and admit that I didn't check before installing the actuators but fortunately there's just enough room for the part representing the radiator face to fit behind them. Phew! I'm still not happy with that brace on the left... it may have to go although it does look OK in the flesh. Anyhoo, my replacement canopy masks have arrived so I guess that's this afternoon sorted, while I ponder the gun heater ducts. Why do we do this to ourselves? More later, Sepp4 points
-
Absolutely Brian. Come think of it, it doesn't take much to make a winner: a subject of interest, accurate shape and dimensions, a simple and smart design, adequate mouldings, nice plastic. Are we asking too much? Indeed C! Sometimes the most innocuous detail makes the difference. To round up the build, the cable dampers were manufactured from the same micro-tube I used for the turnbuckles. The tips were shaped on a whetstone. I made a new mast antenna from a bamboo toothpick. Final rigging for the antenna, a few touch-ups and the Gladiator is finished. Thank you all who followed this build with a special mention to my new friend Mozart Max. Until next time, Cheers, Quang MORE PICS ON RFI3 points
-
Chebourashka at Soviet Air Force
TorbenD and 2 others reacted to ShelbyGT500 for a topic
Hello guys, everything is assemble - antennas, weapons, gears and wheels: Thanks for watching friends as always Cheers3 points -
Silly me had the landing gear legs reversed. Damian spotted it and let me know. Thank you! So I had to make a re-evaluation... Putting the model on a flat surface to check if the angle of the flat spots works...3 points
-
1/32 F-14D VF-213 - Finished!
geedubelyer and 2 others reacted to Marcel111 for a topic
Took some quick IPhone pics of the model before I headed into the mountains. The skunk stripe is on, which is actually very dark blue with a slightly lighter blue border... on the pics it looks about black, as does the real thing. This is how those vents turned out. I used the Scale Navy Stuff parts, which fit perfectly. However, those tore off of the nose section at some point and from there on in it was a huge amount of filling and sanding to get everything together again. I chose to use Archer rivets as fasteners because I did not want to risk pressing rivets into the brittle superglue/filler composite. Not entire accurate since those fasteners are actually flush but I will live with it. Also note GPS receiver. Snapshot of the front section, you can see the skunk stripe blues a little better here. Notice the formation light stips, which I have airbrushed on. I had not noticed that the front one is solid while the rear one is cut into two halves, looks like I will need to correct this... which I am really not keen on doing since with this build it seems every step forward results in half a step back. Cheers, Marcel3 points -
HASEGAWA FW 190 BLACK 2. 1st attempt at an airplane.
Pfuf and 2 others reacted to voncooperstein for a topic
3 points -

1/24 scale Bombs, US 500 lb General Purpose AN-M64
LSP_Ray and 2 others reacted to Model_Monkey for a topic
Happy to announce a set of 1/24 scale bombs, US 500 lb general purpose AN-M64, has been added to the catalog. The models are scaled from US Army Air Corps drawing 82-0-74 dated August, 1942. The models are suitable for F6F Hellcat, P-51 Mustang, P-47 Thunderbolt, etc.3 points -

Macchi M-5
Tnarg and 2 others reacted to sandbagger for a topic
Hi all, The cockpit is now complete. As I found with the engine, the cockpit required a lot of modifications and additions to bring it up to looking more like the actual aircraft cockpit. Basically, the modifications and additions made were as follows: Fuselage inner side walls heavily thinned and both assembled machine guns modified to allow the guns to sit in their correct positions in the cockpit. Forward bulkhead repositioned as the kit instructions were incorrect. Support bar for the instrument panel and climb indicator replaced with micro-tube (kit part too short). Cockpit rear padding created from ‘Milliput’ (kit photo-etch part unusable). Cockpit forward edge padding bead added (not in the kit). Pilot’s seat – addition holes in the seat back. Pilot’s seat – slots created for the seat belts. Pilot’s seat – seat support frame created (not in the kit). Pilot’s foot board assembly modified to allow the control column to be positioned further away from the pilot’s seat. Pilot’s seat top attachment to rear bulkhead added. Panel switches replaced with micro-tube (kit photo-etch unrealistic). ‘Taurus Models’ starter magneto added (not in kit). ‘Taurus Models’ starter magneto safety switch added (not in the kit). Tachometer ‘scratch’ replaced (kit part too large). Engine half compression lever and control rod added (not in the kit). Fuel contents pipe to gauge added – ‘PlusModels’ lead wire. Oil pressure pipe to gauge added – ‘PlusModels’ lead wire. Micro-tube used for control rods (Half compression control, Spark advance control, Fuel mixture control). Cockpit window ports created using clear acetate sheet and in-filled with ‘Krystal Clear’. Rudder control cables added (0.4 mm Nickel-Silver tube and 0.12 mm mono-filament). Hole drilled through right side of fuselage (at engine forward right support strut location) – for cockpit controls to engine. Control column machine gun triggers replaced with micro-tube (kit photo-etch unrealistic). Machine gun trigger cables added (‘PlusModels’ lead wire). Other than that, the cockpit was built straight out of the box!! I forgot to take completion shots of the cockpits internals before closing it up. However, there is the one shot on the cockpit floor assembly finished. In the following photographs, the two ‘white discs’ are the cockpit window ports – the ‘Krystal Clear’ was still setting when I took the photographs, Mike3 points -

XB-51 Dragon
themongoose and 2 others reacted to Dandiego for a topic
With major construction done and the fuselage being really solid it is time to open up the bomb bay. Dan3 points -
1/32 F-14D VF-213 - Finished!
A-10LOADER and 2 others reacted to Marcel111 for a topic
I have used the Mig Ammo walkway paste for the first time. Must say I am really impressed, it's very easy to use and the results are more realistic than what I could achieve with the textured paint method I was previously using. One minor watch-out is not to layer it on too thickly around the masking tape, else you'll get an uneven tear when removing the tape. Cheers, Marcel3 points -
Nice progress as always, John. Damian sure has nice legs! Kev3 points
-
and the chipping frenzy got worse on the other side: I usually use chipping fluid with tamiya or gunze acrylics, it is the first time I use them with MRP, and I'm happy to report that (as expected) it works fine. Maybe even too fine - probably a consequence of my 3 layers of chipping fluids, I won't do that anymore) For the chipping effect, I apply water with a brush where I want the chipping, let it soak for a bit then scraxt with the two sponges or the needle and rub accordingly. IMHO it's much better than any result I can get with a fine brush and silver paint. Next step was to paint the yellow ID bands and the propeller tips. Masking the ID band and the prop tip wasn't a problem and a base coat of white was airbrushed. I still prefer airbrushing the light colours on a white coat otherwise I Always end up with too thick a coat of paint which tends to have a step effect from the camouflage colours. After white paint was applied on the prop tips, I discovered yet another air Bubble in the resin, which screamed to be filled For these corrections, I usually use water based Vallejo putty which is not very good for large correction because it sinks a lot. But it quickly dries and two quick applications of putty each being wiped with a watered Q-tip made short work of the hole The ID bands and the prop tips where then sprayed marker yellow Previous to that the wingtip lights were added and sanded flush with the wings. That removed paint but I will correct that later on. I'm sure I will have many other paint correction soon... To try to keep these to a minimum I coated the model with semi gloss MRP twice, hoping that would prevent the paint to lift too much during the masking sessions. Now I realise that using 3 coats of scratching effect was Indeed overkill and that it would have been better to plan ahead and avoid scratcing product where masks are supposed to be applied at later stages …3 points
-
F-35A 13-5081 AFB Hill
AnthonyWan and one other reacted to CruZz for a topic
Hello gentlemans. Model represent plane from AFB Hill nr: 13-5081. It was only one with some light weathering, when I build it.... Kit Italeri Eduard PE sets Lot of scratchbuild and wiring (wheel bays, bombbays), added many surface details. Wheels True detail... Amraams Eduard brassin. Paiting masks by DN-Models. Decals: Furball Etc.... I made my own exhaust nozzle od 3D printer, because all of aftermarket set was small.... Thank you for watching. Have a nice day. Jan :-)2 points -
First model in 20 years, 100% hand painted
mustang1989 and one other reacted to MB13 for a topic
Hi guys, so I'm back in the hobby after about 20 years, unbelievable how the hobby have changed in those years can't believe it! There is an air force base near where I live so I see F/A-18 almost every day so I decided to go with the Revell 1/48 F-18 to start it off. I did not want to wheter it too mutch as I think the ''too pronunced panel wash'' makes it kind of cartoonish and unrealistic, so went with another technique. I also don't own an airbrush so I did the best I could with what I saw on the net and here is the result, the ones I did back in the days were nowhere near this one but still not as perfect as I would have liked so I have some questions: 1- What technique do you use to hand brush your models (For those who still do it lol) Primer or no primer, thin the paint a lot or not that much, what brush to use.. etc 2- Do you have some tricks or anything else that helps for filling, sanding, wheathering etc.. 3- I'm hopened to criticism so any tips or advice or anything on everything that could help would be much appreciated!! Thanks!!!!2 points -

Gloster Gladiator 72 Sqn RAF 1937
Nighthawk Calling 1 and one other reacted to quang for a topic
This Gladiator K6140 wears the livery of 72 Sqn RAF as seen at Church Fenton in October 1937. The superb ICM kit was built OOB without aftermarket additions except for RB Productions Sutton harness. Basic silver paint: Tamiya TS-30 Silver Leaf. Silver dope on canvas parts: Alclad Flat Aluminium. Stock decals. Hand- painted squadron colours using frisket film All other colours: Vallejo acrylics. Rigging: elastic thread 0,25mm and 0,30mm Turnbuckles: Albion Alloys aluminium micro-tube 0,50mm You can follow the build in progress HERE Hope you like it, Cheers, Quang2 points -
Looks like we got the first hornet Love the picture of it comming out of a. C-17 https://canadianaviator.com/c-17-brings-home-f-18/2 points
-

1/32 Revell Bf109G-6/AS Hohenjager
Martinnfb and one other reacted to D.B. Andrus for a topic
John Shortening the axle to bring the tire closer to the strut would change the look for the better. I remember you did that with your K-4 build and I do that now with the Hasagawa legs. Looks like it should be done with the Revell axles, too, especially when aftermarket wheels are used. The Revell axle measures out at 99 degrees. HTH, D.B.2 points -
Don’t know whether it’s cause for celebration or for crying. Those jets are already obsolete.2 points
-
Great stuff actually! There is something very attractive about an all NMF Mustang with only starts and bars w/codes. Well done!2 points
-
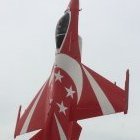
Spitfire MkVb to MkIX conversion 1/24 349 sqn
Troy Molitor and one other reacted to DonH for a topic
That looks really good. I also prefer masks to decals, especially at this scale. You have done a great job with them, the colours of the roundels look perfect. What struck me with the photos is that 1/24 can look very toy like and clunky. Your model is not like that at all, you have really achieved a great look and the finished article is going to look exceptional.2 points -
1/32 Revell Junkers Ju-88A-1
John1 and one other reacted to Tolga ULGUR for a topic
This is 1/32 Revell Junkers Ju-88A-1 of KG54 Battle of Britain Campaign France, September 1940. Eduard intrument panel CMK Ju 88A seats Q32105 Quickboost Ju-88A-1 exhaust set QB32059 Ju-88 A1-A5 resin corrected rudder Airdoc Ju-88 small tires for A1-A5 MDC Ju-88A bomb racks Master Model Gun barrels Painting with Gunze Sangyo acrylics You can see full build story by using the following link in WIP section.2 points -

RCAF received its firs Australian f-18
Alain Gadbois and one other reacted to DonH for a topic
Now, that would be a great diorama!!2 points -
When attempting to use anything other than English search terms. D2 points
-
Ok Chris and group. Lee’s parts arrived today and I’ve set to drawing up a CAD file for laser cutting. In order to achieve the blind holes on both front and back I’ll cut it from two layers of acrylic (Perspex). Then sandwich them together, a little sanding and voila. Nearly there! Here’s a screen grab of the CAD: I’ll cut a test shot tomorrow morning and post the results here. jimbo2 points
-
A gift from a good pal. I've had a "thing" for Century series aircraft for quite a long while now, so this really fills the bill. It's not in the database either, so I'll be adding it shortly.2 points
-

Best P-47 cockpit sets in 1/32 for Hase. and Trumpy.?
Lothar and one other reacted to thierry laurent for a topic
To me the best cockpit for the Hasegawa kit stays the MDC one. I do not know any cockpit resin set intended to the Trumpeter kits. I think only Eduard made specific sets for them.2 points -
Instructions Needed
Rick Griewski and one other reacted to D Bellis for a topic
Often their page(s) with instructions linked to them come up just by Googling: Matchbox 109 32 instructions scalemates That saves having to go through their entire 'timeline' links (which admittedly only takes a few seconds anyway). Not many Scalemates pages have the instructions, yet, but it is an ok starting place for older/esoteric kits. If that doesn't work, drop the 'scalemates' search term to broaden the search results. Of course, most mainstream kit instructions can still be sourced from https://www.1999.co.jp/eng/ HTH, D2 points -
Thank you very much, still on that learning curve with figures...well everything actually. Another milestone in the build has been hit. That point in the build when the fuselage gets closed up. sanding seams...about 3 feet of them in total, now begins2 points
-
Some colour depth for the grey and green added. It's too visible on purpose for now as I expect further treatment to tone this all down: First the grey: with a drop of Medium seay grey added rather than white looks like my 3 coats of scratching effect are already working, paint comes off even with no scratching …. i have the feeling it may have been a bit overdone Then the green: (base colour + a drop of white.) Minor chipping started as I couldn't hold it any longer2 points
-
Thanks for the comments guys. Two things that I am not overly keen on doing with models are seat belts and brake lines. For some reason I find this stage of the build to be a bit of a pain! Needless to say, they both need to be done. First up, the brake lines on the undercarriage. The kit has some reasonably nice lines already there but they are moulded integrally with the leg and are a little to 2D for my liking. I sanded them off. I used .4mm lead wire and .4mm copper wire to depict the two lines that run up each leg. I used thin aluminium foil to replicate the brackets that hold each line in place. A very thin strip of it was passed behind the lines and then folded back up itself. I used the excellent RP Tools ring maker to fabricate some tie down rings. These replaced the kit tie down points which are just lumps of plastic as can be seen by the unmodified one on the left. Done. I hate using photo etch seatbelts, so I used the Aires photo etch and resin buckles and made my own belts from thin aluminium foil. The shoulder straps were next, I used a small section of copper wire at one end to allow me to roll the end over and form the attachment loop. as can be seen on the top strap. Looking at my reference pics, I noticed that on some of them, the pilots shoulder straps were hung over the side as can be seen in the following pics. An excellent pic (not Ron) of a pilot about to go flying. His helmet is on the windshield and the shoulder straps are just visible, hung over the side. Another pic of a maintenance scene. Same deal with the shoulder straps. I thought that this would be a great feature to incorporate, it would really give the model a human touch. I got in touch with Ron and asked him about what the protocol was when the pilots were about to go on a sortie. Here is his response: Typically, when we went out to the aircraft for a mission, we would mount the ladder and deposit our parachute into the cockpit and place our helmet on the top of the front windscreen. We would then dismount and conduct our preflight inspection of the aircraft. Upon completion of the preflight, we would go up the ladder and get into the cockpit. The crew chief would come up the ladder to help us strap in and it was typical for them to leave the straps hanging over the cockpit rail so that this would be easier to do. So -- short answers to your questions are - helmets were placed on the front windscreen until we put them on, and the safety straps were left hanging over the canopy rail until the chief helped us put them on. The photos you sent were authentic. Hope this helps you. Ron Based upon the pics, and Ron's great reply, I got to work and made it happen. I made a copy of the Aerobonus F-100 pilots head with helmet and carved out the head. This will be painted as per the pics that Ron supplied earlier in the thread with his name and checkers on it..... if I can paint them that small! The objective will be to draw the viewers eyes into the cockpit. Just need to work out the parachute pack.2 points
-
Got an email from Simon at Silver Wings and with a pre-order discount, and discounted shipping I couldn't resist her............ Depending when I can actually get back to the bench and finish my Ki-45, This lovely lass may be on the bench next...............just need some MRP WWII RAF yellow.2 points
-
Yeah mate, it looks great. I picked up another car yesterday.2 points
-
First model in 20 years, 100% hand painted
mustang1989 and one other reacted to Landrotten Highlander for a topic
Hi MB13, welcome to the forum. I wish my hand-painted models looked that good (they also are remnants of a byegone era, about 25 yrs to be more precise). Looks to me that you have got the basics of hand-painting large surfaces down to a T. I do not paint my scale models by hand (now invested in a small airbrush and working my way through the learning curve) and am pleased with my progress so far - but still ways to go. However, I do paint figures as another branch of this hobby, and those are always hand-painted. I found that the best effect is alwyas achieved with very thin layers of paint, and to ge the dept of colour and hue I just build it up by many, many layers (I remember on one figure the face consisted of about 20 layers of paint - acrylics - and still was able to maintain a high precision of detail. Attached a picture of one of my busts to show what I managed to achieve (-still loads to learn on that one too). It is a version of what it would look like if Yoda went over to the dark side.2 points -
Almost done2 points


