Leaderboard
Popular Content
Showing content with the highest reputation on 02/18/2020 in all areas
-
Completed the KH Mirage 2000C as a -5F. In my opinion this is KH's best effort to date. Assembly was good in spite of the usual bad instructions. I like the addition of the resin pilot and exhaust. The decals were thick and did not respond to setting solutions. In spite of decals for French, Greek, Brazilian and Taiwanese airframes, there are only French stencils. Also, no information is provided for the 4 different rudder tips and two noses, so check references before assembly. This wasn't my best work - I found a lot of things I would correct in a future build. Your observations and critiques are welcomed. John14 points
-
1/32 F-14D VF-213 - Finished!
A-10LOADER and 8 others reacted to Marcel111 for a topic
I have used the Mig Ammo walkway paste for the first time. Must say I am really impressed, it's very easy to use and the results are more realistic than what I could achieve with the textured paint method I was previously using. One minor watch-out is not to layer it on too thickly around the masking tape, else you'll get an uneven tear when removing the tape. Cheers, Marcel9 points -

HH-60G Pavehawk Kitty Hawk 1/35 DONE!!
matt_1185 and 7 others reacted to Pete Fleischmann for a topic
Hey all- a little test-fit sanity check of the overhead panel. An oil wash coming up, and then this will be almost done..still sorting out the map lights position- circuit breaker panels, etc still to fit- cheers Pete8 points -

1/32 ERA-3B Skywarrior - 3D printed / scratchbuilt
LSP_Paul and 6 others reacted to Starfighter for a topic
The big one keeps fighting me, there are still cracks which keep on re-appearing. I suspect the resin I have used is too brittle to take the tension inside the fuselage... but we will see. I absolutely want this model, so there is no way back. As I didn't have time for real life modelling, I have spent some time on my PC and started preparing the LH side, i.e. Pilot's & Plane Captain's side console. I have just started adding details, so there is a lot of work left to do. I will use Anyz knobs here and there to save time - not only they ease painting, but only have to draw "holes" instead of entire knobs. Here's a quick rendering of what I have done so far.7 points -
Thanks! I've dealt with the fuselage seams (actually Tamiya putty dealt with the seams) and set that component aside for now in order to work up the nerve to cut the left horizontal stabilizer off and add flack/ shell damage. I also made up some ribs and spars (short pieces to protrude through the break) out of .010" sheet plastic. the part I'll be using getting a bit of detail work added I've roughed up the break, it'll look rougher with torn spars and stringers hanging out, and I'll completely delete the elevator from this side, with no hinges there'd be nothing to hold it in place7 points
-
.thumb.png.84c5d3a464f2dd83f0ac37a5aac81ec8.png)
1/32 Tamiya P-51D-5 NA Mustang "Ferocious Frankie"
Greg W and 6 others reacted to Antonio Argudo for a topic
Thanks Chuck, very appreciated from a superb modeler like you, we are working both for NAA aircraft at the moment cheers thanks John for the info, there is a new Alclad decals in the market, coincidence? https://www.hannants.co.uk/product/PF32412P?result-token=mBaQK&fbclid=IwAR0v6EtqXi2X4XmsWFtM9X8zJLffqbX-ZTdVfoXWJy-4LYraxRZMGCsWD84 I have not update since it's been boring stuff and not much visual, lots of sanding and filling rivets/panel lines... still more to sand and prime ahead but getting closer to the paint phase, most of the "silver" paint has been striped using superglue cleanner, I find out by accident, it works fine and does not damage the plastic, the wheel bay will be closed since is the position depicted in the image I'm rendering, so that excuse me from losing my mind with those pipes and wires detailing also a big shout to my friend Mathieu who kindly sent me stencils made in the silhouette for "Ferocious Frankie" markings, cheers7 points -
Thanks! It's definitely starting to look like a shot up B-17 it was/ is still a bit daunting cutting/ damaging up such a big imposing model! I've gotten the left stabilizer assembly finished, primed with Vallejo aluminum, chipping medium and masking will do for the bullet holes and flack I think temporarily put in place to get an idea of the effect Thanks for looking6 points
-
As promised, more pics of the progress:6 points
-
HASEGAWA FW 190 BLACK 2. 1st attempt at an airplane.
Pfuf and 4 others reacted to voncooperstein for a topic
5 points -
Good morning gentlemen, here I am: The end is near.....Cheers !5 points
-

MI-17 1V 1/35 Trumpeter
Loach Driver and 4 others reacted to Flachenty for a topic
I am catching up. My model presents the "tired of service" MI-17-1V No. 6109 used as part of the Independent Air-Assault Group at PKW Afghanistan at the beginning of 2014. Valorization sets have been used to build the model: PART: interior photo-etched parts Profimodeller: resin elements (wheels, main rotor elements) and photoetched (flare cassettes) In addition, the following elements were added from scratch: Interior heating system Right and left doors Elements of armament suspensions Entrance steps All antennas and brackets Rigging Complete interior of the transport compartment Winch Front right fuel tank Additional armor for the engine part Navigation lighting and NVG Part of the decal (tactical number, Leźnica emblem, some inscriptions) Wires Interior armor and deck armament attachment Elements of cockpit equipment Instrument panels Flare launchers The paints used are: BILMODELMAKERS, GUNZE, TAMIYA Other chemicals are AK and MIG products5 points -
modeling time, small advances, I decided to advance in the engine, it turns out that the model brings the Turbomeca Artouste engine version and the model I want needs a Turbomeca Astazou engine. they are quite different Artouste / Astazou we start with some adaptations and I don't love the nozzle, so I made one in aluminum5 points
-
http://www.iglu-one-one.net/tomcats-last-cruise-photo-gallery/ The fun is really starting with this build. The weathered effect was achieved by pre-shading, then spraying with the respective gray with about 20% white mixed in. To simulate the dirt on the areas that are frequently walked on, I sprayed with Tamiya Medium Gray. Plus a few touches of lighter gray and darker gray here and there... basically, every time I airbrush I use the opportunity to introduce another little patchy effect on some part of the model. See above for how the real thing looked. On the below pic, also note the little windscreen blower I scratch-built. I did a lot of extra work in and around the cockpit, I'll showcase that some other time. Cheers, Marcel5 points
-

XB-51 Dragon
themongoose and 3 others reacted to Dandiego for a topic
With major construction done and the fuselage being really solid it is time to open up the bomb bay. Dan4 points -
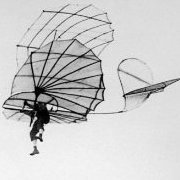
G-EBLV DH60 Cirrus Moth 1:32 scratchbuild
Anthony in NZ and 3 others reacted to RLWP for a topic
Centre section is now rigged, magneto switches fitted and the carb intake made. One of the engine panels has come adrift again, it doesn't like the handling Exhaust in place together with some fiddly sheet metal brackets Monofilament wires for the undercarriage painted silver. I think that looks about right Richard4 points -

HH-60G Pavehawk Kitty Hawk 1/35 DONE!!
A-10LOADER and 3 others reacted to Pete Fleischmann for a topic
Hello all- Tamiya Rubber Black followed up with a dry brush of MM Gunship Grey enamel makes this stuff pop.4 points -

ICM Gladiator slow build. Finished!
Paul in Napier and 3 others reacted to quang for a topic
Indeed Max. The final rigging was a treat. Contrary to Max who gathered all the threads in one bunch on the upper wing, I did my rigging one cable at a time, starting from the cabane struts outward. Sometimes, it also helps to turn the plane upside down on its stand. Anyhow here are some quick photos to show off the rigging. The rigging is left unpainted except for the tailplanes. May be it needs to be painted silver, may be not. 'm still pondering but it doesn't look half bad as is. Hope you like it. Like Max said, pitot tubes, dampers, antennas and off to the RFI. Thank you all for looking. Best wishes, Quang4 points -

ICM Gladiator slow build. Finished!
Paul in Napier and 3 others reacted to quang for a topic
Haha, I won’t mind a second MKII or Sea Gladiator (nudge, nudge). Just to renew the experience. Only this time it will be tidier and hopefully quicker! Quang4 points -
If I find one in 1/24th, does it count as a LSP? It flies around the track... Actually, I might get one for my daughter, she loves Flying Tiger stuff.3 points
-
A gift from a good pal. I've had a "thing" for Century series aircraft for quite a long while now, so this really fills the bill. It's not in the database either, so I'll be adding it shortly.3 points
-
Agreed, thanks for the advice. I sometimes grt too close to the work and cannot see the forest for the trees... I've gone with the good advise and using an R.B Products riveting wheel to make "tear along lines" I marked some .003" printing press tin and then scribed a line in it and tore it off, some PVA glue to attach it (I can put some Mr Surfacer on the seam later) I think it looks a little more prototypical now... or at least getting there.3 points
-
Hi friends Here my last job with my Me 262 Trumpeter. When I saw these Photos 3 years ago I decided to built the same. The main challenge . How to translate these Black and White pictures in color ...3 points
-
Instructions Needed
Rick Griewski and 2 others reacted to D Bellis for a topic
Posted in pdf format: https://www.scalemates.com/products/img/3/3/3/543333-44-instructions.pdf HTH, D3 points -
Thank you very much, still on that learning curve with figures...well everything actually. Another milestone in the build has been hit. That point in the build when the fuselage gets closed up. sanding seams...about 3 feet of them in total, now begins3 points
-

A6M2b Zero - shades of grey
Alain Gadbois and 2 others reacted to Madmax for a topic
As promised, the gunsight and drop tank were next to get some attention. The gunsight is a tiny clear moulding that attaches to a base moulded into the "dashboard". It has the A6M5 bracket that Ryan pointed out has to be removed, and like so many clear mouldings, has a highly visible seam line that runs right through the middle . With a bit of effort, it can be salvaged, since I don't think Barracuda have made one for us yet The crash pad is sanded quite a lot smaller, the seam polished out, the shaded lens lowered and both lenses given a support base. I added an arm on the left side that the ring sight attaches to (and can be rotated out the way). Fiddly work. The drop tank is a little basic, but has the major advantage of being cleverly mounted into rubber o-rings, so that it can be removed or attached at will. I added some weld seams, accentuated the rivets, popped on a fuel cap cover, and sanded some dents into the skin. Since a lot of effort went into the engine, I would like to pose the cowl-flaps open. They are finely moulded on the outside, but looking in from the back, the lip is too thick, no structure and no arms to open the flaps. This was rectified with some scraping, sanding, and styrene. With the fuselage and wings joined, and the wheel wells done, it was time to get some black paint into the engine bay, on the upper gear legs and the cockpit decking. This is how things look at the moment, and it is just about time to start mixing some shades of grey! Cheers, Sean3 points -
3 points
-
F-16CJ, 91-0348, 77 FS/20 FW, SW, Operation Iraqi Freedom, 2003 (maternity base-SHAW AFB, North Caroline) Accessories Aires: cockpit, wheel bay, exhaust nozle Wheelland: Wheels Master: pitot tube Paint: Gunze C, MR Paint, Aero Master Wash: AK Interactive, Ammo Mig Foto: my frend Miloslav( thank you)2 points
-
F-35A 13-5081 AFB Hill
AnthonyWan and one other reacted to CruZz for a topic
Hello gentlemans. Model represent plane from AFB Hill nr: 13-5081. It was only one with some light weathering, when I build it.... Kit Italeri Eduard PE sets Lot of scratchbuild and wiring (wheel bays, bombbays), added many surface details. Wheels True detail... Amraams Eduard brassin. Paiting masks by DN-Models. Decals: Furball Etc.... I made my own exhaust nozzle od 3D printer, because all of aftermarket set was small.... Thank you for watching. Have a nice day. Jan :-)2 points -
Hello! Herewith my first LSP - for that matter, first build of any sort - in more than 40 years. It represents a warbird rendition (hence the modern VHF aerial on the finished thing) of an aircraft from 12e Escadrille, Forces Armées Bretonnes, in Algeria in support of the French operation there in the 50s. My intention with this bird was to learn and a "what if" subject allowed me to experiment without having to worry about faithfully capturing a real aircraft. That said, I did set myself something to aim at: Did I succeed? Well, I'll let you decide - she's never going to win any prizes but for a first go, I'm happy with the result. When I'm a bit better at all this I might revisit her with a slightly more battered "in service" finish, in European theatre colours. Paint and satin finish are Vallejo, some Xtracrylix used in the cockpit, gloss layer is Alclad Aqua and helped along by brass gun barrels, resin main wheels and various scratch stuff. Markings all masked, the few stencils are HGW wet transfers. Build thread is here . and the only pic of the cockpit I have, currently (I know the armour plate should be black... apparently the owner doesn't ) Cheers! Sepp2 points
-
This time F-5F Kitty Hawk, Kitty Hawk models aren't my favorites. However, the F-5F is a beautiful jet, so I had to have this plane in my collection.2 points
-
1/32 Revell Junkers Ju-88A-1
John1 and one other reacted to Tolga ULGUR for a topic
This is 1/32 Revell Junkers Ju-88A-1 of KG54 Battle of Britain Campaign France, September 1940. Eduard intrument panel CMK Ju 88A seats Q32105 Quickboost Ju-88A-1 exhaust set QB32059 Ju-88 A1-A5 resin corrected rudder Airdoc Ju-88 small tires for A1-A5 MDC Ju-88A bomb racks Master Model Gun barrels Painting with Gunze Sangyo acrylics You can see full build story by using the following link in WIP section.2 points -
Thanks! ill add some rivet detail....it’s always something I forget, with a pin in a pin vice...doh!2 points
-
How to - Light curing putty
BiggTim and one other reacted to Modeller 01 for a topic
Hi fellow modelers, In this video I'm showing how to work with light curing putty. Excellent putty, cures fast & doesn`t shrink. BW2 points -
Wow, the battle damage looks great! To my eye however, the tear/break of the elevator seems a bit too clean. Maybe tear/roughen up the edges a bit somehow?2 points
-

1/32 F-14D VF-213 - Finished!
Marcel111 and one other reacted to chuck540z3 for a topic
Looking great Marcel! Those walkways are nice and crisp. As for your wing glove problems, I have felt this pain before, hence a new rule: If it takes clamps with any kind of meaningful pressure to get the parts to fuse together, don’t do it! The join always seems to separate later, especially after painting. Cheers, Chuck2 points -
HKM B 17-G
Dennis7423 and one other reacted to spruebrothers for a topic
Please be aware that BIG3332 is discontinued by Eduard which is why you are not finding it. https://www.eduard.com/Eduard/B-17G-PART-I-1-32.html?cur=2&listtype=search&searchparam=big33322 points -

A6M7 Model 62 1/32 Hasegawa
corsairlada and one other reacted to Miloslav1956 for a topic
A6M7 Model 62, 302 Kokutai Model Hasegawa 1/32 HGW rivets, wet transfers, seat belts & mask Eduard wheels All colour MRP test set IJN Marking mask home made2 points -
I can practically hear the wind screaming over those holes and tears. Lovely work Richard2 points
-
Here is my finished Revell 1/32 Bf109G-6 converted to a G-14 as Blue 62 as is shown on Barracuda decal sheet The complete build can be found here: As you can see i have added the drainage of the MW50 glycol tank Here among my other beauties... Hope you like it, please feel free to comment anything you want!! John2 points
-
You re right ! It's.....future ? everyboby speak english !2 points
-
Instructions Needed
D Bellis and one other reacted to voncooperstein for a topic
Thank you D. Bellis!2 points -

Instructions Needed
D Bellis and one other reacted to Troy Molitor for a topic
Brother D to the rescue.2 points -
In January of 2019 I tried an experiment to try and match fifteen different paint mixes to the paint applied to two Zero artifacts. These were skins from the tail cones of Mitsubishi A6M3 32 s/n 3285 and Nakajima A6M2 s/n 6345. The paint used was: Polly Scale Concrete Polly Scale USSR Topside Green Tamiya XF-76 Tamiya XF-76 / XF-49 (2:1 ratio) AK Interactive AK-2062 J3 Sp Lifecolor UA 039 (FS34201) Lifecolor UA 019 (FS30277) Lifecolor UA 755 Model Master Acryl Armor Sand (30277) Model Master SAC Bomber Tan (FS34201) Model Air CamBeige 023 Hemp Model Air 71.311 IJN Ash Grey Mr. Color 60 RLM02 / 336 Hemp (1:1 ratio) Mission Models MMP-107 J3 Hai-iro Lt Grey Mission Models MMP-110 J3 J3 SP LT The artifacts were partially wet sanded with 3000 grain sandpaper to remove any surface oxidization. The area I matched to is circled on the artifacts. The matching was done and the photos were taken in direct sunlight. It should be noted that the match was for full scale colour – for scale colour the matching paints should be appropriately lightened. The best match for the Nakajima color appears to be first Lifecolor UA 039 (FS34201), second Model Master SAC Bomber Tan (FS34201) and third Mr. Color 60 RLM02 / 336 Hemp (1:1 ratio). None of the paints were an exact match for the Mitsubishi sample. On this weekend I picked up some Model Air Tan Green 71.023 Hemp. It is said on the bottle that it matches FS34201, but it is not anywhere close to the other two paints described as 34201. It is much too green and much too dark. Ryan2 points
-
As if I weren't already insane for having 15 model projects underway, my creative juices got flowing and I started another one! After much research, I finally hacked up a perfectly good Hasegawa kit and started building the conversion for the P-40E M-105. I assembled part of the nose, and cut it away from the rest of the fuselage. Next I cut out the scoop on the top of the cowl and replaced it with a thick piece of white styrene and re-shaped it. Next up is the exhaust port revisions and humps, which are actually done, I just don't have access to the photos of them at work. Tim2 points
-
A bit more work this past weekend, this time on the cowl radiator flaps. The kit part is quite thick, and the D-13 had ALL of the flaps operable, including the one left closed on the kit part (a detail often missed on many of the builds I've seen online). I considered using the kit part with them closed, but in every photo I can find of the plane parked, they are open. Apparently they were mostly closed when the plane was airborne. With that idea shot down (pun intended), I cut all of the flaps off and made new ones out of brass sheet. I installed the actuator arms from the Eduard exterior detail set, which don't look too bad, despite being incredibly thin and fiddly, and will bend if you breath on them. More later, after I get it installed. Tim2 points
-
A small update. Looking at photos of the F-16A the static dischargers seem over scale on the kit. I do not know if they changed to the C or if it is only a molding limitation. I changed this by using .3mm wire which look more in scale. In the photo they still need to be trimmed to length. The ones on the wings and fin I will do as soon as the model is complete , in case my clumsy side bumb them. Nick2 points
-
Now that the Pup and the Roland have been kicked into touch, I'm back on this: That stupid little windscreen held me up for ages. I couldn't work out how to make something to keep the front edge curved that followed the fuselage. I tried thin sheet and bent angle, nothing worked. Then I found a huge roll of really thin transparent stuff behind a cupboard, cut a bit of that, bent it around a cocktail stick and stuck it in place with CA. Just like that! I'll fit the rear one when the rigging is done, otherwise I'll knock it off Richard2 points
-
Damage to the fin and some internal structure visible through the damage, underway now. Thank you for looking2 points
-
Thanks for the comments guys. Two things that I am not overly keen on doing with models are seat belts and brake lines. For some reason I find this stage of the build to be a bit of a pain! Needless to say, they both need to be done. First up, the brake lines on the undercarriage. The kit has some reasonably nice lines already there but they are moulded integrally with the leg and are a little to 2D for my liking. I sanded them off. I used .4mm lead wire and .4mm copper wire to depict the two lines that run up each leg. I used thin aluminium foil to replicate the brackets that hold each line in place. A very thin strip of it was passed behind the lines and then folded back up itself. I used the excellent RP Tools ring maker to fabricate some tie down rings. These replaced the kit tie down points which are just lumps of plastic as can be seen by the unmodified one on the left. Done. I hate using photo etch seatbelts, so I used the Aires photo etch and resin buckles and made my own belts from thin aluminium foil. The shoulder straps were next, I used a small section of copper wire at one end to allow me to roll the end over and form the attachment loop. as can be seen on the top strap. Looking at my reference pics, I noticed that on some of them, the pilots shoulder straps were hung over the side as can be seen in the following pics. An excellent pic (not Ron) of a pilot about to go flying. His helmet is on the windshield and the shoulder straps are just visible, hung over the side. Another pic of a maintenance scene. Same deal with the shoulder straps. I thought that this would be a great feature to incorporate, it would really give the model a human touch. I got in touch with Ron and asked him about what the protocol was when the pilots were about to go on a sortie. Here is his response: Typically, when we went out to the aircraft for a mission, we would mount the ladder and deposit our parachute into the cockpit and place our helmet on the top of the front windscreen. We would then dismount and conduct our preflight inspection of the aircraft. Upon completion of the preflight, we would go up the ladder and get into the cockpit. The crew chief would come up the ladder to help us strap in and it was typical for them to leave the straps hanging over the cockpit rail so that this would be easier to do. So -- short answers to your questions are - helmets were placed on the front windscreen until we put them on, and the safety straps were left hanging over the canopy rail until the chief helped us put them on. The photos you sent were authentic. Hope this helps you. Ron Based upon the pics, and Ron's great reply, I got to work and made it happen. I made a copy of the Aerobonus F-100 pilots head with helmet and carved out the head. This will be painted as per the pics that Ron supplied earlier in the thread with his name and checkers on it..... if I can paint them that small! The objective will be to draw the viewers eyes into the cockpit. Just need to work out the parachute pack.2 points
-
Yesterday I've received resin wheels. They're significantly larger in diameter than kit ones. And definitely more accurate Which lead me to another task. I hoped that I can make them fit - no chance. So again...sandpaper, file, dremel...And there it is. Now I se how unnatural kit wheel looks... Many thanks, AlexM2 points


