Leaderboard
Popular Content
Showing content with the highest reputation on 01/16/2020 in all areas
-
I wasn't sure I'd start a thread on this or not... I may never finish it. Not the 109 but the severely damaged B-17 that goes with it I'm hoping to (someday) realize a model Vignette similar to the book cover "A Higher Call" I have begun with the Revell 109 G-6 because it's the only 109 in 1/32 scale (that I know of) that can be modelled with the wheels up. I have crews to fill both aircraft involved, the ones that can be seen anyway, and decals...all I need is time...years of it! So after a week or two of tinkering with the 109, here's where I'm at. (Feel free to tell me I'm nuts and not to do it, then I have an excuse to stop) Having never really been a fan of "prop blur" props, I filled the prop cutouts in the spinner and sanded it all smooth, trying to give the impression of an invisible prop at high RPM Off to the nut house now...21 points
-
This is tle page 10 of ICM 2020 catalogue!10 points
-
Thanks for the comment guys. On to the painting stage. I like using the black base method for light colours and metal, so I painted the entire under surface black using another excellent SMS product called Camo black. This paint gives a very smooth satin finish which is very hard wearing straight from the bottle. Thus was my mottled coat of the light grey, which will provide a base for subsequent light coats of the same colour. I extended the black base up over the rear fuselage and pre shaded the top surface. The start of the bare metal effect on the rear fuselage. I split the area up into 3 zones as can be seen. From the front I used Alclad Duraluminum, AK extreme metal Duraluminum and Alclad Gunmetal as the base colours. These were mottled over each area. I then used Alclad pale burnt metal thinned with MRP lacquer thinner and mottled it over each panel. This was followed by a further thinned mix of Alclad Gunmetal which gives selected areas a purple discoloured look. It moves around a bit depending on the light. I then started to sketch the different cam colours on the upper side. I build up each colour organically so that it doesn’t look too sterile. I used MRP paints. The rough shapes in place. I have further refined each shape since this pic was taken. An important part of the model is the scorched areas of paint on the rear fuselage. I don’t have any pics of 197 that show this area (although an ultra high res photo of it will show up the day after I finish it) so I have worked off a few pics of different aircraft to come up with a composite. I am leaving the two rear most panels alone and will apply the scorched effect to the front. I lightened the base colour and have sprayed the outer areas of the panel lines to represent the oxidised paint. Over the top of this will be applied the base colour. More to come later.10 points
-
hi that looks an ambitious project , but , for people ( like me) that doesn't know the book " higher call " , we would want to know what your diorama will look like Alain humm ! sorry , I just found ( Goggle is useful ) ..indeed that is an ambitious project !!!!!!!! (if you allow )7 points
-
.thumb.png.84c5d3a464f2dd83f0ac37a5aac81ec8.png)
1/32 Tamiya P-51D-5 NA Mustang "Ferocious Frankie"
Greg W and 6 others reacted to Antonio Argudo for a topic
Thank you Mark, I can't say less about your work, truly inspirational mate! cheers been working on the right cockpit sidewall, again Terrell's sims as a guide, used Barracudas cockpit resin and placards decals, added some white punched decals to represent the NAA inspection stickers also, cheers7 points -
Thank you, Brothers. Finished up the Cockpit and Engine Mount Compartment. A couple of squashed solder balls as fasteners. Black electrical junction box, wire, and tape clasp. Added a switch and crank. Finished up the firewall and roughed in some piping. Empty slots will receive yellow and red wiring. Engine Mount to Firewall mounting connection made up. Another view. Luckily it fit. Another test fit. Vent hardware. Added cabling. It will go through the pulley in the next photo. Pulley. Drilled hole a top to thread the cable. Hole across from pulley is an ERROR, ERROR, ERROR, WILL ROBINSON! Or is it DANGER!? The other hole will accept the three wires from above. Center Engine Mount support structure. Bunch of rods and handle around the canopy crank. Fitted. Thanks for looking. Sincerely, Mark7 points
-
And this is how our latest model looks. Lukgraph Sopwith Baby in 1:32 scale. This is full resin kit. Comments are welcome. Model available in our online store: www.lukgraph.pl Thanks for watching. Best regards Lukgraph Team7 points
-
All closed up and now I need to do some painting. First problem is the greens used by JG54. Every profile and model seem to have their own interpretation. I used one of Claes Sunden's profiles to mix a color from Tamiya enamel. I still need to mix the darker color. I also decided to do reverse masking on the yellow and do that first, The crosses were done on the Sillouette Cutter and sprayed onto the yellow. I will now mask all the yellow areas and the complete the model as usual. Nick6 points
-
Thanks for the comment guys. Nice! Would be great to see a picture or two of you and an F-100. Some more work. I had a bit of a play with the tan colour as I felt it looked a bit too pink. I shaded it with a very thin mix of Model Master enamel Tan to brown it up a little. I have started post shading some lighter areas of each base colour. The scorched areas are still a work in progress.6 points
-
Hi, Our latest decal sheet, Henschel Hs 129 B-2 in Romanian Service, is now ready. This is a decal sheet featuring eight aircraft flown by Aeronautica Regală Română on on the Eastern Front and on the Western Front. The decals are available in the following scales: 1/32: http://www.radubstore.com/index.php?main_page=product_info&cPath=1_65&products_id=767 These decals are suitable for the 1/32 Hs 129 model kit from Zoukei Mura. 1/48: http://www.radubstore.com/index.php?main_page=product_info&cPath=1_66&products_id=768 1/72: http://www.radubstore.com/index.php?main_page=product_info&cPath=1_67&products_id=769 Thank you for your support! Radu5 points
-

ICM announces Fiat Cr.42 1/32 in three presentations!
jimbo and 4 others reacted to Archimedes for a topic
ICM are releasing subjects quickly and consistently that have been wanted for a long time. This is great to see. Perhaps it was a general level of increase in confidence seeing so many biplanes built from the WNW catalogue that have given manufacturers the faith that there is a market as they can be built successfully. 1/32 scale is perfect for many of them; not only the WWI subjects but also there interwar and early WWII subjects. Kind regards, Paul5 points -

Gloster Gladiator.....finished :)
Paul in Napier and 4 others reacted to mozart for a topic
The dampers are just sitting there Brian, I guess they should be "clamped" onto the bracing but too difficult at this scale. Anyhow, apart from the aerial and a little bit of tidying up...........she's finished!! A few rough and ready pictures but RFI in a few days time. I was looking at my Bulldog last night..........daunting!5 points -

Gloster Gladiator.....finished :)
Paul in Napier and 4 others reacted to mozart for a topic
Brake lines and connectors completed, fiddly but fairly effective I think: I've also added the "dampers" for the main bracing wires: For future Gladiator builders I made them 30mm long from 0.88mm plastic rod.5 points -
Hi everyone, Some small progress here. After getting the wings on and tidying up a few seams, I applied MRP fine gray primer. I gave it a day to harden, then I used buffing compound to make sure it was smooth everywhere. Afterwards added Tamiya white where the masks will go. You may notice that a mask is missing for the II Gruppe badge. Here is what the mask looks like for it: You can see that all three attempts suffered some damage due to the smallness of the design and the limitations of the cutter. I've since been told by Mal that I need to make each color in separate parts. I can see the wisdom of what he says. However, before he gave me that advice, I found a decal set. that had the II Gruppe badge so, I ordered it. Hopefully it'll be here, soon. Today I masked off the areas painted with the theater yellow. Then, I painted the lower areas in a mixture to create a shade of RLM 76. I would have taken some pics, but the contrast between the RLM 76 and the gray primer is very small. I'll let that paint cure overnight before I fix any imperfections. Cheers! Gaz5 points
-

Tamiya 1/32 F4U-1 Birdcage Corsair - Done!
Starfighter and 4 others reacted to Brett M for a topic
Thanks! That's kind of what I keep telling myself as well. Once I start on the lower side of the plane, that should help "blue it up". More work tonight. How does the demarcation line look on the tail? It seems that this wasn't exactly a fixed paint scheme, with the line moving up and down on different planes. I'll mix up a slightly lighter shade of blue grey in the next day or two and spray the fabric areas (unpainted). Comments, suggestions, pointers.....all are welcome.5 points -
I will respectfully disagree..I believe we can make something out of the Hasegawa kit with a few mods.I did think about the Airfix but not really my scale and don't have the display room in the case.As nice as it obviously is, also there's the issue with having spent a ton, over time, on goodies to accentuate the Has.kit. Will post some progress pics once the engineering challenges are dealt with. cheers.Bill.5 points
-
Ok just a small update. Here is the horizontal tail with the elevators cut out. Told you it was a small update. Dan5 points
-
Here is an update covering some of the work that I've been doing on the Ta152 over the past few days. A view of the cockpit encased within the fuselage. This was before I realized that the instrument panel hood would place the IP too far back. So I've popped off the IP and will be adding an additional spacer to push it out closer to the pilot. A preliminary view of the engine parts. As usual, I don't think I will be leaving any fuselage hatches/covers in an open position so engine will most likely be hidden from view. So I've decided to paint the kit parts but not add anything extra. The panels on the wing bottom need to be changed so the first step is to fill in the conflicting panel lines. I'm going to use my newly concocted batch of sprue goo for the fill operation. Hopefully, this plastic material will provide a uniform base for the scribing of new panel lines. The goo is given ample time (24 hours) to cure before sanding. The engine cowling, previously filled with Mr Surfacer, is also smoothed out at this stage.4 points
-
Great to see you working on this subject Chuck, I have four of these kits, all destined to end up somewhat modified. So I'm very interested to see what you can do with this one. Great choice of subject too! I'm always amazed to see kit manufacturers coming out with so many inaccuracies in their kits... some are understandable if the subject is rare or poorly documented. But with so many Texans and Harvards around, the mistakes in this kit are unforgivable!! The tail-wheel detail by KH is stupendously poor, and I noticed your solution based on Max's fine work. Since I have 4 of these kits, I've been working on a 3D printed solution to the tail-wheel "knuckle", see my photos below for how it should look: Harvard tail wheel collage by Derek Buckmaster, on Flickr You can see the shape of the fuselage cut-out and the triangular shape of the "knuckle" when viewed from below. It was nice of the Imperial War Museum (Duxford) to hang their Texan up in the air to enable lots of photos of the underside, which you can't normally get! Also, the amount by which the tail-wheel protrudes from the fuselage is due to the fuel and crew load, not related to the position of the tail-wheel. Since the tail-wheel is sprung with an internal pneudraulic cylinder, if the fuel tanks are full and there are 2 pilots on board, the tail-wheel doesn't protrude much at all. In the photos above you can see that with no load on the wheel it is fully extended. Cheers, Derek4 points
-
The last of the very light "weathering" is done and final satin coat of clear is dry. I think it's done...4 points
-

HPH Models 1:32 scale - Austro-Hungarian Aviatik 'Berg' D.I
Dany Boy and 2 others reacted to sandbagger for a topic
Hi all, Here are the final reveal shots of the WW1 Austro-Hungarian Aviatik 'Berg' D.I fighter, operating with Flik 63J during 1918. 1:32 scale resin model from the Czech company 'HPH Models. Gaspatch turnbuckles, micro-tube and mono-filament used for the rigging. Laminated wood propeller from 'ProperPlane'. Figure from Grass mat for display base from 'Polak'. Paint used were 'Tamiya' acryics. Figure - ‘Copper State Models’ Austro-Hungarian flying ace (F32-032). My usual full and detailed PDF build log is available to download from gallery 2 on my site (link below). Mike3 points -
Tamiya P-51D, Sinai, 1956, with Reposted Images
Antonio Argudo and 2 others reacted to dodgem37 for a topic
Thank you, Torben. Thanks for looking and liking. Sincerely, Mark3 points -
Flaps, slats and other bits and bobs put on, along with some nicer weather today, some RLM 76 blue. I will probably stick the gear on too once dry to make painting and handling a bit easier.3 points
-

NLLSP- No Longer a Large Scary Project- finished
MikeC and 2 others reacted to Alain Gadbois for a topic
Cool and ambitious project! I agree with the spinning prop solution, as it is just impossible to have a believable effect with photoetch or clear disc. Alain3 points -
Hi everyone, A few elements to furnish the bottom of the cockpit. The joys of cleaning resin parts. We're going to have to get out the engraver's stalls. To make an old hydraulic pump. The broomstick with the toilets in Boyington. The rudders. See you soon, Sweety3 points
-
Another milestone reached. I can now join the fuselage and wings once the cockpit is in. The stick (control column for the purists and training captains ) seemed thin compared to photos of the real thing , so I replaced it with a piece of plastic rod. I most likely spend too much time on the cockpit as not much can be seen once closed up. This kit is very good in some places, in other you ask what was Revell thinking. Nick3 points
-
Caudron C.714, Azur, 1:32 - FINISHED
red baron and 2 others reacted to Landrotten Highlander for a topic
Then I felt these side-walls were a bit too bare, so I scratch-built some additional items using a variety of wires and - believe it or not - some paper. The LH-side of the cockpit houses a priming pump adjacent to the seat. I manufactured this out of some 2 and 0.5 mm coper wire. Slapping some paint on: The last two pictures show the effect of the synthaglass on the individual instruments a little more clearly. A bit out of focus - but so am I occasionally. Nothing wrong with that I took quit a number of pictures with the fuselage upside down to make sure the details were not hidden in the shadow (taken at night and I only use a table light to work by as this most effectively lights up the working space - all other light sources create too much of a shadow. So once I was happy with the paint-work I was ready to further ensure a proper fit between both fuselage halves and the cockpit floor.3 points -
3 points
-
I was looking forward to removing the masks protecting the interior and the glass parts. The Masking Neo comes off very well even after several weeks.3 points
-
Hurricane MK.IID of
Martinnfb and 2 others reacted to gmctaggart for a topic
Thanks Michael, Its quite discouraging as you go through the various parts and you see the inaccuracies, especially when there are so many great examples that Trumpeter could reference. Case and point are the interestingly shaped propeller blades. I am no expert but in looking at what is in the kit and photos of the real thing you are left scratching your head. At any rate I have thrown some paint at the fuel tank... Firewall and the bulkhead. I have also added some of the piping for the coolant reservoir and first pass at the aluminum colour. Progress but still a ways to go. Thanks for reading and the feedback. Gord3 points -
Back at the bench with an oldy but goody...We are taking two Hasegawa Hellcats and attempting to entitle them. Have been collecting AM for a long time ,some just recently traded for with a good modeling friend. Mating Trumpter wings to the Has fuselage x2,want a F6F-3 and a F6F-5. Will attempt to rescribe and enhance all the surface detail..new cockpits,detailed engines, etc. Have line drawings and references in place and a head full of ideas..All that's left is a bit of time and some luck sorting out how to do it.LOL. Cheers Bill. Got my hands on this nice base from Australia ...quite lovely it is2 points
-

Mitsubishi A6M3-22 Zero JNAF 251 Kokutai , Hiroyoshi Nishizawa
rafju and one other reacted to Miloslav1956 for a topic
Hi all, my last model in this year. Model Tamiya 1/32 A6M5 fuselage & A6M2 wings Aires cockpit HGW seat belts Wheels bay & wheels CMK Painting mask homemade All colours MRP - prototype IJN set2 points -
Hi again, here are some pics of my recently completed WingNut Wings Albatros D.V, my 3rd wingthing and first attempt at a WWI era plane, definitely some room for improvement but pretty happy with it, I hope you like! Built pretty much OOB, just added a bit of engine detail. Cheers!2 points
-
ICM announces Fiat Cr.42 1/32 in three presentations!
FCM and one other reacted to CATCplSlade for a topic
Admit it; you're just afraid of tackling those camo schemes. Deep inside you know you want this.2 points -

HH-60G Pavehawk Kitty Hawk 1/35 DONE!!
KiwiZac and one other reacted to Pete Fleischmann for a topic
Can you see the progress? Slow grind continues! cheers Pete2 points -
A light coat of grey to check the filled panel lines. So far so good. Using masks cut with a Silhouette Portrait cutter, I can mark the locations of the new hatches and ports. The brass template for the large 4-sided access panel are temporarily glued into place with CA glue. Black paint is used to mark the locations for the smaller ports upon which I can use a standard scribing template. This is where I started running into trouble. I had hoped that the panel lines that I had filled with sprue goo would give me a consistent material over which I could run a scriber but this was not the case. The filled areas were much softer than the plastic and it was difficult to track a consistently straight light through any area that had been filled. The filled areas, being softer, clung to any excess pushed up by the scriber, making it more difficult to clean up the lines that had been scribed. And white putty on black putty is not the easiest color combination to worth with since it is hard to distinguish between the putty and sanding dust. Another shot of grey paint removes the visual clutter of the filled lines. But it also reveals the imperfections from the scriber getting bogged down by the softer sprue goo. So frustrating... I was really disappointed at this stage and was compelled to put down my work and go do something else. When I came back, I didn't think the results were THAT bad. Most of the shapes seemed workable. Re-tracing the shapes using the templates cleaned up some of the slop. The worst spots were filled with Black CA and re-scribed. So now I am in micro-cleanup mode, using dabs of Mr Surfacer to repair scratches and make the lines more uniform. Getting there...2 points
-
Well said Paul. If the Fiat is as good as the Gladiator, and why wouldn't it be, ICM are on to another winner which will further encourage them to do more biplanes. Wonderful!! Oh, and welcome to the Forum Paul.2 points
-
Looking in my Japanese Naval Air Force Camouflage and markings WW2 book under propellers and spinners it states that between 1937 and 1943 the forward faces were polished metal with two red stripes at the tip. From 1943 through 1944 the only change was to go to one large red strip near the tip. Mid 1944 to 1945 the forward face was painted in a dark colour such as red brown, dark green or black, during the entire period discussed the rear faces were finished in red brown, dark green or black. This is from the book by Donald W Thorpe so may have been superseded by newer information. I'm just building a Raiden and have used Humbrol 160 German Camo Red Brown for the prop blades though I now have some Sovereign Colourcoats ACJ23 Propeller Brown. Cheers Dennis2 points
-
Morning people , and especially my fellow Sky Pirates, After a couple of nights in the trenches some comments might be in order , first Pylons The re-tooled master is getting close to being cast , just working out the engraving etc, BUT I had a bit of a crisis yesterday as regards the size of them. In common with a couple of outhers I'm planning to add Flightpath Sea Eagles to my Buc, so I bought a pair from the big H this week I'd built them before when I built a GR-1B tornado , and knew all about them , but when I put the Launch rail together and compared it to my Pylon - Yikes , the rail is about 4-5 mm longer - cue an evening of panic comparing my pylon to the Scaled un Huntley plan , it looked fine, and as all you Pirates know the Eagle launch rail is the same length as the pylon, So where had I gone wrong? Well as it turns out I hadn't , When compared the Buc wing , it became obvious to me at least that the launch rail is too long , by said 4-5mm - now I can't absolutely guarantee that is the case but reference of the well know pics of the 208 Sq Bucs toting 4 eagles its obvious to me that the rails do not extend the full cord of the wing, neither to the pylons, so crisis over ,I hope Casting this weekend , hopefully Chaff Flare buckets - Scratch building the flare/Chaff dispensers that go under the airbrake , yikes, a LOT more complex than it appears to be , you RN builders count yourself lucky! Air Brakes - and in particular the re-enforcing panels - I found this pic Here - is this typical of the mods applied to the later RAF Bucs, it looks more like armour plating! , I know the mod was applied as part of th1508 program, but this looks like overkill! , still might be fun to add, and I'd better stock up on Archer Rivets! So its one with the building - which me luck2 points
-
Hurricane MK.IID of
TorbenD and one other reacted to Dpgsbody55 for a topic
I tend to agree with TorbenD insofar as the differences in 1/24 scale would be negligeable. In fact, I'd go so far as to say that in 1/24 scale, it would be hard to differentiate between the Merlin III and a Merlin XX. Both were single stage supercharging, though the Merlin XX had two speed supercharging. I believe that the Merlin XX was a few inches longer and all Merlins after the III had much improved supercharging thanks to improved airflow through the supercharger. For our purposes, we don't model engine internals, unless you're Zoukei Mura . Check these images of Merlin 20 series. I think the lengthening of the engine was due to the introduction of the gear train for the 2 speed supercharger, and this was in the area immediately in front of the supercharger casing itself, so perhaps not too difficult to model. Here's a Merlin III, and you'll notice the increased gap between the supercharger casing and the magneto. I don't see that it would be hard to add a blank into the supercharger, in front of the S/C casing. The nose of the Hurricane II was longer to accommodate this, but that should be included in Trumpeter's model (??). Good luck with this, and I'll be following your progress with interest. Cheers, Michael2 points -

KH T-6/Harvard Kicked Up A Notch: Apr 14/20: Finished!
mozart and one other reacted to chuck540z3 for a topic
Thank you Derek for all that great info and pics on the tail wheel! The last part would explain why the wheel protrudes sometimes and not others. Extra weight would explain why pics of a Texan taxiing to the runway usually has a low profile, while a parked Texan/Harvard, which usually has the wheel forward due to being pushed backwards into a parking stall, has a more pronounced profile with much less weight. My effort to replicate this tail wheel contraption isn't great, but it's a lot better than nothing and once painted should look the part. I suspect in time this part will become available in resin by somebody, along with many other corrections I'm about to find out about! Using Max's guide, I have Mustang wheels as replacements, but a correct set of Texan ones would be most welcome. Barracuda maybe? Time will tell. Cheers, Chuck2 points -
I need to correct my statement. According to Ryan Toews' Tamiya A6M2 Tweak List, the prop had dark brown faces, not black. Tamiya A6M2 Tweak List2 points
-
Thanks a lot to @DONG for the donation. It's always nice to find something that's coming from some distant place like Canada in the mailbox. Now I need to get the model to put the decals on. Thanks again, K2 and the rest o the gang, for making this happen! Juraj2 points
-
...it was a joke...2 points
-
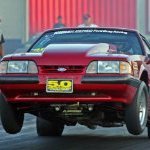
Cross Kit General Lee......ish-Completed-01/16
TorbenD and one other reacted to mustang1989 for a topic
Thanks Brian for the comments and Chris for the vote of confidence! Ok......I've been throwing everything I've got at this one and it's been a lot of little things that all add up to the bigger picture. Engine bay is......finished!! And I've got everything done here except for some work on the hood, some R/T badges, windshield wiper install and custom exhaust tips.2 points -
I started cleaning up the engine parts. Quite a bit of flash in some places. I think the engine looks pretty nice, and I'm considering adding some ignition cables and stuff. Then perhaps I can have the covers off. Just need to figure out how it should look. Have to google a bit! For some reason I continued to clean up parts. Might as well have it done. Just a few more things to do, then I can start painting engine parts and all parts that need to be in RLM02. Other parts to for that matter, but those I need first! Håkan2 points
-
Caudron C.714, Azur, 1:32 - FINISHED
Dpgsbody55 and one other reacted to Landrotten Highlander for a topic
Little update. Slapped some ppaint on the cockpit tub. I glued the little rod that had fallen of since taking the picture. View of the IP: The parts were airbrushed with Mr Hobby C337. There were no decals for the IP panel, so using Scale75 acrylics I painted the appropriate panel faces Black mixed with Abyssal Blue, then dry-brushed the raised edges with White Sands (slighlty ivory colour sort of off-white). Used Blood Red for the VSI. Seat belts were painted with Tamiya Khaki (XF-49), and painted on stitchings with the black-blue mix and mimmicked the fabric with little stipes of Birch highlighted with White Sands. All silver highlights on seat belts and stick were painted with Flat Aluminium. When all was dry I added a little drop of a product called Synthaglass to each of the instruments. This product is practically clear when you put it on (unlike Crystal Clear, which is a mily white) and although it does not show on the foto creates the illusion of glass in front of the panel. What is clear on the picture is a nice darkening of the black.2 points -
Following are some close up shots of the build. Top of the engine with the blast guards in place. These turned out to be a lot easier to construct and place than I thought they would be. Undercarriage. It is a bit unstable, not surprising given the scale thinness of the supports, but I will handle this puppy with extreme care. Tail section. I added some splashes of mud/dirt to the bottom of the rudder and tailplane supports. You can see the control cable ( and that I did not get the ends perfectly cut off. Fortunately that is only apparent in macro photos. Macro of the front of the pit and the backs of the Spandaus, these Gaspatch MGs are real masterpieces and look the biz, though you can see the left one is just a bit canted. Again this is only apparent in a macro photo as very fortunately it is not apparent under normal viewing. Still a bit vexing. Extreme close up of the port engine cowling area. Seat cushion and HGW seatbelt. These turned out rather nice. And finally, one of the upper control cables photographed about as close as I can get. These were easier to install (I used EZ Line) then I thought they would be.2 points
-
Following are some photos of the finished model. I took these in my photo tent so the lighting is better and you can (hopefully) see the kit in a better light. <grin> Above view of the overall plane. You can clearly see that I airbrushed the elevators a different shade of blue. It is probably not 100% historically accurate but I like the contrast. Different angle of the overall plane. Near ground level overall aspect. The prop is a wooden one that I had spare from the Roden Dr. I build, these are very nice. Fairly close view that shows the cables, Spandaus and some of the lower wing well. Intermediate distance view of the cockpit highlighting a couple of the instruments and the Spandaus. Finally a close up of the nose that shows the prop fairly well.2 points
-
IMAM Ro43 1/32 scratch-built
HerculesPA_2 and one other reacted to baffozac for a topic
Here to end the week, a little weathering to add. Cheers !2 points


