Leaderboard

Popular Content
Showing content with the highest reputation on 01/04/2020 in Posts
-
Now with some time and courage there comes progress! FIrst of all: damage report From afar everything looks just fine: With closer examination you can see where the paint ate trough all coats down to the base With some RLM79 sprayed on carefully The coat turned out ultra flat and quite light even though it's from the same jar. After some polishing with a sanding stick the result was a lot more even. The salt fading is a lot heavier than I would like it to be - those MRP colours are sometimes covering too good! I'll try to tone the effect down with more filters. Moving on to the underside: Oil-dot-filter Lots of small dots of white, blue, brown and umber apllied with a toothpick and blended in with mineral spirit The area inside the engine cowlings recieved some extra dark oils as a base for the exaust stains While I was waiting for the oils to cure to aplly a gloss coat (hopefully without any surprises) I turned my attention to the exhausts. They recieved multiple very transparent layers of browns. The idea is to break the uniform look of the exhausts and make every single one unique. The effect is really hard to capture in a photo - the rusty sheen is unfortunately invisible. So where am I? gloss coat repairs decals gloss coat salt fading touch ups oil dot filter gloss coat panel wash gun and exhaust stains careful chipping dust and dirt 1000 small things Still lots of things to do but I really do enjoy weathering and I'm relieved that there's now no more need to hurry which obviously wasn't my style at all6 points
-
Base layer of chipping has been established. Not exactly the result I was envisioning but it will suffice. Hairspray chipping can cause surface irregularities between the two layers. I scrubbed the area with dry Micromesh and then sealed it with a coat of Aqua Gloss. After the clear had dried, I sprayed another coat of hairspray. And then I pre-shaded the panel lines. To establish a bit of tonal variation, I used a piece of brillo pad and some splatter templates to create a random mottle all over the model. The bottom was painted with AK Real Colors Insignia White. I've decided to reduce the pre-shade effect a little bit more than normal to establish the off-color of the white. It's still there but it is VERY subtle and is hard to capture in photos.6 points
-
Hi Guys a small breakthrough, I recovered from the original model the bases that support the rolls that lead the tail rotor direction cable, the rolls are styrene round, and now to start working in the crew cabin and if the weight was not enough for balance, I will apply weight inside, until I achieve it6 points
-
Micro update. I have sprayed internal engine components with Alclad gloss black. When dry I will shoot on some metallic colors. You can see completed turbine blades on the clothes pin. Slow progress when doing a vac. Nothing is easy, no alignment pins, nothing to support internal structures, lots of fiddly work. Dan6 points
-
Just printed the corrugated floor for the rear gunner station. And I found this document which contains some information about the rear Bell M-6 turret. http://hangarthirteen.org/wp-content/uploads/2019/09/Pages_from_Army-Navy_Index_of_Aeronautical_Equipment_-_Volume_5_-_Armament_Section_2.1_Gunnery.pdf The end fuselage section, which is printed with resin, is glued on a thin styrene sheet with superglue. So, it can later be attached to the rest of the fuselage with normal model cement without the risk of fogging on any clear parts. Alex5 points
-
Working on the wing gun pods today, I opened out what I assumed to be the shell ejector holes and by reference to drawings and pictures placed the pods so that the side opening is on the outboard side. The guns are the brass ones intended for the Lancaster: I re-painted the rudder, not happy with the finish but it's now in place. To each rudder horn I added a 0.8mm nut as an attachment point for the cables - not quite as the actual plane but near enough. The cables are fine nickel silver wire, to be trimmed when the CA is firmly set:5 points
-
This kit was talking to me throughout the CF 18 build, calling louder to me through the EA 18 G build, yelling at me through the 109 G10 build! I couldn't take it anymore I had to get a start on it. If I progress to the end (it'll be OOB) it'll be in the splinter scheme included in the instructions and markings.4 points
-
Reading some of the comments on this thread made me realize that I must have a very low bar when it comes to the accuracy of kits. I have enjoyed most of the kits I have built over the years with only a few that did not make the finish line, and those were due to very bad fit issues rather than accuracy issues.4 points
-
LEM kits is still busy pumping out LSP kits of aircraft never made as LSP kits before. Not one or two, but a fistful every year. I wish Tan Models would release it's Su-33, but I guess things in Turkeys economy are going sideways nowadays. ZM is busy. They offer new LSP kits before the last had hit the shelves in Europa. That's fast! HPHs injection molding line is looming at the horizon. Let's se what Nurenberg toy fair will bring. We've got brand new kits of both the F-5 and the Rafale. Today there are even both a Mig-23BN and a Mig-27 available. Great times for jet modellers! With 55 unbuild LSP kits in the stash (counted them at years end) my true wish for this or next year is just a re-release of Revells Ju-88A-4, without all that expensive tech gimmicks. Would be a shame not to build up these nice AIMS conversions I have at hand... Regards - dutik4 points
-

Fw190 V21 prototype
Dpgsbody55 and 3 others reacted to Alain Gadbois for a topic
Hello all! After examining the photos carefully, I can say the top of the cowl is of a regular curved shape. This is very visible in this photo of the prototype: I have drawn a curve on the front of the rear cowl part. The photo is taken towards the rear of the model. Using a new blade, I began removing material carefully along the pencil line. Then began blending this curve to the angular shape close to the windscreen. The V21 cowl hinge line is where the pencil line is drawn, and you will notice the bulge on the prototype continues forward right over the D-9 hinge on the kit. The front cowl part will need to be glued in place to be able to complete the bulge shape in this area. That also means the fuselage halves will have to be joined together, as fixing the top cowl part locks them in place. Looking into another part of the project, I found some wheels in a bag of bits given to me a long time ago. I have no idea from which kit they are from, but the hubs are just the correct size for my V21. The tires need to have the ribs filled up though, and I will need to detail them a bit and hollow out the 6 holes each wheel. Bye for now! Alain4 points -

1/32 Revell Supermarine Seafire Mk 1B
MikeC and 2 others reacted to kopterdoctor for a topic
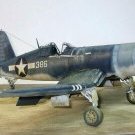
Hi All I found this in my collection 1/32 Revell Supermarine Seafire Mk 1B. The box still has the factory tape seal. My eyes are getting old, so maybe I can see this one a little better.3 points -
.thumb.jpg.f23b2dc356f90ead35d25aa5e3609a95.jpg)
1/48 Heinkel 111 H-3 ICM kit
chrish and 2 others reacted to Dart_Schatten for a topic
Happy New Year, friends! It's my first model in 2020. Heinkel is mostly OOTB. Paints are from Gunze.3 points -

ICM Gloster Gladiator —— new pictures !
Loach Driver and 2 others reacted to reconspit for a topic
Hello, happy new year to everyone... This is my first 2020 build..., well, I finished it today... ICM Gloster Gladiator, out of the box, with PJ Productions Pilot and rigging from EZ Line.... I‘ll post some more pictures in daylight tomorrow...—— DONE I was so surprised by this kit, now real flaws, very easy to build.... Hope you like it...3 points -
Thanks! Aerosol hairspray decanted into the airbrush. I don't know what brand... I just commandeered one from my wife's side of the bathroom. The painting continues... AK Real Colors Intermediate Blue is sprayed next. The Dark Blue is next and I'm using my pre-mixed lightened AK Real Colors Sea Blue as a base and mixing lighter shades on the fly to try and reflect what I'm seeing in the archive photos of 740 and other VMF Corsairs. The engine cowl and fuselage spine receive the lightest shade while the fuselage sides are the darkest. Because the hairspray is under a couple coats of paint, I wanted to do the chipping soon after the Sea Blue was applied on top of the wings. It took some patience, working a wet paint brush over and over on small areas but I was able to get an acceptable result. The transitions between the various shades of Dark Blue is a bit stark so I'll be doing some blending work. The Montex stars and bars mask looks like it slightly expanded so I'm going to cut new masks with the Silhouette cutter.3 points
-

Gloster Gladiator.....finished :)
Paul in Napier and 2 others reacted to mozart for a topic
As a bit of a post script, this arrived in the post today.....possibly the most useful reference book in my library for my future builds: The contents: and a couple of examples of what's in there: 56 Squadron Gloster Gauntlets, the preceder of the Gladiator: Granger drawings for most: Colour plates of squadron markings: and this little "gem": which gives me carte blanche for my build!3 points -

Fa330 Fock Achgelis
themongoose and 2 others reacted to Rick K for a topic
Long story short. I lost the WIP images only because of impatience with my Photo Bucket account issues and PhotoShop. I'd always preach to my kids: "Never enough time to do it right. Plenty of time to do it over." This time its a lesson on me. These images will hopefully cover enough for the parachute pack, belts and foot pedals. Shock cord on the tweezers is .4mm braided thread I secured at a garment store with xs Ultra Wire fed through to allow bending. Seat belts and foot pedals in place. Parachute pack with straps and shock cord release. One of my reference images shows the parachute pack as a "treated canvas" pack with lots of straps. So I got a creative. Flat lead wire straps adjusted to final position and secured with CA. Epoxy applied to parachute pack mount area and shock cord glued to mast then set aside to cure.3 points -
I’m in the same camp, low bar I guess. I built their 1/32 109E and very much enjoyed the OOB build https://www.largescaleplanes.com/articles/article.php?aid=1113 The F6F for example: I won’t build the Trump kit because they missed the shape big time that to my eye looks way off (my low bar was met). To my eye, Eduards 1/48 kit looks great (but I’m not that much of an accuracy hound since Hasegawa’s F6F cowling grin is an issue to some and it looks fine to me). Eduards 1/32 -109E; I had no idea there were issues that caused folks send it on a one way trip to the trash bin. Collin3 points
-
On the home stretch now, only missing things are the gun sight, the landing light and the clear parts:3 points
-
1/32 Revell Supermarine Seafire Mk 1B
MikeC and 2 others reacted to kopterdoctor for a topic
Even the decals look bran new.3 points -
1/32 Revell Supermarine Seafire Mk 1B
MikeC and 2 others reacted to kopterdoctor for a topic
Still in the bag.3 points -
They were a handful to fly3 points
-
Good evening, hope you had a great start into 2020! Besides family stuff (my mom suffered a stroke ... ) I actually found some time for modeling. I started the landing gear using resin replacements for the wheels ... I forgot which brand ... I somewhere read that in late war the quality of tires were really bad which made them to last for about 10 landings and take-offs. Well, the same could be said about the pilots and a/c, too. So they look a bit beaten up in my example of a tire set. Best wishes, 109er.3 points
-

Tamiya 1/32 Spitfire MkXVIe
USMC Herc and one other reacted to KitmodellerNZ for a topic
Hi guys, I just finished this one off this morning. She's been an absolute pleasure to build. I superdetailed the kit engine with lead wire, plastic rod and brass tube. HGW seatbelts, Montex Masks, Barracuda pilot's seat, 3-slot wheels & cockpit door. Painted with Tamiya acrylics, Vallejo acrylics and metallics, AK Interactive and Ammo by Mig weathering products and W&N oil paints.2 points -
1/32 Revell Supermarine Seafire Mk 1B
Dany Boy and one other reacted to kopterdoctor for a topic
I think this is going to OOB as I spent a lot of money on this stuff to restart this Hobby.2 points -
1/32 Revell Supermarine Seafire Mk 1B
BiggTim and one other reacted to kopterdoctor for a topic
Exhaust pipes need a little filler used Vallejo Acrylic putty.2 points -

Aviatik 'Berg' D.I
LSP_Kevin and one other reacted to sandbagger for a topic
Hi all, Undercarriage cross bracing wires fitted, Mike2 points -

XB-51 Dragon
Anthony in NZ and one other reacted to Dandiego for a topic
Another very small update. I have decided to add a thin metal sheet inside the wing which will extend out and then slot into the fuselage. Here is my cardboard template for the metal reinforcement. I will cut out 2. Dan2 points -

New year, will we learn of any new LSPs from “quiet” manufacturers?
thierry laurent and one other reacted to jenshb for a topic
Since there is still no two-seat F-16 from Tamiya, we can conclude that life isn't fair2 points -
2 points
-
Thanks for your encouragement gentlemen! In the meantime I have also put the decals on the weapons, this was at least as much work as the aircraft decalling itself! For this I used the Revell decals, as well as some of the F/A-18C Hornet from Academy. Because there is no decals supplied whatsoever for any of the bombs. Colour indication for Navy bombs is completely inaccurate too Ther are more decals for the missiles, however here are the brown stripes missing from the decal sheet. Strangely enough there are green stripes supplied...someone at Revell or Cartograph has been asleep: this is also the case with the sidewinders AIM-7X and AIM-7M: Is sharp contrast of this all is the big amount of very detailed decals on the pylons.... That is if there was enough of them! decals supplied are only half the amount that is needed! now I have to leave one side of all pylons devoid of details, sigh... Next step is to seal everything with a layer of clear and then start washing and weathering!2 points
-
Id agree with that! I have some of the Mig winter camo paint Ive been wanting to try to............and with the gorgeous set of REXx exhausts I have for it............. I just may have to go shopping for one next I have some coin!2 points
-
Slowly goes it. Ok, fuselage looks pretty good on the upper surface. ...and not so good on the lower. Not sure how this happened, will require a larger hammer I think. Well I'll let that sit for a minute and put the wings together. Need to shim the inner part of the radiator flaps to clean up the gap. A little sanding here after the glue dries should do the trick.2 points
-
Gloster Gladiator.....finished :)
Paul in Napier and one other reacted to mozart for a topic
Looking better! I'm working still on the firebird: This arrived in the post this morning: for a future conversion based on the Gladiator: Should be fun!!!2 points -
That's odd. My only suggestion would be to use enough decal prep like Micro Set or my favorite, Mr. Mark Setter, so that the decal slides easily into position, then take a soft brush and gently push the liquid out from under the decal and then apply a liberal amount of setting solution over the decal and let it dry. Decals by themselves do not conform well (if at all) to raised details and need to be softened so that they stretch without breaking. That's what the two stage setting solution are for. It's simple chemistry. Decals are made with lacquer inks and setting solutions soften lacquer. Hope that helps.2 points
-
Hi Jason, so true, those Soviet twins in "our" scale would be great, as well as an Il-4. Thanks a lot! Christmas holiday means modeling time Sooner or later, the day will come when the fuselage halves get glued together. Before that, most interiors have to be done. One big challenge is the Martin 250 CE turret. I collected all photos I found, as well some handbooks and manuals. But I couldn't find one single scale drawing. The circumstance, that there were apparently variours versions of the turret with detail differneces doesn't make things easier. So, the end-result will contain some artistic licence and simplification. That's the current status of the 3d-model: I also took a closer look on the rear gunner station and realized that the end opening is way to narrow, so the rear section had to be redone. To make it fit to the rest of the fuselage, some comprises were still necassary. It's far from perfect, but hopefully better than the old part: The silver one is the old part Cheers Alex2 points
-
Mirek from HPH has mentioned on Modelforum.cz that they will maybe release Porco Rosso as IM kit https://www.modelforum.cz/viewtopic.php?f=57&t=1312462 points
-
I added an ignition harness to the engine. I know the BMW 801 has two spark plug leads per cylinder but since I will build mine with the cowling closed ,not much will be seen behind the fan anyway. Just a bit more to add a bit of interest. The engine is pretty good out of the box and possibly the best radial I have seen. The Tamiya Corsair is probably better but I have not had eyes on one. And painted Cheers Nick2 points
-
Figured it's time to post some pics of plastic instead of yet more questions! I've got the fuselage mostly buttoned up. Just a tad of filler here and there but aside from that, everything fits nice and tight! I simply glued the rudder and elevators in place. One major dislike I have with this kit is all the work that Tamiya wants you to go through to make the kit into a toy with retractable landing gear, movable flaps, control surfaces, etc. I have no need for any of those "features". Moving on, I've done some additional work on the landing gear wheel wheels. Lots of fun color options here. For some reason, later Mustangs often had one bay with unfinished aluminum roofs (actually, the underside of the upper wing) while the other was GZC. In addition, the rear bulkhead (which was actually the wing spard), was usually YZC. That's the scheme I went with, I think it adds some nice color. Not a lot of corrective work is needed in this area, Tamiya did a good job. Only thing I did was drill out the holes in the oleo calipers and also removed the solid plastic backing for the hydraulic cylinders mounted to the aft bulkhead. Couple of notes - I just received the Fundekals P-51 stencil set. Very nice, as is all of Jenning's stuff. It even includes the stamped markings that were applied to sheet aluminum at the mills! In retrospect, I should have applied these decals before I added the ribs, etc but of course, I was in a rush and as a result, it took twice as long to shoe-horn these small decals into place. IMO, they really add quite a bit to the look. I also added some decals to the landing gear but since my photo skills are awful and today was a pretty cloudy day, it's tough to see these. Also note - I haven't added any additional details to this area. I'm going to add some hydraulic and electrical lines to busy things up but unlike the Corsair I did last, where I slavishly added every line, this area on the Mustang is packed with tiny lines and fittings. I'll add some but there is no way I can add everything. Would have been nice to have an aftermarket outfit take a shot at this area. I obviously will be weathering this once I'm complete. That's it for now, thanks for looking!2 points
-
XB-51 Dragon
Paul in Napier and one other reacted to Dandiego for a topic
A little more prep work on the engines. First are the completed exhaust assemblies. My low cost printer leaves visible ridges on the parts. So to get a smoother surface I sand them down and then slather them with putty. After they are dry they are sanded again. The tubes are really a 64 sided polygon so the inside is sanded and putty applied to get a smother appearance. Next is the intake, 3D printed cone and tube. Turbine face is handmade, because I couldn't figure out how to design it on my computer. Some alignment aids have been added to the inside of the engine pod. Whole thing, getting ready to close up the pod. Dan2 points -
P40F trumpeter 1/32
KUROK reacted to pascal JMW for a topic
hello the last one for this year just finish , P40 F trump + photo etched Eduard for the cockpit and resin wheels , Berna decal , painting Mig ,AK,Gunze and Tamiya 8 white p'ti Quinquin escadrille Lafayette 1943 unknown serial best regard Pascal and happy new year !1 point -
Gloster Gladiator.....finished :)
Paul in Napier reacted to Alain Gadbois for a topic
Very glad to see you were able to sort out the problems with the serial number and checkered markings. If you want to do a Gauntlet conversion, I think it is possible but a big undertaking! Here's an illustration from a very old book I purchased in a yard sale (the yard of the British embassy in Tunisia no less!) when I was 10 by called Flying Adventures by Flight Lieutenant. Alain1 point -

Revell/Monogram 1:48 Dornier Do 335
sturmovik reacted to mustang1989 for a topic
Always good to see one of these built. Such an unusual aircraft and definitely a "must have" for the display case. Good work.1 point -

1/32 F7F Tigercat or ME410
Out2gtcha reacted to Rick Griewski for a topic
guestimation... the kit has to be better than a vac kit. I agree with the engine assessment. It all looks great when the bugger is built.1 point -

Why Doesn't Eduard Make LSPs?
nmayhew reacted to thierry laurent for a topic
I wouldn't say that. Their P-51 was their first large scale plane. When they started making AFV, their Nashorn was also absolutely horrible. To me this is more a learning curve issue and long trends motivated by business decisions. As soon as they allocated the correct resources, the kits became very nice. When they decreased such resources many years later, the quality (essentially the accuracy) went down (e.g. the so-called Black Label AFV series).1 point -
Now that looks alot better! Ron G1 point
-

P-38J Lightning - Revell 1/32
Azgaron reacted to Cap'n Wannabe for a topic
Following this!1 point -

1:32 Cessna O-2 Skymaster, Roden
Starfighter reacted to Ajak for a topic
Finished! My first LSP ready for inspection, I'm so happy! Sorry for poor quality images, but I will learn one day how to take good pictures. These are all I could take before falling asleep standing after this WONDERFUL marathon of kit building. Cessna is in one piece, although it has some blemishes here & there. I hope you guys enjoy looking at her anyway. Next model will be better. Generally speaking - this kit is just OK. no real fit issues. However landing gear is weak, clear parts need a LOT of care - polishing, dipping, and decals, yeah - they are there, nothing short of horrible though. I will do my best to upload better pictures some time in the future but it needs some scene setup, lights etc. I'm looking forward to seeing your great LSP models in the comming 2020.1 point -

ICM I-16 Type 24: COMPLETED 3/12/2020
Jan_G reacted to Dennis7423 for a topic
Small update today, as I finally got some bench time! I have begun adding the Eduard fiddly bits to the cockpit, and they provide some nice additional details to the cockpit: 82044929_525523074712520_2860453982982111232_n by Dennis SAuter, on Flickr 80765755_828669014250781_7871106995367968768_n by Dennis SAuter, on Flickr 81134294_602381133914924_110509834943594496_n by Dennis SAuter, on Flickr the bulkheads have been added to one fuselage half so that I can start adding some additional scratch detail. Nothing too crazy, but I do want to dress up the cockpit just a little bit. Eduard's pre-painted instrument panels are pretty nice, when they get the colors correct. I like to build them, apply a brushed flat coat, and then use clear gloss enamel to add the instrument glass. I'll add a wash to break up some of the variation, and then it'll be ready for install: 80657103_578786012945890_2811578320305520640_n by Dennis SAuter, on Flickr That's all for now! Happy New Years everyone! - Dennis S. Thornton, CO USA1 point -
Thanks a lot mates - I hope to come to a satisfying end with this build. Something unsatiyfying to start with: I had to resort to the decals from two Revell Bf 109G-6 for the drop tanks and they turned out....well see for yourself: I started some small stuff as long as the gloss coat was taking its time to dry. All surfaces painted RLM02 recieved a dark pin wash with oils (raw umber and black). I tried to keep it understated. And finally the Quickboost exhausts (I noticed my bad cleanup as soon as I took the photos - well now it's too late) got some paint. I apllied Alclad steel over a black base followed by pale burnt metal and at last jet exhaust around the openings. More colour will be aded with brown and black oils, pigments and MRP exhaust soot. More bad news - no pictures so far, forgot my camera - from th weathering: I applied two salt fading coats (MRP light grey and a dark brown) and both somehow ate through all previos paint coats down to the black base Joachim1 point
-
@ oh yes Richard, I imagine that real aircraft assembly engineers enjoy the same or more than us building our kits @ Yes, thank you Out2gtcha, taking advantage of the vacation to top, I will try your advice next time, the tip sounds very good. some other parts to be welded, Today I spent the day cutting the new pieces of brass tube and other styrene, let the glue dry the parts with styrene, now I compare with the revell piece, how do you see?1 point


