Leaderboard
Popular Content
Showing content with the highest reputation on 10/18/2019 in all areas
-
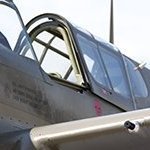
This will be my first WIP. It's the superb Tamiya kit, that we all know about. My neighbour is big Corsair fan (he's an RC plane guy), so I'm building him a Boyington markings version (as close I can make it). I'll be using the following AM. Barracuda - Cockpit Stencils Yahu - Instrument Panel Barracuda - Plain tread wheels EagleCals - EC 161 - F4U-1 Corsairs RB - seatbelts Maketar masks - for the primary insignia (maybe) Ultracast - Boyington pilot figure I'll be using AK Real Colours for main exterior and interior colours. Tamiya for everything else. AK, MIG and oils for the weathering items. Here's the progress so far. Yahu IPs are awesome! Stencils on. They are very very small. Not a huge fan of the RB belts. They're very stiff. Pappy waiting for some more paint Got my head but lost my arm. Cockpit complete. I've been following the paint instruction in the kit, so that's why the head rest is black and the oxygen bottle is silver. I'll be buttoning up the fuselage next and then onto the engine. All the pics are from my Iphone 8 and are hosted with the high quality option (not the original size) on Google Photos. Thanks for looking!7 points
-

Hasegawa 1/16 Sopwith Camel
Uncarina and 6 others reacted to composite guru for a topic
Finally got the wings on. Getting the thing sat flat was the hardest bit. Just the engine and a few other panels to go on and finish ringing it. |https://thumbsnap.com/TOpheKT5 |https://thumbsnap.com/VLpxMNzx |https://thumbsnap.com/317FCmTO7 points -

AIMS 1/32 Gloster Gladiator sets
Roy Noras and 5 others reacted to Pastor John for a topic
Hi everyone, I have the 3D designed and printed engine cowl in my possession now and today received test shot of PE bracing wires. I have done a decals sheet but want to do some changes. Waiting to pick up the kit before everything can be test fitted etc. Thanks John6 points -
ICM Gloster Gladiator
Jan_G and 5 others reacted to Pastor John for a topic
Hi - it was a gamble - I used the SBS engine/cowl for my 1/48 model and I loved it and asked them to upscale the parts for me. I am sure the kit will be good enough - we will see. As for decals - again I designed all of the SBS decals for them and asked if I could upscale some of them and so I have a multi-national sheet but Want to see what type national insignia come sin the kits as I could then squeeze in another option perhaps if insignia not needed. I love this aeroplane that is all and as I have done the decals and bracign wires in other scales and friends have done the engine it seems sensible to get geared up6 points -
Some work on the engine - the ignition cables in place, must say that the Eduard's details fit here very well. Some of the push rods need to be slightly adjusted and glued in a right place. Overall I think it will look decent after it is carefully painted. Now it is only primed with the Gunze's Surfacer 1500.5 points
-

Corsair Mk II last show
TenSeven and 3 others reacted to John Craft for a topic
I decided at the last minute to take the 1/32 Corsair Mk II to one final show. Went to the 2019 SprueDoo in Little Rock, Arkansas this Saturday. Thought about not taking it, but decided to anyway. Glad I did!! I won a Gold, Best Aircraft and Best of Show Military! My first Best of Show! I was shocked and very honored!4 points -
Hello, this is my last model, an F-4J(UK) Phantom (E / ZE353) with the 74 (F)Squadron, also known as "Tiger Squadron", based at RAF Wattisham in the late 80s. The model is based on the Tamiya kit with the addition of the Black Box resin cockpit, GMT resin J-79 exhausts and engine auxiliary air intake, resin wheels and a resin SUU-23A gun pod. I made the reinforcement strip running under the fuselage along the wing using plasitcard. Other minor details come from the Eduard PE sheet. I've also added some hydraulic hoses and plates to the undercarriage wheel bays. The pitot and AOA tubes are made of metal by Master. A couple of red coloured resin FOD were added to the main jet intakes. The unique camouflage is done using Tamiya and Gunze colors: for the greenish bluish gray I made my own mixture. Decals are from Yellowhammer, but I've used small roundels from a Xtradecals sheet... the Yellowhammer's are too big. CIAO! Piero4 points
-

1/32 Tamiya F-16c Aggressor
Alain Gadbois and 3 others reacted to Squizzy 78 for a topic
I've been wanting to start an Aggressor Viper for awhile now, collecting decals and bits and pieces of aftermarket details, now it's time for a fresh start! Having followed the awesome builds by Marcel, it's not hard to see the attraction to the aggressor birds, they're colourful, mean looking and they catch the eye. Theres still more yo get, including zactomodels sidewinders and maybe aim-120's. I'm sure that there will be more along the way, but I'll get started. I have the Tamiya kit, so I'll build a big mouthed viper, I have plenty of decals for a standard mouth bird, and the KASL exhausts, but it's hard to find an Academy F-16, but on line some hobby stores have future releases of academy vipers with ANG markings. Fingers crossed! My biggest problem is picking what set of decals to use. My tossing up between the Arctic Aggressor during 2008 by Afterburner, the arctic Aggressors during 2017 by Two Bobs and the Blue Splinter during 2018 by Two Bobs. To start off I'm just going to get started on some of the smaller bits and pieces that will go into the build. Hopefully I'll have more to come soon, and with a decision on what markings I'll use. Thanks for looking.4 points -

Curtiss Hawk H-75 A7 (ML-KNIL) | SH 1:32
scvrobeson and 3 others reacted to Kendzior for a topic
Some panel lines had to be removed before I start riveting. The same applies to the ejection chutes, as the Dutch Hawks had only one gun per wing. The useless holes in the wing leading edge will be closed when the wings are glued together.4 points -

Finished !!! 1/32 Revell Junkers Ju-88A-1
MikeC and 3 others reacted to Tolga ULGUR for a topic
Dry fitting of the wings. They look ok , don't they? So I can paint wings and fuselage separately4 points -
A7 had probably the same wing as A2 and up models with provision for two guns. If guns were not fitted, the sliding shutter of gun fairing was closed and ejection chute door replaced by a cover plate without hole. On SH model, the doors on top wing are too lenght, and ammo doors are missing at underside.3 points
-
ICM Gloster Gladiator
Jan_G and 2 others reacted to Pastor John for a topic
Hi everyone - I have decals, PE bracing wires and a engine/ cowl on the way, thanks3 points -

Airfix News Just in from Telford: 1/24 Hellcat!
Rick Griewski and 2 others reacted to LSP_Kevin for a topic
There is a semantic connection, though, if you consider that one of the colloquial analogues for duplicitous is two-faced. Kev3 points -

HK Models Avro Lancaster Mk.I WIP: Canopy Attached 3/31/2021
Greg W and one other reacted to Dennis7423 for a topic
All- Since I have completed my HK 1/32 B-17G, it's time to get cracking on another project. My brother and I were contracted two years ago to build some large scale kits for a flight museum that will open in Salt Lake City, Utah in a few years. I figure, why not get started on another kit! The plan for the museum display is to show, in large-scale, the bombing campaign in Europe using heavy bombers, their escorts, and their opposition. We have completed a B-17E so far, with a B-17F, B-17G, B-24D, B-24J, and Lancaster planned for the heavies. The hope is to make them more or less as accurate as possible, to help share the story of the bombing campaign against Germany. The museum has given us pretty free reign as far as what specific aircraft we model, as long as it was operational in the European campaign. I chose to get started with the HK Models 1/32 Lancaster. After having so much fun building their B-17G, I wanted to get cracking on another one of their excellent kits. So, in steps Lancaster Mk.I EE139, "Phantom of the Ruhr". Originally assigned to 100 Squadron on May 31st, 1943, she went on to fly 121 missions, including 15 trips to Berlin. I plan to model her during her early years, where she wore fuselage codes HW-R. She was later assigned to 550 Squadron, and bore fuselage codes BQ-B. a3425306814_10 by Dennis SAuter, on Flickr While I don't have any in-progress shots yet, I have started on a few small modifications to the kit (chopped up the cockpit floor). Here's what I can glean from photos so far, and I would love any input anyone can provide for this particular airframe: She was an early Mk.I, without side blisters to her canopy. Additionally, from photographs, it appears that she has aluminum interiors to her front turret, aluminum landing gear legs, and aluminum hubs to her wheels. All signs point to her being a very early Mk.I. PhantomofTheRuhrBefore100thOperation by Dennis SAuter, on Flickr img012 by Dennis SAuter, on Flickr 24336d1142014385-lanc-phantomoftheruhr_144 by Dennis SAuter, on Flickr 08741b6a17bc6f1e690930dc43d2f8c5 by Dennis SAuter, on Flickr Here's a few questions I have for the boffins: 1. What type of bomb sight would she have? I have a feeling she has an early SABS (Stabilized Automatic Bomb Sight) because she is such an early bird, but I am not sure, and its not entirely clear in the photos. 2. Would she have her fuselage windows painted over on the sides? (EDIT: It looks like in the last photo I posted, that she does indeed her her windows. I hadn't noticed that before). Hoping you all follow along on what will surely be a long journey once again. Thanks for tuning in! - Dennis S. Thornton, CO USA2 points -
Hasegawa 1/16 Sopwith Camel
Alain Gadbois and one other reacted to composite guru for a topic
Hi, not been around for a while as I’ve been building smaller kits. I have always wanted to build a museum type model of the Camel and finally go around to buying one. This is the plastic version and not the larger wooden type so creating the wood effect was a learning curve for me as I’d never done it before. Here are some pics of my build for you to look at. As you can see I’m trying to rig the structure as it would have been using reference photos as the kit asks you to rig most of the parts with one continuous piece of line. I’m making the turnbuckles by hand as no one seems to make 1/16 versions. That’s been a job as there are around 300 in the whole aircraft. Anyway enjoy the build. Hope the image links work ok. Matt2 points -
The Subject The Canadair Sabre Mk 6 was regarded as the ultimate dog-fighter of it's generation by the pilots who flew them. With the Orenda 14 engine giving almost 50% more thrust and having the 6-3 wing with slats it was a step up from the original F-86, which in itself was a great dog-fighter. The Australians would probably argue the title with their Avon powered Sabre but with slats and a similar power to weight ratio, the Mk 6 would probably be advantages in a low speed fight . The Indians would argue for the Gnat to be the ultimate dog-fighter, but to be fair it was of a later period than the Sabre. Be as it may, the Sabre Mk 6 was loved by all who had the privilege to fly it. The Model The Hasegawa 1/32 Sabre was first released in the early seventies. This is the third one I have build. The first build was in 1976 with Microscale Korean decals included with the kit. The second build was a commission for the 2 Sqn SAAF museum where all the changes were made to backdate the kit to a F-86 F-25 as flown by the OC of the squadron during the Korean conflict. I picked up this kit while on holiday two years ago. Maybe my longing for my youth builds played a part but I had clearly forgotten what would be involved to bring this kit to standard. Fortunately the kit is accurate with an excellent fit.( Italeri take note). Changes to the model Wing tips removed and model re-scribed. Vents and sugar scoops added as per Mk 6. True Details seat and a resin cockpit donated by a friend. I also build a new IP to reflext rhe Mk 6 IP. ( I think it is a Cutting Edge set.) Metal pitot tube turned on a Dremel was added and wheels detailed. A scratched build gun sight and control column completed the build. My friend Madmax provided the combat tanks from the Kinetic model as well as printing the squadron badge from a photo. Thanks Sean Subject and Markings The markings are for 1 Squadron SAAF during 1975 at Air Force Base Pietersburg just before they converted to the Mirage F1. I could not source the LEM decals for the subject, so I used SAAF castles printed by Model Decal in the eighties. Despite their age I consider their SAAF castles still to be the most accurate in shape and color. A few markings from the Italeri Mirage and the rest marked and airbrushed. Paint used Humbrol Gloss and Xtra Color. The new Xtra Color proved to be disappointing as they contain too little pigment and by the time the color was sprayed dense enough, a nice little ridge had build up between the color. To get the pattern accurate I used the Sillouette software to cut masks. Enjoy Nick2 points
-

Fa330 Fock Achgelis
themongoose and one other reacted to Rick K for a topic
More scratch work. Rigging bar on rudder, left. Grab bar on tail, right. Will reduce the rib via sanding prior to paint. Grab handles/rigging retainers .4mm styrene rod, bent via mandrel and hair dryer, top main body near base of rotor mast and bottom of main body installed. Tail pad just below stabilizer. Also added .4mm aluminum tube just forward to tail pad for rigging. Grab handles/rigging retainers on rotor mast. What the heck are these? Formed using a mandrel and hairdryer I glued the straight pieces to curved pieces. After a little trimming. Cleats don't fail me now. The cleats and grab/rigging retainers were offered in PE. I elected to makes these out of stryene so they cen weld to plastic. The PE would eventually get knocked off as there will be much handling during painting and rigging. I feel these will be stronger at PE attached with CA. Almost ready to start painting.2 points -
What he said! Here's some pics from that book, might help? Well worth buying, and more useful than the kit instructions!2 points
-
My Silver Wings Hawker Hart arrived in the post this morning: with some mouth-watering inter-war markings to savour: I thought I'd compare the Hart and Demon fuselages just out of interest: and they are nearly identical apart from some surface details/panels, exhaust and the cockpit area: I'm looking forward to the Fury arriving in good time and then probably in the New Year making a start on the family of biplanes.2 points
-

Aviatik 'Berg' D.I
bstachel and one other reacted to sandbagger for a topic
Hi all. I forgot to take shots of the internal fuselage before closing it up. I still have a few bits to do - windows in the front decking, rear cabane cross bracing, top rear engine pipe, blast tubes for the machine guns and crash padding on the breech blocks. Also seam filling and checks, Mike2 points -
The English language is full of subtleties and nuances Juraj. As a non-native speaker your use of English is excellent but I thought you’d appreciate a well intentioned correction.2 points
-
If she was an early production Lanc, and the yellow gas detection circle on her nose suggests this, then she will definitely have the “windows” in the fuselage. Further to the above, EE139 was part of the batch of Lancasters (488 in total) built at Newton Heath/Chadderton under Contract No.B.69274/40 delivered between November 1942 and June 1943. According to my source (The Lancaster Story by Peter Jacobs) she was actually a Mk III, meaning that she had American built Packard Merlins rather than the British built Rolls Royce Merlins. There was no external difference.2 points
-
Howdy folks, Kevin Williams takes a look at the latest build guide from Albatros Productions: Albatros Productions Building the Wingnut Wings Hannover CL.II Thanks, Kevin! And thanks to Ray Rimell at Albatros Productions for the review sample. Kev2 points
-
Howdy folks, I've just published my review of some new Lancaster wheels from Barracuda: Barracuda Studios BR32410: 1/32 Lancaster Main Wheels - Block Tread Thanks to Barracuda Studios for the review sample. Enjoy! Kev2 points
-
Chipping lacquers
TimHepplestone and one other reacted to LSP_Kevin for a topic
MRP can indeed be chipped, but it does take a little more work: In some ways, the extra effort required means that you have more control, and are less likely to overdo it. Kev2 points -

Revell 1/32 Me-262 in stock Spruebrothers
Jan_G and one other reacted to alaninaustria for a topic
Me-262: The step at the rear of the leading edge slat seat is negligible in terms of aerodynamics - the speed regime where the slats are deployed due to gravity up to the point where aerodynamic forces cause the leading edge slats to retract is not negatively affected. It actually aides in re-energizing the boundary layer air flow in the low speed regime up to the point where the slats are fully retracted - at that point all parasitic drag such as landing gear, flaps and full scale control surface deflections (elevator etc). are no longer part of the aerodynamic equation as the aircraft is accelerating into the high speed regime. During deceleration for approach and landing, parasitic drag is introduced again into the equation when the landing gear and flaps etc. are selected down... and at a precalculated airspeed the aerodynamic forces allow the springs to deploy the slats. The major problem experienced during approach was when a slat failed to deploy due to a mechanical issue with the roller bearings. The pilot normally had to react quickly due to the imbalance of lift being generated by using aileron. The so called “step” in the seat of the slat on a 1/32 scale model is almost not noticeable - however due to the limitations of IM - it is slightly over exaggerated. Doesn’t bother me one bit... Happy modeling, Cheers Alan2 points -

Airfix News Just in from Telford: 1/24 Hellcat!
Rick Griewski and one other reacted to mozart for a topic
That’ll be “duplication” Juraj, duplicity is something completely different, ie trickery, fraud, lying etc.2 points -
UK Bombed areas during WW2
Rick Griewski and one other reacted to mozart for a topic
I lived on Portland for 30 years (for the "foreigners" not in the know, Portland is famed for its stone used for hundreds of years for building many places of repute, St Paul's Cathedral and the Houses of Parliament being two-such). The quarrying industry still continues on the island (Portland isn't actually an island since it's joined to mainland England by the Chesil Bank (lots of pebbles of varying sizes!)), but in the late 1990s quarrymen unearthed a German WW2 bomb.....Portland Harbour housed the Home Fleet which was extensively bombed in the early years of the war, notably by Herman Goering's son who I understand was shot down (Bf110?) and killed, (the local RAF fighter base was Warmwell.) Anyway, when the bomb was discovered we, and many other families, were evacuated for the weekend whilst the Bomb Disposal crowd successfully blew up the (500kg?) bomb. Made a big hole even bigger. Just one example of a bomb going astray and causing some angst 50 years later!2 points -
Hello gentlemen, Sme details on the masts of the central float, always renforced with inox tube Contrail profile. Rhodoid square is only there for the photo.......Six hatches are missing and will be cast in resin. At the rear of the masts the "big" pulley where the rudder cable runs. Here, two small pulleys on each side.2 points
-

1/32 OV-10D Bronco by Kitty Hawk
Cheetah11 and one other reacted to spyrosjzmichos for a topic
Hi all! With the undercarriage and wheel wells done I now started work on the tail booms. The construction is a bit tricky due to multiple parts requiring careful alignment before committing to glue. KH sure did design the kit for both engines to be left exposed. The fit of the engine covers was just atrocious and more clean up is required...2 points -
Thanks boys! I spent most of yesterday assembling and finish fitting my new 1/24th-1/32nd JH Models stand. This thing is WAY bigger than I thought and substantially larger than my 1/32nd-1/48th JH Models stand. Its going to fit most larger models and is quite well built and reinforced. Its footprint however may take up more room than I want. I subbed in some felt I pilfered from the wife in place of the supplied rubber bands to glue to the places where the stand contacts the model. I set it up for the F-104D, and test fit the tip tanks: I removed the tanks and wings and did some finish sanding on the fuselage tonight followed by some needed filling. I plan on getting the filling/sanding, re-scribing as well as the intakes added and smoothed prior to gluing the wi Gs and tip tanks on permanently. Ater that I will add the slats and flaps and I should be ready for the prep stages of paint!2 points
-
I just dared to cut off the forward fuselage-section from the kit part, using a printed template to guide the scriber. I hope I don't regret this act of slaugther The printed fuselage section will need some sanding to get a nice transition to the kit part, but basically it works. Now, I'll try to make a new nose, based on better plans. Cheers Alex2 points
-
Well guys, I don't know if this story has already been shared in the forum, if so, I apologize. I personally think it's a beautiful story The Charles Brown and Franz Stigler incident occurred on 20 December 1943, when, after a successful bomb run on Bremen, Charles 'Charlie' Brown's B-17 Flying Fortress (named" Ye Olde Pub ") was severely damaged by German fighters. Luftwaffe pilot and ace Franz Stigler was ordered to shoot down the crippled bomber, but instead, for humanitarian reasons, decided to allow the crew to fly back to their airfield in England.The two pilots met each other 40 years later after an extensive search by Charlie Brown and the friendship that the two developed lasted until their deaths several months apart. Brown's damaged bomber was spotted by Germans on the ground, including Franz Stigler, who was refueling and rearming at an airfield. He soon took off in his Messerschmitt Bf 109 G-6 (which had a .50 BMG slug embedded in the radiator which risked the engine overheating) and quickly caught up with Brown's plane. Through the damaged bomber's airframe Stigler was clearly able to see the injured and incapacitated crew. To the American pilot's surprise, Stigler did not open fire on the crippled bomber. Remembering the words of one of his commanding officers from Jagdgeschwader 27, Gustav Rödel, during his time fighting in North Africa, “You are fighter pilots first, last, always. If I ever hear of any of you shooting at someone in a parachute, I'll shoot you myself. "Stigler later commented," To me, it was just like they were in a parachute. I saw them and I couldn't shoot them down. " Between 1990 and 2008, Charlie Brown and Franz Stigler became close friends and remained so until their deaths within several months of each other in 2008.1 point
-
My sentiments exactly! Kev1 point
-

ICM Gloster Gladiator
Pastor John reacted to Kagemusha for a topic
I hope you do Yellow G from the SBS sheet, nice selection too. In the unlikely event, ICM don't provide skis, and an arrestor hook, in any of their boxing - I doubt they'll release just one - be great if you could, think it's going to be a very popular model.1 point -
It's always nice to learn something new. Don't hesitate to correct me anytime you see something wrong in my posts... Juraj1 point
-

UK Bombed areas during WW2
RLWP reacted to curiouslysophie for a topic
That is usually the problem, but sometimes they show hits but it is indeterminate whether they were exploded or not. The records were only kept as well as they could be.1 point -
A combination of both. You need the water/brush combination to work the water in and get things moving. And you don't want to wait too long before you start chipping, or it'll just get harder and harder to do. But it can certainly be done. Kev1 point
-
Ah yes, Janus!1 point
-
I didn't now it isn't waterproof.... thanks for the heads up.1 point
-
Finished !!! 1/32 Revell Junkers Ju-88A-1
nmayhew reacted to Tolga ULGUR for a topic
I am working on the wings and horizontal tails. I will use Quickboost exhaust set on the cowling1 point -

HK B-25H
Whitey reacted to machine_marty for a topic
A bit more progress. decided to mask/spray the mouth using the decals as a template for masks on my cutter. Came out better than I thought, so happy with that. I've applied a pin wash all over (photos to follow), and then it's just a case of putting it all together. Thanks for all the generous comments1 point -
Duo F4U-1A Lt(jg) Tom Killefer & Lt Cdr. Tom Blackburn
Tolga ULGUR reacted to Kagemusha for a topic
Fantastic, such a great looking aircraft, how lucky we are to have kits of such quality.1 point -
hello gentlemen, thanks for your support! In the mean time Revell is sending me a new canopy so I guess I will be having it in a few days. That has not kept me away from progressing with my build. Panels have been filled with white primer:1 point
-

Tamiya 1/32 F4U-1 Birdcage Corsair - Done!
Starfighter reacted to Brett M for a topic
Thank you both. Not sure how weathering the rear bulkhead will be, but I'm sure I'll add some chipped paint or scratches....somewhere. More minor updates for today. Unfortunately, I still haven't found the HGW seatbelts in the US. Does anyone have any suggestions on where to look? Seat assembled, some chipping added. I will probably take some of the Tamiya weathering pastels to add more wear through the paint where the seatbelts would rub against the seat. I decided not to do much else with the bands on the O2 tank, since it won't be very visible once the fuselage is closed up. And headrest....Tamiya calls for grey for the headrest mount. I haven't found a good picture that show's different. Any opinions here? As always, comments, critiques, "Brett, you've screwed up, change XXXX" are all welcome! Thanks for looking. Brett1 point -

Duo F4U-1A Lt(jg) Tom Killefer & Lt Cdr. Tom Blackburn
Tolga ULGUR reacted to Miloslav1956 for a topic
Today update.1 point -

1/32 Kitty Hawk F-5E Kicked Up A Notch. Oct 3/19. Finished!
Derek B reacted to chuck540z3 for a topic
DONE! I have posted pics of the finished model in the Ready For Inspection Forum here: 1/32 Kitty Hawk F-5E/N: "Kicked Up a Notch" Thank you everyone for your continued interest in this build. I really appreciate your comments and feedback over the past 9 months. Cheers, Chuck1 point -
Little lean on the pictures John, don't ya think?? I mean, come on, that is awesome, but, it's like seeing and smelling a steak. What a tease. Really, really good job!!1 point
-

Mistel Combo
Fvdm reacted to Bruce_Crosby for a topic
Hi Guys, More Mistel! Here's the port engine in its new colours: lots of masking but worth it. Untitled by Bruce Crosby, on Flickr Masking up to paint the areas under the slats. Untitled by Bruce Crosby, on Flickr With some White Aluminium plus Chrome from MMP. Untitled by Bruce Crosby, on Flickr The original holes to locate the struts: I had scaled them from the Dragon 1/48 model but like all things. it hadn't been researched properly and the points are in the middle of panels, not load bearing frames or spars. Untitled by Bruce Crosby, on Flickr And it just jarred on my nerves. So I re-drilled the holes, the front one just behind the cockpit rear bulkhead frame, the other two on the main frame just ahead of the undercarriage doors. The gear legs hang from this frame and the wings are bolted on top, so this is exactly the right place! Untitled by Bruce Crosby, on Flickr The original line up: Untitled by Bruce Crosby, on Flickr New line up: see how the code numbers are no longer aligned. Untitled by Bruce Crosby, on Flickr As it was: Untitled by Bruce Crosby, on Flickr And now. Note I've outlined the Yellow 3 with a black marker pen, only roughly as if hand painted by a 16 year old conscript. (My mental age!) Untitled by Bruce Crosby, on Flickr Hope you like it so far. Regards, Bruce Crosby1 point -
Gladiator is getting closer British Pilots (1939-1945) listed as kits in process http://www.icm.com.ua/news/ and another version of I-16 - type 17 with skis jan1 point