Leaderboard

Popular Content
Showing content with the highest reputation on 07/23/2019 in all areas
-

A big shout out to Wingnut Wings for great customer service!
MikeC and 9 others reacted to Wolf Buddee for a topic
When Wingnut Wings had their big anniversary sale I couldn't resist purchasing their fantastic Felixstowe F.2a Late kit. When the kit arrived I discovered I had 2 sprues for the upper wing but none in the kit for the lower wing assembly! I contacted Richard Alexander who forwarded my concern regarding the missing sprue to Dave Johnson. This afternoon the sprue for the lower wing assembly arrived directly to my door. That's what I call great customer service. Thank-you Richard and Dave! Cheers, Wolf10 points -
Beginning to add the interior structure into the fuselage. I found it easier to do this in sections, though I had to do some bending with the aft floor section. Yeah, I thought about moving he navigator's station aft, and then recreating the radio room, but I decided this would be a B-24 where they hadn't done that yet (it was a field expedient thing anyway, IIRC).7 points
-

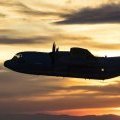
HobbyBoss 1:32 Liberator GR Mk.VI - RAF Coastal Command
Paul in Napier and 5 others reacted to Iain for a topic
Oooh - postie just delivered a neat little brown envelope with two sets of Airscale B-24 Liberator instrument panels... Amazingly fast delivery - and great quality (as always). Piccie from the Airscale website: Have to head into the office just now - or I'd be getting sidetracked with cockpits... Iain6 points -
After closer inspection you are correct sir. I had not noticed the issue until reported. I have contacted paint shop and corrosion control. I was informed "with the flight schedule,They have had a heavy work load keeping these aircraft ready for the current operation." "So deal with it". He also reported "They have been over worked and under paid !!!" Jason5 points
-

RAAF Macchi C.205 serie I - 1/32 21st Century Toys
Paul in Napier and 4 others reacted to artoor_k for a topic
Thanks! Yesterday I've sealed screw holes. One thing I'd like to mention. Although wings are styrene, screw plugs are made of very hard rubber which doesn't cooperate well with Tamiya Extra Thin. So I had to seal them completely with Mr.Hobby Surfacer 500: I've scribed four inspection panels on wings , gun barrels were made of thin brass tubes: Because gear doors from set are very thick I made new ones from two pieces of thin styrene. Dremel was used to make wheel mounts more slim. Then tires were modified. Now they have vertical grooves as they are as correct as smooth tires (I'm working with help of Squadron Signal Walkaround no. 5558):5 points -

EAA oshkosh surprise............
coogrfan and 4 others reacted to brahman104 for a topic
You’re welcome..... https://i.imgur.com/nI6993W.jpg https://i.imgur.com/tWbxWHO.jpg Craig5 points -

1/18 Ta-152H-1
Gazzas and 3 others reacted to Lee in Texas for a topic
Just getting started on it. I was worried about joining the airplane’s plastic with styrene, but super glue seems to be doing the trick. The plan, for now anyway, is gear up/no added cockpit detail and hang it from the ceiling.4 points -
Hi Alain, I hope you are well. How is the Corsair progressing? For the fix on the nose there are two easy possibilities and one other is to modify the master. The one is to cut the Revell nose section behind the cockpit and graft it onto the Italeri kit if a donor kit can be obtained. The other is the solution I used and was to cut (sand) 1 mm from the top and 1 mm from the bottom from the front fuselage sections on the Italeri kit. On the Kfir the fuselage does not need to be extended, making it a lot easier. Here is a photo of all the parts taped together and as you can see it looks the part. But there are a lot more small detail differences between the Mirage and Kfir than is apparent at first. Here is the side in view of the nose. There is a small overhang at the bottom which is a small vent. Regards Nick4 points
-

New Huey
Anthony in NZ and 3 others reacted to Out2gtcha for a topic
There are probably some family members Id give up for a 1/32nd Sea King. Might even be some family members Id be willing to let go for a 35th version.4 points -
Working on the cockpit tub is a test of will. The fit and parts are fiddly. Parts removed and cleaned. This is the HiTech kit with some really nice resin parts. The throttle is fragile so be careful with trim and clean. Gators Grip for the resin parts then Tamiya extra thin throughout. Primer session Gunze Mr. Surfacer 1500 Black. Paint using MRP NATO Black and RAF Interior Green. Added a dark brown panel line wash to pick out details. Some Belter action. Kit supplied textile Sutton Harness, assumption it's HGW. I love this medium. However plenty of angst until completed. All details have been picked out with Vallejo Model Color. Covers and levels with exceptional results. Also, no bleed when used on lacquer finish. Win, win. While glue cures I tape fuselage together and use as a jig for the cockpit to dry while achieving proper shape. Everything dried in proper position. Now to add some plumbing. Yahu IP is a quasi fail for fit. I only used the Yahu center IP panel as the port and starboard IP panels are too big. Kit offerings with decals worked just fine. A little MIG dusting on the floor runners.4 points
-
...will not be in manscale, sadly. I'm still gonna buy it, though! https://www.tamiya.com/english/info/aircraft_preview/index.htm Who knows, maybe there's still hope for the ultimate P-47 in 1/32?? PS - not sure if this topic belongs in this forum, seeing as it's a 1/48 kit, mods please feel free to move it somewhere more appropriate.4 points
-
Glad i could save it. Would have hated parking it on the SOD again. Doing a few more things (fire bottle, tinwork, windows...) then will get more pics. Don4 points
-
After grafting the new tail, and rescribing the panel lines, I need to add to the length of the horizontal tail planes, as the trumpeter ones are shorter, since the resin tail was designed for the Hasegawa kit. So using plastic sheets I added the necessary length: checked if it matches the edges of the empennage: Filled in with epoxy putty, sanding, and viola!4 points
-
Today I have been mostly working on wing profiles (again) and addressing the elephant in the room - the undercarriage bay. This is a really neatly designed unit (each side) - but, of course, it's designed to fit the wing thickness/profile in the kit - and not the reprofiled, thinner, wing we should end up with. To that end I've dry assembled the outer gear bay box for the starboard wing - my test piece for the surgery - and been planning how to progress. In the kit the combination of solid gear bay 'box', strong wing spar and wing strengthening webs results in a very solid structure. The plan is to retain as much of this strength as possible - whilst getting the appropriate cross-sectional profile. I think I now have it... Previously decided the main 'spar' can be re-profiled to suit by removing material. Replacement wing formers I've drawn up will also act as profiles to reshape the inner and outer gear bay formers (to the left and right in photos) to give the correct profile - and the upper roof of the gear bay, with it's moulded ribs, can be bent to suit and attached. Rear section of gear bay will need to be reduced in height (dimensions to be confirmed) - and some of the gear bay internal components re-shaped (this will have to wait until I have the rest sorted). Plan leaves the solid undercarriage mounts exactly as they are, position-wise, as originally kitted - so no issues with undercarriage position, angle, or height. Maybe another update on the wings later today after I've started to play with replacement formers. Happy kit butchering! Iain4 points
-

Me-109 E-3-a Royal BG Air Force
Dany Boy and 3 others reacted to ShelbyGT500 for a topic
Hello guys Continue with the paint job: Also start working over the base: Cheers friends4 points -

Silhouette - impressions & settings
Fanes and 2 others reacted to themongoose for a topic
Best modeling tool I've ever bought. This is so easy to use. A few you-tube videos and I was ready to print. It's totally changing my ability to airbrush beautiful looking graphics. Tonight I needed a 2nd set of stars and scallops for the tail of my F-16. 5 minutes later I had a print out! Almost anything I can scan I can print. I'm using the Kabuki mask from Maketar Paint Masks. I couldn't find settings for it (although I did record the oramask 810 settings others have posted) so I thought I would post them in case someone else wants to try kabuki. These result in just an impression of the cut in the backing: Silhouette Cameo 3 Cut = 1 Speed = 4 Force = 4 Passes = 1 Also quite a few people said they had trouble getting the material off the self adhesive mat. I had that problem as well, causing the kabuki to curl badly. What I did to resolve the problem: Leave the film on the mat. Place the blue non-stick cover sheet over the top of the mask/mat. Turn the mat upside down. Slowly pull the mat off the film, using your other hand to hold the film and cover sheet flat on the desk. Works well and no problems with curling now. No need to de-tac it. Would love to hear any other tips you guys have for the Cameo3 points -

ZOUKEI MURA 2019-2020 - NEW P-51B/C, Bf-109G and Ar-234 ANNOUNCED!!!!!!
Rick Griewski and 2 others reacted to Jan_G for a topic
New old man blog n.103 is out https://www.zoukeimura.co.jp/sentiment/oyajiblog_103.html no updates about P-51B, Ar-234, Fw-190 or Bf-109G just reminder that at Nationals they will display the latest test shots of Hs-129 B-3 and B-2 jan3 points -
Hi Red Dog The Italeri kit is a better starting point for this conversion. There are a few points to take note of depending on the amount of detail you want to add. The faults of the Italeri kit will need to be corrected. The Isracast set should provide some of the detail you require but as the set was made for the Revell kit things like the undercarriage bays are not needed. They are way too shallow anyway. The Kfir undercarriage is a larger unit than the one found on the Mirage III with a compression rod to compress the larger oleo on retraction and other detail changes. At least the Isracast set can supply some of the vents and pylons. Additional vents and panels will still need to be added as well as wheels. I do not know about the Isracast wheels and nozzle but the Aires F-104 nozzle can be used. I do not see any photos of the Colombian Kfirs with the 1700 liter tanks. The tanks in the pictures are 1300 liter tanks but of Israeli origin. They have a different tail to the French build ones. On the Kfir they are about 12 inches further forward than on the Mirage and also on a different pylon which makes them almost horizontal instead of the nose down attitude of the Mirage tanks. The Italeri tanks are a bit small with the Revell 1300 liter tanks correct but with the pylon wrong. The pylon for the Kfir needs to be scratch built anyway. The 500 liter tanks can be used as is. The nose is a bit tricky as it has a couple of interesting contours and additions. Maybe you can get this one as a starting point from John at Scaleworx. He is on the forum as Renegade. Nick3 points
-
Double checking if everything’s square. Need to fill in some seams on the tail plane, make the rudder and fins fit better, then repaint the cockpit. I made an error using bronze green, rather then interior green. Seems I read somewhere that the cockpit was bronze green, turns out it wasn’t.3 points
-
As anyone who's built one of Tamiya's big Spitfires, Mustangs, or Mosquitoes knows, their Merlin is very impressive right out of the box. It's got a tremendous amount of detail (fifty parts just for the engine, not including engine bearers, firewall, and additional plumbing) and is very faithfully rendered. I scratched up a little extra detail using various sizes of solder, copper wire, styrene rod, Meng hex bolts, and a couple parts from the Eduard PE set. I only used the Eduard bits for the fuel priming lines (I was really happy to find this in the kit because scratching it was very fiddly and didn't turn out great when I did it on my Mossie) and the RR nameplates. Flat PE ignition wiring just doesn't look right to me if it's bigger than 1/72. I did skip the mechanical linkage on the port side magneto, done beautifully by Wolf on his build. One part I have experimented with but have not yet done to my satisfaction is the return pipes between the coolant tank and the heads, right on the front here. Since I'm going to be displaying with the engine open, I want to have this rather prominent part, but I haven't been able to build anything that looks right to my eye. Suggestions?3 points
-

EAA Airventure, OSHKOSH
Jack and 2 others reacted to R Palimaka for a topic
Yes, the grounds have been soaked after three severe storms, but yesterday and today were gorgeous. We got in before the storms and managed to get a high spot before it all let loose. The parking and admissions were a nightmare apparently, but I think tomorrow will be ok, This event is seriously mind blowing for aviation enthusiast. There are I think 15 Mustangs here, I've met Bud Anderson, and there are more aircraft than I have ever seen. Sitting drinking Jack Daniels at the moment watching Mustangs, A-10s, F-22s and F-35s playing tag with each other around the field. Richard3 points -
This build still astounds me. Beautiful craftsmanship.2 points
-

Fuji FA-200, 1/20 Nichimo
Starfighter and one other reacted to mgbooyv8 for a topic
The work has started. First I had to undo the not-so-very-good work done by the first owner. The halves of flaps, ailerons and rudder were not aligned with each other, some of them had a shift of more than a mm at one side. For example, here are the flaps: The rudder was worse, but I forgot to take a picture of it. While the leading edges and the sides popped apart easily, this was not the case with the trailing edges. In order to preserve the delicate surface detailing, out came the JLC razor saw to carefully saw the halves apart: The flap hinges did not survive the handling intact, but I could save the detailing. Here's a picture of the rudder halves, sawed apart: And the outer sides: There's only a tiny scar, which is easily repaired. I've taken off the trim tab, it's easier to replace it with a piece of plastic strip. The same procedure was needed for the ailerons. Fortunately, the elevators halves were glued correct. The connecting axle was already broken. What did not survive were the small posts in the fixed part of the horizontal stabilizer, which anchor the springs holding the elevator in place: The same holds for the small spring posts in the wing. However, these are easy to replace. Some scars resulting from disassembly and glue marks of the first owner have to be removed as well. For example at the location of the main gear on the wings: And at the location of the horizontal stabilizer: Thanks to the size, these scars and glue marks can easily be dealt with using small sanding sticks while preserving the surrounding surface details. The ones made by Flory Models are ideally suited for this task. Next will be the reassembly of the control surfaces. Cheers, Peter2 points -

Sopwith 'Swallow 1:32 scale
scvrobeson and one other reacted to sandbagger for a topic
Hi all, Well I've made a start on the resin wing assembly. Needless to say it required filling and sanding. I also strengthened the wing to wing joint, which is a basic 'butt' joint, with no strength. I drilled two 1.0 mm diameter holes into the wing root of both wing halves and inserted 1 mm brass rod, held with CA. The wings halves were then joined using two part epoxy adhesive. I cut the aileron from the wing and profiled the leading edges. The wing was drilled in three position for each aileron and 0.8 mm brass rods inserted with CA adhesive. Corresponding holes were then drilled into the aileron leading edges. Aileron control horns were made from spare photo etch and secured in slot cut into the aileron leading edges. Each horn has a 0.3 mm diameter hole at each end for rigging. Upper surface strengthening ribs, removed during sanding, were replaced with strips of 0.2 mm thick plastic card. I filled the pre-moulded rigging points as they do not align vertically through the wing. These will be drilled later. I still need to re-profile the forward edge of the wing cut-out above the cockpit, which needs to be straighter. Mike2 points -

1/32 F-16D Wolfpack Aggressor
A-10LOADER and one other reacted to Marcel111 for a topic
Thx for the encouragement... much needed as I am struggling with motivation to complete this 3rd in a row F-16. Here's an update of where I am. Flat coat is on and I tried to replicate the surprisingly weathered look seen in the pics above. I may have overdone it a little but no turning back now. Cheers, Marcel2 points -
New Huey
Anthony in NZ and one other reacted to Out2gtcha for a topic
2 points -
I am fundamentally happy with this release, I have wanted to build a p-38 for a long time and not got around to it. Thought fairly hard about a couple of the Eduard releases where they added extra resin bits and some interesting markings. Almost bought one on more than one occasion but always had some reason not to. Would I prefer a 1/32 like most of you yes, however, I am sure this will have amazing detail and being a twin engine in 1/48 the physical size of the complete model will be reasonable. I do feel that models can get too big in 1/32. However, I just purchased a Tamiya Mosquito as I found one that offered a package deal at a good price.2 points
-
Well, that’s a bit disappointing that it is 1/48. Sure hope they also do it in 1/32. Any idea which model of P-38 they are doing? Bill M.2 points
-
Yes, Keith created the basic scheme. Knowing I was a fan of aircraft color schemes, he showed me his drawings during a visit to NASM. He mentioned that there were some revisions to the wing patterns following initial evaluations, but I don't remember the details - perhaps the white (or blue?) lower wing was original, then switched to improve visibility? I never photographed the scheme, nor do I have copies of his drawings. (The 1986 USAF fact sheet on the T-38 shows the blue on all undersides...) Cheers, Dana2 points
-
Good news indeed, just wish it was large scale. I really hope! Ive just taken the liberty of moving this to general discussion where it more appropriately belongs. Thanks for the heads up2 points
-
I use wet and dry sanding sticks - starting at 800 - then 1200 and 2000 - onto Micromesh and Novus (as below) for mould seams. If just polishing - Micromesh pads - followed by Novus Plastic Polish (fine). Novus is available in the UK - I get mine off eBay. I much prefer Novus to T-Cut - as I've had T-Cut actually fog some clear plastics!! Iain2 points
-
I've cut the screw so that it supports the nose leg but the nose leg can be left out of the model until later on. There are four points to hold (with glue) the nose gear into place so no worries about it coming loose. Once the nose gear flipper door is in place - closed, there will be enough details left to add some interest. Still a bit to do in the nose gear wheel well. This photo shows some of the MRP paint and how dark and blue it is. Some touch ups required. Thanks camera.2 points
-

EAA oshkosh surprise............
D.B. Andrus and one other reacted to PhilB for a topic
Have to agree......and look at all that lovely oil-canning..............2 points -
I now know which Spitfire I am Making Spitfire MkIXc, 340 Squadron FAF, France, June 1944. My friend said he was going to get me a good looking spit Decal set for a bird.So here we go. I didn't know which aircraft I was going to do. I got bored and painted the prop the way I wanted it to look. Rivet counters will pissed. https://imgur.com/4504GTT Having problems Inserting image from URL: I am using IMGUR for images:.....Please a little help MODS. TY i hope ya'll enjoy this small update because she is officially started ( Plastic cut, glued and/or Painted) !!!!!! Jason2 points
-

1:32 Douglas A-26 Invader from Trumpeter/Hobbyboss?
Jack and one other reacted to Sabre F-86 for a topic
If they do one, I'll grab one. And then wait for someone with more skills than mine to do an A-26K conversion.2 points -
Please, don't tempt the devil Tony2 points
-
Going back to earlier question about the photo I posted - was that a mirror, or window on back wall ? I can confirm, looking at other pictures they've posted, that it is definitely a window. As said - I'm happy with the provenance of this - but we still don't have any confirmation/announcement from anyone yet - and it may not even be under the Trumpeter/Hobbyboss brands (though likely if true) - they've done moulding for a number of other brands over the years... Me? I'm crossing everything Iain2 points
-

USAF F-100D FINISHED!
crobinsonh and one other reacted to daxspapa for a topic
I just saw this thread and I hope I'm not too late. Your work to this point is terrific but there is a problem with the Aires cockpit tub you may not be aware of. On the aft end of the right console in an F-100 is a map case, inside of which is a ground test plug for the gunsight. The flight manual depicts this by cutting away part of the map case to show the plug. This is a common practice in technical drawings and illustrations to allow hidden items to be identified (I'm a retired engineer so I'm pretty familiar with this stuff). Aires followed the flight manual illustration exactly, in this case too exactly. The top of the map case is solid and not broken out. The error can be easily corrected by replacing the resin with a new top fabricated from sheet plastic, if the cockpit isn't installed in a closed up fuselage. It can be done even if the fuselage is closed. but not as easily. I hope this is in time for you to correct the Aires mistake easily. Great work so far and I will be following this project as I am a big F-100 fan.2 points -

1/32 Kittyhawk F-84F Thunderstreak & RF-84F Thunderflash !
crobinsonh and one other reacted to quang for a topic
I built this Kitty Hawk F9F-8 on the heels of my RF-101C. It took me one month to finish it. It's the same model that made a noted Internet reviewer throw a tantrum and bin the kit 15 minutes after he opened the box. I'd say bring on the accountants who run model kit companies2 points -

1/32 Revell Me 262-A (New Tool) July 2019 Release
D.B. Andrus and one other reacted to VintageEagle for a topic
Hello Chris, White 4 of III./EJG 2 was not Schreiber's aircraft. It had the serial number 170061. You are right that Revell got the serial number wrong. Cheers, Roger PS: I was informed today by the online store in Germany where I have preordered two kits that they expect deliveries from Revell this week and will start shipping orders by beginning of next week.2 points -
1/32 Revell Me 262-A (New Tool) July 2019 Release
D.B. Andrus and one other reacted to Chris Wimmer for a topic
http:// I like the paint scheme of "White 4", but can hardly agree with the serial number! Reportedly 130017 "White 4" was the world's first jet plane to bring down an enemy aircraft. On 26 July 1944 it was flown by Pilot Alfred Schreiber, when he destroyed a Mosquito over the Alps. After landing, "the driver jumped off his towing vehicle and took this photo of the historic bird" (2). Flying the same aircraft Schreiber lost his life in a landing accident on 26 Nov 1944: "Forced by an engine failure Schreiber attempted to emergency land at Lechfeld airbase, but didn't make it to the runway. The jet fighter hit a trench and somersaulted, crushing Schreiber to death." (1) http:// The following pictures, "showing jets of EJG2 training unit, are taken from a training film that was made in December 1944 at Lechfeld Airbase. Being towed by a Kettenkrad "Green3", serial number 110813 is passing the scene. According to Messerschmitt production documents this aircraft was built in the first week of December 1944." (1) http:// http:// So do you think it's possible that 130017 could actually have been repaired and sent back into service within only a few weeks - in late 1944? http://2 points -
HobbyBoss 1:32 Liberator GR Mk.VI - RAF Coastal Command
Paul in Napier and one other reacted to Iain for a topic
In other news, and for the sake of my sanity, I'm making a parallel start on the fuselage interior... I may have mentioned before, but the kit is a bit of a 'curates egg' - and here's a case in point. To avoid losing internal rib detail on the upper rear fuselage due to undercut issues, the designers have included separate inserts in order to keep detail sharp. Whilst it is a little 'clunky' I'm not going to worry too much about the interior - just concentrate on what's visible - but get the shape/look of the exterior right if I can. Need to order some Airscale panels now, methinks! Oh - and just realised I haven't published the lengthy review I wrote up at Christmas - sorry - will try and fix that this week, if there's still interest... Iain2 points -
RAAF Macchi C.205 serie I - 1/32 21st Century Toys
Paul in Napier and one other reacted to artoor_k for a topic
Hello, I've just get back home after visiting my friend and since I'm completely sober now I can continue with Veltro This is how gear weels look now: Also Icut out places for wingtip lights:2 points -
Me-109 E-3-a Royal BG Air Force
Greg W and one other reacted to ShelbyGT500 for a topic
Thanks Gaz, Kev and Michael :) after short break I think it is time to finish this project ;) So continue with detailing the fuselage: Wheels, rims and gears are painted and weathered: And the prop is ready for decals :) Cheers friends :)2 points -

New Huey
John1 reacted to thierry laurent for a topic
I hope we will not get recessed rivets...! I know some modellers really love them but on a military helicopter, come on! Such crafts are built like tanks!1 point -
1/32 Kittyhawk F-84F Thunderstreak & RF-84F Thunderflash !
D.B. Andrus reacted to Iain for a topic
New F-84F: Have fun! Iain1 point -
After making sure the clear IP silhouettes fit as they should, it was onto the cockpits themselves. I had previously tested the fit of these in the fuselage separate from each other, but took this opportunity to unite the two cockpits while they were temporarily held in the fuselage, so fit would not be an issue later. I glued the two ejection seat mounts to their respective pit areas, then after careful alignment, glued the two pits together as per the instructions. After that, the two C2 ejection seats slid nicely down the rails into position temporarily. I then mocked up two heads I wasnt going to use for my Master Details pilots, and proceeded to put them in place to see how they fit, and to see if I had any clearance issues with the clear parts. To my surprise, they actually fit really well, and I didn't have any clearance issues, nor did it seam like I was going to have too much trouble customizing hands and arms to match up with the control stick for the pilot either. I took some extra time and using one of Radu's fine saws, I liberated all 5 main glass parts to the F-104 cockpits. Another (good) surprise here, as not only did I not seem to have any clearance issues with the pilots, but all of the glass parts fit really nice, not even requiring finger pressure to line up. All of this, including all 5 canopy parts, radio and rear access hatches are all just loosely sitting on the fuselage here. Even so the fit is evidently good, and should only improve once all parts are exactly where they should be: The radio and rear hatches fit well too, but will just need some very slight pressure on them when gluing to get them in the perfect spot they need to be to allow the canopy parts to all sit there they need to be: All for now gents and gentettes! I've got to go home and make a vid of the lighting setup for Richard, and hopefully will get that fixed as soon as possible so I can move on and finalize the power situation. Cheers!1 point
-
Looks good!1 point
-
Excellent! That looks great Mike!1 point
-
Cockpit is well underway now with base colors added (some corrections needed on larger parts not shown below). There’s been a lot of work travel lately and little build time, but that should change soon The instruments and two stencils already in place are from the Barracuda stencil set. They look bloody good when applied! Without any special effort, they look nicer than the eduard panel from their color etch set, and nearly as nice as the Yahu panel I have in my other build. I will say that Barracuda set is tricky in terms of knowing what to place where in the bomber variants of the plane. The HK sidewall details are very different to the Tamiya, they all seem relatively accurate to their respective versions but the ‘cuda instructions only show placement for items in the fighter-nose plane.1 point
.thumb.jpg.745e9c32fdfafef712dcea77f75e8a27.jpg)