Leaderboard
Popular Content
Showing content with the highest reputation on 05/03/2019 in all areas
-
Well....I looked at it again tonight with fresh and a little more clinical eyes (spelled, not as pissed) and the damage is not as bad as I thought and is definitely repairable. I'll get back to it with a fresh mojo in a couple of days...sorry I gave the impression it was toast. My fault for over-reacting...gotta learn to relax. Stay tuned, we'll return to our program after a brief commercial break.5 points
-
thanks Bob, your products are just the best, my bulk order has not arrived yet but still plenty of time i just need to add windscreens, foot plates and lots of touch ups and the fuselage will be complete. I counted 32 models on display in my house and after fitting the wings i think a few more will have to be given away. i am tempted to leave the model wingless, but it too good a kit not to finish in all its glory. The 3 way splitter rigging was very time consuming and nowhere near perfect but i'll keep trying thanks for looking5 points
-
And finally.. the SD view... This has been a blast ! Thanks to all who looked in, commented and offered advice/ thoughts. It was great having you all along. Jimi has told me that this will be unveiled at Wonderfest !! I'm stunned that something I had a hand in will be at the show ! If anyone is interested contact him directly on facebook. https://www.facebook.com/JPG-Productions-276298122480883/ I have a different project in the wings.. give me a week or two and there will be more madness for those brave (or nuts) enough to check it out ! Till then, keep sniffin glue !!4 points
-
Revell 1/32 Fw 190. First build since 2001.
LSP_Kevin and 3 others reacted to Longbow_06 for a topic
i struggled to find something for the break line straps. I know a lot of you guys use thinly cut Tamiya masking tape. I ended up using a metal tape, that is used for insulated HVAC ducting. It has a sticky back, covered in brown paper. It worked great, and I just sealed it with some mat varnish prior to primer coat. https://i.imgur.com/BMAarlj.jpg4 points -
Howdy folks, I've just published my review of the revised Tempest book from Valiant Wings: Valiant Wings Publishing Airframe & Miniature 4: The Hawker Tempest (Second Edition) Thanks to Valiant Wings Publishing for the review sample. Enjoy! Kev4 points
-

P-47D-25 & P-47D-30 1/32 Hasegawa
scvrobeson and 3 others reacted to Miloslav1956 for a topic
Color under HGW rivets ready.4 points -

Bf 109F-4/Trop 8./JG27 - finished
AceofClubs and 3 others reacted to Fanes for a topic
And now without the masks: The alignment is for sure not perfect (not showing the other cross) and there is a slight distortion, but I'm quite happy with the result and I can improve on the other ones!4 points -
1/32 Revell Me 262-A (New Tool) July 2019 Release
nmayhew and 3 others reacted to Dave Williams for a topic
I’m not sure that’s a valid comparison. Aside from being two different aircraft, the Revell kit was tooled in 2017 or 2018, while the Wildcat was an early Trumpeter kit tooled in 2002.4 points -

P-47D-25 & P-47D-30 1/32 Hasegawa
Neo and 2 others reacted to Miloslav1956 for a topic
Today update. Great praise for HGW and J. Bobek for their work. Everything fits perfectly.3 points -

Jedha city
scvrobeson and 2 others reacted to spacewolf for a topic
And so... amid a cloud of primer and putty dust, the city appeared !! Beauty shots !!3 points -

Jedha city
Coneheadff and 2 others reacted to spacewolf for a topic
Getting everything as smooth as possible, modelers can texture it a bit if they wish. I was more concerned with the molding/ casting process.. lots of fine detail rips rubber like you wouldn't believe ! The ground work looks good.. to my eye at least... The inner constellations had their lower edges angled to aid the casting process.. With the city plate fitted it looks good methinks !3 points -
Revell 1/32 Fw 190. First build since 2001.
LSP_Kevin and 2 others reacted to Longbow_06 for a topic
Light blue is on... i may admit to it to being impatient...3 points -
Thank you Vincent! I opened up the ammo chutes on the bottom insert piece. I then used it as a mask to mark where I'll need to punch holes in the bottom wing section. I'm going to perform some modifications to this bottom wing section but I've been running into some questions about the specifics. So leaving that for now, I turned back to the cockpit. The Eagle Editions cockpit comes with brass foot pedals. I mangled the straps but they are supposed to be leather so some wrinkles shouldn't hurt. The cockpit parts... primed and ready for painting. I want to chip the back rest and the seat so the back rest was painted silver and the seat tan (the bucket seat was wooden on the K-4). I gave the sidewalls a base coat of black and shot it only from the bottom leaving the upward facing surfaces unpainted. I'm hoping to get a shadow effect. Here are the cockpit parts after basic painting. RLM 66 Dark Grey (Mr Hobby Aqueous) for most of the parts. I usually paint the foot rests and the control stick in a lighter grey to give some contrast to the cockpit. I've glued the bucket onto the seat back and sprayed it with Mig Scratches Effect. I've learned to like this product as it can produce some really fine chipping details, which is great for cockpit work. Hope I didn't jinx myself!3 points
-
Hopefully soon! Yes, that is most likely the route that I'll be headed but maybe with a few variations. I'm thinking about cutting the actuators from the doors to make the wire work easier. Beautiful Corsair build that you did BTW! Another reference that I've been looking at. Can you believe that I stumbled onto the US parachute at The Modeling News BEFORE seeing your build? No, really! Although it is out of order from the kit instructions, I've been working on the outer wings and avoiding work on the inner wings. The wing tips have been glued into place as well as the clear lenses for all of the lights. I used Montex masks and Tamiya tape to mask the clear parts. This is why you have to be careful with Montex masks... After applying the masks, a couple of the Montex masks on curved surfaces lifted overnight. This isn't the first time I've experienced this with the black vinyl masks that Montex uses for clear parts. They work fine on flat surfaces but have a tendency to lift on curved parts. So buyer beware. I used the Montex masks to cut my own from more reliable Tamiya tape. I've painted the interiors of the wing joint even though this build won't have folded wings. Different colors since 740 had what appears to be a replacement wing from an older Corsair. So one is Intermediate Blue and the other is Blue Grey.3 points
-
Here 's my last product. This kit is correct and of course we could enhance some parts as we want. My sources to make my kit are mainly: French magazine Wing master n°44 Heinkel He 162: From Drawing Board to Destruction: the Volksjager Spatz Classic Publications / Ian Allan Publishing and a french web site http://memorial.flight.free.fr/He162.html The paint are for the camo RLM 76.....Gunze 417 RLM 82.....Tamiya XF 26 RLM 81.....Gunze 421 Well , I hope you like See you for a next one....3 points
-
Thanks Shawn. Yes, VERY close now! Got the gear doors on: Also got the .06 stainless steal tubing cut and the X-4 missiles finished off: With those finished and with their pins installed, I could place them to see how they would eventually look in their final positions: I just got done gluing the wheels/tires on, and am letting those cure off while I finalize the radio antenna attachment points. Its all down to this: - attach X-4 missiles - scrap flat spots on tires and confirm level - attach wheels/tires - straighten and re-align pylons/re-glue if necessary - attach cowl - attach flaps - attach ailerons - attach rudders - re-attach starboard side arm rest / touchup - dye white EZ Line silver for canopy restraint wire - make canopy side canopy restraint attachment - attach canopy and paint hinges - attach canopy restraint wire - make radio antenna cone - make radio antenna vertical stab attachment w/spring - make radio antenna w/ceramic insulator - attach radio antenna - attach props - attach umbrella All for now boys.................the next update will definitely be the FIN!3 points
-
Revell/ AIMS Mistel S3C Wk Nr 460066 Bernburg 1945
chukw and 2 others reacted to monthebiff for a topic
Foward facing FuG rack built today from various bits and pieces, the radio faces are from the etched set supplied with the AIMS conversion with the rest from the spares box. Also added the pedals along with hydraulic lines from copper wire. I think that's the cockpit build complete now and ready for some paint, just in time for the upcoming bank holiday weekend. Regards. Andy3 points -

Hughes 500, Nichimo, 1/20
rafju and one other reacted to John Everett for a topic
I meet a lot of modelers who say they have this kit. But none of them seem to be building it. I'll be adding some interior detail.2 points -
1/32 Hasegawa P-40K "Miss Wanna II"
TorbenD and one other reacted to Tolga ULGUR for a topic
Hi Here is 1/32 Hasegawa P-40K Warhawk with the markings of “Miss Wanna II” from 25th FS 51st FG (Summer 1943) . Modifications: Eduard interior set, Master model pitot tube and gunsight set Decals: Superscale decal set #320261 Paints: Gunze Sangyo acrylics2 points -
1/32 Tamiya P-51D Mustang "Old Crow"
AlbertD and one other reacted to Tolga ULGUR for a topic
Here is another Mustang 1/32 Tamiya P-51D-10-NA 44-14450 363rd FS Cockpit modified by Yahu instrument panel, Barracudacast seat and RB Production cockpit floor set. Barracudacast wheels used Decals are from EagleCals EC-101 set. Paints: Alclad metalizers and Tamiya acrylics.2 points -
F/A-18A+ Flying Omar Splinter 08
F-4Phanwell and one other reacted to Fancherello for a topic
Thank you Mike ! You're going to love those stencils ! Last days, I'v been working on the tail stiffeners that are the same as seen on CF-188 and various export countries Hornets. Butterfly patches: and the lightning patches ( i'm just seing on my ref pics that a bit more recessed rivetting needs adding on them ) bye Fanch2 points -
Revell 1/32 Fw 190. First build since 2001.
LSP_Kevin and one other reacted to Longbow_06 for a topic
I was able to get the greys on. Sometines being off work is a good thing lol. Next is is the green... Found a great profile of III Sg 10.2 points -

Jedha city
spacewolf and one other reacted to BloorwestSiR for a topic
The finished city looks great Vaughan. Congrats on seeing something you made go into production! Carl2 points -
Revell 1/32 Fw 190. First build since 2001.
LSP_Kevin and one other reacted to Longbow_06 for a topic
I started the pre-shade.2 points -

Any Tamiya 1/32 rumours?
JerseyChris and one other reacted to Out2gtcha for a topic
For as much as I am in the same boat as most (REALLY wanting a new tool Tamiya LSP) I think that is probably accurate. Most of the time, getting a new tool LSP from Tamiya is like looking for love.................it ONLY seems to happen when you are really not looking for it. Id say we might want to start the new-tool-Tamiya-LSP-wish-list talk up again in 2020, as I feel that may be the next time we see one.2 points -
A lot of detail painting completed last night; radome is simply beautiful now that it's Gloss Black. The canopy sill and cockpit have seen some abuse! So much gloss white on that tail!2 points
-
Revell 1/32 Fw 190. First build since 2001.
Shawn M and one other reacted to Longbow_06 for a topic
Got a coat of Tamiya fine white primer on her, this morning. Hope to be painting later.2 points -
1/32 Hasegawa Bf109K-4 Weisse 8
D.B. Andrus and one other reacted to StefanGebhardt for a topic
I am following this built closely and I am amazed by the input and help across the board. I am not an expert for the K-4 version but I do have quite a number of books from JaPo covering the subject. One item which puzzles me is the positioning of the ejector port for the MK 108 gun. According to the K-4 Tweak List V1.0 it is missing and it needs to be added to the right side. Here is the quote covering this topic, the relevant part is highlighted: I assume that the described change is based on the description on this side: http://www.clubhyper.com/reference/k4bellyvk_1.htm. When it comes to the ejector chute the following picture will be referenced with the quote underneath that it does not show the production version of the K-4: The author is describing the changes made to the belly of the K-4 and here starts the part I don't understand. The changes made to the belly (ejector chute) of the kit are exactly replicating what we see in the prototype picture extracted from a K-4 Flugzeug-Handbuch (which version?). Please have a look at the comparison below. I turned the pic of the modified belly by 180 degree to make it more obvious. The positioning is matching! I managed to find the Werkschrift 2109 K-4 Teil 1, 2, 3, 4, 5 - Bf 109 K-4 Flugzeug-Handbuch Stand Oktober 1944, Ausgabe November 1944 (link at the end of the post) and it contains a mirrored version of the photo above. The fact that it shows the mirrored version of the belly has also an impact on the positioning of the extra valve! In addition both versions of the picture does not show the extra pin added to the top of the belly. To add some more confusion I would like to add a quote from the JaPo Messerschmitt 109 K-4 book page 79: I came across a picture of (what I believe is showing an unidentified wingless K-4 parked close to another K-4) showing the ejector chute on the left side of the fuselage (Source: Messerschmitt Bf 109s of JG 52 in Deutsch Brod). Update: The picture below is not showing a K-4 version, instead a G-10. Nevertheless I am also aware that not all K-4 seems to have an ejector port on the left side or at all (?). Is there actually the possibility that there three options in place when it comes to this detail? Ejector chute on the left Ejector chute on the right No ejector chute at all (similar to the G-series) The referenced K-4 manual can be found here: K-4 Manual Thanks Stefan PS. English is obviously not my mother tongue... Don't be to harsh :-)2 points -
Tamiya's primary market is Japan, though, and a Ki-61 would sell like hot cakes there.2 points
-

1:24 Trumpeter Bf 109G-14
D.B. Andrus and one other reacted to LSP_K2 for a topic
I thought I'd check to see if the fuselage splice area, which I've been working on recently, was acceptable or not, so I spritzed some automotive primer on to check. Obviously I still have some more "finessing" to do.2 points -
Revell 1/32 Fw 190. First build since 2001.
HerculesPA_2 and one other reacted to Longbow_06 for a topic
Managed to get a little more done today. Hopefully more later lol.2 points -

Fokker pair 2
Greg W and one other reacted to sandbagger for a topic
Hi all, The top fuselage frames are cross braced. Onto the sides now, then the make and fit the top decking panel and finally cross brace the bottom fuselage frames, Mike2 points -
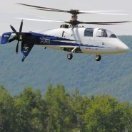
HONG KONG MODELS 1/32 Lancaster MK III Dambuster
Rick Griewski and one other reacted to Juggernut for a topic
LOL! A toddler or someone with a 6X rivet gun, AD4 rivets, and no control....2 points -
Special Hobby Westland Whirlwind Mk 1
R Palimaka and one other reacted to Jan_G for a topic
molds for Whirlwind on SH facebook page https://www.facebook.com/pg/specialhobby/posts/?ref=page_internal jan2 points -
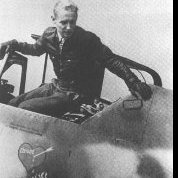
Messerschmitt Bf-109E-3, 1:32, Cyber Hobby
turbo and one other reacted to Hartmann52 for a topic
Finish soon2 points -
Hi guys, its been a couple of weeks since my last post. A business trip and spring yard work cut into my time but I have managed to spend the last few nights working on the build. I did not like how my reverse mottling attempted turned out at all; the edges were much to stark in my opinion. So I re-sprayed the aircraft RLM 76 and then airbrushed the RLM 75 mottle using the tried and true method I normally do - that is air turned down to 5 psi, very thin paint and the .2mm nozzle/needle combo on the H&S Infinity. The Mission Models paint required some practice on a paint mule first, but once a came to grips with the paint the result was fairly pleasing to my eye. The FuG 202 antenna was cobbled together using the parts from my other RoG Uhu kit and some spare brass parts from either an old Owl or the Polish company that makes AM antennas, I forgot which. The end result is not 100% perfect, but looks pretty good from 6" or so away. The gloss coat is Alclad's gloss which is not bad; however, I have come to prefer Tamiya XF-22 thinned down so I am using up the rest of my Alclad gloss. Enjoy the photos! Mottled, glossed and decaled Close up of the mottling on the port wing And the tail Some of the Owl AM decals. Frankly, I thought the RoG decals in the kit were just as good. Bits and bobs painted and ready for weathering. The FuG 202 antenna ready for priming and its RLM 76 coat.2 points
-

1/32 Revell Me 262-A (New Tool) July 2019 Release
Model_Monkey and one other reacted to VintageEagle for a topic
The boxart is apparently out! But no info about decal options yet. I assume White 4 will be one of the options. But White 4 was never equipped with R4M. It was a training aircraft attached to EJG 2. It was also fitted with the experimental wooden vertical stabilizer and rudder.2 points -
Detail painting in the cockpit is 90% complete (right hand console): The instrument panel was quite a struggle. The raised indices on the dials are really hard to paint. I laid down a white based followed by numerous ultra thin black coats (like a wash) to leave the raised areas white. Well in theory... I do prefer dials without raised details and individual decals for them! Enough of the ultra close ups - let's get to the dry fit of the cockpit in the fuselage: When the last bits are done (probably tomorrow) I'll add a gloss coat, placards, washing, chipping and then I can finally close the fuselage for good!2 points
-

P-47D-25 & P-47D-30 1/32 Hasegawa
Seversky and one other reacted to Miloslav1956 for a topic
Last small update.2 points -
Other than the wing (doesnt bother me much) turrets (will have some options for that by the time I get to mine) wheels (already have some options) and a few other minor things I cant see anything that is a deal breaker. There will be plenty of AM to fix the main issues of the kit. Ive heard nothing about bad cowls. The D model (save the obvious removal of the front turret) will be the exact same kit as the J, I virtually guarantee. I'm not sure HB will put much work into any real differences. All is fixable save the wings with minimal effort. There is always the combat vac for those that think the HobbyBoss kit is unbuildable. If the Combat vac nor HB IM B-24s are not up to your build standards, you could always build a 32nd Lib from one of the many other manufacturers who make them.2 points
-
Hi all, I’d like to share my recent build- Hasegawa’s 1/32 Bf109 G2. This photo recon fighter was from 2.(H)/14, La Marsa, Tunisia, March 1943. The spinner originally was 2/3 RLM70 and 1/3 white but the white part was darkened for some reason. I tried for an overall worn appearance for this heavily used plane. Thanks for letting me share this.1 point
-

1/32 Tamiya F4U-1a Corsair - Boyington's 17740
Thunderbolt reacted to Woody V for a topic
It's not the part, it's the use of their trademarked logo. They could just give permission without compensation based on free advertising, but lawyers. And god knows Goodyear needs every penny they can squeeze out of model builders.1 point -
Keeping in mind that for this project, less is more, I've spritzed the 'pit with what I think is an OK green color. Now I'll seal up the fuselage and prepare it for painting.1 point
-
1/32 Revell Me 262-A (New Tool) July 2019 Release
barkhorn reacted to Darren Howie for a topic
Well in 1945 DSLR’s that coukd capture the detail you require to be convinced where nit going to be around for another 70 years. Those with cameras when able where not shooting the angles you can get on museum aircraft to highlight the details. Never mind the dynamic range of film, the quality of processing, storage etc means you can tell most photos struggle to even get a nice image of the aircraft period. But if you believe captive Jews, Slovaks, Poles and Russians where so dedicated to the nazi cause that they would spend hours filling every rivet good luck. You might want to convince the guys in JG7 who flew and the black men who maintained them in combat though as every bit of first hand evidence is they where far from the condition you believe. But hey what would they know?1 point -
Finished !!.... 1/32 Hasegawa P-40K WARHAWK
Tolga ULGUR reacted to MikeC for a topic
That's rather superb, and always good to see a bird from the Assam Draggns.1 point -
Gents, the updates: Kit nº1 panel assembled: nº2: The joint glued, corrected with CA glue, sanded, and rescribed: The front unit glued: Result so far: Now let's bring the 2nd kit up to that point Paulo.1 point
-

Fokker pair 2
Greg W reacted to sandbagger for a topic
Hi all, Yes the 3D printed parts are close tolerance and fit well, although there are no location pegs/holes as you'd get on standard kit parts. However the parts can be printed hollow and include parts the original kit has as separate pieces. You can still see the 'layer lines' created by the vertical printing process, but even at this 1:32 scale, you have to look specifically to notice them. The engine has progressed a bit more now with the addition: The conical valve springs Crankcase breather pipe Magneto drive assembly with two 3D printed magnetos Two air pump to crankcase pipes Decompression valve. Still have to add ignition leads, intake manifold with locking rings, water pump, coolant pipes, oil filler pipes, sump oil sight glass. There's also a couple of other pipes plus engine controls. Mike1 point -

Fokker pair 2
Greg W reacted to sandbagger for a topic
Hi all, A few more engine bits prepared. Spark plugs made from micro-tube and 'RB Motion' aluminium nuts. 'Taurus' manifold locking rings - cut and sanded to fit the 3D printed engine, Mike1 point -
Building a Revell P-51D
Model_Monkey reacted to docdodj01 for a topic
So after trying to look for a suitable replacement, I used a ben, and cut staple wire, then superglued a bead from a bag of dessicant silica. Will paint it black later once the superglue dries. Untitled by Docdodj, on Flickr So that's it for now. Hopefully I can primer the kit by tomorrow, crossing fingers.1 point


