Leaderboard
Popular Content
Showing content with the highest reputation on 05/02/2019 in all areas
-

Special Hobby Westland Whirlwind Mk 1
R Palimaka and 11 others reacted to Jan_G for a topic
molds for Whirlwind on SH facebook page https://www.facebook.com/pg/specialhobby/posts/?ref=page_internal jan12 points -
1/48th Monogram B-24D
AlbertD and 10 others reacted to b757captain for a topic
Hi gents, This guy has been on and off my shelf of doom for several years so it could be subtitled "Glutton for Punishment". One fine day in the somewhat distant past I came to the realization that over the years I had built all the Monogram (and Revell) 1/48th big bombers, except one: any version of the B-24. Well, gotta fix that! I kinda sorta knew that it would not be a "shake-n-bake" kit but little did I realize just how much work it would turn out to to be! Thus the time-outs on the SOD. I gathered some AM for the kit and ended up using some of it - the wheel wells and engines are CMK, good additions and not too terrible to make up although the wheel wells are a little fiddly to build up. They do look much better than the kit wells though. I thought long and hard between the engines versus the engine/1 piece cowl set and finally decided I couldn't justify the cost difference. Please, please - learn from my mistake! The kit molds the nacelles and cowls as top and bottom halves with the wing. Lots and lots of sanding, filling and re-scribing. I think each nacelle got its own trip to the SOD!. I got the Squadron vac-formed canopy and nose but it was damaged in shipping (big dent in the nose) but after looking at the molding I thought they were not as good as the kit pieces so ended up not using them. Finally the decals are Kits World. Kind of a letdown because the US insignia on the real thing is unique but are not included with the decal set. I tried to find just the insignia with no luck and had no intention of masking and painting them so finally just used the kit insignia. Eduard interior - just the instrument panel but you cant see any of it anyway and brass gear rounded out the AM pieces. As for the rest, paint is a custom mix from True North (figured I'd give them a try since my go-to MM is becoming scarce). Jury still out on the paint. Weathering was just a wash to accent the highlights. Here we go: More to come, Cheers, Mark11 points -
1/48th Monogram B-24D
Daniel Leduc and 8 others reacted to b757captain for a topic
More pics: Thanks for looking!9 points -
1/32 Tamiya P-51D Mustang "Old Crow"
AlbertD and 6 others reacted to Tolga ULGUR for a topic
Here is another Mustang 1/32 Tamiya P-51D-10-NA 44-14450 363rd FS Cockpit modified by Yahu instrument panel, Barracudacast seat and RB Production cockpit floor set. Barracudacast wheels used Decals are from EagleCals EC-101 set. Paints: Alclad metalizers and Tamiya acrylics.7 points -
Im real close now gents. The next update after this one will likely be the FIN! I finished up the umbrella. This is just piano wire, for each segment, augmented with two styrene disks attached to each wire for angle adjustment. Looks better in person than in pics (as most of this build seems to). Weathering and highlighting doesn't show up in pics either, but it is there: Next up was a trial fit of how the Eduard wheels and tires are going to look, along with finalizing some flat coat on some touchups I made: Thats it for what is likely the final update on this build before completion! Ive gotten the majority of the main landing gear doors on, save the inner doors (will have the gear doors fully completed tonight) then its really down to gluing on the wheels, cutting some stainless steel tubing for the X-4 missiles, hang those, attaching the canopy and canopy restraint, then Fug 25a radar dipole, pitot tube and finally add the radio antenna w/ spring and ceramic insulator/cone and props and were done! Thanks to all for following along!7 points
-
Thanks Shawn. Yes, VERY close now! Got the gear doors on: Also got the .06 stainless steal tubing cut and the X-4 missiles finished off: With those finished and with their pins installed, I could place them to see how they would eventually look in their final positions: I just got done gluing the wheels/tires on, and am letting those cure off while I finalize the radio antenna attachment points. Its all down to this: - attach X-4 missiles - scrap flat spots on tires and confirm level - attach wheels/tires - straighten and re-align pylons/re-glue if necessary - attach cowl - attach flaps - attach ailerons - attach rudders - re-attach starboard side arm rest / touchup - dye white EZ Line silver for canopy restraint wire - make canopy side canopy restraint attachment - attach canopy and paint hinges - attach canopy restraint wire - make radio antenna cone - make radio antenna vertical stab attachment w/spring - make radio antenna w/ceramic insulator - attach radio antenna - attach props - attach umbrella All for now boys.................the next update will definitely be the FIN!6 points
-
Hi guys, its been a couple of weeks since my last post. A business trip and spring yard work cut into my time but I have managed to spend the last few nights working on the build. I did not like how my reverse mottling attempted turned out at all; the edges were much to stark in my opinion. So I re-sprayed the aircraft RLM 76 and then airbrushed the RLM 75 mottle using the tried and true method I normally do - that is air turned down to 5 psi, very thin paint and the .2mm nozzle/needle combo on the H&S Infinity. The Mission Models paint required some practice on a paint mule first, but once a came to grips with the paint the result was fairly pleasing to my eye. The FuG 202 antenna was cobbled together using the parts from my other RoG Uhu kit and some spare brass parts from either an old Owl or the Polish company that makes AM antennas, I forgot which. The end result is not 100% perfect, but looks pretty good from 6" or so away. The gloss coat is Alclad's gloss which is not bad; however, I have come to prefer Tamiya XF-22 thinned down so I am using up the rest of my Alclad gloss. Enjoy the photos! Mottled, glossed and decaled Close up of the mottling on the port wing And the tail Some of the Owl AM decals. Frankly, I thought the RoG decals in the kit were just as good. Bits and bobs painted and ready for weathering. The FuG 202 antenna ready for priming and its RLM 76 coat.4 points
-

Hughes 500, Nichimo, 1/20
rafju and 2 others reacted to John Everett for a topic
I meet a lot of modelers who say they have this kit. But none of them seem to be building it. I'll be adding some interior detail.3 points -
F/A-18A+ Flying Omar Splinter 08
Sepp and 2 others reacted to Fancherello for a topic
hello I'm not used to that, but I hav a second project in progress. I've been collecting and documenting VFC-12's 08 Hornet because of its weathering, and some decals have been issued recently. When waiting for some parts for my twin B&W project, I couldnt resist starting that project, which will be rather slow, though. Aires cockpit in progress: Cokcpit has been painted with several layers of shades with hairspray between each one of them, then a wet brush chipped the worn areas. Thanks to Miro Medzihradsky for the negative film tip ! I'v been using Anyz' products for hoses, leg straps and knob decals on the consoles. Very good products. That etched stencil has been issued recently by Radu Brinzan. Great product for weathering. bye Fanch3 points -

Bf 109F-4/Trop 8./JG27 - finished
AceofClubs and 2 others reacted to Fanes for a topic
And now without the masks: The alignment is for sure not perfect (not showing the other cross) and there is a slight distortion, but I'm quite happy with the result and I can improve on the other ones!3 points -

Fokker pair 2
Greg W and 2 others reacted to sandbagger for a topic
Hi all, The top fuselage frames are cross braced. Onto the sides now, then the make and fit the top decking panel and finally cross brace the bottom fuselage frames, Mike3 points -

HONG KONG MODELS 1/32 Lancaster MK III Dambuster
Rick Griewski and 2 others reacted to Woody V for a topic
As an ex airframe repairman stressed skin is a reality, but the problem I have with it on kits is that it's too consistent and in places it should not be, like the leading edges of the new 1/24 F6F that someone is releasing. In order to get that much distortion in a leading edge it would have to be riveted by toddlers. But, that's just my opinion.3 points -
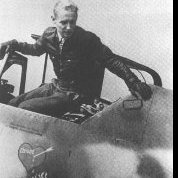
Messerschmitt Bf-109E-3, 1:32, Cyber Hobby
turbo and 2 others reacted to Hartmann52 for a topic
Finish soon3 points -
I just hope the first line in Revell's instructions isn't "Remove excessive flash from parts before assembly."3 points
-
I'm still stuck on the center wing assembly including the wheel wells. I DID find out that the closed landing gear doors will make perfect masks for the wheel wells when it comes time to paint. Amazing fit on those! A couple of views of the area that I'm stalled on. I've fit the landing gear doors into place. There is wiring to be added, of which some I want to connect to those door actuating rods that you see. I normally like to attaching any wiring before painting. But the wheel wells would be much easier to paint and weather before assembly. I can't install the wiring before the wheel wells are assembled. So these thoughts keep rotating in my head, over and over again.3 points
-
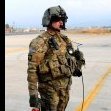
1/35 KH MH-60L "Super 63"
Fancherello and one other reacted to Hawkwrench for a topic
Finally after years of wanting to know information about my friend Joe Pascetti's bird he crewed down in Mogadishu-Super 63, I have been able to befriend many crew chiefs and pilots who were there and was given many pics of OGS and their MH-60L's. So tonight I finally started building it. First I had to correct the instrument panel and center console to represent close to what they looked like on the real MH-60L. The caution/advisory panel is located on the bottom left of the console on the real thing. KH's panel, though very nice, represents a later year panel and has the CA on the instrument panel itself. So I took and cut down and sanded the Academy part and shaved off the detail on the console and glued it in place. Next i shaved off the detail on the KH IP and replaced it with some PE detail parts from Airscale. Here's 2 pics of the C2 bird taken while down in Mogadishu. Tim2 points -

Airfix Mosquito Conversion to MK XVI
Alain Gadbois and one other reacted to patricksparks for a topic
I have been waiting for Airfix to come out with a bomber variant if their kit, but it hasn't happened so I figured I would go ahead and do it on my own. I haven't wanted to spend a fortune on a kit that I was going to be cutting major parts off and I just happen to find the answer on ebay. A seller had a kit that had been damaged in shipping and listed it with photos of the bags and the instruction manual with all the parts circled on the individual trees that were damaged, nothing looked really bad so I went ahead and bought it at a really good price. I had to laugh when I finally got to see the kit first hand, ironically the most damaged parts were the very front of the nacelles which were to be removed anyway !!! Good karma.. Last week I knocked out a pattern to form the 2-stage Merlin nacelles and the lower intake, also I made a pattern for a bomber nose, things are moving along pretty smoothly so far...2 points -
HONG KONG MODELS 1/32 Lancaster MK III Dambuster
Rick Griewski and one other reacted to Robthepom for a topic
Looks like the dam busters version is about to be released. It’s on face book page. Great box art love it i don’t know how to add link sorry “The 76th Dambuster anniversary flight will come soon. I think that is the better timing to release our 1/32 Dambuster with item number 01E011. Here we go.”2 points -

AMC Dh.9 WnW
Tnarg and one other reacted to scvrobeson for a topic
Completely forgot to put this up when I finished the build, so here it is. It's the Wingnuts kit, which is fantastic quality like always. Added in the Barracuda resin wicker seat, and HGW seatbelts. Painted on the barcode on the fuselage. added Gaspatch turnbuckles, and a Taurus drainage pipe under the radiator. As always, let me know what you think Matt2 points -
Just stumbled across a surprisingly high quality color video of flight operations on the USS Shangri-La, circa 1962. Nice footage of flight deck action involving A-4's, F-8's and other old school aircraft. Worth checking out for those are on FB.2 points
-

1:24 Trumpeter Bf 109G-14
D.B. Andrus and one other reacted to LSP_K2 for a topic
I thought I'd check to see if the fuselage splice area, which I've been working on recently, was acceptable or not, so I spritzed some automotive primer on to check. Obviously I still have some more "finessing" to do.2 points -
Revell 1/32 Fw 190. First build since 2001.
LSP_Kevin and one other reacted to Longbow_06 for a topic
The elusive RLM02. I ended up mixing some, to get close to s couple of pix of 109 wheel wells. The picture came out darker than it actually looks.2 points -
Based on my experience with the Revell FW190 F-8 vs the Trumpeter Wildcat, I would definitely say that Revell's fit is MUCH better.2 points
-
1/32 Revell Me 262-A (New Tool) July 2019 Release
AlanG and one other reacted to Thunderbolt for a topic
Revell will get the shape right. I have faith in that. And that's all we really need for a masterpiece to eventually result with the right amount of aftermarket and skill. I'm surprised ZM didn't go for the 262 out of the gate given they have already bothered to make pretty good examples of the Jumo 004 with their Ho 229 A bit strange overall the 262 wasn't more hotly pursued by kit manufacturers than it has been.2 points -

1/24 LSP planes
D.B. Andrus and one other reacted to nmayhew for a topic
Don't laugh until you have actually checked the prices. £17 for 4 small hose thingies Bloody hell!2 points -
HONG KONG MODELS 1/32 Lancaster MK III Dambuster
PhilB and one other reacted to esarmstrong for a topic
My sense is that this will be the more affordable alternative to the WNW kits. HK models will survive their "brush" WNW just fine. This appears to be a very nice kit of the Lancaster.2 points -

Bf 109F-4/Trop 8./JG27 - finished
AceofClubs and one other reacted to Fanes for a topic
It's been a while but I focused on my group build entry. Since the interior colour is drying there, I switched back to the 109. Last week I finally recieved the Oramask stuff. After some struggle with the Silhouette settings I made new masks. Here are the underside crosses in place - well almost. Things didn't go as planned but the underside won't really be visible and so it's practice for the other markings. Then I laid down a very thin black base (thinned with levelling thinner like all colours in this procedure) followed by the almost black: Tamiya Nato black: mask for the white fiddled back into place And here we have the white marble with a Gunze off-white blend coat. hard to photograph due to the glossy finish. The masks for the 2 and the wave thingy were crippled during cutting. The blade pulled the thin outline away. I'll try less force and speed with the next cut.2 points -
Heavy Mod - 1/18 21st Century Toys P-47D Razorback
GROWLER 96 and one other reacted to JayW for a topic
Another update on the surprisingly difficult and involved bomb pylons. The aft halves are proving very difficult, as I am having to custom make each skin panel to match up with variations that have made their way into the build-ups. There are four skins (two per pylon) and so far I have had to scrap two or three each to finally get one I can use. Also, that aft fitting I mentioned in a previous post was small and difficult. The aft end of the pylons are dominated by a hinged arm assembly that is normally stowed, but extended and used to further stabilize the Lockheed (quite large) 150 gallon fuel tank when used. That and the structure to mount it. A cartoon picture from the combat tanks & bombs drawing (93X10101): You can see that arm pretty clearly hanging down and making contact with the top of the tank. Here is a picture from the pylon installation drawing 93C78130, showing that arm assembly: The arm assembly is shown stowed, and also extended in phantom lines. Note the aft fitting that is attached to the wing by three bolts (shown in the top view). That fitting provides the hinge point for the arm, and also an adjustable overtravel stop bolt and jam nut. Note also the forward end of the arm is latched in place by a spring loaded mechanism on the bottom of the aft pylon fairing. I find this all very curious - all just to be able to use the Lockheed aux tank. Now that fitting. It has a very complicated shape and is made from a very complicated casting. Look at the machined part drawing (93C07202): The Dottie Mae resto project never even tried to reproduce this part. They just fashioned some sheet metal equivalent: Here is my effort on this very pesky part: From there, I proceeded to make a framework of sorts for the aft triangle of the pylon: This provided decent support for the triangular skin panel (this one here is the 4th try after three misfits): Note that part has to form the bottom sharp edge of the fairing aft of the aft sway brace, the flat for the arm assembly to be stowed in, an interface with the aft fitting, an interface with the wing lower surface, and an interface with the pylon forward skin. All that made the part shape very tricky. The arm assembly itself is defined on drawing 93C78236: It has a hinge hole on the left, an attach point for a spring in the middle, and a wing of sorts on the left (the "wing" contacts the aft region of the Lockheed tank to provide more stability. You will see mine below. Here is the finished LH pylon, painted and with decals: A close-up of the arm assembly: And the pylon final installed onto the wing: Whew! Now, the RH pylon is a couple days behind. Then it is on to the pitot mast. And then all the various wing decals. At that point, I will post progress and that will be the last I post in this two and a half year long "work in progress" string. I thank all of you who stuck with this so long!2 points -

Airfix Mosquito Conversion to MK XVI
Javlin1 and one other reacted to patricksparks for a topic
Making a little progress, filled in the side entrance door to the cockpit and cut in the new lower door. I have sanded in the new bomber nose and the door patch, I have cut in the nose windows and added the flanges for the windows to sit on. I'm pretty happy with the 2 stage nacelles, I still have make some new exhausts for them and add some more flanges to the lower intakes.2 points -
2 points
-
1/32 Intruder A
Alain Gadbois and one other reacted to Mr b for a topic
Thanks man brad.... it went to the gb....got few shot taken there by others..... on the way back....one wing came loose....need to repair it and....take some shots.....for the gallery n RFI...might just keep the wings extended.....too flimsy....anyways will see...the final pictures will reveal my final choice..hehehe Rgds n happy modelling....2 points -
Aussie target tug Mustang VH-BOY (from Hasegawa 1/32 P-51D kit)
Anthony in NZ and one other reacted to Cap'n Wannabe for a topic
G'day Derek.. If you need any assistance with the decals, let me know. I have a thing for civvie Mustangs, and have done decal sheets for ZK-CCG (The Mobil Mustang), and VH-FCB in the Ansett Air Race scheme.2 points -

F-117A • Nighthawk
Tony T reacted to F`s are my favs for a topic
Guys, i'm back! This time not with something in 1/48 or smaller. That thing... It's the Trumpeter kit, my second 1/32 scale model, and it's quite huge It's so ever slightly bigger than the F-15 in lenght and even in wingspan, which impressed me a bit. Alright, let's do it. I plan a rather slow and longer build. Some may know very well the quality and what's in the box, but i'm gonna make a thorough review these days whatsoever. Here is just a quick glimpse: And of course, i'll take advantage of the AFV Club's tinted canopy, cause i think it's absolutely necessary for a good looking F-117. I cannot tint such a huge canopy by myself and not leave any trace of dust, etc. In 1/48 or less - it's ok because the little imperfections are almost invisible, but this one is one, enormous and two, with perfectly flat straight sides. I'll also use the GTR Wheel set that i didn't use in my F-15E. The kit tires are from very hard rubber and quite small in size. I have the original dimensions of the plane's tires and did the quick measurements. The GTR tyres are perfect. Only the front tyre is a bit smaller in diameter so i might still use the kit's rubber tyre for the nose wheel. And on the other hand, i know that the F-117 had just about the same avionics as the F-18 and just about the same landing gear as the F-15, so that's the perfect moment to use the gorgeous GTR tyres and wheels. And finally, the extra PE screen for the FLIR and DLIR. This is obligatory as well, because the provisions for these sensors are huge. I did a little mistake though by getting the 4x6 screen mesh in believing that the holes are rombs. Yeah, they are rectangulars... i couldn't notice that on the photos and this is my firt time using such a PE screen. Nevertheless, i think i can place the screen at an angle so they can look as rombs. I plan to start from the landing gear and make everything moveable again, for "2 models in 1" - in a parked and in-flight mode. The canopy, the gear, all the control surfaces and the bomb bays will close/open. As for the airframe - i have no idea yeat, but i think it will be one of the early Nighthawks, something Desert Storm-related in a full stealth mode with all the lights and antennas retracted and without the two RCS enhancers on the sides. Quite weathered as well. I'm only looking for a pilot figure and if i cannot find any, i plan to get the F-16 resin figure+seat set by Aires. But i'll wait on that one yet. Nighthawk!1 point -
I can already tell my 1/24 hellcat build will be long and expensive...1 point
-

Airfix Mosquito Conversion to MK XVI
patricksparks reacted to Kagemusha for a topic
Very impressive work, superb project - I'd really like to do something similar in 1/32... do you have a specific aircraft in mind regards markings?1 point -
1 point
-

F-117A • Nighthawk
Tony T reacted to F`s are my favs for a topic
well they are in a reversed order but I'm at the ip now. cheerio1 point -
lol - I actually was just thinking about the big Trib just yesterday, as I found it and had to move it and its contents. The main reason I put the build down (and the reason I haven't picked it back up yet among other things) is that I will have to go from my current "O" scale motor set up to the much smaller "N" scale motor. This means a complete re-design of the working internals. Dont worry though this one is definitely on the to do list still.1 point
-
1 point
-

1/32 Tamiya F4U-1a Corsair - Boyington's 17740
F-4Phanwell reacted to Thunnus for a topic
Thanks Damian! I'll keep that in mind when it comes to painting the wells. I've glued the outer wings together and installed the lenses for the various lights on the wing. These will be masked off.1 point -

Messerschmitt Bf-109E-3, 1:32, Cyber Hobby
Durangokid reacted to Hartmann52 for a topic
"I am back!"(c)1 point -
1/32 Revell Me 262-A (New Tool) July 2019 Release
Pete Fleischmann reacted to Dave Williams for a topic
This episode of rivet talk has been fascinating. Never would have thought a simple thread asking about an upcoming kit would have the term slave labour in it.1 point -
Hmmm, oh no, not the "bad restoration" caveat again. There is a great book by Brett Green published by Eagle Editions that contains a lot of great photos of the UNRESTORED Me 262 preserved in Camberra. Flush rivets are clearly visible in every photo. I was fortunate enough to get very close to five 262s (OK, two of them were Czech Avias :-) ) and I spent a whole day measuring and photographing the 262 in Deutsches Museum in Munich (which is not a "restoration" as such). All of them feature flush rivets. Granted, they are not as bad a Trumpeter made them, but they are not entirely "invisible" either - on the real thing they are "faint circles" rather than "holes". In contrast, the Ar 234 in the Smithsonian is puttied, polished and smoothed to an amazing degree. The wings and fuselage of the Arado feature no panel lines or rivets whereas in some other places (engine cowls) you can still see rivets, some of them not even "flush". When you compare the Me 262 to the Ar 234 it becomes immediately evident that the the 262 is rather "agricultural" in construction. :-) Radu1 point
-
Trumpeter 1/32 RNZAF A-4K "Kahu Upgrade"
KiwiZac reacted to Anthony in NZ for a topic
Yep, you will enjoy that, its a really good DVD! Oh I so want to do this cockpit on my Model...I wonder how far away Roy is to producing it? Must email him There is also a great book on RNZAF Skyhawks by my good friend Don Simms https://www.mightyape.co.nz/product/skyhawks-the-history-of-the-rnzaf-skyhawk-hardback/10200934 Cheers Anthony1 point -

Mil Mi-24 Hind Tiger Meet
Azgaron reacted to BloorwestSiR for a topic
I found it easier to just cut a new side panel from sheet styrene rather than sand off the details from the kit one. I then started gluing on the individual panels. Each panel is made up of a couple layers at least. Some have acetate instruments behind them. So this has really bogged things down.1 point -
I got all the markings on, albeit not on the first try. The Hakenkreuz ended up being white with a black outline at first, so had to completely re-shoot that. As you will see, I also have to re-shoot the crossed swords in the victory crest on the starboard side tail, as the swords were exceptionally small, and proved to be at the cutting/size limits of the Silhouette cutter. Not perfect, but not too shabby. Needs some touch-ups, but the basic paint is done: Port side tail is good: Starboard side needs to have the swords re-shot, but otherwise OK: Balkenkreuz on the underside also turned out very well, with only a very minor touch-up of the black on the port wing: Next up, Ill re-spray the white on the starboard side swords, then will get started on the washes and weathering. YAY! Cheers til next time,1 point


