Leaderboard
Popular Content
Showing content with the highest reputation on 03/22/2019 in all areas
-

1/32 MH-53E Sea Dragon - 3D printed / scratchbuilt
F-4Phanwell and 11 others reacted to Starfighter for a topic
More progress - some details were added to the IP and sanding of the fuselage continues. This will keep me busy for a few more weeks.12 points -
AM for Ki-45 from ZM as posted on their website jan11 points
-

New WNW kits!
Rick Griewski and 7 others reacted to DonH for a topic
But I thought WNW was nearing the end of its run. I must have been misled.8 points -

1/32 Gotha G.I Scratch Build
BradG and 6 others reacted to guitarlute101 for a topic
Wingnut Wings just announced they are releasing a Gotha G.I and UWD! Excellent!! Not to fear, I will be continuing and finishing my scratch build. I just received the last of the goodies I needed for the cockpit today! more soon, Mark7 points -

New WNW kits!
kkarlsen and 4 others reacted to Dave Williams for a topic
Just got an email. Gotha G.1 and Gotha UWD http://www.wingnutwings.com/ww/product?productid=3198 http://www.wingnutwings.com/ww/product?productid=31995 points -

AIMS 32D015: Late War Bf 109's
Wackyracer and 4 others reacted to LSP_Kevin for a topic
Howdy folks, Ray Peterson reviews some new Bf 109 decals from AIMS: AIMS 32D015: Late War Bf 109's Thanks, Ray! Kev5 points -

1:18 Hobbyboss AV-8B Harrier
karimb and 4 others reacted to patricksparks for a topic
Made some rear view mirrors and pull handles today...5 points -

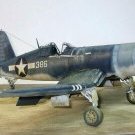
"The Star of Africa" - Hans-Joachim Marseille's Do-335 A-2/Trop - Yellow 14 - FINISHED!
Durangokid and 4 others reacted to Out2gtcha for a topic
I got all the markings on, albeit not on the first try. The Hakenkreuz ended up being white with a black outline at first, so had to completely re-shoot that. As you will see, I also have to re-shoot the crossed swords in the victory crest on the starboard side tail, as the swords were exceptionally small, and proved to be at the cutting/size limits of the Silhouette cutter. Not perfect, but not too shabby. Needs some touch-ups, but the basic paint is done: Port side tail is good: Starboard side needs to have the swords re-shot, but otherwise OK: Balkenkreuz on the underside also turned out very well, with only a very minor touch-up of the black on the port wing: Next up, Ill re-spray the white on the starboard side swords, then will get started on the washes and weathering. YAY! Cheers til next time,5 points -

LEM Mig -9 FINISHED
Martinnfb and 4 others reacted to blackbetty for a topic
55 grams of leadshot to prevent a tailsitter the pit is sparse, as the original. belts are still missing, some airscale dacls for the dials on the side consoles...5 points -
I put this model aside to concentrate on finishing my Boomerang. Now that project was completed, I am onto getting this one finished.My first task was to `lock in' the MK. number that I am intending on doing by filling and removing the 4 vents on the rear of the fuselage near the exhaust pipe that belong to a F.2/FB.2. This model will now represent an F.1. After sanding the wing to fuselage join, I masked up the fairing that covers the wing root and sprayed it with MRP fine surface primer to build up that panel and give it the appearance of an overlapping panel. I did a few small fixes and then primed the model with Tamiya fine surface primer, directly from the spray can. I have marked the model with lead pencil, identifying many small areas that will need rectification before paint. More soon.5 points
-
Thank you very much! I finally moved forward on the central cockpit piece. This contains the two side panels of the cockpit and I've laid down the base painting. The silver switches are old school enamel so I'm going to let this dry completely overnight, seal it with a gloss coat and then try to apply the Barracuda cockpit stencils. After that I can start adding the other detail bits that attach to this piece. The tail wheel well needs to be finished before the fuselage can be closed up so I'm starting the work here. Very nice detail out of the box that I will not add to but hopefully I'll be able to highlight the detail with some careful painting and weathering. There are some ejection pin discs that need to be filled.5 points
-
1:18 Hobbyboss AV-8B Harrier
Azgaron and 4 others reacted to patricksparks for a topic
Moving along...5 points -
Hello, This is my Canadair CL-13 Sabre Mk.4 in the AMI “Aeronautica Militare Italiana” markings of the 4° Squadron “Aerobrigata” based at Pratica di Mare (Rome) around 1960. HISTORY Originally produced by North American, the italian Sabre were produced by Canadair and sold to the Royal Air Force. When the Hawker Hunter arrived in the RAF, around 180 Sabre, designed F-86E(M), where transferred to the AMI. Within the AMI the Sabre was the first ever jet with swept wings and was used only in the air defence role. THE KIT The Sabre kit in 1/32nd was originally produced from Kinetic and reboxed by Italeri. I don’t have the Hasegawa kit, but many modellers say that the Kinetic Sabre is a “copy” of the Hasegawa’s one with recessed panel lines… Overall details are good, there is a nicve stressed skin effetc all around the fuselage and wings. Panel lines are a little bit too deep. As extra parts I’ve used Eduard PE sets for interior and exterior and a resin ejection seat from Avionix. I’ve added some details as hydraulic pipes to the undecarriage bays and legs. Paints are acrylics by Gunze and Tamiya range. Squadron markings, serial numbers and stencils are from Tauro Models decal sheets. A couple od RBF tags were added to finish the model. And now the pictures! CIAO! Piero4 points
-

HPH Models 1/32 C-47 'That's All Brother'
shadowmare and 3 others reacted to Crossofiron for a topic
Bugger, gonna need a bigger workbench... Might take a window out when I do the PBY. The fit, as you would expect is exceptional & everything fuselage wise is pre trimmed. Thanks for comments all. Cheers Steve4 points -

New WNW kits!
wunwinglow and 3 others reacted to Scotsman for a topic
Am I the only one who thinks that the the Gotha UWD should be being flown by Dick Dasterdly. & Mutley . seriously - that's a real aircraft?.. I know my lack of interest in anything pre 1939 is fairly profound .. but that's just tipped the scales from ordinary into weird.. and as a brit I know something about weird things with wings! Seriously , I know how much Wingnut has changed the the landscape for WW1 modelling , and how they have turned what was a niche interest into something that dominates Large scale modelling these days ,And those of you with an interest in this area really have never had it so good, and I'm so pleased for you .. But now can I Please have a 1/32 Vampire/Swift/Blenheim/Beaufort/Buccaneer/Sea Vixen.. etc Please!!!4 points -
Hi guys, Time flies! I've been busy putting the hinges on the weaponbay doors, but forgot to take pictures. I will take them later. Meanwhile I decided I did not want to correct the too flat tyres of the kit wheels. Instead I bought these: No comparison! Another focal point of the model is the canopy. The internal frame is provided by Italeri, but according to the instructions, it has to be build-up in the transparent part. Not ideal to avoid glue smears and to paint it. I decided to see if it was feasible to build and paint the canopy frame separately. The side frames have nasty mould seams over the rivets: The easiest way was remove them all and re-instate the rivets with Archer Rivets. One of the sheets I have contains strips with the right pitch. Indeed it was feasible to build up the canopy frame separate. Do several dry runs to ensure everything fits as it should! The Eduard interior set also includes useful parts for the lower edge of the canopy, its securing latches and the rear bulkhead. Here is the result. The other etched parts are from the kit: Two small mounting plates for the canopy hinges were added on the forward ledge, as seen on pictures The black dots are the Archer rivets. The frame is now ready to Paint it Black. To be continued. Cheers, Peter4 points
-
There's Tamiya Detail and then there is Barracuda Detail. Hard to believe the impact these tiny decals make on the cockpit side consoles. They are small and hard to handle and need lots of patience to place but well worth the effort. I'm about 3/4 of the way done on the decals for this piece alone.3 points
-
1/32 Gotha G.I Scratch Build
D.B. Andrus and 2 others reacted to guitarlute101 for a topic
Thanks Ray and Kevin. I had started out building the Gotha in 1/48...…. But when I saw the GB announced I decided to build it in 1/32. I have not posted much on the site but I have always received so much help from the members and staff I feel I owe my best effort contribution. I really value this site and forum! I've been putting some thought into my build now and I think I'll be amending it a little. I will definitely be building the WnW Gotha G.I, I am so impressed that they have released it for everyone to enjoy! Just so I don't have an overlapping build I will be changing mine slightly to model the 1st incarnation of the G.I called the "Friedel-Ursinus Type FU". This way I can have the Friedel and the G.I in my collection. WnWs release of the Gotha G.I is perfect timing for the stage that I am at in my build as I can easily convert it to the FU without much modification at this point in my build. I am very pleased with how accurate I was able to make the center cockpit area in comparison to the WnW kit and instructions but the FU version had a few variations. The FU had a different cockpit covering, engines, tail and wings than the G.I. The cockpit covering was a simpler design and there were a few redesigns along the way. One particular variation is the engines. The first version had the radiator in the engine nacelle and the nacelle was a little "boxy" I'm going to go with the second version with exposed engines and Hazlet radiators so I can really detail them up. Onward and upward! Thanks so much for looking in and the encouragement! Mark3 points -

RF-101C auxiliary tanks, Vietnam-era
LSP_Kevin and 2 others reacted to RidgeRunner for a topic
Thanks Kevin. I will be upfront in that I am a 1/72 modeller but having been invited to join LSP and seeing some of the content I felt I could contribute as well as learn Martin3 points -
That's the one I buy, no matter if I will ever be able to build it or not Lothar PS: THANKS for posting !!!3 points
-

Kitty Hawk 1/32 Mirage 2000-5F !!!
LSP_K2 and 2 others reacted to timvkampen for a topic
WOW!!! [ https://www.facebook.com/Kitty-hawk-736521713066784/ ]3 points -

New WNW kits!
Rick Griewski and 2 others reacted to Wolf Buddee for a topic
There certainly is Kent! It's a Gotha UWD (the one on floats), sorry couldn't resist, LOL! Cheers, Wolf3 points -
Well, Mark, we all owe you a big thanks for taking the bullet so that we can have an injection-molded one! Maybe if you hurry you can get it done before it comes out! You are doing such a good job with it I am glad you are planning on finishing it.3 points
-

Tamiya F-16C conversion to F-16A
Cheetah11 and 2 others reacted to Durangokid for a topic
I hate it when I get down to the last few things to do and have a mini disaster. I don't know what happened with the canopy but the tamiya tape fused itself to the surface. I've used the tape cutouts with the kit before and this never happened so I'm at a loss. I did future my canopy as I always do but it had been drying for at least a month before I applied the tape. I used regular tamiya tape to cover the areas not covered by the cutouts and it came off just fine. I tried using Goo Gone but that did little to help not to mention it started removing paint with all the scrubbing. Oh well, not that big of a deal as I have other canopies or I can attempt to salvage this one. The only bad thing is matching the paint since I mixed colors to get the shade I wanted. Either way I hope to get it close to the original paint. I've also applied a flat coat and did some more weathering. I was able to get the exhaust toned down but I'm still not crazy about it. Nothing to make me want to start over though... Toned down the exhaust. My camera skills leave a lot to be desired and these images seem washed out a bit. The weathering doesn't show up as it looks in person. So not a whole lot left to do but I'm off to Texas for a week so it will have to wait! Thanks for all the nice comments fellas! Bryan3 points -

1/32 Kitty Hawk F-5E Kicked Up A Notch. Oct 3/19. Finished!
jgrease and 2 others reacted to chuck540z3 for a topic
From the sides, however, the front panel lines are lower than the rear on both sides… While the bottom fit is quite bad. This may have been created by the insertion of my plastic pipe intakes, but I don’t think so, because the fit was not forced. In any case, sanding all this down while retaining the fine detail will be very tough. After a LOT of sanding and rescribing, I think I have the join licked. Again, ghost panel line detail can still be seen under clear CA glue filler. As expected, this bottom join was a bear to fill and re-scribe, but it turned out pretty good after all. With that out of the way, it was time to attend to the front intake parts. As you can see, there are 6 moon crater pin marks on each side and a lip at the rear. The curved cutout may be there so that you can see the engine fans from the front of the intake, although with nothing but plastic junk inside, why bother? That rear lip, I assume, may be for future or failed intake parts, that never made it in the current kit? The pin marks were filled with CA glue and sanded smooth, while the rear of the intake was filled with sheet styrene, to smooth out the intake and create a thicker join to my pipe intakes. A view from the rear, showing how the styrene parts are interlocking, much like the rest of the intake parts. My plan is to not paint the white styrene, but paint the forward portion gloss black as found on my subject. That way your eye will see a sharp demarcation from black to white, with nothing but white found behind in the plastic pipes. To get a good and smooth paint finish, I am going to paint the intakes before assembly both front and back. I will also paint the sides of the fuselage where the intakes attach, again for the same reason. This needle-like jet is now really looking a bit menacing and mean. I love it! Cheers, Chuck3 points -
P40b trumpeter 1/32
Durangokid and one other reacted to pascal JMW for a topic
hello guy's my last one just finish ..... P40b trumpeter (my second one and the last one ) cockpit resin cutting edge , wheels resin , photo etched Eduard , model master gun's , Eagle strike decal for the shark mouth and roundels , all numbers as well as the green circle are painted because the decals fell into pieces in the water..... painting cocktail humbrol gunze and tamiya divers wash pigments , and watercolor pencils for the weathering the 75 white squadron leader Bill Reed for fun with the comic book and dedication of the author best regard Pascal .2 points -

Zoukei Mura in 2018 - Ki-45 / Hs -129 NEWS
Rick Griewski and one other reacted to Vandy 1 VX 4 for a topic
PM me your address I live an hour and a half north of Volks USA. Next time I'm in the area I'll pick one up for you2 points -
Two of the things that frustrate me when building kits are paint order and build order. Chicken or the egg? Which comes first? I spend a lot of time spinning my wheels trying to decide which, usually to then just plunge ahead and just do it for heavens sake! Here I’ve painted the cowl interiors aluminum: And here I’m painting the exhaust stubs, first a dark brown base and then a mist of red primer for a rusty effect (I might hit them with some rust powders during installation): I think I’ll do the cowl exteriors prior to bringing these all together. Onward! Jimbo2 points
-

New WNW kits!
Troy Molitor and one other reacted to williamj for a topic
"should be being flown by Dick Dastardly. & Muttley" Loved that,although we have dated ourselves. Can't wait to see some builds here on LSP...a bit on the "too large size" for me . Still....very exciting to see WNW's still cranking out probably the absolute best aircraft kits to be found.2 points -
Just to make it easier for all: if all goes well 1/32 Kitty Hawk Mirage 2000 will be released to Distributors in August 2019.2 points
-
I think Kittyhawk deliver some of the most colourful markings from any of the manufacturers. I didn't like the idea of the 'narrow joined' decals in the F-86D kits though, they just didn't work! The newer ones are much better by far. I agree, some really 'blingy' jets would be great!2 points
-
Me-262 1/32 details
coogrfan and one other reacted to johnie hopper for a topic
Here's my first attempt for Me 262 B1/U1 Nightfighter inner fuselage board. That's the logitudinally placed one with FuG16ZY, FuG120, FuG25 and FuG125 devices. The second board (placed transversaly) will be bigger stumper :-(. I have only few photos of its left side but none of the whole board or of the right side :-(. What more, there were placed FuG218 devices (Sender, Empfänger, Sichtgerät and may be others) for which I don't have exact dimensions :-(2 points -
yeah, been waiting on this one...hope it comes with one of the MANY colorful liveries2 points
-
RF-101C auxiliary tanks, Vietnam-era
Out2gtcha and one other reacted to RidgeRunner for a topic
Hi all, I've recently joined LSP, being invited in by Quangster. The period of time in question was one of experimentation in terms of camouflage. It was pre-Vietnam. The Greens and brown mix came out of a test programme, documented in TAC-TR-63-8 of October 1963, in which two aircraft were painted in experimental schemes. One (54-1513) was the often referred to "black" machine and the other (54-1514) was in a greens/brown scheme. It is described in the following text: https://www.flickr.com/photos/153072187@N06/46525901355/in/album-72157704162599655/ The Voodoos illustrated here and elsewhere in a "green and black" scheme are a result of those tests. They were operated from Thailand for recce flights over Laos and Cambodia. The RF-101A didn't operate in the Vietnam theatre. Martin2 points -
 Great question! Hopefully sales from Beaufighter cockpits and Mustang cowlings will support more designs for classic kits.2 points
 -

New WNW kits!
ringleheim and one other reacted to karimb for a topic
Yup email received. I am SUPER SUPER EXCITED. Regardless of how many were built, i think the way Wingnut wings surprises us is just fabulous. Every surprise announcement brings alot of giggles and smiles! will be getting both for sure! Karim2 points -
 Any chance of wheel wells for Airfix 1/24 Bf 109E? Cockpit? Cheers, D.B.2 points
 -

New WNW kits!
Rick Griewski and one other reacted to LSP_Ray for a topic
Gotha I on floats...I like how it is so tall you won't even have to bend over to check out the detail!2 points -

Revell 1/32 F4U Corsair - DONE!
sandokan and one other reacted to themongoose for a topic
Spent parts of the last couple days working on a bunch of things in parallel. Canopies are under glass letting the future dry. Engine is primered. Now I just have to find the wire for it so it has some character. This 1st shot is for the in-flight pose. I plan to have it shooting out of the Goodyear Airdock. I've done my best with the pilot. Pappy is now a 1951 Naval Aviator. Can you believe he is hollow! I carved away that heavy lambs-wool collar and the ear muffs and ended up going through the plastic. Nothing a little cement and plastistrut couldn't cure though. I made up the PE seatbelts tonight to see if I could do it. Never tried these before. I annealed them with a lighter and a quick dunk in water. They are working out good so once I have them painted up I'll show you how they turn out (just in case I still mess them up lol).2 points -
Check this out Bf 109 wing patterns2 points
-
.thumb.jpg.cd22b958c9e88a898a21e18b862c523e.jpg)
LEMkits 1/32nd de Havilland Vampire FB.Mk.5 kit..?
paul fisher and one other reacted to upor for a topic
we will also have to sell a lot while we will be doing a B-2, so for now let's deal with those planes that fit into the mailbox and do not require sales of internal organs))2 points -

Make the others jealous
Durangokid and one other reacted to Dukie99 for a topic
Found this at home tonight, straight from Korea: This one goes on the bench on Saturday, I will start a WIP. Cheers, David2 points -
My Hasegawa FW-190A-8 in Heinz Bar colors.2 points
-
1/32 Kitty Hawk F-5E Kicked Up A Notch. Oct 3/19. Finished!
jgrease and one other reacted to chuck540z3 for a topic
March 20/19 Back again after a few weeks on a cruise to Hawaii and back, where my wife and I were able to meet Scott Wilson and his wife, who helped me so much on my long F-4E build. As mentioned in my first post, Scott sent me the 1/32 Hasegawa version of the F-5E and the now very coveted Black Box cockpit, which has been instrumental in “kicking up a notch” the cockpit of this Kitty Hawk kit instead. Scott and his wife Lei took us on a full tour of Volcano National Park on the Big Island and we learned many things about the recent volcanic eruptions and how they affected his community. Scott now flies an air ambulance in a Beechcraft King Air, so he has hundreds of photos of the eruptions from the air that he shared with us. Very cool- as was our all day island tour. I hope to return the favor if he and Lei ever make it to my neck of the woods in Calgary/Banff, so thanks again Scott! Obviously, I haven’t had much time for modeling lately, but I did manage to get the main fuselage assembled this week, complete with my hack seamless intakes made out of PVC plastic pipe. Since the pipe is so thick and hard to sand, my plan is to create a bit of an optical illusion within the intakes, so that all you see at the join with the front portion of the intakes is white and if you’re lucky with a flashlight, the front of the engine fan. After heating and bending the plastic pipe to fit, I cemented it in with lots of thick CA glue, much as I did the resin cockpit. To fill the remaining gaps, I used good old Poly Instafill, primarily used to fill cracks in drywall. This worked really well, because the filler dried quickly, was easy to sand smooth and more importantly, I didn’t have to paint it white. Although really hard to photograph, here’s what the intakes look like inside and if you squint, you can see the front fans. These pics also show the challenge of creating seamless intakes for this kit, because they must flex up and over the landing gear wells. While the prototype Phase Hanger Resin intakes appear to do this, an email exchange with Gary of GT Resin indicates that he may try to incorporate the gear wells in his F-5 intakes as kit replacements to reduce this arch, much like his F-15 seamless intakes that I used on my Aggressor last year. In any event, any new seamless intakes will be better than my plastic pipes and, in the meantime, until they actually become available, plastic pipes are better than nothing! Elsewhere, the fit of the top fuselage to the bottom half was quite bad in many areas and not so bad in others. The panel line and rivet detail isn’t bad, but using several references I did make some changes. The seam line from the rear to the horizontal stab pin is real and should be retained, but forward of that it should be filled completely, as shown in purple below. Other vertical panel lines should be deleted, also in purple, while adding the two blue panel lines instead. And here’s the same pic without all those colored lines for reference. Unfortunately, the dark wash I used earlier can still be found in “ghost panel lines” that I have filled with clear CA glue. For the rear, I used both kit and Eduard PE parts. For some reason only the left of the 4 holes at the top is open, which I found in many different reference pics. This hole was drilled out, along with the loop in the middle from the top. FYI, the wing will cover most of the seam line along the front, so repairs to this area are mostly unnecessary. Before attaching the front intake parts, the front and rear fuselage halves should be cemented together into one unit. This join is poor and weak, so I used the old styrene strip trick to reinforce the junction, fusing the two parts together solidly. From the top, the panel lines line up fairly well, albeit a bit lumpy and no, this join line should not be there as a panel line, as I’ve seen with a few builds of this kit.2 points -

RF-8G Trumpeter & Fisher Model
HerculesPA_2 and one other reacted to EricF for a topic
This is the idea with a quick average dry fit2 points -
T-38A Thunderbird 1/32 In-Flight
Model_Monkey and one other reacted to themongoose for a topic
This beautiful T-38A Thunderbird took a long time and she took a short time. I began a year ago and made good progress through learning to vacuum form a canopy. Then with the pending release of the KittyHawk F-5's I decided to wait it out and gather up some cockpit and clear parts to really make her look sharp. So a year long build timeline with about 4 months of that being actual bench time. The final model is a combination of the Hasegawa F-5E, Belcher Bits F-5A conversion, KittyHawk F-5E/F and some Bondo spot putty! The cockpit and pilot are painted with Vallejo acrylics and the helmet is handpainted. Interior details are scratch built in combination with the Hasegawa side panels and KH seats. The paint is MCW lacquer 60/40 with MrColor Leveling Thinner, 2 coats of MCW clear thinned as well, and wet-sanded to 12000 grit. She's all show AND go with BMF Chrome on the pitot, wingtips, and exhausts. Those exhaust can corrugated metal liners are birthday tiaras for a kids party lol. The decals are a combination of CamPro from the F-4 Thunderbird set and the KH kit. She is adorned with Archer rivets, doors, and hinges to show off her classic airframe! I scribed all the other elements of the fuselage and airfoil surfaces to match the Daco Book as much as possible. Lastly a big thanks goes out to the Aviation Museum of Kentucky who graciously let me take pictures all around their AT-38B Thunderbird including some great shots of the cockpit.2 points -

RP Models -1/10th Douglas Bader and Spitfire Cockpit
Greg W and one other reacted to Brodiebear for a topic
Last night I joined the upper and lower body parts and this only needed a 'smidge' of Mr liquid filler then got the brushes out and painted up his scarf and the fur collar, Not as shiny as it looks, but everything needs a good coat of AK's ultra matt varnish; Needs a bit of 'tidying' up where everything meets :-)2 points -
LEM Mig -9 FINISHED
coogrfan and one other reacted to blackbetty for a topic
the quality is pretty good, no bubbles i see. i expect the same as with their Su-22 that i built. i always start with pinning the main assemblies: 02 by karl holubar, auf Flickr on the fuselage i used resin pourblocks cut to shape and pinned to get something to mount the wings on 03 by karl holubar, auf Flickr stay tuned...2 points -
1/32 MH-53E Sea Dragon - 3D printed / scratchbuilt
F-4Phanwell and one other reacted to Starfighter for a topic
Just a small life sign... my bench time is very limited at the moment, but I decided to start the CAD drawings of the instrument panel to get used to working with Inventor again. The panel is in a very early stage, most details have yet to be added. I am planning to prepare as many interior components as possible in 3D and to 3D print them or to have them CNC machined once ready.2 points -
Kagemusha and Alain, Thank you for your kind words. I am almost finished with the pit and I am pretty happy with the result even though the macro is unforgiving. it looks better IRL I need to finish the bangseat and add bits and bobs and I can then close up the fuselage. Cheers, David2 points


