Leaderboard
Popular Content
Showing content with the highest reputation on 02/14/2019 in all areas
-
Finished... 1/32 Hasegawa Focke Wulf Fw-190A-9
Shawn M and 7 others reacted to Tolga ULGUR for a topic
And the finish...8 points -
To simulate the authentic visual expression of the natural metal finishing painted P-47D is the goal of this build. I've collected hundreds of late WWII pictures and the restored and still flying P-47D. Here are a few examples that I'm following: This build started with the Hasegawa kit, with limited recessed panel line and the rivets only visible along these panel lines. I've decided to proceed with manually riveting. The Line Drawing was downloaded from theblueprints.com https://www.the-blueprints.com/search/p-47d/ It's my first time of using this set purchased from eBay.com. Unexpected challenges and mistakes were inevitable. Right after the riveting, I'd like to try the metallic brush texture commonly seen on the NMF airplanes. I've applied 1) Alclad II Black Base / Microfiller 2) 400/600 Grit sanding - around the fuselage 3) 600 Grit sanding in the different directions on the wings which been divided into large blocks Apply one more coating, 30% Alclad II Gloss Black Base + 70% Lacquer Thinner Next steps is to apply the main color with the airbrush to each divided panels piece by piece. The main color of this build is 70% Alclad II Duralumin + 30% Mirrow Chrome I don't have the fine resolution of pictures to share at this point. These 2 pics briefly present the idea.8 points
-

Iranian F-4D 3-6712, 71st TFS, '' DONE''.......
Gazzas and 5 others reacted to Daniel Leduc for a topic
Hi everyone, It's been a while since I did a quick and easy built.... had that one on the back burner, like many other models I have somewhere in my dark cave ... .. Always liked those colors on a Phantom, very different, the third one in particular... And going to use Techmod decal for it. My load should be some Cutting Edge CBU-10.... I'll put some up to date picture this week-end. Thanks for watching, Dan.6 points -
PZL P11 III “Cleveland” 1932 from scratch scale 1/32
Tnarg and 5 others reacted to Marcin_Matejko for a topic
Hi tigers , So in the summary of the construction of PZL P.11 III Cleveland I would like to boast that the model was awarded the Grand Prix prize in the Super Model competition for the best model of the PZL P.11 aircraft. I would like to thank you for the distinction and sent prizes. I also thank all people of good will for the substantive support of the project. Regards Marcin Matejko IPMS Świdnica6 points -

Academy F/A-18c Hornet
EricF and 5 others reacted to Squizzy 78 for a topic
With a lot of sanding, scribing, riveting and dry fitting done, I'd decided that the way I'm going to put the front together would be to assemble the front fuselage together, and slide the resin sections in for the top. Most of the surface details are fantastic, but there are sections that do need to be reworked, so with a healthy dose of OCD, I redone the lot! The photo etch that runs either side of the wheel bays is from the Amur reaver set, and it's the thinnest photo etch I've ever seen. Very fine, but easy to work with. And now it's on to a paint job on the Aires wheel bay and cockpit. Wish me luck, I'm thinking I'm going to need it! Thanks for looking.6 points -
still needs some more work with the white on you see everything thats wrong so more filling and sanding to go Mark5 points
-
Thanks! I'll definitely be staying inside when I can, my daytime job gets me out in the cold when it can but evenings are nice and warm in the hobby room! I've got a bit of paint on the Hornet last night and tonight and spent a few hours making masks (I think a die cutter could be in my future...) to shoot the hornet stripes. All the gray's are Vallejo as my favorite paint maker (Tamiya) doesn't seem to make to many exact matches for modern jets. The orange and yellow are Tamiya colors, granted they are a mix as well but a lot less farting around to make a bit of orange and yellow than all that gray! The bottom, light gray on top color medium gray hornet yellow/ orange masking in progress for the black now...no pics yet5 points
-

1:18 Hobbyboss AV-8B Harrier
Chris Wimmer and 4 others reacted to patricksparks for a topic
Decided to do some detail/finishing for a change of pace. This is Harold's/AMS resin seat that I have added seat belts and buckles, leg restraint straps some photo-etched bolt heads the ground safety lever on the side of the seat and some Airscale decals.5 points -
PZL P11 III “Cleveland” 1932 from scratch scale 1/32
Tnarg and 4 others reacted to Marcin_Matejko for a topic
Well, that's it The pilot colonel Jerzy Kossowski and plane PZL P11 III in Cleveland 1932. Picture from the monograph AJ Press number. 36 "PZL P.11" The model went on the shelf for the collection of other racers I wish you all the best in the coming new year 2019. Marcin Matejko IPMS Świdnica5 points -
Thanks Ferry and Marcel! I get your hesitation about starting to build without all the bits you require Marcel, after all - one can't wage war without secure supply lines! Go Grumman. Every time I start building a model, I should remind myself that what I have bought is not in fact whatever it says on the box, but this instead: Here is a prime example - exhibit A. I could have sworn the little strengthener plate was flat before I primed the model (your honour). How on earth does that happen? Chemistry of course! Luckily I was able to sand it flat without removing all 0.13mm of styrene. Time to paint. I really wanted to try the mig AMMO acrylics, but given the chemistry lesson I'd just been handed, thought better of it. I will first practice and learn how to use pure acrylic out of the public eye. The actual colours in the AMMO range are notable for their huge range, and they look pretty accurate to me. I used them to base my mixing of Tamiya acrylics on. First up the "dielectric" grey bits were painted. Two coats of AMMO "heavy chipping fluid" later, and I then did what the Luftwaffe did - spray "Light Compass Grey" over the dielectric paint. Then with a bit of water and a paintbrush I did what 600 or so knots of Luft did to the Luftwaffe's paint... With that bit of fun out of the way, the bottom got a coat of the "Light Compass Grey". It is quite difficult to make out which colour goes where on the AirDoc instructions, so I have adapted mine based on various photographs as well as this colour scheme gleaned from wings palette. It appears that the colour scheme changed a bit over the years, and I am doing a very early version of Norm 90J. The upper surfaces first get "Compass Grey". notice the subtle difference in the shades of compass greys on the underside of the horizontal stabs. Finally the "Medium Grey" completed the upper surfaces. At this point I noticed that the chemistry worm was still turning, and have had to sand down the fairings on the chaff/flare dispensers. The very thin styrene seems to react poorly to either the styrene cement, the Aclad primer, or a combination of the two. Whatever I set the big piece aside to sulk and dry a bit, and tackled the last of the building tasks - the weapons pylons. I really enjoy the MiG-29's missile pylons. They look like they were designed by sci-fi movie prop designers, and named by the script writers from Star Wars. How's this, the R-73E missile goes on a P-72-1D launcher. Cool! Here they are straight from the kit. The smallest one is a P-62-1DB1, the big one is the P-72-1D and the long thin one is an APU 470. The APU is my favourite. Although I think the Trumpeter effort on the pylons is excellent, I wanted to add a little detail since I want them missile-less on the model, and they were designed to be missile-full. The first thing was to add rails, then hollow out the nose cones, and add a securing device of sorts. The APU 470 has what looks like vents below the rails, and weld seams all over the launcher body. after hours of fiddling this is what they look like. This kind of detail work will lead to madness or blindness, and I would rather suggest that you order Zactomodels' beautiful pylons and weapons.4 points
-
I took a few good quality of pictures with a Sony camera.4 points
-
CAC Boomerang A46-217 “Hep Cat” Finished.
shadowmare and 3 others reacted to ericg for a topic
Cheers guys. Moving on to some of the smaller details. I added these before I painted the model but forgot to post an update. A small drain and vent were added to the area between the wheel bays. I opened up the panel that covers the ground power receptacle (bottom left of the Q) most of the pics that I have of these aircraft in theatre show it as being left off. I drilled a small hole in the spinner, I guess this is to allow access to a grease nipple on the prop hub. I had dry fitted the exhaust and found that it looked as if something was missing compared to photos. There is a small duct that comes off the rear of the exhaust and enters the fuselage. This was missed in the kit and I felt that it would look good to include it. The exhaust as I had it, ready to install. I made a duct from some plastic rod, heated and bent to shape. Also visible here is a small oval panel below and to the left of the exhaust which was missed in the kit that I scribed when I was working in that area. (There is a stencil data decal provided for it though) The modified and now complete exhaust ready to install. There will be lots of exhaust staining in this area as well as some burnt off paint on the panel around the exhaust, so it is only dry fitted at this stage. Glad I did this little mod.4 points -
Trumpeter Swordfish 1:32
Model_Monkey and 3 others reacted to Fvdm for a topic
Painting has started. First I sprayed the oilcooler. I use Hobby color as paint and I really like it. I can spray indoors, even when it's cold because you don't really smell the paint. For the cooler I used steel with a drop or 2 copper. when you turn it in the light it gets different shades, Then I went for the exhaust ring. I wanted to try to paint some heat stains. The exhaust is made of copper so that is the first layer. Then I toke some clear blue, Followed by clear orange. Finally i did some layers of grey smoke to darken the copper and try to blend the colors a bit. All it needs now is a coat of matt clear to get rid of the shine. For the first try i am happy with it. If you see something to do better the next time, please tell me. Every comment is usefull and appreciated Thanks for watching Ferry4 points -
RP Models -1/10th Douglas Bader and Spitfire Cockpit
Greg W and 2 others reacted to Brodiebear for a topic
This is the 1/10th model of Douglas Bader sitting in a spitfire cockpit, released as a limited edition run by RP Models, I wont go into the full details as their is a lot of fantastic resin,but suffice to say even in dry fit without any trimming/ sanding it goes together like a dream, only small fit issue i have noticed is the googles, not matching up to the straps, but once sanded and cleaned the resin inside the googles may be a perfect fit, few photos of how it looks, its a chunky and not a light piece of resin. I will build the cockpit first then the great man himself. I started cleaning up the major cockpit components, just the usual seam line here and there, opening up some of the holes. The hardest part was where the compass slots onto the instrument fascia, the slot is too small to get a file in so it’s a case of scrapping away the inside with a sharp blade. It is apparent that there is a bit of warpage on the main structural items, including the ‘keel’. Think it’s going to take some careful reshaping in boiling water. I did notice that if I was to glue the seat structure to the rear bulkhead and then glue this to the keel it should pull that part into alignment to attach the instrument panel bulkhead. ‘Douglas’ just required some scrapping and sanding of a few mould lines on his arms and back of his one leg, the googles required some time in cleaning out the back of the left lens, a bit of resin was lodged in here, again tricky to get rid of, but perseverance paid off, along with removing some of the resin on his helmet so the lens sat better. Will just need a smidgen of filler to join the googles to the strap. got round to getting some paint on the SRBP (Synthetic Resin-Bonded Paper) last night, custom mix of tamiya earth, flat red, flat yellow and flat white, overlayed the brush strokes to try and create a pattern of sorts. A futile exercise really as once the pilot is seated it will never be seen again But i enjoyed the couple of hours painting. Been Honest i wasn't looking forward to the decals as even from the top model companies sometimes they break up, curl over, don't sit very well, so when i saw it was RP's first go at them i thought i was in for a long time. How wrong was I, they went on like a dream and just over 1 1/2hrs later all done. Spent a good hour or so last night working on the Gun sight. Had to file out the back of the lens holder and side frames. Did start to score away the top 'glass' but one of the side supports started to come away, so have abandoned that idea. In hindsight I should have cut that piece away first and then sorted the side frames, not sure if they would have survived though as the 'resin webbing' is quite thick, someone needs to devise a 'hot wire' for resin Lol.3 points -
Hi everybody, Really happy to show you my last built, the famous WNW Fokker DVII, with HGW seat belt and Aviattics decals. Paint with Gunze and weathering with oil paints. Have nice building for 2019 !! X153 points
-
I apologize if it has already been mentioned but based on recent post on local forum it looks like nice resin kit https://www.modelforum.cz/viewtopic.php?f=1&t=105045&start=2220 didn't hear about the company so far their facebook page https://www.facebook.com/pg/cacciarimodels/posts/?ref=page_internal jan3 points
-
So, after another excursion around the teddy bears' picnic garden, we have determined that: a/ a conversion set for the Tamiya J is not viable for 2019, if ever again b/ the CE Wild Hare set is really just a rare unaffordable collector's item with a few errors of its own c/ we still don't know the status of the formerly announced HKM kit In the absence of this RAF Phantom icon, the Kitty Hawk Jaguars and any other 1/32 Cold War era jets I'm skipping back to 1/48 pending Iain's Lightning updates. Revell have just repopped the FGR.2, Airfix are repopping the Sea Vixen, and that's plenty for this year. But I would switch back in a moment if and when HKM has anything positive to tell us. Tony3 points
-
1/32 F-4K/M. Conversion Set for Tamiya F-4J
LSP_K2 and 2 others reacted to Dave Williams for a topic
I have to disagree about the base. No one expects a plastic kit for only $50, but there is a limit on what people will pay for a conversion or a plastic kit. The number of people who would pay $200 for a good plastic kit is likely quite a bit different than those who would pay $450 for a conversion of a $100 kit that you need on top of that. A number of people here will easily drop one or two hundred dollars on a kit alone, as seen by the number of ZM, Tamiya, and HKM kits people are buying. Once you start talking $300-$400+ for a 1/32 F-4, the math changes considerably.3 points -
Couldn't disagree with you more, Graham. Any company with even a tiny business sense would consider a variable like that before deciding whether or not to begin such a massive undertaking.3 points
-

1/32 Kitty Hawk F-5E Kicked Up A Notch. Oct 3/19. Finished!
CarstenB and 2 others reacted to chuck540z3 for a topic
Thank you Gentlemen! Thanks Marcel. I never would have tried this on a larger jet, like my big Eagle, because you can actually see quite a bit inside those big intakes. These tiny intakes mean that you can get away with minimal detail, because you can't really see much of it inside, even with a flashlight. In any case, even crude intakes are better than nothing! A bit of an update, but more of a warning. I am currently detailing the upper fuselage before I glue the entire fuselage together and along with moving the fuel caps to the port side, I've been scratching my head on how to deal with those circular windows just in from of the engine vents on each side. These windows indicate the level of some kind of fluid, but the kit instructions don't have clear windows for them. A review of other builds of this kit indicate that nobody is using an alternative, so the circular depressions are left as is. After looking hard at where all the clear parts go (GP Series), I think I have figured out that many parts are miss-labeled and therefore not missing. So here is what I've found by looking at the GP sprue below: 1) On the bottom of the forward fuselage, the instructions tell you to place two GP-9 circular lens into the openings in Step 22. These lenses are too small, so you should use two GP-1 lenses instead. 2) Now we have two small GP-9 lenses for the sides, which fit perfectly in the holes in front of the engine vents in Step 17, which are not mentioned. 3) The instructions tell you to use the GP-1 lenses for the navigation lights on the bottom of the wing in Step 19, but nothing for the top of the wing. Since there are four GP-7 lenses, which are almost identical to the GP-1 lenses, these should be used instead for the bottom AND top of the wing. 4) The remaining error is that the instructions ask you to use the circular GP-7 lenses in the vertical stabilizer in Step 21. This is wrong (and we used them already above), because they are rectangular shaped and should be GP-5 instead. In Summary: 1) Step 22. Use GP-1 instead of GP-9 for the bottom lights on the forward fuselage 2) Step 17. Use GP-9 for the side lenses just forward of the engine vents. (Missing in instructions) 3) Step 19. Use four GP-7 lenses instead of two GP-1 lenses on the end of the wings, top and bottom. 4) Step 21. Use GP-5 instead of GP-7 lenses on the tail. 5) Kitty Hawk instructions should be scrutinized thoroughly before gluing anything. Hope this helps! Chuck3 points -

Spotted Ass Ape HobbyBoss B-24 Assembly Ship
BradG and one other reacted to Wackyracer for a topic
Brass undercarriage arrived! Looks well up for the job.2 points -
Hobbyboss B-24: no turret fix in sight
Thunderbolt and one other reacted to Markjames1968 for a topic
Problem these days is that most in the hobby are just kit assemblers and painters and not modelmakers , the clear parts are an easy fix with a little milliput to take casts, polishing of said cast and vac or plug molding, trimming and assembling said parts to whats left of the trimmed off part is tricky but good results can be had . Its not just modelmaking though, these days everyone wants an instant fix with no effort... patience for others to produce whats needed or effort yourself is the only answer, bemoaning the fact that others havent done what you wont or cant but need is a strange show indeed..2 points -
LAU-51, 19 2,75 in. FFAR rocket launcher used mainly by F-104, G-91, Alphajet, Jaguar and other. 8,00 eu. Again available 1/32 MK-25 Bomb dispenser, 8,00 eu.2 points
-
Wow, this one is new to me! So, available now, I take it? Kev2 points
-
My normal limit for a plastic kit by itself is around the $300 and that would have to be a VERY passionate like for me. It may not be enough to even cover costs of the conversion, but realistically I would have to put a cap of about $200 as a limit for any conversions. As was mentioned, I would not be able to afford a $200+ kit with a $200+ conversion. It might not be realistic as far as what the conversion would cost to make, but its realistic as far as what I would have to spend.2 points
-

Hobbyboss B-24: no turret fix in sight
Rick Griewski and one other reacted to thierry laurent for a topic
Casting normal parts is one thing that is not that difficult, casting large clear parts such as 1/32 scale turrets is something completely different...!2 points -
ZM Ki-45 arrival
Bill_S and one other reacted to Rick Griewski for a topic
Thanks DaveT Off I go Rick2 points -
RP Models -1/10th Douglas Bader and Spitfire Cockpit
Out2gtcha and one other reacted to Brodiebear for a topic
Many thanks all, i am not the fastest builder / painter so bit sporadic with updates, but i will get there in the end. Got all my references ready for Baders Sidcot flying suit, life jacket, parachute, gloves and helmet with goggles, just to translate these images into actual painting of the figure. Got a few more bits of the Spitty cockpit to complete first; Compass, Throttle quadrant and the IFF panel. Steve.2 points -
Go for it - the more the merrier! Only a small update today - I've been busy the last days. First the promised picture of the auxillary stuff: Although there's no explanation for the parts in the Aufklärer Vol.1 book, I managed to find most of them in Vol.2 (free to read on scribd) for a Fw 189. The big things are the "Bildfolgeregler" (k) - I guess it translates into frame rate controller and the "Ueberdeckunsregler" (c) - controls the overlay of the pictures. The latter needs an opening/window in the floor which is included in the drawings from page 1. The wiring of the frame rate controller is a bit of a mystery though. One of the two goes to the camera motor (that's easy and included on other pictures) but the second one is linked to the IP. I have no clue about that since it's not present on the Fw 189 drawing. I got news from my camera mount. A friend of mine at university tried printing it via fused filament. Emphasis on tried but see for your self: Altough the detail looks good there's a problem with the wall thickness. It's below 0.8mm which makes removing the support structure with a water-jet nearly impossible. Removing the supports (without damaging the part) with a sharp blade, sprue cutters and other tools didn't work either. Next try will be with stereolithography - fingers crossed!2 points
-
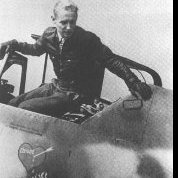
P-47D "Raid Hot Mama", 1:32, Trumpeter
AceofClubs and one other reacted to Hartmann52 for a topic
Painting2 points -
They are in every way a "traditional kit manufacturer". Yes, Peter Jackson is involved, but most likely he just financed the first kit or two. Then the profits from that funded the next releases and so on. That profit increases with every sale and eventually they have enough money to fund more complex models. They are not "idiots with money". They have an accountant. They undertand how commerce works. Radu2 points
-
WNW is nowhere near the end of its run...!
Pup7309 and one other reacted to The Phantom for a topic
WNW Lancaster will sell out very quickly, The cockpit section hopefully will inspire a set of those alone. Imagine a Halifax, Stirling and Lanc together Might see some early ww2 oddities pop up. Martin Balitmore, Beaufiort, Whitley, Wellington, Battle, etc2 points -
I have ordered many times from Volks service, especially when i recently shattered my Horton wing parts, upgraded my Do-335 kit to the 2-seater version and only the other day, extra sprues to make a 2nd Toryu from the 1.5 kits you get in the box .2 points
-

DONE AT LAST! 1:48 Mauve P-40N "Lope's Hope"
mustang1989 and one other reacted to KUROK for a topic
OK, gents, soon...it will be soon... I promise These photoetched canopy rails nearly drove me to drink. I had to add some styrene strip to get them to not sit too proud of the fuselage side. Fortunately, what I had on hand was a great fit! The results: (just need to weather and scratch up paint) I don't trust my ability to freehand airbrush the medium green "dapples". Creating masks of my own. Here they are stored on wax paper until needed. Accurized upper and lower intakes. Ready to primer. I do like this kit for many reasons but my AMS and OCD has made it a drag of time. I think I will do a shake 'n bake Tamiya kit or any other modern kit that does not need so much rework...2 points -
Not gonna get political here but taxes and regulations play a major role in who survives and who doesn't.2 points
-

1/32 Kitty Hawk F-5E Kicked Up A Notch. Oct 3/19. Finished!
Smokey and one other reacted to chuck540z3 for a topic
Thanks Brian. Despite the misgivings of this kit for accuracy, ill fitting parts, mold flaws and poor (and wrong) instructions, I have to remind myself that we modelers should be happy that Kitty Hawk (KH) has created this kit (& F-5F) in the first place. If you wanted a 1/32 F-5, the old Hasegawa kit used to be the only option and it is truly bad. At least this kit gives us a fighting chance to create a really nice model of this iconic and very popular fighter. On the positive side, this kit has: 1) Generally well defined and clean panel lines 2) Good to excellent rivet detail 3) Good overall shape 4) Lots of options to create a specific version with a variety of load-outs 5) Lots of decal options, although I have no idea yet how good the decals are 6) Good plastic that sands and re-scribes easily Also, the front intake parts have a very specific ridge on the inside/back that indicate that something should have or will fit onto it one day, like maybe intake parts? There is no reason for this ridge to be there, so this kit just might improve in the future once these shortcomings are fixed. In the meantime, seamless intakes and likely a new resin cockpit will become available, even if KH doesn't change a thing, to make the kit better. Cheers, Chuck2 points -

New 1/32 F-4K/M (FG.1/FGR.2) Phantom kit announced by HKM
Darren Howie and one other reacted to Iain for a topic
Indeed Kev - I've seen nothing yet to indicate that the HK kit isn't going to materialise - so my hopes are on seeing that at some point. I steered clear of the Wild Hare kit when announced as it's resin overkill - in my humble opinion. I started to work on a conversion - back in 2013 - and had scoped out what needed to be done to convert the Tamiya F-J to the F-4K/M variants - a multi-media approach - but using some modern techniques. Through some good friends on here I've seen the possibilities/technology move forward - and more convinced a mutli-media conversion is doable. Through the very kind offices of a third party I was offered access to a number of airframes - in various states of disassembly - in order to get all the dimensions/shapes needed. Plans changed when we were made aware of the proposed kit. The data that Derek and I obtained was passed on - but I've heard nothing recently. *If* the HK kit doesn't materialise I *may* resurrect what I was planning as a conversion - but this depends on my day job and what happens to the UK at the end of March. I am currently working on a possible first release from Aeronut - but it's not for the Phantom - that's just between us, eh? And, yes, I will dig the Lightning stuff out again. Iain2 points -

New 1/32 F-4K/M (FG.1/FGR.2) Phantom kit announced by HKM
thierry laurent and one other reacted to Iain for a topic
Hi Gary, I know that - and I have dimensions/photos of the relevant areas of the airframe. I understand how the wings interface with the intake trunks - I've seen - and measured - the separate parts of the real aeroplane in front of me. I'm *not* saying the fuselage isn't wider Iain2 points -
You would think there would be a saturation point, but I don’t believe that anymore in scale modeling. The market is not a supply and demand market and it certainly is not rational. Many hobbyists hoard more than build. When you look at the big picture of what is being released now, it has reachead a point where there seems to be a market for everything that can be dreamed up. We are seeing kits issued that we used to say that will never be done. We are seeing cartoon kits being issue now and adults are buying them. In every scale and every subject from cars, to ships to tanks to planes and sci-fi big and small everything imaginable and some things not Imaginable are being released. This seems to have a ways to run. WWI is one of the less taped corners of the modeling world and I think there is a lot of room still left there for high end kit development. The market is also global so American or European perspective is not the be all and end all. Asia is a very big player in all of this. Some examples of who would have imagined: 1/20 Ebbro Brabham Honda F2, 1/48 Trumpeter Type VIIC, 1/35 Amusing Hobby paper panzer series, the uprising of Meng, Takom and Rye Field, Trumpeter 1/200 Warships, Deagostini subscription models, and on and on. Hasegawa is now tooling Japanese industrial equipment, including farm tractors, tarmac rollers and more in 1/24 scale instead of military models. If you look at the Hasegawa stand it is normally now mostly sci-fi or some sort of Japanese market oddities like school desks or other industrial equipment models. They did a modern Japanese airport fire truck recently also in 1/72. Our one 1/32 airplane site is one little subset and WNW is a subset within a subset. But there is so much room for so many things and so many buyers willing to pay around $100 for a model globally that the market is not a big worry.2 points
-
Thanks guys. Two wee updates tonight, hopefully more major progress to report by Friday. "Close enough for punk." The massive step between floor and fuselage reduced a heck of a lot, and while It isn't perfect, I'm moving onto the next fix. I may have to attack that solid thing on the right side of the photo - that's supposed to be an air scoop... Still working out some kinks with my new resin printer and I am queuing up additional parts to print later this week. The spinner and blades for the external winch came out decently from the first print and these will look even nicer under a coat of real primer. Right now it just has a thin coat of tamiya xf19 on to cover the clear green resin.2 points
-
I'm building at least 10 a year. Most go on the FB pages. Must post harder.....2 points
-
primer is on still needs some filler and sanding on some places so i know what to do Mark2 points
-

F-15I Ra’am - FINISHED
Rick Griewski and one other reacted to Dukie99 for a topic
Time for an update and thanks Brian for commenting. With so many exciting build in the multi-engine GB, not much traffic on this one but I will finish my F-15i Ra'am. Not too hard to motivate myself because I find this scheme one of the most attractive for the F-15. I finished decaling, glued the targeting pods, fuel tank and landing gears and applied Tamiya Black panel liner to the center lower fuselage (but not the wings where it would look too heavy). Next steps, finishing the loadout, ejection seats and lots of bits and bobs. I should make it before the end of February deadline. A few pics Cheers, David2 points -
I never test fitted the LERX's I guess I got a bit ahead of myself? In any case after reading your post I remembered I had failed to even check the fit! I'm happy to report the fit is not bad if not good or great? I think it could've been better if done by a more competent modeller but it came out ok with a smear of Vallejo plastic putty in the joint. In my handling of the model I managed to break the joint on the upper rear deck and ejection seat, I'll fix them back in place when the major structural work has been completed I guess to avoid potential permanent damage. The reason I spend so much time at the bench... brrrrrrr The port side LERX attached and faired in the starboard side also done and the bottom2 points
-
ZM Ki-45 Toryu (Nick)
ghatherly and one other reacted to b757captain for a topic
More pics: Cockpit pics to follow.2 points -
PZL P11 III “Cleveland” 1932 from scratch scale 1/32
Tnarg and one other reacted to Marcin_Matejko for a topic
I've fine-tuned the grass. I added a few tufts of tall grass and a few flowers. I extruded the canopy of the cabin I covered the wings with imitation corrugated metal. I glued chessboards in the form of Techmod's wet decal. Today I finish the model and submit it to the competition2 points -
PZL P11 III “Cleveland” 1932 from scratch scale 1/32
Tnarg and one other reacted to Marcin_Matejko for a topic
2 points -
WW1 is still a niche subject, compared to airplanes with swastikas or pointy grey jets. That being said, have you taken some time to look at the in-progress and RFI forums? Seems to be a pretty good number of WNW subjects waiting for your review.1 point
-
I was born in 1970, and I have never heard of most of the planes WNW released. I would say the list I knew would go as follows: SE5, Sopwith Camel, Gotta, Albatros, Fokker DVII. The rest by and large I never knew existed. I am not new to scale modeling either, I can't remember when I did not build models going back at least to 5 years old.1 point
-

Hobby Boss 1/32 B-24J - Initial Observations
Pup7309 reacted to thierry laurent for a topic
You are very probably right Iain. This is a pity as from an engineering perspective that kit is very, very nicely done. The only major, stupid and not easy to solve engineering decision is the way they divided the turrets into parts. Hopefully somebody will solve that. Another problem not really linked to engineering but rather to the lack options is the very short range of US machines corresponding to the kit configuration. It looks only some dozens of J planes starting with 44-40849 sn are complying with the kit features. That production block 185-CO ended with 44-40948 but integrated somewhere during the production a larger navigator window commonly associated with later 190-210 blocks. So, looking for other markings will not be that easy. At least, I found that 44-40870 up to 44-40873 were used by Australia as A72-45 to A72-48. Some very similar but not fully identical planes were also used by the RAF or Coastal Command such as the Block 45 to 105-CF ones. However, as for the US ones there are differences such as the upper turret type or the navigator window shape. So, it will not be easy to accurately use other markings without changing some features typically linked to clear parts...1 point

