Leaderboard
Popular Content
Showing content with the highest reputation on 11/30/2018 in all areas
-

F-14B VF-103 "Jolly Rogers" 1/32 Trumpeter
alex1688 and 22 others reacted to Fancherello for a topic
Done! Here's a little batch of my finished 1/32 F-14B I've been using Aires cockpits ( B and D ), Zactomodels intakes and Sidewinders, Brassin GBU's, Wheeliant wheels, Master Models pitot tube. Mainly painted with Gunze Aqueous paints, Zotz decals, car carbon decals ( engines ) and home made masks ( tails, tanks ). bye Fanch23 points -

Sukhoi Su-27 1/32 Trumpeter Ukraine
Seversky and 11 others reacted to Jarda_Hajecek for a topic
Kit: Sukhoi Su-27 Flanker B Manufacturer: Trumpeter (updated molds with corrected intakes and nose) Aftermarket: Part metal pitot tube and static dischargers, Quickboost seat. Paints: Ammo of MiG, Vallejo, Akan Markings: Ukraine Air Force splinter camouflage Decals: combination of custom masks and kit decals Build was pretty much straight from the box with only adding the metal pitot tube and static wicks from Part and QB seat. The fit of the model is moderate. Some areas fit well some you have to really tweak, fill, sand and rescribe like the nose section. The intakes need a little extra work as well however nothing drastic. One thing to watch out for is the fragility of the nose gear leg. The build was for a friend who wanted to have a splinter Flanker as just fell in love with it. It may not be 100% uber accurate but I believe it comes close. The finishing of the kit was fighting me all the way due to time constraints. The last stretch was the most challenging as the model was literally finished the morning of Palstic Winter contest in Bratislava, Slovakia last weekend. I was finishing the model in my hotel room. Something I fully do not recommend to anyone. Not worth it guys. As an aftermath as the clear coat was still kind of not fully cured and it drizzled rain that morning the rain did a bit of water damage to the paint job. It did create basically real weathering but it was not intended. In the end as it dried it was looking the part but certainly I will have a transport box with a lid next time. For anyone building the kit a word of caution: the model is HUGE. Make sure you have ample room to mamuver the beast around your bench. Many thanks for my close friends for encouraging me throughout the build and to my wife for her support and understanding. Happy modeling everyone. The water damage:12 points -
For me, the P-51B Mustang that really fired my imagination is "Sweet Clara II" Some of you may be looking at it and think: "Is that a Romanian pilot?" Yes it is! This aircraft has a very interesting story. Some of you may know that Bf 109 G-6 with large US flags on the sides. (That was included on my very first decal sheet ;-) ). That Bf 109 was flown on a diplomatic mission by Romania highest-scoring ace, Constantin Cantacuzino, after Romania switched sides and joined the Allies. He flew from Romania to Foggia in Italy. The radio of the Messerschmitt was removed and the highest-ranking US POW in Romania, Col. James A. Gunn III, was placed in that space. The two of them flew to Foggia where they made the arrangements to have all US POWs flown from Romania to Italy before the Russians reached them. After the US officer was delivered to Foggia, Cantacuzino made preparations to fly back in his Bf 109, but some over-enthusiastic US "jock" asked to be allowed to fly it. Even though Cantacuzino warned him that the 109 had a nasty take-off tail-swing, the US pilot still tried to fly it and then promptly totalled the 109 during take-off. Cantacuzino had no plane to fly back home, so the Americans, (red-faced, I presume) gave him this Mustang. Cantacuzino took off without any trouble and landed back in Romania safe and sound. This Mustang was flown back to Foggia by one of the freed POWs. I would like to build both the US-flag 109 and this P-51 side by side and tell this amazing story. ;-) More here: http://www.worldwar2.ro/forum/index.php?showtopic=168710 points
-
Hobby Boss 1/32 B-24J - Initial Observations
PhilB and 7 others reacted to CATCplSlade for a topic
I personally don't care. I'm the only one who will know the wing is off, but no one who visits my home is likely to know and my secret will be safe.8 points -
I, for one, could give two bits about the wing shape. I have one on order, and will happily build this kit, I will probably buy or fabricate a new set of turret glass, maybe some Eduard PE, and remotely possible, but some Eduard Brassin engines might be something I would want. I don't want to sink as much money into this as I have for the B-17 and all the AM I bought for it. I have been building more and more kits OOB lately, and not getting hung up on the wrong shape of airfoils, but having fun building, painting, and weathering them. The only reason I would not build it, would be that the Earlier version comes to market before I do.8 points
-

"Willie the Whale", FINISHED
Hetstaine and 6 others reacted to blackbetty for a topic
so this is where i´m at now: 66 by karl holubar, auf Flickr as for the next assembly steps i decided to not mount the tail now. i want to flip the assembly and determine the position of the landinggear and scratch it. this will allow me to get the thing to sit right. when mounting the tail a lot of weight will be placed at the rear, so i will have to insert weight through the exhaust holes. the exhausts will be last on the agenda. we will see how that turns out....7 points -
The wing is unforgivable. The kit is unbuildable, absolute garbage. Hobby Boss should just close. I'll go build all those other 1/32 Liberator kits out there. </s> I respect the fact that various details of the kit upset other folks, but man, all this hate is harshing my buzz. We've got a 1/32 scale injection-molded Liberator just weeks from the market. How incredible is that? I've only been back into modeling for 5 years or so and even I appreciate that this is something that - even with some issues - is something that we never could have dreamed of even a year ago.6 points
-
Hobby Boss 1/32 B-24J - Initial Observations
Padraic Conway and 4 others reacted to CATCplSlade for a topic
I decided to be primarily OOB and build for the fun of it. I am building for me, not competition.5 points -

Hobby Boss 1/32 B-24J - Initial Observations
scvrobeson and 4 others reacted to LSP_Kevin for a topic
I think it would be fascinating to watch someone come up with, and then execute, a solution for the wing issues on this kit - a la Iain's He 219 (book coming soon, I promise!). I'd book a seat with a bucket of popcorn! Kev5 points -
Same here. No model is ever going to be 100% precise to the original (precise and accurate are, of course, very different things). I'm waiting for someone to sand down the plastic so that it is scale thickness to the model itself too. If you're gonna be this obsessive over something no one but you will know is wrong, you gotta go all the way! I'll buy and build. It's a model - and we should be supporting those who make us these 1/32 scale products so that we can get more of them - like, say.... a Martin B-26 Marauder.... -Ri4 points
-

Hobby Boss 1/32 B-24J - Initial Observations
Gerhard and 3 others reacted to EvilCarrot for a topic
I'm becoming more of an OOB builder as well. Maybe a minimal amount of etch or some fabric seat belts... Spending time researching/fixing inaccuracies and dealing with fiddly AM parts has more than once been a mojo killer for me... As for this one, I'll gladly build it as it is.4 points -

Hobby Boss 1/32 B-24J - Initial Observations
Padraic Conway and 3 others reacted to 1to1scale for a topic
Same here, competitions are too much politics. I had people tell me my model should have won, and I walked away from IPMS shows depressed, wondering why I didnt win, so I could care less now. I won one gold of maybe 20 models entered over the last 4 shows. Thats enough for me.4 points -

1:18 Hobbyboss Av-8B Harrier2
marauderdriver and 3 others reacted to Dave Roof for a topic
A correction set would just be a new kit! This kit simply falls into the "it looks the part and is cool to have" category.4 points -

1/24 Airfix RCAF Mustang IV…finally done
Martinnfb and 3 others reacted to R Palimaka for a topic
Tonight was the first session sanding and priming the corrected nose. As I mentioned above, I tried to flatten and broaden the top profile by adding layers of plastic card, which was then filled with Milliput and Tamiya putty. Once that hardened it was sanded into shape and primed. It will take a couple of sessions of careful priming and sanding until I'm satisfied, but I'm quite pleased with how it's looking so far. Once it's all smoothed out, some of the panel lines and fasteners/rivets will have to be rescribed, and some small panels redone. Sorry for the mess. This was the beginning yesterday...the point where I thought, " Crap!! What the hell have I done!? " After one evening session of filing, sanding and a coat of Mr. Surfacer 1000, it's starting to look more like what I was hoping. I can see a few divots, pitting and issues that need to be refilled and sanded. I think it will take a couple of repeat sessions of sanding and priming with Mr. Surfacer before I'm happy. And the opening for the exhausts, which have had the height reduced with a slice of plastic card and some Mr. Surfacer, again before finishing.4 points -
4 points
-
It makes no difference to myself either but i respect the people that want and chase perfection. Call them what you will but even i can see that it is their pursuit of this perceived perfection that makes the companies up their game to make these detailers/rivet counters etc happy. I would build it as is because in my untrained eyes it's a B-24.To others it maybe a deal breaker. Life goes on.Live it while you can. You're a long time dead3 points
-
And the narrowing of the "Bandages" is complete so next up is the markings, the Hinomaru's will be painted, but I am still debating whether to try painting the tail markings using the Maketar masks or use the kit decal. This is where we are now. Cheers Dennis3 points
-
Going back a few pages, I sent off for some self adhesive lead foil (fly fishing stuff) to have another go at my failed attempt to attach hydraulic lines to the undercarriage legs, it duly arrived and to my amazement it actually worked. It may not be an expert job but I am pleased with it, the photo showed that I needed to pinch it in a bit to conform to the hydraulic pipe (fuse wire) and that the chrome on the seal area needs touching up. All set to go. And the finished article, not earth shaking but new to me. Cheers Dennis3 points
-

Hobby Boss 1/32 B-24J - Initial Observations
hanna and 2 others reacted to Dave Williams for a topic
I don’t need plans to see that the curvature of the upper wing root is different between pictures of the real thing, and pictures of the built up model. It’s pretty obvious to me. I also doubt, given HB/Trumpeter’s long history, that things are going to change from the buildup they brought to the hobby show. That said, it probably won’t prevent me from buying the kit given that there is unlikely to be any other 1/32 B-24 kit in my lifetime. It’s just a data point of information for people to use in making their own determinations.3 points -
CAMERA PIT PART 2 Hi guys I have now managed to complete the camera pit after rather a difficult week or so trying to find information about the equipment that is found in the pit. I do hope that I have done the area justice and hope that it is realistic enough! Its rather a large post so lets get on with it!.... To start with I made the main Junction box and wired it all up.....here's a photo..... Here it is all painted..... I then had to make the Intervallmeter power box which is connected to the camera which allows photos to be taken at intervals for photos of bomb blasts on the target ......this was a fiddly affair being so small but got there in the end!..... ...and painted..... This insect posed for me whilst taking the shot!! Here we have a couple of Supercharger control Amplifiers!....who knows what they do!...amplifies the super charger?..ha ha..haven't a clue! Here they are installed at the back of the camera pit...... The Camera support frame was then built using plastic and wire...... Here is my attempt at scratching the Fairchild K17 camera which was largely used on the B17s...... ...and so you can get the scale of it........ Now comes the unsure of what's what section!! On the floor of the camera pit there is a viewfinder aperture....as far as I can make out ,the operator would attach a view finder onto the aperture which was long enough for the operator to just bend forward and look through it whilst sitting in the chair. This is what I think it looks like from some dodgy photos......... So then....here are a few photos of the now complete camera pit....... I will leave the camera pit door open so that all this work can be seen. So that's another section complete and it's now onto the radio room itself starting with the lower section....lots of radios to be built! As usual thanks a lot for your interest in this build especially to the guys who have followed this for over the past 4-5 years...you will deserve a medal...along side me!! Cheers for looking in and all the best! Fozzy3 points
-
Here is an update i have the mat coat on and i must say im now very happy with it i did run into a oups... after sanding the semi gloss i decided to install all the control surfaces so when i got to spaying the mat i could not place it on the stick like before since the rudder was there.. so in a quick move i made some foam pads that i placed inside the landing gear here you can see the foam legs More later on today3 points
-

pilot and crews figures by Reedoak
ShelbyGT500 and 2 others reacted to norbert for a topic
Hi, Moving from USA to Russia... Two russian airforce ground crews, in summer working uniform (blue or sand), one pulling a munitions cart, the eother one depicted as an officer, but, except the grade badge, outfits are the same. The cart comes from Advanced Modelling,and I'm pushing them to make it in 1/32 too. excuse for the picture quality, the bad luminosity these rainy days do not help. Cheers Norbert3 points -
I'll try and find something with Nebraska or Omahaha in it for you! Got a great story about a 19 year old from Oklahoma who joined the RCAF at 19 and made ace on Malta with over 10 confirmed kills. Oklahoma begins with "O" just like Omaha.3 points
-
I think there is every reason to believe my pessimism is fully justified. You could call me pessimistic or you could call it realistic. I really study everything I can find on Tamiya as I like their other models a lot except motorcycles. Even though their Motorcycle kits are out of this world, I just am not into them. I think there is every reason to believe that there will not be a new 1/32 of any kind in the near future from Tamiya. I just don’t see that as a problem because ZM, WNW and HKM are doing great stuff. These three companies really focus on 1/32 Airplanes and are worthy of our support as modelers. This is a LSP site and for these three their meet and potato’s are LSPs. Revell, although their specialty is low cost like TAmiya is not principle a 1/32 airplane maker, they are a general model maker so we can’t count on them for a lot of subjects coming out. But they do seem committed to regularly doing new 1/32 subjects so they are good too.3 points
-
My most dreaded part of the build, fitting the FuG220d array supports to the nose. As Chris noted in his build, the difficulty is aligning each arm in three dimensions, but added to that each one also has to be aligned to the previously fitted ones; not easy and not done without a lot of thought. I tried to come up with a smartarse jig to help, but not being a smartarse I failed miserably so it was back to the Mk 1 eyeball, a few bits of masking tape, a ruler and a sliver of card. Oh, and the first problem that I found was that the port and starboard supports are not "handed". There is a slight angle on the support/nose interface to aid mating, but the angles are the same for both sides so the starboard upper and port lower have to be amended. The two vertical tape strips are 48mm apart as per the instructions, I tried to get everything centred to help symmetry: I found the distance of the back edge of the support to the cutting mat to be 23mm, so a strip of thick card helped get that distance sorted for the other ones: After an anxious morning, it doesn't look too bad, though of course fitting the arrays will show up misalignment more:3 points
-
Nice! I'll see your "miss Revenge" and raise you "The Iowa Beaut" complete with Malcolm Hood! Interesting aircraft. This one was one of the aircraft flown by Flt Lt Warren Peglar of the RCAF whilst on a secondment in August 1944 with the 355th FG's 354 FS. Three 109's and a 190 plus a JU 52 as it was landing. Made him an ace according to the 8th AF rules but not for the RAF as the JU52 had it's wheels on the ground so "only" a "ground kill"3 points
-
+1 Please supply evidence thanks! OK, here you go. The Davis wing was extremely thick in cross section just behind its leading edge. It resulted in a distinctly downward sloping profile on the upper wing root that is so steep it looks concave in profile towards the trailing edge. The pics in the post above show it. This one does too (ignoring the shadow): And this one too: Look at how thick the wing is just behind the leading edge and the sharp downward slope of the wing at the wing root towards the trailing edge. And here too: Instead of that, HB gives us this: It completely lacks the dramatic high shouldered leading edge / steep downward slope of the trailing edge at the wing root of the real thing. In fact it actually appears to have a convex profile from leading edge to trailing edge on the upper surface, which is simply wrong. It looks to me that the main error is in the wing being too thin in cross section just past the leading edge Look just how thick the Davis wing actually was. It was one of its most distinctive features: It appears the wing in the model is simply too thin in cross section just past the leading edge which flattens the slope from the leading to trailing edge at the root giving it the wrong profile: I can't unsee it. It's the single most distinctive aspect of the plane to me.3 points
-
Oh yeah.....whatever your preference, (I'm a panels closed guy 100% as I generally feel open panels take away from the lines that made me like that plane) I think (FINALLY) having a choice of nice new tool razor back P-51s from two quality manufacturers cant be anything but a good thing. For me personally, bring on Miss Revenge (with some slight mods to an F6)!3 points
-
Time to move on to the nose, initially drilling and pinning the FuG220d supports: Whilst that's all setting I drilled out the apertures for the 30mm cannon. I bought some Aber brass cannons needing a 2mm hole to be drilled through: These two are wondering how they're going to get the wheels fitted tomorrow:3 points
-

PZL P11 III “Cleveland” 1932 from scratch scale 1/32
Tnarg and 2 others reacted to Marcin_Matejko for a topic
Thanks3 points -
Hobby Boss 1/32 B-24J - Initial Observations
Rowen and one other reacted to CATCplSlade for a topic
...'drive' that point home..2 points -
It may make zero difference to me...............but I too would like to have a comparison between the HB B-24 wing root and the real deal. It may make zero difference to me...............but it also might be a deal-breaker. I Just like to have all the evidence on hand to make my own assessment.2 points
-
Although the wing 'issue' means nothing to me (I didn't notice it until someone pointed it out - and then I had to look back and forth between photos of plane and kit for about 5 mins to see what was off) ... I think even Houdini would have trouble getting out of this one with a more corrected shape! I'd sure like to see it though!! Maybe slicing the entire top section through and adding shims of card? ... If someone goes to THAT much trouble, perhaps they should create masters for resin cast? Like the Mk.Vb Spit, there are some small things that AM could attend to that would have a large impact on the finished look ... a bigger 'bang-for-buck' ... I think the modelling community will accept what is provided in the kit for the most part, though ... I'll buy one. Rog2 points
-
For the record, Iowa is the number one corn growing state in the US, so there, Mr. Cornfusker!2 points
-
Hey watch it bub! There is only ONE "Cornhusker" state and Im in it! My grandpa taught me from about age 5 what "IOWA" stood (no offence meant to anyone from that state) for when driving with him as a kid. It seems to be a NE/IA thing.......... Idiot Out Wandering About2 points
-

ZOUKEI MURA 2019-2020 - NEW P-51B/C, Bf-109G and Ar-234 ANNOUNCED!!!!!!
Southern Bandit and one other reacted to John1 for a topic
Too bad about Tamiya, if that ends up being true. Still think that no one else comes close to their level of execution. As noted, there are other outfits so it’s not quite the end of the world, tho WNW is still very much a niche provider. Really wish Airfix had released that Hellcat in 32nd instead of that heretic scale they went with. How big of a market is there for kits in that scale anyway?2 points -
Right, what a corny name.2 points
-
I hope so Dennis, at least the nose is on now: May get a coat of primer on tomorrow, though Herman's quizzical gaze is telling me that I need to do a bit of tidying up first!!2 points
-

F7F-3 Tigercat - BuNo 80405 - VMF 312 MCAS - El Toro, CA 1946
Harold and one other reacted to thierry laurent for a topic
Well, I can understand the need to take a shortcut because of a technoclogical issue but in such a case, you add a "clean" bulkhead wall, not a blob of putty :-((( Come on Hph...2 points -

ZOUKEI MURA 2019-2020 - NEW P-51B/C, Bf-109G and Ar-234 ANNOUNCED!!!!!!
D.B. Andrus and one other reacted to Out2gtcha for a topic
Love it! That is a super pretty scheme.....but just not sure I could put that 4 letter word on my model (Iowa)2 points -
I've just been googling B24 plans, (all of which seem to differ on this wing profile), then wing profiles and also the profile of the Davis wing on the B24 (which actually looks like the shape on the kit fuse). It's plans, plans and more plans and we know how different plans from different sources can vary so much. Until someone can post a definitive and accurate plan of the real deal and then compare it to the actual production kit then I'll defer judgement.2 points
-
the wing cross section is too symetrical anyhow, I have it on preorder and its only one B-24 in 1/32 so far. Even I'm not happy with some errors I will build it after we will get tons of AM for it jan2 points
-
Howdy folks, Kevin Williams takes a look at the latest build guide from Albatros Productions: Albatros Productions Building the Wingnut Wings Dolphin & Pfalz D.IIIA Thanks, Kevin! And thanks, too, to Ray Rimell at Albatros Productions for the review copy. Kev2 points
-
I decided to color the only one available photo from nearly 90 years ago. That's how I imagine this sky-high limousine in color. Thanks Lukasz2 points
-

RAF P-39D
R Palimaka and one other reacted to Neo for a topic
OK as promesses here are some shots Once the decal completed i applied some Tamiya weathering pastels for the guns. Then I applied a coat of Alclad 310 Klear coat, then once dried i started my panel wash using Tamiya line wash Brown i really like this panel wash BUT its the second time that once i get to wiping it off it messes with the gloss coat. I really need to find a super hard acrylic gloss. here the right side is done And the entire bottom I then applied a coat of Alclad semi-gloss coat but i was not satisfied. The above mentioned damage to the gloss coat les what looked like very small hairs all over the place. It was also a bit too glossy. So i took a sanding cloth and wet sanded the entire plane. Since im on vacation this week i decided it was time for a major cleanup of my workspace. I really love my glass deck since its super easy to clean, all glue marks and over spray (when im too lazy to pull out the paint booth) are simply scraped off using a sharp blade, then some Windex and voila! More to come soon i will spray some Humbrol Mat over the hole thing then start final weathering Cheers2 points -
Some more work. I used the new British interior green from SMS and am very impressed with the results. Pour it in the airbrush and spray. This stuff is really good paint and is super smooth. I felt the seat needed a bit of work so I added some detail from plastic card according to my references. I primed it and then painted it silver, followed by some chipping of the interior green using AK Worn effects.2 points
-

1:32 scale SPAD XIII C.1 of Frank Luke Jnr
olgerd83 and one other reacted to sandbagger for a topic
2 points -
Thanks for the tips Kev. A couple more pics, this time larger. Cheers, Jason2 points
-
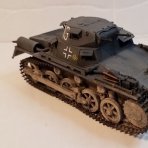
Hi All, Long time viewer, first time caller! Bit of a techno dinosaur I am afraid, but after some prompting and couching from Kev I am having a go. The Panther was built out of the box, really no need for anything else with Paul Fisher's kits! Hope you like the pics.... Now that I know how I will start a thread in the WIP forum on the Fisher Cougar I have on the bench. Cheers, Jason1 point
-
"Willie the Whale", FINISHED
blackbetty reacted to LSP_Kevin for a topic
Really impressive stuff, Karl! Kev1 point


