Leaderboard


Popular Content
Showing content with the highest reputation on 11/18/2018 in all areas
-
Hi Mike - I have them made when I get batches of stock made by Fantasy Printshop for my airscale lines - trouble with that is I end up with 25-50 sets... So, evening all Its been a while, so now Telford is out of the way I start to get my mojo back. It was great to meet up with everyone and I still can't believe we sold out of our show stock for the new HK Lancaster cockpit set ..next up for Lopes Hope is the sidewall completion so I can prime & paint the main structures before fetailing them.. seen here left to right - the low shelf down by the side of the seat holds the signal flares, the star shaped thing sticking into the fuselage ay the mid point is the mounting plate for the signal pistol (I think the pilot shot through it, but don't recall seeing big holes on the outside of the airframe?), and on the far lower right is a sort of triangular curved lever housing which is the bomb control selector... (with a red handle top..) ..these were the next bits up onto the bench.. ..the low shelf was created from plan drawings put together in different colours so I knew where the folds were - these were then stuck to litho to be cut out.. ..folded, finished & with the metal parts of the holder added.. ..same process for the flare gun holder - the part was drawn & scaled - some dents were made around the inner hole with a screwdriver and the part cut out.. ..I forgot to take pics of the finished part, but you can see it mounted here on the sidewall along with the shelf.. ..and test fitted with the completed pedestal... ..the bomb selector lever housing was made by using a PE template to make a plug I can vacform over.. ..lots of plastic to get one little part... ..trimmed & with details added this will be primed & painted before adding metal internals and the lever itself.. ..I also made the panel the housing sits on - this side is nearly ready for painting.. ..good to be back at it TTFN Peter8 points
-

Hobby boss 1/18 harrier 2 plus build
Youngtiger1 and 5 others reacted to Leontuitt1985 for a topic
Hi guys, another quick update. Managed to bring a travel build kit and the cockpit so have started adding the layers to the seat. Added some yellow that still needs black striping and also have made a start on the upper harness straps and buckles. just the lap straps to go a gloss, wash then Matt coat and I’ll call this done!6 points -

1/32 ZM Kawasaki Ki-45 Kai Tei Toryu
Uncarina and 5 others reacted to monthebiff for a topic
Some more progress made today and first up filling those annoying ejector pin marks of which there are plenty inside the fuselage halves before adding the internal detail. A couple of issue's found today while adding detail the rear fuselage around the tail wheel area, first up the rear bulk head should have a pair of locating lugs but these are missing. Also the tail wheel should have a pair of locating pins but the moulding only has one only Not sure what ZM are doing here but pretty poor really. I have glued these parts in place but it made alignment fairly difficult. Also completed the bulkeads on the central section of the main wing spar followed by adding initial detail to the whell wells in readyness for painting. 20mm upward firing cannon assembly built up ready for painting, very sloppy fit on all of these parts so I dry fitted the upper spar brace to assist alignment while the glue freid. Also built up the 37mm nose cannon which looks fantastic and a shame it will be hidden away! So thats all of the interior parts built up in readyness for painting, so far a very quick and enjoyable assembly sequence and looking foward to getting some colour on. Regards. Andy6 points -
Cockpit / Fuselage: Time to check for Canopy fitment and to really show you how bloody complex this cockpit area really is! The photos speak for themselves... Now that I've got the major mounting points of most of the parts established .. I can now continue with the wall - liner Here's an interesting comparison between my efforts so far and a 1/48th example of same area.. The padded - wall section comes out as one piece clam-shell design and will be copied in resin at a later stage ( when i got all the cockpit components done) So far - soo Good! Pip5 points
-

L-19 Bird Dog ..Manitoba circa winter 62-63
Loach Driver and 3 others reacted to williamj for a topic
Well we finally are finished,after a few setbacks and rebounds...Big thanks to Roden for designing and producing this kit...no one else would have done it. It does have a few areas that require attention (what kit doesn't) But builds up nicely with a little care. Thanks for following, and it's on to the next. Warm regards..Bill. And thanks for the pic Barney. 1954..an early one.4 points -

Hobby Boss 1/32 B-24J - Initial Observations
monthebiff and 3 others reacted to BloorwestSiR for a topic
Ours would probably find it a happy upgrade from her Spitfire box. Carl4 points -
Canopy - Continued Now that the Canopy's outside 'basic' shape is established .. my focus is now to the inside of canopy... I now make a mounting - ring that inserts into the top of the fuselage and locks itself in - for want of a better description.. I'll let the photos tell the rest of the story..... Once i had the mounting ring made... I realised the back - inside area of canopy was raised and the tubular vent system went up with it.. This effects the clear window shown as red arrow... (above) ... Here's a better view of back of canopy area... Now for the tubular vents that goes right around the edging of the canopy ... ( to strengthen the canopy frame and to stop the canopy misting up - I should think) Its rather a very bendy and twisty affair - as shown in photo below... Because of the roller coaster tubular vent design ... it's makes it very hard to make unless you make a jig or something... so I took the next option of making it in sections and joining them up later... ....All to do now is simply clean up the weld points Now test for fit and appearance ... The canopy sits and fits well.. and thats one battle - won for now! Pip4 points
-

Paul Fisher Fire Relief - GoFundMe
Padraic Conway and 3 others reacted to CANicoll for a topic
I sent the GoFund me link to my club back in the states and am trying to get it published in our Dec newsletter. Our next meeting is the Christmas dinner so hoping everyone will be in a generous mood. I am proud to be part of this community that bands together to help those of us in need. Well done folks! Chris4 points -
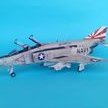
Kit manufacturer: Tamiya Scale: 1/32 Type: F-4J Extras used: Aires cockpit, added several wires to the wheel bays Paints and colors used: Gunze Mr.Hobby, Tamiya3 points
-

JG300 Red 12 Bf 109 G-6/R-6 Bonn-Hangelar 1943 (Now Complete)
J.J. and 2 others reacted to Wackyracer for a topic
Final Reveal Pics Details Really enjoyed this one.3 points -
Ive finally managed to get some bench time and make some progress on the Typhoon. The engine is just about built and painted and really is a kit in itself! Not weathered yet though and I'm still that some thought, given the scale i don't think a simple wash will be enough? Ive also painted several other components including the instrument panel which looks a little odd without the dial faces! Cheers Matt3 points
-
Note I edited my last post (concave versus convex). Now, it's update time. I am steadily if slowly checking off the list of many items to be done for the wings. I live in fear of gluing them together only find I had to do something prior to. Recall that -30 variants have a newly located landing light. So here is the new landing light: The step drill worked to perfection, giving me a perfect .5 inch diameter hole in which to put a lathe-machined acrylic piece done so to depict the hollow look of the light. The "bulb" is a piece of .06 round plastic. I wish I could have better smoothed out the machining marks.... Now all I have to do is putty in one of those access doors, which I will do after the wing halves are joined. Next up were the ID lights, which were done similarly with the step drill. Nothing spectacular here, but here they are: I just drilled out the existing (pitiful) circular indentations, put in .005 inch thick cover rings, some clear plastic "glass", and filled in with some clear epoxy. Clear red, green, amber paint, and there you go. Must mask really well once I paint. Now the tip lights - some of you were waiting to see how I do this. My first plan worked well enough, so no need for the toothbrush! First, I turned to the trusty lathe and turned a large diameter thin piece like this: Yeah, my machined tires are similar! This part was just as big a PITA as the tires though; I don't want to do it again. How is this like a tip light? You cut out pieces: My surgical saw (that's what I call it) cuts through acrylic nicely. The secret to this method turned out to be one, creating a good representative cross section on the lathe. Alot of contour study was involved in order to do that. And two, making the right cuts on the lathe-turned 2-inch diameter piece. You will see two chunks cut out in the picture above. One is too small, the other more like it. I will cut the part for the other wing, and then I must wait until after the wing halves are joined to finish it all up. Challenges remain but I feel pretty good about it. Meanwhile, I began the aileron work (when will I do the flaps?????). The flaps will be last. So I must have aileron supports in the outboard fixed trailing edge (FTE) that match up well with aileron attach points. At the same time the ailerons must be made somewhat more realistic even though they will not be movable. What I started with is no good: Those two pics show before and after. I sanded away the leading edge to give it an aero cross section. It is more true to form, but these ailerons are much thicker than the real thing. That's just the way it is. Note I cut off the stupid tabs that attached the original part to the wing. While I was at it, I corrected the trim tab on the RH aileron. While the LH aileron has a controllable trim tab on P-47's, the RH aileron does not. However it does have a fixed tab on its inboard end. I had to correct this on the RH aileron: The RH aileron is basically finished: Yes!! That is an aileron drive arm! Part of it is actually seen with the aileron attached to the wing, so I wanted it there. Lastly - here are the aileron supports for the RH wing: Just well-supported .04 thick horns that will fit into the slots on the aileron LE. This will be a vast improvement over what was there. I guarantee it. Now, to get the LH aileron and wing outbd TE into shape. More later. Can't wait for the flaps and flap linkage. That's gonna be fun!3 points
-

A-1H Skyraider USN [ZM 1/32]
Coneheadff and 2 others reacted to discus for a topic
Progress from the weekend: Panel lines marking and start of the decals3 points -
comically oversized box aside, the sheer size of the parts is pretty astounding!3 points
-
Thanks Kev, I hope I've conveyed here, how complex this cockpit really is... Taxing? Yes very! ... at times, it does push me to my limits - I feel. It's that 'Love-Hate' feeling we get with modelling as we all experience at times. Pip3 points
-

Paul Fisher Fire Relief - GoFundMe
williamj and 2 others reacted to Ivan Ivanovich for a topic
Faith in humanity (partially) restored.3 points -
Finally wings attached to fuselage and all small parts added. Some fillerwas needed to get perfect alignment now its ready to first coat of surfacer thanks for looking jan3 points
-
Hobby boss 1/18 harrier 2 plus build
Starfighter and 2 others reacted to Leontuitt1985 for a topic
Good evening Gentlemen and ladies if your reading! My apologies for the delay it seems close protection isn’t as quiet as people would let you think! Any way as promised here are some more images of my progress. It’s been a little slow as I only had a 7 day break before being back on task. Threw some primer on the seat and decided I still wasn’t happy with the dimensions so broke out the milliput. Whilst I was at it I had a play with a prototype for the seat cushions. Primed seat Playing with the seat cushion highlighted to me the back was still to short. I’ve also added a set of seat belt harness mounts (white card) The seat after an extension (pre-sanding) With the prototype back rest With some colour before the highlighting just gave it a quick dry brush so the detail came out in the shot. Going to be a bit of trial and error to get the colours how I want them. Here she is in place in the next few shots and one with the nose installed just to start giving an impression on what a beast of a kit it is! And an an old full view mock up. Couldn’t resist! i am home next week so will start the cockpit side consoles and maybe the ip. Have also just realised I have missed the 1/32 b-24 release which may be a good thing as having this in 1/18 and a 1/18 aggressor f-16 disassembled ready for some serious detail I think I may genuinely need a hanger should I find the b-24! Really happy to see such an icon in an impressive scale! Although being a lover of aircraft and 1/32 scale or larger I’d like a kit of every military aircraft on the planet! Any way I hope you enjoy the pics and I’ll get some more up next week of the wings I’ve re-shaped/butchered. Happy modelling! LT3 points -

FW 190D-11 & D-13 Hasegawa & Real Model
dodgem37 and 2 others reacted to Miloslav1956 for a topic
Thanks all! Today update.3 points -

AMC Dh.9 WNW
williamj and one other reacted to scvrobeson for a topic
Did have to paint the sunburst on the tail, just couldn't get the decals to conform or look right. Matt2 points -

Airfix News Just in from Telford: 1/24 Hellcat!
Troy Molitor and one other reacted to Out2gtcha for a topic
Crap. That really stinks.....why the motorized prop option with NO option for anyone at the controls?!??2 points -
JG300 Red 12 Bf 109 G-6/R-6 Bonn-Hangelar 1943 (Now Complete)
BradG and one other reacted to Wackyracer for a topic
Added the fuel tank Weathering Underwing gondola's Engine cowls and acoustic pipes Wing weathering Aerial added Engine support2 points -

Airfix News Just in from Telford: 1/24 Hellcat!
Rick Griewski and one other reacted to JerseyChris for a topic
Dissapointed to hear that Airfix are breaking with tradition where 1/24 scale kits are concerned and aren't supplying a pilot figure. I read on another forum that they estimated it would cost up to £10,000 to get a figure sculpted and they weren't prepared to add that to the production costs.2 points -
As promised, I took some pictures under natural light today but no sunshine, still better than under electric light. Enjoy! Cheers, David2 points
-

Repopped Bf110C-7 ? ...
BloorwestSiR and one other reacted to mozart for a topic
Obviously a man with better eyes and brain than me then Carl, hadn't spotted that!! IF it's a Dragon re-pop I'll be getting it for sure.2 points -
Most of the dekkelz on, now's when I start noticing things I missed and boobooz so it'll need some minor changes but this is the general idea ...2 points
-
what? ..that is impossible... ..I can honestly say those are some of the finest worked parts I have ever seen...no.....they ARE the finest worked parts I have ever seen.. ..they make mine look positively agricultural.. absolutely breathtaking and wonderful to have you back Tomasz Peter2 points
-
Thanks, one and all. The campaign has now raised over $24,000, and in only 5 days! This is an astonishing community response, and I'm sure Paul will be able to put the money to good use. How far can it go? Given that this amazing amount comes from just 322 people, I'd say quite a bit further! Kev2 points
-

Zukei Mura: a jet in 1/32???
Southern Bandit and one other reacted to GrahamF for a topic
I've got a novel idea, rather than keep asking for new kits what about buying the ones that were previously asked for? Graham2 points -

TELFORD 2019
CANicoll reacted to Phartycr0c for a topic
Hi folks. I capitalised the title so as not to get lost amongst the other great Telford threads but in order to maximise the time available, I am starting the LSP at Telford 2019 thread. Firstly can I thank all those who contributed to the display and helped with the running during the last weekend, the 32nd sig / LSP stand looked superb and garnered a lot of interest and NOT just because of the Lancaster. Several folk asked about joining the forum and genuinely showed an interest in 32nd scale aircraft in particular with at least 4 individuals jumping from 48th - 32nd scale. Anyhoo, any contributions towards next years display should be on the theme NAVY. ANY aircraft, props or jet rotary or fixed wing, with a naval connection from ANY country of origin, so that includes, Fleet Air Arms, Marines, Coastal Command etc, etc.... the world really is your omlette. So similar to last year I will start a list of builds in an attempt to avoid a table full of F18 Hornets. Again, black = possible build Red =In Progress Green= complete. So to start Phartycr0c Catalina Phartycr0c Sea Hornet Phartycr0c Helldiver Phartycr0c Avenger Phartycr0c Wessex Phartycr0c Lynx Phartycr0c Skyraider Phartycr0c Talon 28 C For me the Catalina will be a certainty with one or possibly two from the remainder.1 point -
Sweet as... and twice s nice! Lovely, inspirational work. Torben1 point
-
It may be a few more years before I can manage to come over. My daughter starts college next fall, and I may have to be in Vegas for work at that time, so 2019 is not happening. Someday.....1 point
-
Well that worked, I hope! Cannon taped into position @ approx 15 deg (?): Cannon plus floor and bulkhead, not sitting square because on the kit there is a sloping fillet: Fillet removed, rearward distance measured @ 4mm: Temporarily placed to gauge fit, looks ok: Of course all this may only hold true for the late G4s like Andy and I have modelled, those doing earlier ones may have to find their own solution.1 point
-
Yep, XF-56; a tad dark perhaps, but a great base color for track.1 point
-

Kitty Hawk has announced an Fw 190A-5
MikeMaben reacted to Troy Molitor for a topic
I wonder if the kit will come with a resin rear fuselage plug to extend it to the correct length? Just a joke people! Any WWII kit in the European or Pacific conflict, single or twin will always be welcomed in my budget. Carry on and hope you don’t glue your fingers together anytime soon. Troy1 point -
Dragon/ AIMS 1/32 Messerschmitt BF110 G-4 2Z+GB Stab 1./NJG6..........Finished!!
mozart reacted to monthebiff for a topic
You are not wrong there Max, spent some time today trying to build the Master Fu220 but gave up. Bloody annoying so I'm thinking one per day maybe? Regards.Andy1 point -

1/18TH JSI F-14B Tomcat conversion
Gerhard reacted to hamfists nz for a topic
I'm waiting and searching everywhere for these pics..?1 point -

Kitty Hawk has announced an Fw 190A-5
timvkampen reacted to LSP_K2 for a topic
Yep, I'm really looking forward to that one.1 point -
Ha ha, there speaks the voice of experience!! Yes, it'll have to move back for sure Andy. I've just been looking at John's build, the opening in the canopy where his cannons go through is much further forward than mine, which are either side of the opening for the Zwilling machine guns, John's and my positions in red: Yours I see are in the same positions as mine and I think that's the root cause of our problem, which in all honesty I don't think John made any allowance for.1 point
-

Repopped Bf110C-7 ? ...
Rick Griewski reacted to AlanG for a topic
Well if Revell do issue this and i can get the AIMS G4 upgrade then i'm going to use Chrish's build as inspiration. Gotta love a Bf110 with a set of antlers1 point -

Kitty Hawk has announced an Fw 190A-5
timvkampen reacted to quang for a topic
.’.. like the 1/32 F-84F Thunderstreak which is gathering dust in the aisle1 point -
Yes, we're over $20k now! That's double our original goal in just 3 days. I'm running out of words to describe how amazing this is. The generosity of the modelling community really is a special thing. Kev1 point
-

1/32 Me 262 A-1a/U4 Kanonenvogel Conversion
daHeld reacted to alaninaustria for a topic
Short update - she’s getting all the hydraulic brake lines and external gear attached! Cheers Alan1 point -
1/32 Me 262 A-1a/U4 Kanonenvogel Conversion
daHeld reacted to alaninaustria for a topic
Well, spent a few hours at the bench today... slowly, but surely getting these birds done! She is finally up on her own gear! I’m very happy I shortened the oleos on the main gear by 2mm - makes a very big difference! And, the nightfighter is almost done too! Final shot for today... I finished up a few small jobs today - light filter application followed by clear coating, adding amongst others the re-fuelling decals, polishing the finish with a 6000 grit fabric polishing cloth, resealing - post decalling and adding flaps (for both airframes). Tomorrow will be the gear, hydraulic cables/hoses, leading edge slats and RATO units and radar antenaes. Am really looking forward to finishing these two beasts up!! Cheers Alan1 point -
That is beautiful, absolutely impressive! Those Aviattic decals are incredible!1 point
-

1/18 P51C Mustang "Lopes Hope the 3rd"
daHeld reacted to BlackCanopy for a topic
You could blame it on me. I'm beyond jurisdiction. One of my favourite pieces of Mustang perfectly represented! How the pilots were supposed to 'read' the information on the placard in the upper right corner from this steep angle is completely unclear, though. If the placard was put there for maintenance crew, (bending into the cockpit from the wing to do what with the landing gear?) the placard should actually be placed upside down! See where ignorance combined with logic thinking can get you? ... ... Experts to the rescue!1 point -

1/18 P51C Mustang "Lopes Hope the 3rd"
airscale reacted to brahman104 for a topic
I just love the way you seamlessly combine so many materials to make the end result look like it was pressed out of one piece I'm really glad the 3D prints turned out better for you this time! Craig1 point -
Not bad Pete ! ( ) How are the decals made ?1 point
-
Ok, I started to make a dent on this massive kit. As I was not feeling like starting with the cockpit, I started with the Rhino intake and these were very easy to use. The aft portion of the trunking is molded in white resin and can simply be screwed on the kit as direct replacement on the kit parts. I added some epoxy for strength. I primed the fan with Alclad black and shot some aluminum before gluing with epoxy. The forward portion of the intake are molded in grey resin, I primed the interior with MRP grey primer before shooting MRP IAF light blue. You need to cut the kit intake lip by about five mm to install the forward intake but once this is done it fits like a glove. There is a little bit a filling to be done but as you can see from the pictures nothing too bad Aside from that I have cut a lot of plastic and glued and prepped various parts (wings, pods, tank, conformal tank pylons) a nice change of pace from the MH-47G. Cheers, David1 point