Leaderboard
Popular Content
Showing content with the highest reputation on 08/10/2018 in all areas
-

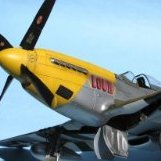
F4U-1A LT. JAMES „BIG JIM“ STREIG, VF-17
Loach Driver and 7 others reacted to Miloslav1956 for a topic
1/32 Tamiya Eagle Cals decals Barracuda Wheels HGW, Wet Transfers & Seat belts All colours Mr.Paint/MRP8 points -
5 points
-

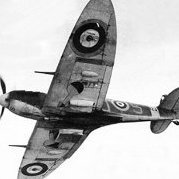
Revell Spitfire Vb - Finished!
BradG and 4 others reacted to BloorwestSiR for a topic
I used a simple paper mask to minimise any over spray on the cockpit when I repainted the seat. This worked well (except for all the dust) and I just have to make a new set of shoulder harnesses. I then finished the work on the wings. First I added the control surfaces and landing flaps. Then it was time for the gun blisters. So I just need to add the rad fairings and the wing is complete.5 points -
Howdy folks, I've just published my review of the new block tread Mustang wheels from Barracuda: Barracuda Studios BR32381: P-51 Mustang Block Tread Main Wheels Thanks to Roy at Barracuda Studios for the review sample. Kev4 points
-
Thank You all for your very positive comments on this thread, looks like it's underway! Well, to the best on my ability... Just a photo to prove the project is started, the canopy will be closed so I won't waste too much time on the details that won't be seen, the reason for this is that the cockpit sills would need reconstruction if I left the canopy open, so I'll take another short cut... I have taken note of the comprehensive and excellent "Tweak" notes by Thierry, what a wonderful job he does! And I have some decals from Zane of Mavdecals (just google him) - these are Alps printed on quite thin backing, so need to be cut out carefully and used with care, I may use Superfilm too... The orange colour is a little pixilated on my sheet, but I can carefully overpaint... this is after all what the SAAF groundcrew did to the Brit roundels anyway! Well, off to do some more work on this colourful Spitfire! Regards, Marc4 points
-

HPH Models 1/32 P-51H Mustang (group buy possible)
Rick Griewski and 3 others reacted to Radub for a topic
HPH "called the bluff". They simply said "put your money where your mouth is." Manufacturers get bombarded with demands for unsaleable kits whose only "feature" is that "it was never kitted before". Maybe there is a reason why such kits were never issued before. Kits need to sell in order to amortise costs. Get enough people to pay upfront, not just say that would pay later, and they will make it. Sounds OK to me. Radu4 points -
1/32 Revell F-4E 50TFW - In-Flight and Lit Up
Anthony in NZ and 2 others reacted to RichieB for a topic
Hi everyone, This is the Revell 1/32 F-4E kit with some aftermarket help from GT Resin in the form of exhausts, belly strap and intakes, new nose from Sierra Hotel, Aim-9Js from Cutting Edge and a cockpit from Legend. The aim was to depict a late 70's USAFE jet from the 50TFW at Hahn AFB using AirDoc decals, put her in-flight and add some lighting to bring her to life. This was sort of a learning project for me, picking up on the excellent tips found in this forum, trying out some new techniques and learning from my mistakes (of which I made a few - see build for details!). In the end it took 2 and a half years to complete so the ratio of builds to acquires is way out of kilter. Anyway, on to the pics... And with lights on... Overall, a challenging but fun build of the impressive Phantom! Build thread is here ... https://forum.largescaleplanes.com/index.php?/topic/58988-132-revell-f-4e-what-could-possibly-go-wrong/&page=1 Many thanks for looking!3 points -
My decals arrived so I can start! These are Two Bobs decals for the aircraft as it appeared after the 65th Aggressor Squadron was disestablished and the aircraft went to California.3 points
-
Could I join this GB with an old kit, but reasonably accurate? The scheme will be 40 Sqdn SAAF doing Tactical Reconnaissance during Rommel's final retreat. This is the colour scheme I hope to do. The kit is the old Hasegawa kit with raised panel lines: There will be a few improvements but don't expect me to rescribe this kit... It would take far too much of my life! But I have some ideas on how to make it look OK... Regards, Marc3 points
-
AIMS 1/32 Ju 88 P-1 conversion for Revell A-4 kit
kuya and 2 others reacted to Pastor John for a topic
Now available my 1/32 Ju 88 P-1 conversion for Revell A-4 kit. £35.00 plus shipping3 points -
Kitty Hawk T-28C "Warbird"
CODY and 2 others reacted to Eraucubsfan for a topic
Not much of an update, but it's been painted Yellow3 points -
Revell Bf 109 G-10 Erla
Victor K2 and 2 others reacted to Pastor John for a topic
Fixed problem - the instrument panel fitted into the Aires locating points is enough to spread the cockpit out - not too much were upper engine cowl part is glued to the fuselage halves but by the time the problem spreads to end of windshield it is 0.5mm each side. I carefully removed the instrument panel, snipped away the side wall lugs and a fraction of the side of the panel and re-attached it this time to the inside of the windshield part. With a little pressure downward on the kit the assembly plops back in with much much less pressure needed sideways to join cockpit sill to windshield. Phew!3 points -
2018 Phoenix Nat Pictures
Jeff and 2 others reacted to Wolf Buddee for a topic
Ahhhh, so that was YOUR Spitfire, Brad! We ran in to each other in the vendors room but you never mentioned you had brought anything in for the show. Well done Brad! Cheers, Wolf3 points -
3 points
-
Got a bit more progress to report - Completed the installation of the seats and controls. Added harnesses from the Eduard OH-6A set. These would be appropriate for a late 80's vintage an MD500 helo (and as far as I know, are still current for today's AH-6M's). To me, harnesses are pretty key on a model. They attract a great deal of attention and can either help the build or hurt it. Nothing looks worse than belts uniformly hanging off seats, with no variation. PE is the worst because it's so hard to position them in a way that looks realistic. I'm a big fan of resin seats with molded on belts but since there is nothing out there, I had to get by with PE. I tried to position them to look natural, like the pilots just tossed them aside as they exited the helo. Hopefully I've succeeded. Next step will be to add a dark wash to the seat belts to break up the uniform paint work. Aside from that, I added the cyclics, fire extinguisher (with PE strap) and touched up some paintwork. Still got some additional touchup work to do. Tough dealing with an overall black cockpit, it all tends to blur together. Disregard the rear compartment, with with the tinted windows, not much will be visible. Just wanted to add some lumps and bumps to make it look "busy" back there. Anyway, some pics: Thanks for looking!3 points
-

Revell Spitfire Vb - Finished!
BradG and 2 others reacted to BloorwestSiR for a topic
As a relaxing birthday present yesterday, I was banished to my workbench for the day and told not to lift a finger with regards to housework by my wife. So I managed to make some reasonable progress on the build. I started by spraying most of the cockpit components in Tamiya XF71. Since I had the paint out, I ended up painting some Tamiya Spitfire cockpit parts too so those may show up in some of the pics. One of the kit omissions is the lack of the armour plate behind the pilot's seat. I copied the PE one from the Tamiya kit onto thin sheet styrene. With the main colour on, I assembled the front bulkhead. I sanded off the kit IP and used a Yahu one instead. It's much better detailed and better than I could do. Next up, I painted the Tamiya seat XF9 Hull Red and installed it with the armour plate onto the bulkhead. It's the one on the left.3 points -

ARCHER DOES AIRCRAFT (again)
Rick Griewski and one other reacted to Woody V for a topic
Not many people remember that 29 years ago Archer opened for business by selling dry transfers for aircraft, but there was little demand in that market so we switched over to armor for which we are now best known. Fortunately we archived all our aircraft files and will be adding some really cool aircraft dry transfers in the coming months. We just released several sheets of generic aircraft stencils and swastikas and you can see those along with the rest of the things we offer for aircraft HERE. Warm Regards, Woody Vondracek Archer Fine Transfers2 points -
Accurate Miniatures in 1/48 It was built oob. Canopy masking set was used on this build Hope you like the pics2 points
-
1/32 Tamiya F4U-1D!
LSP_K2 and one other reacted to ade rowlands for a topic
Good stuff. Ran through several Tamiya masking sheets yesterday trying to do something simple so yeah, you do the work and save me some money and more importantly, some sanity as I have precious little left to lose in that department.2 points -
Gents, We can understand the nature of the beast in modeling; AM can be a game in which few play, and even fewer run business for said AM. This is in fact an international site, run, seen and read by modelers all around the world, but we need to keep things civil please. Lets keep the personal jabs out of things and stick to the business at hand. Discussing issues is never a problem when discussed in a civil, polite and respectful way, but language and cultural differences can sometimes tend to lead to misunderstandings especially in text.2 points
-
Blast, you beat me to it! I used them on my Revell P-51D and got a LOT of positive comments just about the block tread tyres. The only thing you have to be careful of is positioning for the brake line on the wheel hub. Easy to mess that up then the brake line is on the wrong side of the gear leg. But the detail is terrific - as you pointed out and very easy to separate from the mould seam. At Nats I picked up another set of these block tyres for another P-51 build (either Tamiya or Revell - have not decided yet). Chris2 points
-
1/32 Tamiya F4U-1D!
LSP_K2 and one other reacted to ade rowlands for a topic
When you figure out the sizes and pattern for the G symbol i’d be happy to take a copy of the file off your hands. Always happy to let others do that kind of work for me.2 points -
2 points
-
If memory serves me correctly; 'Did any of the desert F's or early G's leave the factory in desert scheme?' Yes. Ready to go, except they had radio call numbers and letters, not field markings. 'I know lot of them have their panel lines filled and puttied... but I don't know if this was done at the factory or not.' At the factory. Sincerely, Mark2 points
-

HPH Models 1/32 P-51H Mustang (group buy possible)
Ivan Ivanovich and one other reacted to Radub for a topic
This is the purest example of "calling the bluff". Some people do not understand that there is actually an expense involved with creating a model. Some people are so detached from reality that they imagine that models appear fully formed out of nothing just like Pallas Athena emerged in full armour out of Zeus' head. Yes, HpH will do custom models, but you pay for that. HpH is a business, not some kind of "make a wish foundation." Costs must be amortised by sales. Not enough sales means a loss. So, they called the bluff: you pay and we will make it. There is no point in going after me. Pay HpH. Radu2 points -
2018 IPMS Phoenix Convention
alaninaustria and one other reacted to Wolf Buddee for a topic
Thanks Maru! Getting two 1st place gold was indeed a surprise. A pleasant one but a surprise nonetheless. So was getting back my camera bag with all it's contents. As I mentioned before, a wonderful answer to prayer. As far as not being able to take me out anywhere, I've been told that a time or two already. I'd hear it loud and clear again if I ever have the courage to tell my wife what happened. But I won't 'cause she doesn't need to know.............. right? Cheers, Wolf2 points -

1/32 Francesco Baracca from Model Cellar
ModelCellar and one other reacted to LSP_Ray for a topic
Nice!2 points -
I know, that really worked out well, huh? So here's quick and dirty sketch I did during lunch today of the nose art in the photo: Obviously, it will need cleaning up in PS or some such program, but what do you guys think of my interpretation of it?2 points
-

Hasegawa N1K2 George
Shawn M and one other reacted to Troy Molitor for a topic
By George this looks awesome Kevin! Well done you. Regards from Haikou, China. Troy2 points -
Here is a small distraction during my Me 110 build. I have been wanting to do this scheme for a long time but could not find any decals for it . The Sillouette cutter made it possible. I initially thought the colors were Rlm 78,Rlm79 but thanks to members on this forum I obtained hopefully the correct interpretation. I also wanted to post another model but I decided to use the wife's phone with a better camera. To my horror I could now see all the dust not readily visible to the naked eye !!! Maybe tomorrow. The most obvious correction and changes were made to the Hasegawa kit. The spinner was re-profiled on a Dremmel, gun troughs moved for the G-2 and cartridge chutes filled. The step in the slat recess was filled with plastic card and lead foil belts added. Tail wheel fairing was cut out and shaped and a new tail wheel scratch build. The main wheel angle was corrected for a G-2 and Airies wheels used. Enjoy Nick2 points
-
This was my one and only LSP entry. Brad2 points
-
Revell Bf 109 G-10 Erla
AceofClubs and one other reacted to Pastor John for a topic
And so that moment comes when you know very soon a good photo of your 109 cockpit will be forever impossible!2 points -
Thanks guys. Little progress, finished installing the insulation on the starboard side and the bulkhead. Next step is to add some colors, hopefully it will look the part. Cheers, David2 points
-
1/32 P-51B, P-40B instead of P-51H?
Troy Molitor and one other reacted to Michel borderline Beekveld for a topic
I found that the most effective way to "make an offer the manufacturers can't refuse", is to meet with my Bulgarian associate. I'm sure there is a parking garage where i can setup a meeting to talk about contracts...2 points -

1/32 P-51B, P-40B instead of P-51H?
Troy Molitor and one other reacted to ssculptor for a topic
That is a great idea, but for the wrong plane. I propose doing the same for the Japanese Val and the Kate. Waddyathink, gentlemen of the society of the admirers of Japanese Aeroplanes of WW2? P.S. How do you get spell check to work in this new format?2 points -

Revell Spitfire Vb - Finished!
BradG and one other reacted to BloorwestSiR for a topic
Next up was the Wako fabric seat belts. I first painted them with XF49 Khaki. For the buckles, I used the new Tamiya lacquer silver. Here's the shoulder belts assembled and installed onto the seat. Lap belts are up next and then the detail painting in the cockpit. Carl2 points -
I think the smart move at this juncture would be to contact Glen Coleman at Kitty Hawk and ask him if they're still considering an injection-moulded P-51H in 1/32 scale. He's announced plans for such in the past, but it was some time ago. Better to clarify what's happening there before launching a risky venture like this one. Kev2 points
-
Only two Wolf? Better pick up your game buddy!! Congrats man, well deserved. I am always in awe when I see your skills.1 point
-
Lovely! I really love the shapes of the Macchi fighters. Bang up job! Gaz1 point
-
Howdy folks, I've just published my review of the new diamond tread Mustang wheels from Barracuda: Barracuda Studios BR32380: P-51 Mustang Diamond Tread Main Wheels Thanks to Roy at Barracuda Studios for the review sample. Kev1 point
-
Tim: Looking good! After enlarging your photo, one comment is that I think all of the letters in 'Scotts' are the same size. Your 'o' and the last 's' are a little small or perhaps the letters gradually get a bit smaller from the first 'S' to the last 's'. From what I can see anyway! Looking forward to seeing this build... Chris1 point
-

Spitfire Vb SAAF Libya
BloorwestSiR reacted to Kagemusha for a topic
You're fine Marc, always a pleasure to see a Spitfire.1 point -

Revell Spitfire Vb - Finished!
BradG reacted to BloorwestSiR for a topic
Some more progress and a small setback. First I drilled out the new ejection ports for the 20mm cannon and filled in the extraneous 0.303 ones. I also boxed in the cannon ejection chutes but forgot to take any pics. I painted the inner wings black where the openings are. Then the wing was glued together. The wing was then drilled for the Master barrels to be installed. While all that dried, I installed the cockpit into the starboard fuselage half. This is where my minor setback happened I used some tape to hold the cockpit in place while the glue was drying. On removal, it snagged the shoulder harnesses and head armour plate and took them with it. This tore the belts in half. So after cleaning up the remnants, I'll have to repaint the seat, and install new shoulder belts and the armour plate.1 point -
Omani Hunter, Call her done!
BradG reacted to Daniel Leduc for a topic
Hey Buddy, Here's another view or option.... https://www.pinterest.co.uk/pin/308285536985509074/?lp=true Dan.1 point -
It's the only pic of a single seat that I could find. All others are of the twin seater. Cheers1 point
-
Fiddly parts N3 and N5 fitted fore and aft before the radiator housings: then: I've been thinking about the clear panels in the engine nacelles through which the pilot read oil pressures etc. I'm experimenting with Krystal Klear rather than using the modified kit parts, it's looking encouraging so far.1 point
-
What I know about helicopters can be written on the back of a postage stamp, but your build looks very impressive David and certainly holds my interest. Can't wait to see the next stage!1 point
-
Fantastic work, the Cobra line were taken over by Lone Star Models, might be worth sending them an email should you still require the parts..?1 point
-
That is probably the attitude we all should take to this sort of thing.1 point
-
1 point


