

Starfighter Jock
-
Posts
163 -
Joined
-
Last visited


-
 Starfighter Jock reacted to a post in a topic:
USS Constitution Tribute Build
Starfighter Jock reacted to a post in a topic:
USS Constitution Tribute Build
-
Starfighter Jock reacted to a post in a topic:
Brush painted Kotare Mk.Ia - Weathering the underside
-
Starfighter Jock reacted to a post in a topic:
Hurricane IIb, Revell 1/32 - finished
-
Starfighter Jock reacted to a post in a topic:
Mossie mini wip ...
-
Starfighter Jock reacted to a post in a topic:
Mossie mini wip ...
-
Starfighter Jock reacted to a post in a topic:
Mossie mini wip ...
-
Starfighter Jock reacted to a post in a topic:
1/32 Tamiya P-51D-5 "Little Eva III"
-
Starfighter Jock reacted to a post in a topic:
1/32 Tamiya P-51D-5 "Little Eva III"
-
Starfighter Jock reacted to a post in a topic:
1/32 Tamiya P-51D-5 "Little Eva III"
-
Starfighter Jock reacted to a post in a topic:
Border 1/35 Fw 190A-6 Nowotny Double Chevron
-
Borsos reacted to a post in a topic:
Kotare 1/32 Spitfire Mk.Ia (Mid)
-
chaos07 reacted to a post in a topic:
Kotare 1/32 Spitfire Mk.Ia (Mid)
-
monthebiff reacted to a post in a topic:
Kotare 1/32 Spitfire Mk.Ia (Mid)
-
scvrobeson reacted to a post in a topic:
Kotare 1/32 Spitfire Mk.Ia (Mid)
-
scvrobeson reacted to a post in a topic:
Kotare 1/32 Spitfire Mk.Ia (Mid)
-
Shoggz reacted to a post in a topic:
Kotare 1/32 Spitfire Mk.Ia (Mid)
-
HB252 reacted to a post in a topic:
Kotare 1/32 Spitfire Mk.Ia (Mid)
-
HB252 reacted to a post in a topic:
Kotare 1/32 Spitfire Mk.Ia (Mid)
-
geedubelyer reacted to a post in a topic:
Kotare 1/32 Spitfire Mk.Ia (Mid)
-
MikeMaben reacted to a post in a topic:
Kotare 1/32 Spitfire Mk.Ia (Mid)
-
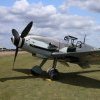
Kotare 1/32 Spitfire Mk.Ia (Mid)
Starfighter Jock replied to Starfighter Jock's topic in Works in Progress
Just about have the Spit ready for its paint job. Few odds and ends to finish up along with some clean up here and there. Whether or not you have interest in the Spitfire, just have to say that this kit has been a pleasure to build. Kind of been working on it in a on and off manner, but keep coming back to it to finish, kit just draws me in without losing my mojo for it. Few photos from the workbench with the no frills, no touch ups, iPhone 13. KJ- 24 replies
-
- 12
-
-
If it's on par with the newly released B5N2 Kate, looks like I will need to be opening up space on the shelf for another kit. After HK releasing the 17 in 1/32, never would have thought another one would be coming out in large scale.
-
Kotare 1/32 Spitfire Mk.Ia (Mid)
Starfighter Jock replied to Starfighter Jock's topic in Works in Progress
After being away from the workbench for the Spring and Summer months, getting back to some progress on my Spitfire. Cockpit just about completed and ready to start closing up the fuselage. Built up with what comes in the box, other than the addition of a HGW Suttons harness and some Model Kasten rigging line for the control cables. Tamiya and AK real colors paints along with MIG dark wash and burnt umber oil wash. KJ- 24 replies
-
- 18
-
-
Kotare 1/32 Spitfire Mk.Ia (Mid)
Starfighter Jock replied to Starfighter Jock's topic in Works in Progress
Well, the IP decals are on and detail painting about done. Next step a semi-gloss clear coat, some weathering, and gloss coating the dial faces. I shall call it progress. KJ- 24 replies
-
- 24
-
-
Followed your Thud build in Air Modeller magazine with great enthusiasm. Your post photos are even more spectacular, thanks for sharing more on this build! KJ
-
-
Kotare 1/32 Spitfire Mk.Ia (Mid)
Starfighter Jock replied to Starfighter Jock's topic in Works in Progress
I had read that in the building manual too, why I decided to base coat the aluminum painted areas with Tamiya bare-metal silver. Once I over coat these areas with a semi-gloss, it should take the shine out of the silver and look much more like aluminum paint. Hopefully anyway. KJ -
Kotare 1/32 Spitfire Mk.Ia (Mid)
Starfighter Jock replied to Starfighter Jock's topic in Works in Progress
Decal Note: Looking back on applying the instrument decals, the decal carrier film is so thin it is almost invisible on these smaller decals. I started thinking that using Micro Set may have created the issue I had with a couple of the decals beginning to tear and separate as soon as I applied them to the surface. So, "When all else fails, read the directions." Sure enough, Kotare does not recommend using decal setting solutions with their decals. The next round of decals for the IP, I will just use warm water as recommended and skip using any setting solutions. Shall see how that goes. KJ -
Kotare 1/32 Spitfire Mk.Ia (Mid)
Starfighter Jock replied to Starfighter Jock's topic in Works in Progress
Working on the cockpit in sub-assemblies, I decided to start applying a few of the 22 decals that get applied to the IP. I also have changed what I was using as my base color of the panel. Originally, I had applied a layer of AK Nato Black, but once dry I just was not happy with the overall finish. For whatever reason, most likely operator error, the finish came out very grainy and rough. Quick dip into some Tamiya laquear thinner and the paint was quickly removed. Repainted now with Tamiya gloss black and the lower IP frame is the suggested paint mix by Kotare for Supermarine Interior Green, specifically, 2 parts XF-71 to 1 part X-28. The instrument and placard decals as supplied by Kotare are very well registered but also extremely thin as I discovered when applying the first few. Two of the instrument decals separated as I was attempting to move them into final position. End result turned out not to bad and I believe the couple of instrument decals that separated on me will not be noticeable once the cockpit is all closed up in the fuselage. So far, the decals are responding well to Micro Set and Micro Sol. Have some touch up to do on the lower IP, some overspray leaked in under my masking, then some detail painting on the lower IP frame needs to be done. After that, will continue on with finishing up the decal work on the IP. KJ- 24 replies
-
- 13
-
-
Kotare 1/32 Spitfire Mk.Ia (Mid)
Starfighter Jock replied to Starfighter Jock's topic in Works in Progress
Thanks Tom, camouflage masks will definitely be helpful. KJ -
Kotare 1/32 Spitfire Mk.Ia (Mid)
Starfighter Jock replied to Starfighter Jock's topic in Works in Progress
Thanks Paul, I am looking forward to just building a spectacular kit as it comes in the box. KJ -
Kotare 1/32 Spitfire Mk.Ia (Mid)
Starfighter Jock replied to Starfighter Jock's topic in Works in Progress
Laying some Tamiya AS-12 bare-metal silver (decanted from the spray can) as a base layer on several of the individual cockpit assemblies. The detail provided by Kotare can be appreciated. The IP has been base coated with some AK Nato Black, and once dry will get a coat of Aqua Gloss in prep for all the beautiful instruments and placards provided as decals. Interestingly, Kotare has spelled out a Supermarine interior green for the immediate cockpit areas which is made up of Tamiya XF71 + X28. I will be sticking with the suggested mix and applying this to the specified areas as indicated on the building manual. KJ (Kirk Johnston)- 24 replies
-
- 21
-
-
Keeping this build just as it comes in the box and utilizing the kit decals. My subject choice of the three different profiles offered by Kotare will be P9495 DW-K, 610 Squadron, June to July 1940.
-
Kotare 1/32 Spitfire Mk.Ia (Mid) just arrived
Starfighter Jock replied to Starfighter Jock's topic in LSP Discussion
I might just have to dust off my camera and do that. I have been spending my entire evening just going over this kit. Very impressed with it. KJ -
Returned home from work today and was delighted to find a delivered box from New Zealand. The new 1/32 Spitfire Mk.Ia (Mid) from the new venture Kotare Models. Like a kid coming home from the hobby shop, had to get into this box right away. Waves of WnW rushed over me looking the kit over and the extensive building manual. It all looks and feels just like Wingnut Wings but with subject being a iconic WWII Spit. Looking forward to getting this one on the bench PDQ. KJ
