

Sepp
-
Posts
334 -
Joined
-
Last visited
Recent Profile Visitors
2,650 profile views


-
 Buster99 reacted to a post in a topic:
Italeri 1/9 Zündapp KS750 and sidecar
Buster99 reacted to a post in a topic:
Italeri 1/9 Zündapp KS750 and sidecar
-
Buster99 reacted to a post in a topic:
Italeri 1/9 Zündapp KS750 and sidecar
-
Buster99 reacted to a post in a topic:
Italeri 1/9 Zündapp KS750 and sidecar
-
Buster99 reacted to a post in a topic:
Italeri 1/9 Zündapp KS750 and sidecar
-
Buster99 reacted to a post in a topic:
Italeri 1/9 Zündapp KS750 and sidecar
-
Sepp reacted to a post in a topic:
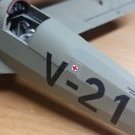
Zoukei-Mura’s 1/32 Bf 109G-14 with Swiss markings
-
Sepp reacted to a post in a topic:
Zoukei-Mura’s 1/32 Bf 109G-14 with Swiss markings
-
Sepp reacted to a post in a topic:
Zoukei-Mura’s 1/32 Bf 109G-14 with Swiss markings
-
Sepp reacted to a post in a topic:
Zoukei-Mura’s 1/32 Bf 109G-14 with Swiss markings
-
Sepp reacted to a post in a topic:
1/18 Hawker Sea Fury - probably VX620..
-
Alain Gadbois reacted to a post in a topic:
Italeri 1/9 Zündapp KS750 and sidecar
-
Alain Gadbois reacted to a post in a topic:
Italeri 1/9 Zündapp KS750 and sidecar
-
Alain Gadbois reacted to a post in a topic:
Italeri 1/9 Zündapp KS750 and sidecar
-
Alain Gadbois reacted to a post in a topic:
Italeri 1/9 Zündapp KS750 and sidecar
-
Sepp reacted to a post in a topic:
1/24 Airfix Spitfire Mk.IXe ML407
-
Sepp reacted to a post in a topic:
Scratchbuilt 1/24 Grumman F8F-1 Bearcat
-
Sepp reacted to a post in a topic:
Malvinas Dagger
-
Sepp reacted to a post in a topic:
175 Squadron Hurribomber finished!
-
Sepp reacted to a post in a topic:
175 Squadron Hurribomber finished!
-
TankBuster reacted to a post in a topic:
Italeri 1/9 Zündapp KS750 and sidecar
-
Some seriously good work, there, Thierry! Definitely following this - bizjets (and their military cousins) are very close to my heart, having flown 'em for thirty-something years.
-
Ahoy! It's been far too long since I posted an update - purely procrastination, I'm afraid. Last time, I was about address the spokes (160, not the 120 I mentioned - I forgot about the spare wheel!) and rims, but I got about ten in and decided that it was not the game of soldiers I was looking for, so I set about the sidecar, instead. The kit offers the Steib BW43 for your entertainment. Unfortunately, the body exhibits sink marks including a big one right across the front deck, various surface imperfections, and fit is... approximate. The two halves have slightly different profiles (which you can hopefully make out in the first pic), and the wall thickness also varies between the two halves in various places. Those aren't water marks, they're scabs in the material. The interior surface is poorly finished. It is worth mentioning at this point that the raised rail across the front of the tub is a complete facrication. The rail ought to be flush with the deck and run behind it: Note that, as seen in the last pic, there ought to be seven small loops running across the deck and side walls; these take securing straps for a canvas deck covering - the kit only provides six, omitting the one on the left wall. The various studs on the rear deck are also not provided. The kit also omits the stamped Steib logo from the right forward wall, opting instead for a decal. This is a pity; it would've made a nice touch I have decided not to include the heater assembly and exhaust, panniers or machine gun rail/pintle, and chose to blank off the mounting holes with Meng bolt heads rather than filling them - the intention being to suggest that the various furniture could be mounted, if needed. I also added corresponding nuts to the inner surface ( one is juuuust about visible in the second pic). After many, many, rounds of filling, sanding and priming, I ended up here: I didn't notice the rail error until I'd finished the outer surface; rather than risk opening up the seam I decided to leave it be, and settled for reducing the size of the moulded part to match the separate piece that provides the handle, and I have not bothered to address the interior seam line as it will not be apparent under the seat. The floor forward of that was simply covered with thin foil to hide the joint. Interestingly, the kit includes these ten vaguely circular parts: These do not appear on the runner diagrams and are not mentioned in any of the build steps. I wonder if they were intended to be blanks for the six pannier and four MG rail attachments? I have seen a pic of a civilianized KS750 with similar, but being so distorted, you'd have to replace them, anyway. The boot lid hinge straps received Meng bold heads, as the kit's were misshapen: The frame went together without issue. My only query is the provision of a vinyl grommet in one place. I could see no purpose in this, so I replaced it with a doughnut punched from plastic card. Which brings me to this unfortunate object: which is the boot lid latch handle, and ought to look like this: This is still a WIP; I've carved the body to increase the width of the lower land and sanded down the sides a little. I have to go further with both the above, but my intention is to replace the shaft with brass tube and add a ball made from some yet to be selected item, probably a small ball bearing, if I can get one to stick solidly enough to said brass shaft. I'll leave further size reduction until I know that works, as it'll be easier to hold when drilling the various holes. Finally for this update, I've started on the front saddle. Much of this differs from the real thing. The kit provides large bosses which retain the saddle springs, top and bottom. On the real thing, the springs are attached to small central turrets, as seen on this beautifully restored example: I'm not going to do anything clever here. The parts are, typically, vaguely related: after some adjustment: The hinge points at the top of this are different sizes, but the holes line up correctly, so I have left correcting the mismatch until the frame and saddle all sit together nicely. In the following pic, the "bow" is mounted in the locating holes on the saddle. The bosses have central pins that locate in the holes you can see. Hopefully, you can make out that the pin on the front of the saddle doesn't line up with the hole in the frame. the sharp-eyed will note I mounted the front part upside down - fortunately, as previously noted, the kit's plastic doesn't like being glued, so separating everything and re-doing it was a doddle. Trial fit suggests that the arms are too long; when seated, the front attachment locates the the saddle correctly fore and aft in relation to the fuel tank. Note that one arm is also narrower than the other. While attempting to bend the arms slightly to get them to fit, this arm broke - you'll want to add a splint here. The arms being too long, the bosses also protrude slightly from the rear of the saddle, so they were sanded down somewhat. (I considered cutting the bosses off the frame and shorterning the arms a little, but I eventually persuaded it all to come together and surgery is currently postponed). That's all for now. I may get some paint on various bits this week, but I'm off the the States shortly for a fortnight so this might go on the back burner until I return. Thanks for looking, Sepp, out.
-
Book ordered - thanks for the heads-up, Paul!
-
Welcome aboard! iirc, British (and US) aerial wire was 18swg (~1.2mm dia.) - in 1/24 thats 0.05mm. Infini do ultra-fine rigging line in a range of gauges including 0.048mm, available from all sorts places, including here. Uschi products are good, but I've had terrible problems getting orders delivered and after the last (big) one failed to arrive after 6 months, I completely gave up on them. I look forward to seeing your build
-
Lovely work! Following
-
Cheers! I'd love a Kettenkrad - maybe next year
-
You did!
-
Back again. I forgot to add in the above post re. the engine: the dynamo, which sits on the front of the engine received some work, too. The kit's offering is a single lump, but it should have a separate cap secured with two screws - duly scribed and Archered. I've not painted the cap yet, as I still don't know what scheme it'll wear. Part 2 - the frame. Before getting stuck in, it is perhaps worth repeating what others have said about this kit - namely, the plastic does not respond at all to Tamiya thin or extra thin cement, and MEK seems to frighten it into a literal jelly. "Normal" Tamiya cement, though, works fine. Be prepared to spend a lot of time removing parting lines, too. And so... Oh dear. Oh dear, oh dear... There appear to have been two teams working on the tooling for this kit, with two distinctly different ideas of what the it should look like. The outer parts of the rear rack are moulded to the support legs; I've removed them as it will be much easier to address the poor fit of the centre part "off the bike". The legs seem to differ in height by around 0.5mm, too, so there will have to be some fettling when the rack and mudguard go on. At least, despite the flaws, the frame sits reasonably square. The kit would have you mount the engine before painting, but this would obviously not be ideal, so the first job was to remove the forward mounting bar, drill the frame and replace with slide fit tubing. Much care required here, as there's not much material left once the holes are cut. Then it was just a case of sand and fill, sand and sand again. Getting there... The four white filled slots are where the kit would like you to locate the fuel tank - they don't exist on the real bike, so they're gone. I don't think the people who were responsible for the throttle quadrant had ever seen the drawings for the frame. A lot of reshaping required to get the majority of the body to fit, then a lump of filler to shape the rear end. Eventually, I was happy with the plastic surgery, and whaddya know, the engine actually fits. Phew. The white dot rectifies another oddity; the left side of the kit frame has a hole through which various wires pass. No such hole exists on the left side of the KS750, but does on the 600 - which makes me think again that there was some confusion between the two - understandable, they're very similar - and I've come across quite a few pics online that are mis-labelled. Photos exist that show the welds on the upper forward part of the frame and the frame legs to vary from agricultural to completely ground away, so after much rumination I've decided not to add them*. Whoever owns this bike has taken more care than was felt necessary in WWII. And so to the fuel tank. The kit would have you build it with the hinge on the left: which I duly did. If you could kindly ignore the fact that the hinge should have five leaves, not three, that would be great: only to discover - or rather notice - that in just about every pic online, the hinge is on the right, e.g.: So, with a fresh blade, I removed the button/knob/cap and hinge as carefully as I was able, and swapped 'em over: You know what's coming, don't you. Yes, that's right. While looking for something else... At least there seem to be a mahoosive number of different combinations of features on these bikes. It seems that no two are completely identical in layout. Ah, well. Lastly for this update, another 'wut'. The joint between the two hinged parts of the rear mudguard is depicted with a raised panel line.... in 1/9 scale? Really? Scriber out again. The two required wingnut fasteners are not included in the kit, so will be added. Again, lots of sanding to remove extraneous surface blemishes. That's all for now - there will be a short interlude while I go and gently coax parting lines off 120 spokes and try to get eight rim halves to fit seamlessly. Joy. Thanks for looking, Sepp, out. *At least, I think I have. You know how it goes....
- 11 replies
-
- 12
-
-
Ahoy! Apologies for the delayed update - seasonal flu wiped me out for a while. Part one - the engine. Not a lot to say about this other than it serves as a metaphor for the entire kit - some details are really well done, others are... wut?! The parts as provided generally fit OK - the exception being the clutch lever which is too short, too big at the base and generally a poor rerpresentation of the real thing. I considered entirely re-working it but decided it won't be very visible, so it could just be tarted up. I forgot to take a pic of the engine before making the various mods, but these pics 1 2 from a build on Small Tracks give a good idea of what the kit offers. Note the inlet tubes end in a blind lump - it should have a bolt top and bottom, so some carving was required here. This part of the engine is in the "wut" category, as it looks nothing like the real thing. The spark plug leads are a mystery, too - in just about every pic I'd seen of a KS750, the leads enter the block just forward of the inlet tubes (note how short they are, compared to the kit's rendition). I was beginning to wonder if the designers mixed up the KS600 engine with the 750 when working the kit up (first pic 750, second 600) when I found this pic, which is pretty much the only one that shows the plug lead behaving per the kit. Oh well, I moved them anyway. Another oddity is the top cover, which protects the magneto ignition unit and carburettor. The real thing is split down the middle and should feature variously two, four or six ventilation slots on each side; the kit's is a blank, single piece - forgivable, but I wish I'd spotted the omitted slots before I'd glued it in place. The kit includes the magneto unit but not the carb - an odd choice as the mag is completely obscured by the cover, and is thus redundant; otoh, omitting the carb means you'd need to do a LOT of work if you wanted to display the model with the cover opened or removed. The cover also ought to have lettering (START - BETRIEB) moulded in next to the rich start selector (the paddle on the top of the cover) The KS750 air filter on the back of the engine is either the pan type included in the kit or, for dusty conditions, a nifty three-can vortex filter (first pic). Sadly, the latter is not included in the kit, so more work is required if you want to depict an Afrika Korps etc. machine. Where I am now: I've carved the inlet tubes to look more sensible and added rubber boots over the joint (appropriately sized heat-shrink tube, glued on), added various missing nuts, studs and/or bolts to the crank case, cylinder heads, inlet tubes and clutch lever, moved the plug lead entry points, added the spring to the cluch lever, added the gearbox dipstick cap (red thing on the right side), added the missing retaining lip to the battery shelf, and replaced the moulded battery strap with lead foil. It is currently my intention to replace the kit's vinyl tubing with lead wire or similar, which is what I've used for the battery earth lead, plus heat shrink for the terminator. On most pics, the earth connection is made to the top bolt on the crank case joint. I did find one pic where the connection is made as depicted in the kit, so went with that to save a lot of messing around. Every time I think I'm done, I notice something else to add - there ought to be a grease nipple between the studs on top of the kick start unit (behind the battery), and I need to open the fuel line entry point (blank U-shaped bit on the right side of the top cover). Incidentally - the kit includes the fuel tap, but omits the line entirely. A final engine oddity: if you refer to the box art - which apparently depicts a finished kit - you'll see a large red wing/butterfly nut, which is the oil filler cap. This feature is not included; you get a plain hex bolt - on my kit, it was badly mis-shapen, so I've replaced it with a cap concocted from scrap. I have some wing nuts on order; if one looks suitable, I'll change it. Time for a spot of lunch, then part 2 - the frame. Sepp, out.
- 11 replies
-
- 10
-
-
The 'missing' bit of the right-hand hood rail is part of the right-hand cockpit wall/door/hatch insert, which you will encounter in step 24
-
Right enough procrastination - I mean research - time to start... and after about 0.5 seconds, out-the-box went out-the-window. First up is this sorry object, which purports to be the sidecar footwell planking: and ought to look like this: Using some lime wood strip and thin plasticard, I came up with something inbetween the two. The slats are closer together than they should be as I'm not sure how much room there will be in front of the seat base when I slip it in once the sidecar is assembled. If there's more room than I have anticipated, I'll revisit, and open up the slats. I still haven't decided what colour(s) this will end up, but while looking around I came upon this build by Michael Benolkin on Cybermodeler which I thought interesting, so it will either be an alt history post-war Breton military bike or a modern civvy restoration - either way, it'll need an "open" headlight. Hooray: the kit includes rims for both covered and uncovered lights. Boo: it doesn't include a reflector shell, so you're left with this: which is not much help. Fortunately, I recently bought a Kotare Spit which includes two spinners. These have a nice socket at the tip, which will do for a bulb holder: After scraping out the mahoosive ejector marks (no insult to Kotare, no reason to be subtle inside the spinner) and some rounded off clear sprue (coloured to represent the selective yellow bulbs used in France until the '70s): It's not wonderful, but behind the lens it won't look too bad on the shelf. Small start, but that's all for now - next: engine and frame. Sepp
- 11 replies
-
- 12
-
-
This build is bonkers, but brilliant
-
To clear the palette between aircraft, I'm going to have a go at Italeri's [edit: or rather, Italeri's re-pop of ESCI's] ancient KS750 kit. I last made one of these when I was about 14; I recall poorly fitting parts, wobbly wheels and a host of other horrors, including awful vinyl parts and hoses. How much of that was my lack of skill will shortly become apparent.... Obligatory box shot: I haven't yet decided whether to follow one of the included schemes (which are quite nice), do another wartime machine, or add it to my what if/alt history collection - but I'm intending to build it mainly OOB... we'll see how long that lasts More shortly. Sepp.
- 11 replies
-
- 14
-
-
Mind bogglingly good, this is
-
My paternal ancestors were Breton, and Paramé nr. St. Malo is my spiritual home (also my actual home for five years, back in the late 80s/early 90s). As anyone who knows me will tell you, I'm a massive francophile Once again, excellent job on the gear bay and leg!

